check engine FORD ECOSPORT 2018 Owner's Manual
[x] Cancel search | Manufacturer: FORD, Model Year: 2018, Model line: ECOSPORT, Model: FORD ECOSPORT 2018Pages: 452, PDF Size: 17.04 MB
Page 141 of 452
Your vehicle may not pass the I/M test ifthe service engine soon indicator is on ornot working properly (bulb is burned out),or if the OBD-II system has determinedthat some of the emission control systemshave not been properly checked. In thiscase, the vehicle is not ready for I/Mtesting.
If the vehicle’s engine or transmission hasjust been serviced, or the battery hasrecently run down or been replaced, theOBD-II system may indicate that thevehicle is not ready for I/M testing. Todetermine if the vehicle is ready for I/Mtesting, turn the ignition key to the onposition for 15 seconds without crankingthe engine. If the service engine soonindicator blinks eight times, it means thatthe vehicle is not ready for I/M testing; ifthe service engine soon indicator stays onsolid, it means that your vehicle is readyfor I/M testing.
The OBD-II system checks the emissioncontrol system during normal driving. Acomplete check may take several days.
If the vehicle is not ready for I/M testing,you can perform the following driving cycleconsisting of mixed city and highwaydriving:
1.15 minutes of steady driving on anexpressway or highway followed by 20minutes of stop-and-go driving with atleast four 30-second idle periods.
2.Allow your vehicle to sit for at leasteight hours with the ignition off. Then,start the vehicle and complete theabove driving cycle. The vehicle mustwarm up to its normal operatingtemperature. Once started, do not turnoff the vehicle until the above drivingcycle is complete.
If the vehicle is still not ready for I/Mtesting, you need to repeat the abovedriving cycle.
137EcoSport (CBW) Canada/United States of America, Vehicles Built From: 14-08-2017, GN15-19G219-ZFB enUSA, First PrintingEngine Emission Control
Page 144 of 452
SelectShift in sport (S):
•Provides manual gear selection withouta time out period.
To exit SelectShift mode:
•If in drive (D), move the selector tosport (S) and then back to drive (D). Ifin sport (S), move the selector to drive(D) and then back to sport (S).
Upshift to the recommended shift speedsaccording to the following chart:
Upshifts when accelerating (recom-mended for best fuel economy)
Shift from:
15 mph (24 km/h)1 - 2
25 mph (40 km/h)2 - 3
40 mph (64 km/h)3 - 4
45 mph (72 km/h)4 - 5
50 mph (80 km/h)5 - 6
The instrument cluster displays yourcurrent gear. If a gear is requested but notavailable due to vehicle conditions (toolow or too high engine speed), the currentgear flashes three times.
Note:At full accelerator pedal travel, thetransmission may automatically downshiftfor maximum performance.
Emergency Park Position ReleaseLever
Note:Do not drive your vehicle until youverify that the brake lamps are working.
WARNINGS
When doing this procedure, you needto take the transmission out of park(P) which means your vehicle canroll freely. To avoid unwanted vehiclemovement, always fully apply the parkingbrake prior to doing this procedure. Usewheels chocks if appropriate.
If the parking brake is fully released,but the brake warning lamp remainsilluminated, the brakes may not beworking properly. Have your vehiclechecked as soon as possible.
Note:For some markets this feature will bedisabled.
Your vehicle is equipped with a brake-shiftinterlock feature that prevents moving thegearshift lever from park (P) when theignition is on and the brake pedal is notpressed.
If you cannot move the transmissionselector lever out of park (P) position withthe ignition in the on position and the brakepedal pressed, a malfunction may haveoccurred. It is possible that a fuse hasblown or your vehicle’s brake lamps arenot operating properly. See FuseSpecification Chart (page 193).
If the fuse is not blown and the brakelamps are working properly, the followingprocedure will allow you to move thegearshift lever from park (P).
140EcoSport (CBW) Canada/United States of America, Vehicles Built From: 14-08-2017, GN15-19G219-ZFB enUSA, First PrintingTransmission
Page 148 of 452
Sand
When driving over sand, try to keep all fourwheels on the most solid area of the trail.Avoid reducing the tire pressures but shiftto a lower gear and drive steadily throughthe terrain. Apply the accelerator slowlyand avoid spinning the wheels.
Do not drive your 4WD vehicle in deepsand. This will cause the 4WD system tooverheat. After the system has cooleddown, normal 4WD function will return.
Under severe operating conditions, the A/Cmay cycle on and off to protectoverheating of the engine.
Avoid excessive speed because vehiclemomentum can work against you andcause the vehicle to become stuck to thepoint that assistance may be required fromanother vehicle. Remember, you may beable to back out the way you came if youproceed with caution.
Mud and Water
If you must drive through high water, driveslowly. Traction or brake capability maybe limited.
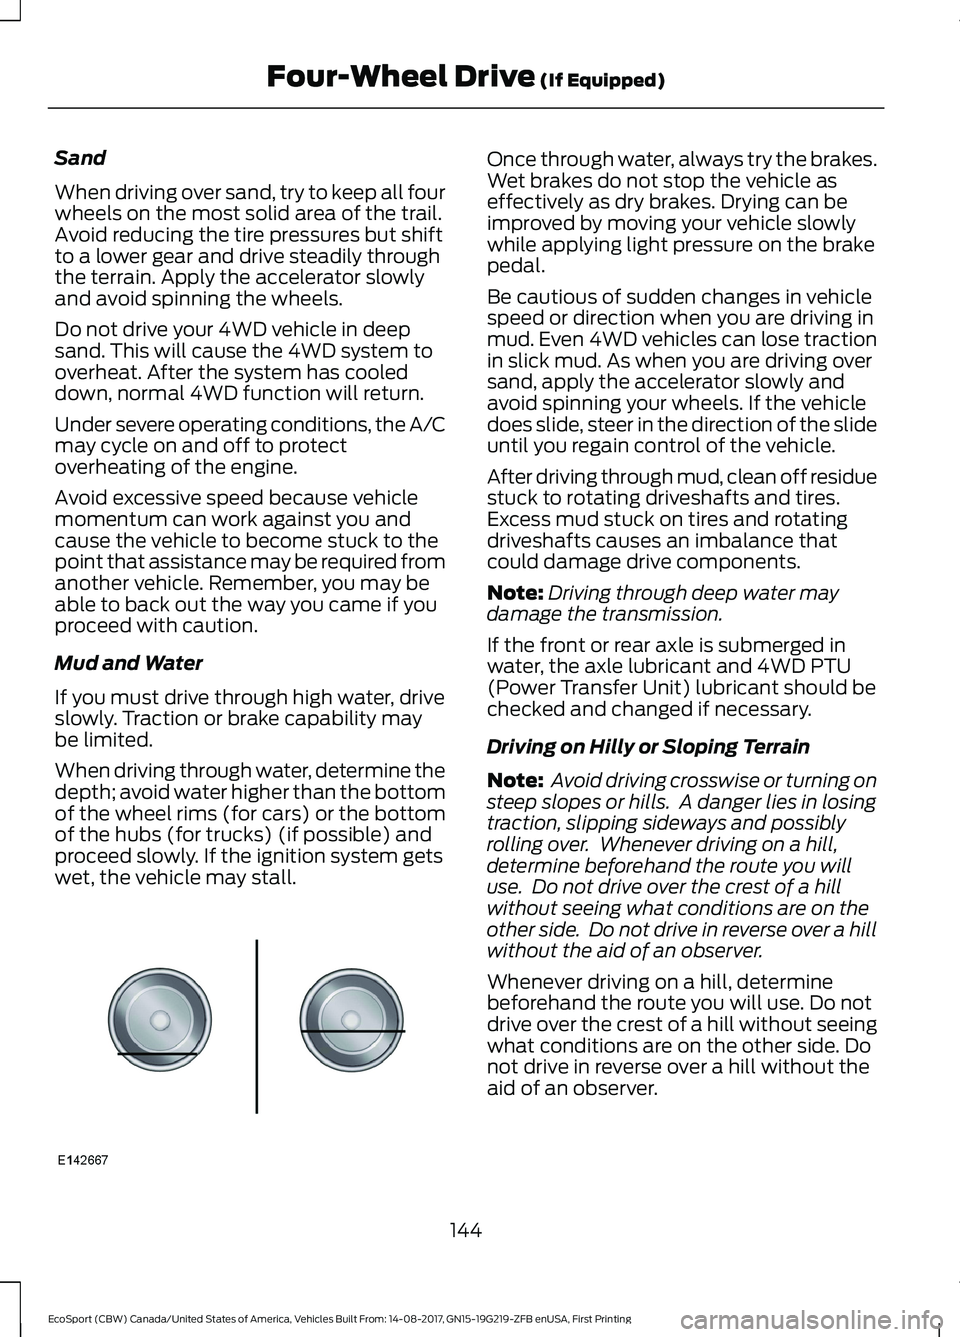
When driving through water, determine thedepth; avoid water higher than the bottomof the wheel rims (for cars) or the bottomof the hubs (for trucks) (if possible) andproceed slowly. If the ignition system getswet, the vehicle may stall.
Once through water, always try the brakes.Wet brakes do not stop the vehicle aseffectively as dry brakes. Drying can beimproved by moving your vehicle slowlywhile applying light pressure on the brakepedal.
Be cautious of sudden changes in vehiclespeed or direction when you are driving inmud. Even 4WD vehicles can lose tractionin slick mud. As when you are driving oversand, apply the accelerator slowly andavoid spinning your wheels. If the vehicledoes slide, steer in the direction of the slideuntil you regain control of the vehicle.
After driving through mud, clean off residuestuck to rotating driveshafts and tires.Excess mud stuck on tires and rotatingdriveshafts causes an imbalance thatcould damage drive components.
Note:Driving through deep water maydamage the transmission.
If the front or rear axle is submerged inwater, the axle lubricant and 4WD PTU(Power Transfer Unit) lubricant should bechecked and changed if necessary.
Driving on Hilly or Sloping Terrain
Note: Avoid driving crosswise or turning onsteep slopes or hills. A danger lies in losingtraction, slipping sideways and possiblyrolling over. Whenever driving on a hill,determine beforehand the route you willuse. Do not drive over the crest of a hillwithout seeing what conditions are on theother side. Do not drive in reverse over a hillwithout the aid of an observer.
Whenever driving on a hill, determinebeforehand the route you will use. Do notdrive over the crest of a hill without seeingwhat conditions are on the other side. Donot drive in reverse over a hill without theaid of an observer.
144EcoSport (CBW) Canada/United States of America, Vehicles Built From: 14-08-2017, GN15-19G219-ZFB enUSA, First PrintingFour-Wheel Drive (If Equipped)
Page 150 of 452
GENERAL INFORMATION
Wet brakes result in reduced brakingefficiency. Gently press the brake pedal afew times when driving from a car wash orstanding water to dry the brakes.
Brake Over Accelerator
In the event the accelerator pedalbecomes stuck or entrapped, apply steadyand firm pressure to the brake pedal toslow the vehicle and reduce engine power.If you experience this condition, apply thebrakes and bring your vehicle to a safestop. Shift the transmission to park (P)(automatic transmission) or to a low gear(manual transmission), switch the engineoff and apply the parking brake.
Inspect the accelerator pedal and the areaaround it for any items or debris that maybe obstructing its movement. If none arefound and the condition persists, have yourvehicle towed to the dealer for service.
Emergency Brake Assist
Emergency brake assist detects when youbrake heavily by measuring the rate atwhich you press the brake pedal. Itprovides maximum braking efficiency aslong as you press the pedal. Emergencybrake assist can reduce stopping distancesin critical situations.
Anti-lock Brake System (If Equipped)
This system helps you maintain steeringcontrol and vehicle stability duringemergency stops by keeping the brakesfrom locking.
This lamp momentarilyilluminates when you switch theignition on. If the light does notilluminate during start up, remains on orflashes, the system may be disabled. Havethe system checked by an authorizeddealer. If the anti-lock brake system isdisabled, normal braking is still effective.
If the brake warning lampilluminates when you release theparking brake, have the systemchecked by an authorized dealer.
Note: Occasional brake noise is normal. Ifa metal-to-metal, continuous grinding orcontinuous squeal sound is present, thebrake linings may be worn-out. If yourvehicle has continuous vibration or shudderin the steering wheel while braking, haveyour vehicle checked by an authorizeddealer.
Note: Brake dust may accumulate on thewheels, even under normal drivingconditions. Some dust is inevitable as thebrakes wear. See Cleaning the Wheels(page 234).
Note:Depending on applicable laws andregulations in the country for which yourvehicle was originally built, the brake lampsmay flash during heavy braking. Followingthis the hazard warning flashers may alsoflash when your vehicle comes to a stop.
See Warning Lamps andIndicators (page 81).
HINTS ON DRIVING WITH
ANTI-LOCK BRAKES
The anti-lock braking system does noteliminate the risks when:
•You drive too closely to the vehicle infront of you.
•Your vehicle is hydroplaning.
146EcoSport (CBW) Canada/United States of America, Vehicles Built From: 14-08-2017, GN15-19G219-ZFB enUSA, First PrintingBrakes
Page 168 of 452
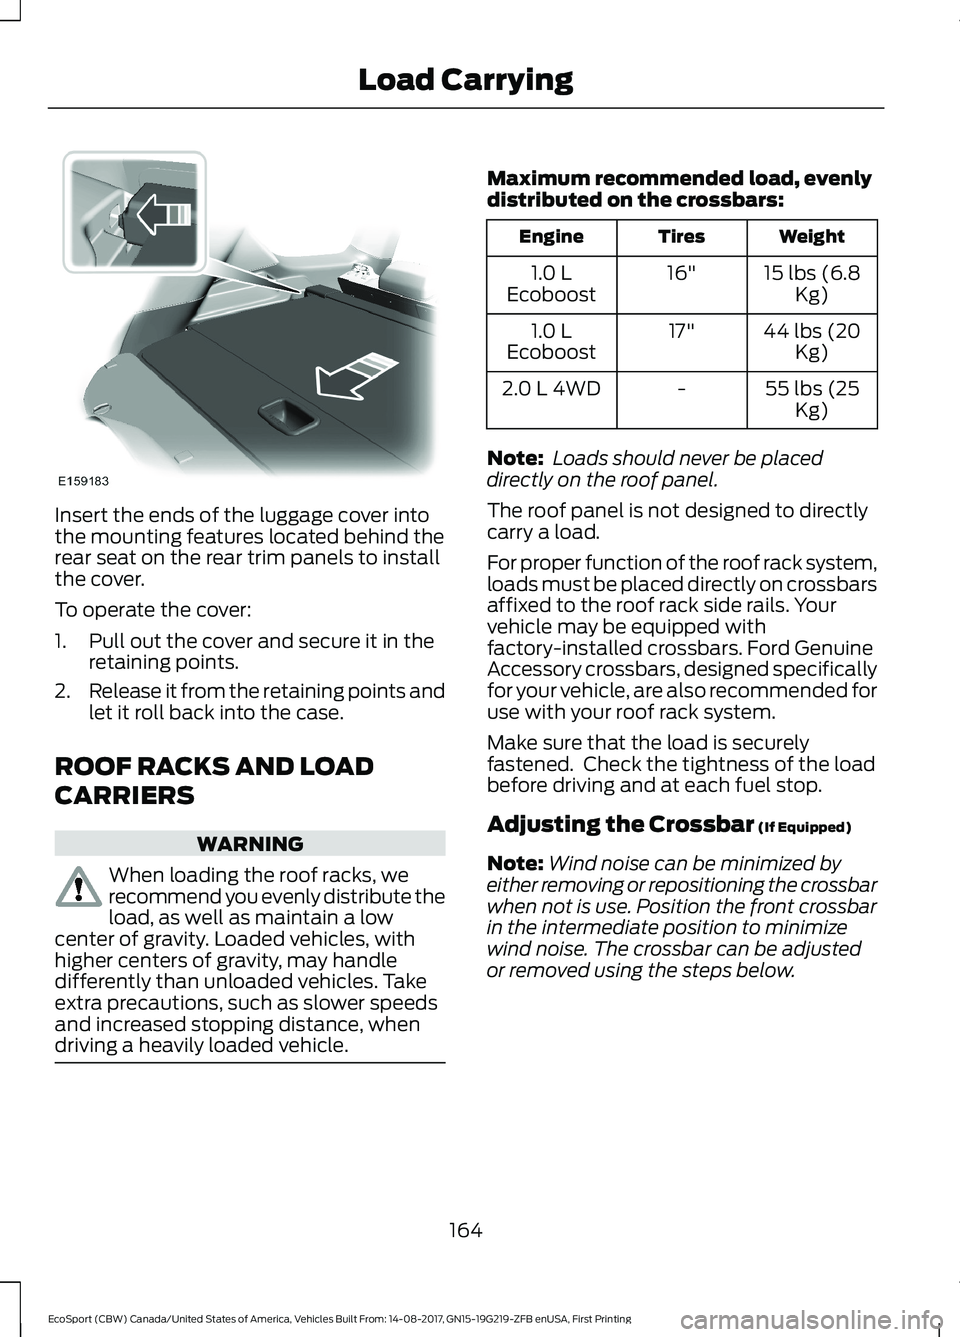
Insert the ends of the luggage cover intothe mounting features located behind therear seat on the rear trim panels to installthe cover.
To operate the cover:
1.Pull out the cover and secure it in theretaining points.
2.Release it from the retaining points andlet it roll back into the case.
ROOF RACKS AND LOAD
CARRIERS
WARNING
When loading the roof racks, werecommend you evenly distribute theload, as well as maintain a lowcenter of gravity. Loaded vehicles, withhigher centers of gravity, may handledifferently than unloaded vehicles. Takeextra precautions, such as slower speedsand increased stopping distance, whendriving a heavily loaded vehicle.
Maximum recommended load, evenlydistributed on the crossbars:
WeightTiresEngine
15 lbs (6.8Kg)16"1.0 LEcoboost
44 lbs (20Kg)17"1.0 LEcoboost
55 lbs (25Kg)-2.0 L 4WD
Note: Loads should never be placeddirectly on the roof panel.
The roof panel is not designed to directlycarry a load.
For proper function of the roof rack system,loads must be placed directly on crossbarsaffixed to the roof rack side rails. Yourvehicle may be equipped withfactory-installed crossbars. Ford GenuineAccessory crossbars, designed specificallyfor your vehicle, are also recommended foruse with your roof rack system.
Make sure that the load is securelyfastened. Check the tightness of the loadbefore driving and at each fuel stop.
Adjusting the Crossbar (If Equipped)
Note:Wind noise can be minimized byeither removing or repositioning the crossbarwhen not is use. Position the front crossbarin the intermediate position to minimizewind noise. The crossbar can be adjustedor removed using the steps below.
164EcoSport (CBW) Canada/United States of America, Vehicles Built From: 14-08-2017, GN15-19G219-ZFB enUSA, First PrintingLoad Carrying
Page 176 of 452
This feature applies your vehicle brakes atindividual wheels and if necessary, reducesengine power. If the trailer begins to sway,the traction control warning lamp flashesand a message will appear in theinformation display. Slow your vehicledown, pull safely to the side of the roadand check for correct load distribution.See Load Carrying (page 163).
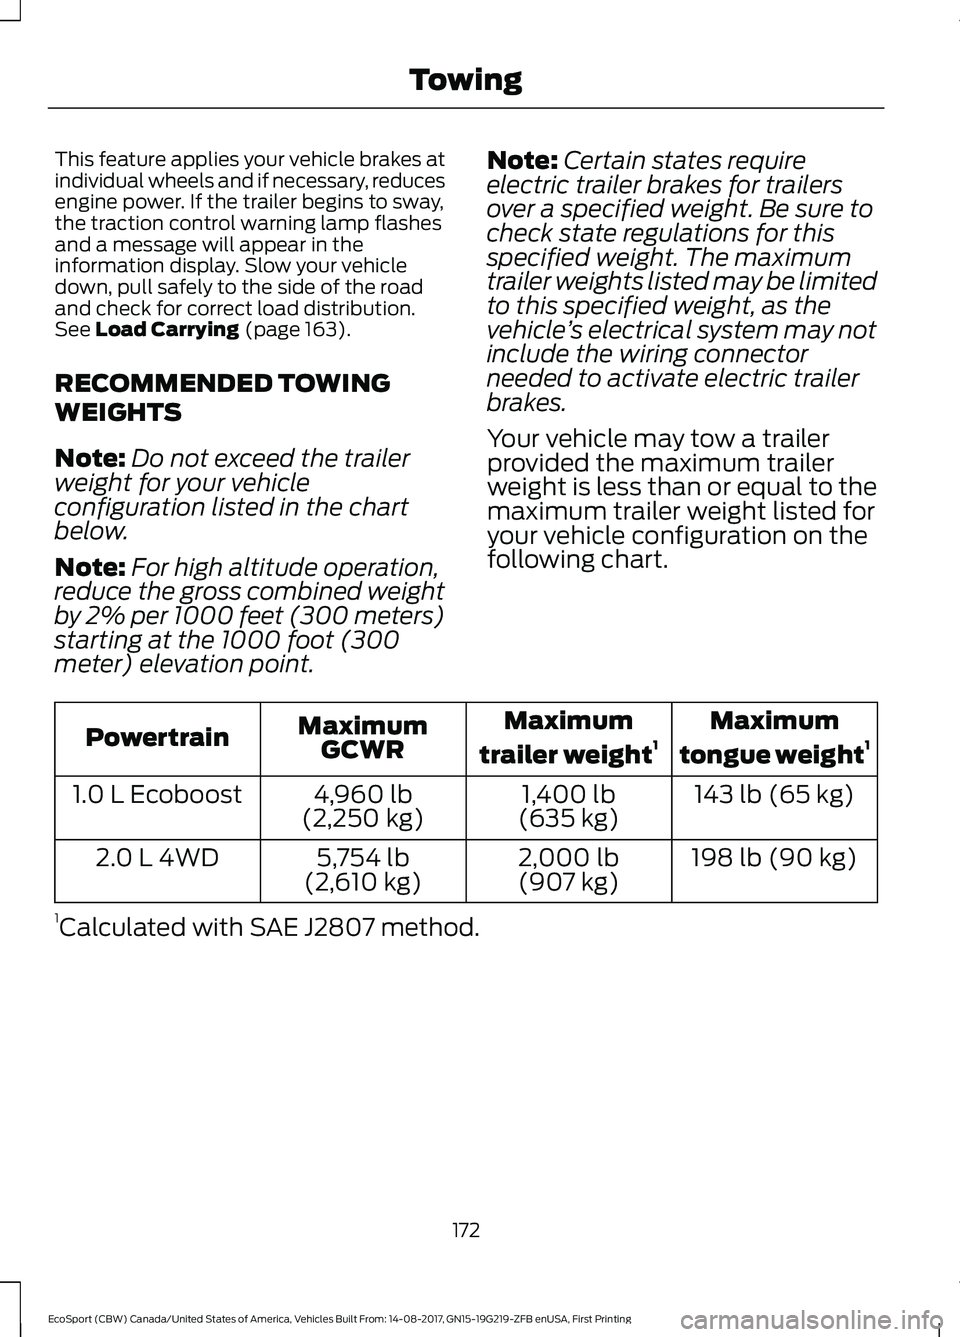
RECOMMENDED TOWING
WEIGHTS
Note:Do not exceed the trailerweight for your vehicleconfiguration listed in the chartbelow.
Note:For high altitude operation,reduce the gross combined weightby 2% per 1000 feet (300 meters)starting at the 1000 foot (300
meter) elevation point.
Note:Certain states requireelectric trailer brakes for trailersover a specified weight. Be sure tocheck state regulations for thisspecified weight. The maximumtrailer weights listed may be limitedto this specified weight, as thevehicle’s electrical system may notinclude the wiring connectorneeded to activate electric trailerbrakes.
Your vehicle may tow a trailerprovided the maximum trailerweight is less than or equal to themaximum trailer weight listed foryour vehicle configuration on thefollowing chart.
Maximum
tongue weight1Maximum
trailer weight1MaximumGCWRPowertrain
143 lb (65 kg)1,400 lb(635 kg)4,960 lb(2,250 kg)1.0 L Ecoboost
198 lb (90 kg)2,000 lb(907 kg)5,754 lb(2,610 kg)2.0 L 4WD
1Calculated with SAE J2807 method.
172EcoSport (CBW) Canada/United States of America, Vehicles Built From: 14-08-2017, GN15-19G219-ZFB enUSA, First PrintingTowing
Page 178 of 452
Before Towing a Trailer
Practice turning, stopping and backing upto get the feel of your vehicle-trailercombination before starting on a trip.When turning, make wider turns so thetrailer wheels clear curbs and otherobstacles.
When Towing a Trailer
•Do not drive faster than 70 mph(113 km/h) during the first 500 mi(800 km).
•Do not make full-throttle starts.
•Check your hitch, electrical connectionsand trailer wheel lug nuts thoroughlyafter you have traveled 50 mi (80 km).
•When stopped in congested or heavytraffic during hot weather, place thegearshift in position P to aid engine andtransmission cooling and to help A/Cperformance.
•Turn off the speed control with heavyloads or in hilly terrain. The speedcontrol may turn off automaticallywhen you are towing on long, steepgrades.
•Shift to a lower gear when driving downa long or steep hill. Do not apply thebrakes continuously, as they mayoverheat and become less effective.
•If your transmission is equipped with aGrade Assist or Tow/Haul feature, usethis feature when towing. This providesengine braking and helps eliminateexcessive transmission shifting foroptimum fuel economy andtransmission cooling.
•Allow more distance for stopping witha trailer attached. Anticipate stops andbrake gradually.
•Avoid parking on a grade. However, ifyou must park on a grade:
1.Turn the steering wheel to point yourvehicle tires away from traffic flow.
2.Set your vehicle parking brake.
3.Place the automatic transmission inposition P.
4.Place wheel chocks in front and backof the trailer wheels. (Chocks notincluded with vehicle.)
Launching or Retrieving a Boat orPersonal Watercraft (PWC)
Note:Disconnect the wiring to the trailerbefore backing the trailer into the water.
Note:Reconnect the wiring to the trailerafter removing the trailer from the water.
When backing down a ramp during boatlaunching or retrieval:
•Do not allow the static water level torise above the bottom edge of the rearbumper.
•Do not allow waves to break higherthan 6 in (15 cm) above the bottomedge of the rear bumper.
Exceeding these limits may allow water toenter vehicle components:
•Causing internal damage to thecomponents.
•Affecting driveability, emissions, andreliability.
Replace the rear axle lubricant anytimethe rear axle has been submerged in water.Water may have contaminated the rearaxle lubricant, which is not normallychecked or changed unless a leak issuspected or other axle repair is required.
174EcoSport (CBW) Canada/United States of America, Vehicles Built From: 14-08-2017, GN15-19G219-ZFB enUSA, First PrintingTowing
Page 186 of 452
Vehicles Sold in Canada: GettingRoadside Assistance
To fully assist you should you have avehicle concern, Ford Motor Company ofCanada, Limited offers a complimentaryroadside assistance program. Thisprogram is eligible within Canada or thecontinental United States.
This program is separate from the NewVehicle Limited Warranty, but the coverageis concurrent with the powertrain coverageperiod of your vehicle.
Canadian customers who require roadsideassistance, call 1-800-665-2006.
Vehicles Sold in Canada: UsingRoadside Assistance
Complete the roadside assistanceidentification card and place it in yourwallet for quick reference.
In Canada, this card is found in theWarranty Guide in the glove compartmentof your vehicle.
Vehicles Sold in Canada: RoadsideAssistance Program Coverage
The service is available 24 hours a day,seven days a week.
Canadian roadside coverage and benefitsmay differ from the U.S. coverage.
If you require more information, pleaserefer to the coverage section of yourwarranty guide, call us in Canada at1-800-665-2006, or visit our website atwww.ford.ca.
HAZARD FLASHERS
The hazard warning button islocated on the instrument panel.
Use it when your vehicle is creating a safetyhazard for other motorists.
Press the button to turn on the hazardwarning function, and the front and reardirection indicators will flash.
Press the button again to turn them off.
Note:If used when the engine is notrunning, the battery will lose charge. Theremay be insufficient power to restart yourengine.
Note:Depending on applicable laws andregulations in the country for which yourvehicle was originally built, the hazardwarning flashers may flash if you brakeheavily.
FUEL SHUTOFF
WARNING
If your vehicle has been involved in acrash, have the fuel system checked.Failure to follow this instructioncould result in fire, personal injury or death.
In the event of a moderate to severecollision, this vehicle includes a fuel pumpshutoff feature that stops the flow of fuelto the engine. Not every impact will causea shutoff.
Should your vehicle shut off after acollision, you may restart your vehicle. Forvehicles equipped with a key system:
1.Switch off the ignition.
2.Switch to start position.
3.Switch off the ignition.
4.Switch on the ignition to re-enable thefuel pump.
For vehicles equipped with a push buttonstart system:
1.Press the START/STOP button toswitch off the ignition.
2.Press the brake pedal and press theSTART/STOP button to switch on theignition.
182EcoSport (CBW) Canada/United States of America, Vehicles Built From: 14-08-2017, GN15-19G219-ZFB enUSA, First PrintingRoadside Emergencies
Page 187 of 452
3.Remove your foot from the brake pedaland press the START/STOP buttonto switch off the ignition.
4.You can either attempt to start theengine by pressing the brake pedal andthe START/STOP button, or switchon the ignition only by pressing theSTART/STOP button withoutpressing the brake pedal. Both waysre-enable the fuel system.
Note: When you try to restart your vehicleafter a fuel shutoff, the vehicle makes surethat various systems are safe to restart.Once your vehicle determines that thesystems are safe, then the vehicle will allowyou to restart.
Note:In the event that your vehicle doesnot restart after your third attempt, contactan authorized dealer.
JUMP STARTING THE VEHICLE
WARNINGS
Batteries normally produce explosivegases which can cause personalinjury. Therefore, do not allowflames, sparks or lighted substances tocome near the battery. When working nearthe battery, always shield your face andprotect your eyes. Always provide correctventilation.
Keep batteries out of reach ofchildren. Batteries contain sulfuricacid. Avoid contact with skin, eyes orclothing. Shield your eyes when workingnear the battery to protect against possiblesplashing of acid solution. In case of acidcontact with skin or eyes, flushimmediately with water for a minimum of15 minutes and get prompt medicalattention. If acid is swallowed, call aphysician immediately.
Use only adequately sized cables withinsulated clamps.
Do not attempt to push-start yourautomatic transmission vehicle. Automatictransmissions do not have push-startcapability. Attempting to push-start avehicle with an automatic transmissionmay cause transmission damage.
Preparing Your Vehicle
Note:Use only a 12-volt supply to start yourvehicle.
Note:Do not disconnect the battery of thedisabled vehicle as this could damage thevehicle's electrical system.
1.Park the booster vehicle close to thehood of the disabled vehicle makingsure the two vehicles do not touch. Setthe parking brake on both vehicles andstay clear of the engine cooling fan andother moving parts.
2.Check all battery terminals and removeany excessive corrosion before youattach the battery cables. Ensure thatvent caps are tight and level.
3.Turn the heater fan on in both vehiclesto protect from any electrical surges.Turn all other accessories off.
Connecting the Jumper Cables
WARNINGS
Do not use fuel lines, engine valvecovers, windshield wiper arms, theintake manifold, or hood latch asground points.
Use only adequately sized cableswith insulated clamps.
Note:In the illustration, the vehicle on thebottom is used to designate the assisting(boosting) battery.
183EcoSport (CBW) Canada/United States of America, Vehicles Built From: 14-08-2017, GN15-19G219-ZFB enUSA, First PrintingRoadside Emergencies
Page 204 of 452
Battery Fuse Box
Protected componentsFuse amp ratingFuse
Engine compartment fuse box.250A1
Electric power assist steering.60A2
Body control module.100A3
Heating control unit.70A4
Starter.275A5
CHANGING A FUSE
Fuses
WARNING
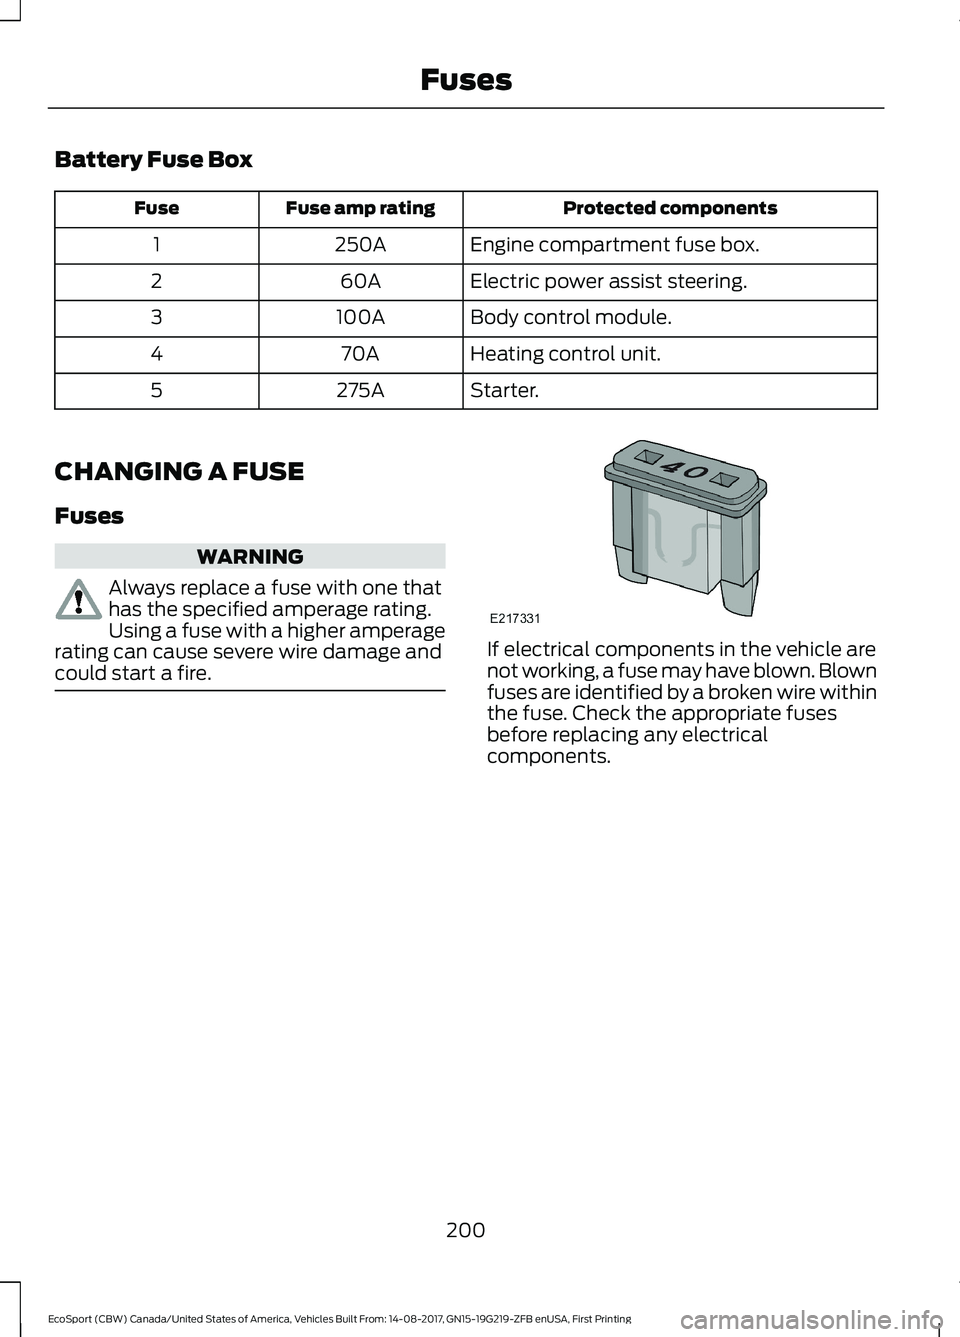
Always replace a fuse with one thathas the specified amperage rating.Using a fuse with a higher amperagerating can cause severe wire damage andcould start a fire.If electrical components in the vehicle arenot working, a fuse may have blown. Blownfuses are identified by a broken wire withinthe fuse. Check the appropriate fusesbefore replacing any electricalcomponents.
200EcoSport (CBW) Canada/United States of America, Vehicles Built From: 14-08-2017, GN15-19G219-ZFB enUSA, First PrintingFuses