clock FORD EDGE 2007 1.G Owners Manual
[x] Cancel search | Manufacturer: FORD, Model Year: 2007, Model line: EDGE, Model: FORD EDGE 2007 1.GPages: 320, PDF Size: 2.74 MB
Page 22 of 320
3.MENU:Press repeatedly to
access the following settings:
CATEGORY (satellite radio if equipped):Press MENU until the
currently active category appears in the display (CATEGORY MODE).
In CATEGORY MODE, press
/to scroll through the list of
available SIRIUS channel Categories (Pop, Rock, News, etc.) Press
SEEK, SEEKor SCAN to select the category. After a category is
selected, press SEEK to search for that specific category of channels
only (i.e. ROCK). To select a different category, press MENU until the
category appears in the display. Press
/to select a different
category. You may also select CATEGORY ALL to seek all available
SIRIUS categories and channels.
Satellite radio is available only with a valid SIRIUS radio
subscription. Check with your authorized dealer for availability.
Setting the clock:Press MENU until SET HOURS or SET MINUTES is
displayed. Use
/to manually increase/decrease. Press MENU
again to disengage clock mode.
AUTOSET:Press MENU until the display reads AUTOSET. Autoset
allows you to set the strongest local radio stations without losing your
original manually set preset stations for AM/FM1/FM2. Use
/to
turn on/off.
When the six strongest stations are filled, the station stored in preset 1
will begin playing. If there are less than six strong stations, the system
will store the last one in the remaining presets.
BASS:Press MENU to reach the bass setting. Use
/to adjust.
TREB (Treble):Press MENU to reach the treble setting. Use
/
to adjust.
BAL (Balance):Press MENU to reach the balance setting. Use
/
to adjust the audio between the left (L) and right (R) speakers.
FADE:Press MENU to reach the fade setting. Use
/to adjust the
audio between the back (B) and front (F) speakers.
SPEED VOL (Speed sensitive volume):Press MENU to reach the
SPEEDVOL setting. Radio volume automatically gets louder with
increasing vehicle speed to compensate for road and wind noise.
Use
/to adjust.
2007 Edge(edg)
Owners Guide (post-2002-fmt)
USA(fus)
Entertainment Systems
22
Page 28 of 320
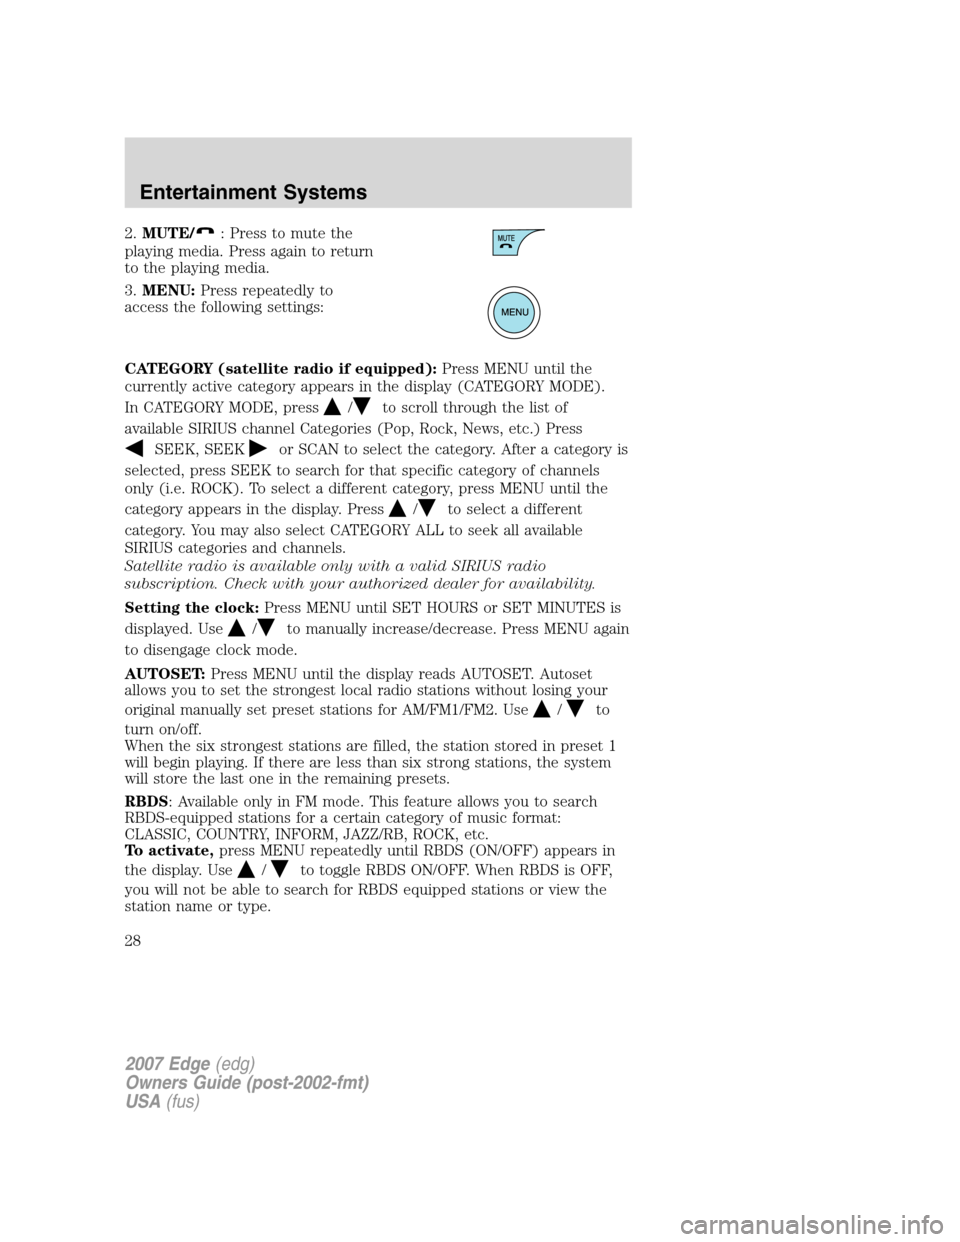
2.MUTE/: Press to mute the
playing media. Press again to return
to the playing media.
3.MENU:Press repeatedly to
access the following settings:
CATEGORY (satellite radio if equipped):Press MENU until the
currently active category appears in the display (CATEGORY MODE).
In CATEGORY MODE, press
/to scroll through the list of
available SIRIUS channel Categories (Pop, Rock, News, etc.) Press
SEEK, SEEKor SCAN to select the category. After a category is
selected, press SEEK to search for that specific category of channels
only (i.e. ROCK). To select a different category, press MENU until the
category appears in the display. Press
/to select a different
category. You may also select CATEGORY ALL to seek all available
SIRIUS categories and channels.
Satellite radio is available only with a valid SIRIUS radio
subscription. Check with your authorized dealer for availability.
Setting the clock:Press MENU until SET HOURS or SET MINUTES is
displayed. Use
/to manually increase/decrease. Press MENU again
to disengage clock mode.
AUTOSET:Press MENU until the display reads AUTOSET. Autoset
allows you to set the strongest local radio stations without losing your
original manually set preset stations for AM/FM1/FM2. Use
/to
turn on/off.
When the six strongest stations are filled, the station stored in preset 1
will begin playing. If there are less than six strong stations, the system
will store the last one in the remaining presets.
RBDS: Available only in FM mode. This feature allows you to search
RBDS-equipped stations for a certain category of music format:
CLASSIC, COUNTRY, INFORM, JAZZ/RB, ROCK, etc.
To activate,press MENU repeatedly until RBDS (ON/OFF) appears in
the display. Use
/to toggle RBDS ON/OFF. When RBDS is OFF,
you will not be able to search for RBDS equipped stations or view the
station name or type.
2007 Edge(edg)
Owners Guide (post-2002-fmt)
USA(fus)
Entertainment Systems
28
Page 74 of 320
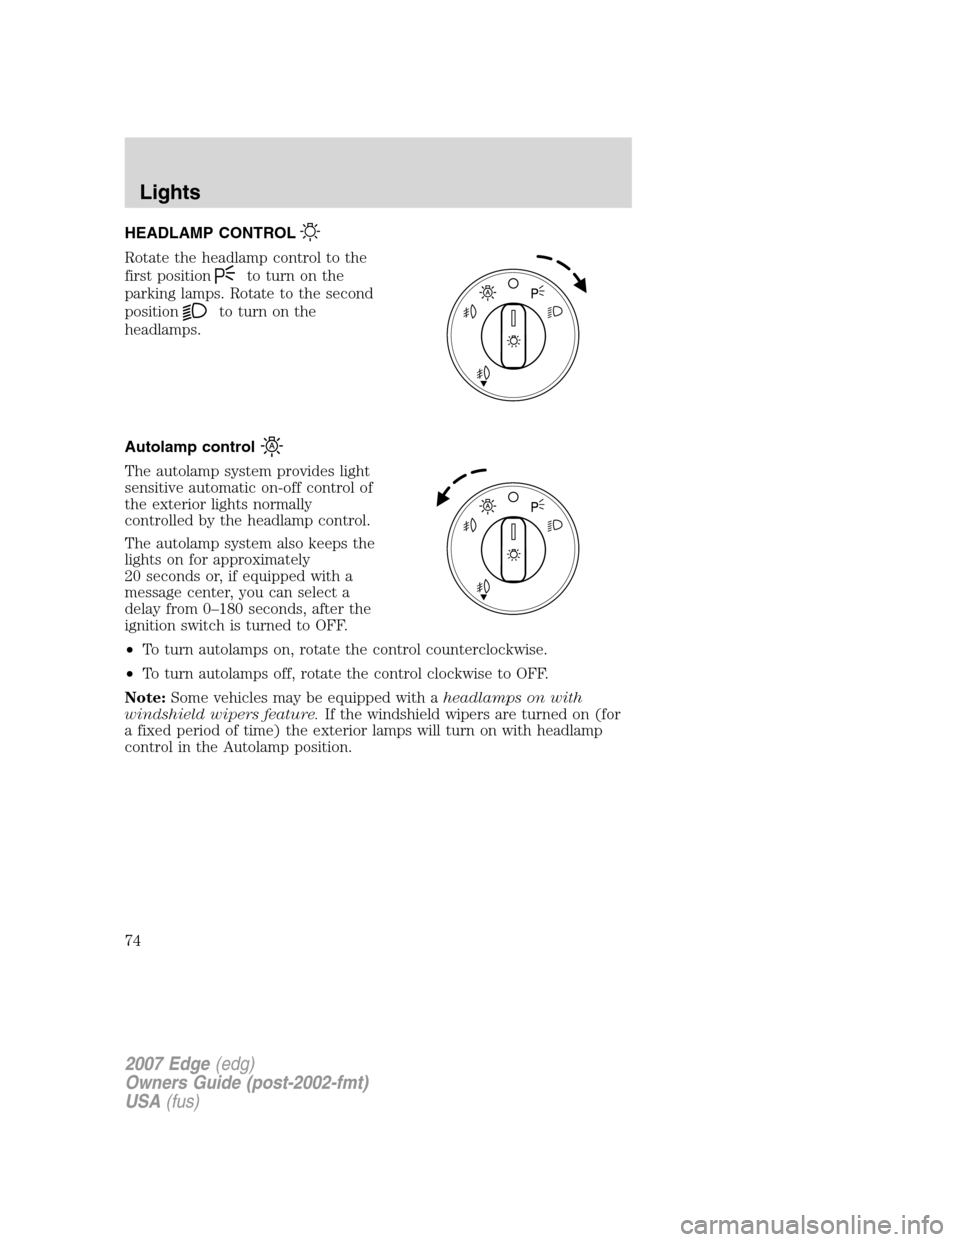
HEADLAMP CONTROL
Rotate the headlamp control to the
first position
to turn on the
parking lamps. Rotate to the second
position
to turn on the
headlamps.
Autolamp control
The autolamp system provides light
sensitive automatic on-off control of
the exterior lights normally
controlled by the headlamp control.
The autolamp system also keeps the
lights on for approximately
20 seconds or, if equipped with a
message center, you can select a
delay from 0–180 seconds, after the
ignition switch is turned to OFF.
•To turn autolamps on, rotate the control counterclockwise.
•To turn autolamps off, rotate the control clockwise to OFF.
Note:Some vehicles may be equipped with aheadlamps on with
windshield wipers feature.If the windshield wipers are turned on (for
a fixed period of time) the exterior lamps will turn on with headlamp
control in the Autolamp position.
2007 Edge(edg)
Owners Guide (post-2002-fmt)
USA(fus)
Lights
74
Page 77 of 320
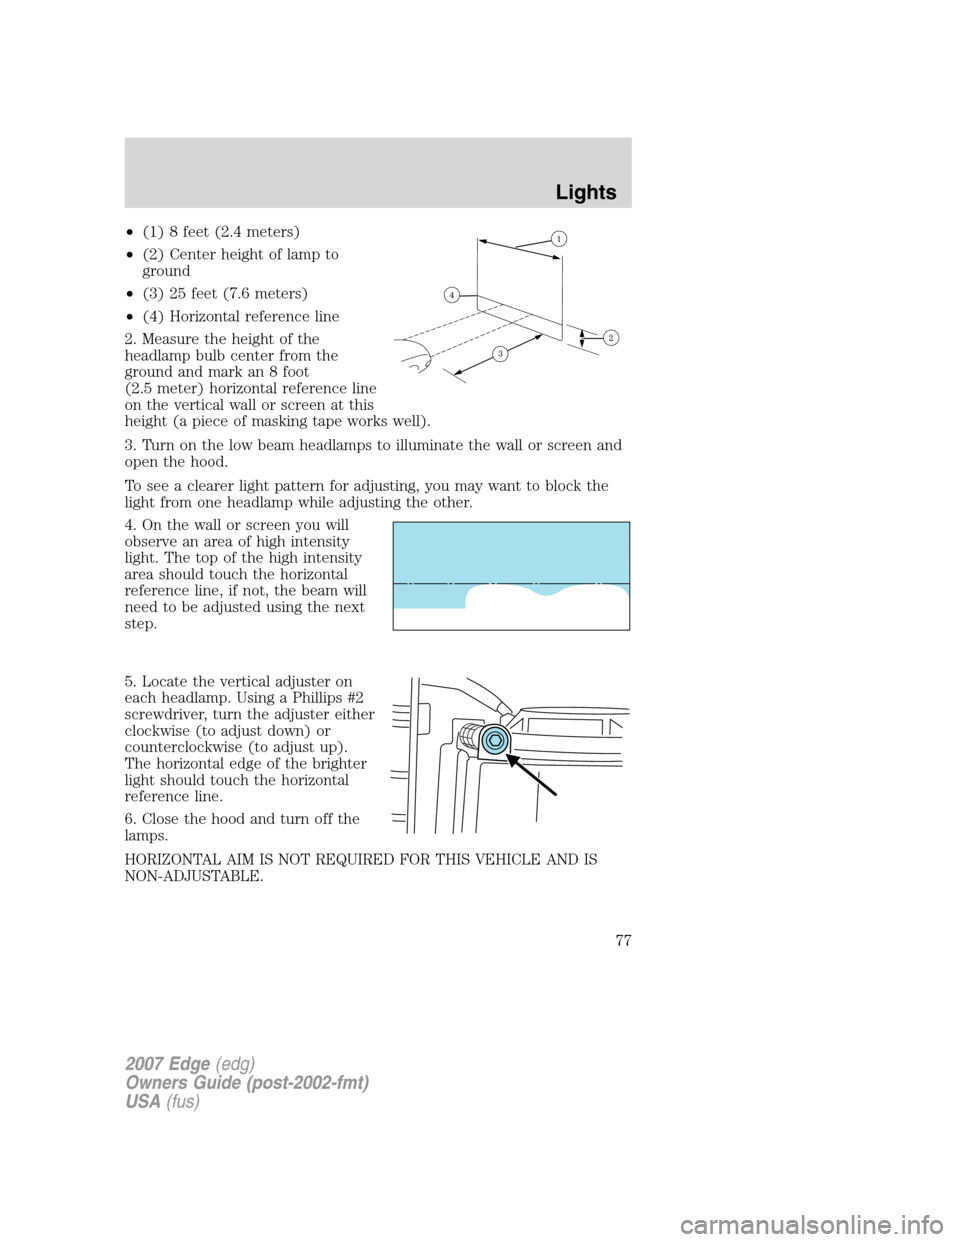
•(1) 8 feet (2.4 meters)
•(2) Center height of lamp to
ground
•(3) 25 feet (7.6 meters)
•(4) Horizontal reference line
2. Measure the height of the
headlamp bulb center from the
ground and mark an 8 foot
(2.5 meter) horizontal reference line
on the vertical wall or screen at this
height (a piece of masking tape works well).
3. Turn on the low beam headlamps to illuminate the wall or screen and
open the hood.
To see a clearer light pattern for adjusting, you may want to block the
light from one headlamp while adjusting the other.
4. On the wall or screen you will
observe an area of high intensity
light. The top of the high intensity
area should touch the horizontal
reference line, if not, the beam will
need to be adjusted using the next
step.
5. Locate the vertical adjuster on
each headlamp. Using a Phillips #2
screwdriver, turn the adjuster either
clockwise (to adjust down) or
counterclockwise (to adjust up).
The horizontal edge of the brighter
light should touch the horizontal
reference line.
6. Close the hood and turn off the
lamps.
HORIZONTAL AIM IS NOT REQUIRED FOR THIS VEHICLE AND IS
NON-ADJUSTABLE.
2007 Edge(edg)
Owners Guide (post-2002-fmt)
USA(fus)
Lights
77
Page 80 of 320
Function Number of bulbsTrade
number
Map lamp 2 12V6W
Second row dome/reading
lamp3 578
Rear courtesy lamp 1 1600XB
Visor vanity lamp - Slide
on Rail system (SOR)
(if equipped)237
All replacement bulbs are clear in color except where noted.
To replace all instrument panel lights - see your authorized dealer.
Replacing the interior bulbs
Check the operation of all bulbs frequently.
Replacing exterior bulbs
Check the operation of all the bulbs frequently.
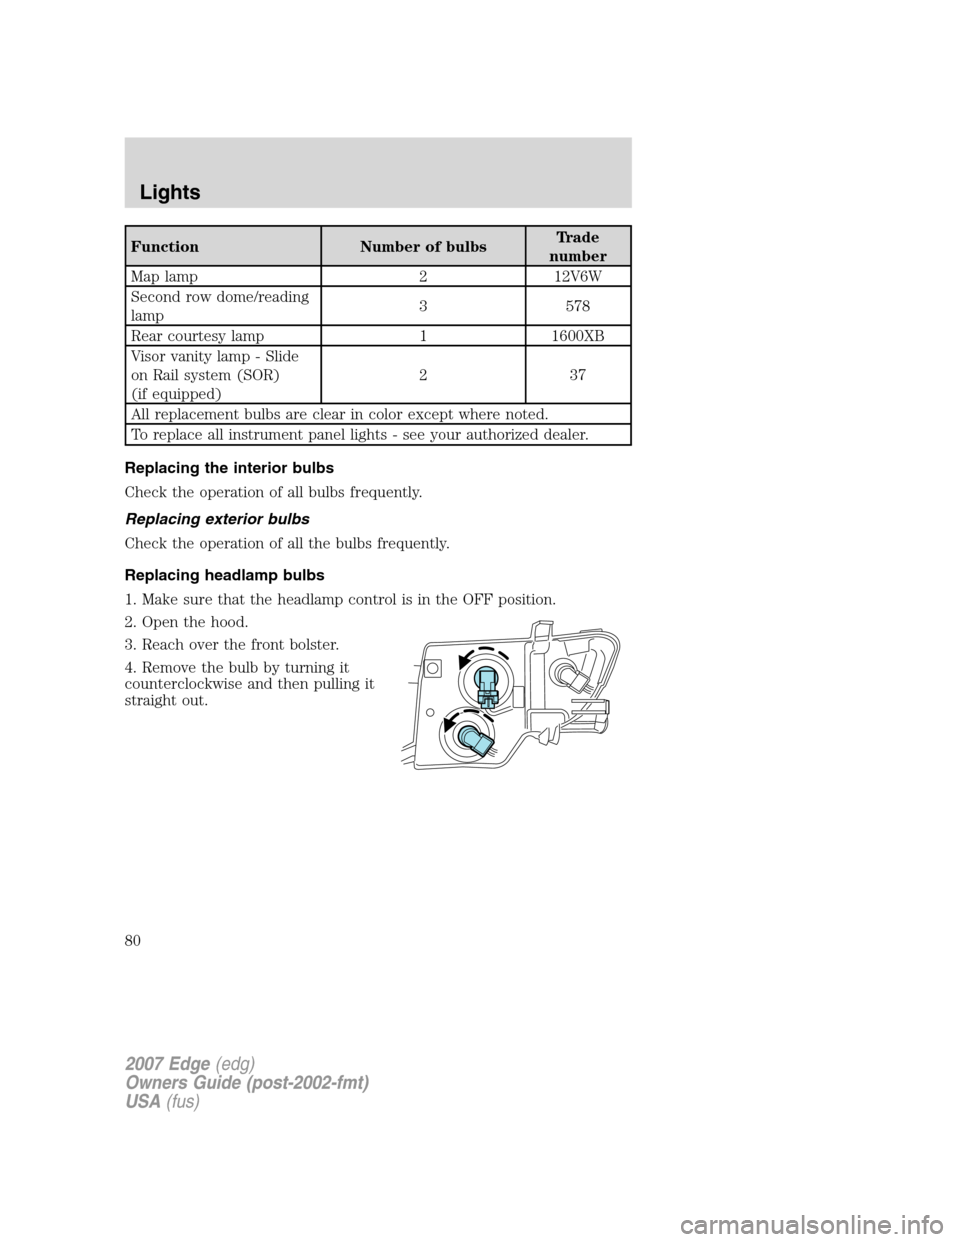
Replacing headlamp bulbs
1. Make sure that the headlamp control is in the OFF position.
2. Open the hood.
3. Reach over the front bolster.
4. Remove the bulb by turning it
counterclockwise and then pulling it
straight out.
2007 Edge(edg)
Owners Guide (post-2002-fmt)
USA(fus)
Lights
80
Page 81 of 320
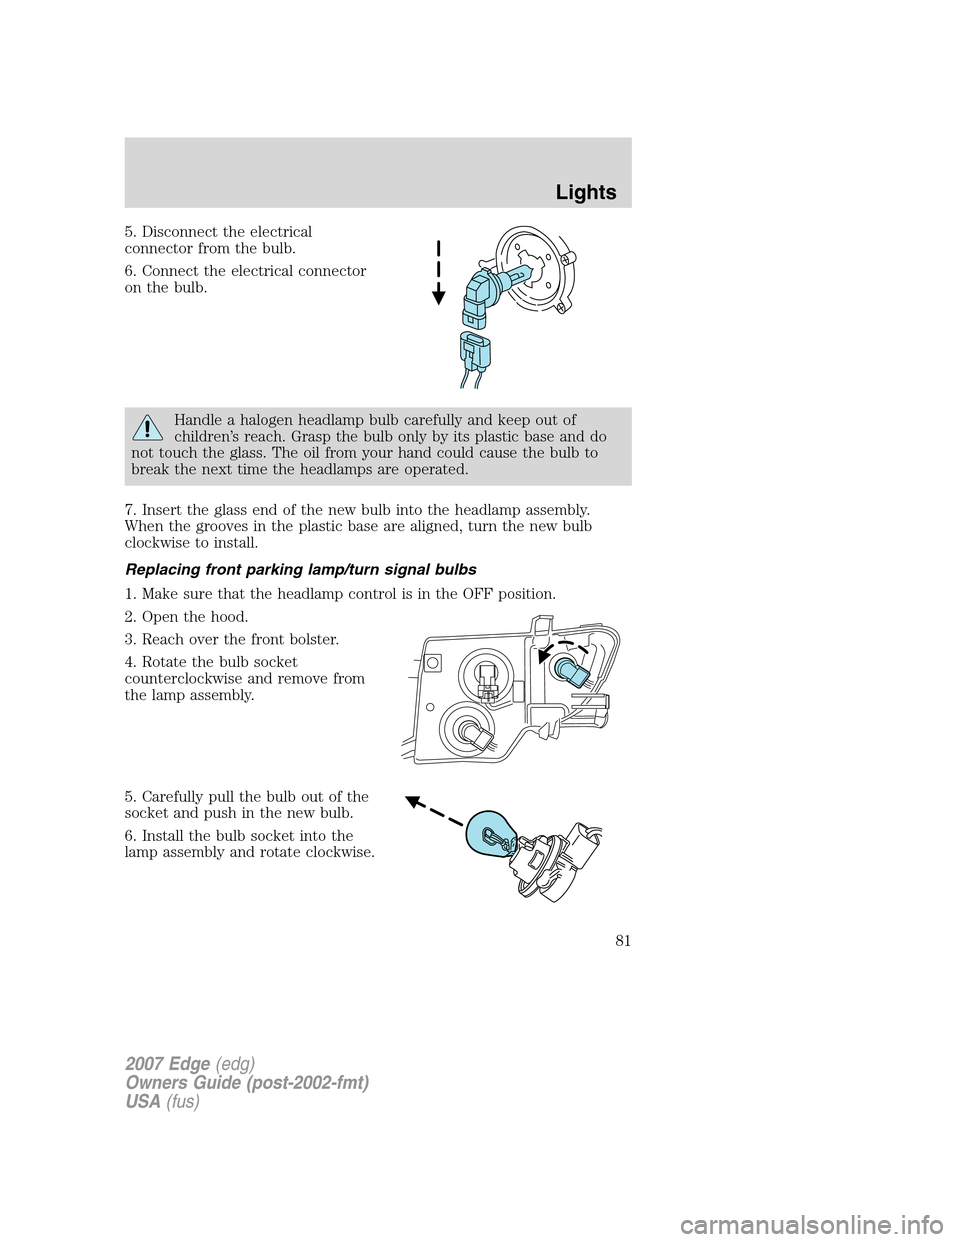
5. Disconnect the electrical
connector from the bulb.
6. Connect the electrical connector
on the bulb.
Handle a halogen headlamp bulb carefully and keep out of
children’s reach. Grasp the bulb only by its plastic base and do
not touch the glass. The oil from your hand could cause the bulb to
break the next time the headlamps are operated.
7. Insert the glass end of the new bulb into the headlamp assembly.
When the grooves in the plastic base are aligned, turn the new bulb
clockwise to install.
Replacing front parking lamp/turn signal bulbs
1. Make sure that the headlamp control is in the OFF position.
2. Open the hood.
3. Reach over the front bolster.
4. Rotate the bulb socket
counterclockwise and remove from
the lamp assembly.
5. Carefully pull the bulb out of the
socket and push in the new bulb.
6. Install the bulb socket into the
lamp assembly and rotate clockwise.
2007 Edge(edg)
Owners Guide (post-2002-fmt)
USA(fus)
Lights
81
Page 82 of 320
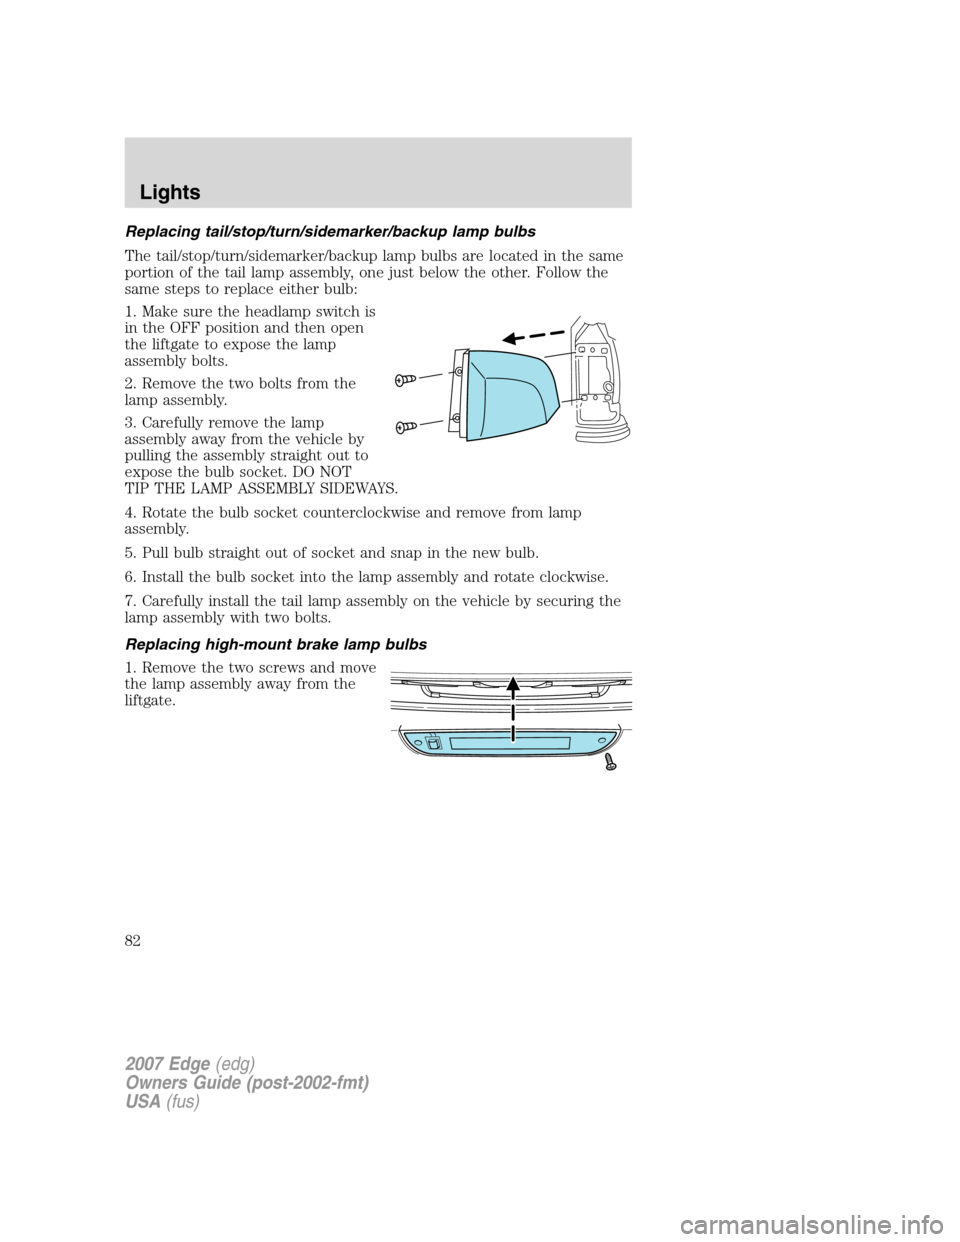
Replacing tail/stop/turn/sidemarker/backup lamp bulbs
The tail/stop/turn/sidemarker/backup lamp bulbs are located in the same
portion of the tail lamp assembly, one just below the other. Follow the
same steps to replace either bulb:
1. Make sure the headlamp switch is
in the OFF position and then open
the liftgate to expose the lamp
assembly bolts.
2. Remove the two bolts from the
lamp assembly.
3. Carefully remove the lamp
assembly away from the vehicle by
pulling the assembly straight out to
expose the bulb socket. DO NOT
TIP THE LAMP ASSEMBLY SIDEWAYS.
4. Rotate the bulb socket counterclockwise and remove from lamp
assembly.
5. Pull bulb straight out of socket and snap in the new bulb.
6. Install the bulb socket into the lamp assembly and rotate clockwise.
7. Carefully install the tail lamp assembly on the vehicle by securing the
lamp assembly with two bolts.
Replacing high-mount brake lamp bulbs
1. Remove the two screws and move
the lamp assembly away from the
liftgate.
2007 Edge(edg)
Owners Guide (post-2002-fmt)
USA(fus)
Lights
82
Page 83 of 320
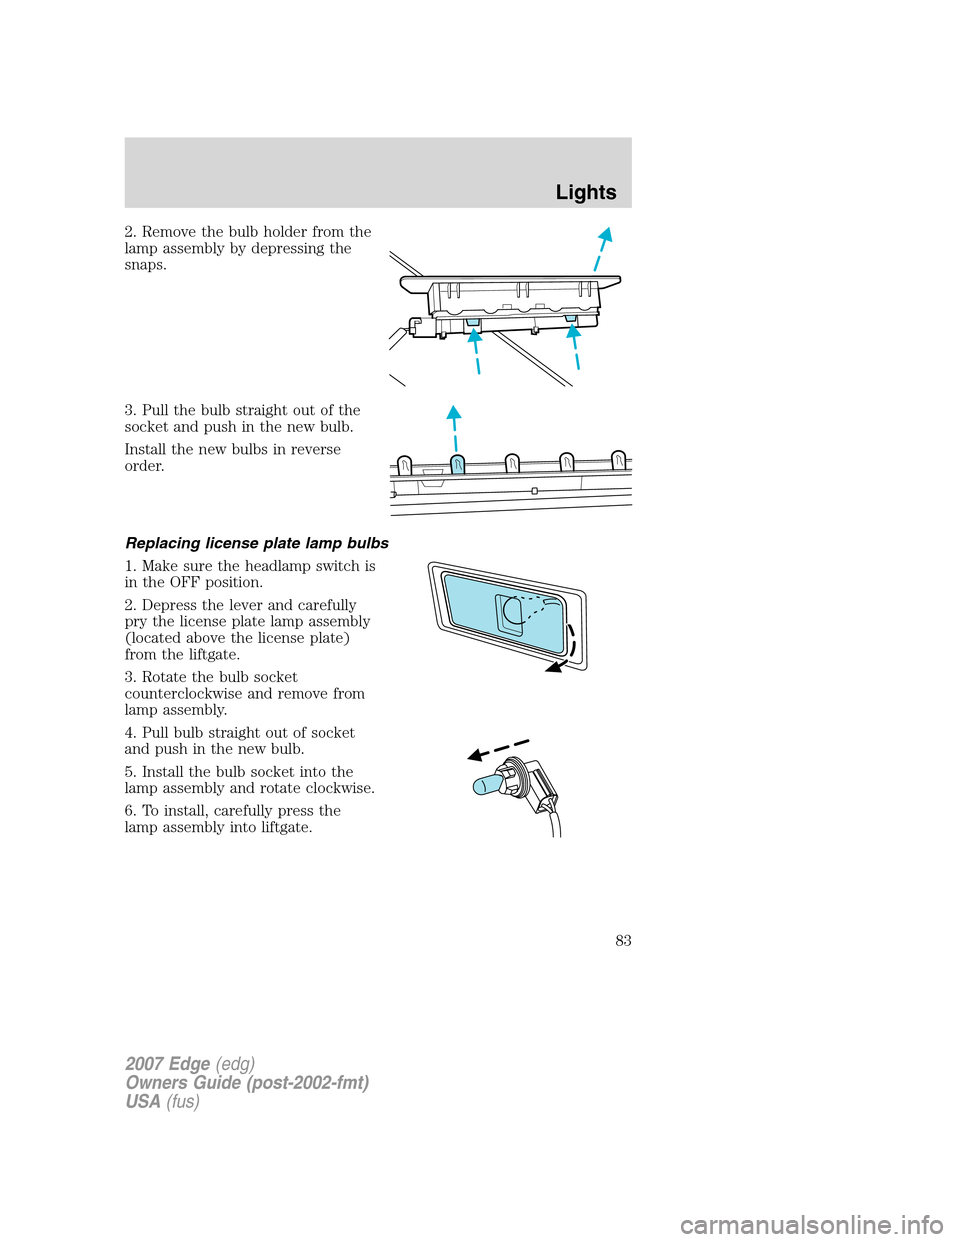
2. Remove the bulb holder from the
lamp assembly by depressing the
snaps.
3. Pull the bulb straight out of the
socket and push in the new bulb.
Install the new bulbs in reverse
order.
Replacing license plate lamp bulbs
1. Make sure the headlamp switch is
in the OFF position.
2. Depress the lever and carefully
pry the license plate lamp assembly
(located above the license plate)
from the liftgate.
3. Rotate the bulb socket
counterclockwise and remove from
lamp assembly.
4. Pull bulb straight out of socket
and push in the new bulb.
5. Install the bulb socket into the
lamp assembly and rotate clockwise.
6. To install, carefully press the
lamp assembly into liftgate.
2007 Edge(edg)
Owners Guide (post-2002-fmt)
USA(fus)
Lights
83
Page 84 of 320
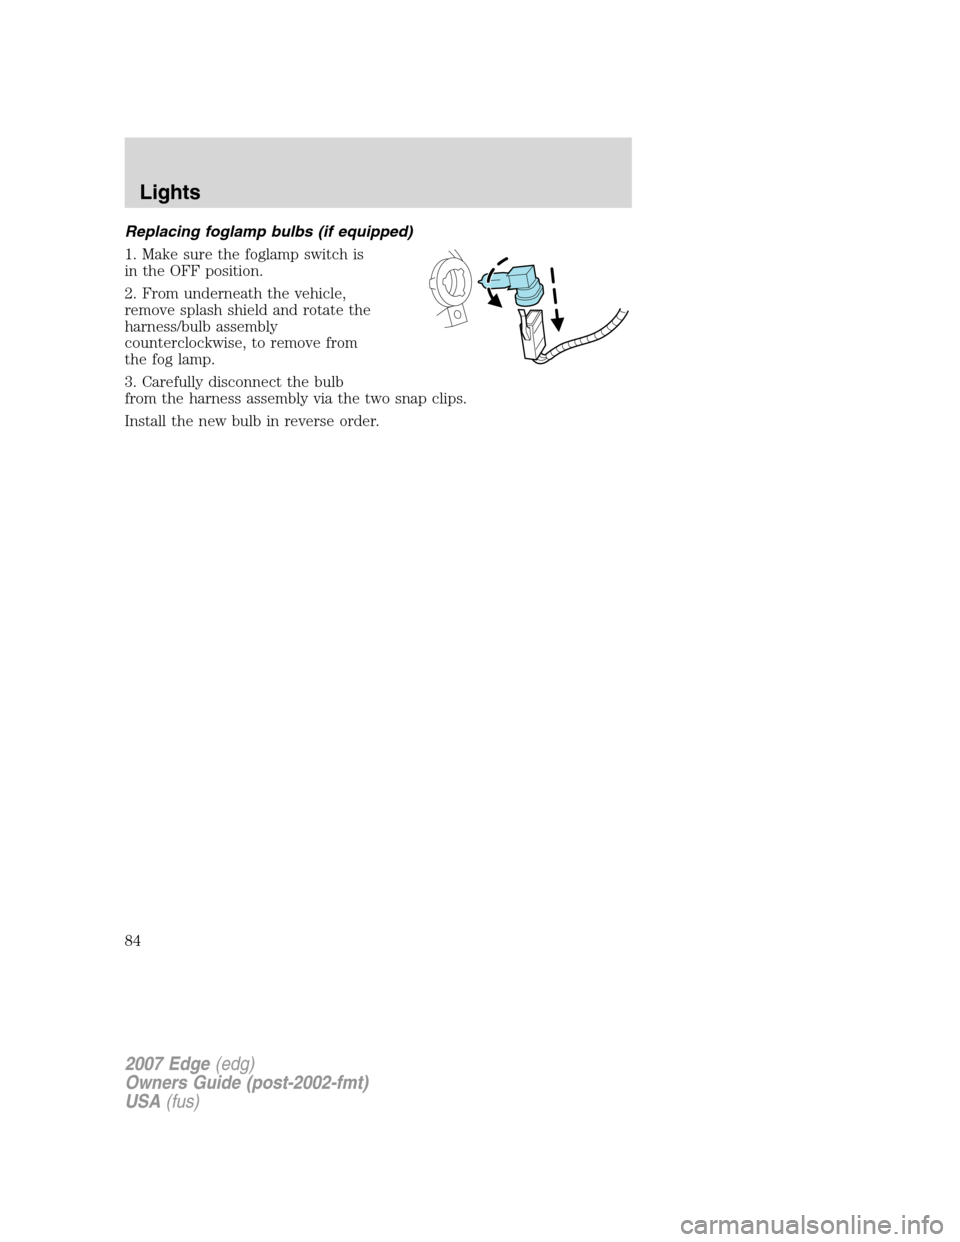
Replacing foglamp bulbs (if equipped)
1. Make sure the foglamp switch is
in the OFF position.
2. From underneath the vehicle,
remove splash shield and rotate the
harness/bulb assembly
counterclockwise, to remove from
the fog lamp.
3. Carefully disconnect the bulb
from the harness assembly via the two snap clips.
Install the new bulb in reverse order.
2007 Edge(edg)
Owners Guide (post-2002-fmt)
USA(fus)
Lights
84
Page 91 of 320
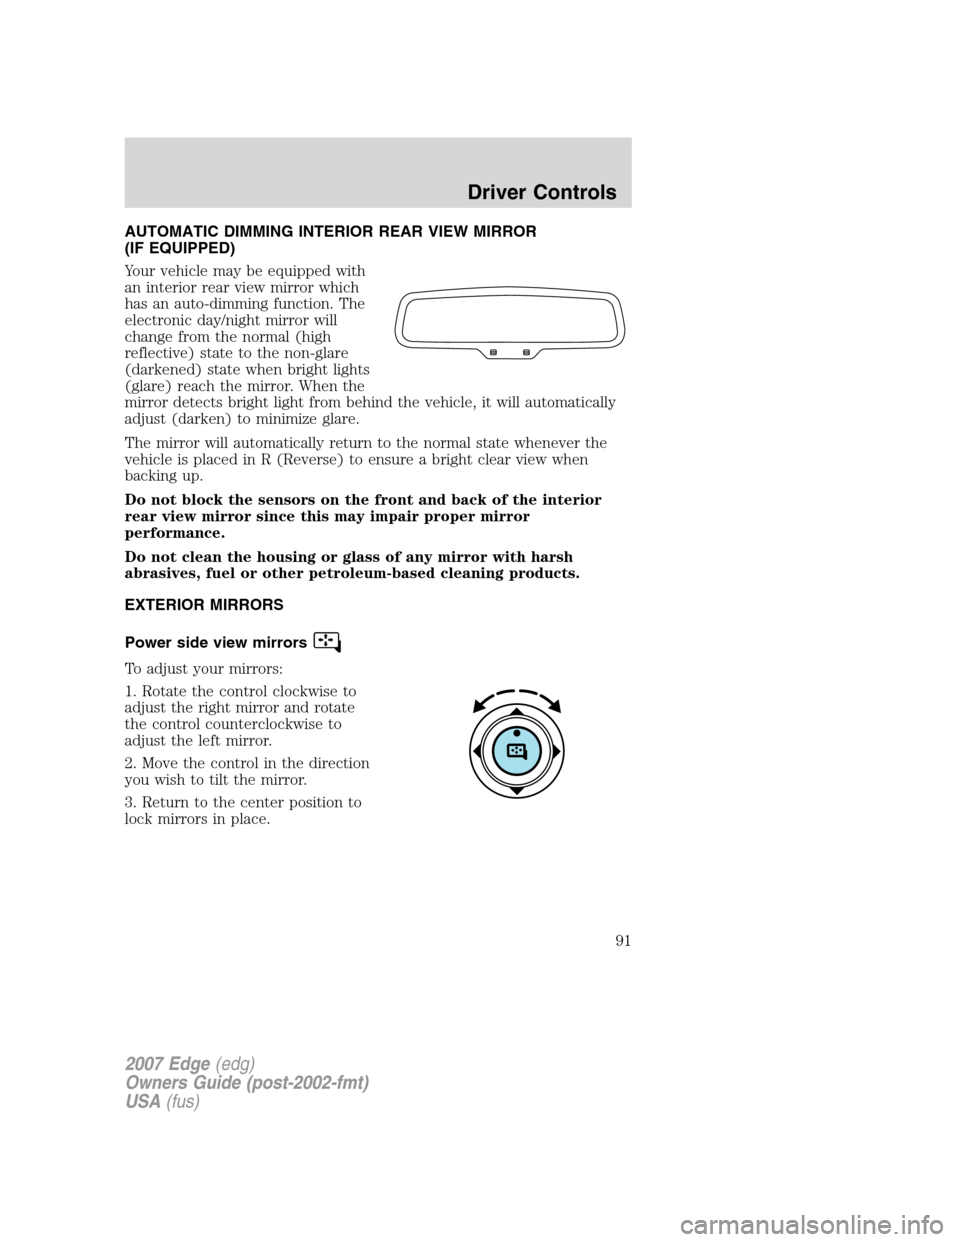
AUTOMATIC DIMMING INTERIOR REAR VIEW MIRROR
(IF EQUIPPED)
Your vehicle may be equipped with
an interior rear view mirror which
has an auto-dimming function. The
electronic day/night mirror will
change from the normal (high
reflective) state to the non-glare
(darkened) state when bright lights
(glare) reach the mirror. When the
mirror detects bright light from behind the vehicle, it will automatically
adjust (darken) to minimize glare.
The mirror will automatically return to the normal state whenever the
vehicle is placed in R (Reverse) to ensure a bright clear view when
backing up.
Do not block the sensors on the front and back of the interior
rear view mirror since this may impair proper mirror
performance.
Do not clean the housing or glass of any mirror with harsh
abrasives, fuel or other petroleum-based cleaning products.
EXTERIOR MIRRORS
Power side view mirrors
To adjust your mirrors:
1. Rotate the control clockwise to
adjust the right mirror and rotate
the control counterclockwise to
adjust the left mirror.
2. Move the control in the direction
you wish to tilt the mirror.
3. Return to the center position to
lock mirrors in place.
2007 Edge(edg)
Owners Guide (post-2002-fmt)
USA(fus)
Driver Controls
91