mirror FORD EDGE 2016 2.G Quick Reference Guide
[x] Cancel search | Manufacturer: FORD, Model Year: 2016, Model line: EDGE, Model: FORD EDGE 2016 2.GPages: 10, PDF Size: 6.19 MB
Page 7 of 10

*if equipped
CLIMATE
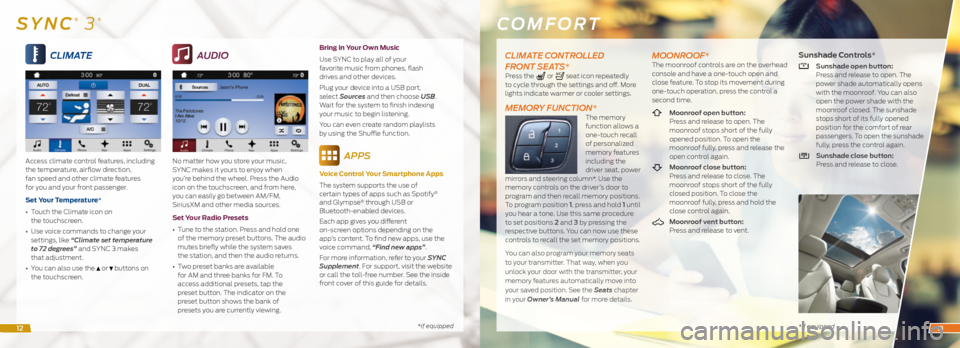
Access climate control features, including
the temperature, airflow direction,
fan speed and other climate features
for you and your front passenger.
Set Your Temperature*
• Touch the Climate icon on
the touchscreen.
• Use voice commands to change your
settings, like “Climate set temperature
to 72 degrees” and SYNC 3 makes
that adjustment.
• You can also use the
or buttons on
the touchscreen.
AUDIO
No matter how you store your music,
SYNC makes it yours to enjoy when
you’re behind the wheel. Press the Audio
icon on the touchscreen, and from here,
you can easily go between AM/FM,
SiriusXM and other media sources.
Set Your Radio Presets
• Tune to the station. Press and hold one
of the memory preset buttons. The audio
mutes briefly while the system saves
the station, and then the audio returns.
• Two preset banks are available
for AM and three banks for FM. To
access additional presets, tap the
preset button. The indicator on the
preset button shows the bank of
presets you are currently viewing. Bring in Your Own Music
Use SYNC to play all of your
favorite music from phones, flash
drives and other devices.
Plug your device into a USB port,
select Sources and then choose USB
.
Wait for the system to finish indexing
your music to begin listening.
You can even create random playlists
by using the Shuffle function.
APPS
Voice Control Your Smartphone Apps
The system supports the use of
certain types of apps such as Spotify
®
and Glympse® through USB or
Bluetooth-enabled devices.
Each app gives you different
on-screen options depending on the
app’s content. To find new apps, use the
voice command, “Find new apps”.
For more information, refer to your SYNC
Supplement. For support, visit the website
or call the toll-free number. See the inside
front cover of this guide for details.
COMFORT
* if equipped
SYNC® 3*
CLIMATE CONTROLLED
FRONT SEATS*
Press the or seat icon repeatedly
to cycle through the settings and off. More
lights indicate warmer or cooler settings.
MEMORY FUNCTION*The memory
function allows a
one-touch recall
of personalized
memory features
including the
driver seat, power
mirrors and steering column*. Use the
memory controls on the driver’s door to
program and then recall memory positions.
To program position 1, press and hold 1 until
you hear a tone. Use this same procedure
to set positions 2 and 3 by pressing the
respective buttons. You can now use these
controls to recall the set memory positions.
You can also program your memory seats
to your transmitter. That way, when you
unlock your door with the transmitter, your
memory features automatically move into
your saved position. See the Seats chapter
in your Owner’s Manual for more details.
MOONROOF*The moonroof controls are on the overhead
console and have a one-touch open and
close feature. To stop its movement during
one-touch operation, press the control a
second time.
Moonroof open button:
Press and release to open. The
moonroof stops short of the fully
opened position. To open the
moonroof fully, press and release the
open control again.
Moonroof close button:
Press and release to close. The
moonroof stops short of the fully
closed position. To close the
moonroof fully, press and hold the
close control again.
Moonroof vent button:
Press and release to vent.
Sunshade Controls*
Sunshade open button:
Press and release to open. The
power shade automatically opens
with the moonroof. You can also
open the power shade with the
moonroof closed. The sunshade
stops short of its fully opened
position for the comfort of rear
passengers. To open the sunshade
fully, press the control again.
Sunshade close button:
Press and release to close.
1213
Page 9 of 10

*if equipped*if equipped
REAR VIEW CAMERA*The feature provides a video image of
the area behind the vehicle. The image
automatically appears in the touchscreen
when the vehicle is in reverse (R) and
operates at speeds below 3 mph (5 km/h).
The system uses green, yellow and red
guides to alert you of your proximity
to objects.
Note: If mud, water or debris obstructs the
camera’s view, clean the lens with a soft,
lint-free cloth and non-abrasive cleaner.
ADAPTIVE STEERING*You can configure your steering modes
when your vehicle transmission is in drive
(D) or Sport (S). The configuration remains
active until you change it.
Select or change your steering mode
through the main menu within the
information display:
• Normal – Default setting.
• Sport – Slightly higher effort required for
steering with more road force felt through
the steering wheel.
BLIS® (BLIND SPOT
INFORMATION SYSTEM)*
Aids you in detecting vehicles that may have
entered into your blind spot area on both
sides of the vehicle, extending rearward
from the exterior mirrors to approximately
13 ft (4 m) beyond the bumper. The system
illuminates an amber alert indicator in the
outside mirror on the side of your vehicle
the approaching vehicle is coming from. In
addition, the yellow alert indicator flashes
if the direction indicator is ON when a Blind
Spot Information System alert is active.
Note: When the Blind Spot Information System alerts on a vehicle and the
corresponding turn signal is ON, the Blind
Spot Information System alert indicator
flashes as an increased warning level.
CROSS TRAFFIC ALERT*Is designed to warn you of vehicles
approaching from the sides when the
transmission is in reverse (R). It detects
vehicles that approach with speeds of up to
37 mph (60 km/h).
The system illuminates an amber alert
indicator in the outside mirror on the side
of your vehicle the approaching vehicle
is coming from. In addition, cross traffic
alert also sounds an audible alert and a
message appears in the information display
indicating a vehicle is coming from the right
or left.
Note: Visibility aids do not replace the need to watch where the vehicle is moving.
Refer to your Owner’s Manual for safety
information, more details and limitations.
FUNCTION
1617
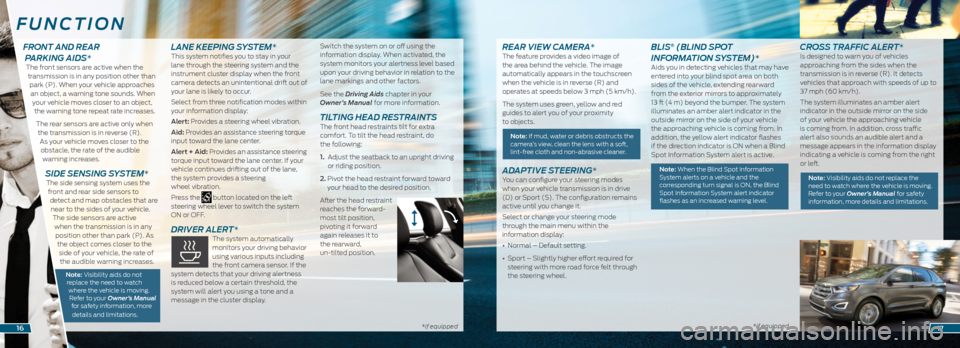
FRONT AND REAR
PARKING AIDS*
The front sensors are active when the
transmission is in any position other than park (P). When your vehicle approaches an object, a warning tone sounds. When your vehicle moves closer to an object, the warning tone repeat rate increases.
The rear sensors are active only when the transmission is in reverse (R). As your vehicle moves closer to the obstacle, the rate of the audible warning increases.
SIDE SENSING SYSTEM* The side sensing system uses the front and rear side sensors to detect and map obstacles that are near to the sides of your vehicle. The side sensors are active when the transmission is in any position other than park (P). As the object comes closer to the side of your vehicle, the rate of the audible warning increases.
Note: Visibility aids do not replace the need to watch where the vehicle is moving. Refer to your Owner’s Manual for safety information, more
details and limitations.
LANE KEEPING SYSTEM*This system notifies you to stay in your
lane through the steering system and the
instrument cluster display when the front
camera detects an unintentional drift out of
your lane is likely to occur.
Select from three notification modes within
your information display:
Alert: Provides a steering wheel vibration.
Aid: Provides an assistance steering torque
input toward the lane center.
Alert + Aid: Provides an assistance steering
torque input toward the lane center. If your
vehicle continues drifting out of the lane,
the system provides a steering
wheel vibration.
Press the
button located on the left
steering wheel lever to switch the system
ON or OFF.
DRIVER ALERT* The system automatically
monitors your driving behavior
using various inputs including
the front camera sensor. If the
system detects that your driving alertness
is reduced below a certain threshold, the
system will alert you using a tone and a
message in the cluster display. Switch the system on or off using the
information display. When activated, the
system monitors your alertness level based
upon your driving behavior in relation to the
lane markings and other factors.
See the Driving Aids chapter in your
Owner’s Manual for more information.
TILTING HEAD RESTRAINTS The front head restraints tilt for extra
comfort. To tilt the head restraint, do
the following:
1.
Adjust the seatback to an upright driving
or riding position.
2. Pivot the head restraint forward toward
your head to the desired position.
After the head restraint
reaches the forward-
most tilt position,
pivoting it forward
again releases it to
the rearward,
un-tilted position.