warning FORD EDGE 2016 2.G Quick Reference Guide
[x] Cancel search | Manufacturer: FORD, Model Year: 2016, Model line: EDGE, Model: FORD EDGE 2016 2.GPages: 10, PDF Size: 6.19 MB
Page 1 of 10

GT4J 19G217 AA
WA R N I N G
Driving while distracted can result in loss of vehicle control,
crash and injury. We strongly recommend that you use
extreme caution when using any device that may take your
focus off the road. Your primary responsibility is the safe
operation of your vehicle. We recommend against the use
of any hand-held device while driving and encourage the
use of voice-operated systems when possible. Make sure
you are aware of all applicable local laws that may affect
the use of electronic devices while driving.
LEARN MORE ABOUT YOUR NEW VEHICLE
Scan the country-appropriate QR code with your
smartphone (make sure you have a scanner app
installed) and you can access even more information
about your vehicle.
owner.ford.com (U.S.)ford.ca (Canada)
This Quick Reference Guide is not intended to replace
your vehicle Owner’s Manual which contains more
detailed information concerning the features of your
vehicle, as well as important safety warnings designed
to help reduce the risk of injury to you and your
passengers. Please read your entire Owner’s Manual
carefully as you begin learning about your new vehicle
and refer to the appropriate chapters when questions
arise. All information contained in this Quick Reference
Guide was accurate at the time of duplication. We
reserve the right to change features, operation and/or
functionality of any vehicle specification at any time.
Your Ford dealer is the best source for the most
current information. For detailed operating and safety
information, please consult your Owner’s Manual.
United States
Ford Customer Relationship Center
1-800-392-3673 (FORD)
(TDD for the hearing impaired:
1-800-232-5952)
owner.ford.com
@FordService
Canada
Ford Customer Relationship Centre
1-800-565-3673 (FORD)
ford.ca
@FordServiceCA
October 2015
First Printing
Quick Reference Guide
Edge
Litho in U.S.A.2016 EDGE QUICK REFERENCE GUIDE
Page 4 of 10

INSTRUMENT PANEL
109
11
12
*if equipped6
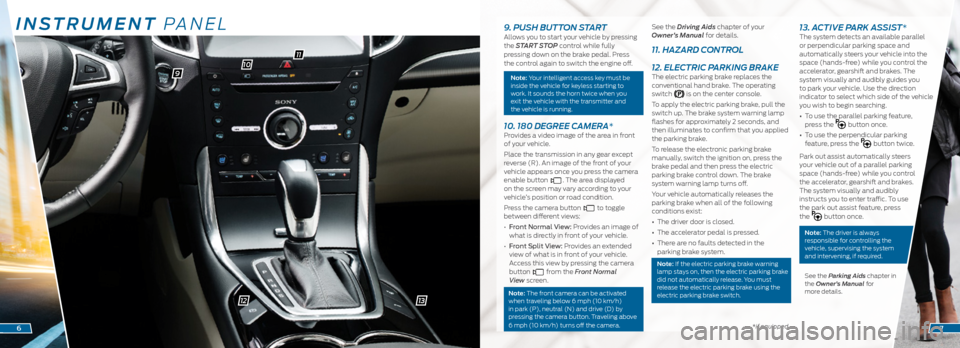
9. PUSH BUTTON STARTAllows you to start your vehicle by pressing
the START STOP control while fully
pressing down on the brake pedal. Press
the control again to switch the engine off.
Note: Your intelligent access key must be
inside the vehicle for keyless starting to
work. It sounds the horn twice when you
exit the vehicle with the transmitter and
the vehicle is running.
10. 180 DEGREE CAMERA*Provides a video image of the area in front
of your vehicle.
Place the transmission in any gear except
reverse (R). An image of the front of your
vehicle appears once you press the camera
enable button
. The area displayed
on the screen may vary according to your
vehicle’s position or road condition.
Press the camera button
to toggle
between different views:
• Front Normal View: Provides an image of
what is directly in front of your vehicle.
• Front Split View: Provides an extended
view of what is in front of your vehicle.
Access this view by pressing the camera
button
from the Front Normal
View screen.
Note: The front camera can be activated
when traveling below 6 mph (10 km/h)
in park (P), neutral (N) and drive (D) by
pressing the camera button. Traveling above
6 mph (10 km/h) turns off the camera.
See the Driving Aids chapter of your
Owner’s Manual for details.
11. HAZARD CONTROL
12. ELECTRIC PARKING BRAKE
The electric parking brake replaces the
conventional hand brake. The operating
switch
is on the center console.
To apply the electric parking brake, pull the
switch up. The brake system warning lamp
flashes for approximately 2 seconds, and
then illuminates to confirm that you applied
the parking brake.
To release the electronic parking brake
manually, switch the ignition on, press the
brake pedal and then press the electric
parking brake control down. The brake
system warning lamp turns off.
Your vehicle automatically releases the
parking brake when all of the following
conditions exist:
• The driver door is closed.
• The accelerator pedal is pressed.
• There are no faults detected in the
parking brake system.
Note: If the electric parking brake warning
lamp stays on, then the electric parking brake
did not automatically release. You must
release the electric parking brake using the
electric parking brake switch.
13. ACTIVE PARK ASSIST*The system detects an available parallel
or perpendicular parking space and
automatically steers your vehicle into the
space (hands-free) while you control the
accelerator, gearshift and brakes. The
system visually and audibly guides you
to park your vehicle. Use the direction
indicator to select which side of the vehicle
you wish to begin searching.
• To use the parallel parking feature,
press the
button once.
• To use the perpendicular parking
feature, press the
button twice.
Park out assist automatically steers
your vehicle out of a parallel parking
space (hands-free) while you control
the accelerator, gearshift and brakes.
The system visually and audibly
instructs you to enter traffic. To use
the park out assist feature, press
the
button once.
Note: The driver is always
responsible for controlling the
vehicle, supervising the system
and intervening, if required.
See the Parking Aids chapter in
the Owner’s Manual for
more details.
7
13
Page 9 of 10

*if equipped*if equipped
REAR VIEW CAMERA*The feature provides a video image of
the area behind the vehicle. The image
automatically appears in the touchscreen
when the vehicle is in reverse (R) and
operates at speeds below 3 mph (5 km/h).
The system uses green, yellow and red
guides to alert you of your proximity
to objects.
Note: If mud, water or debris obstructs the
camera’s view, clean the lens with a soft,
lint-free cloth and non-abrasive cleaner.
ADAPTIVE STEERING*You can configure your steering modes
when your vehicle transmission is in drive
(D) or Sport (S). The configuration remains
active until you change it.
Select or change your steering mode
through the main menu within the
information display:
• Normal – Default setting.
• Sport – Slightly higher effort required for
steering with more road force felt through
the steering wheel.
BLIS® (BLIND SPOT
INFORMATION SYSTEM)*
Aids you in detecting vehicles that may have
entered into your blind spot area on both
sides of the vehicle, extending rearward
from the exterior mirrors to approximately
13 ft (4 m) beyond the bumper. The system
illuminates an amber alert indicator in the
outside mirror on the side of your vehicle
the approaching vehicle is coming from. In
addition, the yellow alert indicator flashes
if the direction indicator is ON when a Blind
Spot Information System alert is active.
Note: When the Blind Spot Information System alerts on a vehicle and the
corresponding turn signal is ON, the Blind
Spot Information System alert indicator
flashes as an increased warning level.
CROSS TRAFFIC ALERT*Is designed to warn you of vehicles
approaching from the sides when the
transmission is in reverse (R). It detects
vehicles that approach with speeds of up to
37 mph (60 km/h).
The system illuminates an amber alert
indicator in the outside mirror on the side
of your vehicle the approaching vehicle
is coming from. In addition, cross traffic
alert also sounds an audible alert and a
message appears in the information display
indicating a vehicle is coming from the right
or left.
Note: Visibility aids do not replace the need to watch where the vehicle is moving.
Refer to your Owner’s Manual for safety
information, more details and limitations.
FUNCTION
1617
FRONT AND REAR
PARKING AIDS*
The front sensors are active when the
transmission is in any position other than park (P). When your vehicle approaches an object, a warning tone sounds. When your vehicle moves closer to an object, the warning tone repeat rate increases.
The rear sensors are active only when the transmission is in reverse (R). As your vehicle moves closer to the obstacle, the rate of the audible warning increases.
SIDE SENSING SYSTEM* The side sensing system uses the front and rear side sensors to detect and map obstacles that are near to the sides of your vehicle. The side sensors are active when the transmission is in any position other than park (P). As the object comes closer to the side of your vehicle, the rate of the audible warning increases.
Note: Visibility aids do not replace the need to watch where the vehicle is moving. Refer to your Owner’s Manual for safety information, more
details and limitations.
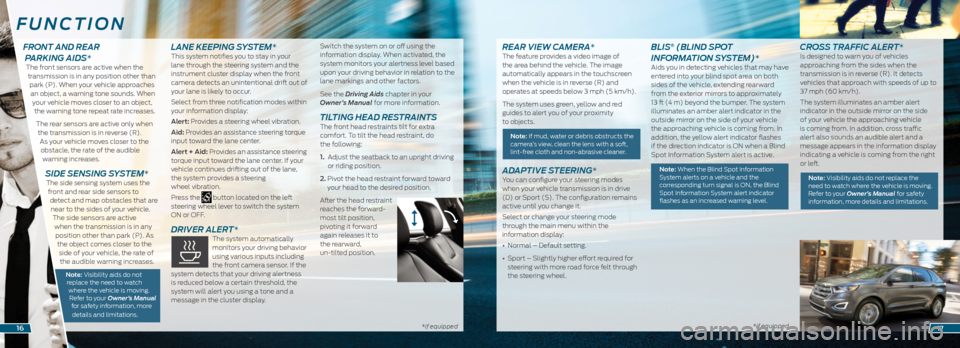
LANE KEEPING SYSTEM*This system notifies you to stay in your
lane through the steering system and the
instrument cluster display when the front
camera detects an unintentional drift out of
your lane is likely to occur.
Select from three notification modes within
your information display:
Alert: Provides a steering wheel vibration.
Aid: Provides an assistance steering torque
input toward the lane center.
Alert + Aid: Provides an assistance steering
torque input toward the lane center. If your
vehicle continues drifting out of the lane,
the system provides a steering
wheel vibration.
Press the
button located on the left
steering wheel lever to switch the system
ON or OFF.
DRIVER ALERT* The system automatically
monitors your driving behavior
using various inputs including
the front camera sensor. If the
system detects that your driving alertness
is reduced below a certain threshold, the
system will alert you using a tone and a
message in the cluster display. Switch the system on or off using the
information display. When activated, the
system monitors your alertness level based
upon your driving behavior in relation to the
lane markings and other factors.
See the Driving Aids chapter in your
Owner’s Manual for more information.
TILTING HEAD RESTRAINTS The front head restraints tilt for extra
comfort. To tilt the head restraint, do
the following:
1.
Adjust the seatback to an upright driving
or riding position.
2. Pivot the head restraint forward toward
your head to the desired position.
After the head restraint
reaches the forward-
most tilt position,
pivoting it forward
again releases it to
the rearward,
un-tilted position.
Page 10 of 10

*if equipped
*if equipped
ESSENTIAL INFORMATION
TIRE PRESSURE MONITORING SYSTEM Your vehicle illuminates a low tire pressure warning light in your
instrument cluster when one or more of your tires are significantly
under-inflated. You can use the left information display to view the
Tire Pressure On-demand screen. It displays your current individual
tire pressures.
Refer to the Tire Pressure Monitoring System section in the
Wheels and Tires chapter of your Owner’s Manual for
more information.
LOCATION OF SPARE TIRE AND TOOLS Your spare tire and tools are beneath the carpeted floor panel in
the rear of your vehicle. The spare tire is designed for emergency
use only and should be replaced as soon as possible. For complete
details on changing your tire, refer to the Wheels and Tires chapter
in your Owner’s Manual.
ROADSIDE ASSISTANCE Your new Ford vehicle comes with the assurance and support of
24-hour emergency roadside assistance.
To receive roadside assistance in the United States, call
1-800-241-3673. In Canada, call 1-800-665-2006.
COLLISION WARNING SYSTEM* This system alerts you of certain collision risks. The system’s
sensor detects your vehicle’s rapid approach to other vehicles
traveling in the same direction as your vehicle.
When your vehicle rapidly approaches another vehicle, a red
warning light flashes and a tone sounds. The brake support
system assists you in reducing any collision speed by
pre-charging the brakes. If the risk of collision continues to
increase after the audio-visual warning, the brake support
prepares the brake system for rapid braking. The system does
not automatically activate the brakes, but if the brake pedal
is pressed even lightly, the brakes apply full stopping power.
TOWING YOUR VEHICLE Towing your vehicle behind an RV or any other vehicle may
be limited. Refer to Towing the Vehicle on Four Wheels
in the Towing chapter of your Owner’s Manual.
1819
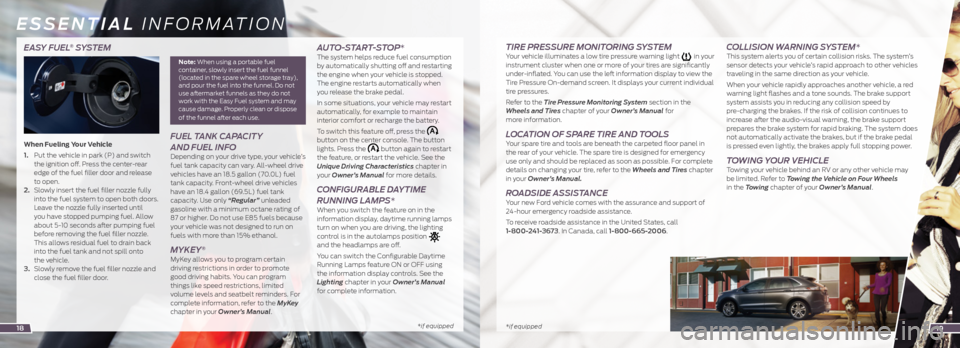
EASY FUEL® SYSTEM
When Fueling Your Vehicle
1. Put the vehicle in park (P) and switch
the ignition off. Press the center-rear
edge of the fuel filler door and release
to open.
2. Slowly insert the fuel filler nozzle fully
into the fuel system to open both doors.
Leave the nozzle fully inserted until
you have stopped pumping fuel. Allow
about 5-10 seconds after pumping fuel
before removing the fuel filler nozzle.
This allows residual fuel to drain back
into the fuel tank and not spill onto
the vehicle.
3. Slowly remove the fuel filler nozzle and
close the fuel filler door.
Note: When using a portable fuel
container, slowly insert the fuel funnel
(located in the spare wheel storage tray),
and pour the fuel into the funnel. Do not
use aftermarket funnels as they do not
work with the Easy Fuel system and may
cause damage. Properly clean or dispose
of the funnel after each use.
FUEL TANK CAPACITY
AND FUEL INFO
Depending on your drive type, your vehicle’s
fuel tank capacity can vary. All-wheel drive
vehicles have an 18.5 gallon (70.0L) fuel
tank capacity. Front-wheel drive vehicles
have an 18.4 gallon (69.5L) fuel tank
capacity. Use only “Regular” unleaded
gasoline with a minimum octane rating of
87 or higher. Do not use E85 fuels because
your vehicle was not designed to run on
fuels with more than 15% ethanol.
MYKEY®
MyKey allows you to program certain
driving restrictions in order to promote
good driving habits. You can program
things like speed restrictions, limited
volume levels and seatbelt reminders. For
complete information, refer to the MyKey
chapter in your Owner’s Manual.
AUTO-START-STOP* The system helps reduce fuel consumption
by automatically shutting off and restarting
the engine when your vehicle is stopped.
The engine restarts automatically when
you release the brake pedal.
In some situations, your vehicle may restart
automatically, for example to maintain
interior comfort or recharge the battery.
To switch this feature off, press the
button on the center console. The button
lights. Press the
button again to restart
the feature, or restart the vehicle. See the
Unique Driving Characteristics chapter in
your Owner’s Manual for more details.
CONFIGURABLE DAYTIME
RUNNING LAMPS*
When you switch the feature on in the
information display, daytime running lamps
turn on when you are driving, the lighting
control is in the autolamps position
and the headlamps are off.
You can switch the Configurable Daytime
Running Lamps feature ON or OFF using
the information display controls. See the
Lighting chapter in your Owner’s Manual
for complete information.