lights FORD EDGE 2018 Owners Manual
[x] Cancel search | Manufacturer: FORD, Model Year: 2018, Model line: EDGE, Model: FORD EDGE 2018Pages: 557, PDF Size: 7.02 MB
Page 44 of 557
The Personal Safety System provides an
improved overall level of frontal crash
protection to front seat occupants and is
designed to help further reduce the risk of
airbag-related injuries. The system is able
to analyze different occupant conditions
and crash severity before activating the
appropriate safety devices to help better
protect a range of occupants in a variety
of frontal crash situations.
The Vehicle Personal Safety System
consists of:
•
Driver and passenger dual-stage airbag
supplemental restraints.
• Front seat outboard seatbelts with
pretensioners, energy management
retractors and seatbelt usage sensors.
• Driver seat position sensor.
• Front passenger sensing system.
• Passenger airbag status indicator.
• Front crash severity sensors.
• Restraints control module with impact
and safing sensors.
• Restraint system warning lamp and
tone.
• The electrical wiring for the airbags,
crash sensors, seatbelt pretensioners,
front seatbelt usage sensors, driver
seat position sensor, front passenger
sensing system and indicator lights.
How Does the Personal Safety
System Work?
The Personal Safety System can adapt the
deployment strategy of the safety devices
according to crash severity and occupant
conditions. A collection of crash and
occupant sensors provides information to
the restraints control module. During a
crash, the restraints control module may
deploy the seatbelt pretensioners, one or
both stages of the dual-stage airbags
based on crash severity and occupant
conditions.
41
Edge (CDQ) Canada/United States of America, enUSA, Edition date: 201706, Third-Printing- Personal Safety System
™
Page 92 of 557
Automatic High Beam Indicator (If
Equipped) The indicator lamp illuminates
to confirm when the system is
ready to assist.
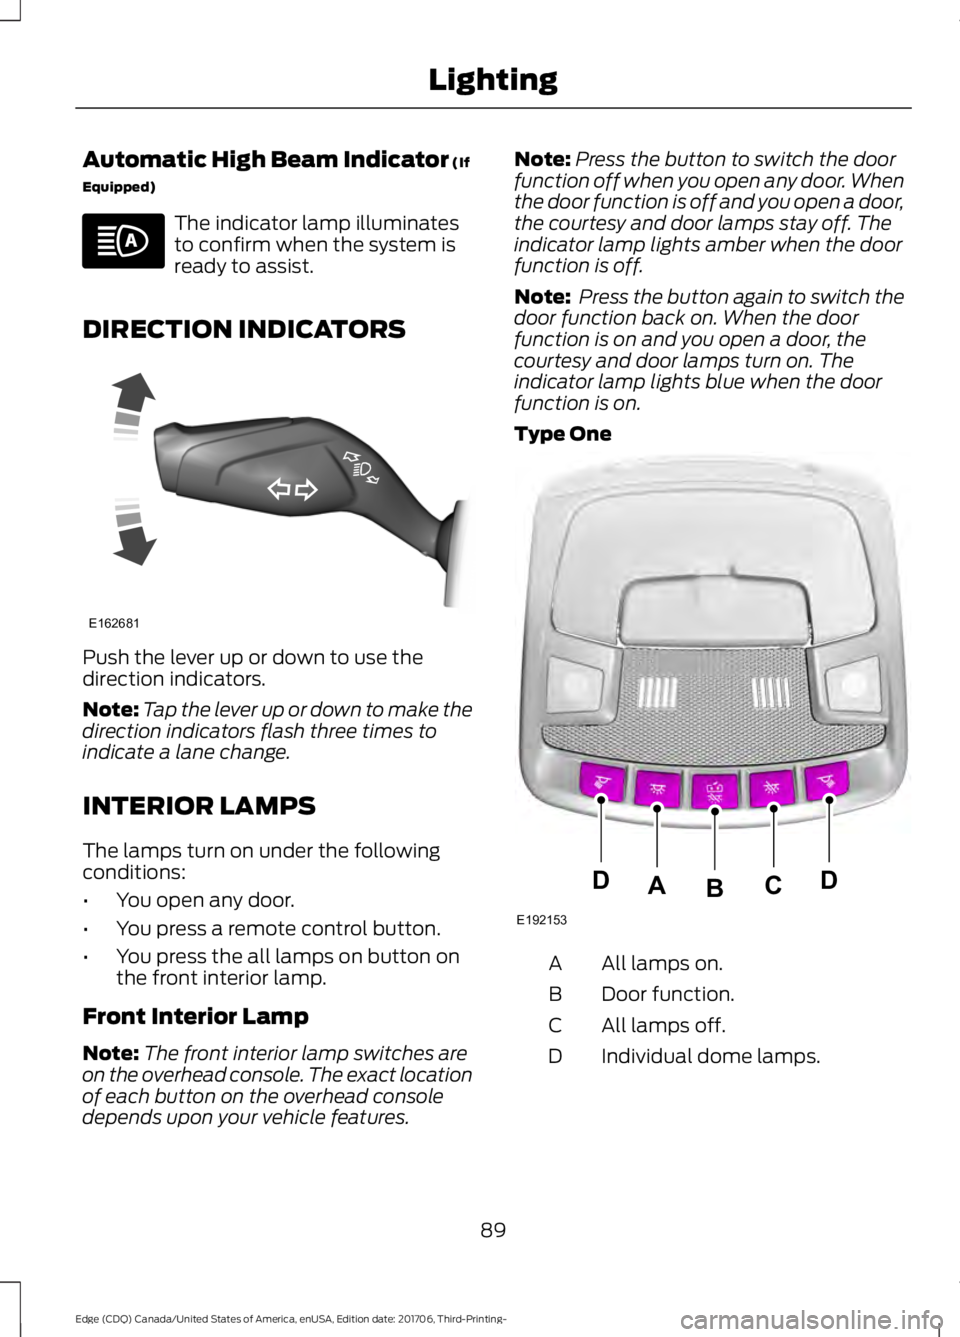
DIRECTION INDICATORS Push the lever up or down to use the
direction indicators.
Note:
Tap the lever up or down to make the
direction indicators flash three times to
indicate a lane change.
INTERIOR LAMPS
The lamps turn on under the following
conditions:
• You open any door.
• You press a remote control button.
• You press the all lamps on button on
the front interior lamp.
Front Interior Lamp
Note: The front interior lamp switches are
on the overhead console. The exact location
of each button on the overhead console
depends upon your vehicle features. Note:
Press the button to switch the door
function off when you open any door. When
the door function is off and you open a door,
the courtesy and door lamps stay off. The
indicator lamp lights amber when the door
function is off.
Note: Press the button again to switch the
door function back on. When the door
function is on and you open a door, the
courtesy and door lamps turn on. The
indicator lamp lights blue when the door
function is on.
Type One All lamps on.
A
Door function.
B
All lamps off.
C
Individual dome lamps.
D
89
Edge (CDQ) Canada/United States of America, enUSA, Edition date: 201706, Third-Printing- Lighting E162681 E192153
DDCAB
Page 97 of 557
To adjust your mirrors, switch your vehicle
on (with the ignition in accessory mode or
the engine running) and then:
1. Select the mirror you want to adjust.
The control lights.
2. Use the adjustment control to adjust the position of the mirror.
3. Press the mirror control again. The control light turns off.
Fold-Away Exterior Mirrors
Push the mirror toward the door window
glass. Make sure that you fully engage the
mirror in its support when returning it to its
original position.
Heated Exterior Mirrors (If Equipped)
See Heated Windows and Mirrors (page
138
).
Memory Mirrors
(If Equipped)
You can save and recall the mirror
positions through the memory function.
See
Memory Function (page 145).
Auto-dimming Feature
(If Equipped)
The driver exterior mirror automatically
dims when the interior auto-dimming
mirror turns on.
Direction Indicator Mirrors (If Equipped)
While the vehicle is running, the
forward-facing portion of the appropriate
mirror housing blinks when you switch on
the direction indicator.
Puddle Lamps
(If Equipped)
The lamps on the bottom part of the mirror
housing light when you use your
transmitter to unlock the doors or when
you open a door. Integrated Blind Spot Mirror
(If
Equipped) WARNING:
Objects in the blind spot
mirror are closer than they appear.
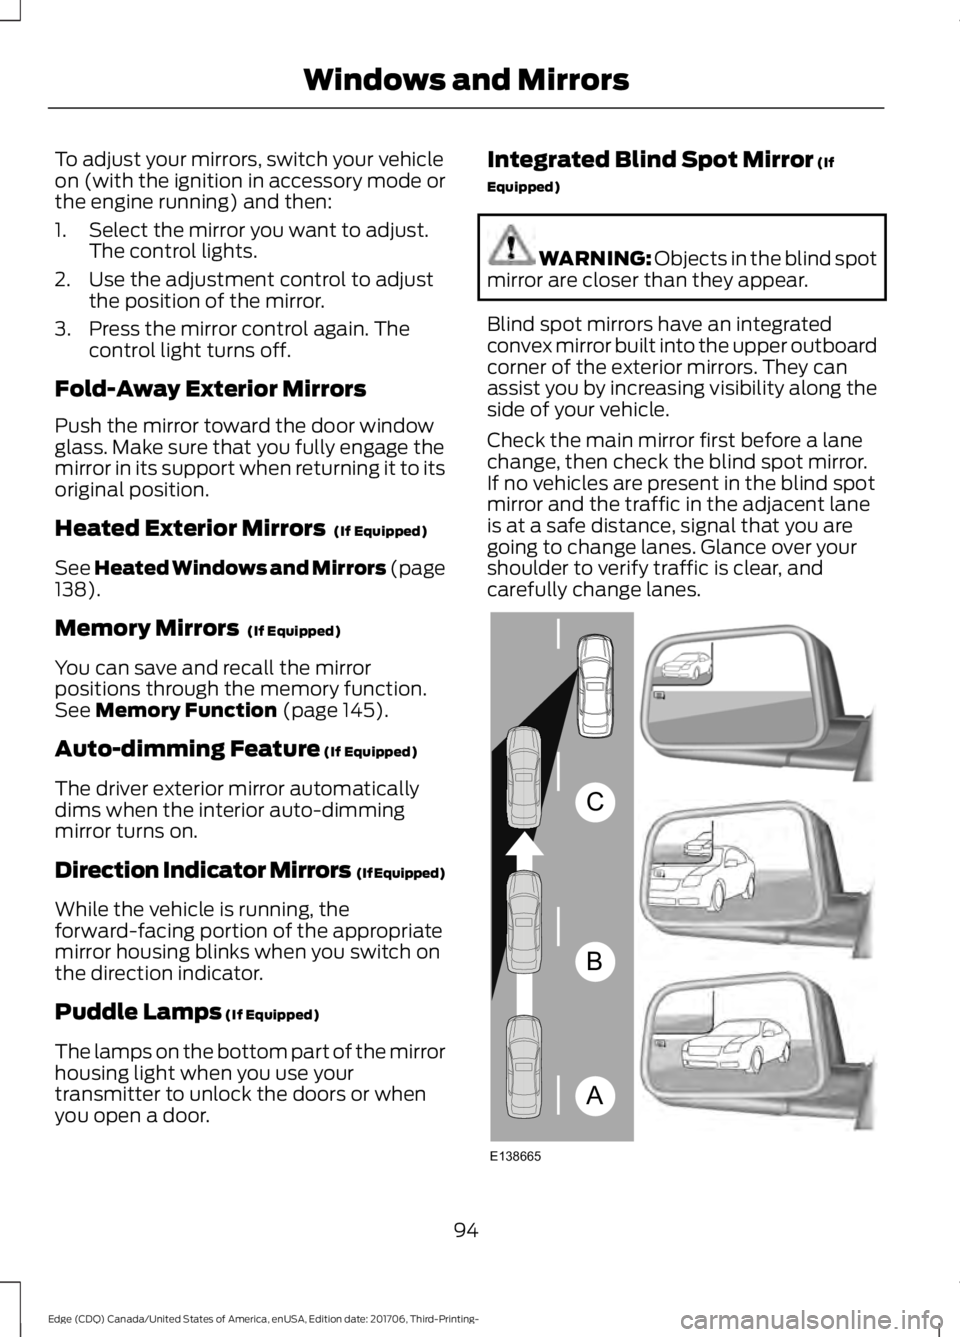
Blind spot mirrors have an integrated
convex mirror built into the upper outboard
corner of the exterior mirrors. They can
assist you by increasing visibility along the
side of your vehicle.
Check the main mirror first before a lane
change, then check the blind spot mirror.
If no vehicles are present in the blind spot
mirror and the traffic in the adjacent lane
is at a safe distance, signal that you are
going to change lanes. Glance over your
shoulder to verify traffic is clear, and
carefully change lanes. 94
Edge (CDQ) Canada/United States of America, enUSA, Edition date: 201706, Third-Printing- Windows and MirrorsA
B
C
E138665
Page 105 of 557
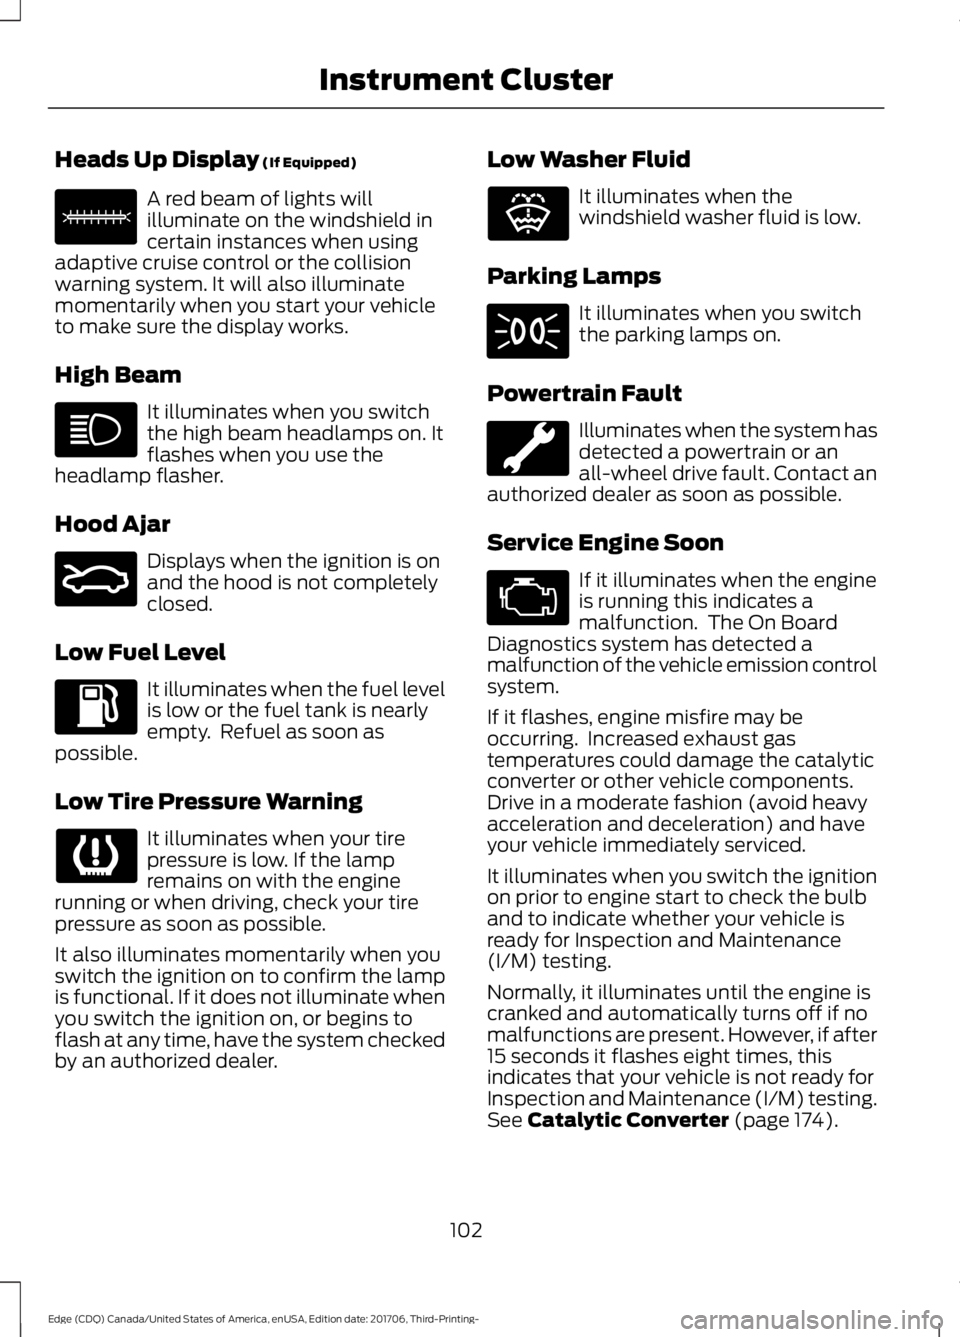
Heads Up Display (If Equipped)
A red beam of lights will
illuminate on the windshield in
certain instances when using
adaptive cruise control or the collision
warning system. It will also illuminate
momentarily when you start your vehicle
to make sure the display works.
High Beam It illuminates when you switch
the high beam headlamps on. It
flashes when you use the
headlamp flasher.
Hood Ajar Displays when the ignition is on
and the hood is not completely
closed.
Low Fuel Level It illuminates when the fuel level
is low or the fuel tank is nearly
empty. Refuel as soon as
possible.
Low Tire Pressure Warning It illuminates when your tire
pressure is low. If the lamp
remains on with the engine
running or when driving, check your tire
pressure as soon as possible.
It also illuminates momentarily when you
switch the ignition on to confirm the lamp
is functional. If it does not illuminate when
you switch the ignition on, or begins to
flash at any time, have the system checked
by an authorized dealer. Low Washer Fluid It illuminates when the
windshield washer fluid is low.
Parking Lamps It illuminates when you switch
the parking lamps on.
Powertrain Fault Illuminates when the system has
detected a powertrain or an
all-wheel drive fault. Contact an
authorized dealer as soon as possible.
Service Engine Soon If it illuminates when the engine
is running this indicates a
malfunction. The On Board
Diagnostics system has detected a
malfunction of the vehicle emission control
system.
If it flashes, engine misfire may be
occurring. Increased exhaust gas
temperatures could damage the catalytic
converter or other vehicle components.
Drive in a moderate fashion (avoid heavy
acceleration and deceleration) and have
your vehicle immediately serviced.
It illuminates when you switch the ignition
on prior to engine start to check the bulb
and to indicate whether your vehicle is
ready for Inspection and Maintenance
(I/M) testing.
Normally, it illuminates until the engine is
cranked and automatically turns off if no
malfunctions are present. However, if after
15 seconds it flashes eight times, this
indicates that your vehicle is not ready for
Inspection and Maintenance (I/M) testing.
See
Catalytic Converter (page 174).
102
Edge (CDQ) Canada/United States of America, enUSA, Edition date: 201706, Third-Printing- Instrument ClusterE156133 E159324 E132353
Page 110 of 557
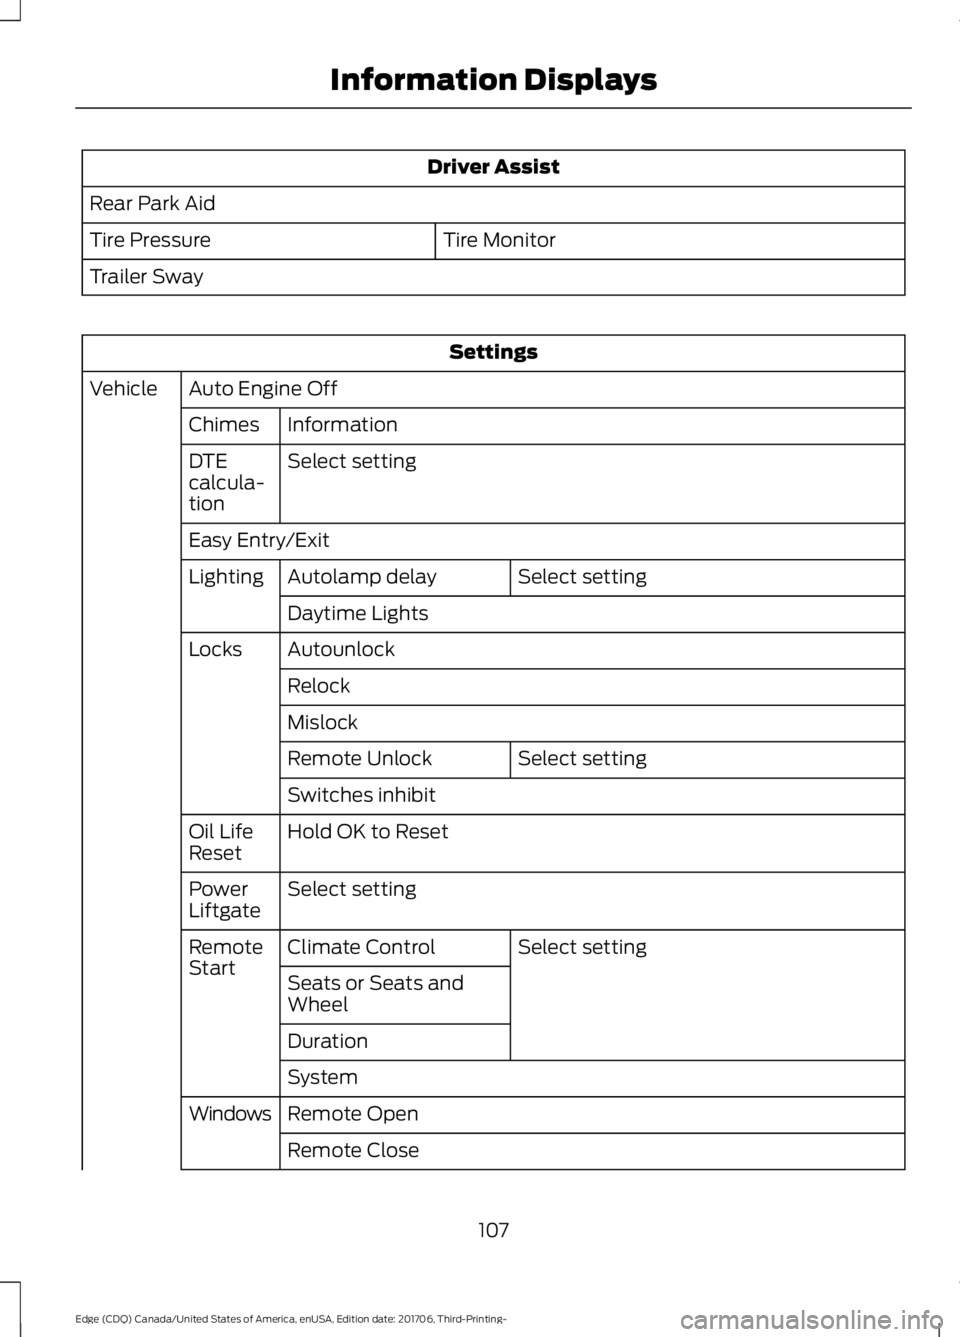
Driver Assist
Rear Park Aid Tire Monitor
Tire Pressure
Trailer Sway Settings
Auto Engine Off
Vehicle
Information
Chimes
Select setting
DTE
calcula-
tion
Easy Entry/Exit
Select setting
Autolamp delay
Lighting
Daytime Lights
Autounlock
Locks
Relock
Mislock Select setting
Remote Unlock
Switches inhibit
Hold OK to Reset
Oil Life
Reset
Select setting
Power
Liftgate
Select setting
Climate Control
Remote
Start
Seats or Seats and
Wheel
Duration
System
Remote Open
Windows
Remote Close
107
Edge (CDQ) Canada/United States of America, enUSA, Edition date: 201706, Third-Printing- Information Displays
Page 115 of 557
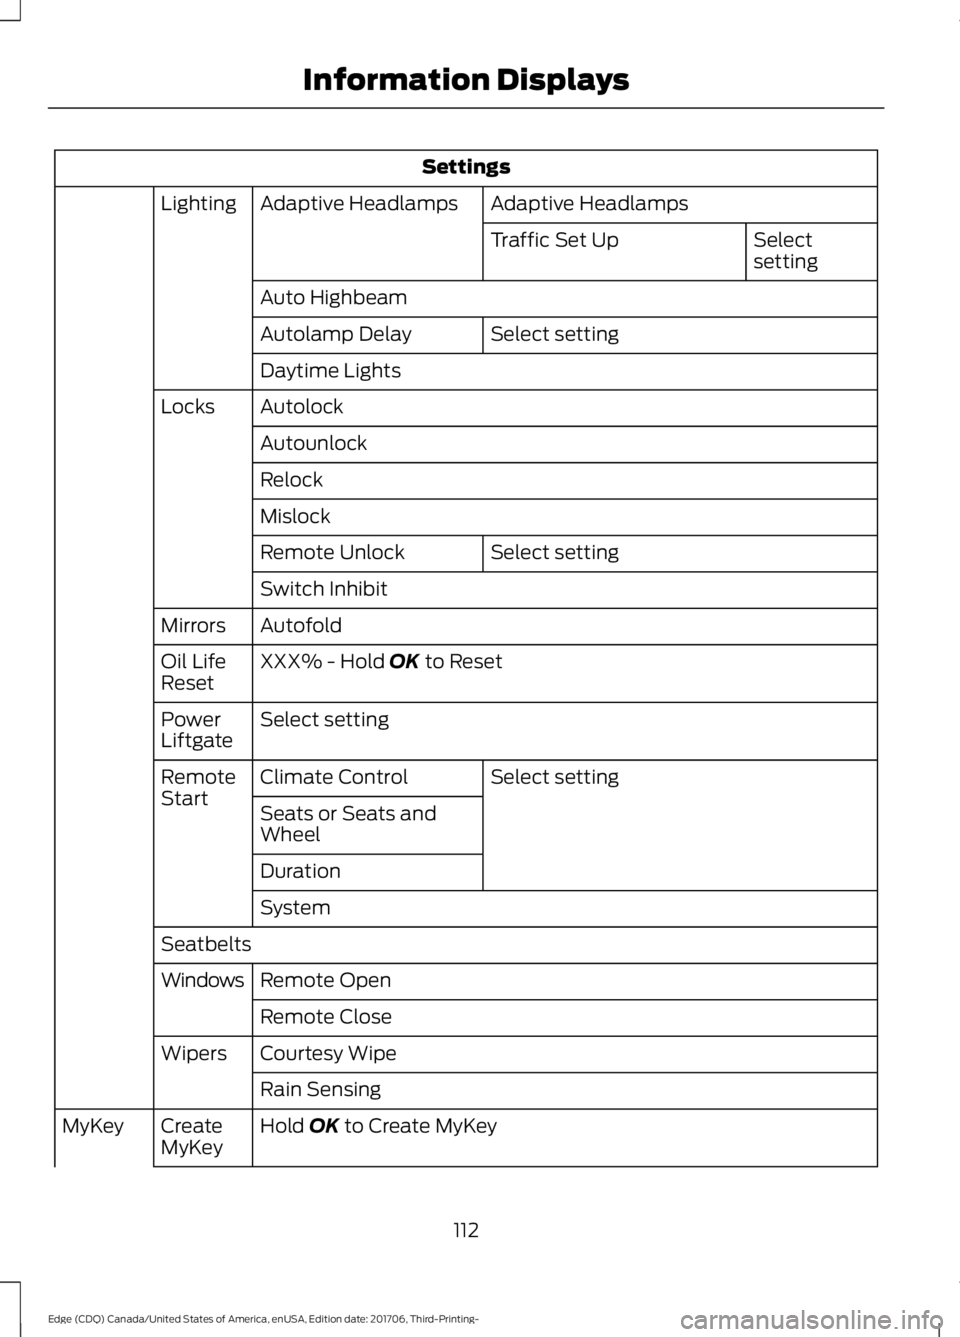
Settings
Adaptive Headlamps
Adaptive Headlamps
Lighting
Select
setting
Traffic Set Up
Auto Highbeam Select setting
Autolamp Delay
Daytime Lights
Autolock
Locks
Autounlock
Relock
Mislock Select setting
Remote Unlock
Switch Inhibit
Autofold
Mirrors
XXX% - Hold OK to Reset
Oil Life
Reset
Select setting
Power
Liftgate
Select setting
Climate Control
Remote
Start
Seats or Seats and
Wheel
Duration
System
Seatbelts Remote Open
Windows
Remote Close
Courtesy Wipe
Wipers
Rain Sensing
Hold
OK to Create MyKey
Create
MyKey
MyKey
112
Edge (CDQ) Canada/United States of America, enUSA, Edition date: 201706, Third-Printing- Information Displays
Page 151 of 557
HEATED SEATS (If Equipped)
Front Seats WARNING:
People who are unable
to feel pain to their skin because of
advanced age, chronic illness, diabetes,
spinal cord injury, medication, alcohol use,
exhaustion or other physical conditions,
must use caution when using the heated
seat. The heated seat may cause burns
even at low temperatures, especially if
used for long periods of time. Do not place
anything on the seat that may block the
heat, such as a blanket or cushion. This can
cause the heated seat to overheat. Do not
puncture the seat with pins, needles or
other pointed objects. This damages the
heating element and can cause the heated
seat to overheat. An overheated seat may
cause serious personal injury.
Do not do the following:
• Place heavy objects on the seat.
• Operate the heated seat if water or any
other liquid spills on the seat. Allow the
seat to dry thoroughly.
Note: The heated seats will only function
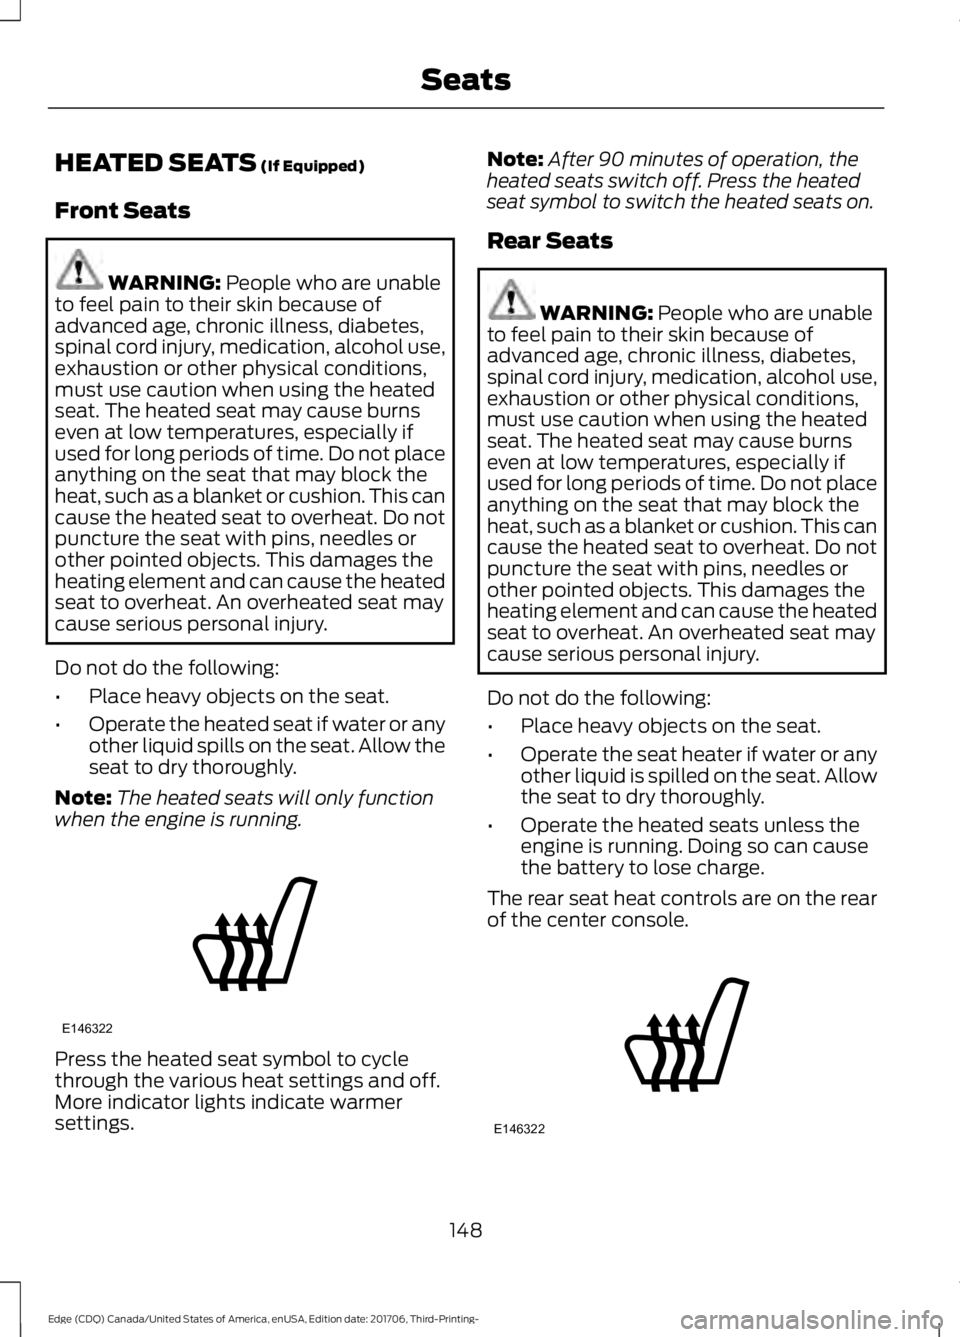
when the engine is running. Press the heated seat symbol to cycle
through the various heat settings and off.
More indicator lights indicate warmer
settings. Note:
After 90 minutes of operation, the
heated seats switch off. Press the heated
seat symbol to switch the heated seats on.
Rear Seats WARNING:
People who are unable
to feel pain to their skin because of
advanced age, chronic illness, diabetes,
spinal cord injury, medication, alcohol use,
exhaustion or other physical conditions,
must use caution when using the heated
seat. The heated seat may cause burns
even at low temperatures, especially if
used for long periods of time. Do not place
anything on the seat that may block the
heat, such as a blanket or cushion. This can
cause the heated seat to overheat. Do not
puncture the seat with pins, needles or
other pointed objects. This damages the
heating element and can cause the heated
seat to overheat. An overheated seat may
cause serious personal injury.
Do not do the following:
• Place heavy objects on the seat.
• Operate the seat heater if water or any
other liquid is spilled on the seat. Allow
the seat to dry thoroughly.
• Operate the heated seats unless the
engine is running. Doing so can cause
the battery to lose charge.
The rear seat heat controls are on the rear
of the center console. 148
Edge (CDQ) Canada/United States of America, enUSA, Edition date: 201706, Third-Printing- SeatsE146322 E146322
Page 152 of 557
Press the heated seat symbol to cycle
through the various heat settings and off.
More indicator lights indicate warmer
settings.
CLIMATE CONTROLLED SEATS
(If Equipped)
Heated Seats
WARNING: People who are unable
to feel pain to their skin because of
advanced age, chronic illness, diabetes,
spinal cord injury, medication, alcohol use,
exhaustion or other physical conditions,
must exercise care when using the heated
seat. The heated seat may cause burns
even at low temperatures, especially if
used for long periods of time. Do not place
anything on the seat that insulates against
heat, such as a blanket or cushion. This
may cause the heated seat to overheat.
Do not puncture the seat with pins, needles
or other pointed objects. This may damage
the heating element which may cause the
heated seat to overheat. An overheated
seat may cause serious personal injury.
Note: Do not do the following:
• Place heavy objects on the seat.
• Operate the seat heater if water or any
other liquid spills on the seat. Allow the
seat to dry thoroughly.
Note: The heated seats only function when
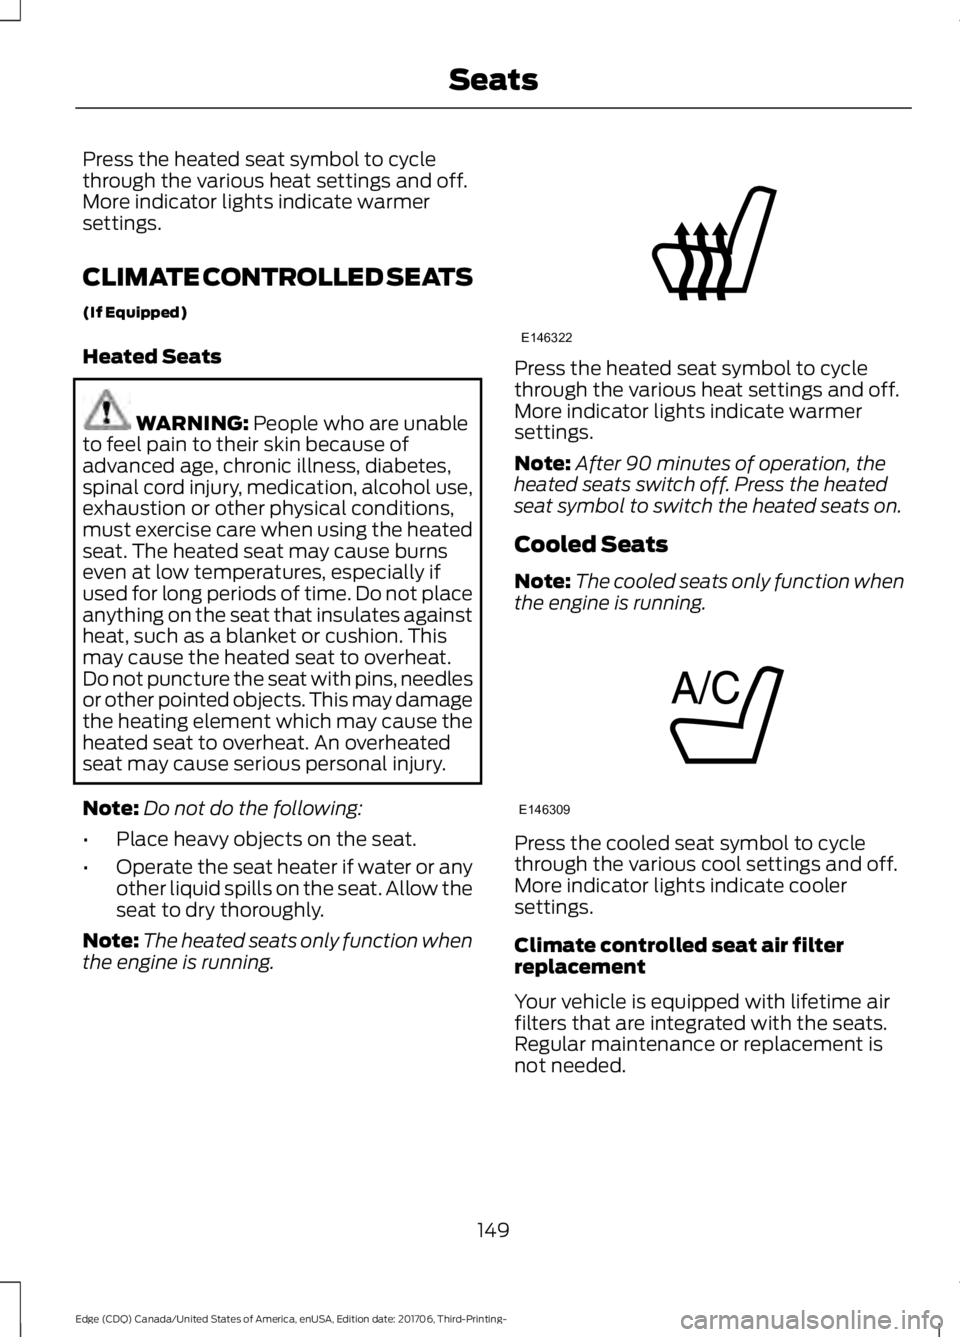
the engine is running. Press the heated seat symbol to cycle
through the various heat settings and off.
More indicator lights indicate warmer
settings.
Note:
After 90 minutes of operation, the
heated seats switch off. Press the heated
seat symbol to switch the heated seats on.
Cooled Seats
Note: The cooled seats only function when
the engine is running. Press the cooled seat symbol to cycle
through the various cool settings and off.
More indicator lights indicate cooler
settings.
Climate controlled seat air filter
replacement
Your vehicle is equipped with lifetime air
filters that are integrated with the seats.
Regular maintenance or replacement is
not needed.
149
Edge (CDQ) Canada/United States of America, enUSA, Edition date: 201706, Third-Printing- SeatsE146322 E146309
Page 156 of 557
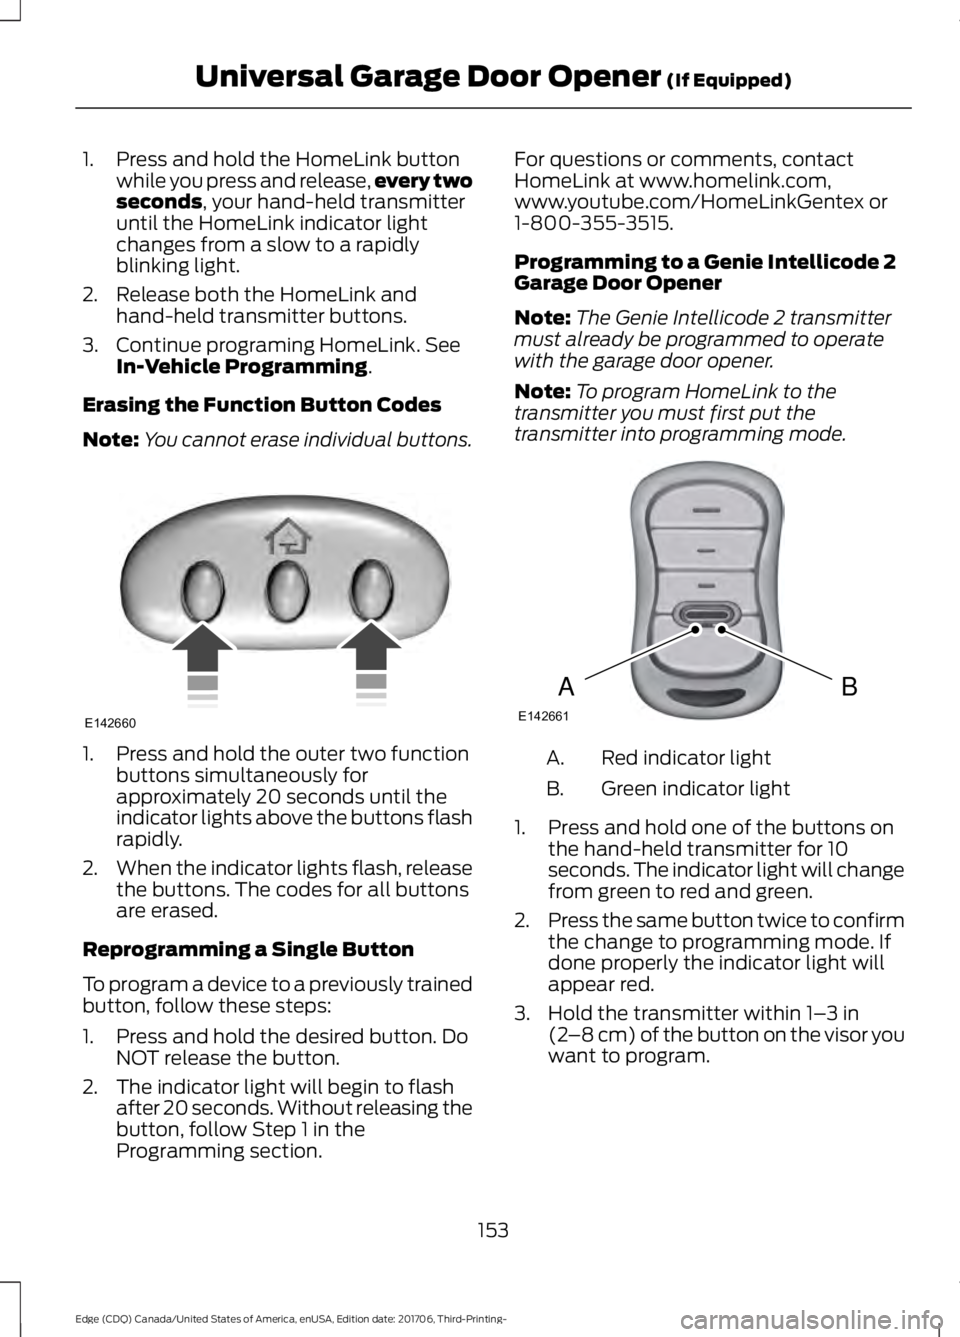
1. Press and hold the HomeLink button
while you press and release, every two
seconds, your hand-held transmitter
until the HomeLink indicator light
changes from a slow to a rapidly
blinking light.
2. Release both the HomeLink and hand-held transmitter buttons.
3. Continue programing HomeLink. See In-Vehicle Programming
.
Erasing the Function Button Codes
Note: You cannot erase individual buttons. 1. Press and hold the outer two function
buttons simultaneously for
approximately 20 seconds until the
indicator lights above the buttons flash
rapidly.
2. When the indicator lights flash, release
the buttons. The codes for all buttons
are erased.
Reprogramming a Single Button
To program a device to a previously trained
button, follow these steps:
1. Press and hold the desired button. Do NOT release the button.
2. The indicator light will begin to flash after 20 seconds. Without releasing the
button, follow Step 1 in the
Programming section. For questions or comments, contact
HomeLink at www.homelink.com,
www.youtube.com/HomeLinkGentex or
1-800-355-3515.
Programming to a Genie Intellicode 2
Garage Door Opener
Note:
The Genie Intellicode 2 transmitter
must already be programmed to operate
with the garage door opener.
Note: To program HomeLink to the
transmitter you must first put the
transmitter into programming mode. Red indicator light
A.
Green indicator light
B.
1. Press and hold one of the buttons on the hand-held transmitter for 10
seconds. The indicator light will change
from green to red and green.
2. Press the same button twice to confirm
the change to programming mode. If
done properly the indicator light will
appear red.
3. Hold the transmitter within
1– 3 in
(2 –8 cm) of the button on the visor you
want to program.
153
Edge (CDQ) Canada/United States of America, enUSA, Edition date: 201706, Third-Printing- Universal Garage Door Opener
(If Equipped)E142660 BAE142661
Page 157 of 557
4. Press and hold both the programmed
Genie button on the hand-held
transmitter and the button you want
to program. The indicator light on the
visor will flash rapidly when the
programming is successful.
Note: The Genie transmitter will transmit
for up to 30 seconds. If HomeLink does not
program within 30 seconds the Genie
transmitter will need to be pressed again. If
the Genie transmitter indicator light displays
green and red, release the button until the
indicator light turns off before pressing the
button again.
Once HomeLink has been programmed
successfully, the Genie transmitter must
be changed out of program mode. To do
this:
1. Press and hold the previously programmed Genie button on the
hand-held transmitter for 10 seconds.
The indicator light will change from red
to red and green.
2. Press the same button twice to confirm
the change. If done correctly the
indicator light will turn green.
Programming HomeLink to the Genie
Intellicode Garage Door Opener Motor
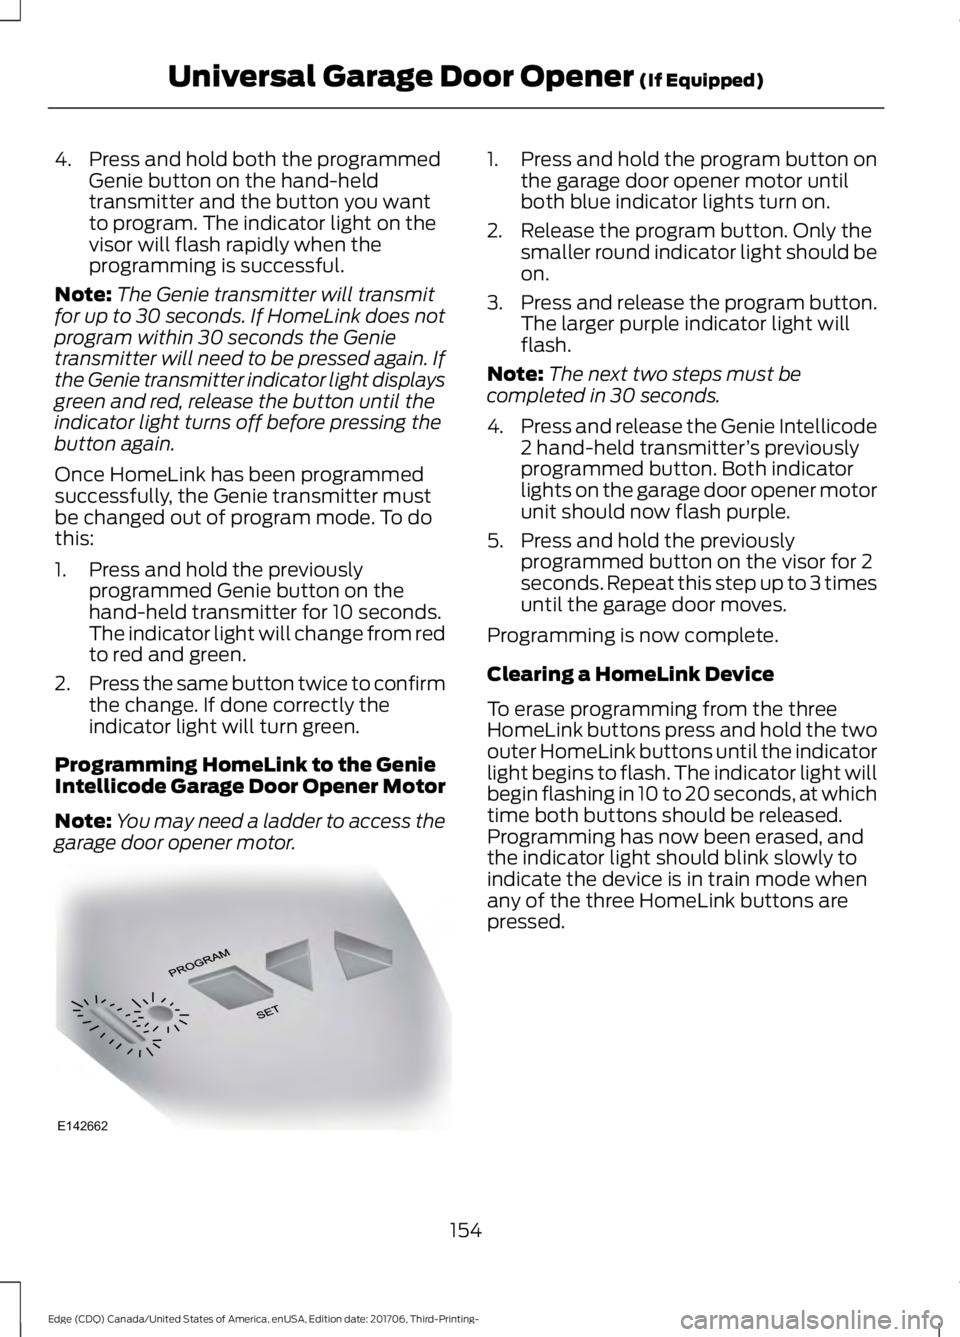
Note: You may need a ladder to access the
garage door opener motor. 1. Press and hold the program button on
the garage door opener motor until
both blue indicator lights turn on.
2. Release the program button. Only the smaller round indicator light should be
on.
3. Press and release the program button.
The larger purple indicator light will
flash.
Note: The next two steps must be
completed in 30 seconds.
4. Press and release the Genie Intellicode
2 hand-held transmitter ’s previously
programmed button. Both indicator
lights on the garage door opener motor
unit should now flash purple.
5. Press and hold the previously programmed button on the visor for 2
seconds. Repeat this step up to 3 times
until the garage door moves.
Programming is now complete.
Clearing a HomeLink Device
To erase programming from the three
HomeLink buttons press and hold the two
outer HomeLink buttons until the indicator
light begins to flash. The indicator light will
begin flashing in 10 to 20 seconds, at which
time both buttons should be released.
Programming has now been erased, and
the indicator light should blink slowly to
indicate the device is in train mode when
any of the three HomeLink buttons are
pressed.
154
Edge (CDQ) Canada/United States of America, enUSA, Edition date: 201706, Third-Printing- Universal Garage Door Opener (If Equipped)E142662