ECO mode FORD EDGE 2020 Owner's Manual
[x] Cancel search | Manufacturer: FORD, Model Year: 2020, Model line: EDGE, Model: FORD EDGE 2020Pages: 495, PDF Size: 6.38 MB
Page 153 of 495
Gate Operator / Canadian
Programming
Canadian radio-frequency laws require
transmitter signals to
“time-out” (or quit)
after several seconds of transmission –
which may not be long enough for
HomeLink to pick up the signal during
programming. Similar to this Canadian law,
some U.S. gate operators are designed to
“time-out” in the same manner.
Note: If programming a garage door opener
or gate operator, it is advised to unplug the
device during the “cycling” process to
prevent possible overheating.
1. Press and hold the HomeLink button while you press and release, every two
seconds, your hand-held transmitter
until the HomeLink indicator light
changes from a slow to a rapidly
blinking light.
2. Release both the HomeLink and hand-held transmitter buttons.
3. Continue programing HomeLink. See In-Vehicle Programming
.
Erasing the Function Button Codes
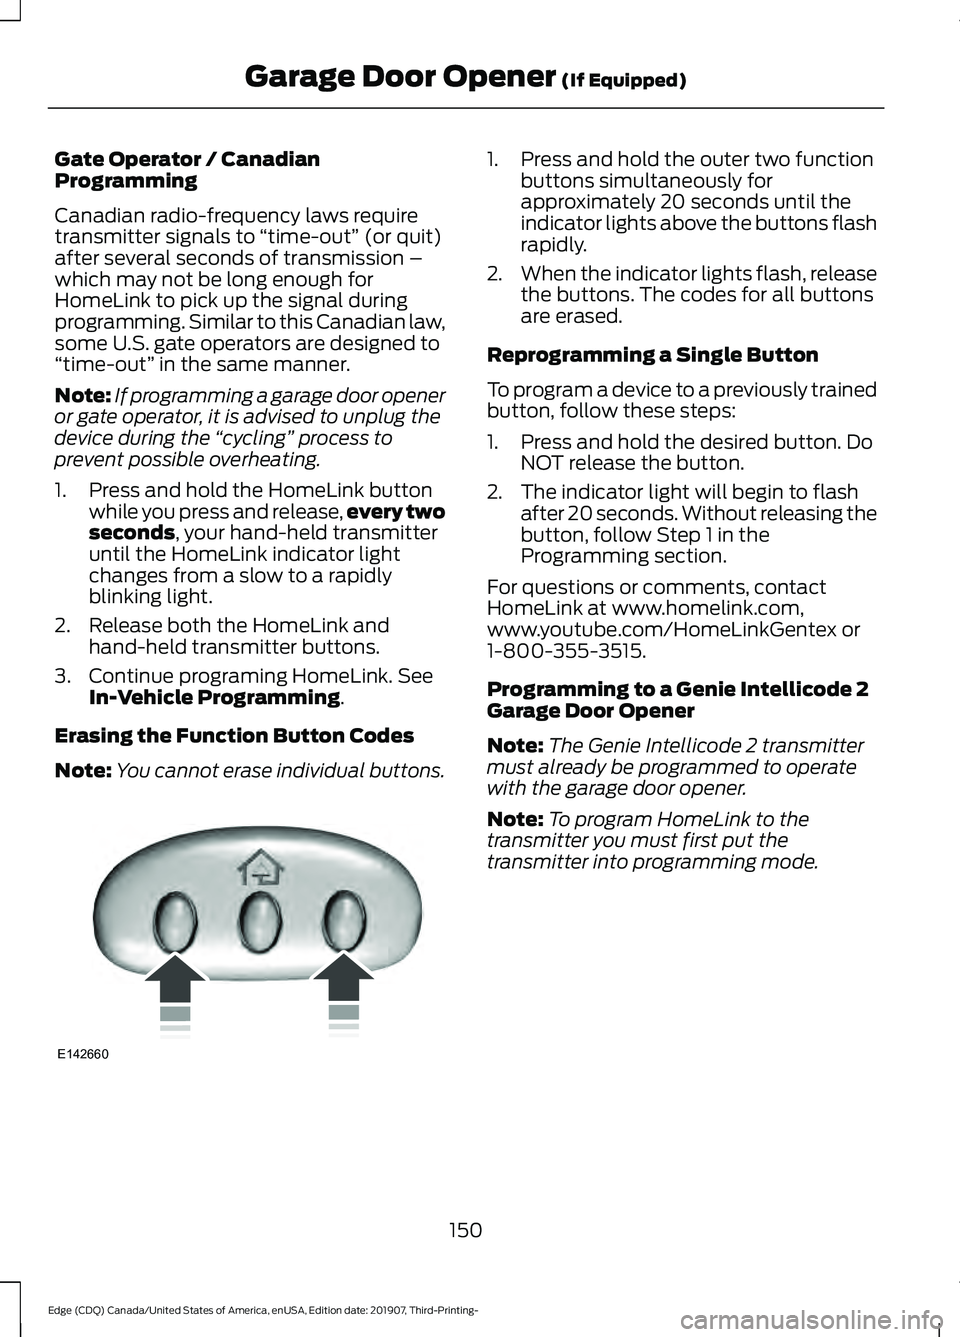
Note: You cannot erase individual buttons. 1. Press and hold the outer two function
buttons simultaneously for
approximately 20 seconds until the
indicator lights above the buttons flash
rapidly.
2. When the indicator lights flash, release
the buttons. The codes for all buttons
are erased.
Reprogramming a Single Button
To program a device to a previously trained
button, follow these steps:
1. Press and hold the desired button. Do NOT release the button.
2. The indicator light will begin to flash after 20 seconds. Without releasing the
button, follow Step 1 in the
Programming section.
For questions or comments, contact
HomeLink at www.homelink.com,
www.youtube.com/HomeLinkGentex or
1-800-355-3515.
Programming to a Genie Intellicode 2
Garage Door Opener
Note: The Genie Intellicode 2 transmitter
must already be programmed to operate
with the garage door opener.
Note: To program HomeLink to the
transmitter you must first put the
transmitter into programming mode.
150
Edge (CDQ) Canada/United States of America, enUSA, Edition date: 201907, Third-Printing- Garage Door Opener
(If Equipped)E142660
Page 154 of 495
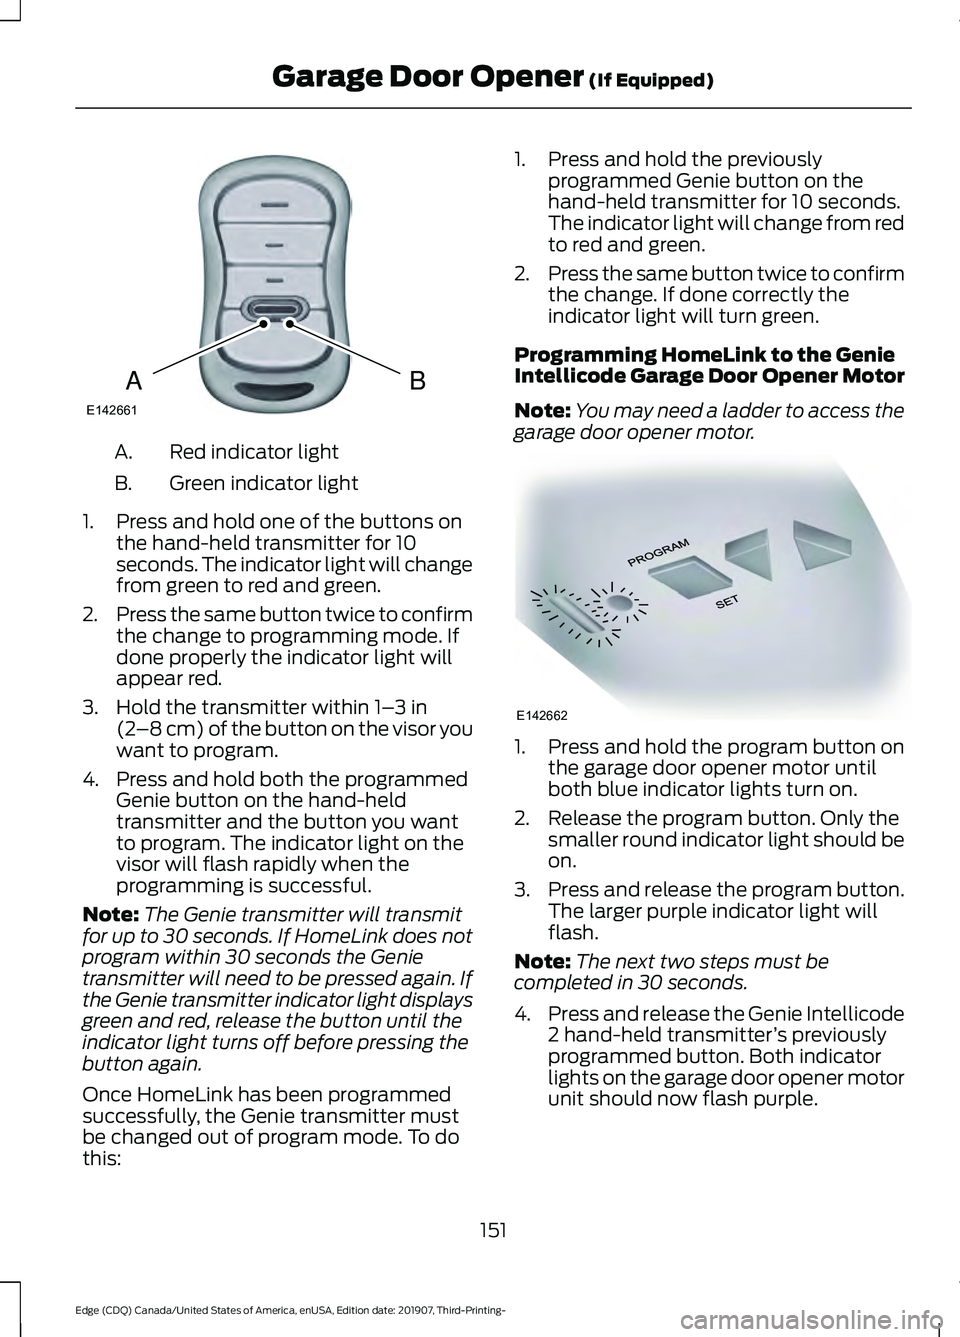
Red indicator light
A.
Green indicator light
B.
1. Press and hold one of the buttons on the hand-held transmitter for 10
seconds. The indicator light will change
from green to red and green.
2. Press the same button twice to confirm
the change to programming mode. If
done properly the indicator light will
appear red.
3. Hold the transmitter within 1– 3 in
(2 –8 cm) of the button on the visor you
want to program.
4. Press and hold both the programmed Genie button on the hand-held
transmitter and the button you want
to program. The indicator light on the
visor will flash rapidly when the
programming is successful.
Note: The Genie transmitter will transmit
for up to 30 seconds. If HomeLink does not
program within 30 seconds the Genie
transmitter will need to be pressed again. If
the Genie transmitter indicator light displays
green and red, release the button until the
indicator light turns off before pressing the
button again.
Once HomeLink has been programmed
successfully, the Genie transmitter must
be changed out of program mode. To do
this: 1. Press and hold the previously
programmed Genie button on the
hand-held transmitter for 10 seconds.
The indicator light will change from red
to red and green.
2. Press the same button twice to confirm
the change. If done correctly the
indicator light will turn green.
Programming HomeLink to the Genie
Intellicode Garage Door Opener Motor
Note: You may need a ladder to access the
garage door opener motor. 1. Press and hold the program button on
the garage door opener motor until
both blue indicator lights turn on.
2. Release the program button. Only the smaller round indicator light should be
on.
3. Press and release the program button.
The larger purple indicator light will
flash.
Note: The next two steps must be
completed in 30 seconds.
4. Press and release the Genie Intellicode
2 hand-held transmitter ’s previously
programmed button. Both indicator
lights on the garage door opener motor
unit should now flash purple.
151
Edge (CDQ) Canada/United States of America, enUSA, Edition date: 201907, Third-Printing- Garage Door Opener
(If Equipped)BAE142661 E142662
Page 155 of 495

5. Press and hold the previously
programmed button on the visor for 2
seconds. Repeat this step up to 3 times
until the garage door moves.
Programming is now complete.
Clearing a HomeLink Device
To erase programming from the three
HomeLink buttons press and hold the two
outer HomeLink buttons until the indicator
light begins to flash. The indicator light will
begin flashing in 10 to 20 seconds, at which
time both buttons should be released.
Programming has now been erased, and
the indicator light should blink slowly to
indicate the device is in train mode when
any of the three HomeLink buttons are
pressed.
FCC and RSS-210 Industry Canada
Compliance
This device complies with Part 15 of the
FCC Rules and with RSS-210 of Industry
Canada. Operation is subject to the
following two conditions: (1) this device
may not cause harmful interference, and
(2) this device must accept any
interference received, including
interference that may cause undesired
operation. WARNING: Changes or
modifications not expressively approved
by the party responsible for compliance
could void the user's authority to operate
the equipment. The term "IC:" before the
radio certification number only signifies
that Industry Canada technical
specifications were met. This equipment complies with FCC
radiation exposure limits set forth for an
uncontrolled environment. End Users must
follow the specific operating instructions
for satisfying RF exposure compliance. This
transmitter must be at least
8 in (20 cm)
from the user and must not be co-located
or operating in conjunction with any other
antenna or transmitter.
The term “IC:” before the
certification/registration number only
signifies that Industry Canada technical
specifications were met.
152
Edge (CDQ) Canada/United States of America, enUSA, Edition date: 201907, Third-Printing- Garage Door Opener
(If Equipped)
Page 157 of 495
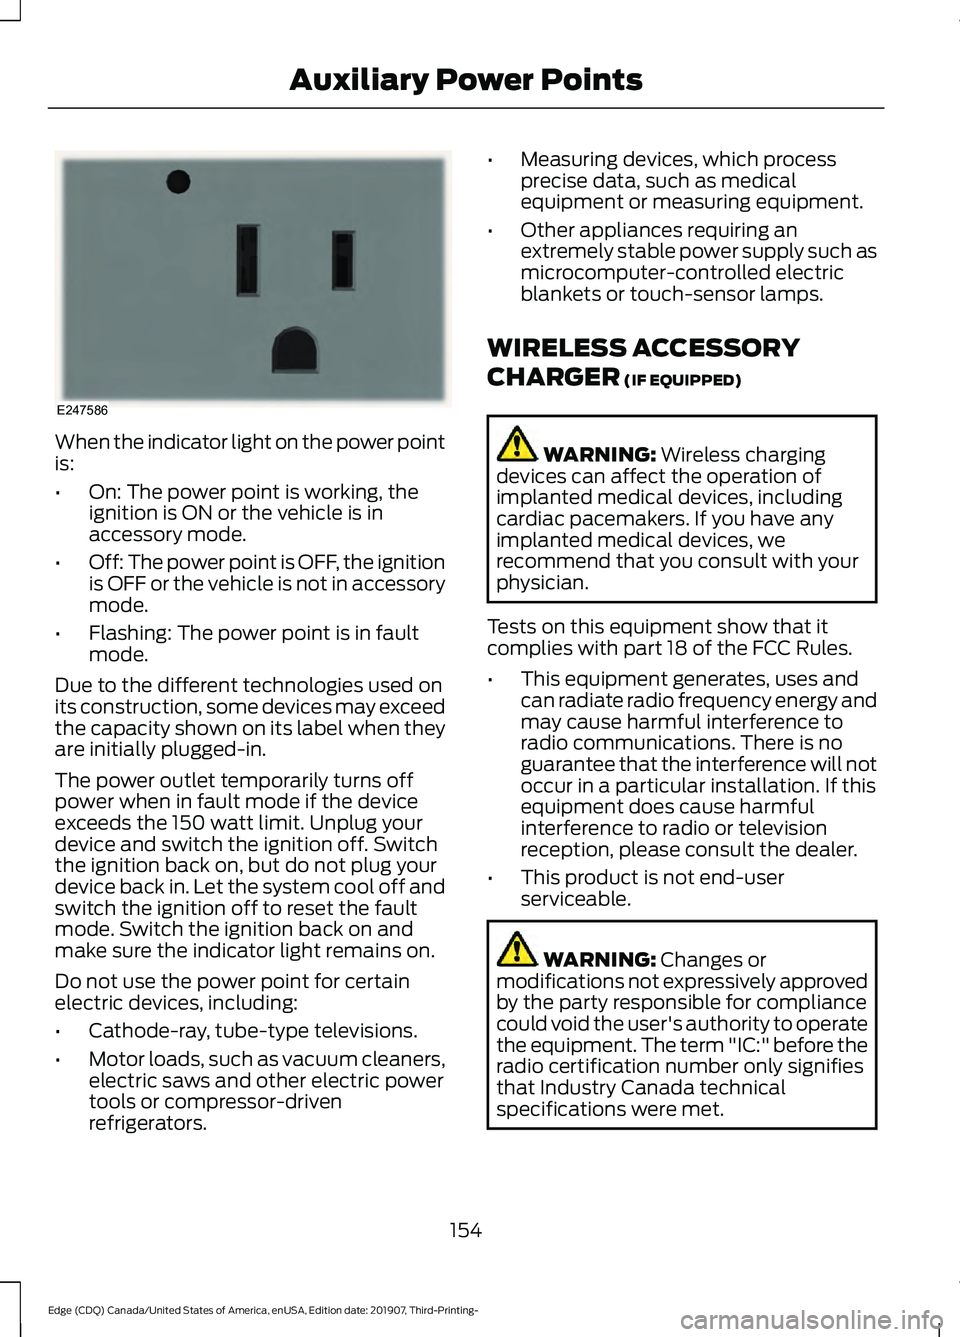
When the indicator light on the power point
is:
•
On: The power point is working, the
ignition is ON or the vehicle is in
accessory mode.
• Off: The power point is OFF, the ignition
is OFF or the vehicle is not in accessory
mode.
• Flashing: The power point is in fault
mode.
Due to the different technologies used on
its construction, some devices may exceed
the capacity shown on its label when they
are initially plugged-in.
The power outlet temporarily turns off
power when in fault mode if the device
exceeds the 150 watt limit. Unplug your
device and switch the ignition off. Switch
the ignition back on, but do not plug your
device back in. Let the system cool off and
switch the ignition off to reset the fault
mode. Switch the ignition back on and
make sure the indicator light remains on.
Do not use the power point for certain
electric devices, including:
• Cathode-ray, tube-type televisions.
• Motor loads, such as vacuum cleaners,
electric saws and other electric power
tools or compressor-driven
refrigerators. •
Measuring devices, which process
precise data, such as medical
equipment or measuring equipment.
• Other appliances requiring an
extremely stable power supply such as
microcomputer-controlled electric
blankets or touch-sensor lamps.
WIRELESS ACCESSORY
CHARGER (IF EQUIPPED) WARNING:
Wireless charging
devices can affect the operation of
implanted medical devices, including
cardiac pacemakers. If you have any
implanted medical devices, we
recommend that you consult with your
physician.
Tests on this equipment show that it
complies with part 18 of the FCC Rules.
• This equipment generates, uses and
can radiate radio frequency energy and
may cause harmful interference to
radio communications. There is no
guarantee that the interference will not
occur in a particular installation. If this
equipment does cause harmful
interference to radio or television
reception, please consult the dealer.
• This product is not end-user
serviceable. WARNING:
Changes or
modifications not expressively approved
by the party responsible for compliance
could void the user's authority to operate
the equipment. The term "IC:" before the
radio certification number only signifies
that Industry Canada technical
specifications were met.
154
Edge (CDQ) Canada/United States of America, enUSA, Edition date: 201907, Third-Printing- Auxiliary Power PointsE247586
Page 160 of 495
GENERAL INFORMATION
WARNING: Extended idling at high
engine speeds can produce very high
temperatures in the engine and exhaust
system, creating the risk of fire or other
damage. WARNING:
Do not park, idle or
drive your vehicle on dry grass or other
dry ground cover. The emission system
heats up the engine compartment and
exhaust system, creating the risk of fire. WARNING: Do not start the engine
in a closed garage or in other enclosed
areas. Exhaust fumes can be toxic.
Always open the garage door before you
start the engine. WARNING:
Exhaust leaks may
result in entry of harmful and potentially
lethal fumes into the passenger
compartment. If you smell exhaust
fumes inside your vehicle, have your
vehicle inspected immediately. Do not
drive if you smell exhaust fumes.
If you disconnect the battery, your vehicle
may exhibit some unusual driving
characteristics for approximately
5 mi
(8 km) after you reconnect it. This is
because the engine management system
must realign itself with the engine. You
can disregard any unusual driving
characteristics during this period.
The powertrain control system meets all
Canadian interference-causing equipment
standard requirements regulating the
impulse electrical field or radio noise.
When you start the engine, avoid pressing
the accelerator pedal before and during
operation. Only use the accelerator pedal
when you have difficulty starting the
engine. KEYLESS STARTING
Note:
The system may not function if the
intelligent access key is close to metal
objects or electronic devices, for example
keys or a cell phone.
Note: A valid intelligent access key must
be located inside your vehicle to switch the
ignition on and start your vehicle.
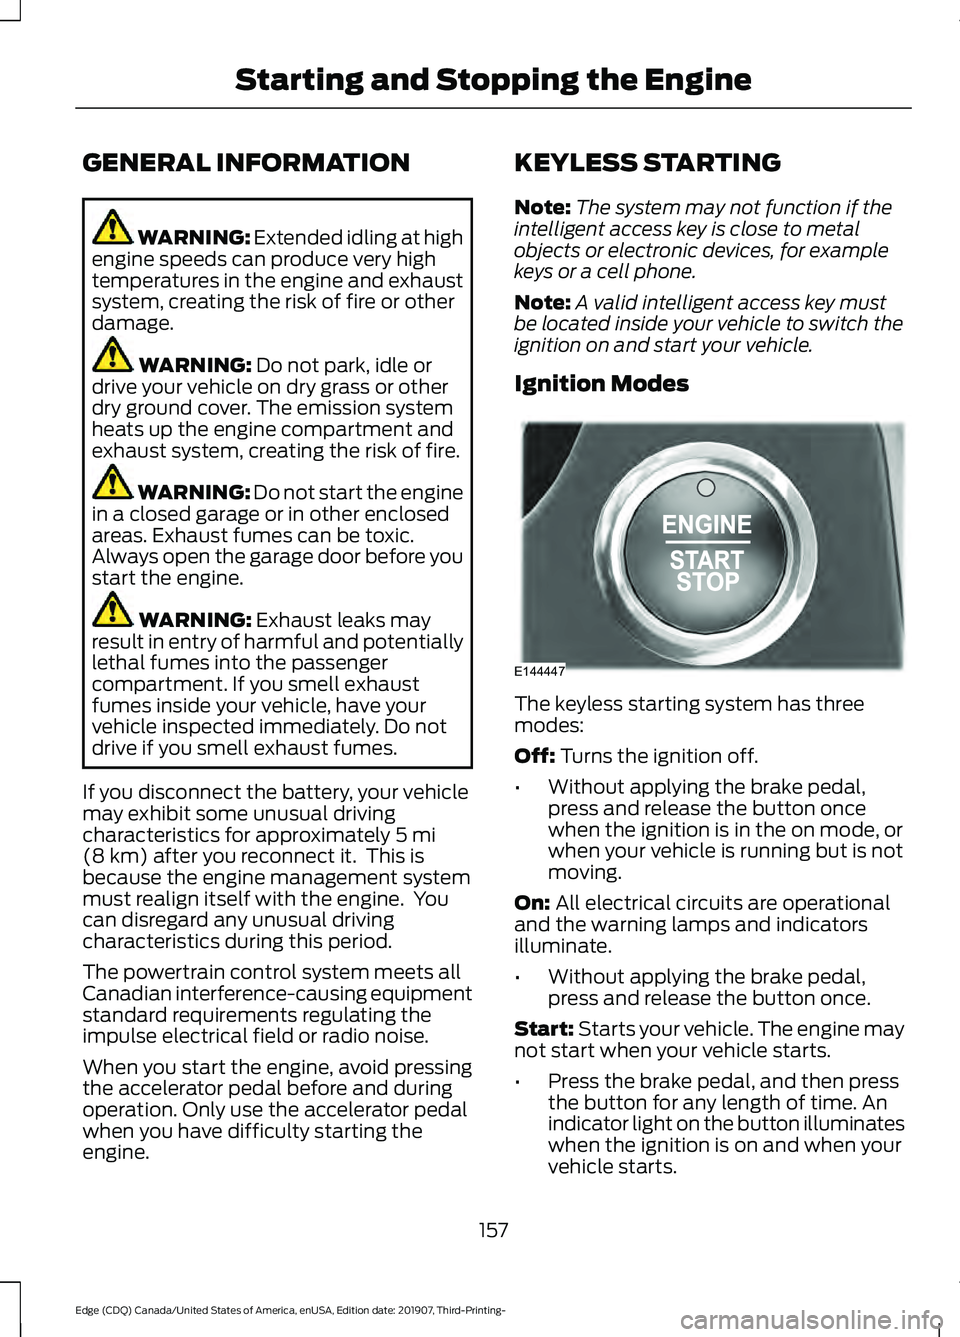
Ignition Modes The keyless starting system has three
modes:
Off:
Turns the ignition off.
• Without applying the brake pedal,
press and release the button once
when the ignition is in the on mode, or
when your vehicle is running but is not
moving.
On:
All electrical circuits are operational
and the warning lamps and indicators
illuminate.
• Without applying the brake pedal,
press and release the button once.
Start:
Starts your vehicle. The engine may
not start when your vehicle starts.
• Press the brake pedal, and then press
the button for any length of time. An
indicator light on the button illuminates
when the ignition is on and when your
vehicle starts.
157
Edge (CDQ) Canada/United States of America, enUSA, Edition date: 201907, Third-Printing- Starting and Stopping the EngineE144447
Page 178 of 495
AUTOMATIC TRANSMISSION
WARNING: Always fully apply the
parking brake and make sure you shift
into park (P). Failure to follow this
instruction could result in personal injury
or death. WARNING:
Do not apply the brake
pedal and accelerator pedal
simultaneously. Applying both pedals
simultaneously for more than a few
seconds will limit engine performance,
which may result in difficulty maintaining
speed in traffic and could lead to serious
injury. WARNING:
When your vehicle is
stationary, keep the brake pedal fully
pressed when shifting gears. Failure to
follow this instruction could result in
personal injury, death or property
damage.
Note: You may not be able to shift out of
park (P) unless the intelligent access key is
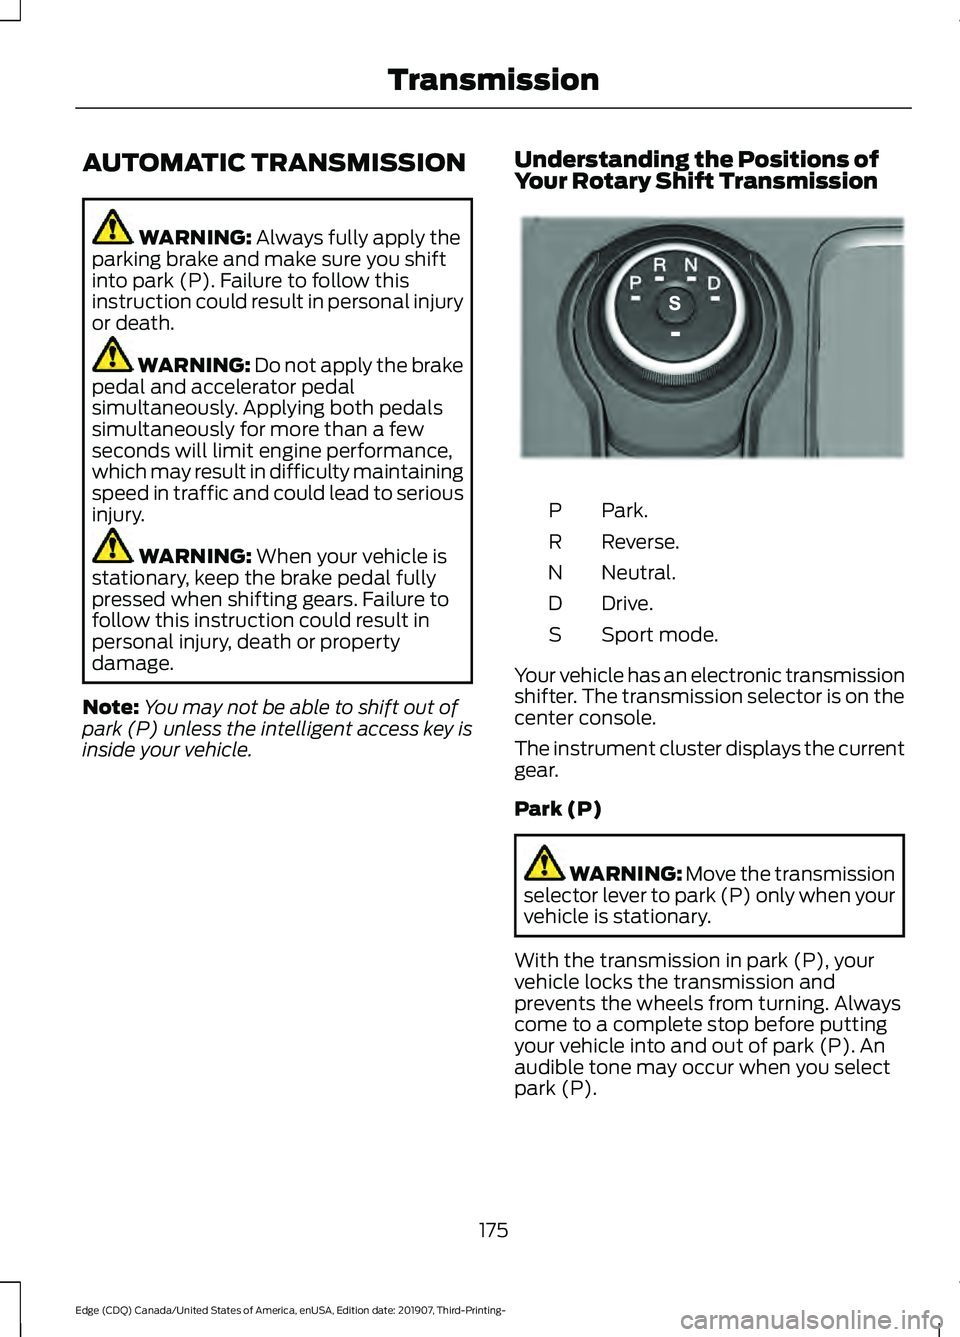
inside your vehicle. Understanding the Positions of
Your Rotary Shift Transmission Park.
P
Reverse.
R
Neutral.
N
Drive.
D
Sport mode.
S
Your vehicle has an electronic transmission
shifter. The transmission selector is on the
center console.
The instrument cluster displays the current
gear.
Park (P) WARNING:
Move the transmission
selector lever to park (P) only when your
vehicle is stationary.
With the transmission in park (P), your
vehicle locks the transmission and
prevents the wheels from turning. Always
come to a complete stop before putting
your vehicle into and out of park (P). An
audible tone may occur when you select
park (P).
175
Edge (CDQ) Canada/United States of America, enUSA, Edition date: 201907, Third-Printing- TransmissionE222981
Page 180 of 495
To enter Stay in Neutral mode, do the
following:
1. Bring your vehicle to a complete stop.
2. Shift into neutral (N).
Note:
A message appears in the
information display.
3. Press the sport (S) button.
Note: A confirmation message appears in
the information display when your vehicle
has entered Stay in Neutral mode and the
neutral (N) button on the transmission
selector slowly blinks.
To exit Stay in Neutral mode, press the
brake pedal and shift into another gear.
Drive (D)
Drive (D) is the normal driving position for
the optimum fuel economy and
smoothness. Shift the transmission gear
selector to drive (D) to allow your vehicle
to move forward and shift automatically
through the forward gears.
The transmission shifts to the appropriate
gear for optimum performance based on
ambient temperature, road slope, vehicle
load and your input.
Sport Mode (S)
In sport (S) mode, the transmission selects
the optimum gear for the best
performance. This gear selection is
typically lower than that of drive (D), and
the transmission shifts are quicker, and at
higher engine speeds.
SelectShift Automatic ™
Transmission (If Equipped)
The SelectShift automatic transmission
gives you the ability to change gears up or
down as desired.
Downshifts are allowed unless the engine
speed after the shift exceeds the
maximum allowable limit. In order to prevent engine stalls,
SelectShift automatically downshifts at
low engine speeds.
Note:
Engine damage may occur if you
maintain excessive engine revving without
shifting.
SelectShift does not automatically upshift,
even if the engine is approaching the RPM
limit, unless the accelerator pedal is at full
travel.
Take notice of the shift indicator lamp,
which alerts you when to shift to help you
achieve the optimum level of efficiency
and fuel economy.
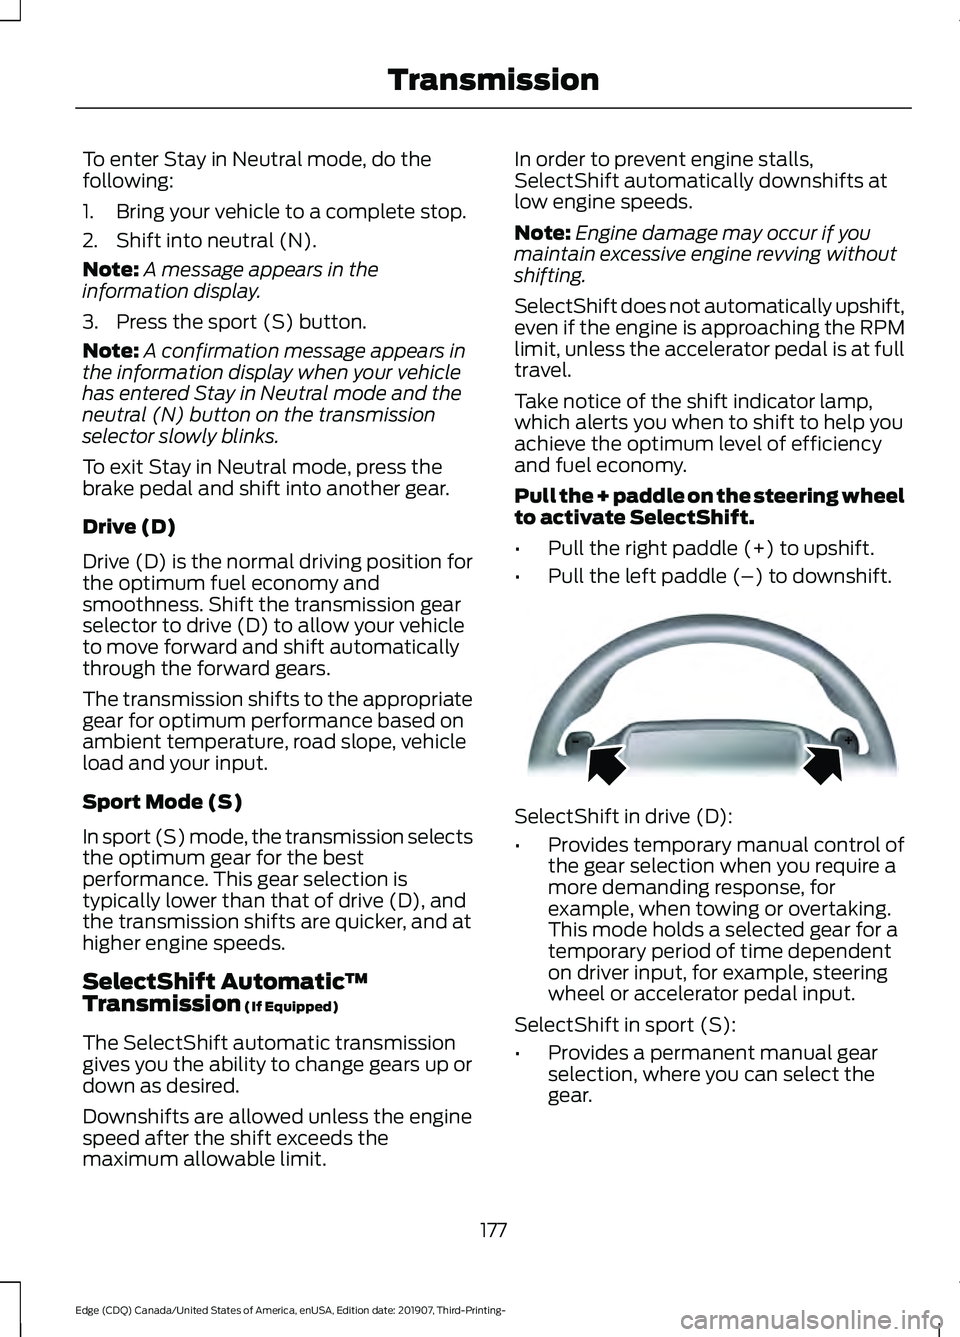
Pull the + paddle on the steering wheel
to activate SelectShift.
• Pull the right paddle (+) to upshift.
• Pull the left paddle (–) to downshift. SelectShift in drive (D):
•
Provides temporary manual control of
the gear selection when you require a
more demanding response, for
example, when towing or overtaking.
This mode holds a selected gear for a
temporary period of time dependent
on driver input, for example, steering
wheel or accelerator pedal input.
SelectShift in sport (S):
• Provides a permanent manual gear
selection, where you can select the
gear.
177
Edge (CDQ) Canada/United States of America, enUSA, Edition date: 201907, Third-Printing- TransmissionE144821
Page 181 of 495

To exit SelectShift mode:
•
Press and hold the + paddle on the
steering wheel to deactivate
SelectShift mode in drive (D) or sport
(S).
OR
• Diesel vehicles only: Press and hold the
+ toggle or + steering wheel paddle for
a few seconds.
The instrument cluster displays your
current gear. If you request a gear that is
not available due to vehicle conditions, too
low or too high engine speed, the current
gear flashes three times.
Note: At full accelerator pedal travel, the
transmission may automatically downshift
for maximum performance.
Manual Park Release WARNING: When doing this
procedure, you need to take the
transmission out of park (P) which
means your vehicle can roll freely. To
avoid unwanted vehicle movement,
always fully apply the parking brake prior
to doing this procedure. Use wheels
chocks if appropriate. WARNING:
If the parking brake is
fully released, but the brake warning
lamp remains illuminated, the brakes
may not be working properly. Have your
vehicle checked as soon as possible. WARNING:
Do not drive your
vehicle until you verify that the
stoplamps are working.
Use the manual park release to move your
transmission from the park (P) position in
the event of an electrical malfunction or
emergency. Activating the Manual Park Release
Cable
1. Apply the parking brake.
Note:
If vehicle battery is dead, for example,
no electrical power available, an external
power may be required to apply the parking
brake. 2. Locate the manual park release cable
access cover under the dash, below the
steering wheel.
3. Using a tool, carefully remove the screw from the access cover and open.
Note: Do not pull the tether until you are in
the driver's seat.
178
Edge (CDQ) Canada/United States of America, enUSA, Edition date: 201907, Third-Printing- TransmissionE307294
Page 182 of 495
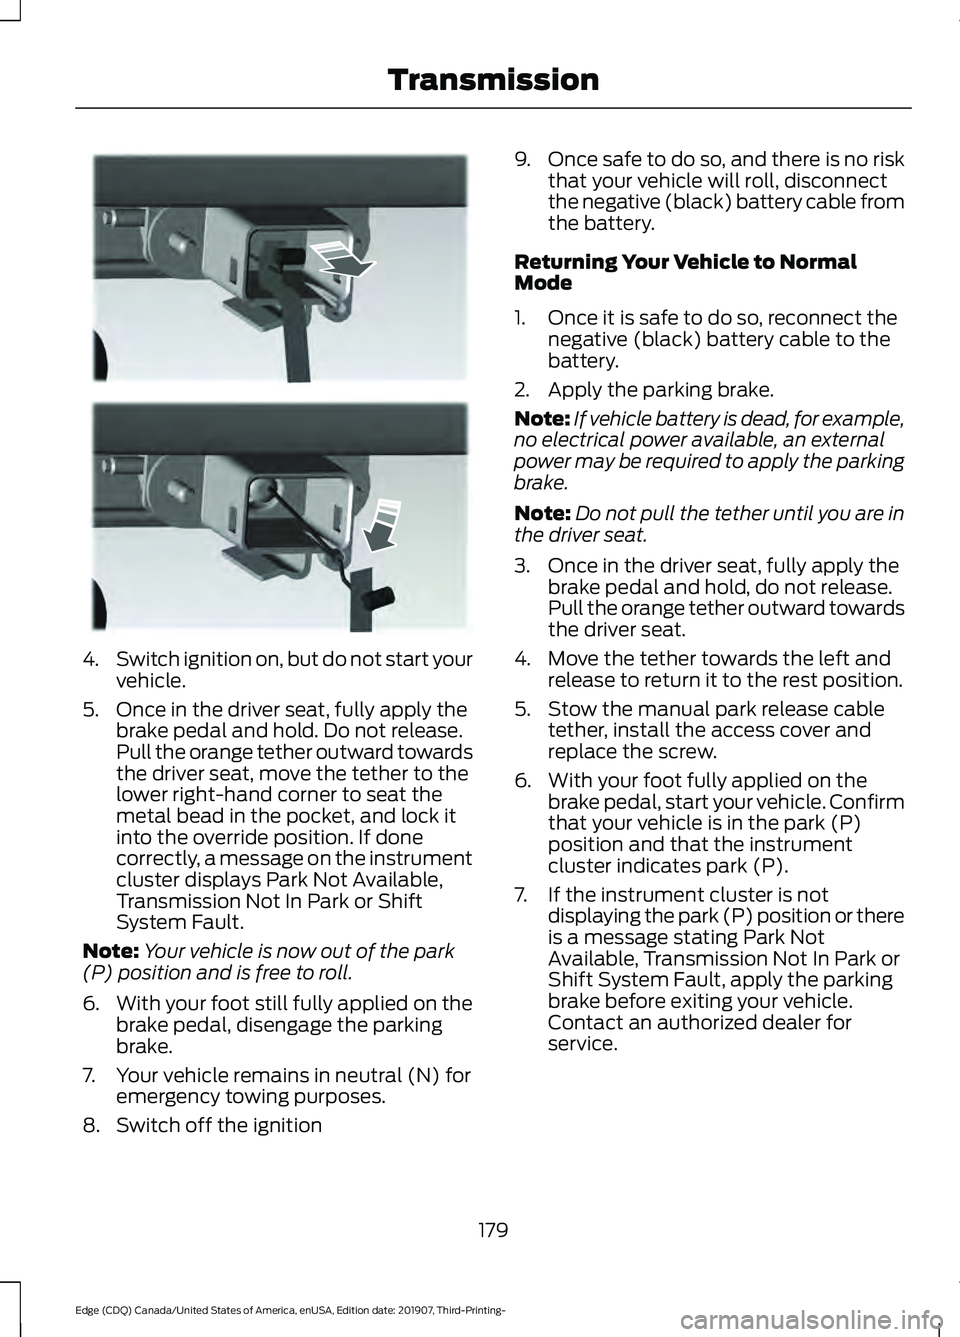
4.
Switch ignition on, but do not start your
vehicle.
5. Once in the driver seat, fully apply the brake pedal and hold. Do not release.
Pull the orange tether outward towards
the driver seat, move the tether to the
lower right-hand corner to seat the
metal bead in the pocket, and lock it
into the override position. If done
correctly, a message on the instrument
cluster displays Park Not Available,
Transmission Not In Park or Shift
System Fault.
Note: Your vehicle is now out of the park
(P) position and is free to roll.
6. With your foot still fully applied on the
brake pedal, disengage the parking
brake.
7. Your vehicle remains in neutral (N) for emergency towing purposes.
8. Switch off the ignition 9.
Once safe to do so, and there is no risk
that your vehicle will roll, disconnect
the negative (black) battery cable from
the battery.
Returning Your Vehicle to Normal
Mode
1. Once it is safe to do so, reconnect the negative (black) battery cable to the
battery.
2. Apply the parking brake.
Note: If vehicle battery is dead, for example,
no electrical power available, an external
power may be required to apply the parking
brake.
Note: Do not pull the tether until you are in
the driver seat.
3. Once in the driver seat, fully apply the brake pedal and hold, do not release.
Pull the orange tether outward towards
the driver seat.
4. Move the tether towards the left and release to return it to the rest position.
5. Stow the manual park release cable tether, install the access cover and
replace the screw.
6. With your foot fully applied on the brake pedal, start your vehicle. Confirm
that your vehicle is in the park (P)
position and that the instrument
cluster indicates park (P).
7. If the instrument cluster is not displaying the park (P) position or there
is a message stating Park Not
Available, Transmission Not In Park or
Shift System Fault, apply the parking
brake before exiting your vehicle.
Contact an authorized dealer for
service.
179
Edge (CDQ) Canada/United States of America, enUSA, Edition date: 201907, Third-Printing- TransmissionE307295
Page 184 of 495
USING ALL-WHEEL DRIVE
All-wheel drive uses all four wheels to
power the vehicle. This increases traction,
enabling you to drive over terrain and road
conditions that a conventional two-wheel
drive vehicle cannot. The AWD system
turns on when needed and does not require
input from you.
Note:
The AWD feature gives your vehicle
some limited off-road capabilities in which
driving surfaces are relatively level,
obstruction-free and otherwise similar to
normal on-road driving conditions.
Operating your vehicle under other than
those conditions could subject the vehicle
to excessive stress which might result in
damage which is not covered under your
warranty.
Note: A warning message will be displayed
in the information display when an AWD
system fault is present See Information
Messages (page 115). An AWD system fault
will cause the AWD system to default to
front-wheel drive only mode. When this
warning message is displayed, have your
vehicle serviced at an authorized dealer
Note: A warning message will be displayed
in the information display if the AWD system
has overheated
See Information
Messages (page 115). This condition may
occur if the vehicle was operated in extreme
conditions with excessive wheel slip, such
as deep sand. To resume normal AWD
function as soon as possible, stop the
vehicle in a safe location and stop the
engine for at least 10 minutes. After the
engine has been restarted and the AWD
system has adequately cooled, the warning
message will turn off and normal AWD
function will return. Do not use a spare tire of a different size
other than the tire provided. If the
mini-spare tire is installed, the AWD
system may disable automatically and
enter front-wheel drive only mode to
protect driveline components. This
condition will be indicated by a warning in
the information display See Information
Messages
(page 115). If there is a warning
message in the information display from
using the spare tire, this indicator should
turn off after reinstalling the repaired or
replaced normal road tire and cycling the
ignition off and on. It is recommended to
reinstall the repaired or replaced road tire
as soon as possible. Major dissimilar tire
sizes between the front and rear axles
could cause the AWD system to stop
functioning and default to front-wheel
drive or damage the AWD system.
Driving in Special Conditions with
All-Wheel Drive (AWD)
AWD vehicles are equipped for driving on
sand, snow, mud and rough roads and have
operating characteristics that are
somewhat different from conventional
vehicles, both on and off the highway.
Under severe operating conditions, the A/C
may cycle on and off to protect
overheating of the engine.
Basic operating principles in special
conditions
• Drive slower in strong crosswinds which
can affect the normal steering
characteristics of your vehicle.
• Be extremely careful when driving on
pavement made slippery by loose sand,
water, gravel, snow or ice.
181
Edge (CDQ) Canada/United States of America, enUSA, Edition date: 201907, Third-Printing- All-Wheel Drive
(If Equipped)