Back light FORD EDGE 2020 Owners Manual
[x] Cancel search | Manufacturer: FORD, Model Year: 2020, Model line: EDGE, Model: FORD EDGE 2020Pages: 495, PDF Size: 6.38 MB
Page 29 of 495
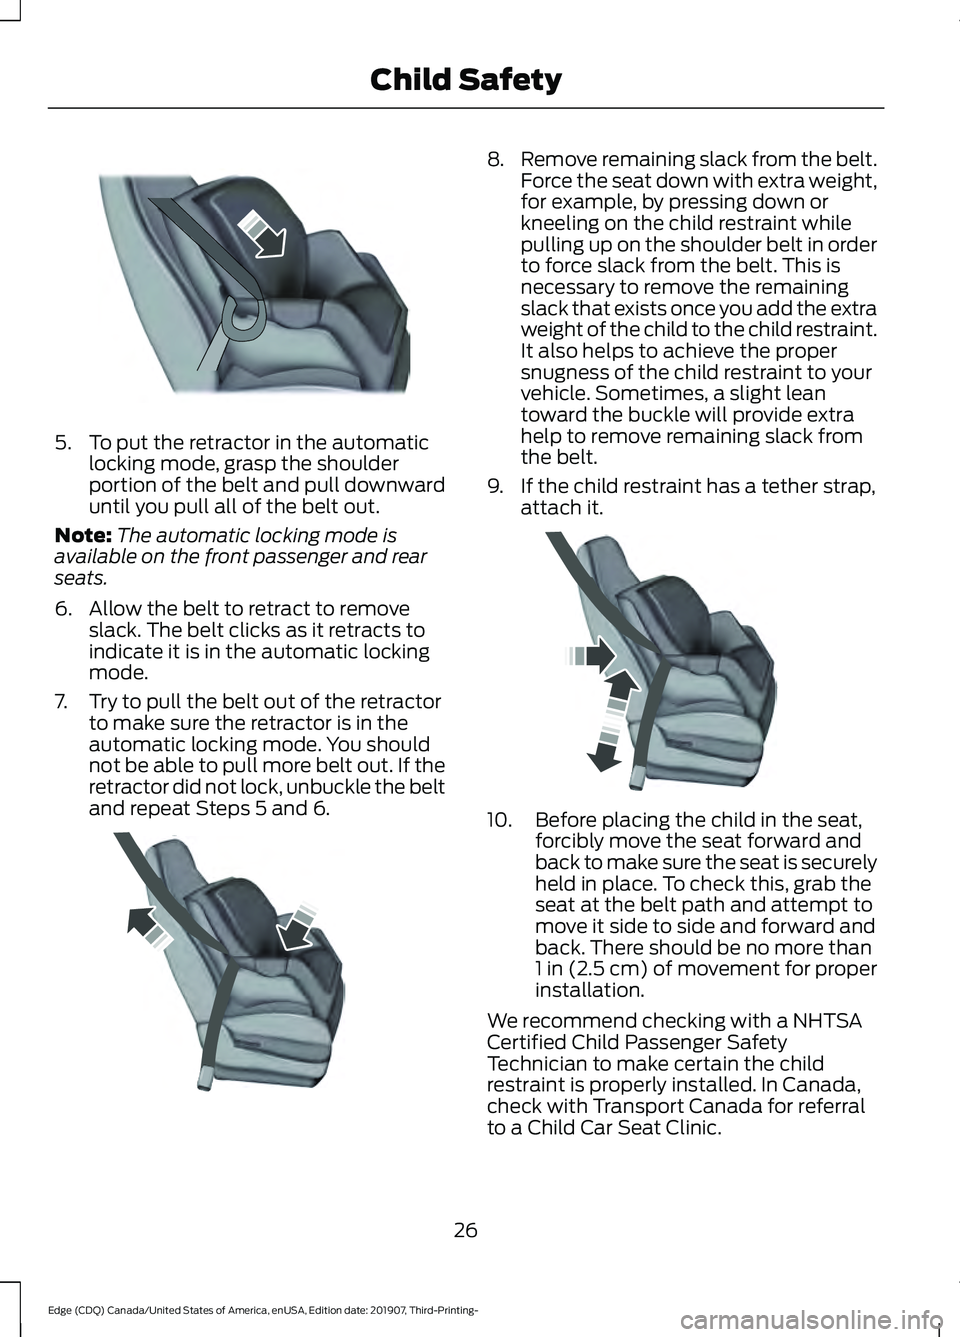
5. To put the retractor in the automatic
locking mode, grasp the shoulder
portion of the belt and pull downward
until you pull all of the belt out.
Note: The automatic locking mode is
available on the front passenger and rear
seats.
6. Allow the belt to retract to remove slack. The belt clicks as it retracts to
indicate it is in the automatic locking
mode.
7. Try to pull the belt out of the retractor to make sure the retractor is in the
automatic locking mode. You should
not be able to pull more belt out. If the
retractor did not lock, unbuckle the belt
and repeat Steps 5 and 6. 8.
Remove remaining slack from the belt.
Force the seat down with extra weight,
for example, by pressing down or
kneeling on the child restraint while
pulling up on the shoulder belt in order
to force slack from the belt. This is
necessary to remove the remaining
slack that exists once you add the extra
weight of the child to the child restraint.
It also helps to achieve the proper
snugness of the child restraint to your
vehicle. Sometimes, a slight lean
toward the buckle will provide extra
help to remove remaining slack from
the belt.
9. If the child restraint has a tether strap, attach it. 10. Before placing the child in the seat,
forcibly move the seat forward and
back to make sure the seat is securely
held in place. To check this, grab the
seat at the belt path and attempt to
move it side to side and forward and
back. There should be no more than
1 in (2.5 cm) of movement for proper
installation.
We recommend checking with a NHTSA
Certified Child Passenger Safety
Technician to make certain the child
restraint is properly installed. In Canada,
check with Transport Canada for referral
to a Child Car Seat Clinic.
26
Edge (CDQ) Canada/United States of America, enUSA, Edition date: 201907, Third-Printing- Child SafetyE142875 E142533 E142534
Page 38 of 495
PRINCIPLE OF OPERATION
WARNING: Always drive and ride
with your seatback upright and the lap
belt snug and low across the hips. WARNING:
Children must always
be properly restrained. WARNING:
Do not allow a
passenger to hold a child on their lap
when your vehicle is moving. Failure to
follow this instruction could result in
personal injury or death in the event of a
sudden stop or crash. WARNING:
All occupants of your
vehicle, including the driver, should
always properly wear their seatbelts,
even when an airbag supplemental
restraint system is provided. Failure to
properly wear your seatbelt could
seriously increase the risk of injury or
death. WARNING:
It is extremely
dangerous to ride in a cargo area, inside
or outside of a vehicle. In a crash, people
riding in these areas are more likely to be
seriously injured or killed. Do not allow
people to ride in any area of your vehicle
that is not equipped with seats and
seatbelts. Make sure everyone in your
vehicle is in a seat and properly using a
seatbelt. Failure to follow this warning
could result in serious personal injury or
death. WARNING:
In a rollover crash, an
unbelted person is significantly more
likely to die than a person wearing a
seatbelt. WARNING:
Each seating position
in your vehicle has a specific seatbelt
assembly made up of one buckle and
one tongue designed to be used as a pair.
Use the shoulder belt on the outside
shoulder only. Never wear the shoulder
belt under the arm. Never use a single
seatbelt for more than one person. WARNING:
Even with advanced
restraints systems, properly restrain
children 12 and under in a rear seating
position. Failure to follow this could
seriously increase the risk of injury or
death. WARNING:
Seatbelts and seats
may be hot in a vehicle that is in the
sunshine. The hot seatbelts or seats may
burn a small child. Check seat covers and
buckles before you place a child
anywhere near them.
All seating positions in your vehicle have
lap and shoulder seatbelts. All occupants
of the vehicle should always properly wear
their seatbelts, even when an airbag
supplemental restraint system is provided.
The seatbelt system consists of:
• Lap and shoulder seatbelts.
• Shoulder seatbelt with automatic
locking mode, (except driver seatbelt).
• Height adjuster at the front outermost
seating positions.
• Seatbelt pretensioners at the front
outermost and second row outermost
seating positions.
• Belt tension sensor at the front
outermost passenger seating position. •
Seatbelt warning light and chime.
35
Edge (CDQ) Canada/United States of America, enUSA, Edition date: 201907, Third-Printing- SeatbeltsE71880
Page 47 of 495
While the system is designed to help
reduce serious injuries, contact with a
deploying airbag may also cause abrasions
or swelling. Temporary hearing loss is also
a possibility as a result of the noise
associated with a deploying airbag.
Because airbags must inflate rapidly and
with considerable force, there is the risk of
death or serious injuries such as fractures,
facial and eye injuries or internal injuries,
particularly to occupants who are not
properly restrained or are otherwise out of
position at the time of airbag deployment.
Thus, it is extremely important that
occupants be properly restrained as far
away from the airbag module as possible
while maintaining vehicle control.
Routine maintenance of the airbags is not
required.
DRIVER AND PASSENGER
AIRBAGS
WARNING: Do not place your arms
on the airbag cover or through the
steering wheel. Failure to follow this
instruction could result in personal injury. WARNING:
Keep the areas in front
of the airbags free from obstruction. Do
not affix anything to or over the airbag
covers. Objects could become projectiles
during airbag deployment or in a sudden
stop. Failure to follow this instruction
could result in personal injury or death. WARNING: Airbags can kill or injure
a child in a child restraint. Never place a
rear-facing child restraint in front of an
active airbag. If you must use a
forward-facing child restraint in the front
seat, move the seat upon which the child
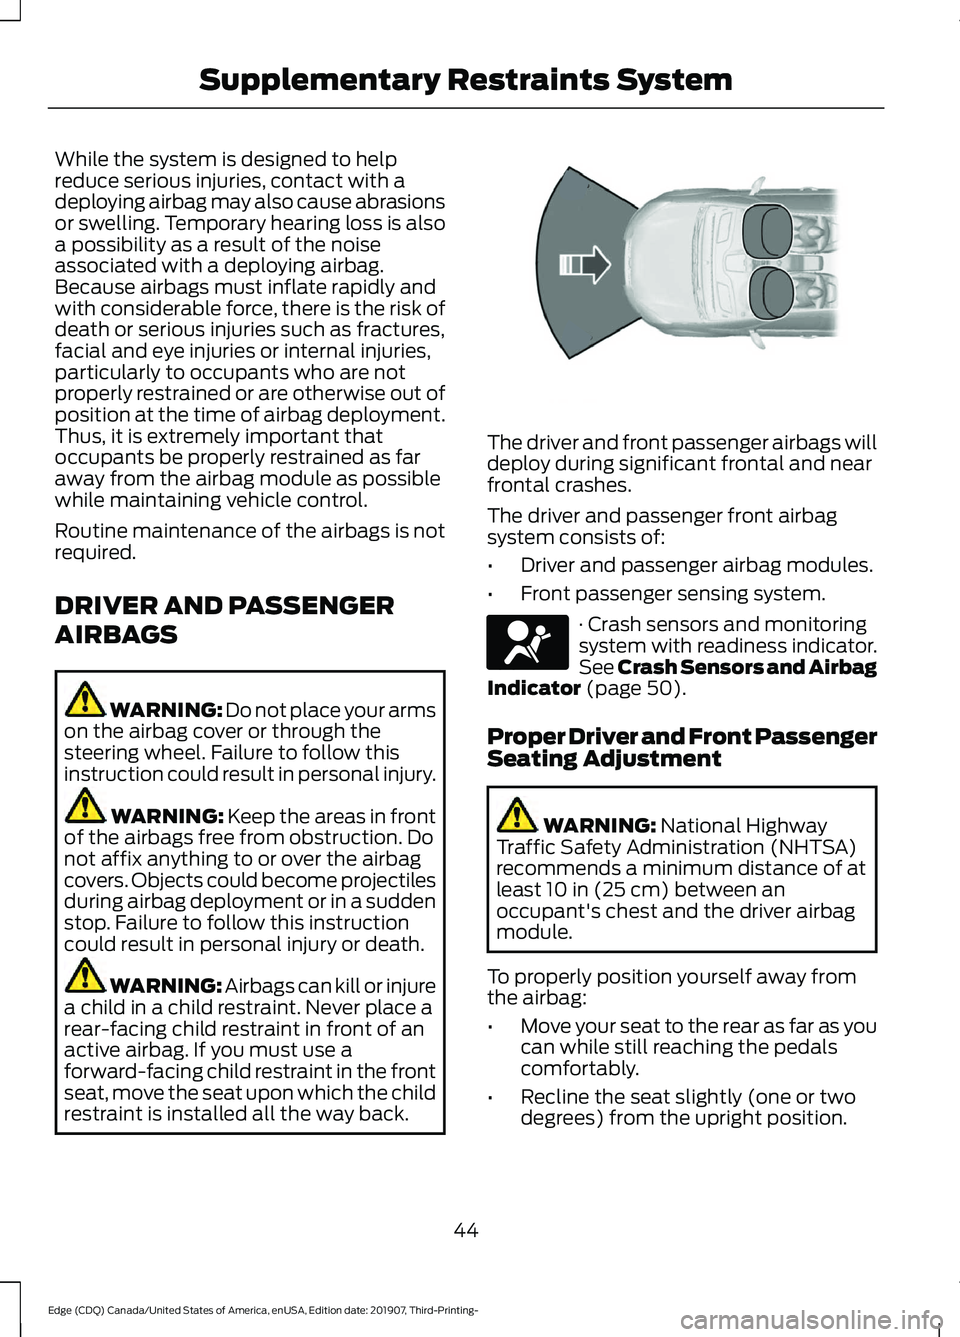
restraint is installed all the way back. The driver and front passenger airbags will
deploy during significant frontal and near
frontal crashes.
The driver and passenger front airbag
system consists of:
•
Driver and passenger airbag modules.
• Front passenger sensing system. · Crash sensors and monitoring
system with readiness indicator.
See Crash Sensors and Airbag
Indicator
(page 50).
Proper Driver and Front Passenger
Seating Adjustment WARNING:
National Highway
Traffic Safety Administration (NHTSA)
recommends a minimum distance of at
least
10 in (25 cm) between an
occupant's chest and the driver airbag
module.
To properly position yourself away from
the airbag:
• Move your seat to the rear as far as you
can while still reaching the pedals
comfortably.
• Recline the seat slightly (one or two
degrees) from the upright position.
44
Edge (CDQ) Canada/United States of America, enUSA, Edition date: 201907, Third-Printing- Supplementary Restraints System E151127 E67017
Page 50 of 495
After all occupants have adjusted their
seats and put on seatbelts, it is very
important that they continue to sit
properly. A properly seated occupant sits
upright, leaning against the seat backrest,
and centered on the seat cushion, with
their feet comfortably extended on the
floor. Sitting improperly can increase the
chance of injury in a crash event. For
example, if an occupant slouches, lies
down, turns sideways, sits forward, leans
forward or sideways, or puts one or both
feet up, the chance of injury during a crash
greatly increases.
If you think that the status of the passenger
airbag off indicator lamp is incorrect, check
for the following:
•
Objects lodged underneath the seat.
• Objects between the seat cushion and
the center console.
• Objects hanging off the seat backrest.
• Objects stowed in the seat backrest
map pocket.
• Objects placed on the occupant's lap.
• Cargo interference with the seat.
• Other passengers pushing or pulling on
the seat.
• Rear passenger feet and knees resting
or pushing on the seat.
The conditions listed above may cause the
weight of a properly seated occupant to
be incorrectly interpreted by the front
passenger sensing system. The person in
the front passenger seat may appear
heavier or lighter due to the conditions
described in the list above. Make sure the front passenger
sensing system is operating
properly. See Crash Sensors
and Airbag Indicator (page 50).
If the airbag readiness light is lit, do the
following: The driver and adult passengers should
check for objects lodged underneath the
front passenger seat, or cargo interfering
with the seat.
If there are lodged objects, or cargo is
interfering with the seat, take the following
steps to remove the obstruction:
•
Pull the vehicle over.
• Switch the vehicle off.
• Driver and adult passengers should
check for any objects lodged
underneath the front passenger seat
or cargo interfering with the seat.
• Remove the obstruction(s) (if found).
• Restart the vehicle.
• Wait at least two minutes and verify
that the airbag readiness light is no
longer illuminated.
• If the airbag readiness light remains
illuminated, this may or may not be a
problem due to the front passenger
sensing system.
Do not attempt to repair or service the
system. Take your vehicle immediately to
an authorized dealer.
If it is necessary to modify an advanced
front airbag system to accommodate a
person with disabilities, contact the Ford
Customer Relationship Center. See
Getting the Services You Need
(page
258).
SIDE AIRBAGS WARNING:
Do not place objects
or mount equipment on or near the
airbag cover, on the side of the front or
rear seatbacks, or in areas that may
come into contact with a deploying
airbag. Failure to follow these
instructions may increase the risk of
personal injury in the event of a crash.
47
Edge (CDQ) Canada/United States of America, enUSA, Edition date: 201907, Third-Printing- Supplementary Restraints SystemE67017
Page 53 of 495
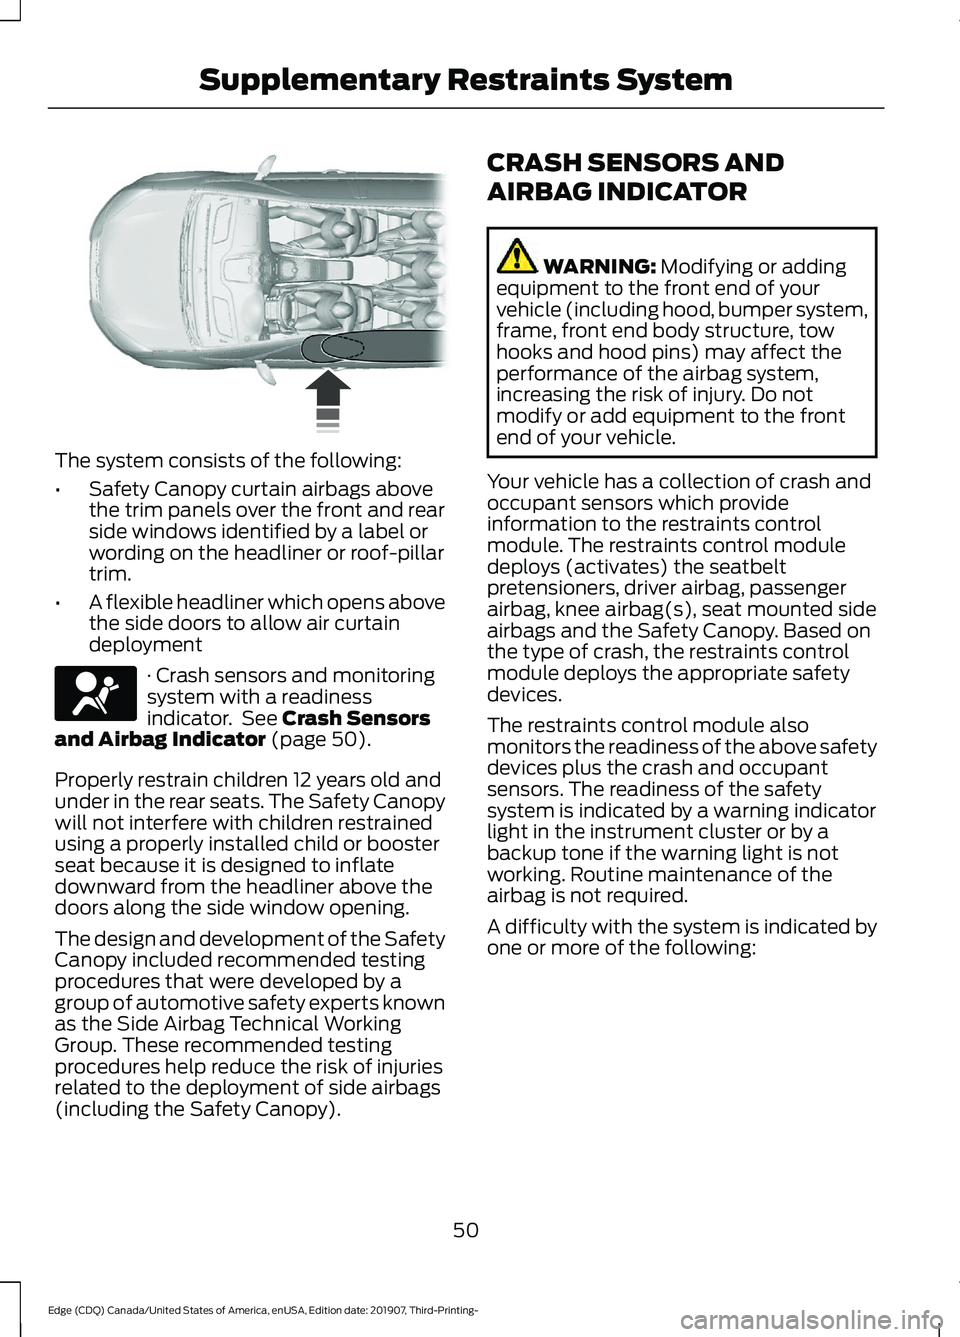
The system consists of the following:
•
Safety Canopy curtain airbags above
the trim panels over the front and rear
side windows identified by a label or
wording on the headliner or roof-pillar
trim.
• A flexible headliner which opens above
the side doors to allow air curtain
deployment · Crash sensors and monitoring
system with a readiness
indicator. See Crash Sensors
and Airbag Indicator (page 50).
Properly restrain children 12 years old and
under in the rear seats. The Safety Canopy
will not interfere with children restrained
using a properly installed child or booster
seat because it is designed to inflate
downward from the headliner above the
doors along the side window opening.
The design and development of the Safety
Canopy included recommended testing
procedures that were developed by a
group of automotive safety experts known
as the Side Airbag Technical Working
Group. These recommended testing
procedures help reduce the risk of injuries
related to the deployment of side airbags
(including the Safety Canopy). CRASH SENSORS AND
AIRBAG INDICATOR WARNING:
Modifying or adding
equipment to the front end of your
vehicle (including hood, bumper system,
frame, front end body structure, tow
hooks and hood pins) may affect the
performance of the airbag system,
increasing the risk of injury. Do not
modify or add equipment to the front
end of your vehicle.
Your vehicle has a collection of crash and
occupant sensors which provide
information to the restraints control
module. The restraints control module
deploys (activates) the seatbelt
pretensioners, driver airbag, passenger
airbag, knee airbag(s), seat mounted side
airbags and the Safety Canopy. Based on
the type of crash, the restraints control
module deploys the appropriate safety
devices.
The restraints control module also
monitors the readiness of the above safety
devices plus the crash and occupant
sensors. The readiness of the safety
system is indicated by a warning indicator
light in the instrument cluster or by a
backup tone if the warning light is not
working. Routine maintenance of the
airbag is not required.
A difficulty with the system is indicated by
one or more of the following:
50
Edge (CDQ) Canada/United States of America, enUSA, Edition date: 201907, Third-Printing- Supplementary Restraints System E75004 E67017
Page 60 of 495
Many states and provinces have
restrictions for the use of remote start.
Check your local and state or provincial
laws for specific requirements regarding
remote start systems.
The remote start system does not work if:
•
The ignition is on.
• The alarm system is triggered.
• You switch off the feature in the
information display. See Information
Displays (page 105).
• The hood is open.
• The transmission is not in park (P).
• The vehicle battery voltage is too low.
• The service engine soon light is on.
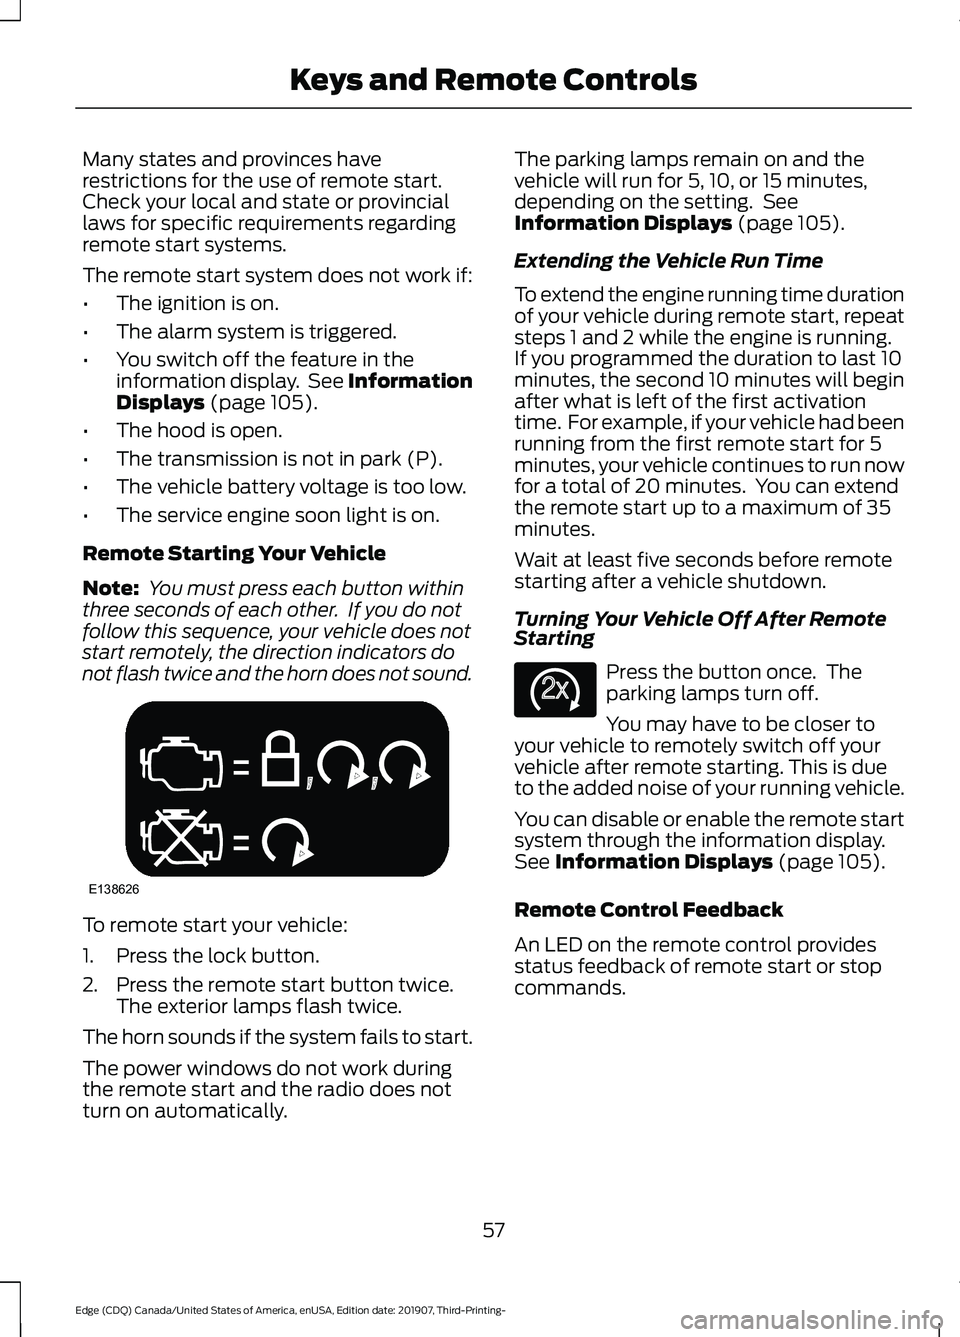
Remote Starting Your Vehicle
Note: You must press each button within
three seconds of each other. If you do not
follow this sequence, your vehicle does not
start remotely, the direction indicators do
not flash twice and the horn does not sound. To remote start your vehicle:
1. Press the lock button.
2. Press the remote start button twice.
The exterior lamps flash twice.
The horn sounds if the system fails to start.
The power windows do not work during
the remote start and the radio does not
turn on automatically. The parking lamps remain on and the
vehicle will run for 5, 10, or 15 minutes,
depending on the setting. See
Information Displays
(page 105).
Extending the Vehicle Run Time
To extend the engine running time duration
of your vehicle during remote start, repeat
steps 1 and 2 while the engine is running.
If you programmed the duration to last 10
minutes, the second 10 minutes will begin
after what is left of the first activation
time. For example, if your vehicle had been
running from the first remote start for 5
minutes, your vehicle continues to run now
for a total of 20 minutes. You can extend
the remote start up to a maximum of 35
minutes.
Wait at least five seconds before remote
starting after a vehicle shutdown.
Turning Your Vehicle Off After Remote
Starting Press the button once. The
parking lamps turn off.
You may have to be closer to
your vehicle to remotely switch off your
vehicle after remote starting. This is due
to the added noise of your running vehicle.
You can disable or enable the remote start
system through the information display.
See
Information Displays (page 105).
Remote Control Feedback
An LED on the remote control provides
status feedback of remote start or stop
commands.
57
Edge (CDQ) Canada/United States of America, enUSA, Edition date: 201907, Third-Printing- Keys and Remote ControlsE138626 E138625
Page 91 of 495
Note:
The brightness of the daytime running
lamps may decrease when the front fog
lamps are switched on.
Front Fog Lamp Indicator It illuminates when you switch
the front fog lamps on.
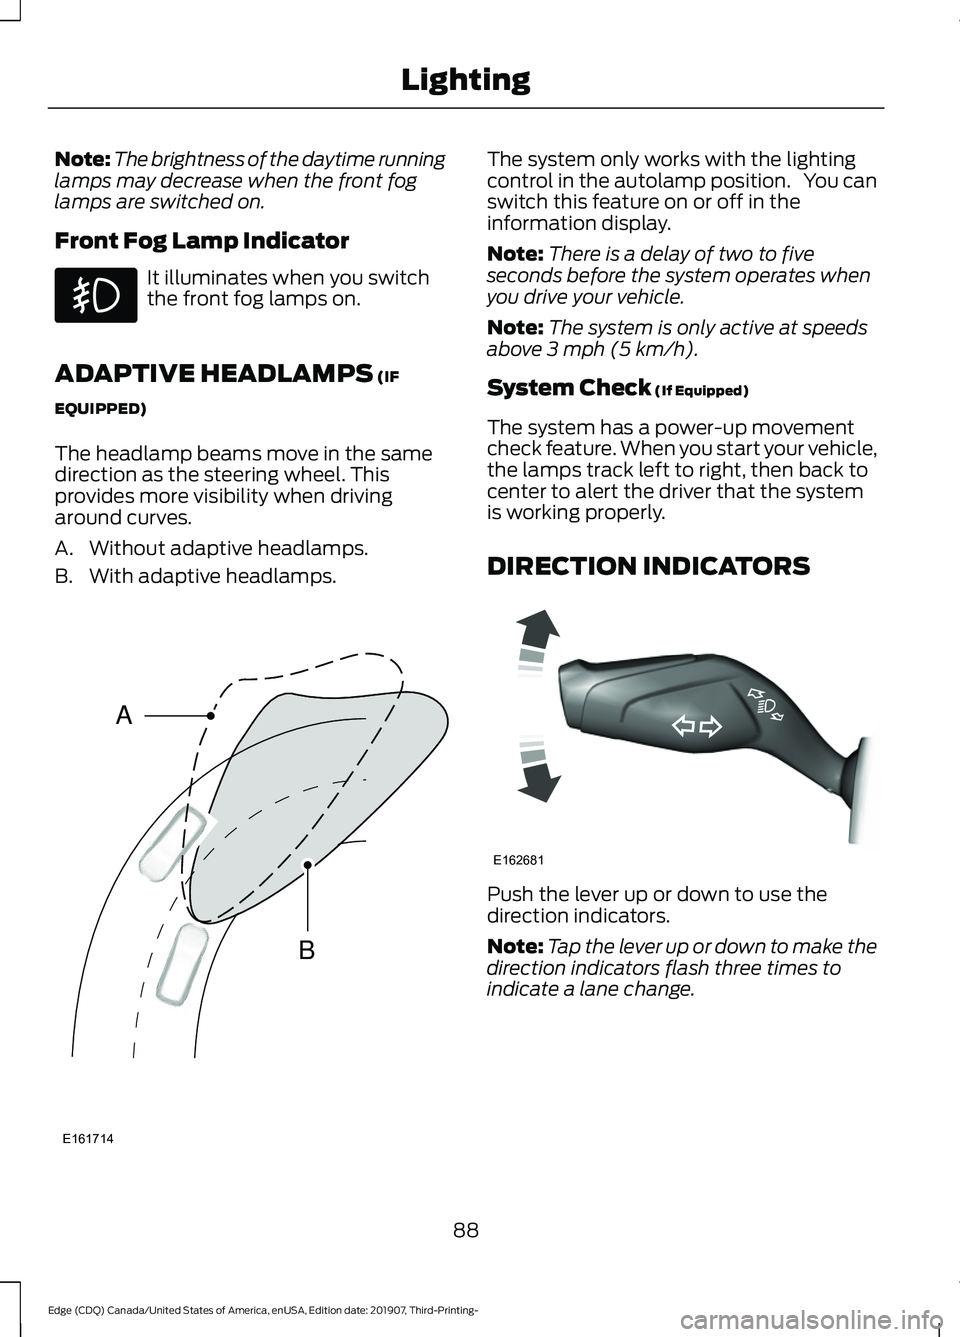
ADAPTIVE HEADLAMPS (IF
EQUIPPED)
The headlamp beams move in the same
direction as the steering wheel. This
provides more visibility when driving
around curves.
A. Without adaptive headlamps.
B. With adaptive headlamps. The system only works with the lighting
control in the autolamp position. You can
switch this feature on or off in the
information display.
Note:
There is a delay of two to five
seconds before the system operates when
you drive your vehicle.
Note: The system is only active at speeds
above
3 mph (5 km/h).
System Check
(If Equipped)
The system has a power-up movement
check feature. When you start your vehicle,
the lamps track left to right, then back to
center to alert the driver that the system
is working properly.
DIRECTION INDICATORS Push the lever up or down to use the
direction indicators.
Note:
Tap the lever up or down to make the
direction indicators flash three times to
indicate a lane change.
88
Edge (CDQ) Canada/United States of America, enUSA, Edition date: 201907, Third-Printing- Lighting E161714
B
A E162681
Page 96 of 495

POWER WINDOWS
WARNING: Do not leave children
unattended in your vehicle and do not
let them play with the power windows.
They may seriously injure themselves. WARNING:
When closing the
power windows, you should verify they
are free of obstructions and make sure
that children and pets are not in the
proximity of the window openings. Note:
You may hear a pulsing noise when
just one of the windows is open. Lower the
opposite window slightly to reduce this
noise.
Press the control to open the window.
Lift the control to close the window.
One-Touch Down
Press the control fully and release it. Press
again or lift it to stop the window.
One-Touch Up
Lift the control fully and release it. Press
again or lift it to stop the window. Resetting One-Touch Up
1. Lift and hold the control until the
window is fully closed.
2. Release the control.
3. Open the window and then try to close
it automatically.
4. Repeat the procedure if the window does not close automatically.
Note: The one-touch down and one-touch
up feature only applies to the front
windows.
Bounce-Back
The window will automatically stop and
reverse some distance if it detects an
obstacle while closing.
Overriding the Bounce-Back Feature WARNING:
When you override the
bounce-back feature the window will
not reverse if it detects an obstacle. Take
care when closing the windows to avoid
personal injury or damage to your
vehicle.
Pull up the window switch and hold within
two seconds of the window reaching the
bounce-back position. The window travels
up with no bounce-back protection. The
window stops if you release the switch
before the window is fully closed.
93
Edge (CDQ) Canada/United States of America, enUSA, Edition date: 201907, Third-Printing- Windows and MirrorsE146043
Page 99 of 495
Blind Spot Monitor
The design of the system is to detect
vehicles that could enter the blind spot
zone.
See Blind Spot Information System
(page 226).
INTERIOR MIRROR WARNING:
Do not adjust the
mirrors when your vehicle is moving. This
could result in the loss of control of your
vehicle, serious personal injury or death.
Note: Do not clean the mirror housing or
glass with harsh abrasives, fuel or other
petroleum-based cleaning products.
You can adjust the interior mirror to your
preference. Some mirrors also have a
second pivot point. This lets you move the
mirror head up or down and from side to
side.
Manual Dimming Mirror
Pull the tab below the mirror toward you
to reduce the effect of bright light from
behind.
Automatic Dimming Mirror (If Equipped)
Note: Do not block the sensors on the front
and back of the mirror. A rear center
passenger or raised rear center head
restraint may also block light from reaching
the sensor.
The mirror dims to reduce the effect of
bright light from behind. It returns to
normal when the bright light from behind
is no longer present or if you shift into
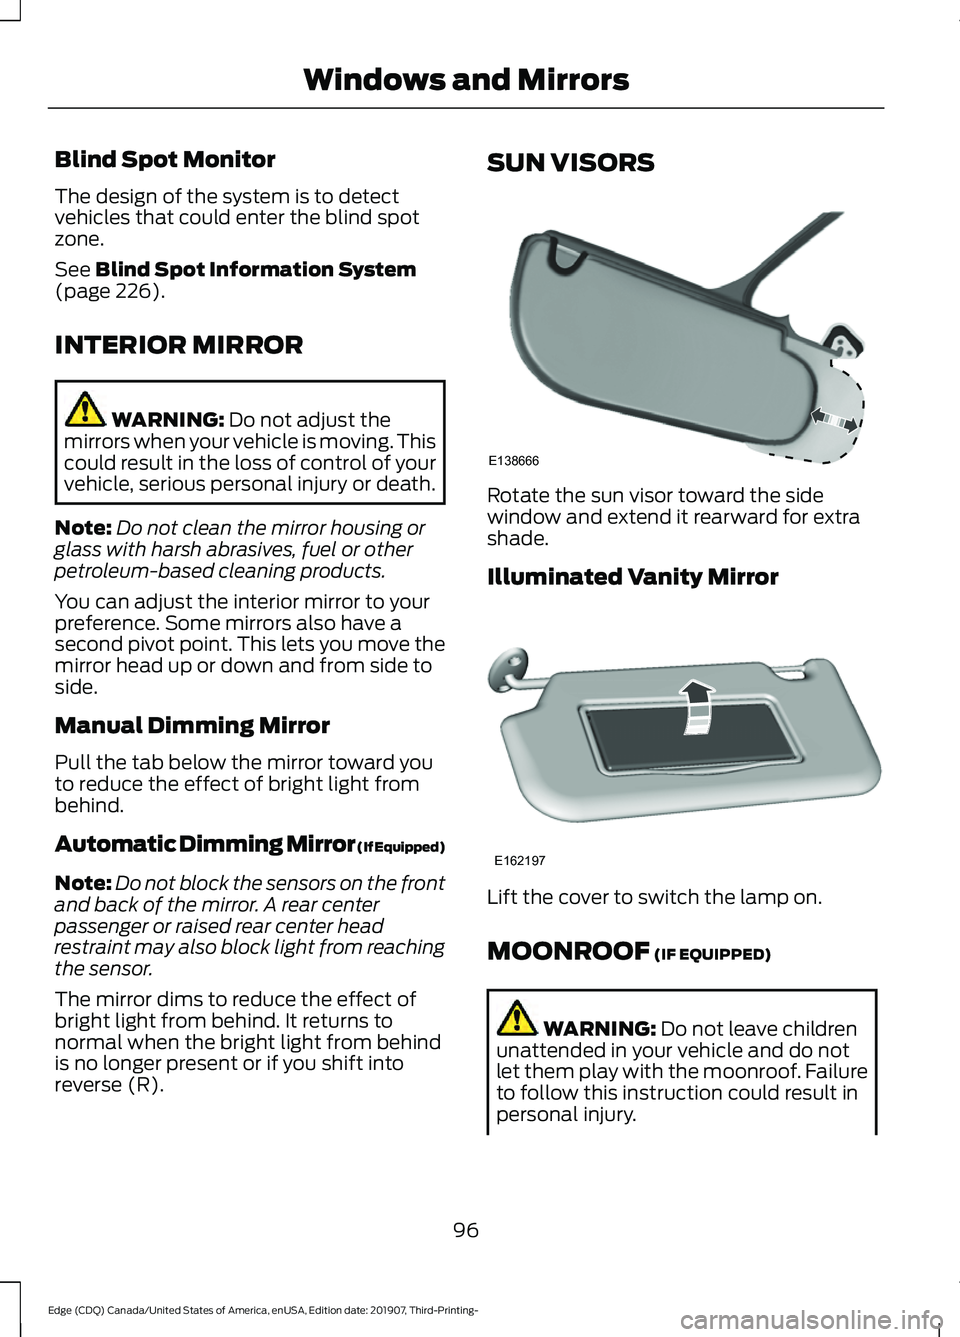
reverse (R). SUN VISORS
Rotate the sun visor toward the side
window and extend it rearward for extra
shade.
Illuminated Vanity Mirror
Lift the cover to switch the lamp on.
MOONROOF
(IF EQUIPPED)
WARNING:
Do not leave children
unattended in your vehicle and do not
let them play with the moonroof. Failure
to follow this instruction could result in
personal injury.
96
Edge (CDQ) Canada/United States of America, enUSA, Edition date: 201907, Third-Printing- Windows and MirrorsE138666 E162197
Page 113 of 495
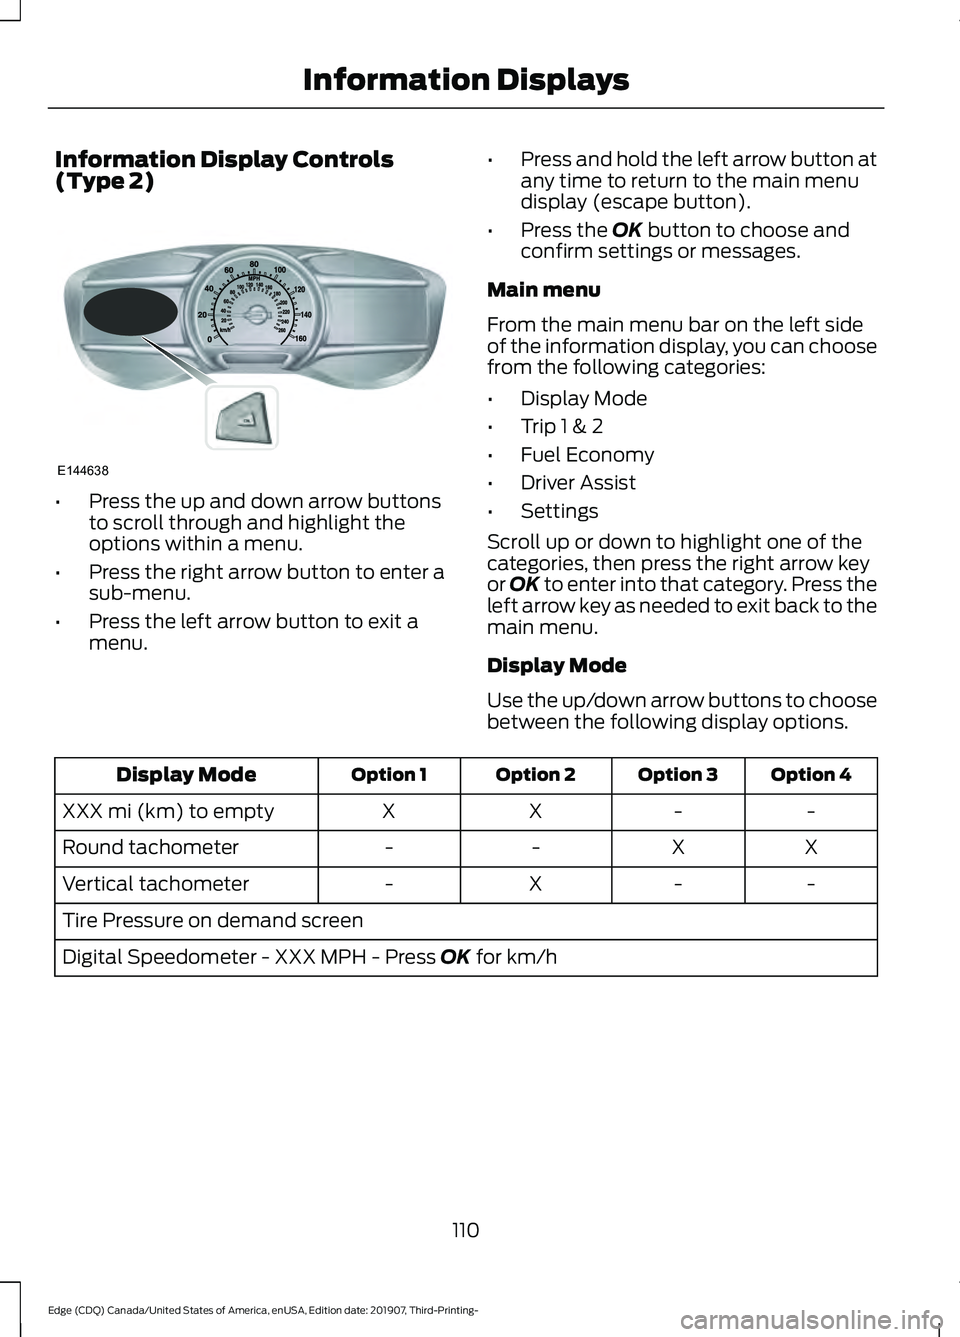
Information Display Controls
(Type 2)
•
Press the up and down arrow buttons
to scroll through and highlight the
options within a menu.
• Press the right arrow button to enter a
sub-menu.
• Press the left arrow button to exit a
menu. •
Press and hold the left arrow button at
any time to return to the main menu
display (escape button).
• Press the OK button to choose and
confirm settings or messages.
Main menu
From the main menu bar on the left side
of the information display, you can choose
from the following categories:
• Display Mode
• Trip 1 & 2
• Fuel Economy
• Driver Assist
• Settings
Scroll up or down to highlight one of the
categories, then press the right arrow key
or
OK to enter into that category. Press the
left arrow key as needed to exit back to the
main menu.
Display Mode
Use the up/down arrow buttons to choose
between the following display options. Option 4
Option 3
Option 2
Option 1
Display Mode
-
-
X
X
XXX mi (km) to empty
X
X
-
-
Round tachometer
-
-
X
-
Vertical tachometer
Tire Pressure on demand screen
Digital Speedometer - XXX MPH - Press
OK for km/h
110
Edge (CDQ) Canada/United States of America, enUSA, Edition date: 201907, Third-Printing- Information DisplaysE144638