check engine FORD ESCAPE 2002 1.G User Guide
[x] Cancel search | Manufacturer: FORD, Model Year: 2002, Model line: ESCAPE, Model: FORD ESCAPE 2002 1.GPages: 280, PDF Size: 2.75 MB
Page 226 of 280
SERVICE RECOMMENDATIONS
To help you service your vehicle:
²We highlight do-it-yourself items in the engine compartment for easy
location.
²We provide a scheduled maintenance guide which makes tracking
routine service easy.
If your vehicle requires professional service, your dealership can provide
the necessary parts and service. Check yourWarranty Guideto find out
which parts and services are covered.
Use only recommended fuels, lubricants, fluids and service parts
conforming to specifications. Motorcraft parts are designed and built to
provide the best performance in your vehicle.
PRECAUTIONS WHEN SERVICING YOUR VEHICLE
Be especially careful when inspecting or servicing your vehicle.
²Do not work on a hot engine.
²When the engine is running, make sure that loose clothing, jewelry or
long hair does not get caught up in moving parts.
²Do not work on a vehicle with the engine running in an enclosed
space, unless you are sure you have enough ventilation.
²Keep all lit cigarettes, open flames and other lit material away from
the battery and all fuel related parts.
If you disconnect the battery, the engine must ªrelearnº its idle
conditions before your vehicle will drive properly, as explained in the
Batterysection of this chapter.
Working with the engine off
²Automatic transmission:
1. Set the parking brake and ensure the gearshift is securely latched in P
(Park).
2. Turn off the engine and remove the key.
3. Block the wheels to prevent the vehicle from moving unexpectedly.
²Manual transmission:
1. Set the parking brake.
2. Depress the clutch and place the gearshift in 1 (First).
Maintenance and Specifications
226
Page 231 of 280
WINDSHIELD WASHER FLUID
Checking and adding washer fluid
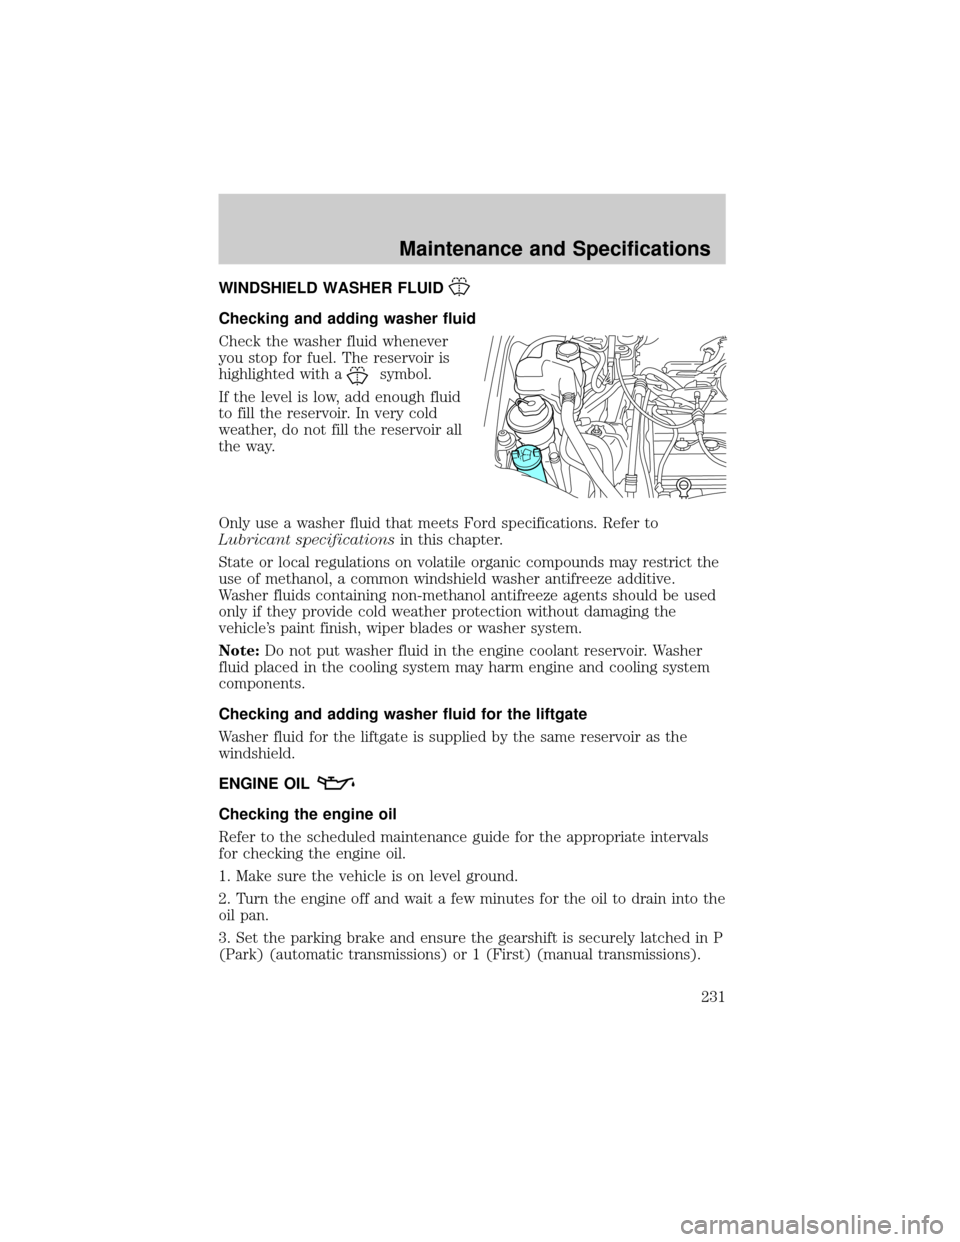
Check the washer fluid whenever
you stop for fuel. The reservoir is
highlighted with a
symbol.
If the level is low, add enough fluid
to fill the reservoir. In very cold
weather, do not fill the reservoir all
the way.
Only use a washer fluid that meets Ford specifications. Refer to
Lubricant specificationsin this chapter.
State or local regulations on volatile organic compounds may restrict the
use of methanol, a common windshield washer antifreeze additive.
Washer fluids containing non-methanol antifreeze agents should be used
only if they provide cold weather protection without damaging the
vehicle's paint finish, wiper blades or washer system.
Note:Do not put washer fluid in the engine coolant reservoir. Washer
fluid placed in the cooling system may harm engine and cooling system
components.
Checking and adding washer fluid for the liftgate
Washer fluid for the liftgate is supplied by the same reservoir as the
windshield.
ENGINE OIL
Checking the engine oil
Refer to the scheduled maintenance guide for the appropriate intervals
for checking the engine oil.
1. Make sure the vehicle is on level ground.
2. Turn the engine off and wait a few minutes for the oil to drain into the
oil pan.
3. Set the parking brake and ensure the gearshift is securely latched in P
(Park) (automatic transmissions) or 1 (First) (manual transmissions).
Maintenance and Specifications
231
Page 233 of 280
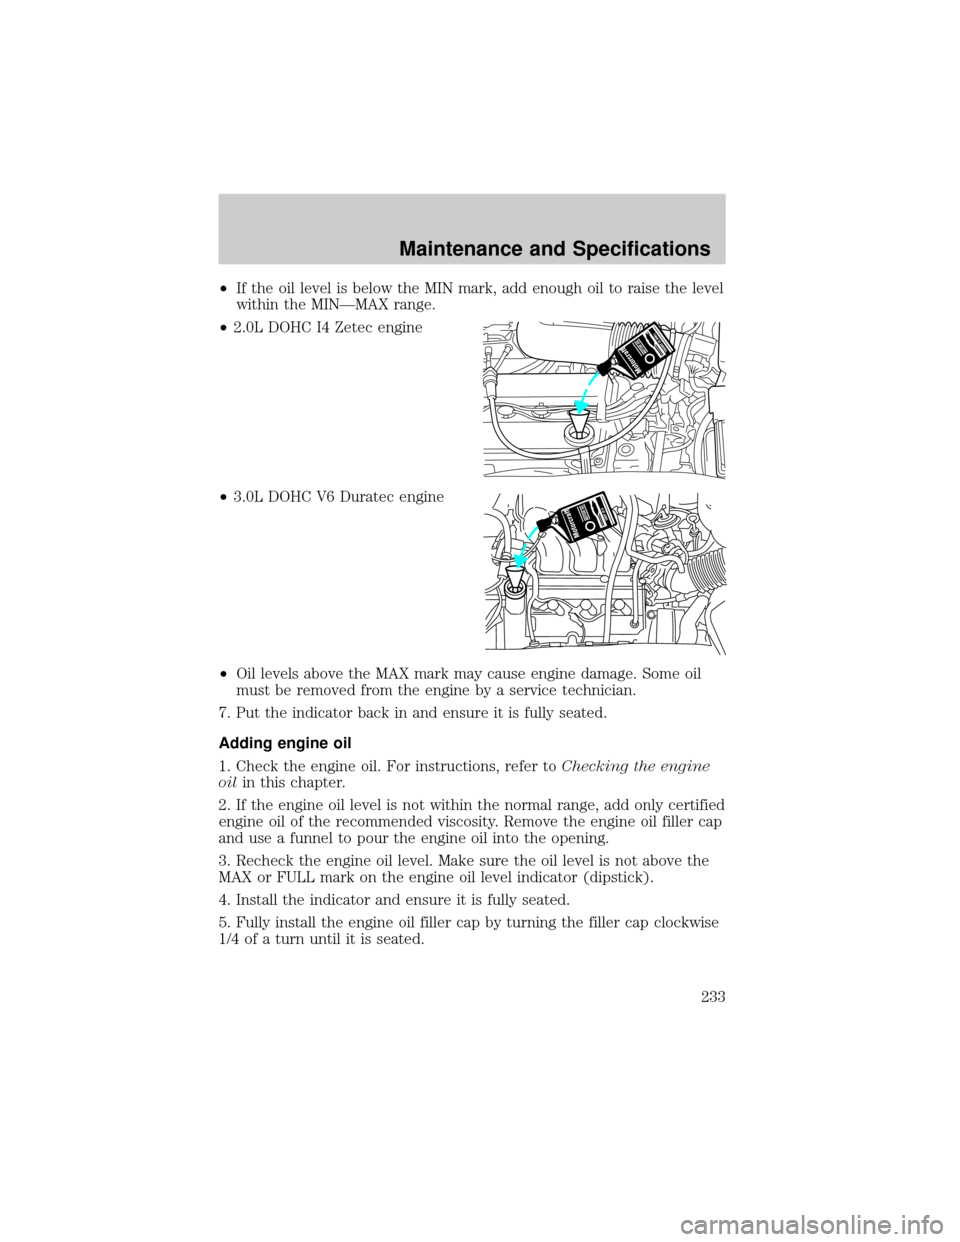
²If the oil level is below the MIN mark, add enough oil to raise the level
within the MINÐMAX range.
²2.0L DOHC I4 Zetec engine
²3.0L DOHC V6 Duratec engine
²Oil levels above the MAX mark may cause engine damage. Some oil
must be removed from the engine by a service technician.
7. Put the indicator back in and ensure it is fully seated.
Adding engine oil
1. Check the engine oil. For instructions, refer toChecking the engine
oilin this chapter.
2. If the engine oil level is not within the normal range, add only certified
engine oil of the recommended viscosity. Remove the engine oil filler cap
and use a funnel to pour the engine oil into the opening.
3. Recheck the engine oil level. Make sure the oil level is not above the
MAX or FULL mark on the engine oil level indicator (dipstick).
4. Install the indicator and ensure it is fully seated.
5. Fully install the engine oil filler cap by turning the filler cap clockwise
1/4 of a turn until it is seated.
Maintenance and Specifications
233
Page 237 of 280
will not affect function or durability of the transmission. Over time the
adaptive learning process will fully update transmission operation to its
optimum shift feel.
If the battery has been disconnected or a new battery has been installed,
the clock and the preset radio stations must be reset once the battery is
reconnected.
²Always dispose of automotive
batteries in a responsible manner.
Follow your local authorized
standards for disposal. Call your
local authorized recycling center
to find out more about recycling
automotive batteries.
ENGINE COOLANT
Checking engine coolant
The concentration and level of engine coolant should be checked at the
mileage intervals listed in the scheduled maintenance guide. The coolant
concentration should be maintained at 50/50 coolant and water, which
equates to a freeze point of -36É C (-34É F). Coolant concentration
testing is possible with a hydrometer or antifreeze tester (such as the
Rotunda Battery and Antifreeze Tester, 014±R1060). The level of coolant
should be maintained at the ªcold fullº of ªcold fill rangeº level in the
coolant reservoir. If the level falls below, add coolant per the instructions
in theAdding engine coolantsection.
Your vehicle was factory-filled with a 50/50 engine coolant and water
concentration. If the concentration of coolant falls below 40% or above
60%, the engine parts could become damaged or not work properly.A
50±50 mixture of coolant and water provides the following:
²Freeze protection down to -36É C (-34É F).
²Boiling protection up to 129É C (265É F).
²Protection against rust and other forms of corrosion.
²Enables calibrated gauges to work properly.
LEAD
RETURN
RECYCLE
Maintenance and Specifications
237
Page 238 of 280
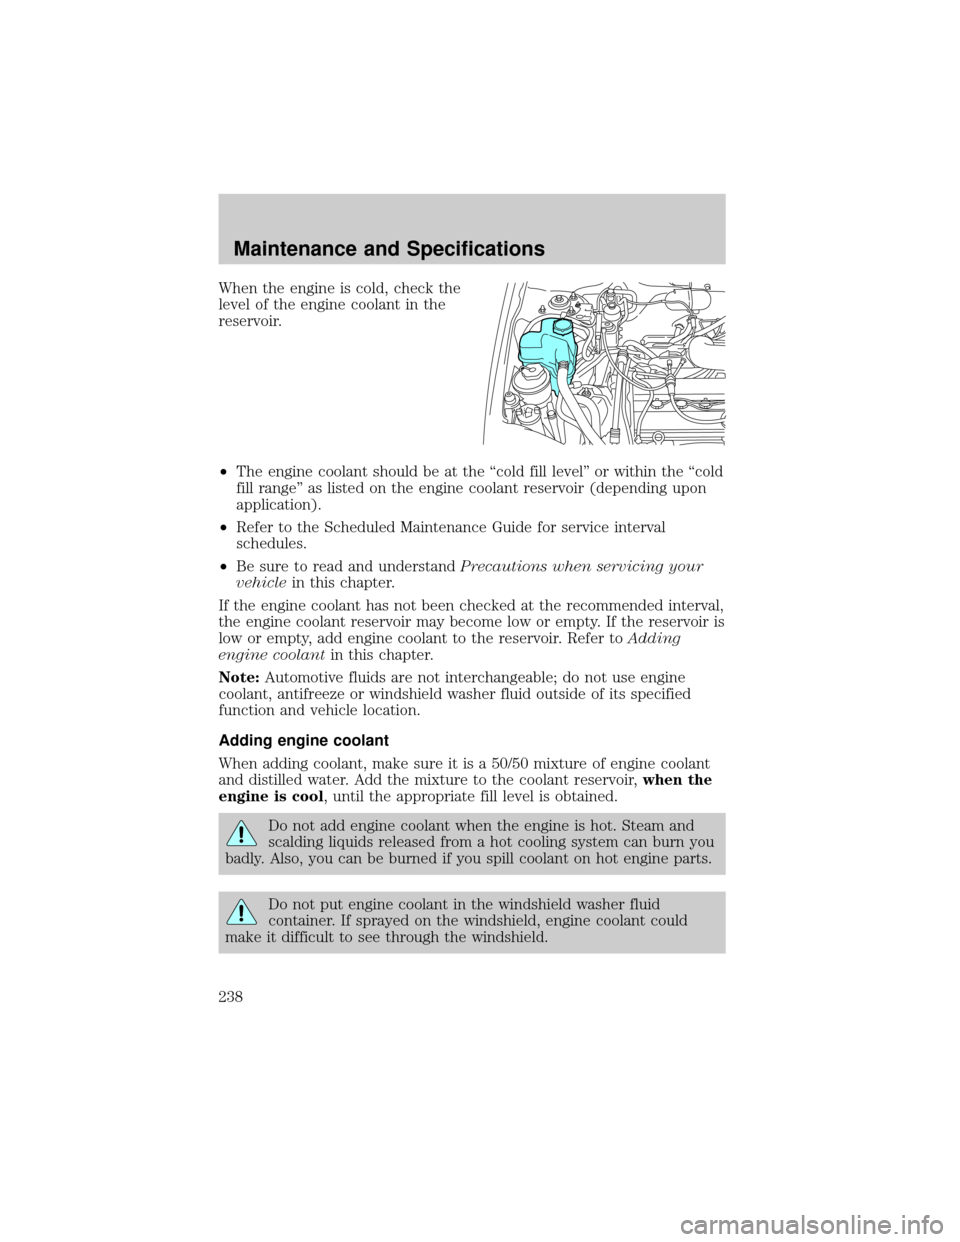
When the engine is cold, check the
level of the engine coolant in the
reservoir.
²The engine coolant should be at the ªcold fill levelº or within the ªcold
fill rangeº as listed on the engine coolant reservoir (depending upon
application).
²Refer to the Scheduled Maintenance Guide for service interval
schedules.
²Be sure to read and understandPrecautions when servicing your
vehiclein this chapter.
If the engine coolant has not been checked at the recommended interval,
the engine coolant reservoir may become low or empty. If the reservoir is
low or empty, add engine coolant to the reservoir. Refer toAdding
engine coolantin this chapter.
Note:Automotive fluids are not interchangeable; do not use engine
coolant, antifreeze or windshield washer fluid outside of its specified
function and vehicle location.
Adding engine coolant
When adding coolant, make sure it is a 50/50 mixture of engine coolant
and distilled water. Add the mixture to the coolant reservoir,when the
engine is cool, until the appropriate fill level is obtained.
Do not add engine coolant when the engine is hot. Steam and
scalding liquids released from a hot cooling system can burn you
badly. Also, you can be burned if you spill coolant on hot engine parts.
Do not put engine coolant in the windshield washer fluid
container. If sprayed on the windshield, engine coolant could
make it difficult to see through the windshield.
Maintenance and Specifications
238
Page 239 of 280
The cooling system in your vehicle is filled with either green-colored
Motorcraft Premium Engine Coolant meeting Ford specification
ESE-M97B44±A or yellow-colored Motorcraft Premium Gold Engine
Coolant meeting Ford Specification WSS-M97B51±A1. To determine your
vehicle's coolant type (color), check your coolant reservoir.
²Add Motorcraft Premium Engine Coolant (green-colored),
VC-4±A (U.S.) or CXC-10 (Canada) or Motorcraft Premium
Gold Engine Coolant (yellow-colored), VC-7±A (VC-7±B in
Oregon), depending on the type of coolant originally equipped
in your vehicle.If you are unsure which type of coolant your vehicle
requires, check your coolant reservoir or contact your local dealer.
Note:Use of Motorcraft Cooling System Stop Leak Pellets, VC-6,
darkens the color of Motorcraft Premium Gold Engine Coolant from
yellow to golden tan.
²Do not add/mix an orange-colored, extended life coolant such
as Motorcraft Speciality Orange Engine Coolant, VC-2 (US) or
CXC-209 (Canada), meeting Ford specification WSS-M97B44±D
with the factory-filled coolant.Mixing Motorcraft Speciality Orange
Engine Coolant or any orange-colored extended life product with your
factory filled coolant can result in degraded corrosion protection.
²A large amount of water without engine coolant may be added, in case
of emergency, to reach a vehicle service location. In this instance, the
cooling system must be drained and refilled with a 50/50 mixture of
engine coolant and distilled water as soon as possible. Water alone
(without engine coolant) can cause engine damage from corrosion,
overheating or freezing.
²Do not use alcohol, methanol, brine or any engine coolants
mixed with alcohol or methanol antifreeze (coolant).Alcohol
and other liquids can cause engine damage from overheating or
freezing.
²Do not add extra inhibitors or additives to the coolant.These
can be harmful and compromise the corrosion protection of the engine
coolant.
²Do not mix with recycled coolant unless from a Ford-approved
recycling process (seeUse of Recycled engine coolantsection).
For vehicles with overflow coolant systems with a non-pressurized cap
on the coolant recovery system, add coolant to the coolant recovery
reservoir when the engine is cool. Add the proper mixture of coolant and
water to the ªcold fullº level. For all other vehicles, which have a coolant
Maintenance and Specifications
239
Page 240 of 280
degas system with a pressurized cap, or if it is necessary to remove the
coolant pressure relief cap on the radiator of a vehicle with an overflow
system, follow these steps to add engine coolant.
To reduce the risk of personal injury, make sure the engine is
cool before unscrewing the coolant pressure relief cap. The
cooling system is under pressure; steam and hot liquid can come out
forcefully when the cap is loosened slightly.
1. Before you begin, turn the engine off and let it cool.
2. When the engine is cool, wrap a thick cloth around the coolant
pressure relief cap on the coolant reservoir (an opaque plastic bottle).
Slowly turn cap counterclockwise (left) until pressure begins to release.
3. Step back while the pressure releases.
4. When you are sure that all the pressure has been released, use the
cloth to turn it counterclockwise and remove the cap.
5. Fill the coolant reservoir slowly with the proper coolant mixture (see
above), to within the ªcold fill rangeº or the ªcold fullº level on the
reservoir. If you removed the radiator cap in an overflow system, fill the
radiator until the coolant is visible and radiator is almost full.
6. Replace the cap. Turn until tightly installed. (Cap must be tightly
installed to prevent coolant loss.)
After any coolant has been added, check the coolant concentration see
Checking Engine Coolant section). If the concentration is not 50/50
(protection to ±34É F/±36É C), drain some coolant and adjust the
concentration. It may take several drains and additions to obtain a 50/50
coolant concentration.
Whenever coolant has been added, the coolant level in the coolant
reservoir should be checked the next few times you drive the vehicle. If
necessary, add enough 50/50 concentration of engine coolant and
distilled water to bring the liquid level to the proper level.
If you have to add more than 1.0 liter (1.0 quart) of engine coolant per
month, have your dealer check the engine cooling system. Your cooling
system may have a leak. Operating an engine with a low level of coolant
can result in engine overheating and possible engine damage.
Maintenance and Specifications
240
Page 244 of 280
The flow of fuel through a fuel pump nozzle can produce static
electricity, which can cause a fire if fuel is pumped into an
ungrounded fuel container.
Use the following guidelines to avoid static build-up when filling an
ungrounded fuel container:
²Place approved fuel container on the ground.
²DO NOT fill a fuel container while it is in the vehicle (including the
cargo area).
²Keep the fuel pump nozzle in contact with the fuel container while
filling.
²DO NOT use a device that would hold the fuel pump handle in the fill
position.
Fuel Filler Cap
Your fuel tank filler cap has an indexed design with a 1/8 turn on/off
feature.
When fueling your vehicle:
1. Turn the engine off.
2. Carefully turn the filler cap counterclockwise 1/8 of a turn until it
stops.
3. Pull to remove the cap from the fuel filler pipe.
4. To install the cap, align the tabs on the cap with the notches on the
filler pipe.
5. Turn the filler cap clockwise 1/8 of a turn until it stops.
After refueling, if the ªCHECK FUEL CAPº
indicator comes on and
stays on when you start the engine, the fuel filler cap may not be
properly installed. Turn off the engine, remove the fuel filler cap, align
the cap properly and reinstall it securely. The
indicator should turn
off after three driving cycles with the fuel filler cap properly installed. A
driving cycle consists of a cold engine start-up followed by mixed
city/highway driving.
If you must replace the fuel filler cap, replace it with a fuel filler
cap that is designed for your vehicle. The customer warranty may
be void for any damage to the fuel tank or fuel system if the
correct genuine Ford or Motorcraft fuel filler cap is not used.
Maintenance and Specifications
244
Page 246 of 280
more pronounced. If the problems persist, see your dealer or a qualified
service technician.
It should not be necessary to add any aftermarket products to your fuel
tank if you continue to use high quality fuel of the recommended octane
rating. Aftermarket products could cause damage to the fuel system.
Repairs to correct the effects of using an aftermarket product in your
fuel may not be covered by your warranty.
Many of the world's automakers
issued the World-wide Fuel Charter
that recommends gasoline
specifications to provide improved
performance and emission control
system protection for your vehicle.
Gasolines that meet the World-wide
Fuel Charter should be used when
available. Ask your fuel supplier
about gasolines that meet the
World-wide Fuel Charter. In Canada,
look for fuels that display theAuto Makers' Choiceylogo.
Cleaner air
Ford endorses the use of reformulated ªcleaner-burningº gasolines to
improve air quality.
Running out of fuel
Avoid running out of fuel because this situation may have an adverse
affect on powertrain components.
If you have run out of fuel:
²You may need to cycle the ignition from OFF to ON several times after
refueling, to allow the fuel system to pump the fuel from the tank to
the engine.
²The
indicator may come on. For more information on the ªCheck
Engineº indicator, refer to theInstrument Clusterchapter.
Fuel Filter
For fuel filter replacement, see your dealer or a qualified service
technician. Refer to the scheduled maintenance guide for the appropriate
intervals for changing the fuel filter.
Maintenance and Specifications
246
Page 249 of 280
![FORD ESCAPE 2002 1.G User Guide ²Sudden or hard accelerations may reduce fuel economy.
²Slow down gradually.
²Driving at reasonable speeds (traveling at 88 km/h [55 mph] uses 15%
less fuel than traveling at 105 km/h [65 mph]).
² FORD ESCAPE 2002 1.G User Guide ²Sudden or hard accelerations may reduce fuel economy.
²Slow down gradually.
²Driving at reasonable speeds (traveling at 88 km/h [55 mph] uses 15%
less fuel than traveling at 105 km/h [65 mph]).
²](/img/11/4853/w960_4853-248.png)
²Sudden or hard accelerations may reduce fuel economy.
²Slow down gradually.
²Driving at reasonable speeds (traveling at 88 km/h [55 mph] uses 15%
less fuel than traveling at 105 km/h [65 mph]).
²Revving the engine before turning it off may reduce fuel economy.
²Using the air conditioner or defroster may reduce fuel economy.
²You may want to turn off the speed control in hilly terrain if
unnecessary shifting between third and fourth gear occurs.
Unnecessary shifting of this type could result in reduced fuel
economy.
²Warming up a vehicle on cold mornings is not required and may
reduce fuel economy.
²Resting your foot on the brake pedal while driving may reduce fuel
economy.
²Combine errands and minimize stop-and-go driving.
Maintenance
²Keep tires properly inflated and use only recommended size.
²Operating a vehicle with the wheels out of alignment will reduce fuel
economy.
²Use recommended engine oil. Refer toLubricant specificationsin
this chapter.
²Perform all regularly scheduled maintenance items. Follow the
recommended maintenance schedule and owner maintenance checks
found in your vehicle scheduled maintenance guide.
Conditions
²Heavily loading a vehicle or towing a trailer may reduce fuel economy
at any speed.
²Carrying unnecessary weight may reduce fuel economy (approximately
0.4 km/L [1 mpg] is lost for every 180 kg [400 lb] of weight carried).
²Adding certain accessories to your vehicle (for example bug
deflectors, rollbars/light bars, running boards, ski/luggage racks) may
reduce fuel economy.
²Using fuel blended with alcohol may lower fuel economy.
Maintenance and Specifications
249