key FORD ESCAPE 2002 1.G User Guide
[x] Cancel search | Manufacturer: FORD, Model Year: 2002, Model line: ESCAPE, Model: FORD ESCAPE 2002 1.GPages: 280, PDF Size: 2.75 MB
Page 111 of 280
PERIMETER ALARM SYSTEM (IF EQUIPPED)
The perimeter anti-theft system will help prevent your vehicle from
unauthorized entry.
If there is any potential perimeter anti-theft problem with your vehicle,
ensureALL remote entry transmittersare brought to the dealership,
to aid in troubleshooting.
Arming the system
When armed, this system will help protect your vehicle from
unauthorized entry. When unauthorized entry occurs, the system will
flash the headlamps, parking lamps and will sound the horn.
The system is ready to arm whenever the key is removed from the
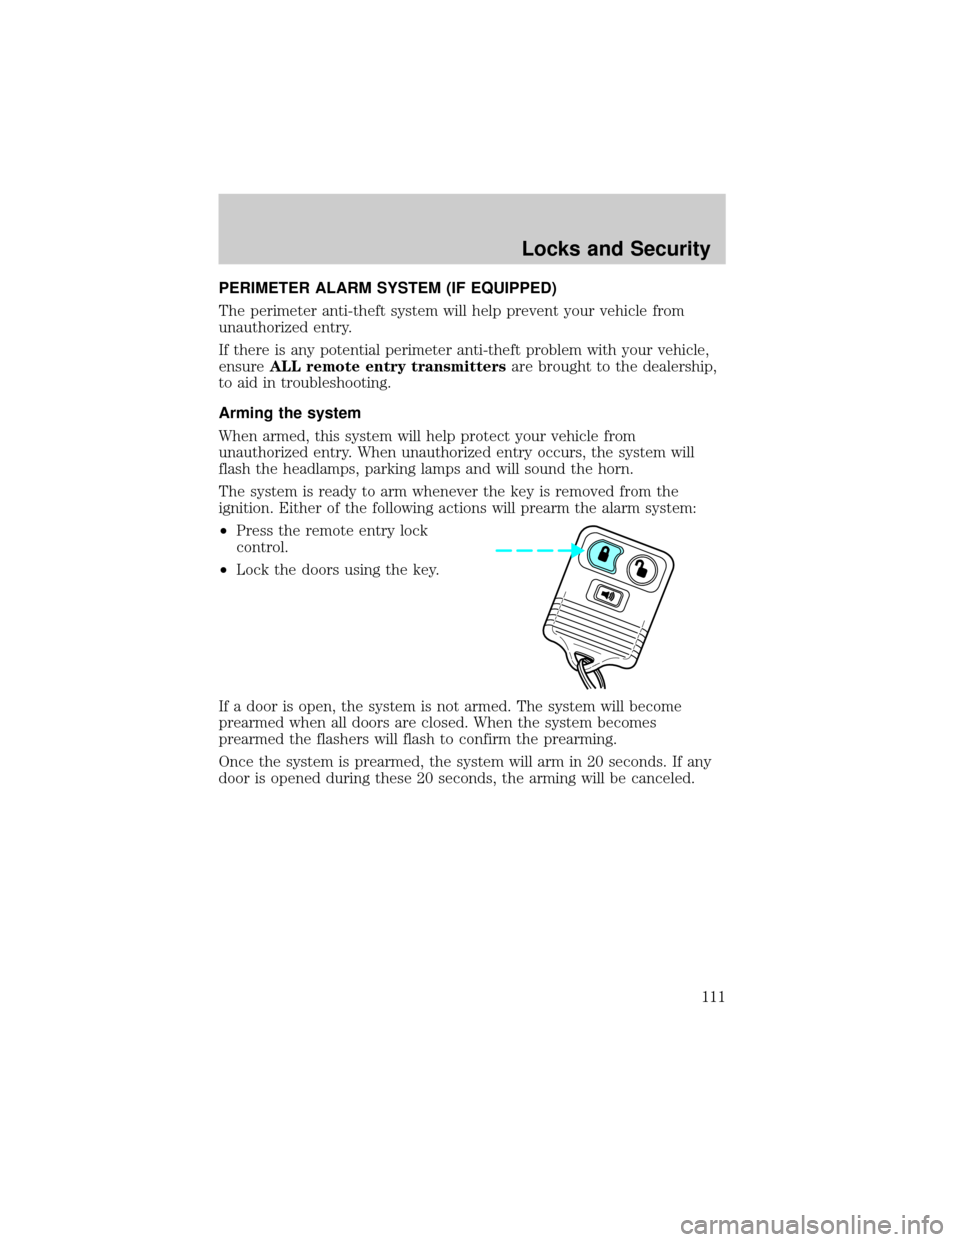
ignition. Either of the following actions will prearm the alarm system:
²Press the remote entry lock
control.
²Lock the doors using the key.
If a door is open, the system is not armed. The system will become
prearmed when all doors are closed. When the system becomes
prearmed the flashers will flash to confirm the prearming.
Once the system is prearmed, the system will arm in 20 seconds. If any
door is opened during these 20 seconds, the arming will be canceled.
Locks and Security
111
Page 112 of 280
Disarming the system
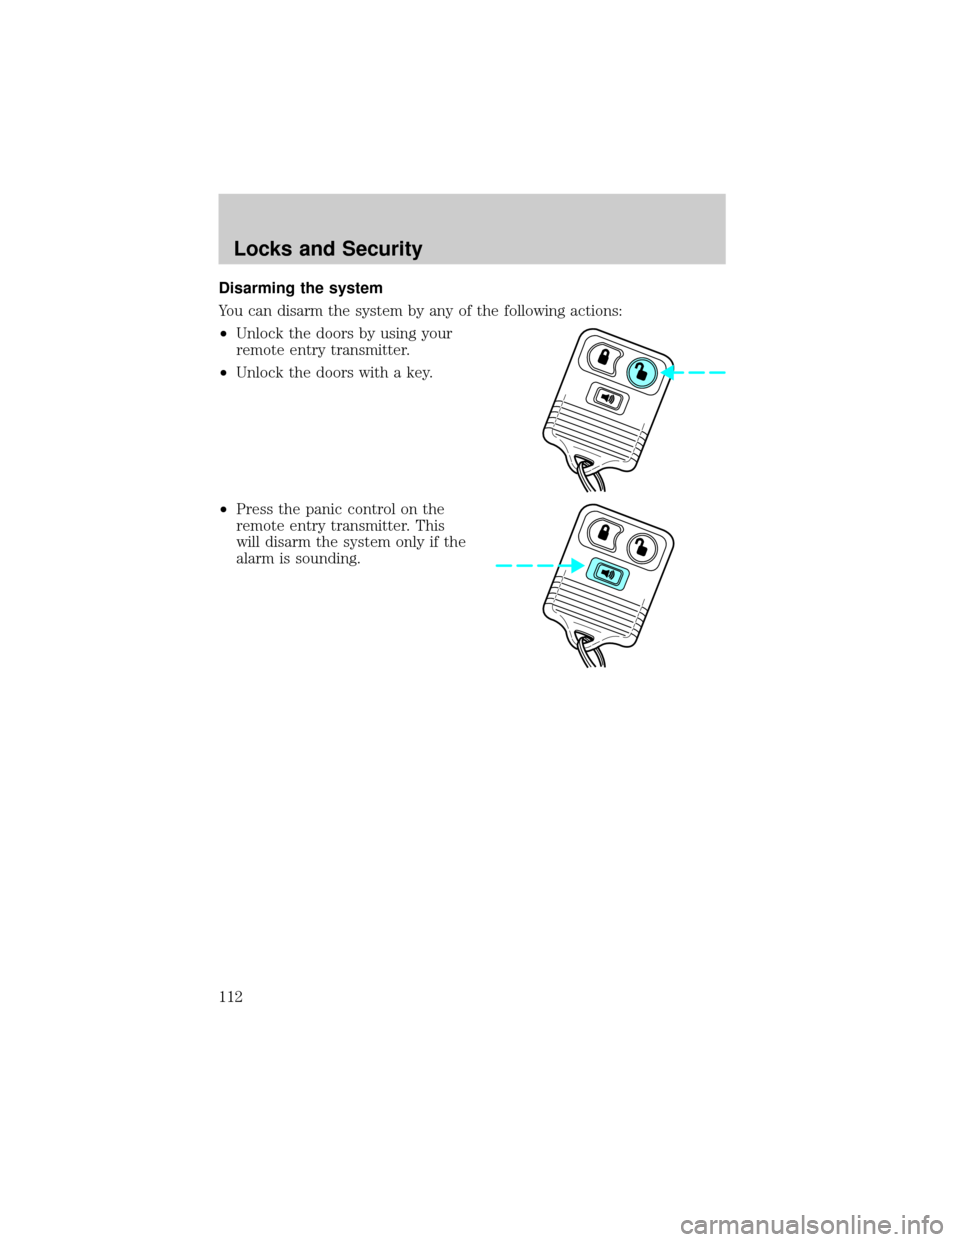
You can disarm the system by any of the following actions:
²Unlock the doors by using your
remote entry transmitter.
²Unlock the doors with a key.
²Press the panic control on the
remote entry transmitter. This
will disarm the system only if the
alarm is sounding.
Locks and Security
112
Page 154 of 280
STARTING
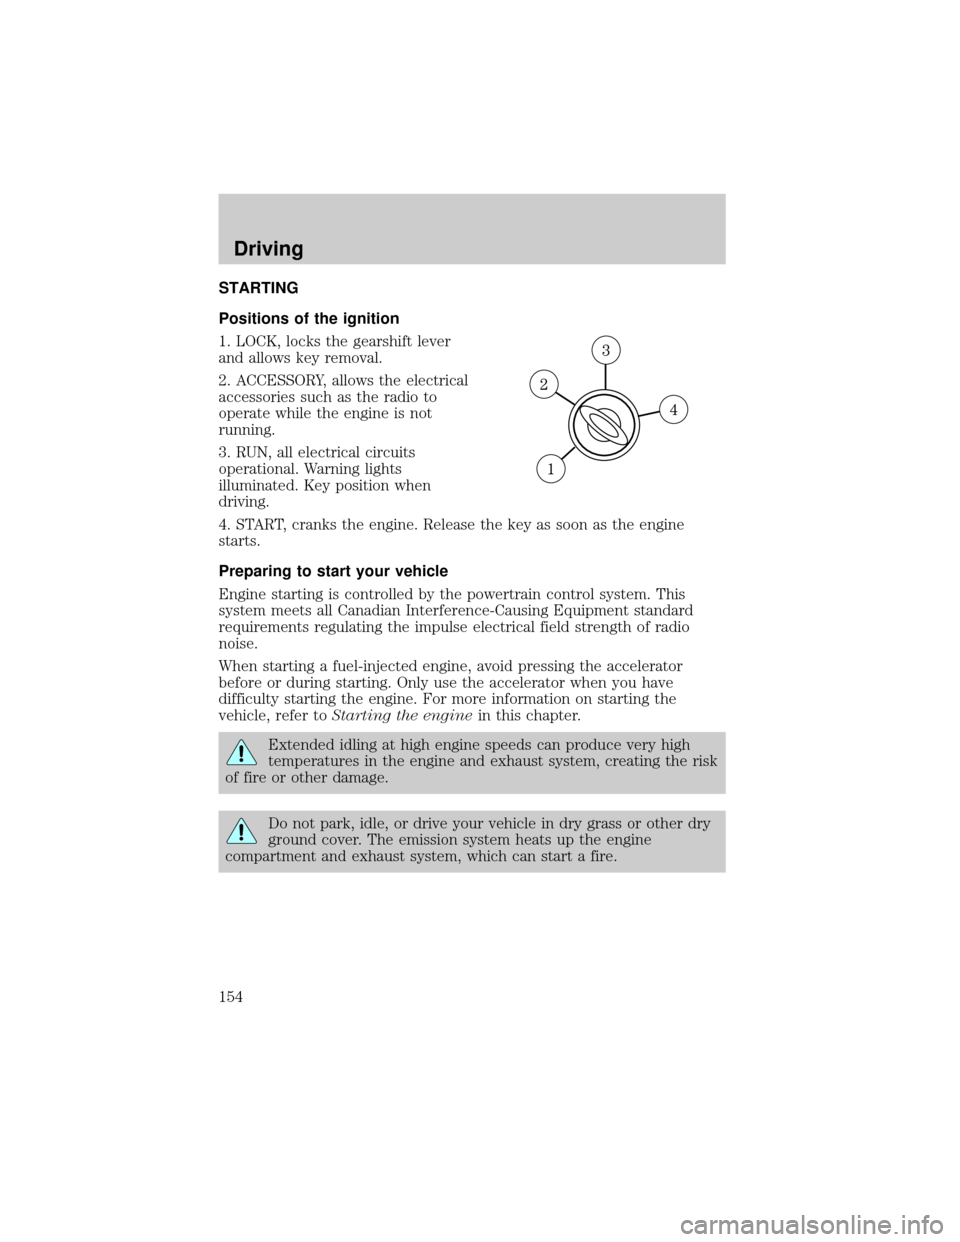
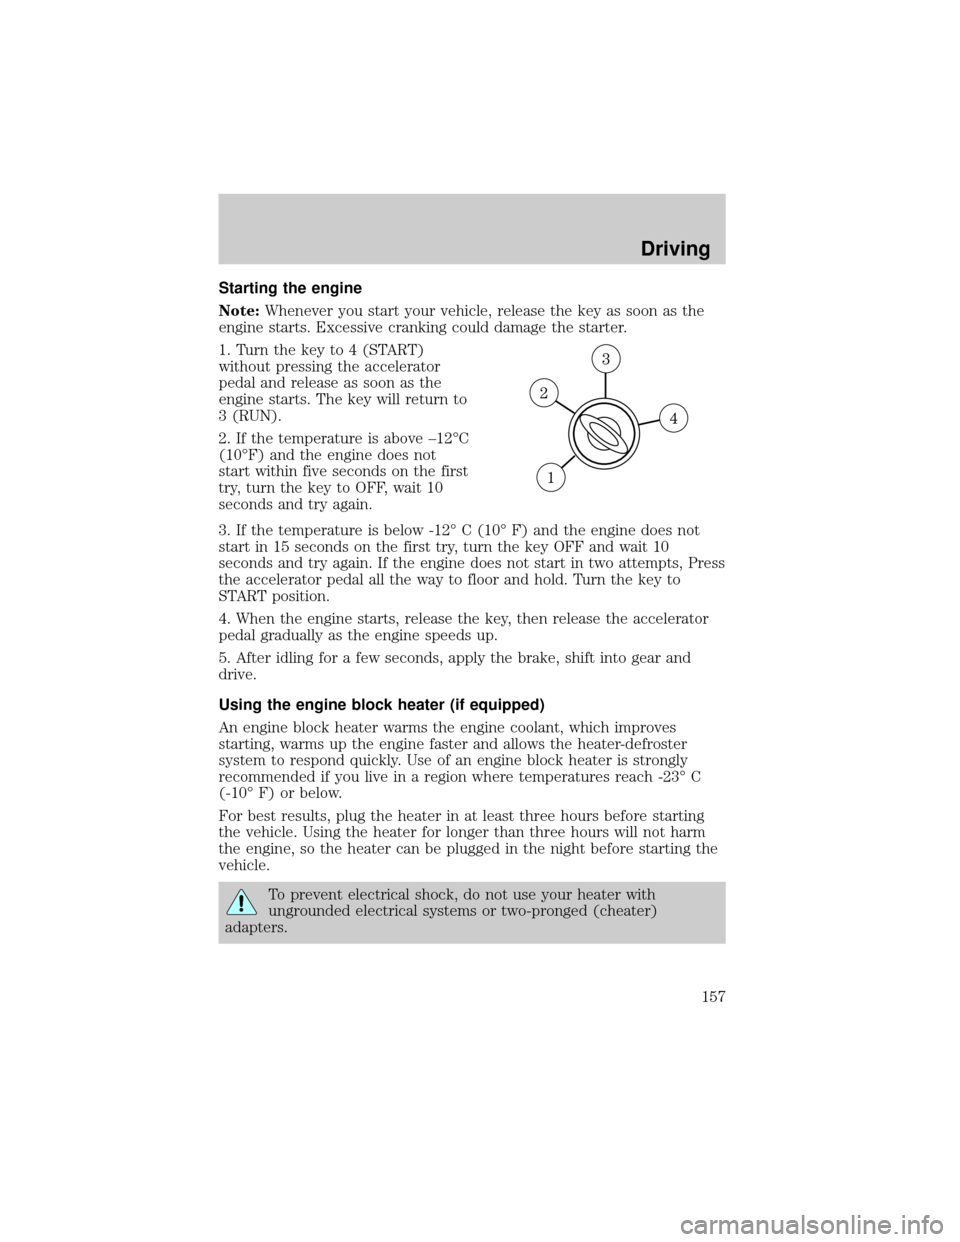
Positions of the ignition
1. LOCK, locks the gearshift lever
and allows key removal.
2. ACCESSORY, allows the electrical
accessories such as the radio to
operate while the engine is not
running.
3. RUN, all electrical circuits
operational. Warning lights
illuminated. Key position when
driving.
4. START, cranks the engine. Release the key as soon as the engine
starts.
Preparing to start your vehicle
Engine starting is controlled by the powertrain control system. This
system meets all Canadian Interference-Causing Equipment standard
requirements regulating the impulse electrical field strength of radio
noise.
When starting a fuel-injected engine, avoid pressing the accelerator
before or during starting. Only use the accelerator when you have
difficulty starting the engine. For more information on starting the
vehicle, refer toStarting the enginein this chapter.
Extended idling at high engine speeds can produce very high
temperatures in the engine and exhaust system, creating the risk
of fire or other damage.
Do not park, idle, or drive your vehicle in dry grass or other dry
ground cover. The emission system heats up the engine
compartment and exhaust system, which can start a fire.
Driving
154
Page 156 of 280
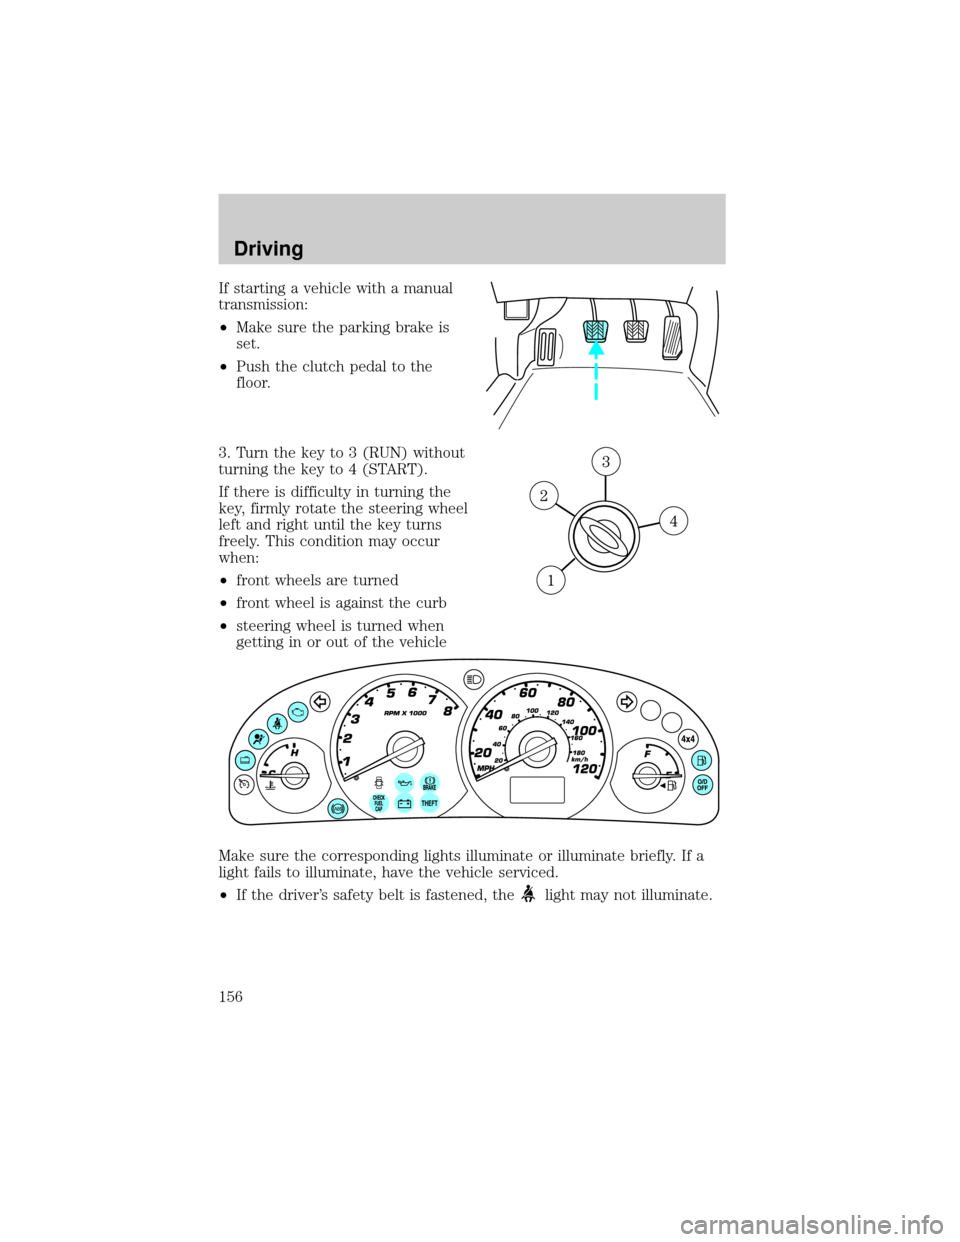
If starting a vehicle with a manual
transmission:
²Make sure the parking brake is
set.
²Push the clutch pedal to the
floor.
3. Turn the key to 3 (RUN) without
turning the key to 4 (START).
If there is difficulty in turning the
key, firmly rotate the steering wheel
left and right until the key turns
freely. This condition may occur
when:
²front wheels are turned
²front wheel is against the curb
²steering wheel is turned when
getting in or out of the vehicle
Make sure the corresponding lights illuminate or illuminate briefly. If a
light fails to illuminate, have the vehicle serviced.
²If the driver's safety belt is fastened, the
light may not illuminate.
Driving
156
Page 157 of 280
Starting the engine
Note:Whenever you start your vehicle, release the key as soon as the
engine starts. Excessive cranking could damage the starter.
1. Turn the key to 4 (START)
without pressing the accelerator
pedal and release as soon as the
engine starts. The key will return to
3 (RUN).
2. If the temperature is above ±12ÉC
(10ÉF) and the engine does not
start within five seconds on the first
try, turn the key to OFF, wait 10
seconds and try again.
3. If the temperature is below -12É C (10É F) and the engine does not
start in 15 seconds on the first try, turn the key OFF and wait 10
seconds and try again. If the engine does not start in two attempts, Press
the accelerator pedal all the way to floor and hold. Turn the key to
START position.
4. When the engine starts, release the key, then release the accelerator
pedal gradually as the engine speeds up.
5. After idling for a few seconds, apply the brake, shift into gear and
drive.
Using the engine block heater (if equipped)
An engine block heater warms the engine coolant, which improves
starting, warms up the engine faster and allows the heater-defroster
system to respond quickly. Use of an engine block heater is strongly
recommended if you live in a region where temperatures reach -23É C
(-10É F) or below.
For best results, plug the heater in at least three hours before starting
the vehicle. Using the heater for longer than three hours will not harm
the engine, so the heater can be plugged in the night before starting the
vehicle.
To prevent electrical shock, do not use your heater with
ungrounded electrical systems or two-pronged (cheater)
adapters.
Driving
157
Page 163 of 280
AUTOMATIC TRANSAXLE OPERATION (IF EQUIPPED)
Brake-shift interlock
This vehicle is equipped with a brake-shift interlock feature that prevents
the gearshift lever from being moved from P (Park) when the ignition is
in the ON position unless brake pedal is depressed.
If you cannot move the gearshift lever out of P (Park) with ignition in
the ON position and the brake pedal depressed:
1. Apply the parking brake, turn ignition key to LOCK, then remove the
key.
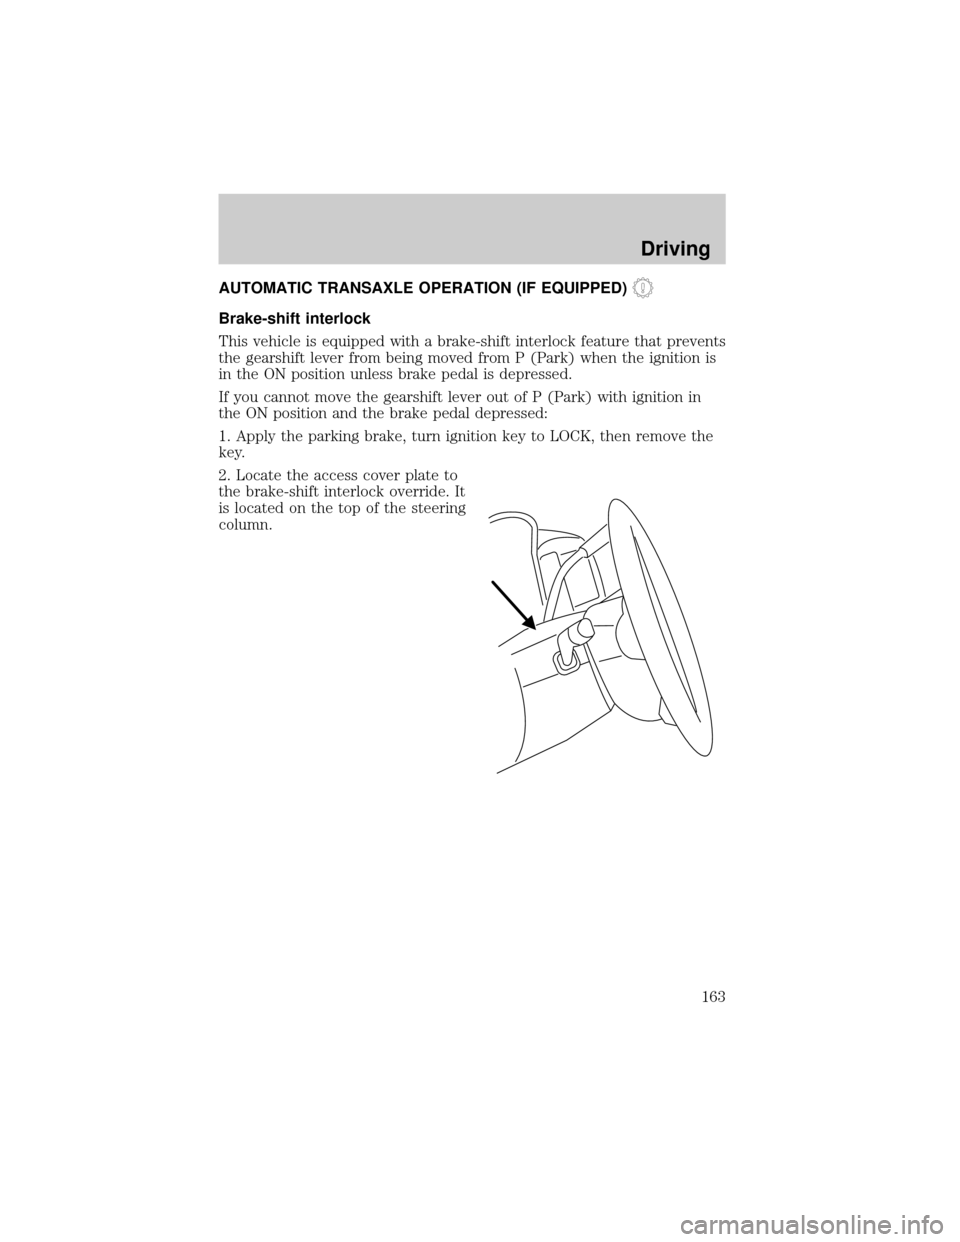
2. Locate the access cover plate to
the brake-shift interlock override. It
is located on the top of the steering
column.
Driving
163
Page 165 of 280
Do not rock the vehicle if the engine is not at normal operating
temperature or damage to the transmission may occur.
Do not rock the vehicle for more than a few minutes or damage
to the transmission and tires may occur or the engine may
overheat.
Always set the parking brake fully and make sure the gearshift is
latched in P (Park). Turn the ignition to the LOCK position and
remove the key whenever you leave your vehicle.
If the parking brake is fully released, but the brake warning lamp
remains illuminated, the brakes may not be working properly.
See your dealer or a qualified service technician.
Driving with an automatic overdrive transaxle
Your automatic transaxle electronically controls the shift feel by using an
adaptive learning strategy. This feature is designed to optimize shift
smoothness. It is normal for your transaxle to shift firmly during the first
few hundred kilometers (miles) of operation until the adaptive strategy
has been learned. The adaptive learning strategy is maintained by power
from the battery. When the battery is disconnected or a new battery is
installed, the transaxle must relearn its adaptive strategy. Optimal
shifting will resume within a few hundred kilometers (miles) of
operation.
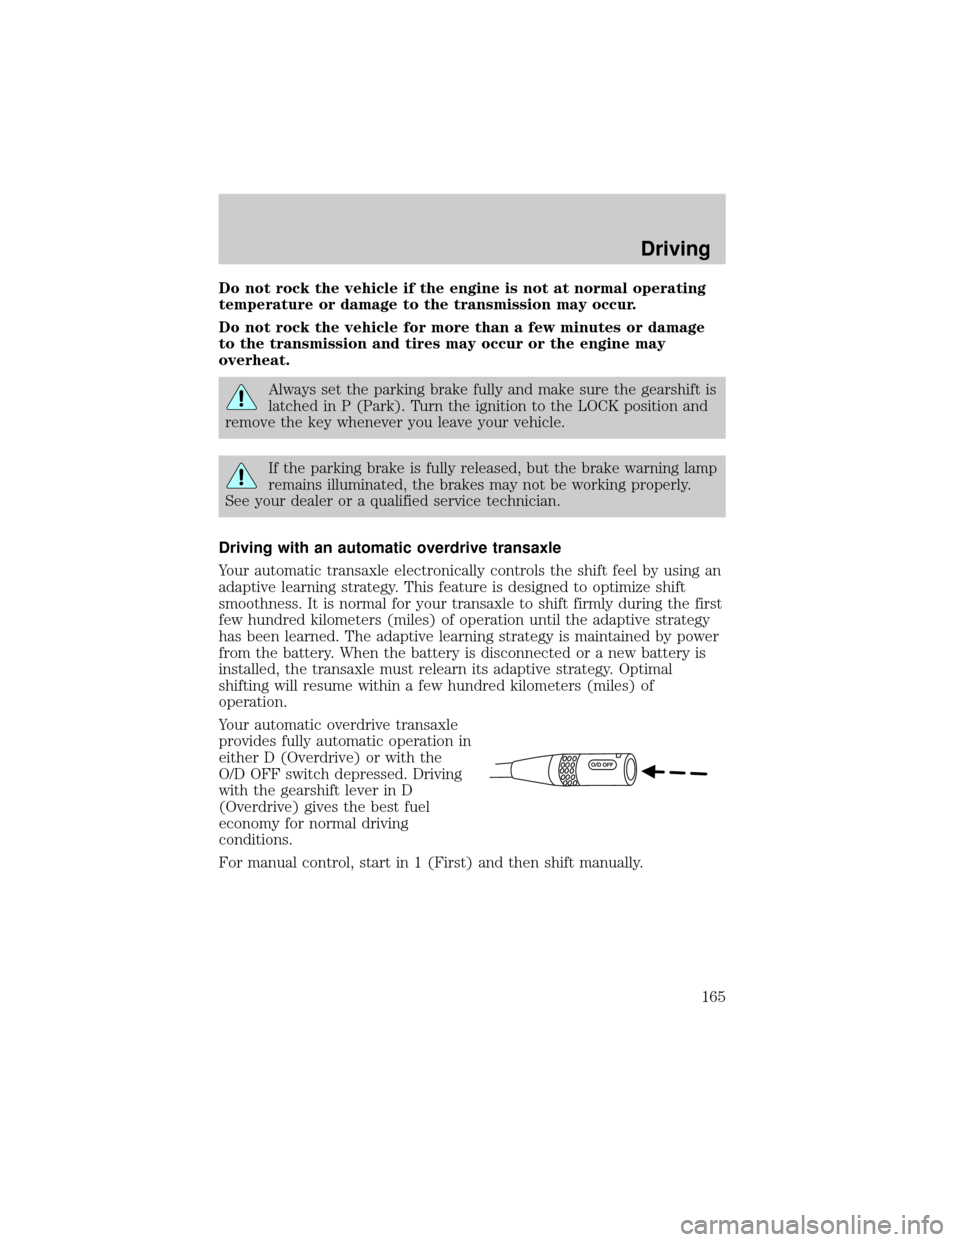
Your automatic overdrive transaxle
provides fully automatic operation in
either D (Overdrive) or with the
O/D OFF switch depressed. Driving
with the gearshift lever in D
(Overdrive) gives the best fuel
economy for normal driving
conditions.
For manual control, start in 1 (First) and then shift manually.
Driving
165
Page 166 of 280
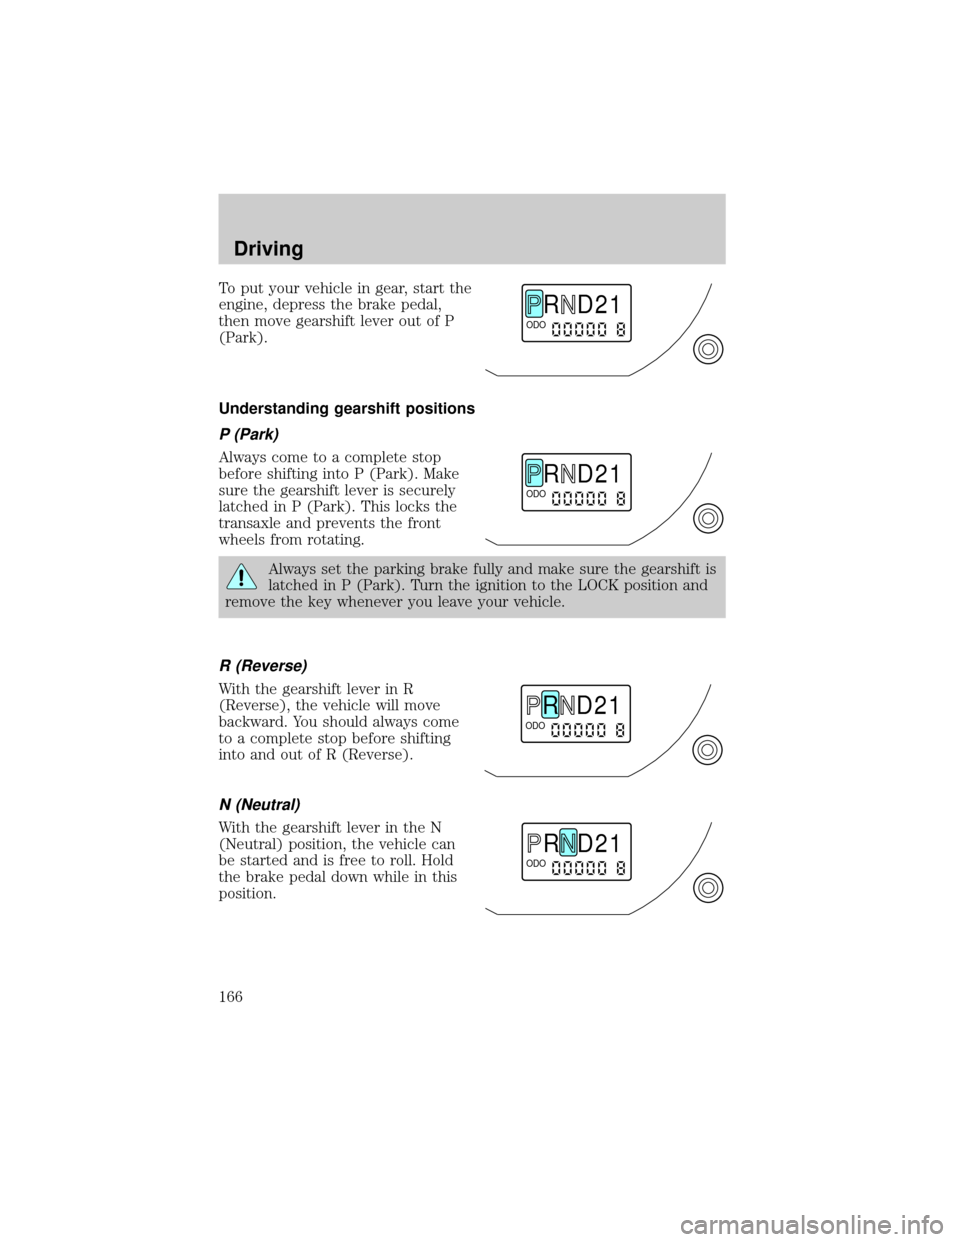
To put your vehicle in gear, start the
engine, depress the brake pedal,
then move gearshift lever out of P
(Park).
Understanding gearshift positions
P (Park)
Always come to a complete stop
before shifting into P (Park). Make
sure the gearshift lever is securely
latched in P (Park). This locks the
transaxle and prevents the front
wheels from rotating.
Always set the parking brake fully and make sure the gearshift is
latched in P (Park). Turn the ignition to the LOCK position and
remove the key whenever you leave your vehicle.
R (Reverse)
With the gearshift lever in R
(Reverse), the vehicle will move
backward. You should always come
to a complete stop before shifting
into and out of R (Reverse).
N (Neutral)
With the gearshift lever in the N
(Neutral) position, the vehicle can
be started and is free to roll. Hold
the brake pedal down while in this
position.
R D 2 1ODO
R D 2 1ODO
R D 2 1ODO
R D 2 1ODO
Driving
166
Page 188 of 280
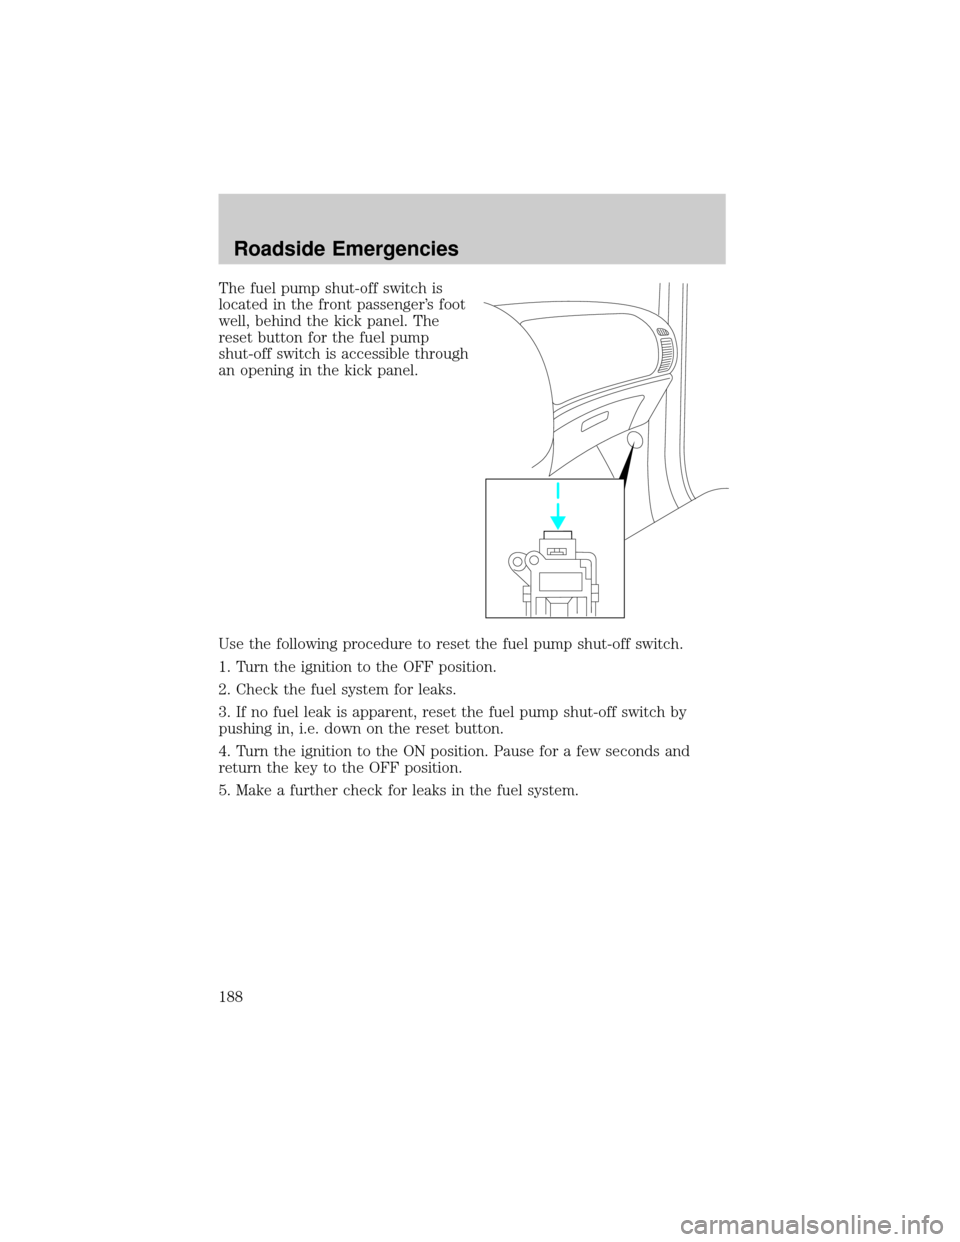
The fuel pump shut-off switch is
located in the front passenger's foot
well, behind the kick panel. The
reset button for the fuel pump
shut-off switch is accessible through
an opening in the kick panel.
Use the following procedure to reset the fuel pump shut-off switch.
1. Turn the ignition to the OFF position.
2. Check the fuel system for leaks.
3. If no fuel leak is apparent, reset the fuel pump shut-off switch by
pushing in, i.e. down on the reset button.
4. Turn the ignition to the ON position. Pause for a few seconds and
return the key to the OFF position.
5. Make a further check for leaks in the fuel system.
Roadside Emergencies
188
Page 191 of 280
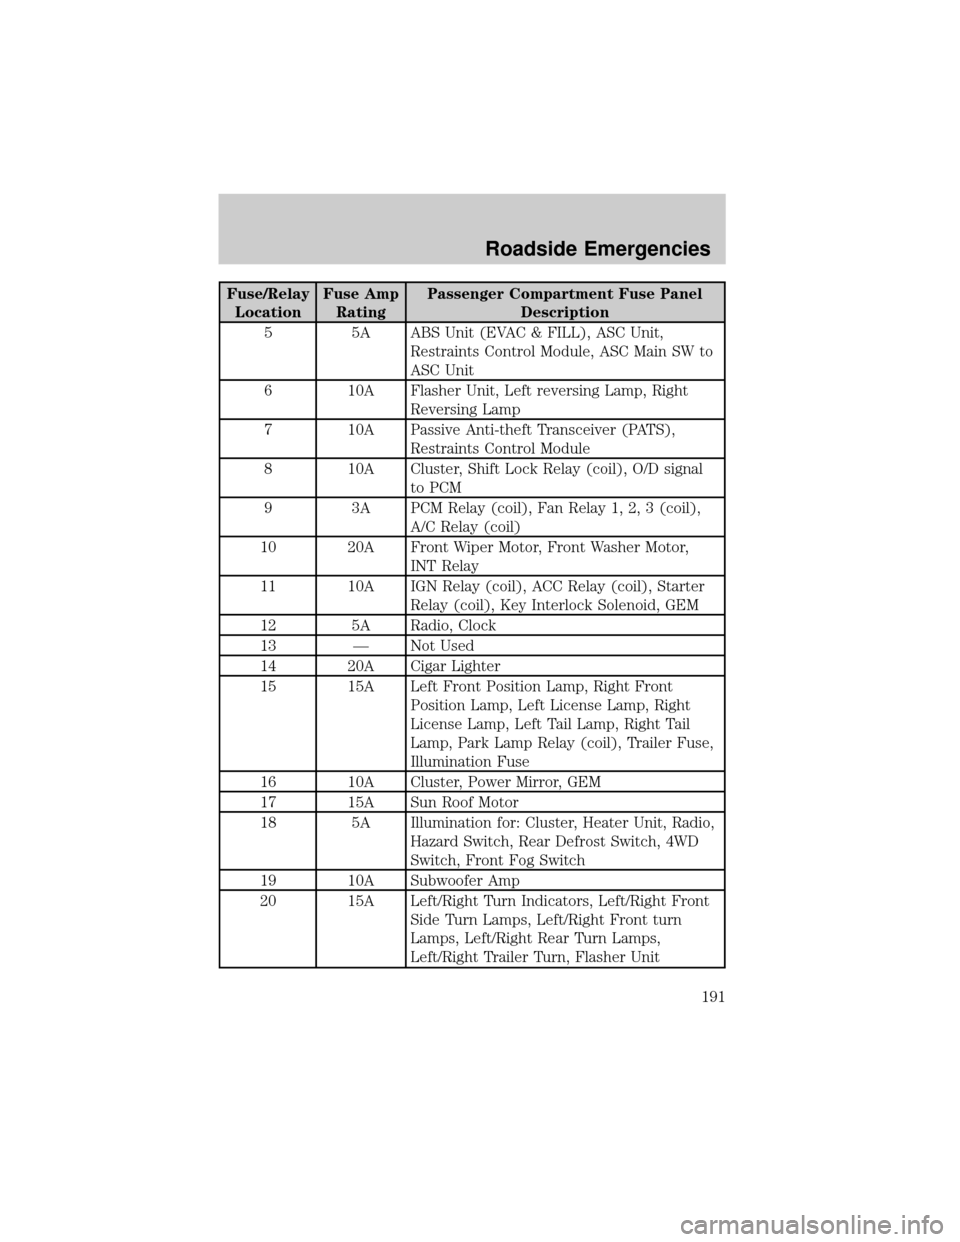
Fuse/Relay
LocationFuse Amp
RatingPassenger Compartment Fuse Panel
Description
5 5A ABS Unit (EVAC & FILL), ASC Unit,
Restraints Control Module, ASC Main SW to
ASC Unit
6 10A Flasher Unit, Left reversing Lamp, Right
Reversing Lamp
7 10A Passive Anti-theft Transceiver (PATS),
Restraints Control Module
8 10A Cluster, Shift Lock Relay (coil), O/D signal
to PCM
9 3A PCM Relay (coil), Fan Relay 1, 2, 3 (coil),
A/C Relay (coil)
10 20A Front Wiper Motor, Front Washer Motor,
INT Relay
11 10A IGN Relay (coil), ACC Relay (coil), Starter
Relay (coil), Key Interlock Solenoid, GEM
12 5A Radio, Clock
13 Ð Not Used
14 20A Cigar Lighter
15 15A Left Front Position Lamp, Right Front
Position Lamp, Left License Lamp, Right
License Lamp, Left Tail Lamp, Right Tail
Lamp, Park Lamp Relay (coil), Trailer Fuse,
Illumination Fuse
16 10A Cluster, Power Mirror, GEM
17 15A Sun Roof Motor
18 5A Illumination for: Cluster, Heater Unit, Radio,
Hazard Switch, Rear Defrost Switch, 4WD
Switch, Front Fog Switch
19 10A Subwoofer Amp
20 15A Left/Right Turn Indicators, Left/Right Front
Side Turn Lamps, Left/Right Front turn
Lamps, Left/Right Rear Turn Lamps,
Left/Right Trailer Turn, Flasher Unit
Roadside Emergencies
191