belt FORD ESCAPE 2002 1.G Owners Manual
[x] Cancel search | Manufacturer: FORD, Model Year: 2002, Model line: ESCAPE, Model: FORD ESCAPE 2002 1.GPages: 280, PDF Size: 2.75 MB
Page 8 of 280
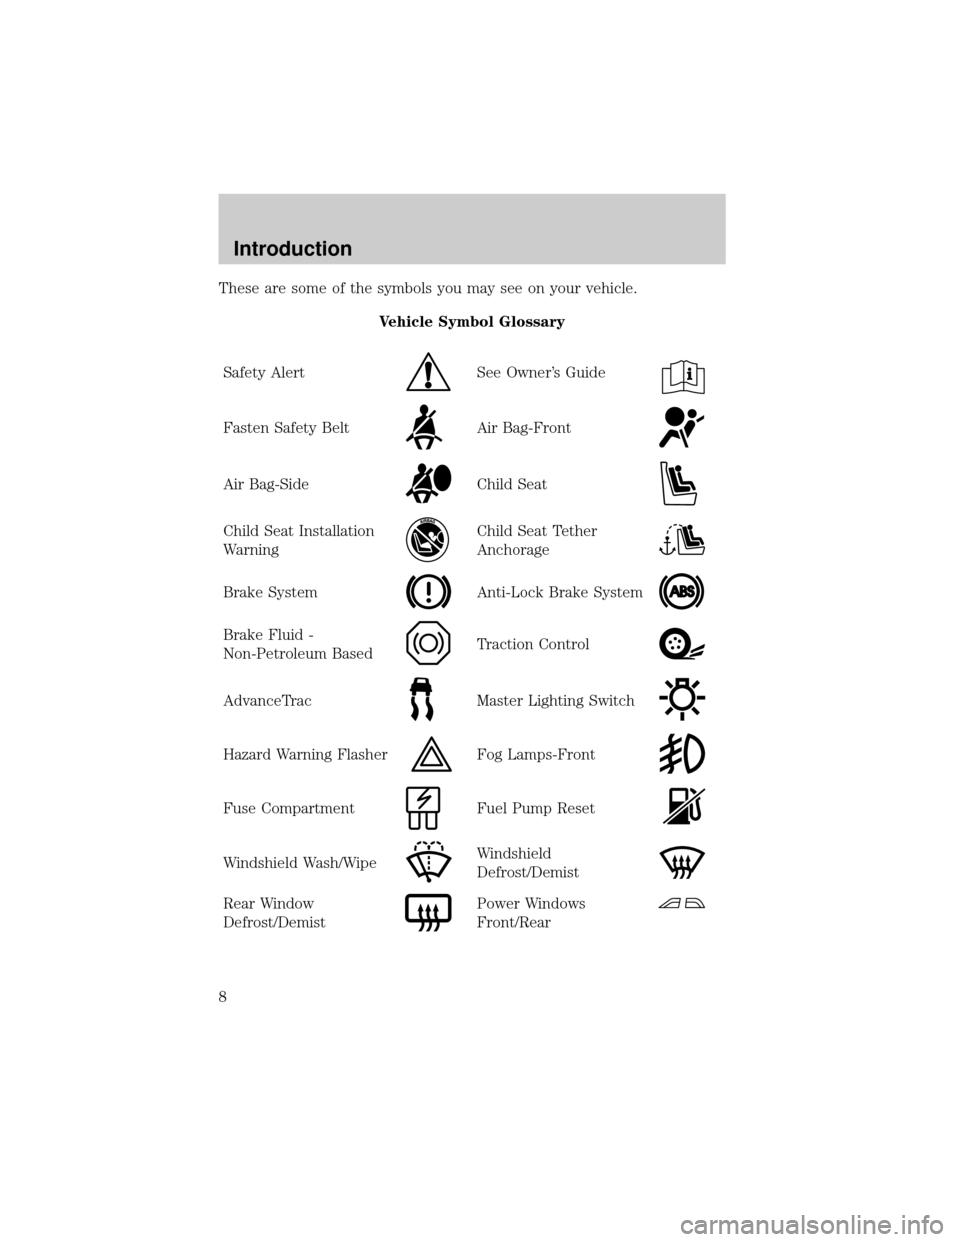
These are some of the symbols you may see on your vehicle.
Vehicle Symbol Glossary
Safety Alert
See Owner's Guide
Fasten Safety BeltAir Bag-Front
Air Bag-SideChild Seat
Child Seat Installation
WarningChild Seat Tether
Anchorage
Brake SystemAnti-Lock Brake System
Brake Fluid -
Non-Petroleum BasedTraction Control
AdvanceTracMaster Lighting Switch
Hazard Warning FlasherFog Lamps-Front
Fuse CompartmentFuel Pump Reset
Windshield Wash/WipeWindshield
Defrost/Demist
Rear Window
Defrost/DemistPower Windows
Front/Rear
Introduction
8
Page 12 of 280
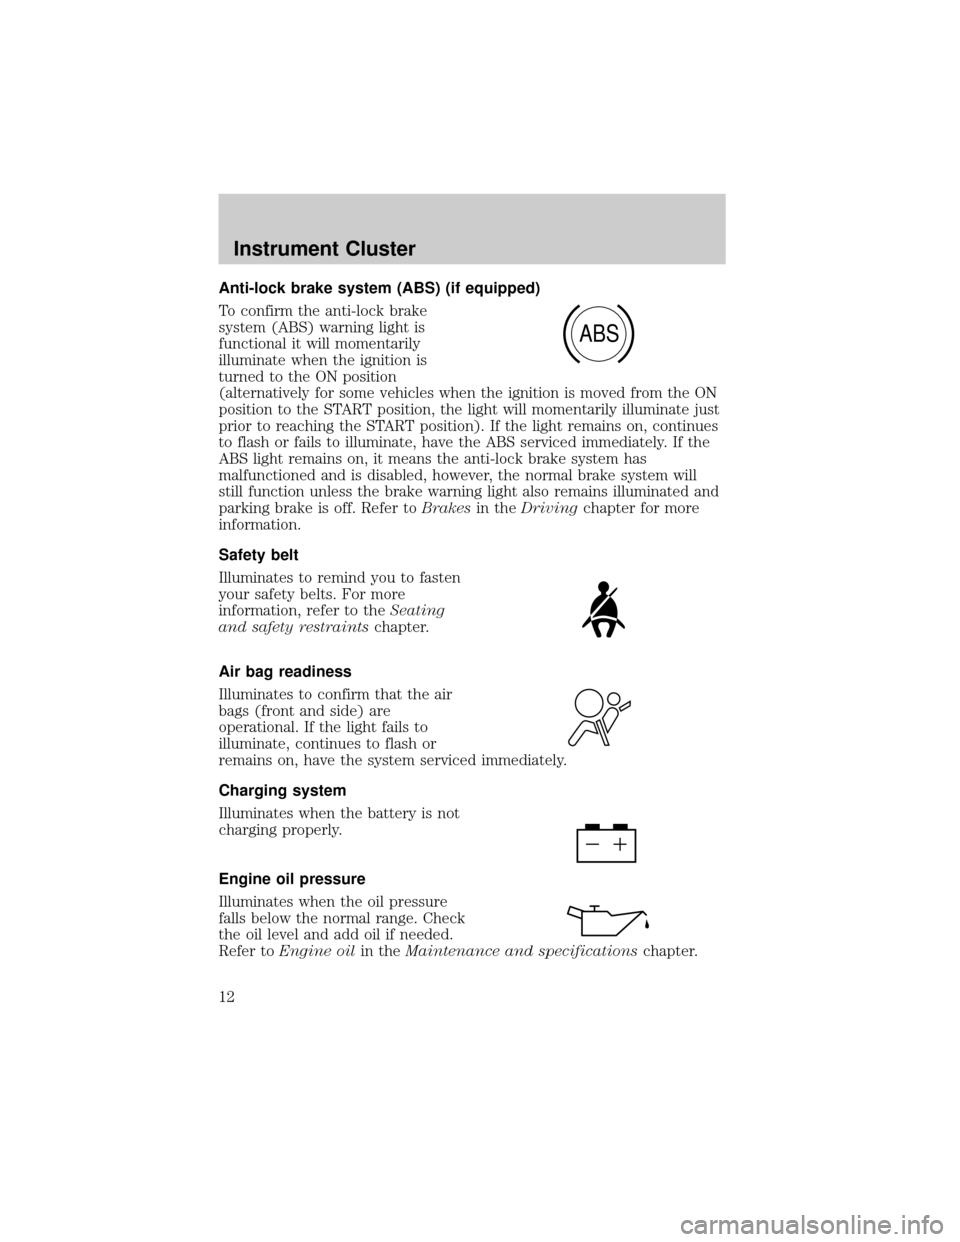
Anti-lock brake system (ABS) (if equipped)
To confirm the anti-lock brake
system (ABS) warning light is
functional it will momentarily
illuminate when the ignition is
turned to the ON position
(alternatively for some vehicles when the ignition is moved from the ON
position to the START position, the light will momentarily illuminate just
prior to reaching the START position). If the light remains on, continues
to flash or fails to illuminate, have the ABS serviced immediately. If the
ABS light remains on, it means the anti-lock brake system has
malfunctioned and is disabled, however, the normal brake system will
still function unless the brake warning light also remains illuminated and
parking brake is off. Refer toBrakesin theDrivingchapter for more
information.
Safety belt
Illuminates to remind you to fasten
your safety belts. For more
information, refer to theSeating
and safety restraintschapter.
Air bag readiness
Illuminates to confirm that the air
bags (front and side) are
operational. If the light fails to
illuminate, continues to flash or
remains on, have the system serviced immediately.
Charging system
Illuminates when the battery is not
charging properly.
Engine oil pressure
Illuminates when the oil pressure
falls below the normal range. Check
the oil level and add oil if needed.
Refer toEngine oilin theMaintenance and specificationschapter.
ABS
Instrument Cluster
12
Page 14 of 280
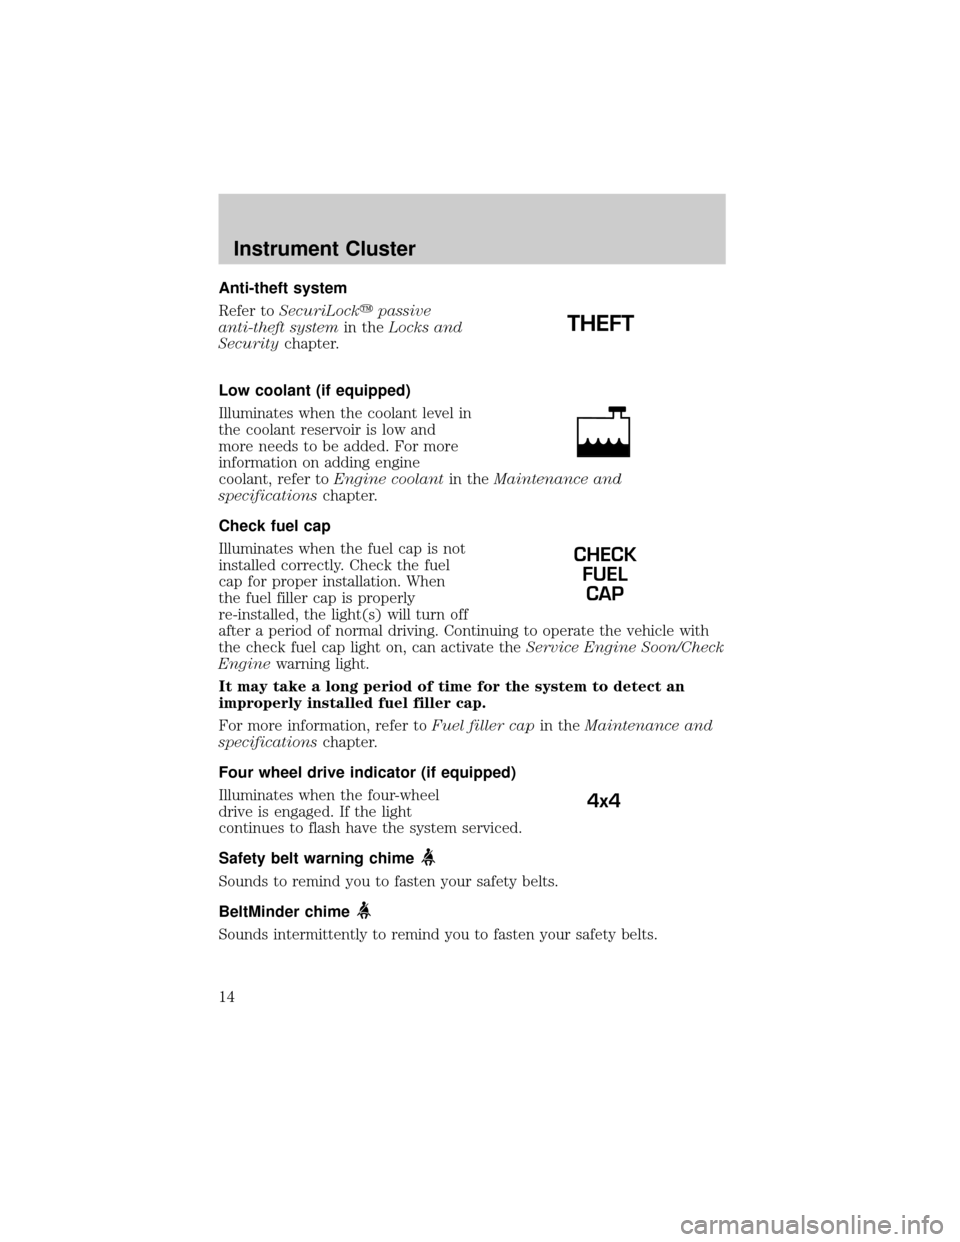
Anti-theft system
Refer toSecuriLockypassive
anti-theft systemin theLocks and
Securitychapter.
Low coolant (if equipped)
Illuminates when the coolant level in
the coolant reservoir is low and
more needs to be added. For more
information on adding engine
coolant, refer toEngine coolantin theMaintenance and
specificationschapter.
Check fuel cap
Illuminates when the fuel cap is not
installed correctly. Check the fuel
cap for proper installation. When
the fuel filler cap is properly
re-installed, the light(s) will turn off
after a period of normal driving. Continuing to operate the vehicle with
the check fuel cap light on, can activate theService Engine Soon/Check
Enginewarning light.
It may take a long period of time for the system to detect an
improperly installed fuel filler cap.
For more information, refer toFuel filler capin theMaintenance and
specificationschapter.
Four wheel drive indicator (if equipped)
Illuminates when the four-wheel
drive is engaged. If the light
continues to flash have the system serviced.
Safety belt warning chime
Sounds to remind you to fasten your safety belts.
BeltMinder chime
Sounds intermittently to remind you to fasten your safety belts.
CHECK
FUEL
CAP
4x4
Instrument Cluster
14
Page 113 of 280
SEATING
Adjusting the front manual seat
Never adjust the driver's seat or seatback when the vehicle is
moving.
Do not pile cargo higher than the seatbacks to reduce the risk of
injuring people in a collision or sudden stop.
Always drive and ride with your seatback upright and the lap
belt snug and low across the hips.
Reclining the seatback can cause an occupant to slide under the
seat's safety belt, resulting in severe personal injuries in the
event of a collision.
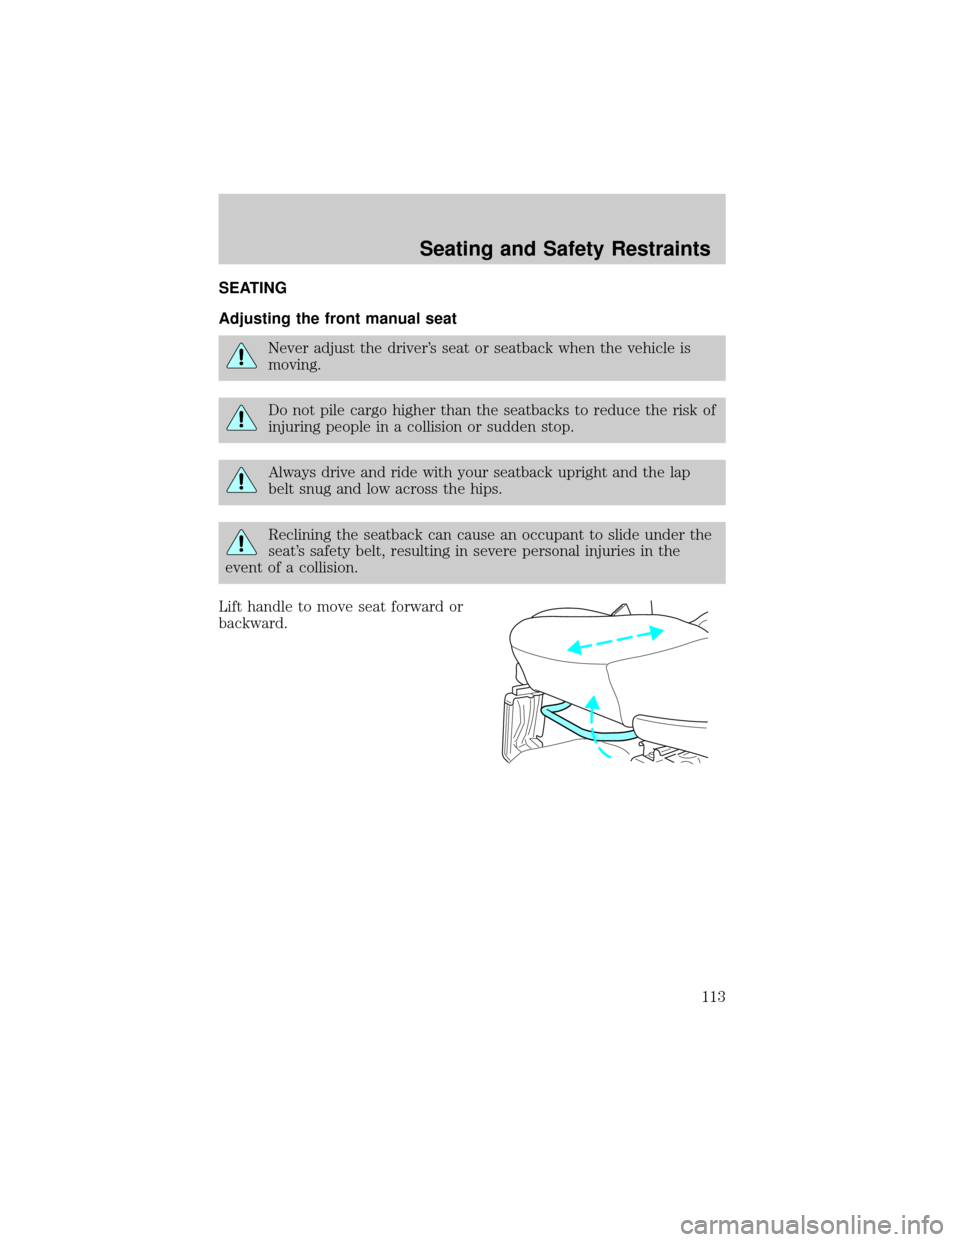
Lift handle to move seat forward or
backward.
Seating and Safety Restraints
113
Page 114 of 280
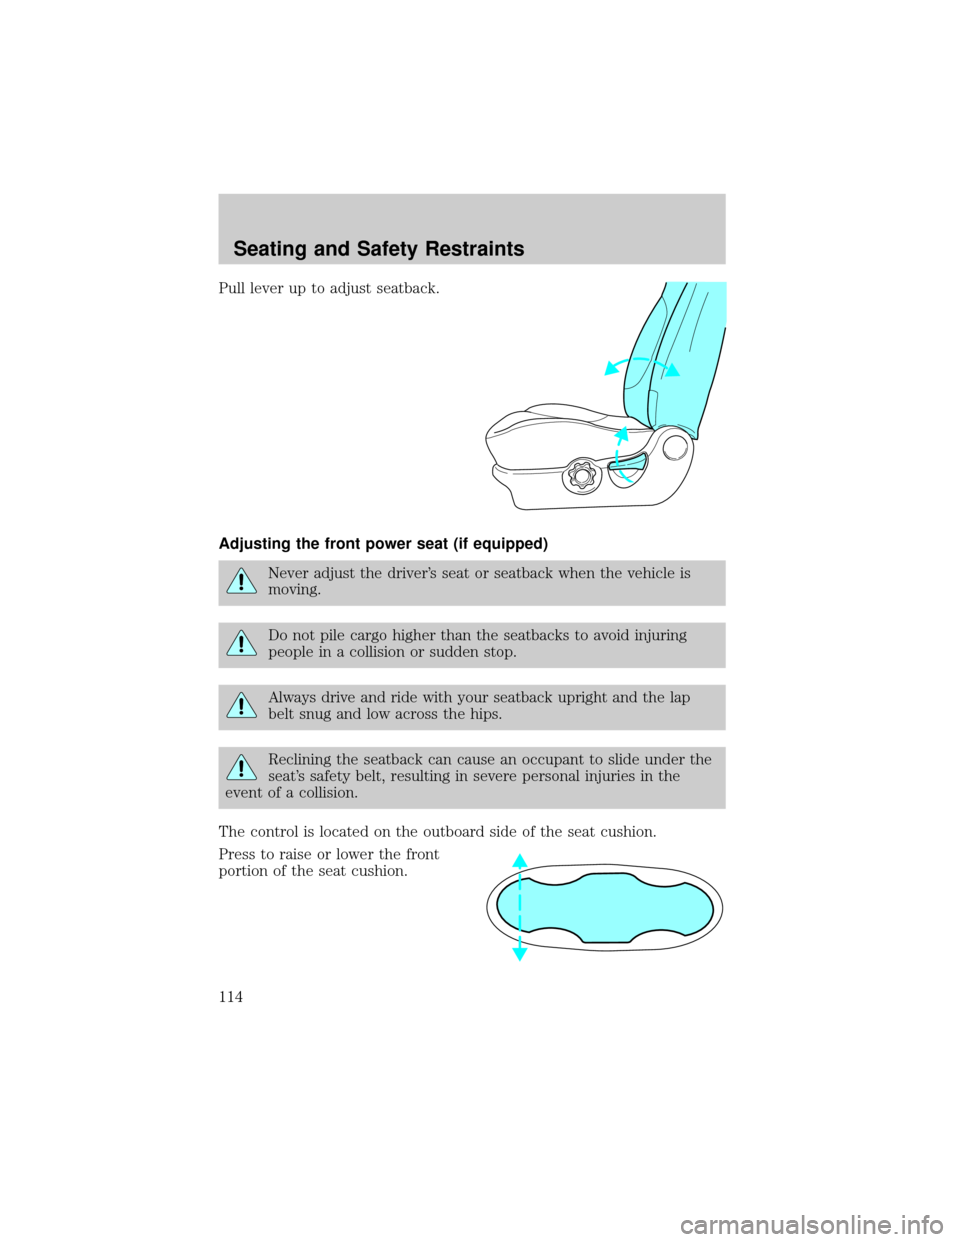
Pull lever up to adjust seatback.
Adjusting the front power seat (if equipped)
Never adjust the driver's seat or seatback when the vehicle is
moving.
Do not pile cargo higher than the seatbacks to avoid injuring
people in a collision or sudden stop.
Always drive and ride with your seatback upright and the lap
belt snug and low across the hips.
Reclining the seatback can cause an occupant to slide under the
seat's safety belt, resulting in severe personal injuries in the
event of a collision.
The control is located on the outboard side of the seat cushion.
Press to raise or lower the front
portion of the seat cushion.
Seating and Safety Restraints
114
Page 118 of 280
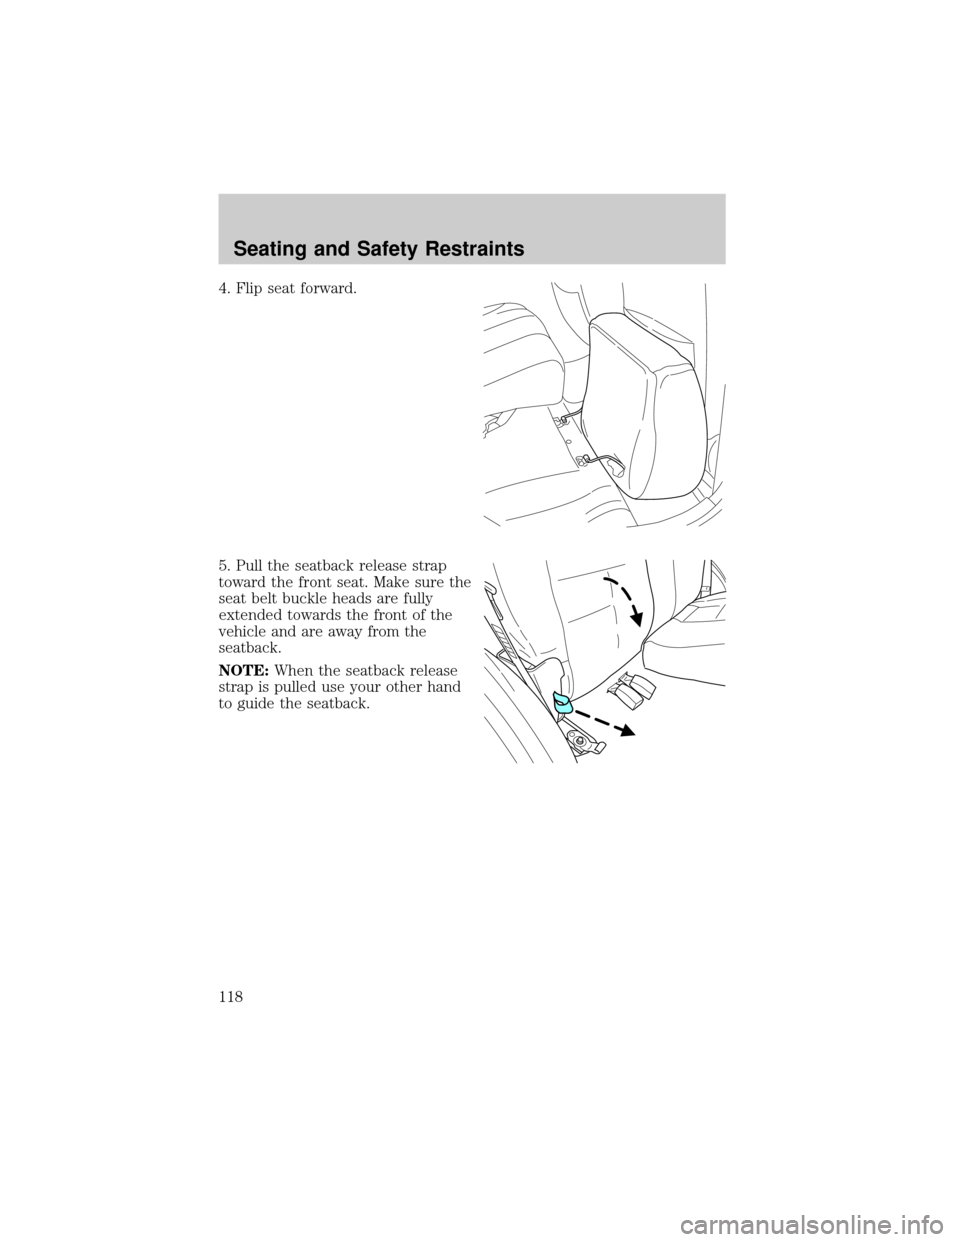
4. Flip seat forward.
5. Pull the seatback release strap
toward the front seat. Make sure the
seat belt buckle heads are fully
extended towards the front of the
vehicle and are away from the
seatback.
NOTE:When the seatback release
strap is pulled use your other hand
to guide the seatback.
Seating and Safety Restraints
118
Page 119 of 280
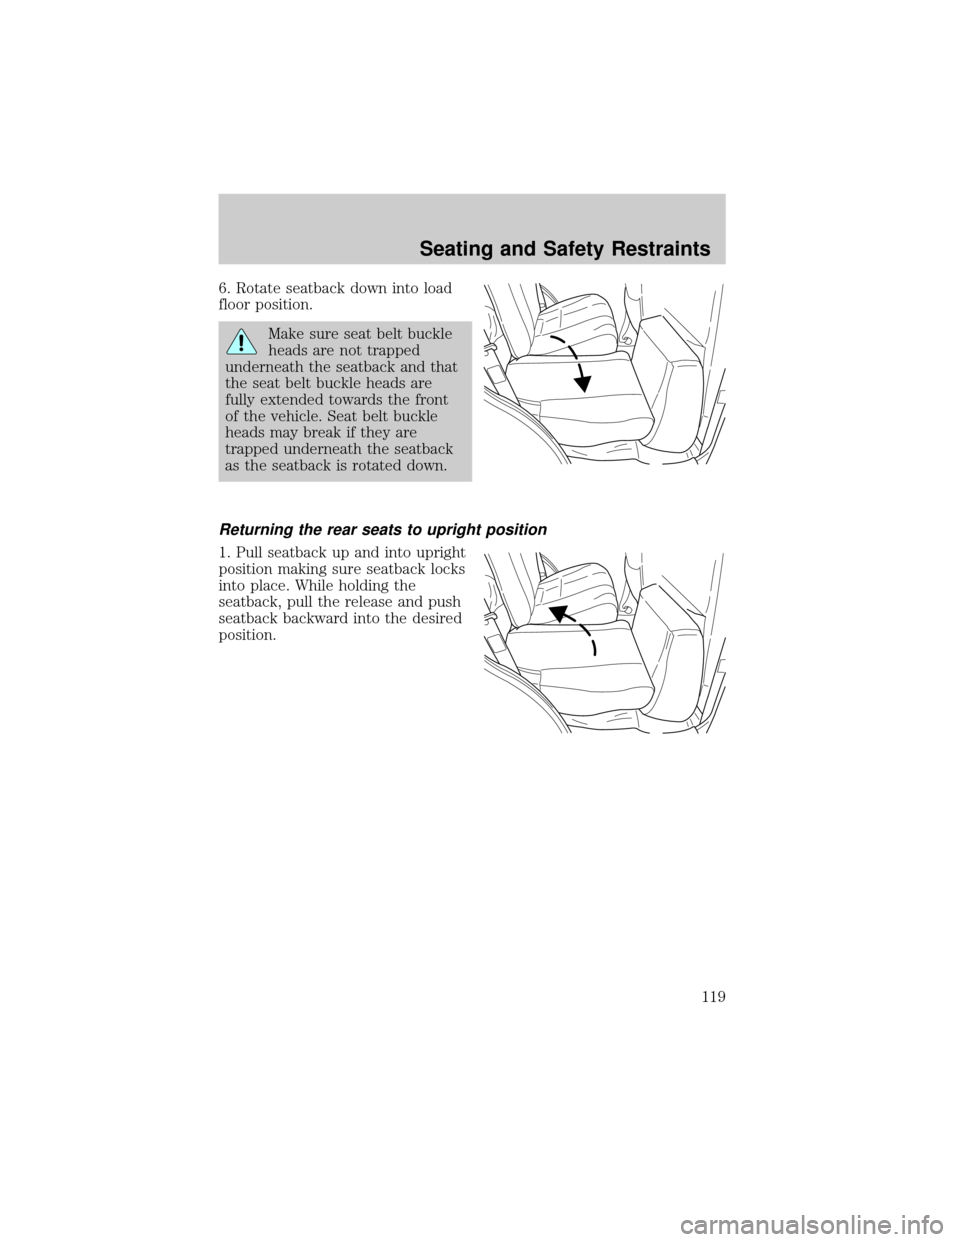
6. Rotate seatback down into load
floor position.
Make sure seat belt buckle
heads are not trapped
underneath the seatback and that
the seat belt buckle heads are
fully extended towards the front
of the vehicle. Seat belt buckle
heads may break if they are
trapped underneath the seatback
as the seatback is rotated down.
Returning the rear seats to upright position
1. Pull seatback up and into upright
position making sure seatback locks
into place. While holding the
seatback, pull the release and push
seatback backward into the desired
position.
Seating and Safety Restraints
119
Page 120 of 280
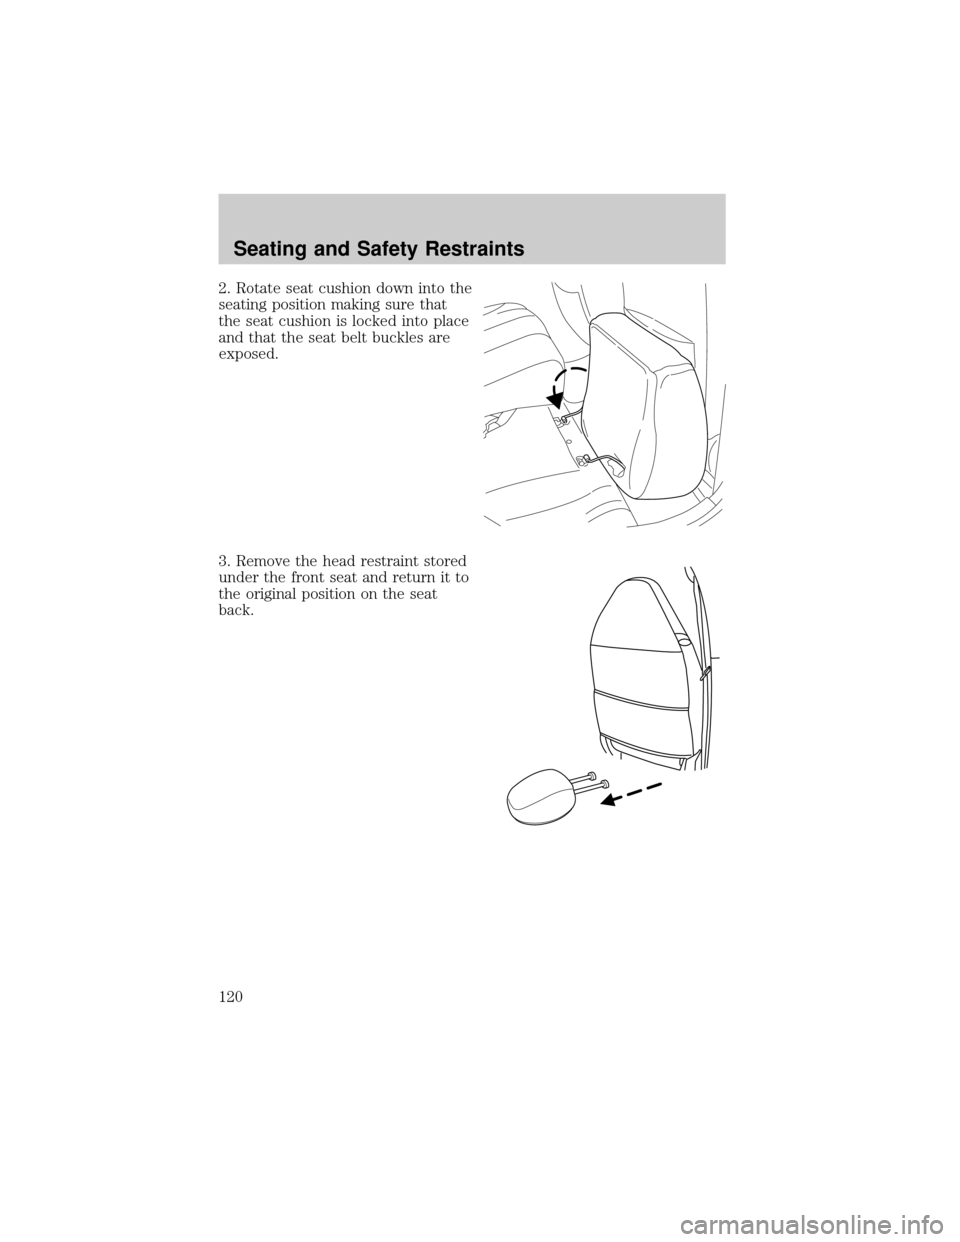
2. Rotate seat cushion down into the
seating position making sure that
the seat cushion is locked into place
and that the seat belt buckles are
exposed.
3. Remove the head restraint stored
under the front seat and return it to
the original position on the seat
back.
Seating and Safety Restraints
120
Page 123 of 280
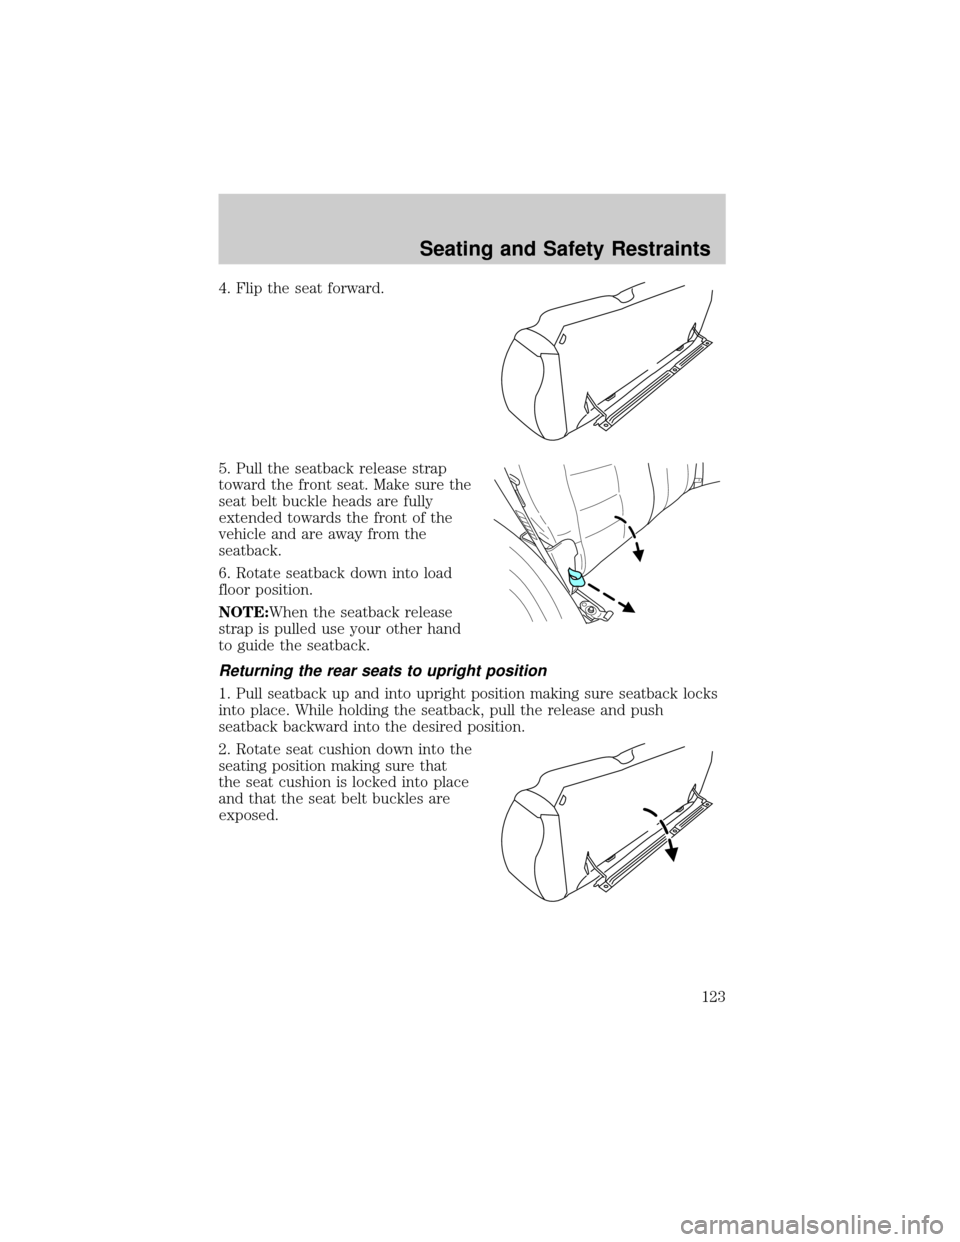
4. Flip the seat forward.
5. Pull the seatback release strap
toward the front seat. Make sure the
seat belt buckle heads are fully
extended towards the front of the
vehicle and are away from the
seatback.
6. Rotate seatback down into load
floor position.
NOTE:When the seatback release
strap is pulled use your other hand
to guide the seatback.
Returning the rear seats to upright position
1. Pull seatback up and into upright position making sure seatback locks
into place. While holding the seatback, pull the release and push
seatback backward into the desired position.
2. Rotate seat cushion down into the
seating position making sure that
the seat cushion is locked into place
and that the seat belt buckles are
exposed.
Seating and Safety Restraints
123
Page 125 of 280
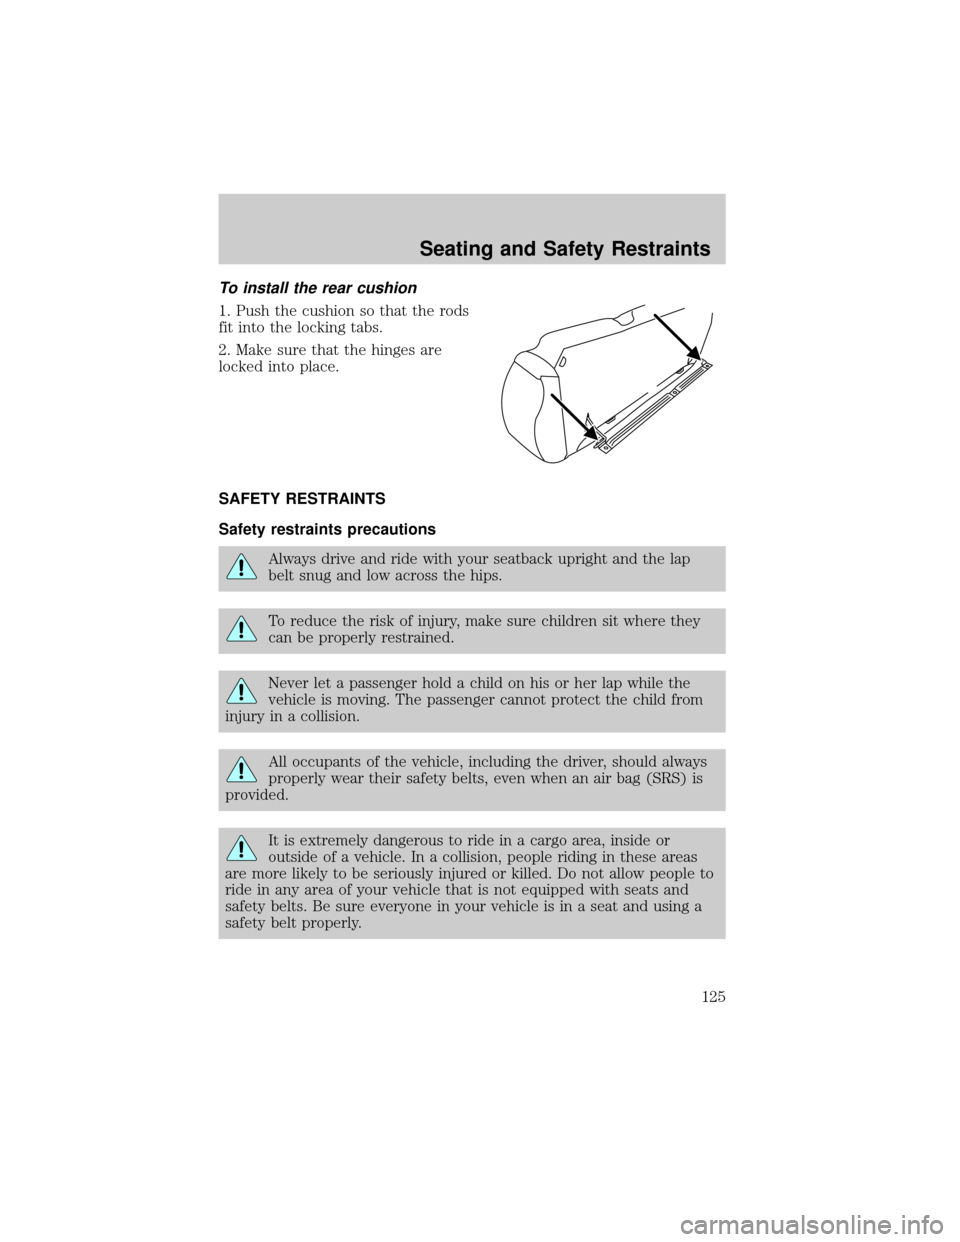
To install the rear cushion
1. Push the cushion so that the rods
fit into the locking tabs.
2. Make sure that the hinges are
locked into place.
SAFETY RESTRAINTS
Safety restraints precautions
Always drive and ride with your seatback upright and the lap
belt snug and low across the hips.
To reduce the risk of injury, make sure children sit where they
can be properly restrained.
Never let a passenger hold a child on his or her lap while the
vehicle is moving. The passenger cannot protect the child from
injury in a collision.
All occupants of the vehicle, including the driver, should always
properly wear their safety belts, even when an air bag (SRS) is
provided.
It is extremely dangerous to ride in a cargo area, inside or
outside of a vehicle. In a collision, people riding in these areas
are more likely to be seriously injured or killed. Do not allow people to
ride in any area of your vehicle that is not equipped with seats and
safety belts. Be sure everyone in your vehicle is in a seat and using a
safety belt properly.
Seating and Safety Restraints
125