engine FORD ESCAPE 2011 2.G Service Manual
[x] Cancel search | Manufacturer: FORD, Model Year: 2011, Model line: ESCAPE, Model: FORD ESCAPE 2011 2.GPages: 367, PDF Size: 2.61 MB
Page 223 of 367
provide consistent shift feel over the life of the vehicle. A new vehicle or
transmission may have firm and/or soft shifts. This operation is
considered normal and will not affect function or durability of the
transmission. Over time, the adaptive learning process will fully update
transmission operation. Additionally, whenever the battery is
disconnected or a new battery installed, the strategy must be relearned.
Understanding the gearshift positions of the 6–speed automatic
transmission
Your vehicle has been designed to improve fuel economy by reducing
fuel usage while coasting or decelerating. When you take your foot off
the accelerator pedal and the vehicle begins to slow down, the torque
converter clutch locks up and aggressively shuts off fuel flow to the
engine while decelerating. This fuel economy benefit may be perceived
as a light to medium braking sensation when removing your foot from
the accelerator pedal.
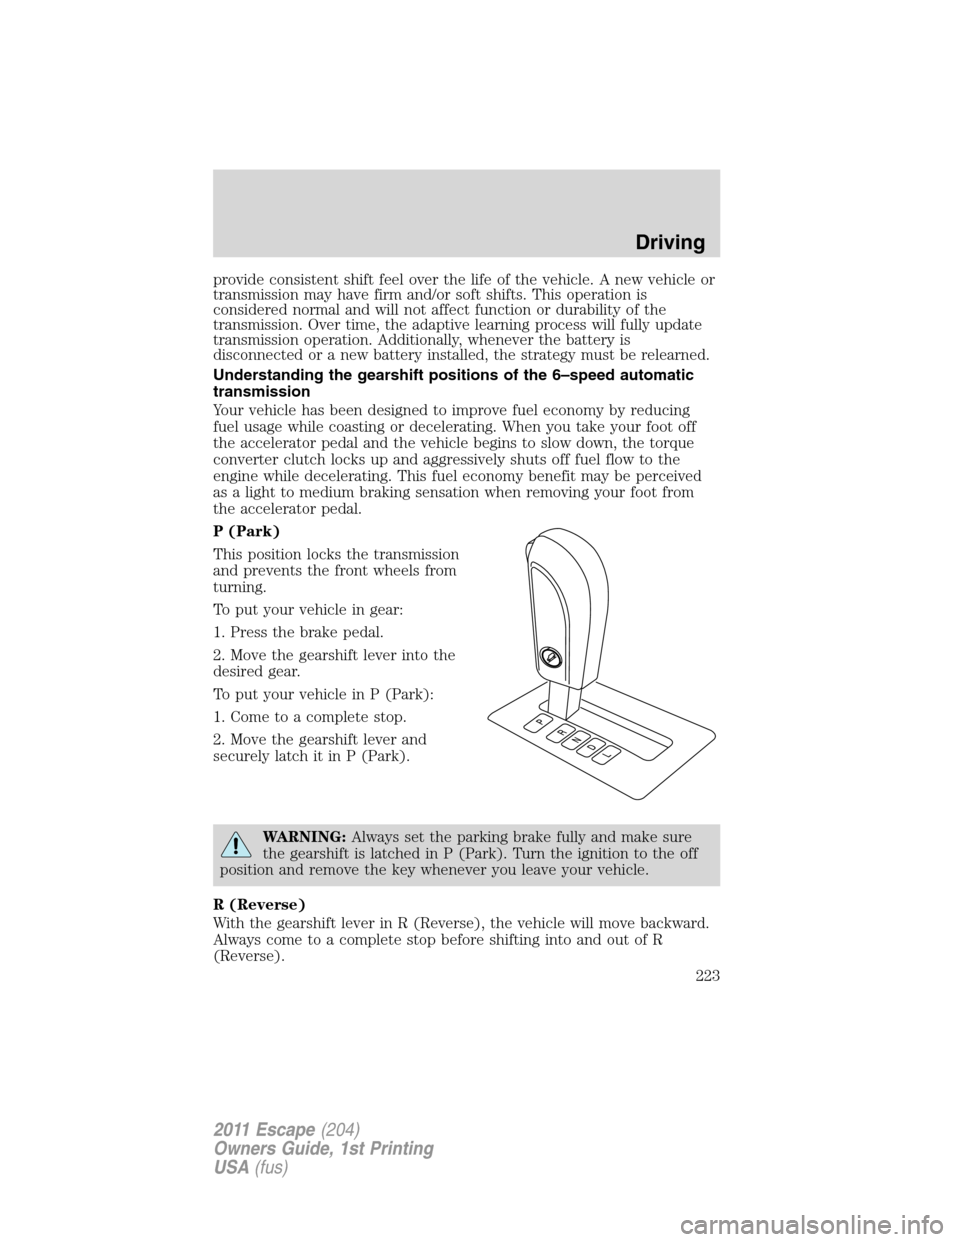
P (Park)
This position locks the transmission
and prevents the front wheels from
turning.
To put your vehicle in gear:
1. Press the brake pedal.
2. Move the gearshift lever into the
desired gear.
To put your vehicle in P (Park):
1. Come to a complete stop.
2. Move the gearshift lever and
securely latch it in P (Park).
WARNING:Always set the parking brake fully and make sure
the gearshift is latched in P (Park). Turn the ignition to the off
position and remove the key whenever you leave your vehicle.
R (Reverse)
With the gearshift lever in R (Reverse), the vehicle will move backward.
Always come to a complete stop before shifting into and out of R
(Reverse).
Driving
223
2011 Escape(204)
Owners Guide, 1st Printing
USA(fus)
Page 224 of 367
N (Neutral)
With the gearshift lever in N (Neutral), the vehicle can be started and is
free to roll. Hold the brake pedal down while in this position.
D (Drive) with Overdrive
The normal driving position for the best fuel economy. Transmission
operates in gears one through six.
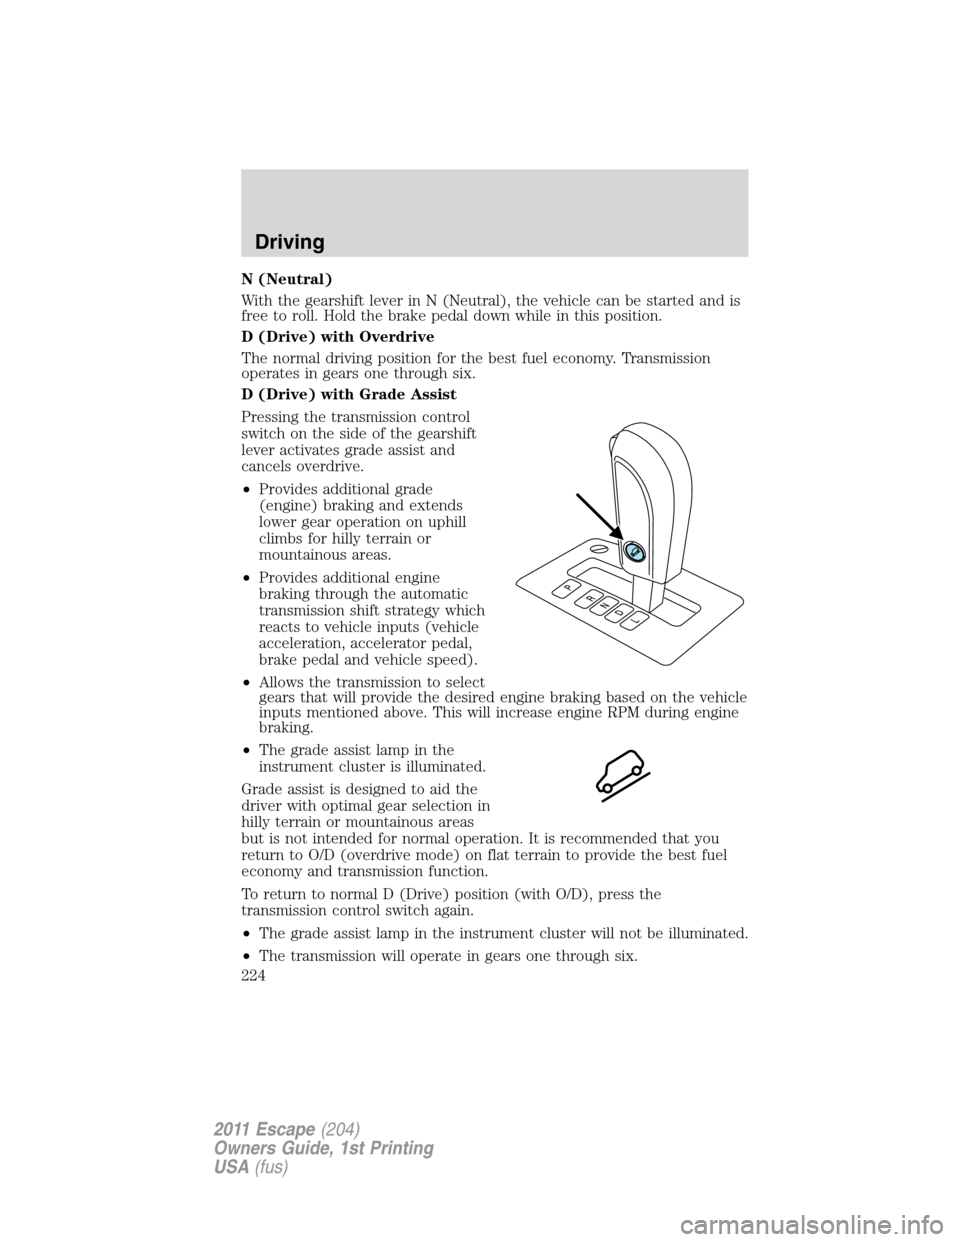
D (Drive) with Grade Assist
Pressing the transmission control
switch on the side of the gearshift
lever activates grade assist and
cancels overdrive.
•Provides additional grade
(engine) braking and extends
lower gear operation on uphill
climbs for hilly terrain or
mountainous areas.
•Provides additional engine
braking through the automatic
transmission shift strategy which
reacts to vehicle inputs (vehicle
acceleration, accelerator pedal,
brake pedal and vehicle speed).
•Allows the transmission to select
gears that will provide the desired engine braking based on the vehicle
inputs mentioned above. This will increase engine RPM during engine
braking.
•The grade assist lamp in the
instrument cluster is illuminated.
Grade assist is designed to aid the
driver with optimal gear selection in
hilly terrain or mountainous areas
but is not intended for normal operation. It is recommended that you
return to O/D (overdrive mode) on flat terrain to provide the best fuel
economy and transmission function.
To return to normal D (Drive) position (with O/D), press the
transmission control switch again.
•The grade assist lamp in the instrument cluster will not be illuminated.
•The transmission will operate in gears one through six.
Driving
224
2011 Escape(204)
Owners Guide, 1st Printing
USA(fus)
Page 225 of 367
O/D (overdrive mode) is automatically returned each time the engine is
turned off.
L (Low)
•Provides maximum engine braking.
•Will downshift to the lowest available gear for the current vehicle
speed; allows for first gear when vehicle reaches slower speeds.
If your vehicle gets stuck in mud or snow
If your vehicle gets stuck in mud or snow, it may be rocked out by
shifting between forward and reverse gears, stopping between shifts in a
steady pattern. Press lightly on the accelerator in each gear.
Do not rock the vehicle if the engine is not at normal operating
temperature or damage to the transmission may occur.
Do not rock the vehicle for more than a minute or damage to the
transmission and tires may occur, or the engine may overheat.
MANUAL TRANSMISSION OPERATION (IF EQUIPPED)
Using the clutch
Manual transmission vehicles have a starter interlock that prevents
cranking the engine unless the clutch pedal is fully pressed.
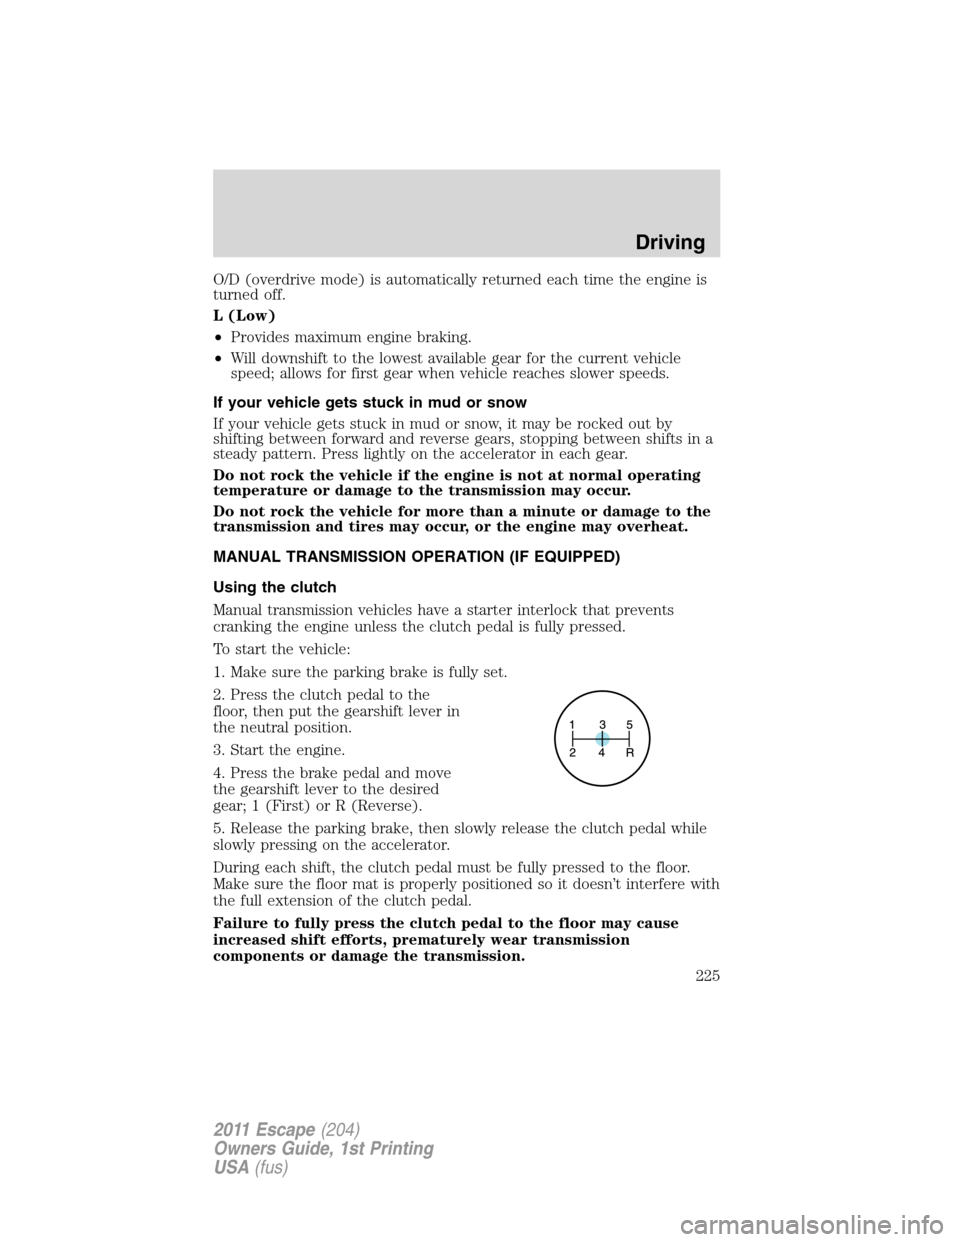
To start the vehicle:
1. Make sure the parking brake is fully set.
2. Press the clutch pedal to the
floor, then put the gearshift lever in
the neutral position.
3. Start the engine.
4. Press the brake pedal and move
the gearshift lever to the desired
gear; 1 (First) or R (Reverse).
5. Release the parking brake, then slowly release the clutch pedal while
slowly pressing on the accelerator.
During each shift, the clutch pedal must be fully pressed to the floor.
Make sure the floor mat is properly positioned so it doesn’t interfere with
the full extension of the clutch pedal.
Failure to fully press the clutch pedal to the floor may cause
increased shift efforts, prematurely wear transmission
components or damage the transmission.
Driving
225
2011 Escape(204)
Owners Guide, 1st Printing
USA(fus)
Page 238 of 367
•It often may be less risky to strike small objects, such as highway
reflectors, with minor damage to your vehicle rather than attempt a
sudden return to the pavement which could cause the vehicle to slide
sideways out of control or roll over. Remember, your safety and the
safety of others should be your primary concern.
WARNING:Vehicles with a higher center of gravity such as
utility and four-wheel drive vehicles handle differently than
vehicles with a lower center of gravity. Utility and four-wheel drive
vehicles arenotdesigned for cornering at speeds as high as passenger
cars any more than low-slung sports cars are designed to perform
satisfactorily under off-road conditions. Avoid sharp turns, excessive
speed and abrupt maneuvers in these vehicles. Failure to drive
cautiously could result in an increased risk of loss of vehicle control,
vehicle rollover, personal injury and death.
If your vehicle gets stuck
If your vehicle gets stuck in mud or snow it may be rocked out by
shifting between forward and reverse gears, stopping between shifts, in a
steady pattern. Press lightly on the accelerator in each gear.
Do not rock the vehicle if the engine is not at normal operating
temperature or damage to the transmission may occur.
Do not rock the vehicle for more than a few minutes or damage
to the transmission and tires may occur or the engine may
overheat.
WARNING:Always set the parking brake fully and make sure
the gearshift is latched in P (Park). Turn the ignition to the off
position and remove the key whenever you leave your vehicle.
WARNING:If the parking brake is fully released, but the brake
warning lamp remains illuminated, the brakes may not be
working properly. See your authorized dealer.
WARNING:Do not spin the wheels at over 35 mph (56 km/h).
The tires may fail and injure a passenger or bystander.
Driving
238
2011 Escape(204)
Owners Guide, 1st Printing
USA(fus)
Page 241 of 367
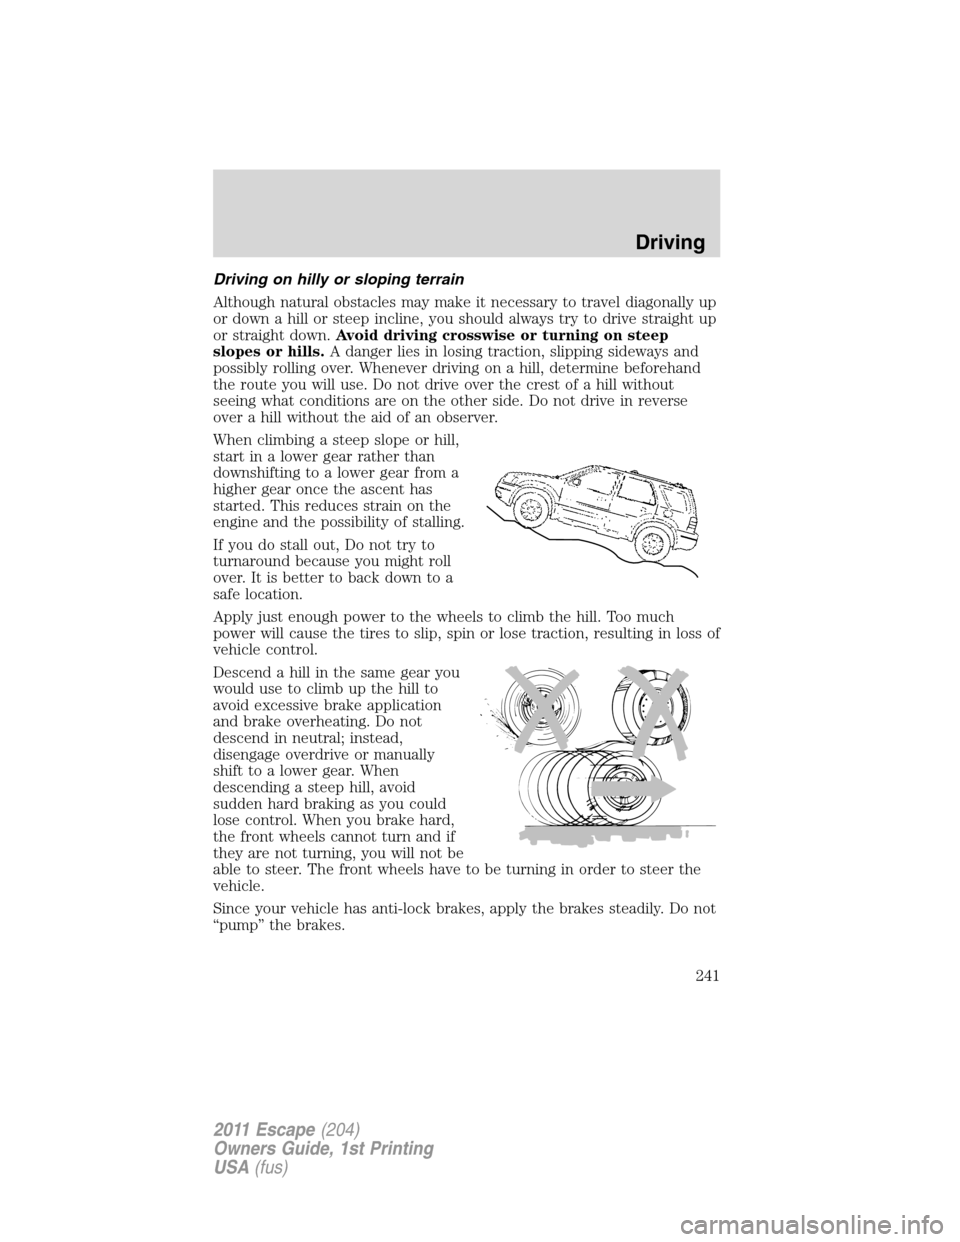
Driving on hilly or sloping terrain
Although natural obstacles may make it necessary to travel diagonally up
or down a hill or steep incline, you should always try to drive straight up
or straight down.Avoid driving crosswise or turning on steep
slopes or hills.A danger lies in losing traction, slipping sideways and
possibly rolling over. Whenever driving on a hill, determine beforehand
the route you will use. Do not drive over the crest of a hill without
seeing what conditions are on the other side. Do not drive in reverse
over a hill without the aid of an observer.
When climbing a steep slope or hill,
start in a lower gear rather than
downshifting to a lower gear from a
higher gear once the ascent has
started. This reduces strain on the
engine and the possibility of stalling.
If you do stall out, Do not try to
turnaround because you might roll
over. It is better to back down to a
safe location.
Apply just enough power to the wheels to climb the hill. Too much
power will cause the tires to slip, spin or lose traction, resulting in loss of
vehicle control.
Descend a hill in the same gear you
would use to climb up the hill to
avoid excessive brake application
and brake overheating. Do not
descend in neutral; instead,
disengage overdrive or manually
shift to a lower gear. When
descending a steep hill, avoid
sudden hard braking as you could
lose control. When you brake hard,
the front wheels cannot turn and if
they are not turning, you will not be
able to steer. The front wheels have to be turning in order to steer the
vehicle.
Since your vehicle has anti-lock brakes, apply the brakes steadily. Do not
“pump” the brakes.
Driving
241
2011 Escape(204)
Owners Guide, 1st Printing
USA(fus)
Page 243 of 367
Any modifications to a vehicle that raise the center of gravity can make
it more likely the vehicle will roll over as a result of a loss of control.
Ford Motor Company recommends that caution be used with any vehicle
equipped with a high load or device (such as ladder racks or pickup box
cover).
Failure to maintain your vehicle properly may void the warranty, increase
your repair cost, reduce vehicle performance and operational capabilities
and adversely affect driver and passenger safety. Frequent inspection of
vehicle chassis components is recommended if the vehicle is subjected to
heavy off-road usage.
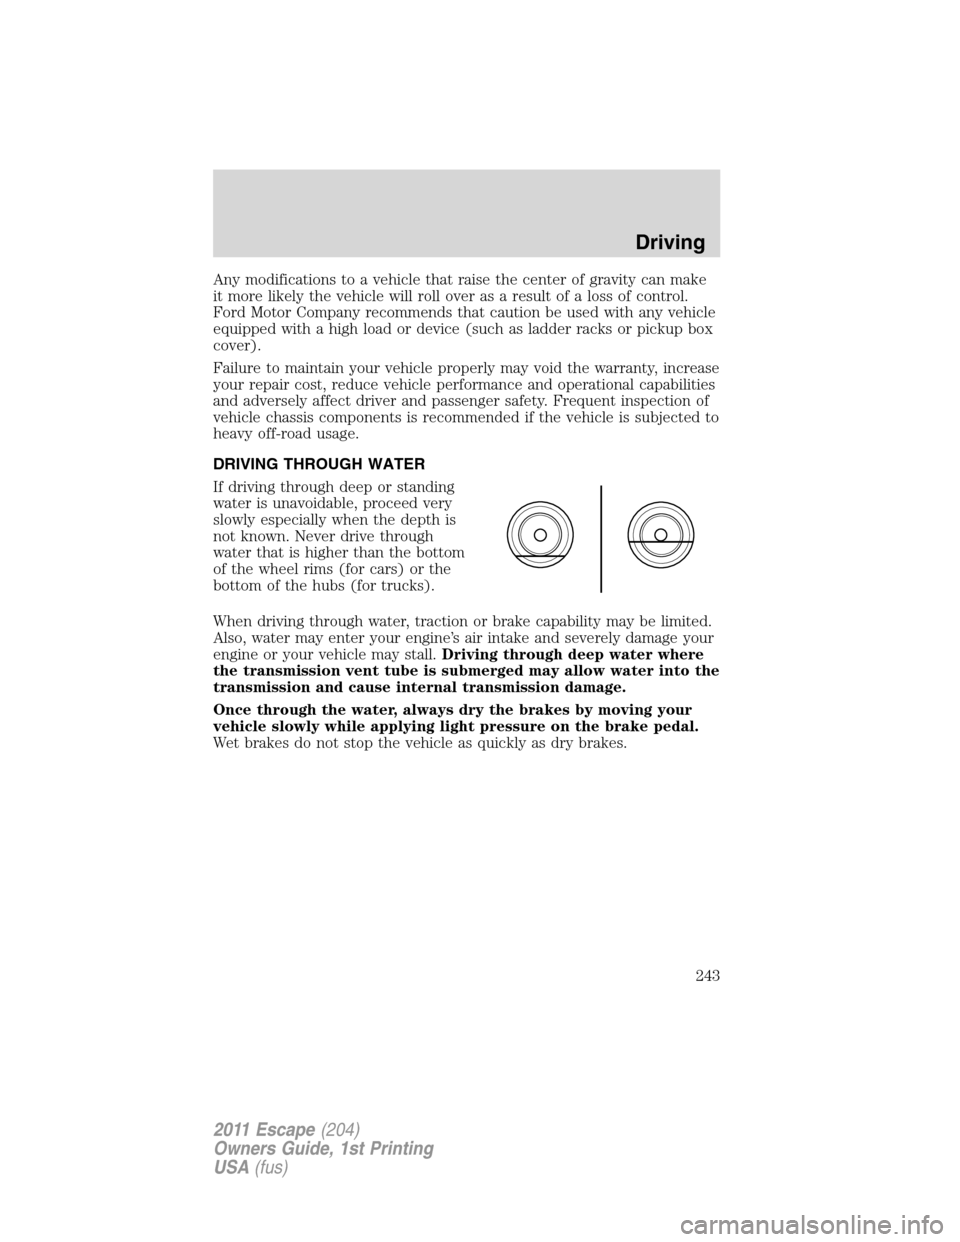
DRIVING THROUGH WATER
If driving through deep or standing
water is unavoidable, proceed very
slowly especially when the depth is
not known. Never drive through
water that is higher than the bottom
of the wheel rims (for cars) or the
bottom of the hubs (for trucks).
When driving through water, traction or brake capability may be limited.
Also, water may enter your engine’s air intake and severely damage your
engine or your vehicle may stall.Driving through deep water where
the transmission vent tube is submerged may allow water into the
transmission and cause internal transmission damage.
Once through the water, always dry the brakes by moving your
vehicle slowly while applying light pressure on the brake pedal.
Wet brakes do not stop the vehicle as quickly as dry brakes.
Driving
243
2011 Escape(204)
Owners Guide, 1st Printing
USA(fus)
Page 245 of 367
Owner Guide portfolio in the glove compartment. In Canada, the card is
found in theWarranty Guidein the glove compartment.
U.S. Ford, Mercury and Lincoln vehicle customers who require Roadside
Assistance, call 1-800-241-3673.
Canadian customers who require roadside assistance, call
1-800-665-2006.
If you need to arrange roadside assistance for yourself, Ford Motor
Company will reimburse a reasonable amount for towing to the nearest
dealership within 35 miles (56 km). To obtain reimbursement
information, U.S. Ford, Mercury and Lincoln vehicle customers call
1-800-241-3673. Customers will be asked to submit their original
receipts.
Canadian customers who need to obtain reimbursement information, call
1-800-665-2006 or visit our website at www.ford.ca.
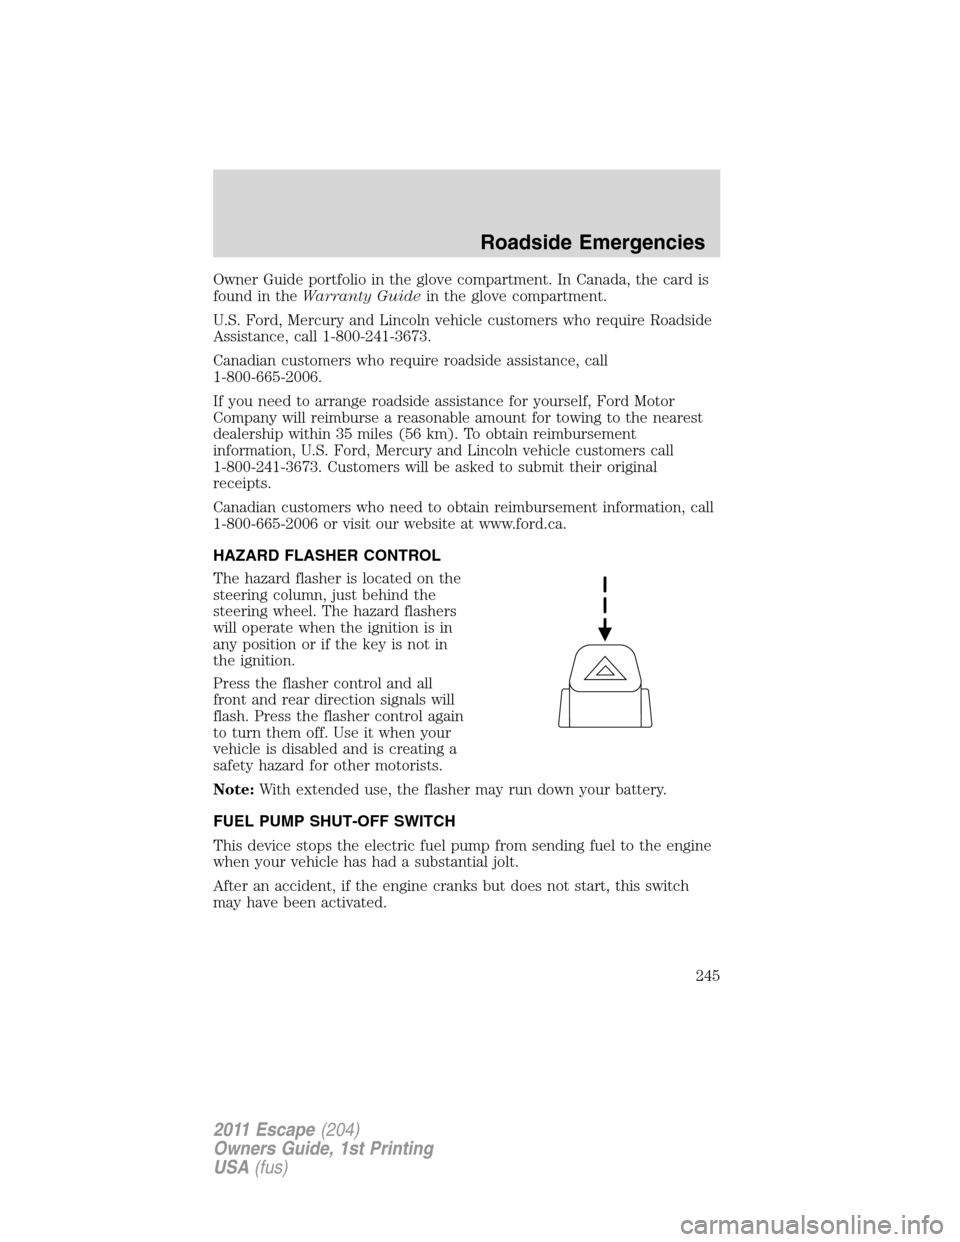
HAZARD FLASHER CONTROL
The hazard flasher is located on the
steering column, just behind the
steering wheel. The hazard flashers
will operate when the ignition is in
any position or if the key is not in
the ignition.
Press the flasher control and all
front and rear direction signals will
flash. Press the flasher control again
to turn them off. Use it when your
vehicle is disabled and is creating a
safety hazard for other motorists.
Note:With extended use, the flasher may run down your battery.
FUEL PUMP SHUT-OFF SWITCH
This device stops the electric fuel pump from sending fuel to the engine
when your vehicle has had a substantial jolt.
After an accident, if the engine cranks but does not start, this switch
may have been activated.
Roadside Emergencies
245
2011 Escape(204)
Owners Guide, 1st Printing
USA(fus)
Page 250 of 367
Fuse/Relay
LocationFuse Amp
RatingProtected Circuits
41 15A Driver/passenger door lock
switches, Automatic dimming
mirror, Compass, Ambient
lighting, Moon roof, Camera
display in mirror
42 10A Not used (spare)
43 10A Rear wiper logic, Heated seats
relay, Instrument cluster
44 10A Not used (spare)
45 5A Front wiper logic, Blower motor
relay
46 7.5A Occupant classification system
(OCS), Passenger airbag
deactivation indicator (PADI)
47 30A Circuit
BreakerPower windows
48 — Delayed accessory relay
Power distribution box
The power distribution box is located in the engine compartment. Refer
to theIdentifying components in the engine compartmentsection of
theMaintenance and Specificationschapter for the location. The
power distribution box contains high-current fuses that protect your
vehicle’s main electrical systems from overloads.
WARNING:Always disconnect the battery before servicing high
current fuses.
WARNING:To reduce risk of electrical shock, always replace
the cover to the Power Distribution Box before reconnecting the
battery or refilling fluid reservoirs.
Roadside Emergencies
250
2011 Escape(204)
Owners Guide, 1st Printing
USA(fus)
Page 256 of 367
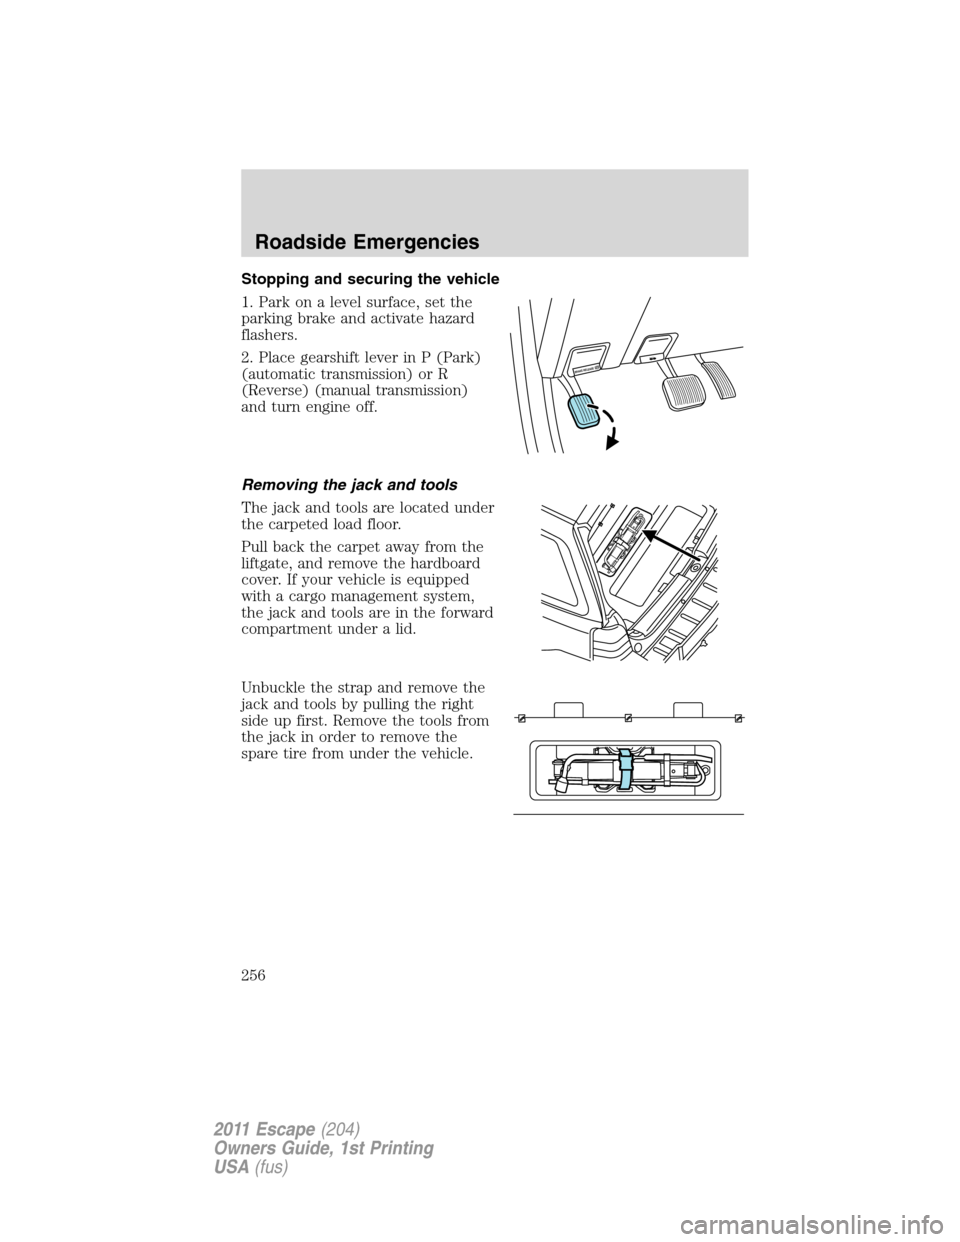
Stopping and securing the vehicle
1. Park on a level surface, set the
parking brake and activate hazard
flashers.
2. Place gearshift lever in P (Park)
(automatic transmission) or R
(Reverse) (manual transmission)
and turn engine off.
Removing the jack and tools
The jack and tools are located under
the carpeted load floor.
Pull back the carpet away from the
liftgate, and remove the hardboard
cover. If your vehicle is equipped
with a cargo management system,
the jack and tools are in the forward
compartment under a lid.
Unbuckle the strap and remove the
jack and tools by pulling the right
side up first. Remove the tools from
the jack in order to remove the
spare tire from under the vehicle.
BRAKE RELEASE P
Roadside Emergencies
256
2011 Escape(204)
Owners Guide, 1st Printing
USA(fus)
Page 262 of 367
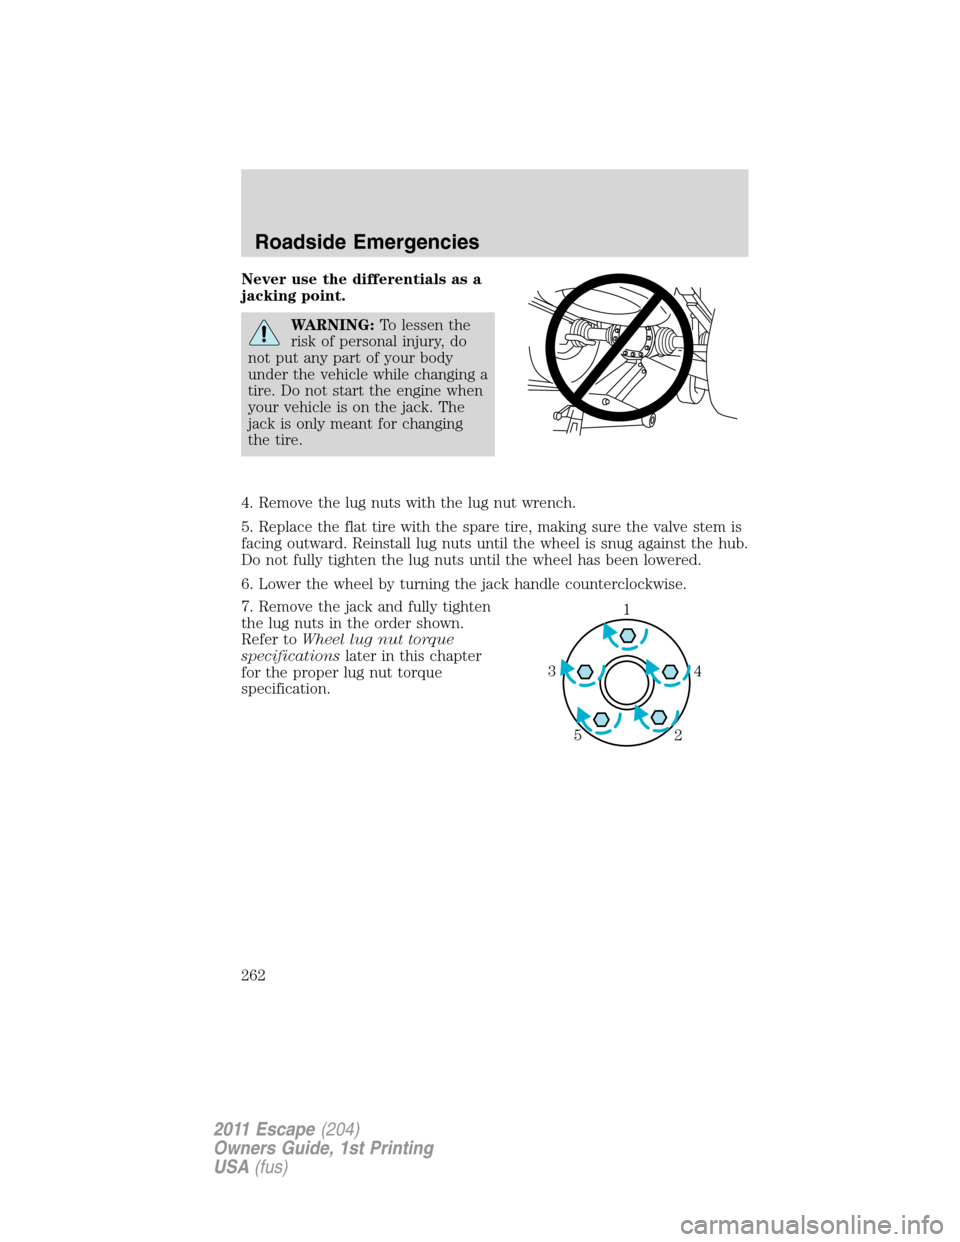
Never use the differentials as a
jacking point.
WARNING:To lessen the
risk of personal injury, do
not put any part of your body
under the vehicle while changing a
tire. Do not start the engine when
your vehicle is on the jack. The
jack is only meant for changing
the tire.
4. Remove the lug nuts with the lug nut wrench.
5. Replace the flat tire with the spare tire, making sure the valve stem is
facing outward. Reinstall lug nuts until the wheel is snug against the hub.
Do not fully tighten the lug nuts until the wheel has been lowered.
6. Lower the wheel by turning the jack handle counterclockwise.
7. Remove the jack and fully tighten
the lug nuts in the order shown.
Refer toWheel lug nut torque
specificationslater in this chapter
for the proper lug nut torque
specification.
1
4 3
2 5
Roadside Emergencies
262
2011 Escape(204)
Owners Guide, 1st Printing
USA(fus)