Cluster FORD ESCAPE 2018 User Guide
[x] Cancel search | Manufacturer: FORD, Model Year: 2018, Model line: ESCAPE, Model: FORD ESCAPE 2018Pages: 517, PDF Size: 6.62 MB
Page 95 of 517
Normally, it illuminates until the engine is
cranked and automatically turns off if no
malfunctions are present. However, if after
15 seconds it flashes eight times, this
indicates that your vehicle is not ready for
Inspection and Maintenance (I/M) testing.
See Emission Law (page 147).
Traction and Stability Control It will flash when the system is
active. If it remains illuminated
or does not illuminate when you
switch the ignition on, this indicates a
malfunction. During a malfunction the
system will switch off. Have the system
checked by your authorized dealer
immediately.
Traction and Stability Control Off It illuminates when you switch
the system off. It will go out
when you switch the system
back on or when you switch the ignition
off.
AUDIBLE WARNINGS AND
INDICATORS
Key in Ignition Warning Chime
(If
Equipped)
Sounds when you open the driver's door
and you have left the key in the ignition.
Engine On Warning Chime
A warning chime will sound when any door
is opened if the vehicle exceeds a relatively
low speed.
Keyless Warning Alert
(If Equipped)
Sounds the horn twice when you exit the
vehicle and the keyless vehicle is in RUN,
indicating the vehicle is still on. Headlamps On Warning Chime
Sounds when you remove the key from the
ignition and open the driver's door and you
have left the headlamps or parking lamps
on.
Parking Brake On Warning Chime
Sounds when you have left the parking
brake on and drive your vehicle. If the
warning chime remains on after you have
released the parking brake, have the
system checked by your authorized dealer
immediately.
Automatic Transmission Warning
Chime
Sounds when you have not moved the
transmission selector lever to position
P.
A message will be shown in the display.
92
Escape (TM2) Canada/United States of America, JJ5J 19A321 AC enUSA, Edition date: 201706, Fourth-Printing Instrument ClusterE138639 E130458
Page 99 of 517
System Check
All active warnings will display first if
applicable. The system check menu may
appear different based upon equipment
options and current vehicle status. Use the
up/down arrow buttons to scroll through
the list.
TRIP COMPUTER
Resetting the Trip Computer
Press and hold OK on the current screen
to reset the respective trip distance, time,
average fuel and average speed
information.
Distance to E
Indicates the approximate distance the
vehicle will travel on the fuel remaining in
the tank. Changes in driving pattern may
cause the value to vary.
Trip Odometer
Registers the distance traveled of
individual journeys.
Trip Timer
Registers the time of individual journeys.
Instantaneous Fuel (If Equipped)
Shows your instantaneous fuel usage.
Average Fuel
Indicates the average fuel consumption
since the function was last reset.
Digital Speedo
Shows a digital display of your vehicle
speed. All Value
(If Equipped)
Indicates all the respective remaining fuel,
distance, instantaneous fuel and average
fuel information.
INFORMATION MESSAGES
Note: Depending on your vehicle options
and instrument cluster type, not all of the
messages display or are available.
Additionally, the information display may
abbreviate or shorten certain messages. Press the
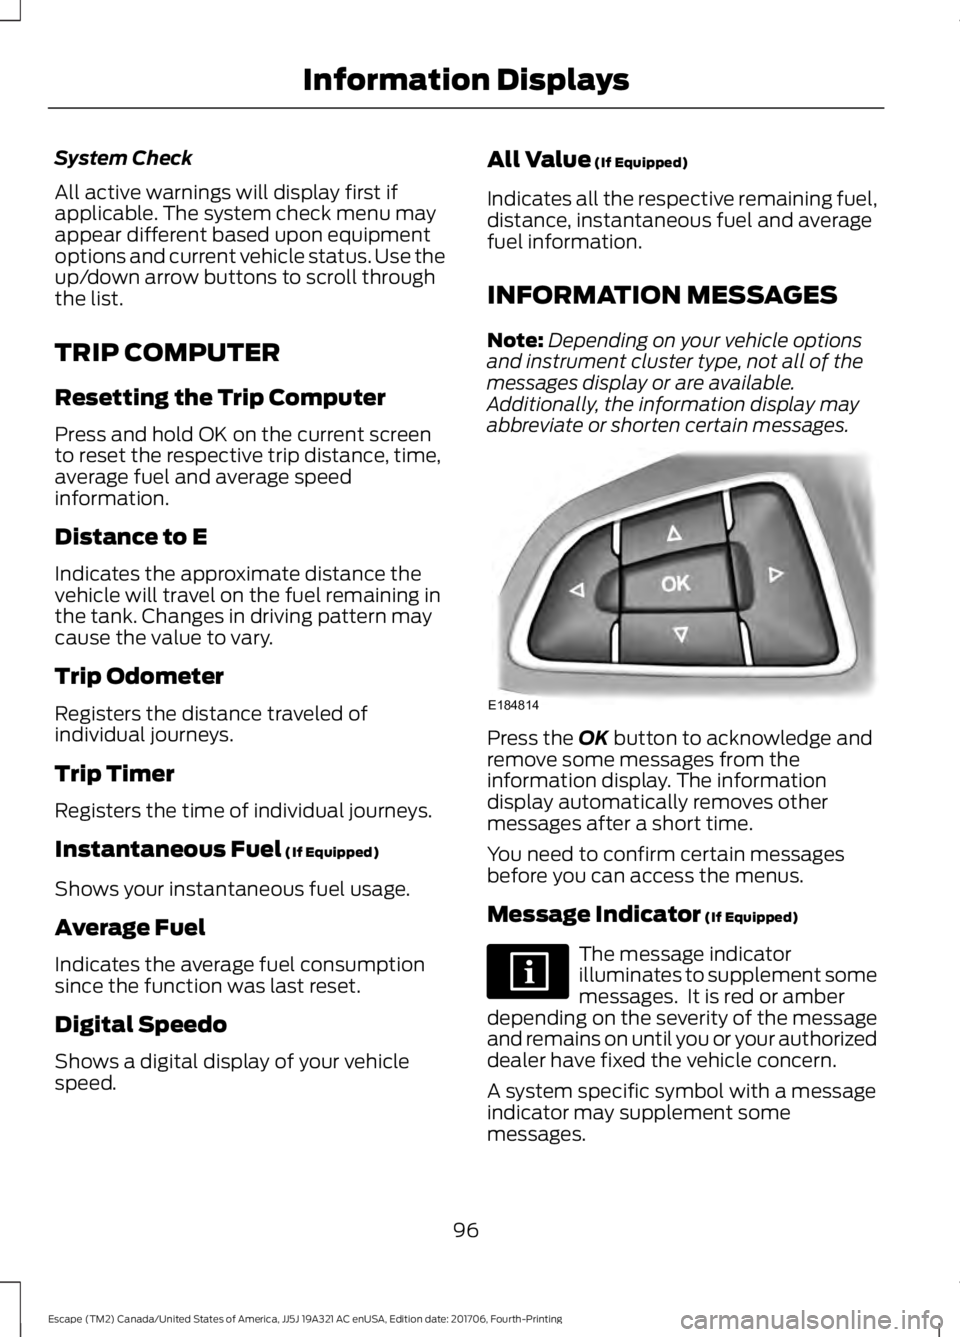
OK button to acknowledge and
remove some messages from the
information display. The information
display automatically removes other
messages after a short time.
You need to confirm certain messages
before you can access the menus.
Message Indicator
(If Equipped) The message indicator
illuminates to supplement some
messages. It is red or amber
depending on the severity of the message
and remains on until you or your authorized
dealer have fixed the vehicle concern.
A system specific symbol with a message
indicator may supplement some
messages.
96
Escape (TM2) Canada/United States of America, JJ5J 19A321 AC enUSA, Edition date: 201706, Fourth-Printing Information DisplaysE184814
Page 140 of 517
AUTO-START-STOP
The system helps reduce fuel consumption
by automatically shutting off and restarting
the engine while your vehicle is stopped.
The engine will restart automatically when
you release the brake pedal. In some
situations, your vehicle may restart
automatically, for example:
•
To maintain interior comfort
• To recharge the battery
Note: Power assist steering is turned off
when the engine is off. WARNING: Always fully apply the
parking brake. Make sure you shift into park
(P) for vehicles with an automatic
transmission. Switch the ignition off and
remove the key whenever you leave your
vehicle. WARNING: Before opening the hood
or performing any maintenance, fully apply
the parking brake, shift into park (P) or
neutral (N) and switch the ignition off. WARNING:
Always switch the
ignition off before leaving the vehicle. If the
ignition is switched on an automatic restart
may occur at any time. WARNING:
The system may require
the engine to automatically restart when
the auto-start-stop indicator illuminates
green or flashes amber. Failure to follow
this instruction could result in personal
injury.
The Auto-Start-Stop system status is
available at a glance within the information
display. See Information Displays (page
93
). Enabling Auto-Start-Stop
The system is automatically enabled every
time you start your vehicle if the following
conditions are met:
•
The Auto-Start-Stop button is not
pressed (not illuminated).
• Your vehicle exceeds an initial speed
of
3 mph (5 km/h) after the vehicle has
been initially started.
• Your vehicle is stopped.
• Your foot is on the brake pedal.
• The transmission is in drive (D).
• The driver's door is closed.
• There is adequate brake vacuum.
• The interior compartment has been
cooled or warmed to an acceptable
level.
• The front windshield defroster is off.
• The steering wheel is not turned rapidly
or is not at a sharp angle.
• The vehicle is not on a steep road
grade.
• The battery is within optimal operating
conditions (battery state of charge and
temperature in range).
• The engine coolant is at operating
temperature.
• Elevation is below approximately
10,000 ft (3,048 m)
.
• Ambient temperature is moderate. The green Auto-Start-Stop
indicator light on the instrument
cluster will illuminate to indicate
when the automatic engine stop occurs. If the instrument cluster is
equipped with a grey
Auto-Start-Stop indicator light,
it is illuminated when automatic engine
stop is not available due to one of the
above noted conditions not being met.
137
Escape (TM2) Canada/United States of America, JJ5J 19A321 AC enUSA, Edition date: 201706, Fourth-Printing Unique Driving Characteristics E146361
Page 154 of 517
AUTOMATIC TRANSMISSION
WARNING: Always fully apply the
parking brake and make sure you shift into
park (P). Failure to follow this instruction
could result in personal injury or death. WARNING:
Do not apply the brake
pedal and accelerator pedal
simultaneously. Applying both pedals
simultaneously for more than a few
seconds will limit engine performance,
which may result in difficulty maintaining
speed in traffic and could lead to serious
injury. WARNING:
When your vehicle is
stationary, keep the brake pedal fully
pressed when shifting gears. Failure to
follow this instruction could result in
personal injury, death or property damage.
Note: You may not be able to shift out of
park (P) unless the intelligent access key is
inside your vehicle.
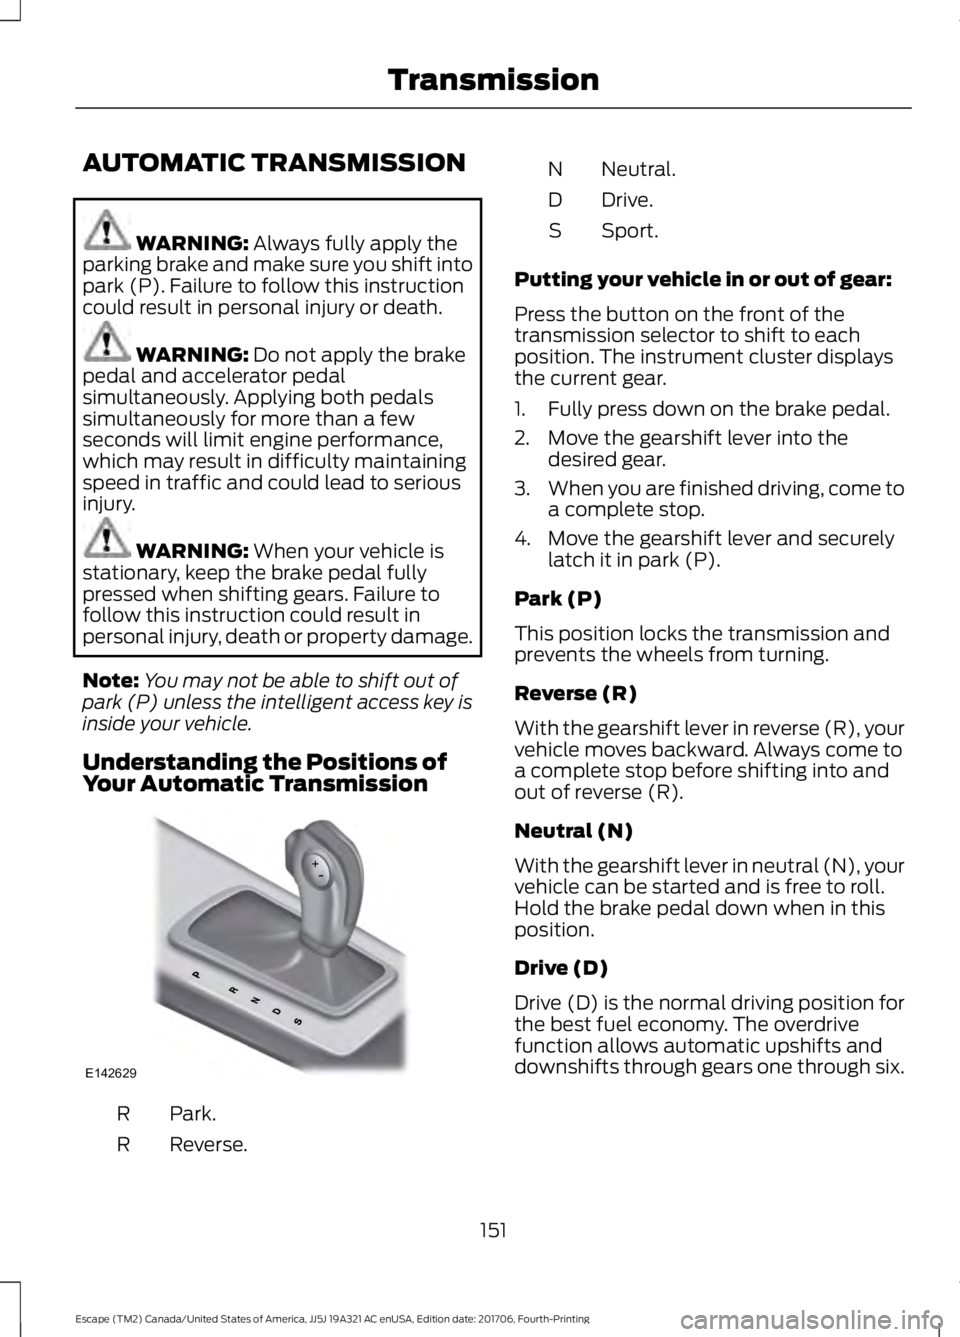
Understanding the Positions of
Your Automatic Transmission Park.
R
Reverse.
R Neutral.
N
Drive.
D
Sport.
S
Putting your vehicle in or out of gear:
Press the button on the front of the
transmission selector to shift to each
position. The instrument cluster displays
the current gear.
1. Fully press down on the brake pedal.
2. Move the gearshift lever into the desired gear.
3. When you are finished driving, come to
a complete stop.
4. Move the gearshift lever and securely latch it in park (P).
Park (P)
This position locks the transmission and
prevents the wheels from turning.
Reverse (R)
With the gearshift lever in reverse (R), your
vehicle moves backward. Always come to
a complete stop before shifting into and
out of reverse (R).
Neutral (N)
With the gearshift lever in neutral (N), your
vehicle can be started and is free to roll.
Hold the brake pedal down when in this
position.
Drive (D)
Drive (D) is the normal driving position for
the best fuel economy. The overdrive
function allows automatic upshifts and
downshifts through gears one through six.
151
Escape (TM2) Canada/United States of America, JJ5J 19A321 AC enUSA, Edition date: 201706, Fourth-Printing TransmissionE142629
Page 156 of 517
SelectShift in sport (S):
•
Provides a permanent manual gear
selection where full control of gear
selection is required.
To exit SelectShift mode, shift the
transmission into drive (D).
The instrument cluster displays your
currently selected gear. If a gear is
requested but not available due to vehicle
conditions, low speed, too high engine
speed for requested gear selection, the
current gear flashes three times.
Note: At full accelerator pedal travel, the
transmission downshifts to ensure
maximum performance.
Note: In low traction conditions, you can
pull away in second gear using SelectShift.
To perform this operation select drive (D)
or sport (S) mode and press either the +
toggle or pull the + paddle until 2 is
displayed on the cluster. Your vehicle is now
ready to move in 2nd gear.
Brake-Shift Interlock Override WARNING: Do not drive your vehicle
until you verify that the stoplamps are
working. WARNING: When doing this
procedure, you need to take the
transmission out of park (P) which means
your vehicle can roll freely. To avoid
unwanted vehicle movement, always fully
apply the parking brake prior to doing this
procedure. Use wheels chocks if
appropriate. WARNING:
If the parking brake is
fully released, but the brake warning lamp
remains illuminated, the brakes may not
be working properly. Have your vehicle
checked as soon as possible. Use the brake shift interlock lever to move
the gearshift lever from the park position
in the event of an electrical malfunction or
if your vehicle has a dead battery.
Apply the parking brake and turn your
vehicle off before performing this
procedure.
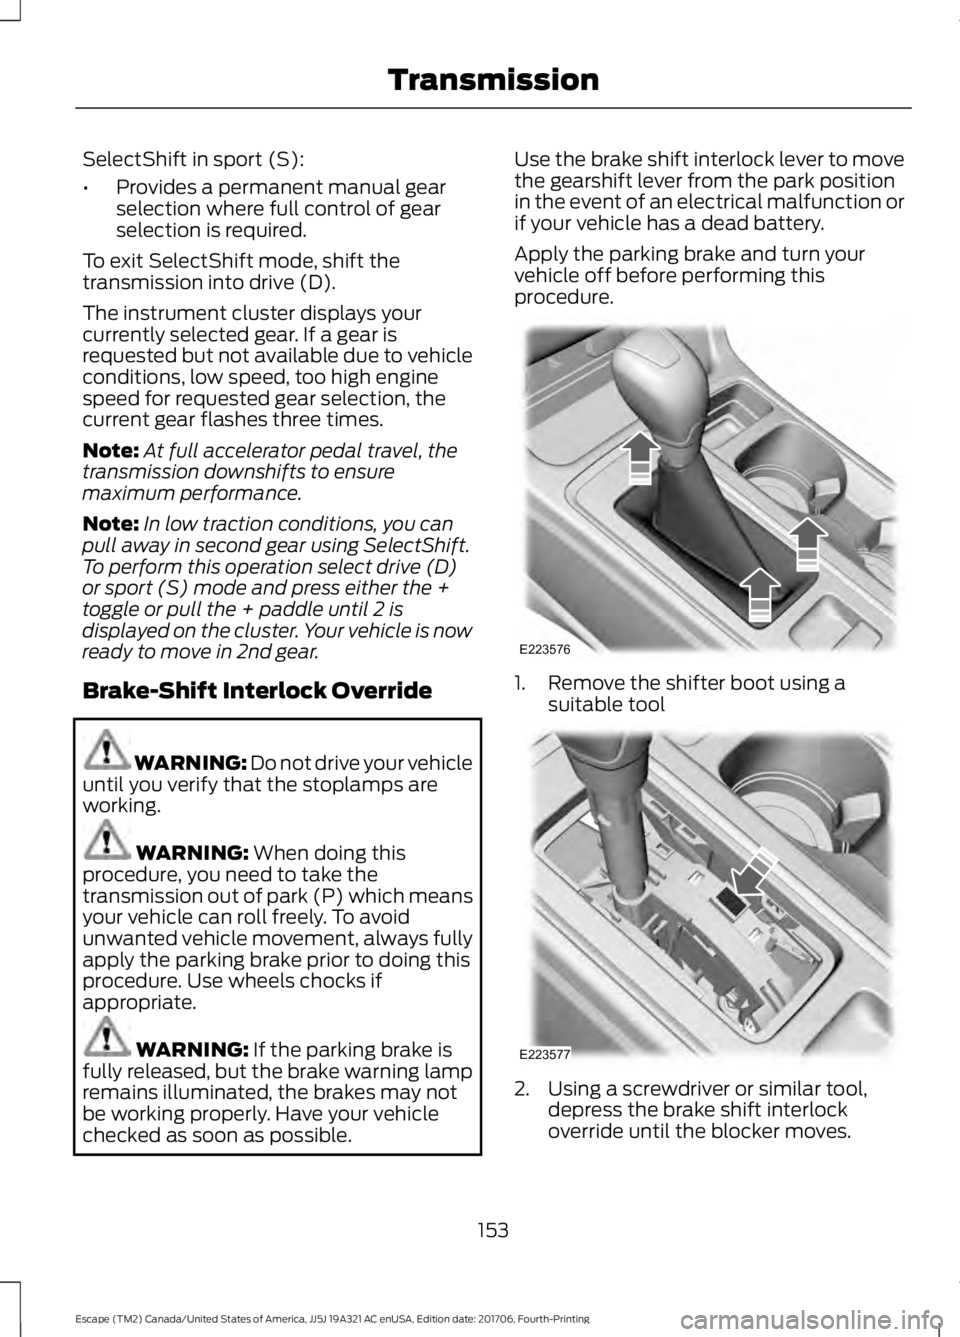
1. Remove the shifter boot using a
suitable tool 2. Using a screwdriver or similar tool,
depress the brake shift interlock
override until the blocker moves.
153
Escape (TM2) Canada/United States of America, JJ5J 19A321 AC enUSA, Edition date: 201706, Fourth-Printing TransmissionE223576 E223577
Page 185 of 517
PRINCIPLE OF OPERATION
Cruise control lets you maintain a set
speed without keeping your foot on the
accelerator pedal. You can use cruise
control when your vehicle speed is greater
than 20 mph (30 km/h).
USING CRUISE CONTROL WARNING: Do not use cruise control
on winding roads, in heavy traffic or when
the road surface is slippery. This could
result in loss of vehicle control, serious
injury or death. WARNING:
When you are going
downhill, your vehicle speed could increase
above the set speed. The system does not
apply the brakes.
Note: Cruise control disengages if the
vehicle speed decreases more than 10 mph
(16 km/h) below the set speed when driving
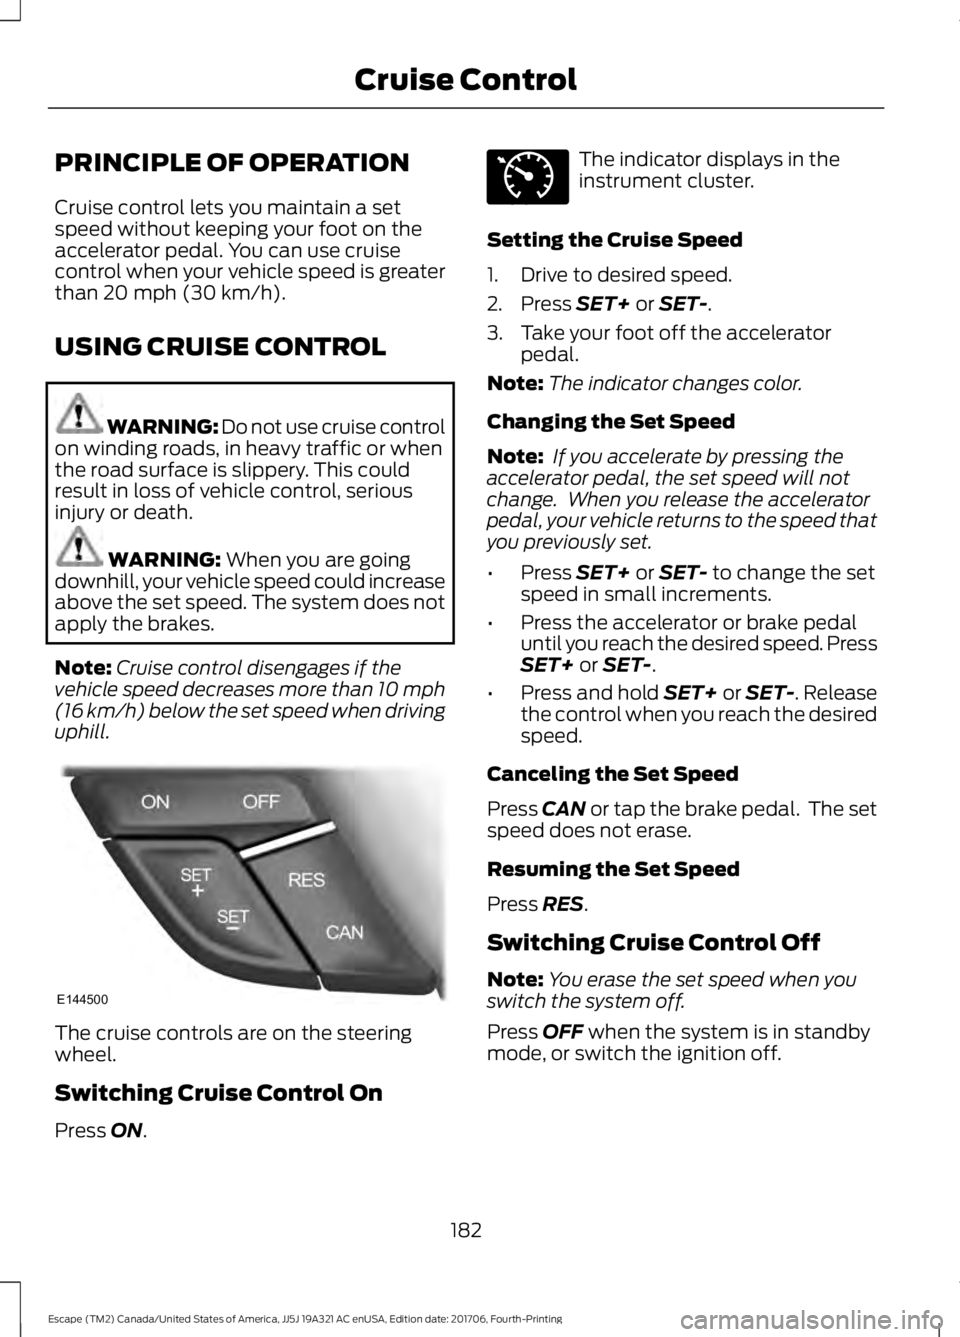
uphill. The cruise controls are on the steering
wheel.
Switching Cruise Control On
Press
ON. The indicator displays in the
instrument cluster.
Setting the Cruise Speed
1. Drive to desired speed.
2. Press
SET+ or SET-.
3. Take your foot off the accelerator pedal.
Note: The indicator changes color.
Changing the Set Speed
Note: If you accelerate by pressing the
accelerator pedal, the set speed will not
change. When you release the accelerator
pedal, your vehicle returns to the speed that
you previously set.
• Press
SET+ or SET- to change the set
speed in small increments.
• Press the accelerator or brake pedal
until you reach the desired speed. Press
SET+
or SET-.
• Press and hold SET+ or SET-. Release
the control when you reach the desired
speed.
Canceling the Set Speed
Press
CAN or tap the brake pedal. The set
speed does not erase.
Resuming the Set Speed
Press
RES.
Switching Cruise Control Off
Note: You erase the set speed when you
switch the system off.
Press
OFF when the system is in standby
mode, or switch the ignition off.
182
Escape (TM2) Canada/United States of America, JJ5J 19A321 AC enUSA, Edition date: 201706, Fourth-Printing Cruise ControlE144500 E71340
Page 187 of 517
Setting the Adaptive Cruise Speed
Note:
When adaptive cruise control is
active, the speedometer may vary slightly
from the set speed displayed in the
information display.
1. Drive to desired speed.
2. Press SET-.
3. A green indicator light, the current gap
setting and your set speed appear in
the information display.
4. Take your foot off the accelerator pedal.
5. A vehicle image illuminates if the system detects a vehicle in front of you.
Following a Vehicle WARNING:
When following a
vehicle, your vehicle does not decelerate
automatically to a stop, nor does your
vehicle always decelerate quickly enough
to avoid a crash without driver intervention.
Always apply the brakes when necessary.
Failing to do so may result in a crash,
serious injury or death. WARNING:
Adaptive cruise control
only warns of vehicles detected by the
radar sensor. In some cases there may be
no warning or a delayed warning. You
should always apply the brakes when
necessary. Failure to do so may result in a
crash, serious injury or death.
Note: When you are following a vehicle and
you switch on a direction indicator, adaptive
cruise control may provide a small
temporary acceleration to help you pass.
Note: The brakes may emit noise when
applied by the system. When a vehicle ahead of you enters the
same lane or a slower vehicle is ahead in
the same lane, the vehicle speed adjusts
to maintain a preset gap distance. A
vehicle graphic illuminates in the
instrument cluster.
Your vehicle maintains a consistent gap
from the vehicle ahead until:
•
The vehicle in front of you accelerates
to a speed above the set speed.
• The vehicle in front of you moves out
of the lane you are in.
• The vehicle speed falls below
10 mph
(20 km/h).
• You set a new gap distance.
The system applies the brakes to slow your
vehicle to maintain a safe gap distance
from the vehicle in front. The system only
applies limited braking. You can override
the system by applying the brakes.
If the system determines that its maximum
braking level is not sufficient, an audible
warning sounds when the system
continues to brake. A red warning bar
displays on the windshield and you must
take immediate action.
Setting the Gap Distance
Note: The gap setting is time dependent
and therefore the distance adjusts with your
vehicle speed.
Note: It is your responsibility to select a gap
appropriate to the driving conditions.
You can decrease or increase the distance
between your vehicle and the vehicle in
front by pressing the gap control.
184
Escape (TM2) Canada/United States of America, JJ5J 19A321 AC enUSA, Edition date: 201706, Fourth-Printing Cruise ControlE247590
Page 240 of 517
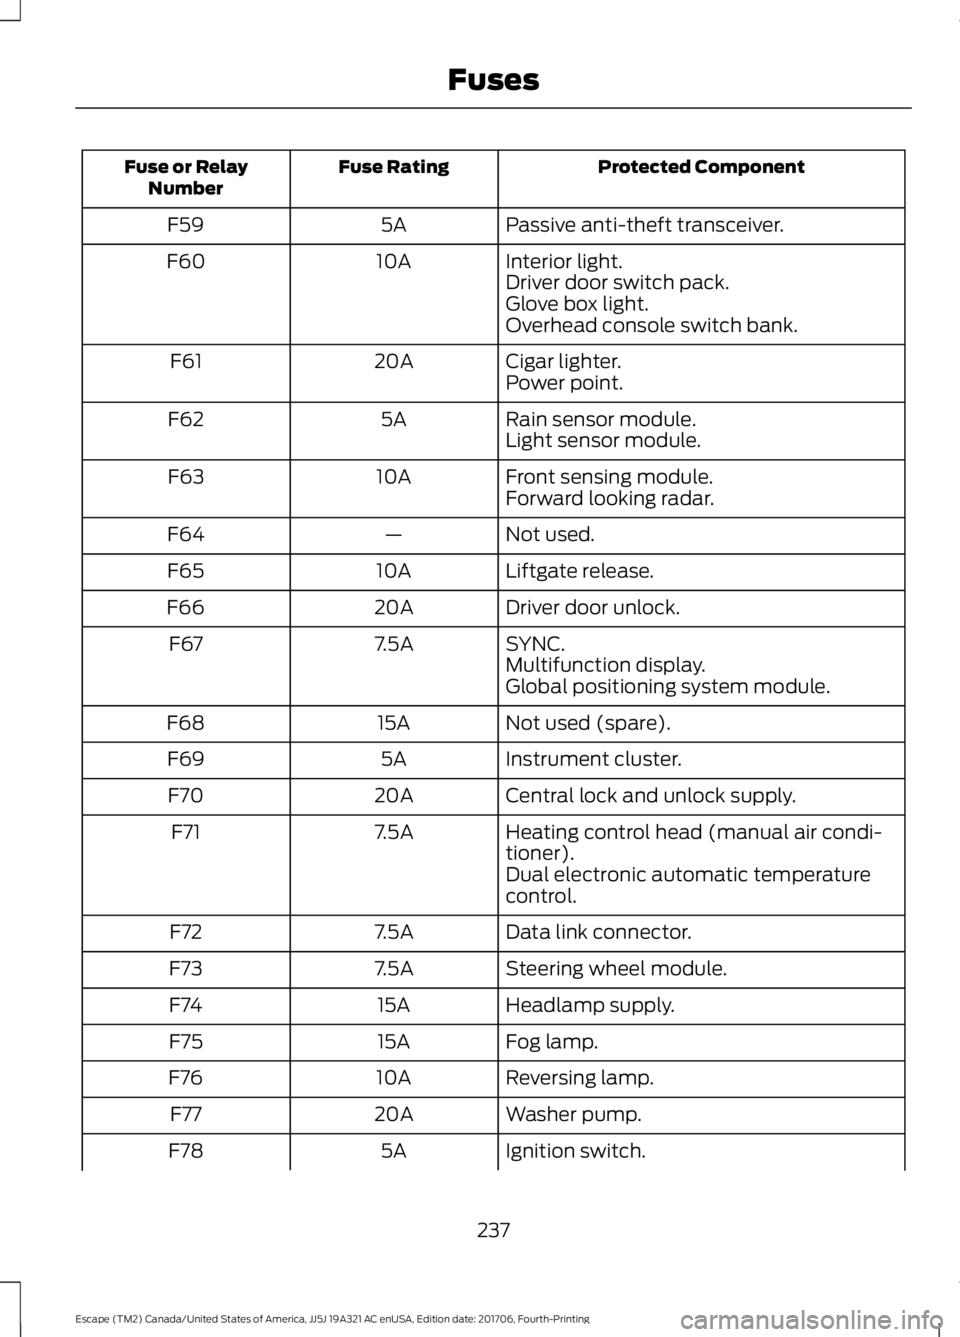
Protected Component
Fuse Rating
Fuse or Relay
Number
Passive anti-theft transceiver.
5A
F59
Interior light.
10A
F60
Driver door switch pack.
Glove box light.
Overhead console switch bank.
Cigar lighter.
20A
F61
Power point.
Rain sensor module.
5A
F62
Light sensor module.
Front sensing module.
10A
F63
Forward looking radar.
Not used.
—
F64
Liftgate release.
10A
F65
Driver door unlock.
20A
F66
SYNC.
7.5A
F67
Multifunction display.
Global positioning system module.
Not used (spare).
15A
F68
Instrument cluster.
5A
F69
Central lock and unlock supply.
20A
F70
Heating control head (manual air condi-
tioner).
7.5A
F71
Dual electronic automatic temperature
control.
Data link connector.
7.5A
F72
Steering wheel module.
7.5A
F73
Headlamp supply.
15A
F74
Fog lamp.
15A
F75
Reversing lamp.
10A
F76
Washer pump.
20A
F77
Ignition switch.
5A
F78
237
Escape (TM2) Canada/United States of America, JJ5J 19A321 AC enUSA, Edition date: 201706, Fourth-Printing Fuses
Page 252 of 517
Do not use supplemental engine oil
additives because they are unnecessary
and could lead to engine damage that may
not be covered by the vehicle Warranty.
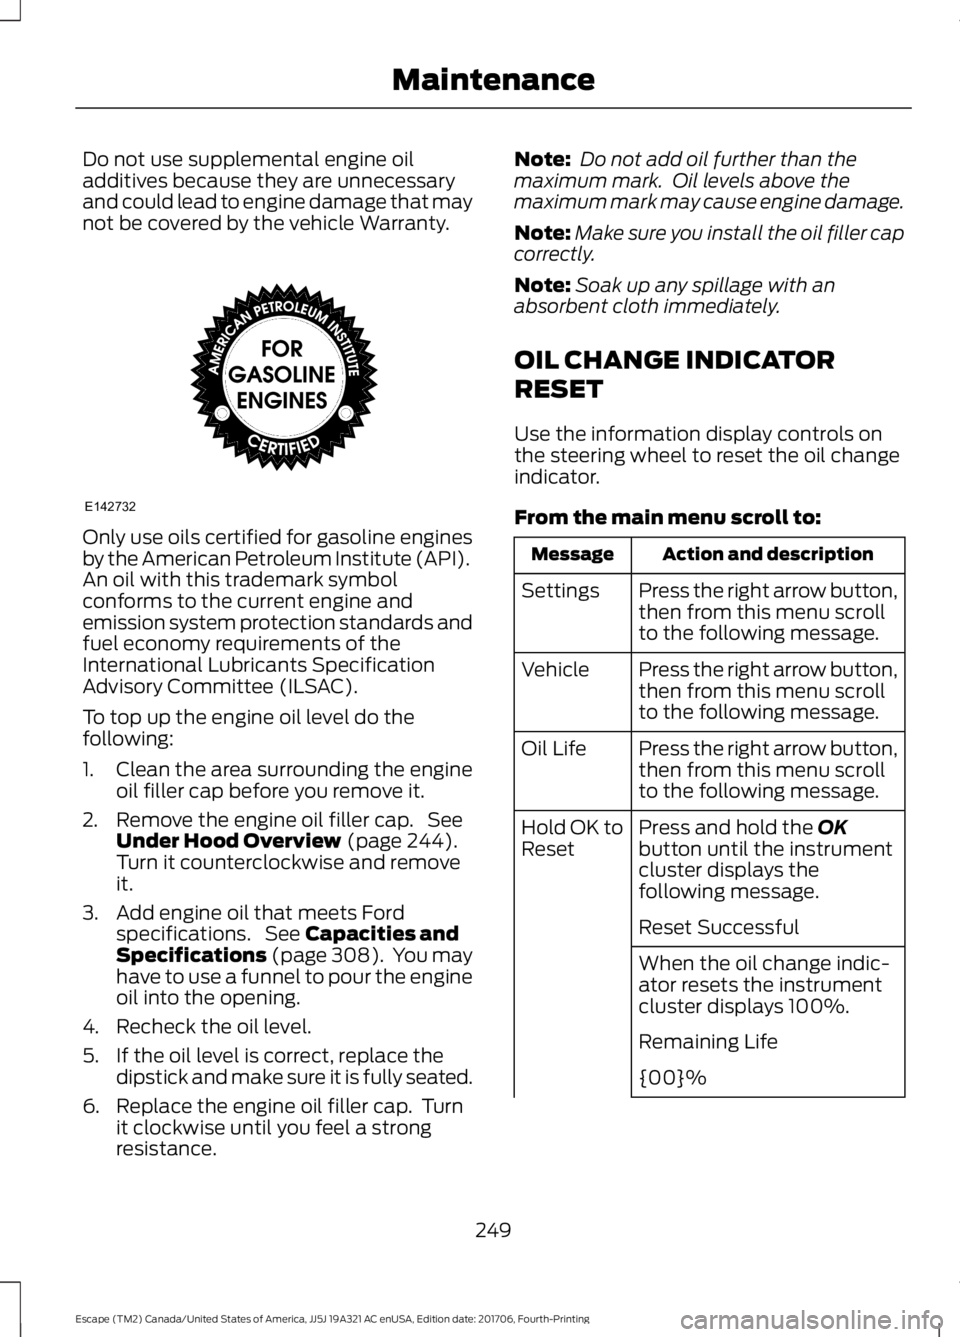
Only use oils certified for gasoline engines
by the American Petroleum Institute (API).
An oil with this trademark symbol
conforms to the current engine and
emission system protection standards and
fuel economy requirements of the
International Lubricants Specification
Advisory Committee (ILSAC).
To top up the engine oil level do the
following:
1. Clean the area surrounding the engine
oil filler cap before you remove it.
2. Remove the engine oil filler cap. See Under Hood Overview (page 244).
Turn it counterclockwise and remove
it.
3. Add engine oil that meets Ford specifications. See
Capacities and
Specifications (page 308). You may
have to use a funnel to pour the engine
oil into the opening.
4. Recheck the oil level.
5. If the oil level is correct, replace the dipstick and make sure it is fully seated.
6. Replace the engine oil filler cap. Turn it clockwise until you feel a strong
resistance. Note:
Do not add oil further than the
maximum mark. Oil levels above the
maximum mark may cause engine damage.
Note: Make sure you install the oil filler cap
correctly.
Note: Soak up any spillage with an
absorbent cloth immediately.
OIL CHANGE INDICATOR
RESET
Use the information display controls on
the steering wheel to reset the oil change
indicator.
From the main menu scroll to: Action and description
Message
Press the right arrow button,
then from this menu scroll
to the following message.
Settings
Press the right arrow button,
then from this menu scroll
to the following message.
Vehicle
Press the right arrow button,
then from this menu scroll
to the following message.
Oil Life
Press and hold the
OK
button until the instrument
cluster displays the
following message.
Hold OK to
Reset
Reset Successful
When the oil change indic-
ator resets the instrument
cluster displays 100%.
Remaining Life
{00}%
249
Escape (TM2) Canada/United States of America, JJ5J 19A321 AC enUSA, Edition date: 201706, Fourth-Printing MaintenanceE142732
Page 253 of 517
Action and description
Message
If the instrument cluster
displays one of the following
messages, repeat the
process.
Not Reset
Reset Cancelled
ENGINE COOLANT CHECK WARNING: Do not remove the
coolant reservoir cap when the cooling
system is hot. Wait 10 minutes for the
cooling system to cool down. Cover the
coolant reservoir cap with a thick cloth to
prevent the possibility of scalding and
slowly remove the cap. Failure to follow
this instruction could result in personal
injury. WARNING: Do not put coolant in the
windshield washer reservoir. If sprayed on
the windshield, coolant could make it
difficult to see through the windshield. WARNING:
To reduce the risk of
personal injury, make sure the engine is
cool before unscrewing the coolant
pressure relief cap. The cooling system is
under pressure. Steam and hot liquid can
come out forcefully when you loosen the
cap slightly. WARNING:
Do not add coolant
further than the MAX mark.
When the engine is cold, check the
concentration and level of the coolant at
the intervals listed in the scheduled
maintenance information. See Scheduled
Maintenance
(page 455). Note:
Make sure that the coolant level is
between the
MIN and MAX marks on the
coolant reservoir.
Note: Coolant expands when it is hot. The
level may extend beyond the
MAX mark.
Maintain coolant concentration within
48% to 50%, which equates to a freeze
point between
-29°F (-34°C) and -35°F
(-37°C). Coolant concentration should be
checked using a refractometer. We do not
recommend the use of hydrometers or
coolant test strips for measuring coolant
concentration.
Adding Coolant WARNING:
Do not add engine
coolant when the engine is hot. Failure to
follow this instruction could result in
personal injury. WARNING:
Do not remove the
coolant reservoir cap when the cooling
system is hot. Wait 10 minutes for the
cooling system to cool down. Cover the
coolant reservoir cap with a thick cloth to
prevent the possibility of scalding and
slowly remove the cap. Failure to follow
this instruction could result in personal
injury.
Note: Automotive fluids are not
interchangeable. Take care not to put
engine coolant in the windshield washer
fluid reservoir or windshield washer fluid in
the engine coolant reservoir.
Note: Do not use stop leak pellets, cooling
system sealants, or non-specified additives
as they can cause damage to the engine
cooling or heating systems. Resulting
component damage may not be covered by
the vehicle Warranty.
250
Escape (TM2) Canada/United States of America, JJ5J 19A321 AC enUSA, Edition date: 201706, Fourth-Printing Maintenance