reset FORD ESCAPE 2018 Owners Manual
[x] Cancel search | Manufacturer: FORD, Model Year: 2018, Model line: ESCAPE, Model: FORD ESCAPE 2018Pages: 517, PDF Size: 6.62 MB
Page 7 of 517
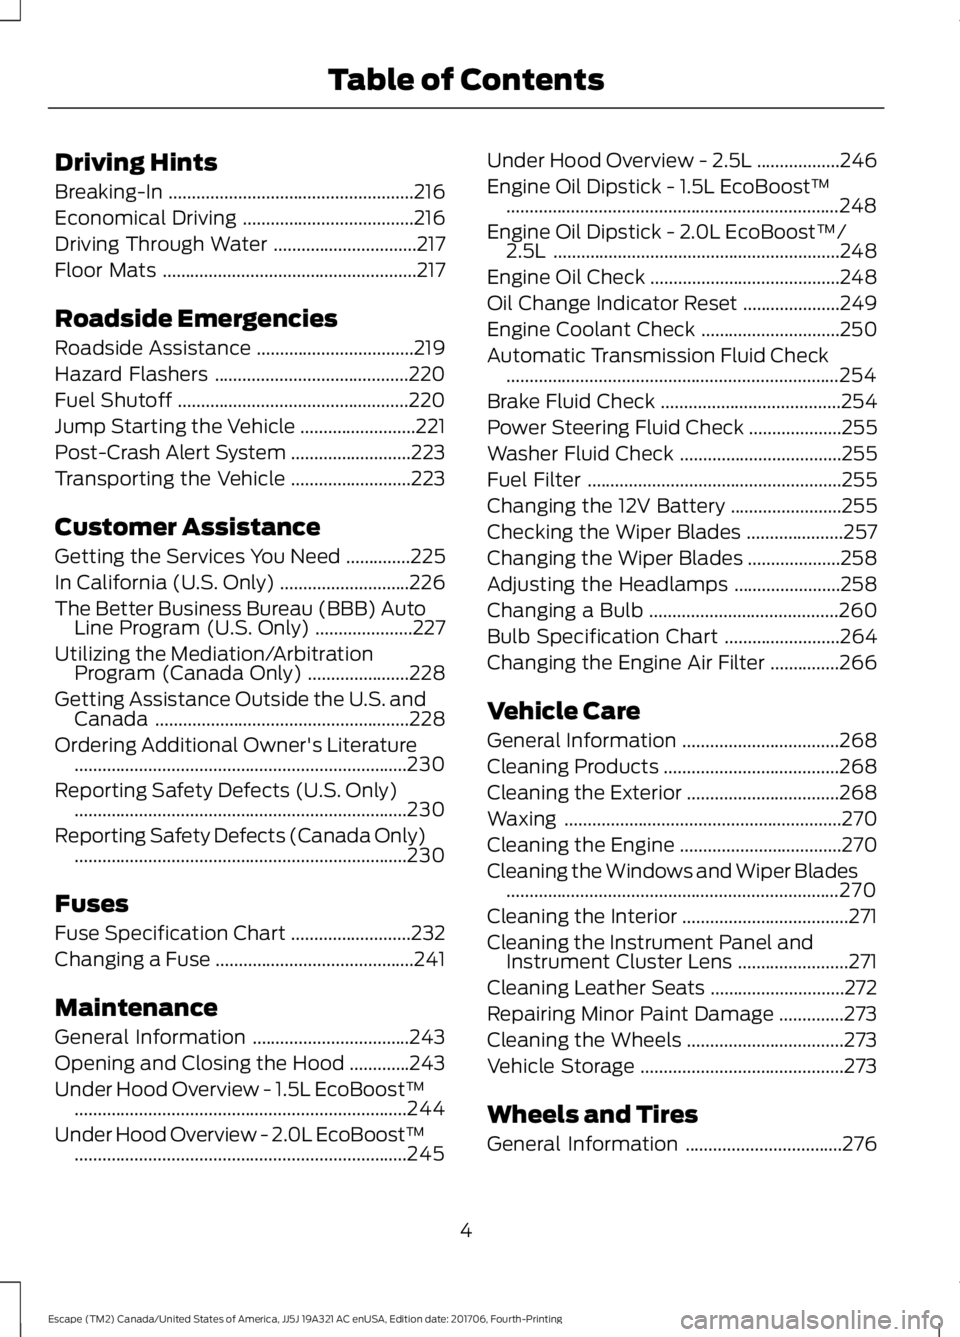
Driving Hints
Breaking-In
.....................................................216
Economical Driving .....................................
216
Driving Through Water ...............................
217
Floor Mats .......................................................
217
Roadside Emergencies
Roadside Assistance ..................................
219
Hazard Flashers ..........................................
220
Fuel Shutoff ..................................................
220
Jump Starting the Vehicle .........................
221
Post-Crash Alert System ..........................
223
Transporting the Vehicle ..........................
223
Customer Assistance
Getting the Services You Need ..............
225
In California (U.S. Only) ............................
226
The Better Business Bureau (BBB) Auto Line Program (U.S. Only) .....................
227
Utilizing the Mediation/Arbitration Program (Canada Only) ......................
228
Getting Assistance Outside the U.S. and Canada .......................................................
228
Ordering Additional Owner's Literature ........................................................................\
230
Reporting Safety Defects (U.S. Only) ........................................................................\
230
Reporting Safety Defects (Canada Only) ........................................................................\
230
Fuses
Fuse Specification Chart ..........................
232
Changing a Fuse ...........................................
241
Maintenance
General Information ..................................
243
Opening and Closing the Hood .............
243
Under Hood Overview - 1.5L EcoBoost™ ........................................................................\
244
Under Hood Overview - 2.0L EcoBoost™ ........................................................................\
245 Under Hood Overview - 2.5L
..................
246
Engine Oil Dipstick - 1.5L EcoBoost™ ........................................................................\
248
Engine Oil Dipstick - 2.0L EcoBoost™/ 2.5L ..............................................................
248
Engine Oil Check .........................................
248
Oil Change Indicator Reset .....................
249
Engine Coolant Check ..............................
250
Automatic Transmission Fluid Check ........................................................................\
254
Brake Fluid Check .......................................
254
Power Steering Fluid Check ....................
255
Washer Fluid Check ...................................
255
Fuel Filter .......................................................
255
Changing the 12V Battery ........................
255
Checking the Wiper Blades .....................
257
Changing the Wiper Blades ....................
258
Adjusting the Headlamps .......................
258
Changing a Bulb .........................................
260
Bulb Specification Chart .........................
264
Changing the Engine Air Filter ...............
266
Vehicle Care
General Information ..................................
268
Cleaning Products ......................................
268
Cleaning the Exterior .................................
268
Waxing ............................................................
270
Cleaning the Engine ...................................
270
Cleaning the Windows and Wiper Blades ........................................................................\
270
Cleaning the Interior ....................................
271
Cleaning the Instrument Panel and Instrument Cluster Lens ........................
271
Cleaning Leather Seats .............................
272
Repairing Minor Paint Damage ..............
273
Cleaning the Wheels ..................................
273
Vehicle Storage ............................................
273
Wheels and Tires
General Information ..................................
276
4
Escape (TM2) Canada/United States of America, JJ5J 19A321 AC enUSA, Edition date: 201706, Fourth-Printing Table of Contents
Page 11 of 517
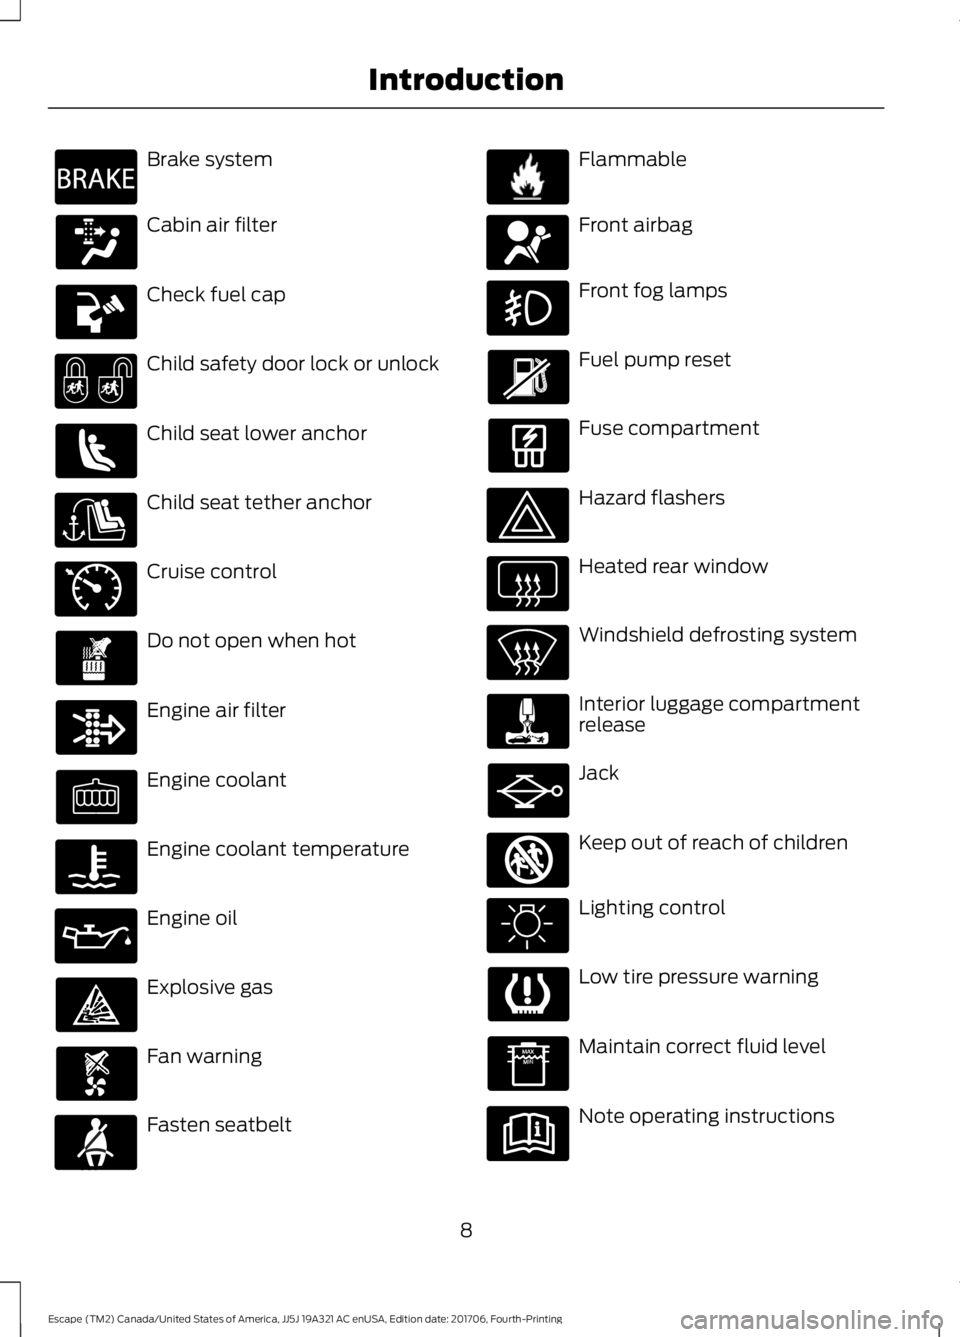
Brake system
Cabin air filter
Check fuel cap
Child safety door lock or unlock
Child seat lower anchor
Child seat tether anchor
Cruise control
Do not open when hot
Engine air filter
Engine coolant
Engine coolant temperature
Engine oil
Explosive gas
Fan warning
Fasten seatbelt Flammable
Front airbag
Front fog lamps
Fuel pump reset
Fuse compartment
Hazard flashers
Heated rear window
Windshield defrosting system
Interior luggage compartment
release
Jack
Keep out of reach of children
Lighting control
Low tire pressure warning
Maintain correct fluid level
Note operating instructions
8
Escape (TM2) Canada/United States of America, JJ5J 19A321 AC enUSA, Edition date: 201706, Fourth-Printing IntroductionE270480 E71340 E71880 E231160 E67017 E161353
Page 61 of 517
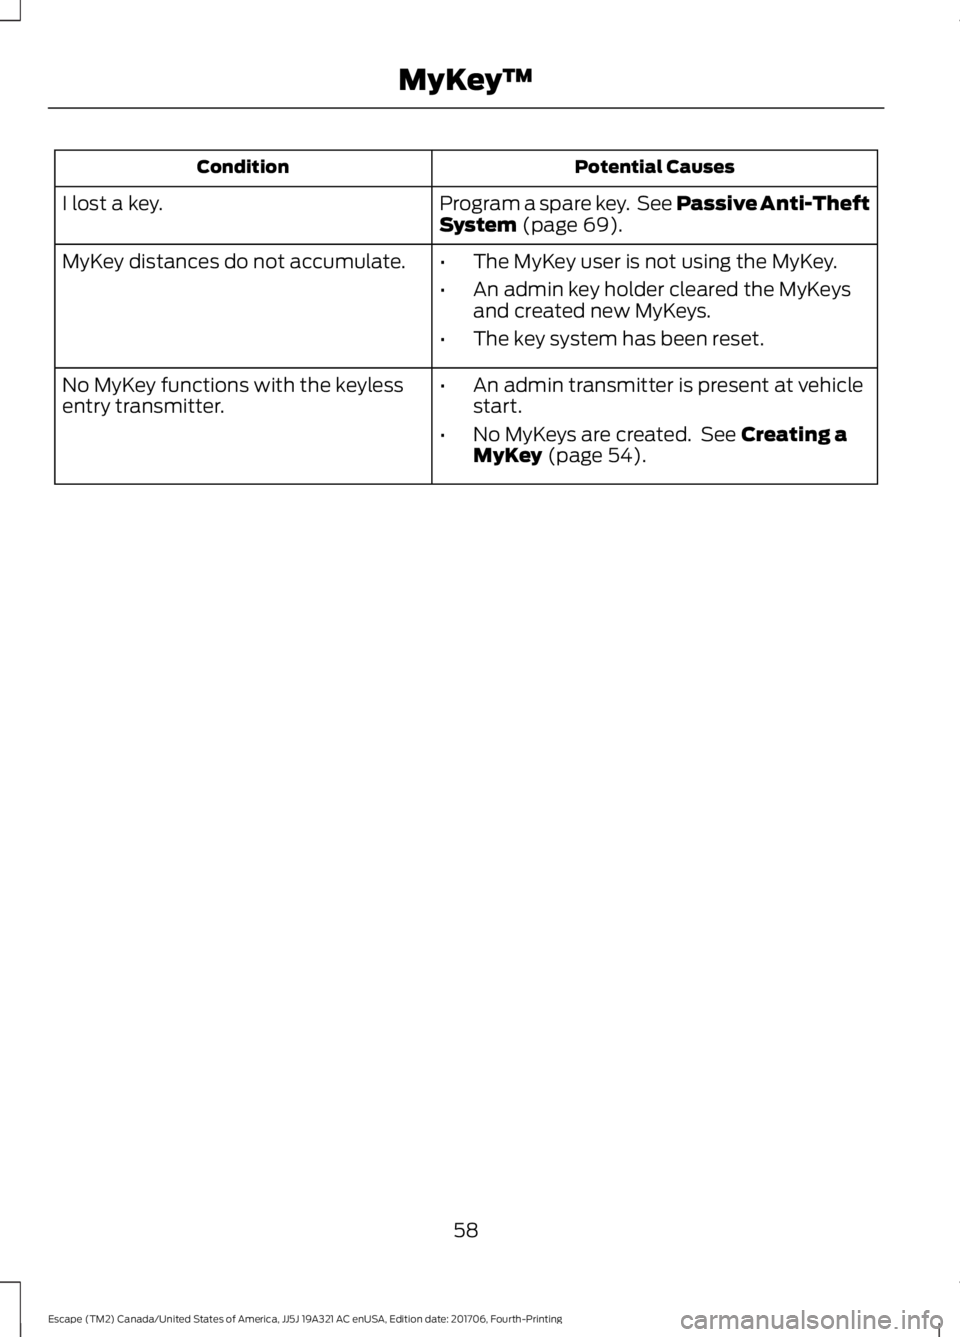
Potential Causes
Condition
Program a spare key. See Passive Anti-Theft
System (page 69).
I lost a key.
MyKey distances do not accumulate.
•The MyKey user is not using the MyKey.
• An admin key holder cleared the MyKeys
and created new MyKeys.
• The key system has been reset.
• An admin transmitter is present at vehicle
start.
• No MyKeys are created. See
Creating a
MyKey (page 54).
No MyKey functions with the keyless
entry transmitter.
58
Escape (TM2) Canada/United States of America, JJ5J 19A321 AC enUSA, Edition date: 201706, Fourth-Printing MyKey
™
Page 75 of 517
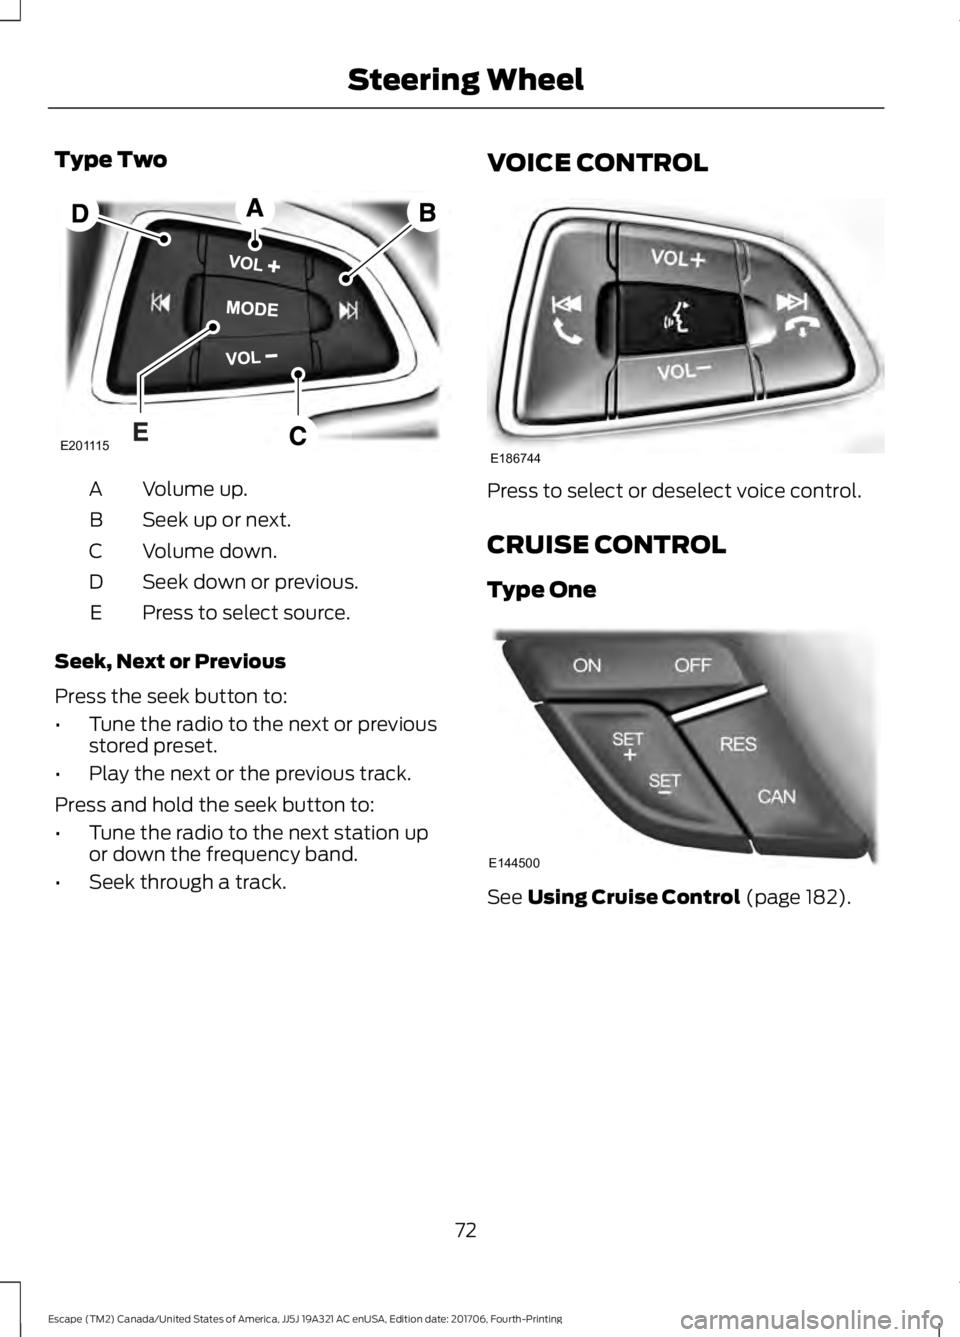
Type Two
Volume up.
A
Seek up or next.
B
Volume down.
C
Seek down or previous.
D
Press to select source.
E
Seek, Next or Previous
Press the seek button to:
• Tune the radio to the next or previous
stored preset.
• Play the next or the previous track.
Press and hold the seek button to:
• Tune the radio to the next station up
or down the frequency band.
• Seek through a track. VOICE CONTROL Press to select or deselect voice control.
CRUISE CONTROL
Type One
See Using Cruise Control (page 182).
72
Escape (TM2) Canada/United States of America, JJ5J 19A321 AC enUSA, Edition date: 201706, Fourth-Printing Steering WheelE201115 E186744 E144500
Page 86 of 517
POWER WINDOWS
WARNING: Do not leave children
unattended in your vehicle and do not let
them play with the power windows. Failure
to follow this instruction could result in
personal injury. WARNING: When closing the power
windows, verify they are free of obstruction
and make sure that children and pets are
not in the proximity of the window
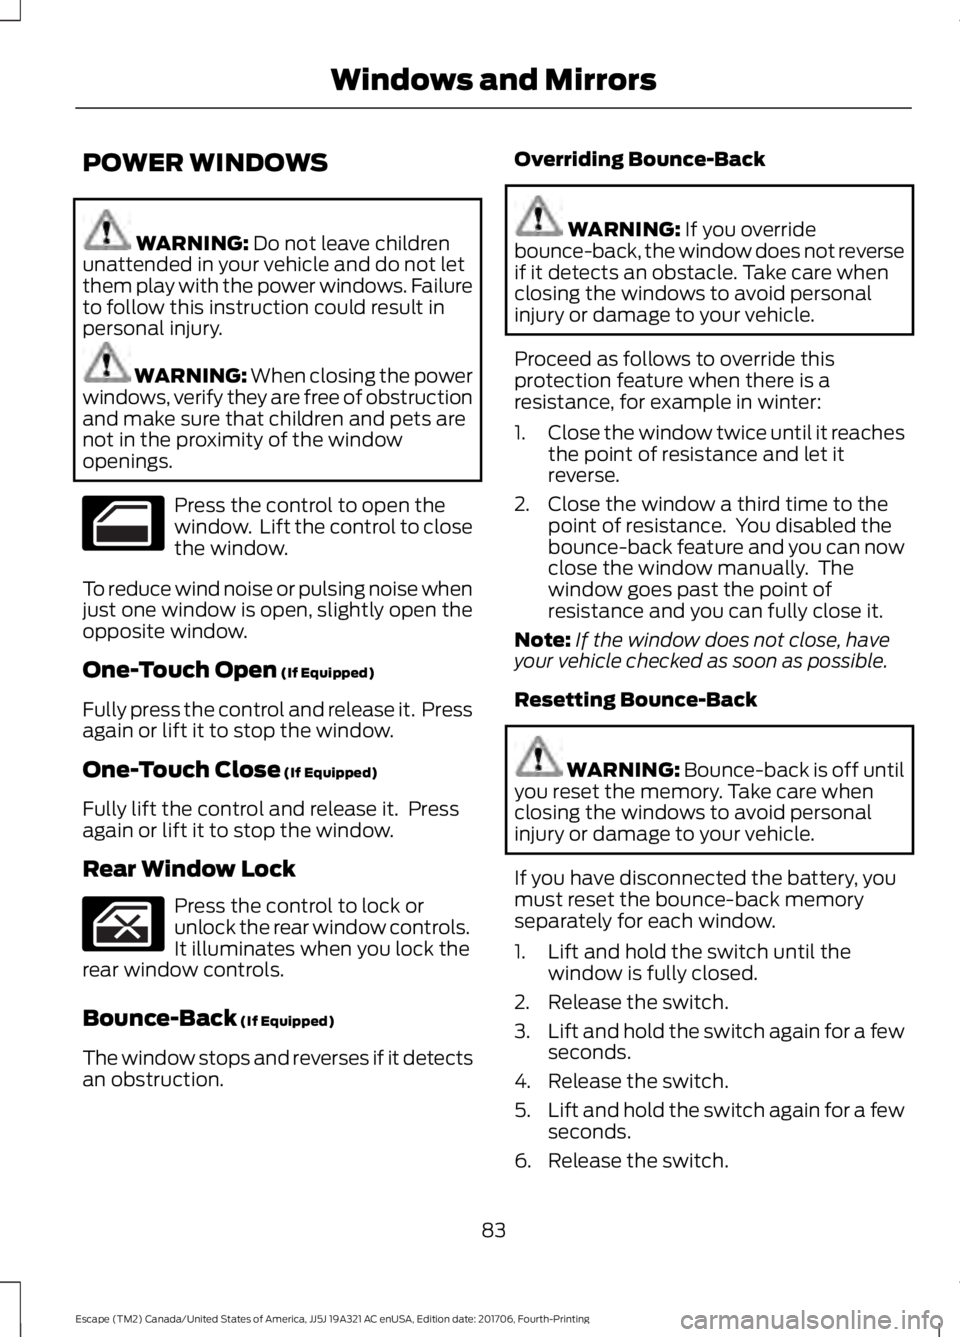
openings. Press the control to open the
window. Lift the control to close
the window.
To reduce wind noise or pulsing noise when
just one window is open, slightly open the
opposite window.
One-Touch Open
(If Equipped)
Fully press the control and release it. Press
again or lift it to stop the window.
One-Touch Close
(If Equipped)
Fully lift the control and release it. Press
again or lift it to stop the window.
Rear Window Lock Press the control to lock or
unlock the rear window controls.
It illuminates when you lock the
rear window controls.
Bounce-Back
(If Equipped)
The window stops and reverses if it detects
an obstruction. Overriding Bounce-Back WARNING:
If you override
bounce-back, the window does not reverse
if it detects an obstacle. Take care when
closing the windows to avoid personal
injury or damage to your vehicle.
Proceed as follows to override this
protection feature when there is a
resistance, for example in winter:
1. Close the window twice until it reaches
the point of resistance and let it
reverse.
2. Close the window a third time to the point of resistance. You disabled the
bounce-back feature and you can now
close the window manually. The
window goes past the point of
resistance and you can fully close it.
Note: If the window does not close, have
your vehicle checked as soon as possible.
Resetting Bounce-Back WARNING:
Bounce-back is off until
you reset the memory. Take care when
closing the windows to avoid personal
injury or damage to your vehicle.
If you have disconnected the battery, you
must reset the bounce-back memory
separately for each window.
1. Lift and hold the switch until the window is fully closed.
2. Release the switch.
3. Lift and hold the switch again for a few
seconds.
4. Release the switch.
5. Lift and hold the switch again for a few
seconds.
6. Release the switch.
83
Escape (TM2) Canada/United States of America, JJ5J 19A321 AC enUSA, Edition date: 201706, Fourth-Printing Windows and Mirrors
Page 96 of 517
GENERAL INFORMATION
WARNING: Driving while distracted
can result in loss of vehicle control, crash
and injury. We strongly recommend that
you use extreme caution when using any
device that may take your focus off the
road. Your primary responsibility is the safe
operation of your vehicle. We recommend
against the use of any hand-held device
while driving and encourage the use of
voice-operated systems when possible.
Make sure you are aware of all applicable
local laws that may affect the use of
electronic devices while driving.
You can control various systems on your
vehicle using the information display
controls on the steering wheel. The
information display shows the
corresponding information.
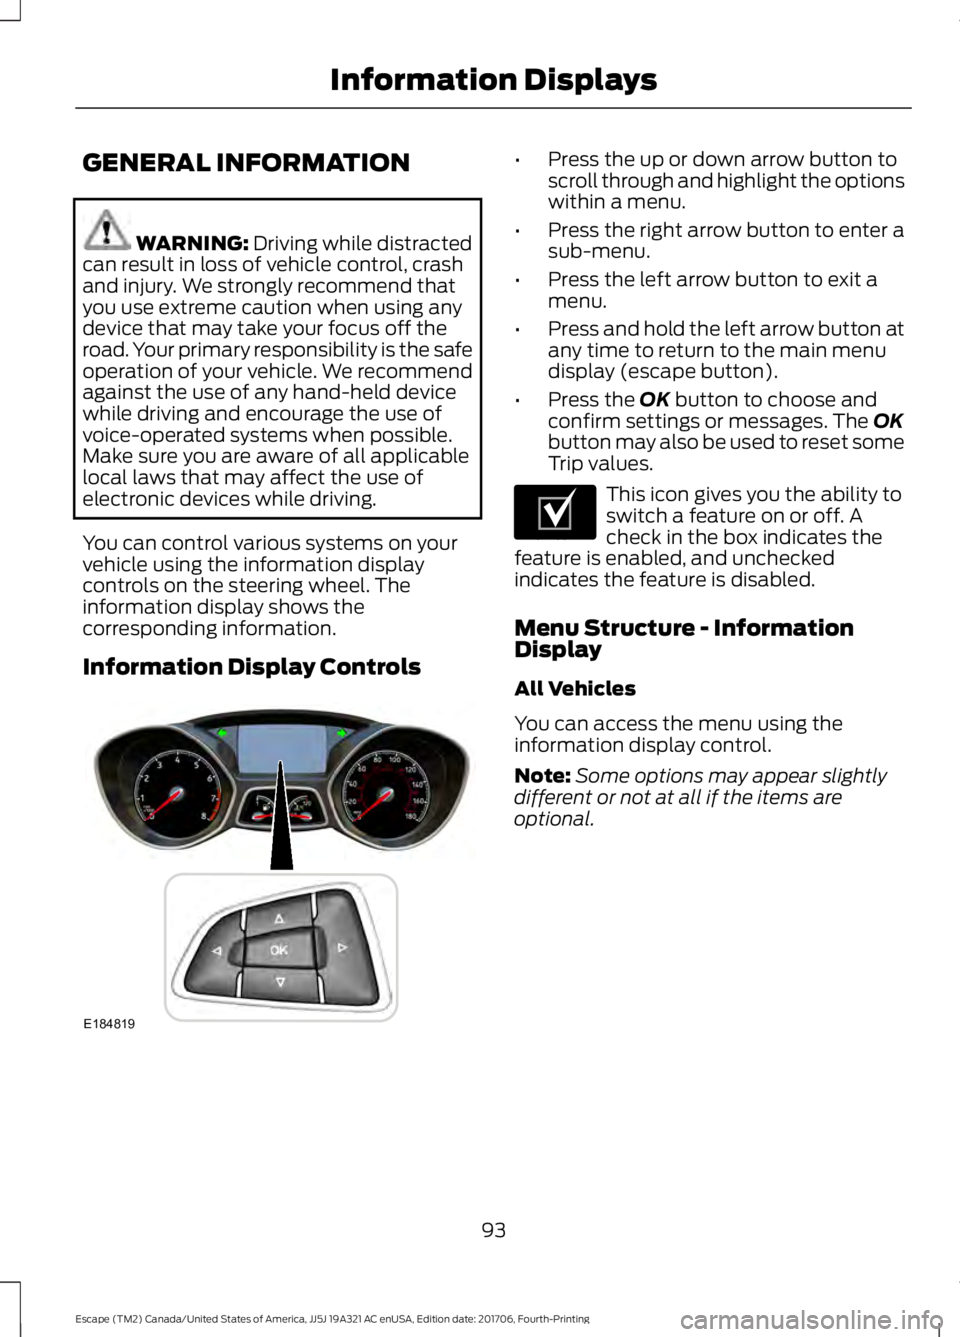
Information Display Controls •
Press the up or down arrow button to
scroll through and highlight the options
within a menu.
• Press the right arrow button to enter a
sub-menu.
• Press the left arrow button to exit a
menu.
• Press and hold the left arrow button at
any time to return to the main menu
display (escape button).
• Press the
OK button to choose and
confirm settings or messages. The OK
button may also be used to reset some
Trip values. This icon gives you the ability to
switch a feature on or off. A
check in the box indicates the
feature is enabled, and unchecked
indicates the feature is disabled.
Menu Structure - Information
Display
All Vehicles
You can access the menu using the
information display control.
Note: Some options may appear slightly
different or not at all if the items are
optional.
93
Escape (TM2) Canada/United States of America, JJ5J 19A321 AC enUSA, Edition date: 201706, Fourth-Printing Information DisplaysE184819 E204495
Page 98 of 517
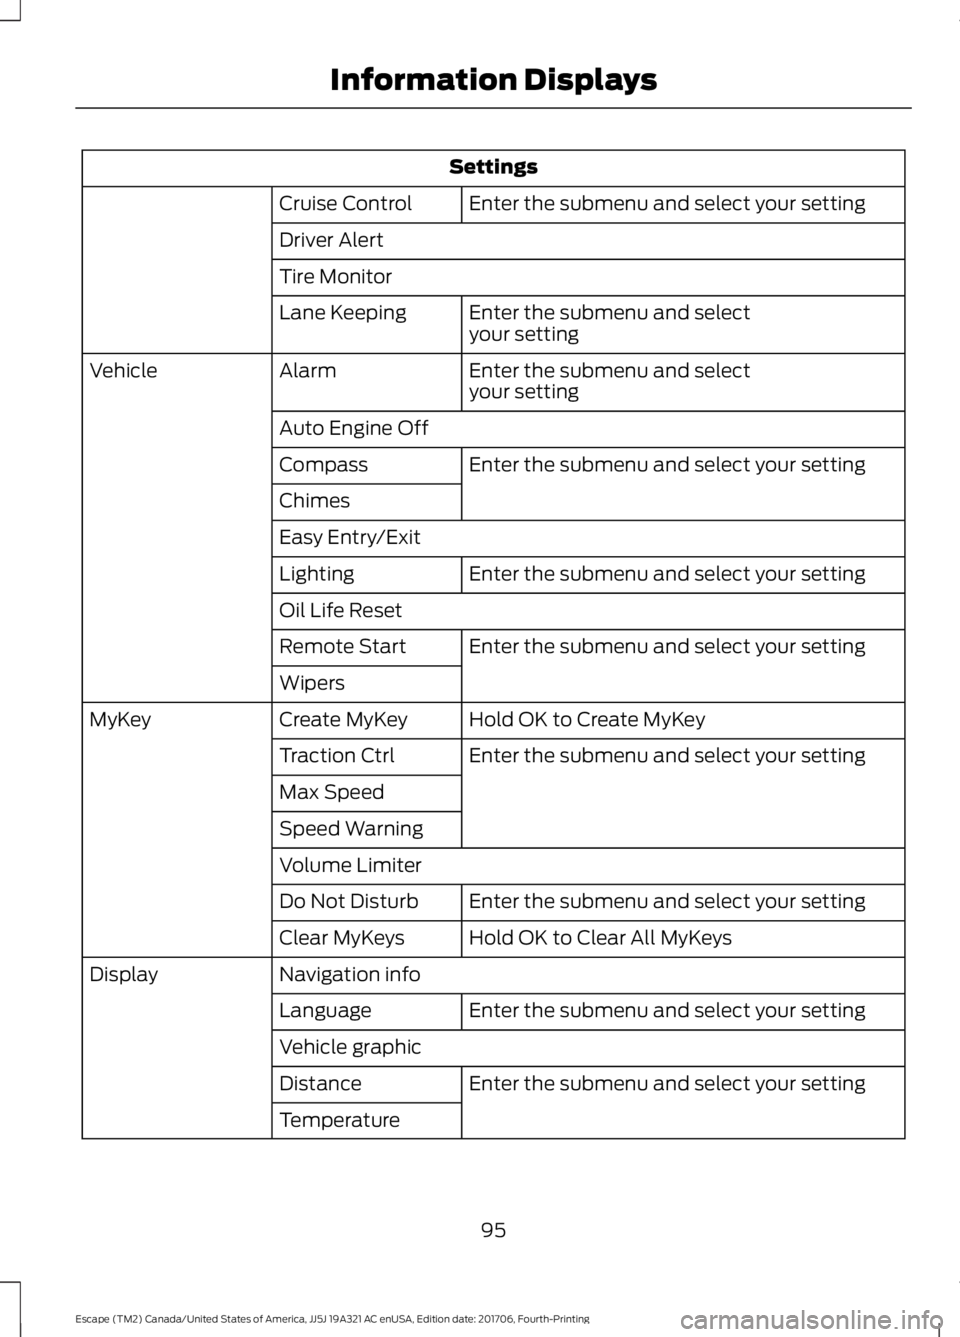
Settings
Enter the submenu and select your setting
Cruise Control
Driver Alert
Tire Monitor
Enter the submenu and select
your setting
Lane Keeping
Enter the submenu and select
your setting
Alarm
Vehicle
Auto Engine OffEnter the submenu and select your setting
Compass
Chimes
Easy Entry/Exit
Enter the submenu and select your setting
Lighting
Oil Life Reset
Enter the submenu and select your setting
Remote Start
Wipers
Hold OK to Create MyKey
Create MyKey
MyKey
Enter the submenu and select your setting
Traction Ctrl
Max Speed
Speed Warning
Volume Limiter
Enter the submenu and select your setting
Do Not Disturb
Hold OK to Clear All MyKeys
Clear MyKeys
Navigation info
Display
Enter the submenu and select your setting
Language
Vehicle graphic
Enter the submenu and select your setting
Distance
Temperature
95
Escape (TM2) Canada/United States of America, JJ5J 19A321 AC enUSA, Edition date: 201706, Fourth-Printing Information Displays
Page 99 of 517
System Check
All active warnings will display first if
applicable. The system check menu may
appear different based upon equipment
options and current vehicle status. Use the
up/down arrow buttons to scroll through
the list.
TRIP COMPUTER
Resetting the Trip Computer
Press and hold OK on the current screen
to reset the respective trip distance, time,
average fuel and average speed
information.
Distance to E
Indicates the approximate distance the
vehicle will travel on the fuel remaining in
the tank. Changes in driving pattern may
cause the value to vary.
Trip Odometer
Registers the distance traveled of
individual journeys.
Trip Timer
Registers the time of individual journeys.
Instantaneous Fuel (If Equipped)
Shows your instantaneous fuel usage.
Average Fuel
Indicates the average fuel consumption
since the function was last reset.
Digital Speedo
Shows a digital display of your vehicle
speed. All Value
(If Equipped)
Indicates all the respective remaining fuel,
distance, instantaneous fuel and average
fuel information.
INFORMATION MESSAGES
Note: Depending on your vehicle options
and instrument cluster type, not all of the
messages display or are available.
Additionally, the information display may
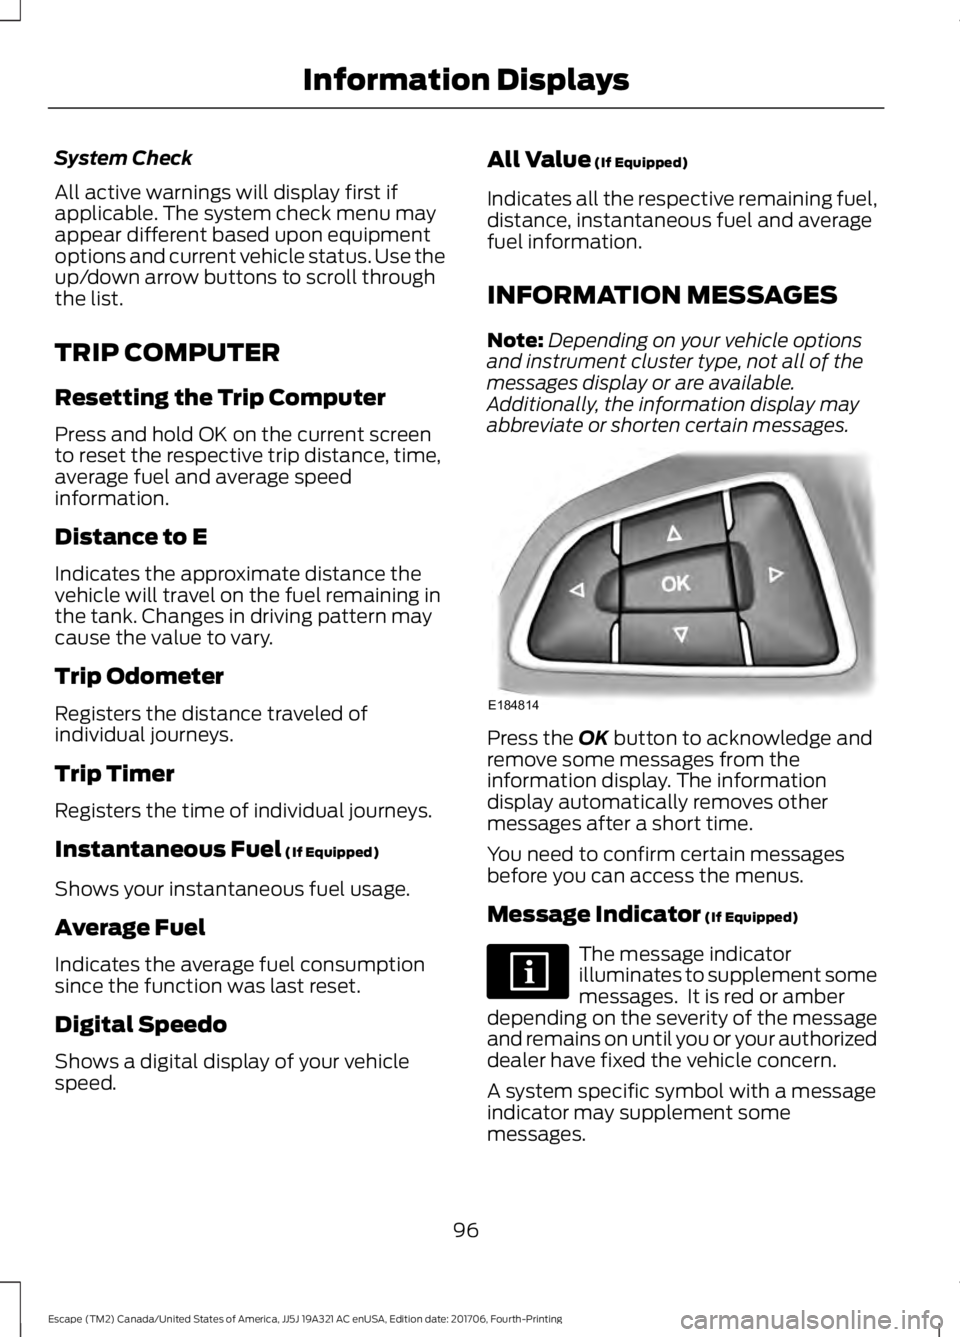
abbreviate or shorten certain messages. Press the
OK button to acknowledge and
remove some messages from the
information display. The information
display automatically removes other
messages after a short time.
You need to confirm certain messages
before you can access the menus.
Message Indicator
(If Equipped) The message indicator
illuminates to supplement some
messages. It is red or amber
depending on the severity of the message
and remains on until you or your authorized
dealer have fixed the vehicle concern.
A system specific symbol with a message
indicator may supplement some
messages.
96
Escape (TM2) Canada/United States of America, JJ5J 19A321 AC enUSA, Edition date: 201706, Fourth-Printing Information DisplaysE184814
Page 121 of 517
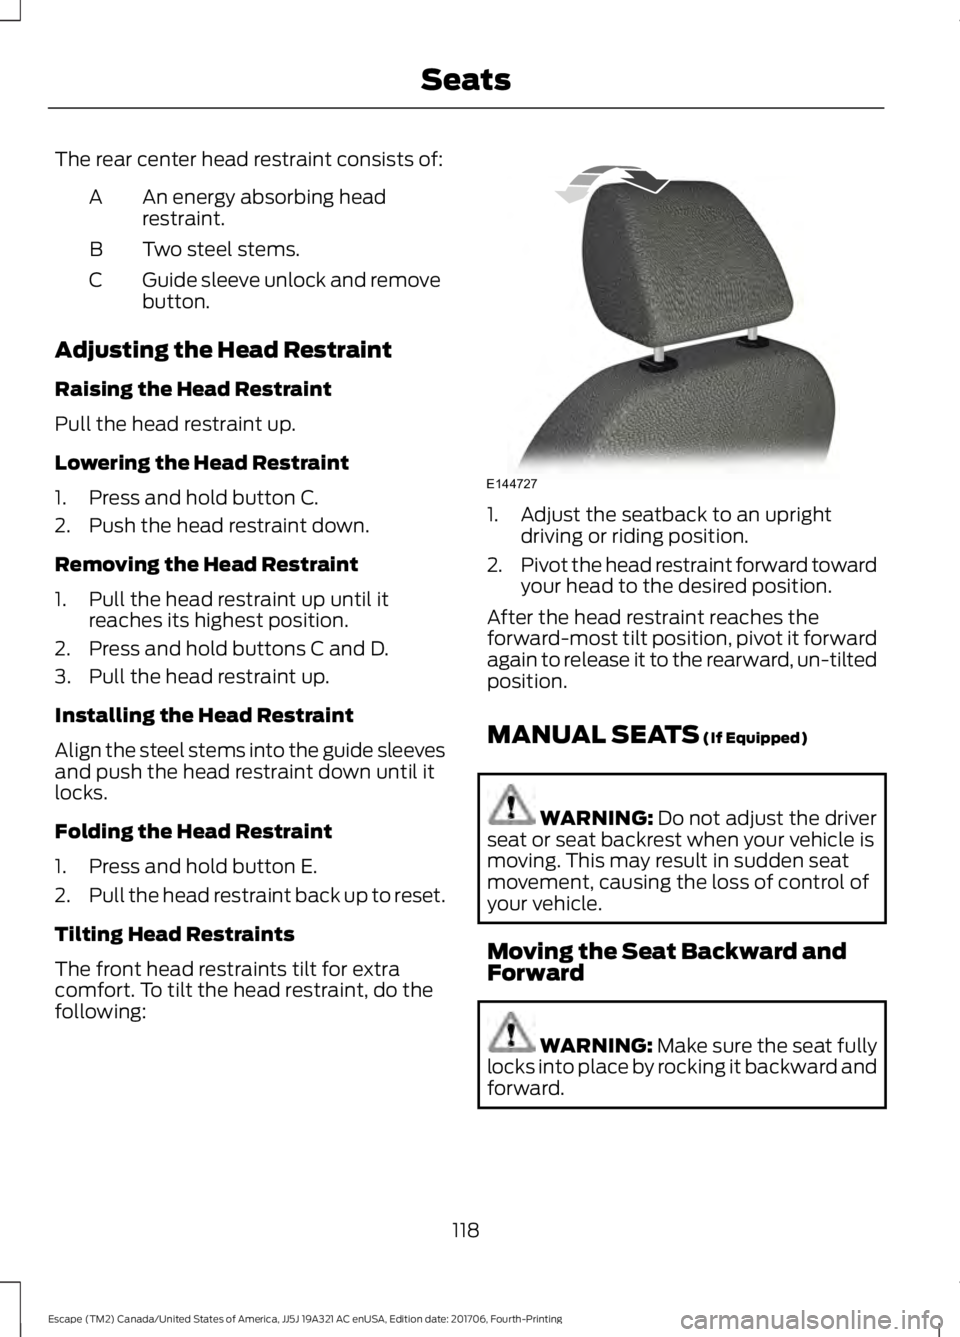
The rear center head restraint consists of:
An energy absorbing head
restraint.
A
Two steel stems.
B
Guide sleeve unlock and remove
button.
C
Adjusting the Head Restraint
Raising the Head Restraint
Pull the head restraint up.
Lowering the Head Restraint
1. Press and hold button C.
2. Push the head restraint down.
Removing the Head Restraint
1. Pull the head restraint up until it reaches its highest position.
2. Press and hold buttons C and D.
3. Pull the head restraint up.
Installing the Head Restraint
Align the steel stems into the guide sleeves
and push the head restraint down until it
locks.
Folding the Head Restraint
1. Press and hold button E.
2. Pull the head restraint back up to reset.
Tilting Head Restraints
The front head restraints tilt for extra
comfort. To tilt the head restraint, do the
following: 1. Adjust the seatback to an upright
driving or riding position.
2. Pivot the head restraint forward toward
your head to the desired position.
After the head restraint reaches the
forward-most tilt position, pivot it forward
again to release it to the rearward, un-tilted
position.
MANUAL SEATS (If Equipped) WARNING:
Do not adjust the driver
seat or seat backrest when your vehicle is
moving. This may result in sudden seat
movement, causing the loss of control of
your vehicle.
Moving the Seat Backward and
Forward WARNING: Make sure the seat fully
locks into place by rocking it backward and
forward.
118
Escape (TM2) Canada/United States of America, JJ5J 19A321 AC enUSA, Edition date: 201706, Fourth-Printing SeatsE144727
Page 124 of 517
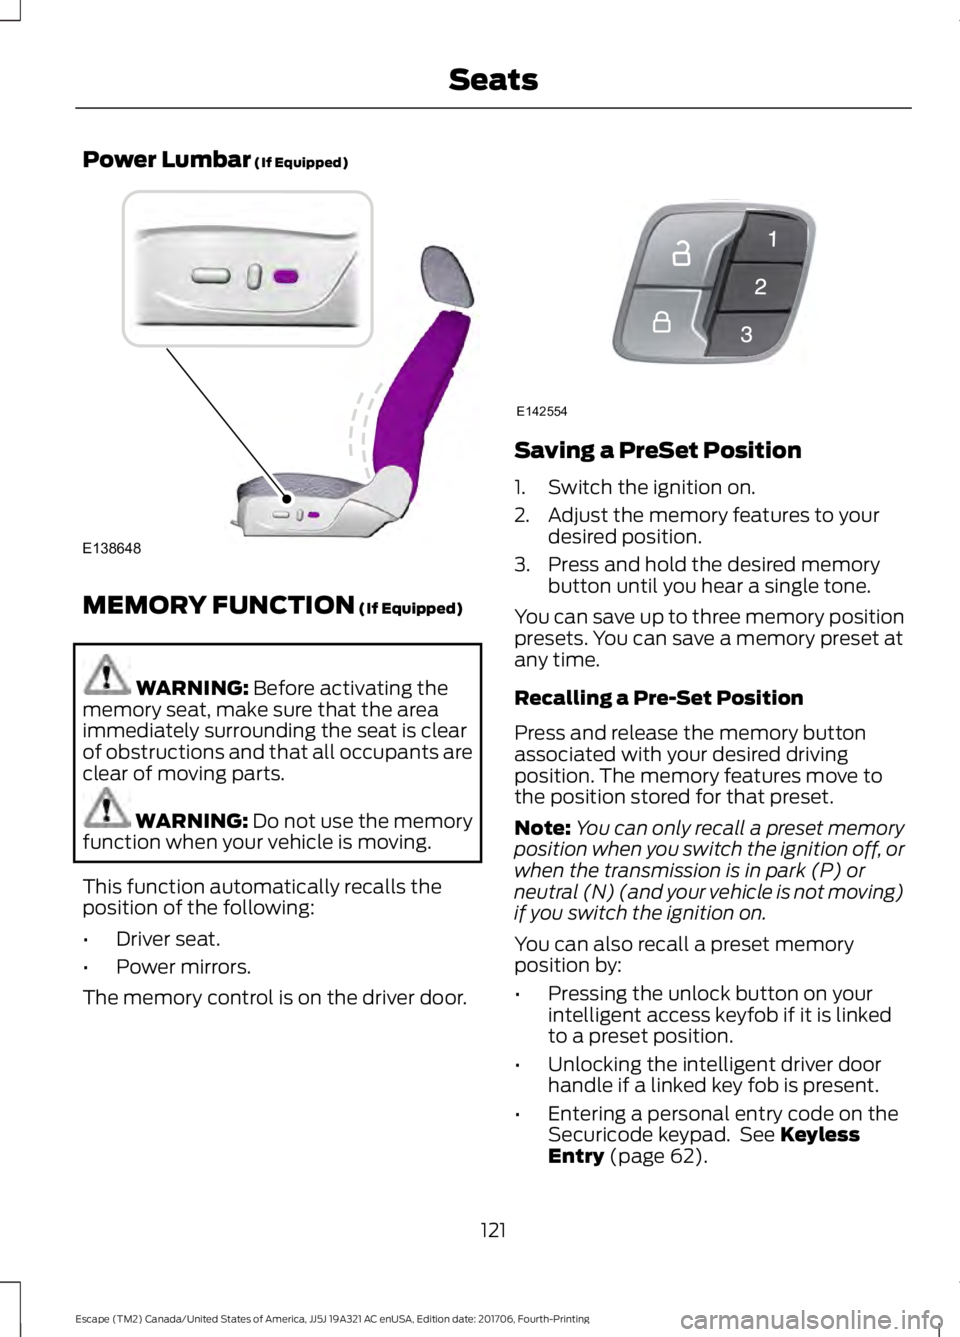
Power Lumbar (If Equipped)
MEMORY FUNCTION
(If Equipped)
WARNING:
Before activating the
memory seat, make sure that the area
immediately surrounding the seat is clear
of obstructions and that all occupants are
clear of moving parts. WARNING:
Do not use the memory
function when your vehicle is moving.
This function automatically recalls the
position of the following:
• Driver seat.
• Power mirrors.
The memory control is on the driver door. Saving a PreSet Position
1. Switch the ignition on.
2. Adjust the memory features to your
desired position.
3. Press and hold the desired memory button until you hear a single tone.
You can save up to three memory position
presets. You can save a memory preset at
any time.
Recalling a Pre-Set Position
Press and release the memory button
associated with your desired driving
position. The memory features move to
the position stored for that preset.
Note: You can only recall a preset memory
position when you switch the ignition off, or
when the transmission is in park (P) or
neutral (N) (and your vehicle is not moving)
if you switch the ignition on.
You can also recall a preset memory
position by:
• Pressing the unlock button on your
intelligent access keyfob if it is linked
to a preset position.
• Unlocking the intelligent driver door
handle if a linked key fob is present.
• Entering a personal entry code on the
Securicode keypad. See
Keyless
Entry (page 62).
121
Escape (TM2) Canada/United States of America, JJ5J 19A321 AC enUSA, Edition date: 201706, Fourth-Printing SeatsE138648 E142554