headlamp FORD ESCAPE 2019 User Guide
[x] Cancel search | Manufacturer: FORD, Model Year: 2019, Model line: ESCAPE, Model: FORD ESCAPE 2019Pages: 509, PDF Size: 6.69 MB
Page 96 of 509
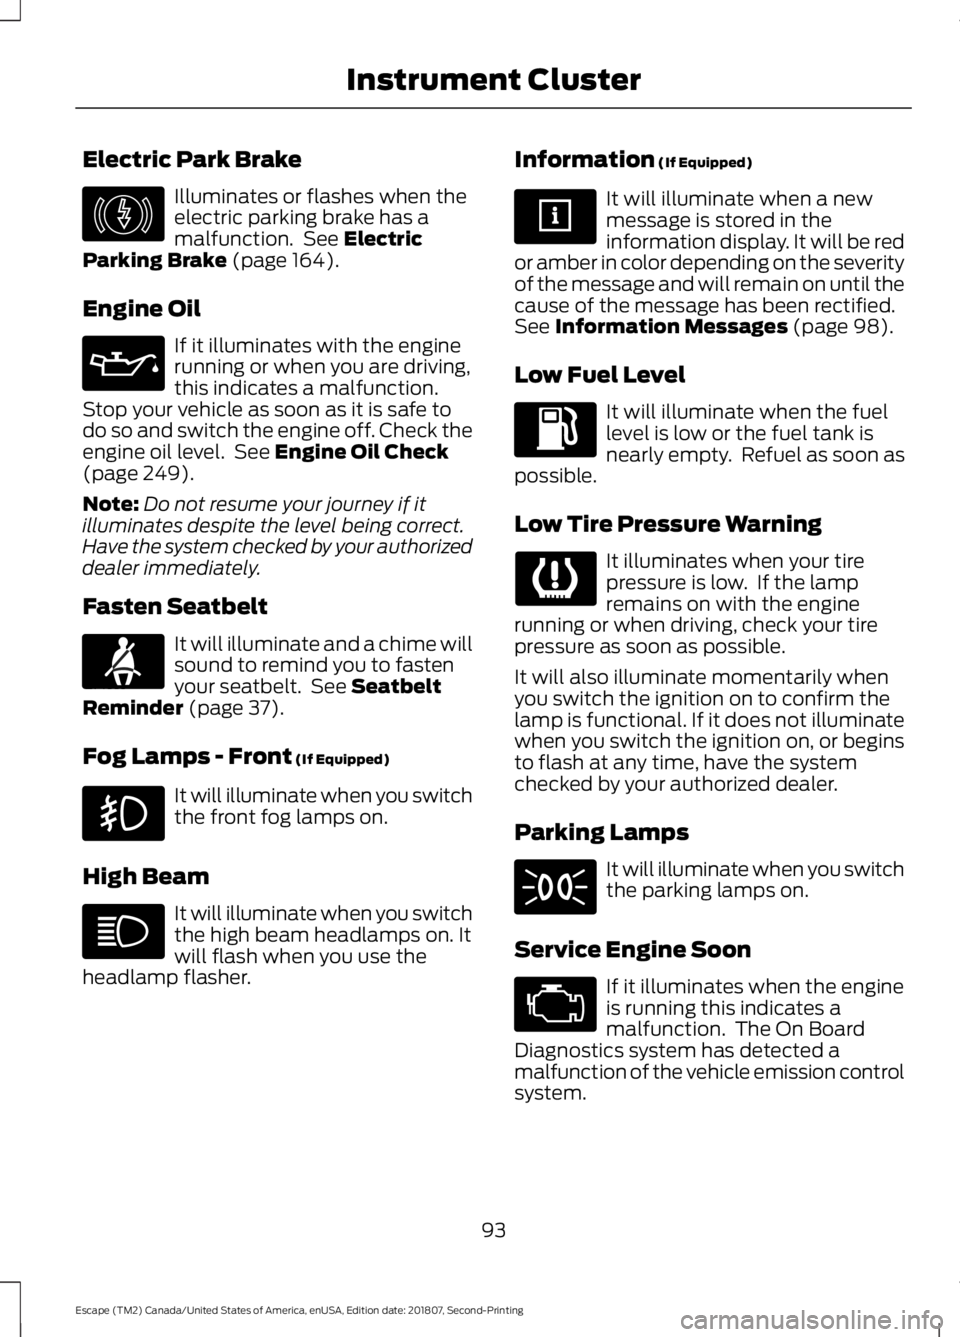
Electric Park Brake
Illuminates or flashes when the
electric parking brake has a
malfunction. See Electric
Parking Brake (page 164).
Engine Oil If it illuminates with the engine
running or when you are driving,
this indicates a malfunction.
Stop your vehicle as soon as it is safe to
do so and switch the engine off. Check the
engine oil level. See
Engine Oil Check
(page 249).
Note: Do not resume your journey if it
illuminates despite the level being correct.
Have the system checked by your authorized
dealer immediately.
Fasten Seatbelt It will illuminate and a chime will
sound to remind you to fasten
your seatbelt. See
Seatbelt
Reminder (page 37).
Fog Lamps - Front
(If Equipped) It will illuminate when you switch
the front fog lamps on.
High Beam It will illuminate when you switch
the high beam headlamps on. It
will flash when you use the
headlamp flasher. Information
(If Equipped) It will illuminate when a new
message is stored in the
information display. It will be red
or amber in color depending on the severity
of the message and will remain on until the
cause of the message has been rectified.
See
Information Messages (page 98).
Low Fuel Level It will illuminate when the fuel
level is low or the fuel tank is
nearly empty. Refuel as soon as
possible.
Low Tire Pressure Warning It illuminates when your tire
pressure is low. If the lamp
remains on with the engine
running or when driving, check your tire
pressure as soon as possible.
It will also illuminate momentarily when
you switch the ignition on to confirm the
lamp is functional. If it does not illuminate
when you switch the ignition on, or begins
to flash at any time, have the system
checked by your authorized dealer.
Parking Lamps It will illuminate when you switch
the parking lamps on.
Service Engine Soon If it illuminates when the engine
is running this indicates a
malfunction. The On Board
Diagnostics system has detected a
malfunction of the vehicle emission control
system.
93
Escape (TM2) Canada/United States of America, enUSA, Edition date: 201807, Second-Printing Instrument ClusterE146190 E71880
Page 97 of 509
If it flashes, engine misfire may be
occurring. Increased exhaust gas
temperatures could damage the catalytic
converter or other vehicle components.
Drive in a moderate fashion (avoid heavy
acceleration and deceleration) and have
your vehicle immediately serviced.
It illuminates when you switch the ignition
on prior to engine start to check the bulb
and to indicate whether your vehicle is
ready for Inspection and Maintenance
(I/M) testing.
Normally, it illuminates until the engine is
cranked and automatically turns off if no
malfunctions are present. However, if after
15 seconds it flashes eight times, this
indicates that your vehicle is not ready for
Inspection and Maintenance (I/M) testing.
See Emission Law (page 150).
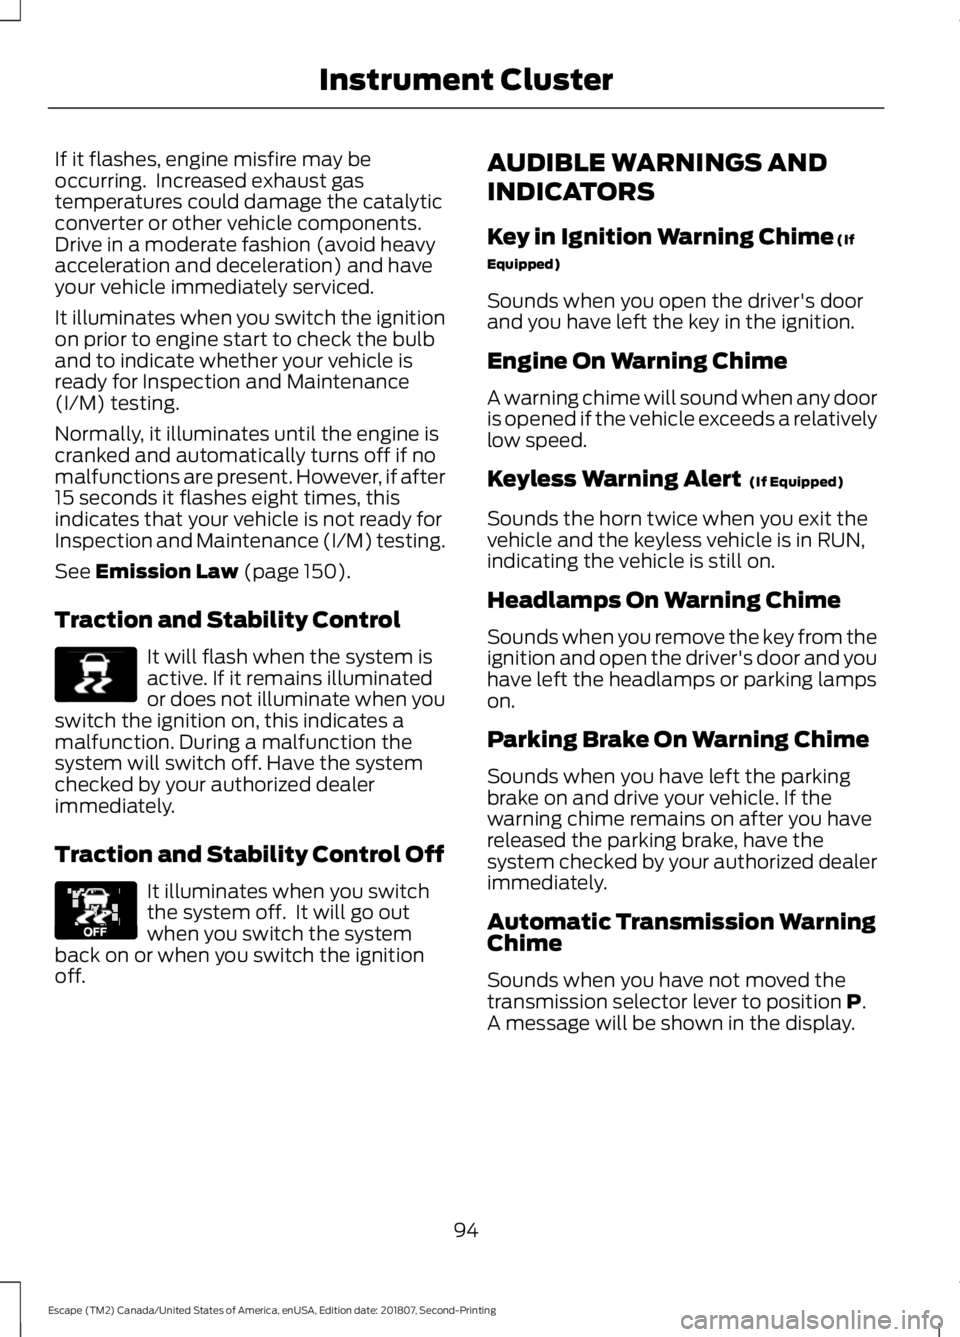
Traction and Stability Control It will flash when the system is
active. If it remains illuminated
or does not illuminate when you
switch the ignition on, this indicates a
malfunction. During a malfunction the
system will switch off. Have the system
checked by your authorized dealer
immediately.
Traction and Stability Control Off It illuminates when you switch
the system off. It will go out
when you switch the system
back on or when you switch the ignition
off. AUDIBLE WARNINGS AND
INDICATORS
Key in Ignition Warning Chime
(If
Equipped)
Sounds when you open the driver's door
and you have left the key in the ignition.
Engine On Warning Chime
A warning chime will sound when any door
is opened if the vehicle exceeds a relatively
low speed.
Keyless Warning Alert
(If Equipped)
Sounds the horn twice when you exit the
vehicle and the keyless vehicle is in RUN,
indicating the vehicle is still on.
Headlamps On Warning Chime
Sounds when you remove the key from the
ignition and open the driver's door and you
have left the headlamps or parking lamps
on.
Parking Brake On Warning Chime
Sounds when you have left the parking
brake on and drive your vehicle. If the
warning chime remains on after you have
released the parking brake, have the
system checked by your authorized dealer
immediately.
Automatic Transmission Warning
Chime
Sounds when you have not moved the
transmission selector lever to position
P.
A message will be shown in the display.
94
Escape (TM2) Canada/United States of America, enUSA, Edition date: 201807, Second-Printing Instrument ClusterE138639 E130458
Page 108 of 509
Lighting
Action
Message
Indicator
Message
Displays when the brake lamp bulb has burnedout. Contact your authorized dealer.
-
Brake Lamp Bulb Fault
Displays when the low beam headlamp bulb
has burned out. Contact your authorized dealer.
-
Low Beam Bulb Fault
Displays when an electrical system problem
occurs with the headlamp system. Contact your authorized dealer.
Amber
Headlamp fault Service
required
Maintenance Action
Message
Indicator
Message
Displays when the engine oil life is depleted andrequires a change. See Engine Oil Check
(page 249).
-
Engine oil change due
Indicates the brake fluid level is low and the
brake system should be inspected immediately. See
Brake Fluid Check (page 255).
Red
Brake fluid level low
Service now
MyKey Action
Message
Indicator
Message
Displays when MyKey is active.
-
MyKey active Drive
Safely
Displays when starting the vehicle and MyKeyis in use and the MyKey speed limit is on.
-
MyKey Speed Limited to
XX MPH/km/h
Displays when a MyKey is in use and the MyKeyspeed limit is on and the vehicle speed is approaching 80 mph (130 km/h).
Amber
MyKey Vehicle Near Top
Speed
Displays when a MyKey is in use and the MyKeyspeed limit is reached.
Amber
MyKey Vehicle at Top
Speed
105
Escape (TM2) Canada/United States of America, enUSA, Edition date: 201807, Second-Printing Information Displays
Page 138 of 509
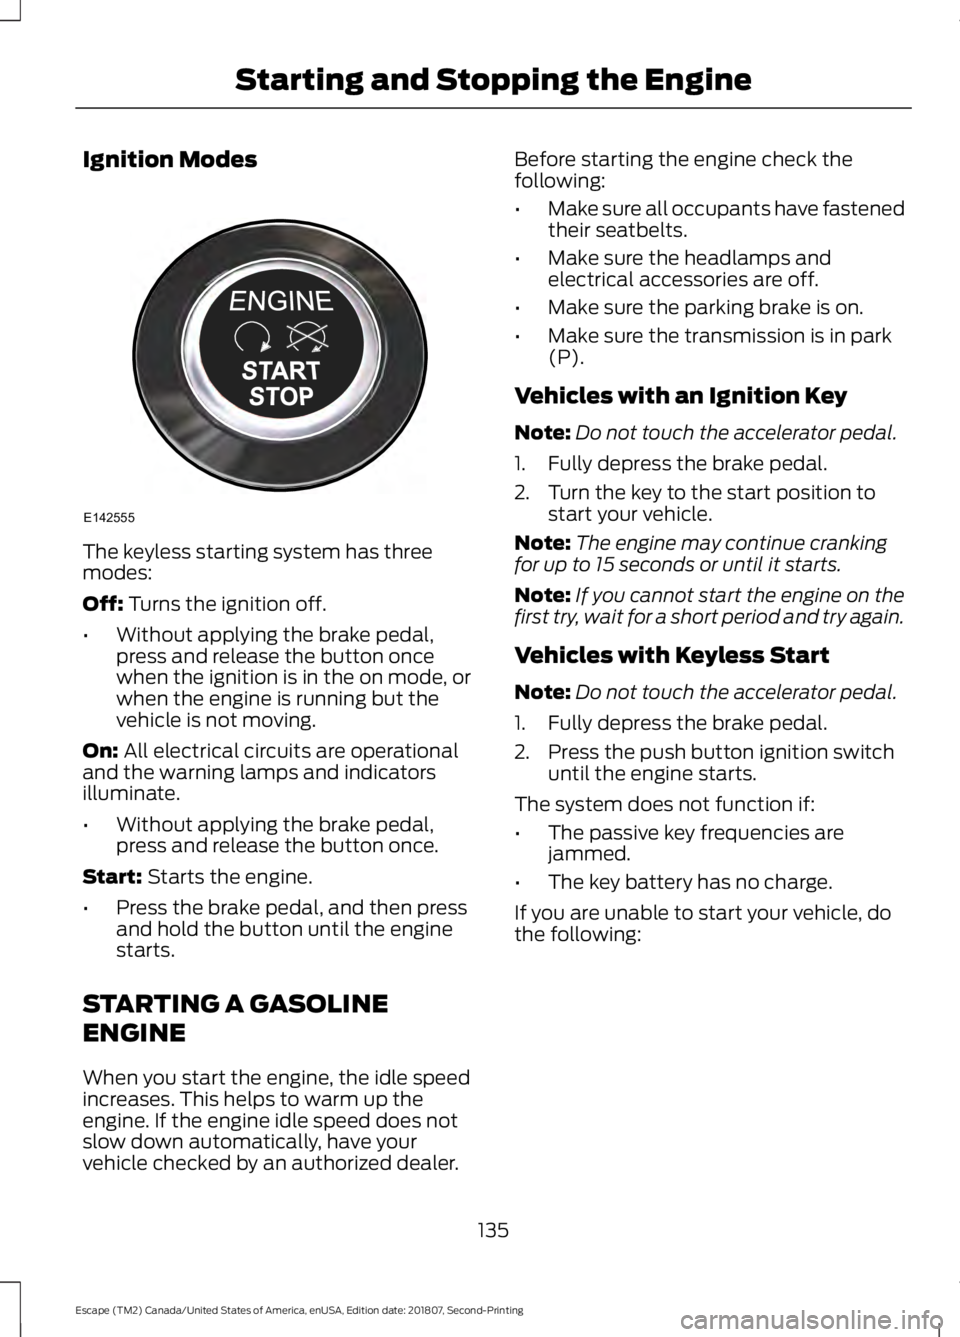
Ignition Modes
The keyless starting system has three
modes:
Off: Turns the ignition off.
• Without applying the brake pedal,
press and release the button once
when the ignition is in the on mode, or
when the engine is running but the
vehicle is not moving.
On:
All electrical circuits are operational
and the warning lamps and indicators
illuminate.
• Without applying the brake pedal,
press and release the button once.
Start:
Starts the engine.
• Press the brake pedal, and then press
and hold the button until the engine
starts.
STARTING A GASOLINE
ENGINE
When you start the engine, the idle speed
increases. This helps to warm up the
engine. If the engine idle speed does not
slow down automatically, have your
vehicle checked by an authorized dealer. Before starting the engine check the
following:
•
Make sure all occupants have fastened
their seatbelts.
• Make sure the headlamps and
electrical accessories are off.
• Make sure the parking brake is on.
• Make sure the transmission is in park
(P).
Vehicles with an Ignition Key
Note: Do not touch the accelerator pedal.
1. Fully depress the brake pedal.
2. Turn the key to the start position to start your vehicle.
Note: The engine may continue cranking
for up to 15 seconds or until it starts.
Note: If you cannot start the engine on the
first try, wait for a short period and try again.
Vehicles with Keyless Start
Note: Do not touch the accelerator pedal.
1. Fully depress the brake pedal.
2. Press the push button ignition switch until the engine starts.
The system does not function if:
• The passive key frequencies are
jammed.
• The key battery has no charge.
If you are unable to start your vehicle, do
the following:
135
Escape (TM2) Canada/United States of America, enUSA, Edition date: 201807, Second-Printing Starting and Stopping the EngineE142555
Page 198 of 509
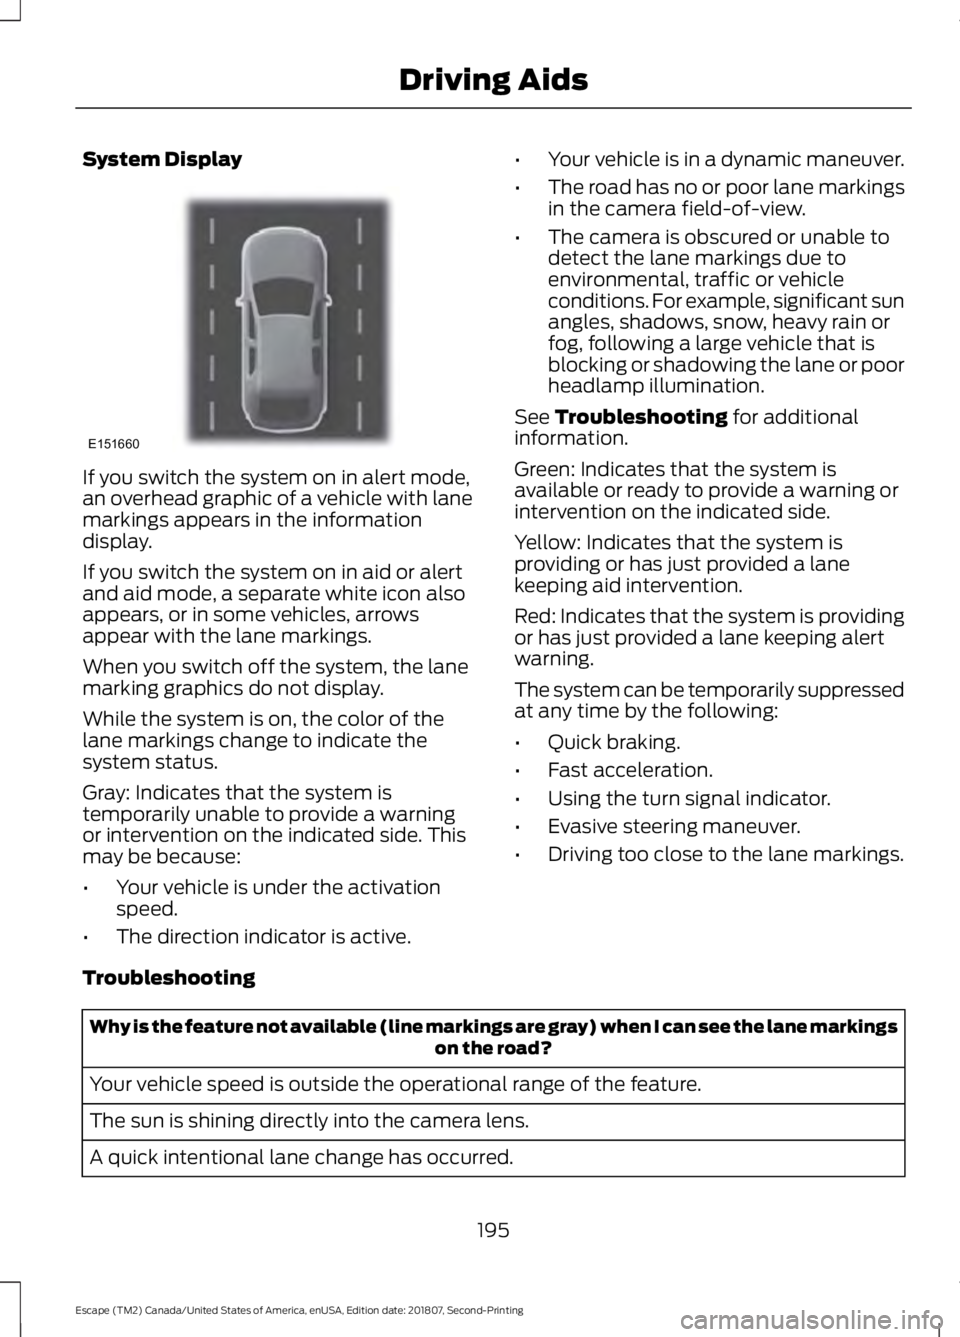
System Display
If you switch the system on in alert mode,
an overhead graphic of a vehicle with lane
markings appears in the information
display.
If you switch the system on in aid or alert
and aid mode, a separate white icon also
appears, or in some vehicles, arrows
appear with the lane markings.
When you switch off the system, the lane
marking graphics do not display.
While the system is on, the color of the
lane markings change to indicate the
system status.
Gray: Indicates that the system is
temporarily unable to provide a warning
or intervention on the indicated side. This
may be because:
•
Your vehicle is under the activation
speed.
• The direction indicator is active. •
Your vehicle is in a dynamic maneuver.
• The road has no or poor lane markings
in the camera field-of-view.
• The camera is obscured or unable to
detect the lane markings due to
environmental, traffic or vehicle
conditions. For example, significant sun
angles, shadows, snow, heavy rain or
fog, following a large vehicle that is
blocking or shadowing the lane or poor
headlamp illumination.
See Troubleshooting for additional
information.
Green: Indicates that the system is
available or ready to provide a warning or
intervention on the indicated side.
Yellow: Indicates that the system is
providing or has just provided a lane
keeping aid intervention.
Red: Indicates that the system is providing
or has just provided a lane keeping alert
warning.
The system can be temporarily suppressed
at any time by the following:
• Quick braking.
• Fast acceleration.
• Using the turn signal indicator.
• Evasive steering maneuver.
• Driving too close to the lane markings.
Troubleshooting Why is the feature not available (line markings are gray) when I can see the lane markings
on the road?
Your vehicle speed is outside the operational range of the feature.
The sun is shining directly into the camera lens.
A quick intentional lane change has occurred.
195
Escape (TM2) Canada/United States of America, enUSA, Edition date: 201807, Second-Printing Driving AidsE151660
Page 206 of 509
If a message regarding a blocked sensor
appears in the information display, the
radar signals from the sensor have been
obstructed. The sensors are located behind
a fascia cover near the driver side of the
lower grille. When the sensors are
obstructed, a vehicle ahead cannot be
detected and the collision warning system
does not function. The following table lists
possible causes and actions for this
message being displayed. Action
Cause
Clean the grille surface in front of the radaror remove the object causing the obstruc- tion
The surface of the radar in the grille is dirty
or obstructed in some way
Wait a short time. It may take several
minutes for the radar to detect that it is no longer obstructed
The surface of the radar in the grille is clean
but the message remains in the display
The collision warning system is temporarily
disabled. Collision warning should automat-ically reactivate a short time after the weather conditions improve
Heavy rain, spray, snow, or fog is interfering
with the radar signals
The collision warning system is temporarily
disabled. Collision warning should automat-ically reactivate a short time after the weather conditions improve
Swirling water, or snow or ice on the surface
of the road may interfere with the radar signals
System Limitations WARNING: The collision warning
system ’s brake support can only help
reduce the speed at which a collision
occurs if the driver applies the vehicle ’s
brakes. The brake pedal must be pressed
just like any typical braking situation.
Due to the nature of radar technology,
there may be certain instances where
vehicles do not provide a collision warning.
These include:
• Stationary vehicles or vehicles moving
below 6 mph (10 km/h).
• Pedestrians or objects in the roadway.
• Oncoming vehicles in the same lane. •
Severe weather conditions (see
blocked sensor section).
• Debris build-up on the grille near the
headlamps (see blocked sensor
section).
• Small distance to vehicle ahead.
• Steering wheel and pedal movements
are large (very active driving style).
If the front end of the vehicle is hit or
damaged, the radar sensing zone may be
altered causing missed or false collision
warnings. See your authorized dealer to
have your collision warning radar checked
for proper coverage and operation.
203
Escape (TM2) Canada/United States of America, enUSA, Edition date: 201807, Second-Printing Driving Aids
Page 227 of 509
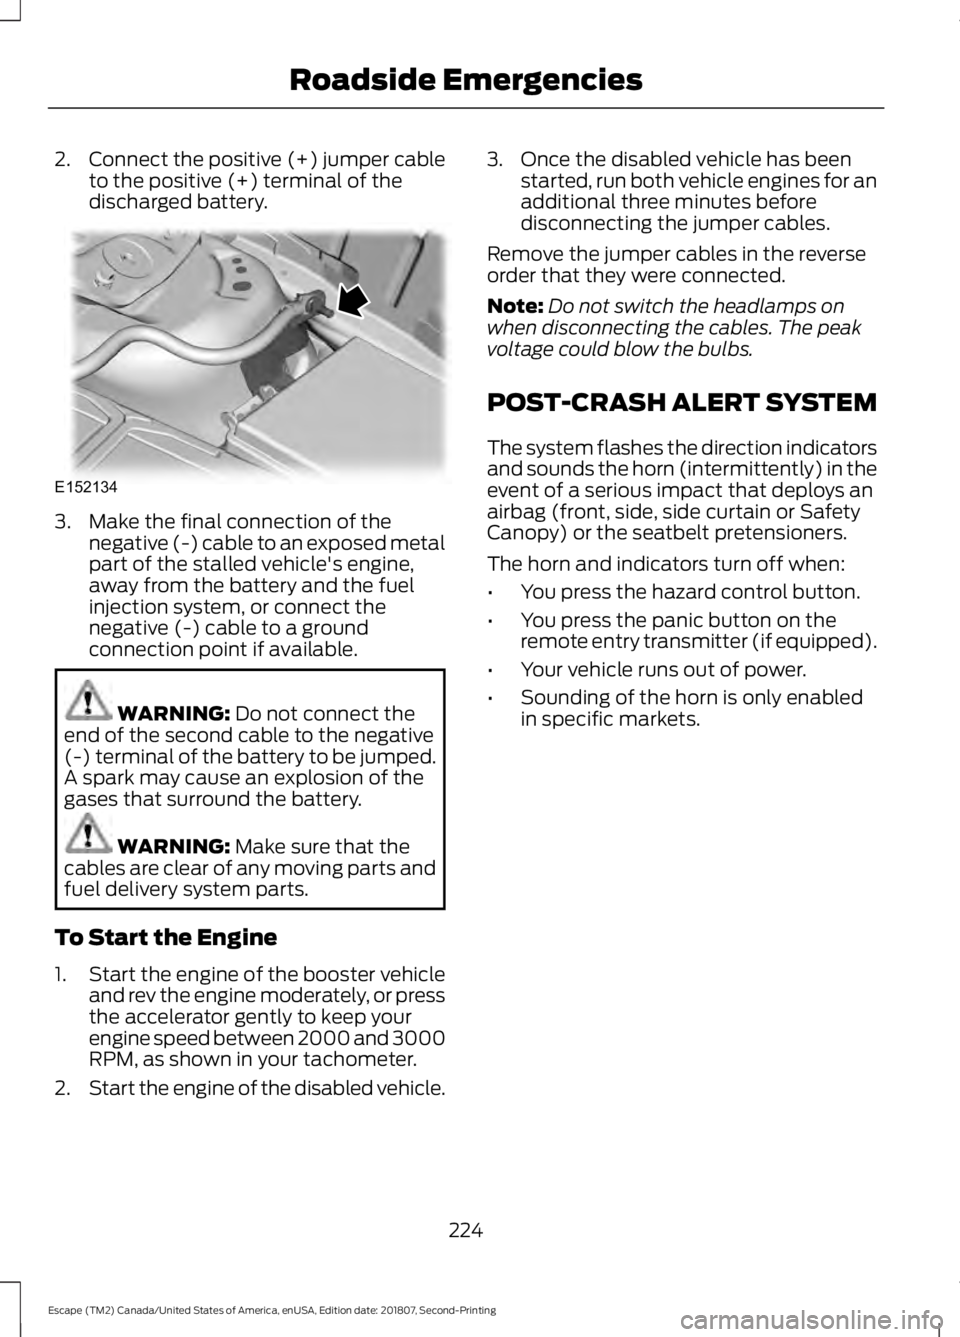
2.
Connect the positive (+) jumper cable
to the positive (+) terminal of the
discharged battery. 3. Make the final connection of the
negative (-) cable to an exposed metal
part of the stalled vehicle's engine,
away from the battery and the fuel
injection system, or connect the
negative (-) cable to a ground
connection point if available. WARNING: Do not connect the
end of the second cable to the negative
(-) terminal of the battery to be jumped.
A spark may cause an explosion of the
gases that surround the battery. WARNING:
Make sure that the
cables are clear of any moving parts and
fuel delivery system parts.
To Start the Engine
1. Start the engine of the booster vehicle
and rev the engine moderately, or press
the accelerator gently to keep your
engine speed between 2000 and 3000
RPM, as shown in your tachometer.
2. Start the engine of the disabled vehicle. 3. Once the disabled vehicle has been
started, run both vehicle engines for an
additional three minutes before
disconnecting the jumper cables.
Remove the jumper cables in the reverse
order that they were connected.
Note: Do not switch the headlamps on
when disconnecting the cables. The peak
voltage could blow the bulbs.
POST-CRASH ALERT SYSTEM
The system flashes the direction indicators
and sounds the horn (intermittently) in the
event of a serious impact that deploys an
airbag (front, side, side curtain or Safety
Canopy) or the seatbelt pretensioners.
The horn and indicators turn off when:
• You press the hazard control button.
• You press the panic button on the
remote entry transmitter (if equipped).
• Your vehicle runs out of power.
• Sounding of the horn is only enabled
in specific markets.
224
Escape (TM2) Canada/United States of America, enUSA, Edition date: 201807, Second-Printing Roadside EmergenciesE152134
Page 239 of 509
Circuits protected
Fuse Rating
Fuse
Headlamp control module supply.
15A 2
F43
Forward looking radar.
5A 2
F44
Heated passenger seat.
20A 2
F45
Smart wiper motor modules.
40A 1
F46
Not used.
—
F47
Keypad.
5A 2
F48
1 Cartridge Fuse
2 Mini Fuse Circuits switched
Relay
Not used.
R1
Horn.
R2
Not used.
R3
Not used.
R4
Not used.
R5
Cooling fan (600 Watt).
R6
Partially heated windshield.
R7
Not used.
R8
Not used.
R9
Starter relay.
R10
Air conditioner clutch.
R11
Cooling fan.
R12
Heater blower.
R13
Engine control relay.
R14
Cooling fan (600 Watt).
R15
Ignition 15.
R16
236
Escape (TM2) Canada/United States of America, enUSA, Edition date: 201807, Second-Printing Fuses
Page 241 of 509
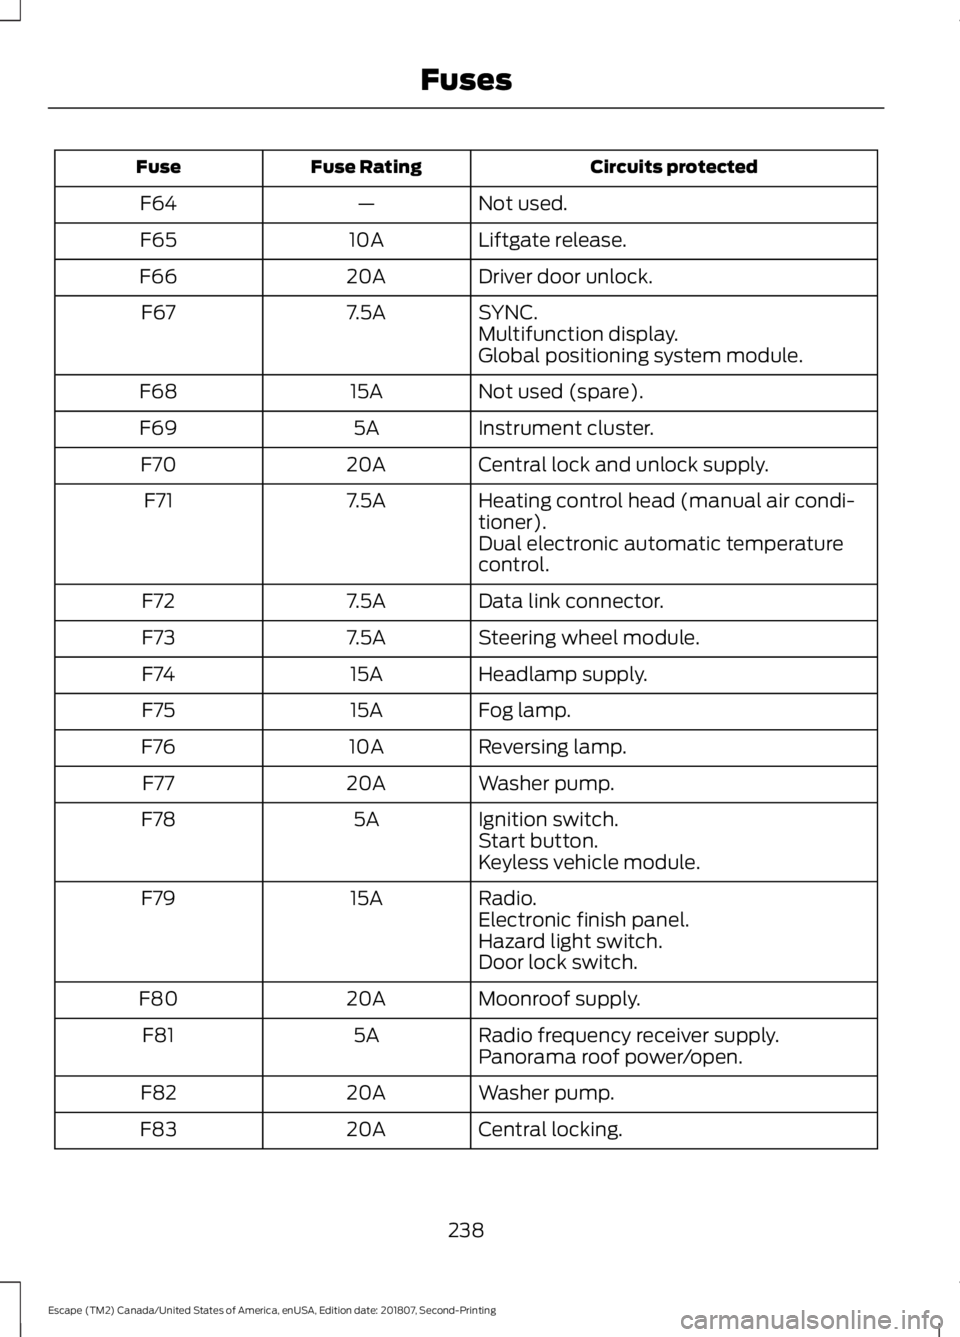
Circuits protected
Fuse Rating
Fuse
Not used.
—
F64
Liftgate release.
10A
F65
Driver door unlock.
20A
F66
SYNC.
7.5A
F67
Multifunction display.
Global positioning system module.
Not used (spare).
15A
F68
Instrument cluster.
5A
F69
Central lock and unlock supply.
20A
F70
Heating control head (manual air condi-
tioner).
7.5A
F71
Dual electronic automatic temperature
control.
Data link connector.
7.5A
F72
Steering wheel module.
7.5A
F73
Headlamp supply.
15A
F74
Fog lamp.
15A
F75
Reversing lamp.
10A
F76
Washer pump.
20A
F77
Ignition switch.
5A
F78
Start button.
Keyless vehicle module.
Radio.
15A
F79
Electronic finish panel.
Hazard light switch.
Door lock switch.
Moonroof supply.
20A
F80
Radio frequency receiver supply.
5A
F81
Panorama roof power/open.
Washer pump.
20A
F82
Central locking.
20A
F83
238
Escape (TM2) Canada/United States of America, enUSA, Edition date: 201807, Second-Printing Fuses
Page 262 of 509
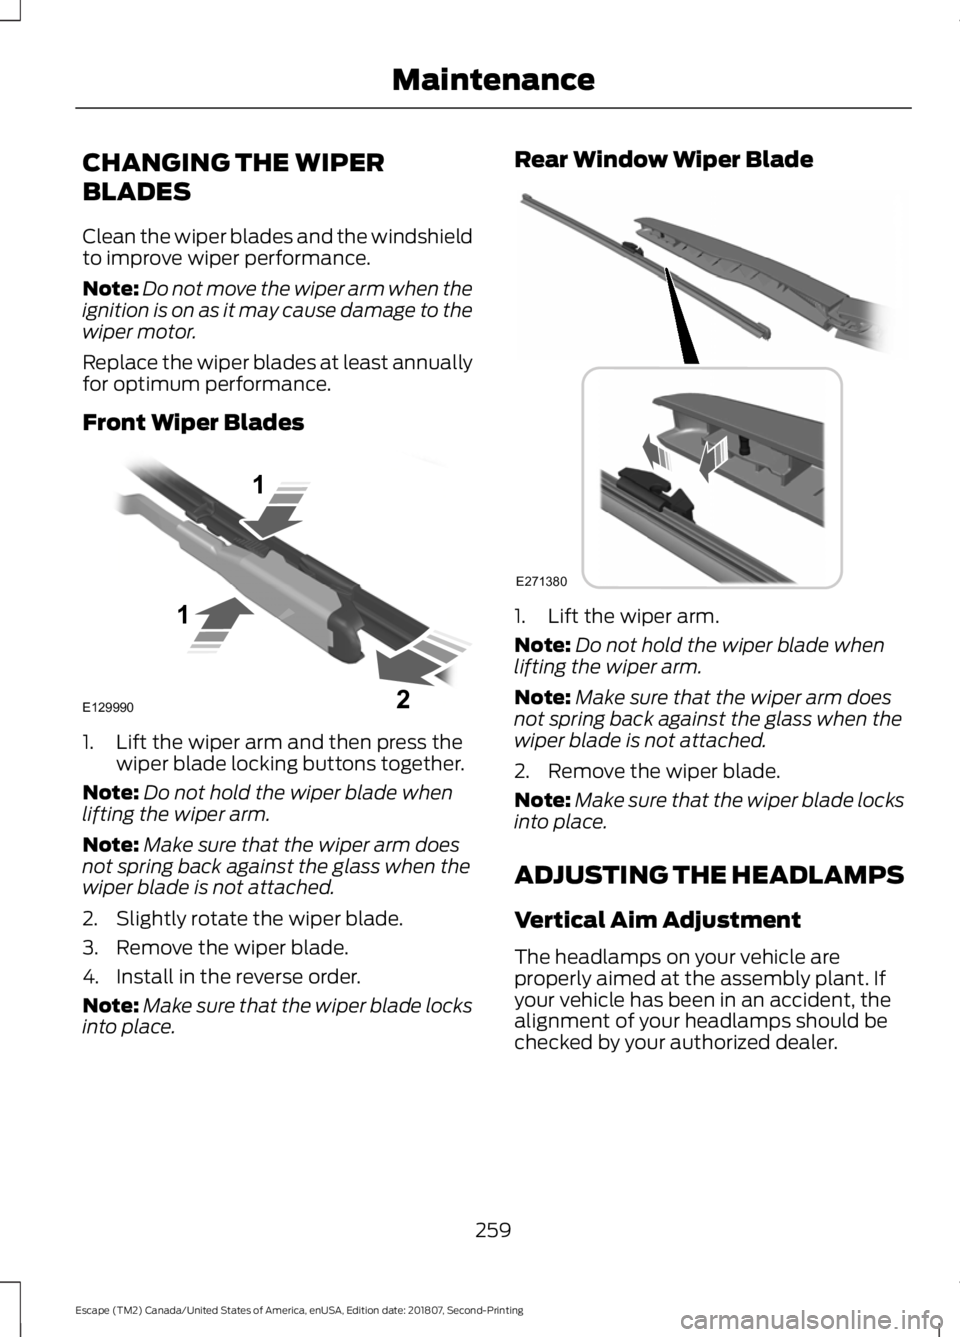
CHANGING THE WIPER
BLADES
Clean the wiper blades and the windshield
to improve wiper performance.
Note:
Do not move the wiper arm when the
ignition is on as it may cause damage to the
wiper motor.
Replace the wiper blades at least annually
for optimum performance.
Front Wiper Blades 1. Lift the wiper arm and then press the
wiper blade locking buttons together.
Note: Do not hold the wiper blade when
lifting the wiper arm.
Note: Make sure that the wiper arm does
not spring back against the glass when the
wiper blade is not attached.
2. Slightly rotate the wiper blade.
3. Remove the wiper blade.
4. Install in the reverse order.
Note: Make sure that the wiper blade locks
into place. Rear Window Wiper Blade
1. Lift the wiper arm.
Note:
Do not hold the wiper blade when
lifting the wiper arm.
Note: Make sure that the wiper arm does
not spring back against the glass when the
wiper blade is not attached.
2. Remove the wiper blade.
Note: Make sure that the wiper blade locks
into place.
ADJUSTING THE HEADLAMPS
Vertical Aim Adjustment
The headlamps on your vehicle are
properly aimed at the assembly plant. If
your vehicle has been in an accident, the
alignment of your headlamps should be
checked by your authorized dealer.
259
Escape (TM2) Canada/United States of America, enUSA, Edition date: 201807, Second-Printing MaintenanceE129990
1
1 2 E271380