mirror controls FORD ESCAPE 2020 Owners Manual
[x] Cancel search | Manufacturer: FORD, Model Year: 2020, Model line: ESCAPE, Model: FORD ESCAPE 2020Pages: 553, PDF Size: 7.73 MB
Page 96 of 553

POWER WINDOWS
WARNING: Do not leave children
unattended in your vehicle and do not
let them play with the power windows.
Failure to follow this instruction could
result in personal injury. WARNING:
When closing the
power windows, verify they are free of
obstruction and make sure that children
and pets are not in the proximity of the
window openings. Press the control to open the
window. Lift the control to close
the window.
To reduce wind noise or pulsing noise when
just one window is open, slightly open the
opposite window.
One-Touch Down
(If Equipped)
Press the switch fully and release it. Press
again or lift it to stop the window.
One-Touch Up
(If Equipped)
Lift the switch fully and release it. Press or
lift it again to stop the window.
Resetting One-Touch Up
Start the engine.
1. Lift and hold the window switch until you fully close the door window.
Continue to hold the switch for a few
seconds after you close the window.
2. Release the window switch.
3. Press and hold the window switch until
you fully open the door window.
4. Release the window switch.
5. Lift and hold the window switch until you fully close the window. 6. Test for correct window operation by
carrying out the one-touch down and
one-touch up features.
Rear Window Lock Press the control to lock or
unlock the rear window controls.
It illuminates when you lock the
rear window controls.
Bounce-Back
(If Equipped)
The window stops and reverses if it detects
an obstruction.
Overriding the Bounce-Back Feature WARNING:
If you override
bounce-back, the window does not
reverse if it detects an obstacle. Take
care when closing the windows to avoid
personal injury or damage to your
vehicle.
Pull up the window switch and hold within
a few seconds of the window reaching the
bounce-back position. The window travels
up with no bounce-back protection. The
window stops if you release the switch
before the window fully closes.
Resetting Bounce-Back WARNING: Bounce-back is off until
you reset the memory. Take care when
closing the windows to avoid personal
injury or damage to your vehicle.
If you have disconnected the battery, you
must reset the bounce-back memory
separately for each window.
1. Lift and hold the switch until the window is fully closed.
2. Release the switch.
93
Escape (CTC) Canada/United States of America, Vehicles Built From: 17-06-2019, enUSA, Edition date: 201906, Third-Printing- Windows and Mirrors
Page 97 of 553

3.
Lift and hold the switch again for a few
seconds.
4. Release the switch.
5. Lift and hold the switch again for a few
seconds.
6. Release the switch.
7. Press and hold the switch until the window is fully open.
8. Lift and hold the switch until the window is fully closed.
9. Release the switch.
10. Open the window and then try to close it using one-touch close.
Note: Repeat the procedure if the window
does not close when you use one-touch.
Accessory Delay
You can use the window controls for
several minutes after switching off the
ignition or until opening either front door.
EXTERIOR MIRRORS
Power Exterior Mirrors WARNING: Do not adjust the
mirrors when your vehicle is moving. This
could result in the loss of control of your
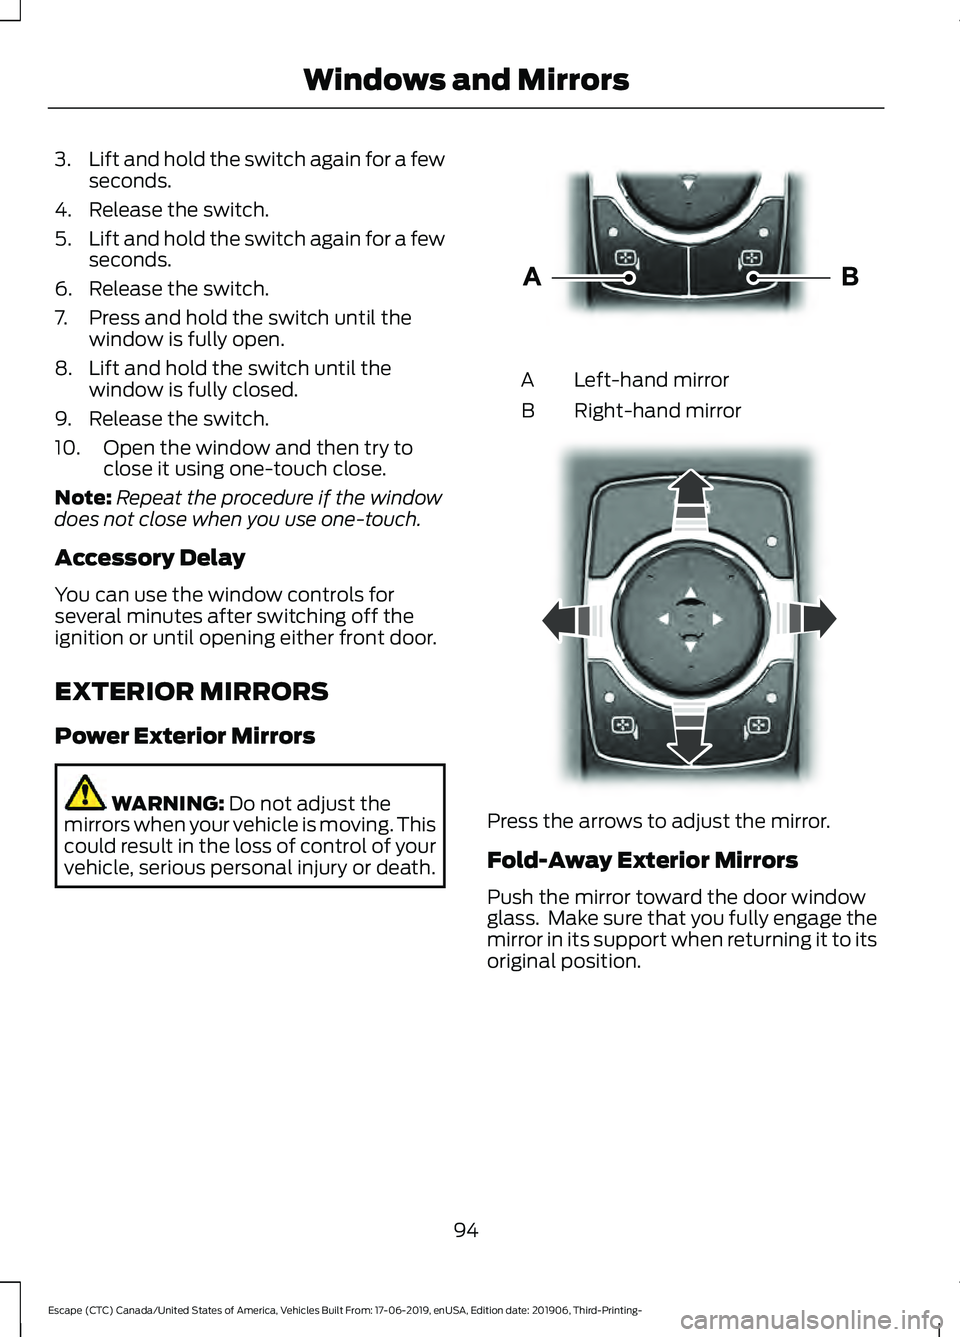
vehicle, serious personal injury or death. Left-hand mirror
A
Right-hand mirror
B Press the arrows to adjust the mirror.
Fold-Away Exterior Mirrors
Push the mirror toward the door window
glass. Make sure that you fully engage the
mirror in its support when returning it to its
original position.
94
Escape (CTC) Canada/United States of America, Vehicles Built From: 17-06-2019, enUSA, Edition date: 201906, Third-Printing- Windows and MirrorsE303926 E303927
Page 99 of 553

Manual Dimming Mirror
Pull the tab below the mirror toward you
to reduce the effect of bright light from
behind.
Automatic Dimming Mirror (If Equipped)
Note:
Do not block the sensors on the front
and back of the mirror. A rear center
passenger or raised rear center head
restraint may also block light from reaching
the sensor.
The mirror dims to reduce the effect of
bright light from behind. It returns to
normal when the bright light from behind
is no longer present or if you shift into
reverse (R).
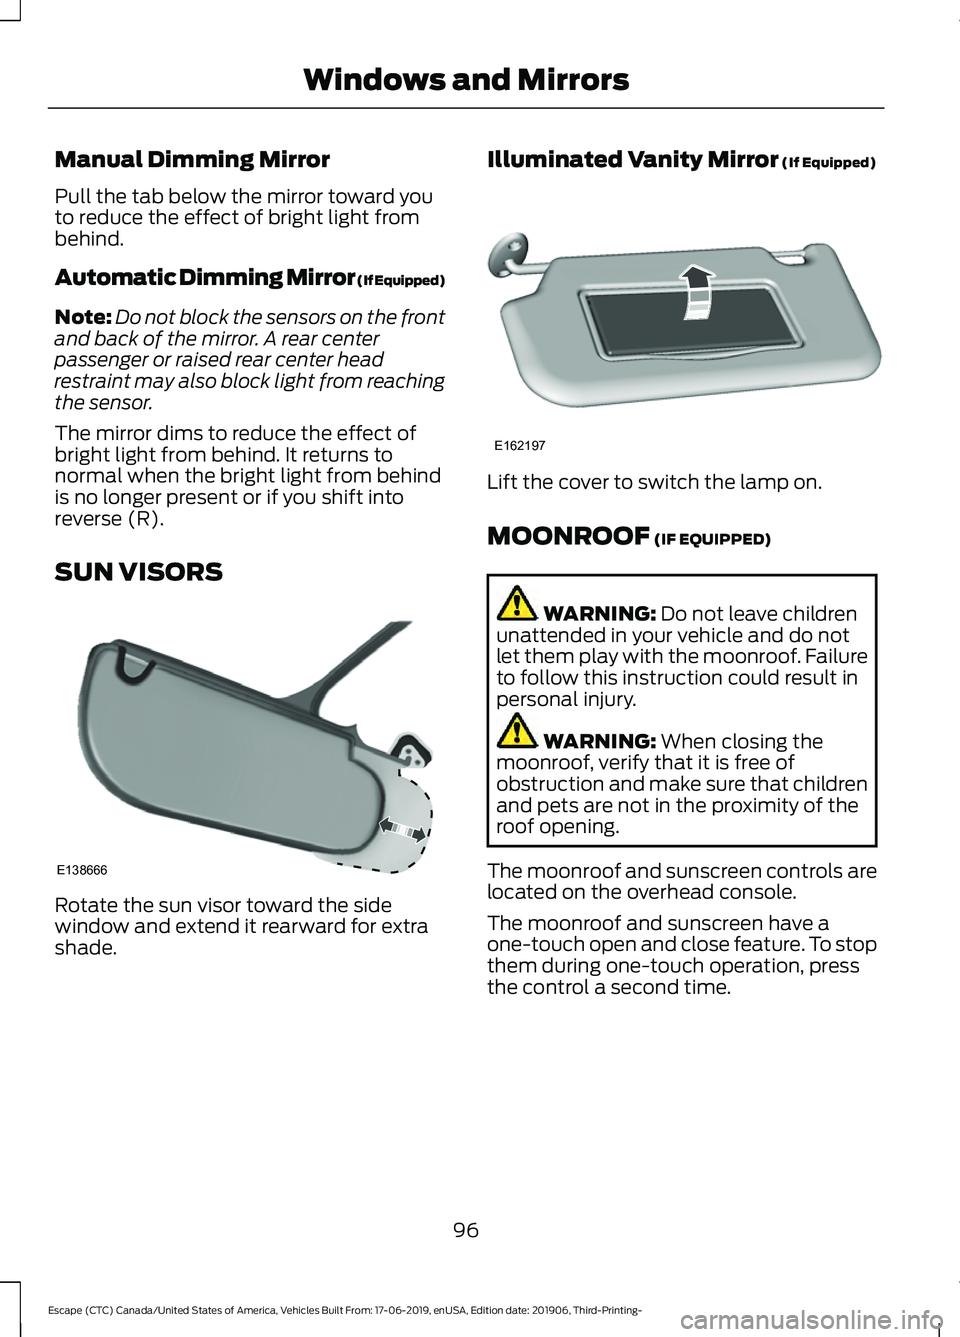
SUN VISORS Rotate the sun visor toward the side
window and extend it rearward for extra
shade. Illuminated Vanity Mirror (If Equipped) Lift the cover to switch the lamp on.
MOONROOF
(IF EQUIPPED)
WARNING:
Do not leave children
unattended in your vehicle and do not
let them play with the moonroof. Failure
to follow this instruction could result in
personal injury. WARNING:
When closing the
moonroof, verify that it is free of
obstruction and make sure that children
and pets are not in the proximity of the
roof opening.
The moonroof and sunscreen controls are
located on the overhead console.
The moonroof and sunscreen have a
one-touch open and close feature. To stop
them during one-touch operation, press
the control a second time.
96
Escape (CTC) Canada/United States of America, Vehicles Built From: 17-06-2019, enUSA, Edition date: 201906, Third-Printing- Windows and MirrorsE138666 E162197
Page 137 of 553

Cleaning the Head Up Display
Use a damp, lint-free cloth to clean the
head up display.
Note:
Do not touch the display screen or
mirror.
Note: Do not use household cleaning
products or glass cleaners. This can cause
damage not covered by the vehicle
Warranty. Switching the Head Up Display On
or Off Press the button on the steering
wheel.
Note: The head up display menu appears
in the information display.
Use the information display controls on the steering wheel to select the following: Action
Menu Item
Press the OK button.
Head-Up Display (HUD)
Press the
OK button.
Note: The system remembers the last setting when you start the engine.
Adjusting the Head Up Display
Settings
Start the engine and switch the system on.
Note: Press the button on the steering
wheel if you do not see the head up display
menu in the information display. Note:
For your safety, some features are
speed-dependent. The system limits their
use to when your vehicle is not moving.
Use the information display controls on
the steering wheel to adjust the head up
display settings.
134
Escape (CTC) Canada/United States of America, Vehicles Built From: 17-06-2019, enUSA, Edition date: 201906, Third-Printing- Information DisplaysE265900
Page 156 of 553

Adjusting the Lumbar Support
MEMORY FUNCTION (IF EQUIPPED)
WARNING:
Before activating the
memory seat, make sure that the area
immediately surrounding the seat is clear
of obstructions and that all occupants
are clear of moving parts. WARNING:
Do not use the memory
function when your vehicle is moving.
This function recalls the position of the
following:
• Driver seat.
• Power mirrors.
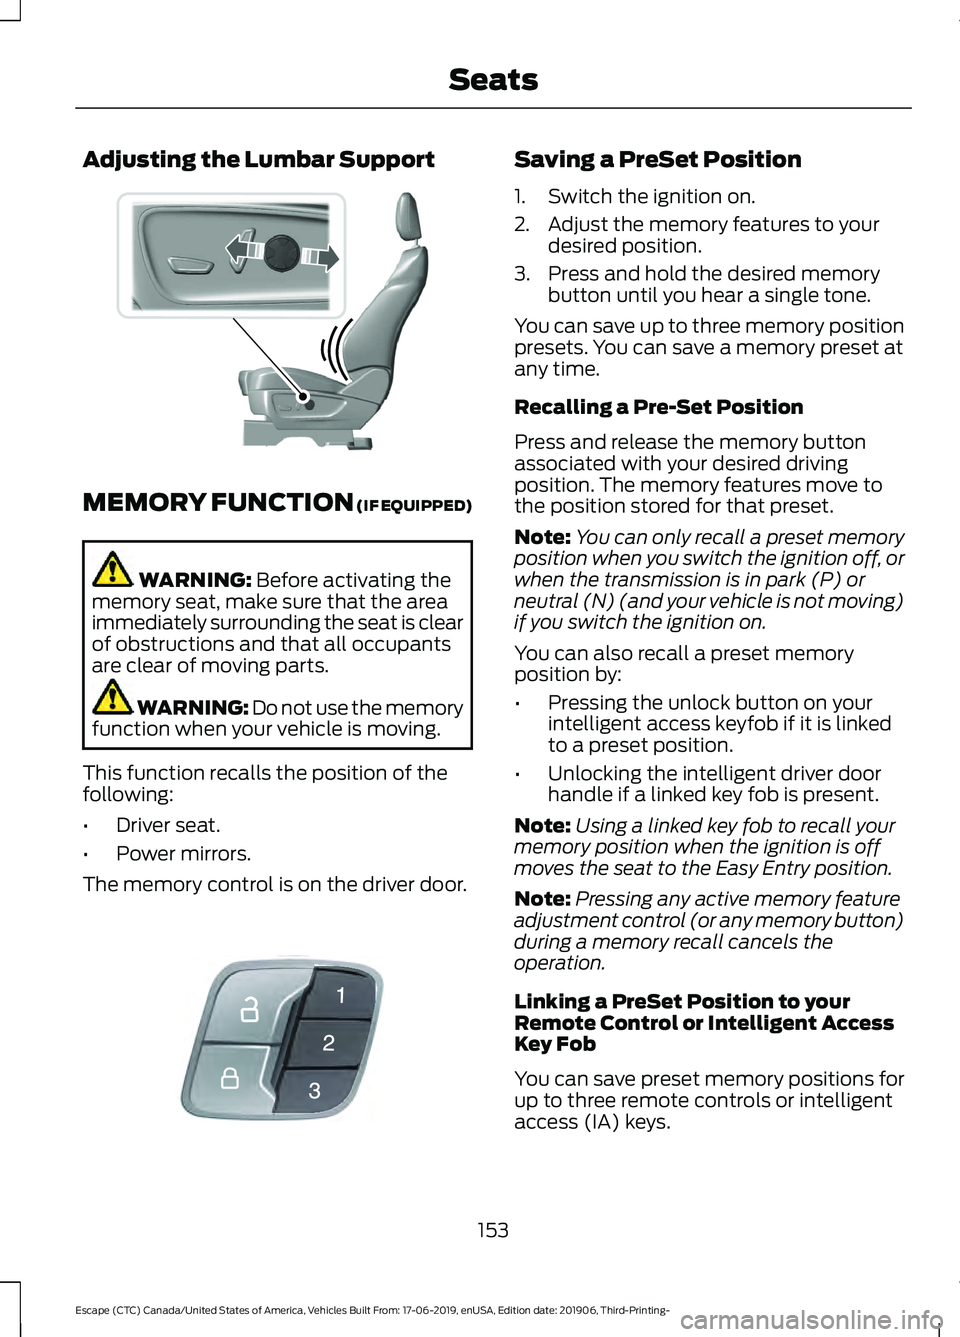
The memory control is on the driver door. Saving a PreSet Position
1. Switch the ignition on.
2. Adjust the memory features to your
desired position.
3. Press and hold the desired memory button until you hear a single tone.
You can save up to three memory position
presets. You can save a memory preset at
any time.
Recalling a Pre-Set Position
Press and release the memory button
associated with your desired driving
position. The memory features move to
the position stored for that preset.
Note: You can only recall a preset memory
position when you switch the ignition off, or
when the transmission is in park (P) or
neutral (N) (and your vehicle is not moving)
if you switch the ignition on.
You can also recall a preset memory
position by:
• Pressing the unlock button on your
intelligent access keyfob if it is linked
to a preset position.
• Unlocking the intelligent driver door
handle if a linked key fob is present.
Note: Using a linked key fob to recall your
memory position when the ignition is off
moves the seat to the Easy Entry position.
Note: Pressing any active memory feature
adjustment control (or any memory button)
during a memory recall cancels the
operation.
Linking a PreSet Position to your
Remote Control or Intelligent Access
Key Fob
You can save preset memory positions for
up to three remote controls or intelligent
access (IA) keys.
153
Escape (CTC) Canada/United States of America, Vehicles Built From: 17-06-2019, enUSA, Edition date: 201906, Third-Printing- SeatsE298774 E142554
Page 546 of 553

Fuel........................................................................\
...
124
Hill Start Assist.................................................... 124
Keys and Intelligent Access............................ 124
Lane Keeping System........................................ 125
Maintenance......................................................... 126
MyKey...................................................................... 127
Park Aid................................................................... 127
Park Brake............................................................. 128
Power Steering.................................................... 129
Pre-Collision Assist............................................ 129
Remote Start....................................................... 130
Seats....................................................................... 130
Starting System ................................................. 130
Tire Pressure Monitoring System................... 131
Trailer........................................................................\
131
Transmission.........................................................132
Installing Child Restraints...........................24
Child Restraints..................................................... 24
Using Lap and Shoulder Belts......................... 24
Using Lower Anchors and Tethers for CHildren (LATCH)........................................... 26
Using Tether Straps............................................. 28
Instrument Cluster
........................................98
Instrument Lighting Dimmer......................87
Instrument Panel
...........................................20
Interior Lamps.................................................89
Interior Lamp Function...................................... 89
Switching All of the Interior Lamps Off........................................................................\
. 89
Switching All of the Interior Lamps On........................................................................\
. 89
Switching the Front Interior Lamps On and Off........................................................................\
. 90
Switching the Rear Interior Lamps On and Off........................................................................\
. 90
Interior Mirror
...................................................95
Automatic Dimming Mirror.............................. 96
Manual Dimming Mirror..................................... 96
Introduction........................................................9
J
Jump Starting the Vehicle - Excluding: Hybrid Electric Vehicle (HEV)/Plug-In
Hybrid Electric Vehicle (PHEV)...........289
Connecting the Jumper Cables ................... 289
Preparing Your Vehicle.................................... 289
Removing the Jumper Cables...................... 290Starting the Engine...........................................
290
Jump Starting the Vehicle - Hybrid Electric Vehicle (HEV)/Plug-In Hybrid
Electric Vehicle (PHEV)..........................291
Connecting the Jumper Cables ................... 292
Preparing Your Vehicle...................................... 291
Removing the Jumper Cables....................... 293
Starting the Engine........................................... 293
K
Keyless Entry...................................................69 SECURICODE™ KEYLESS ENTRY
KEYPAD.............................................................. 69
Keyless Starting.............................................167 Ignition Modes..................................................... 168
Keys and Remote Controls.........................54
L
Lane Keeping System
.................................251
Switching the System On and Off...............252
Liftgate................................................................71
Lighting Control..............................................86 Flashing High Beam Headlamps.................... 87
Lighting Control Selections.............................. 86
Switching High Beam Headlamps On and Off........................................................................\
. 86
Lighting..............................................................86 General Information........................................... 86
Load Carriers See: Roof Racks and Load Carriers............269
Load Carrying
................................................268
Load Limit.......................................................270
Special Loading Instructions for Owners of
Pick-up Trucks and Utility-type
Vehicles............................................................. 274
Vehicle Loading - with and without a Trailer................................................................. 270
Locking and Unlocking................................66 Activating Intelligent Access............................ 67
Autolock.................................................................. 68
Battery Saver......................................................... 69
Illuminated Entry.................................................. 68
Illuminated Exit..................................................... 69
Locking and Unlocking the Doors with the Key Blade........................................................... 66
Opening a Rear Door from the Inside...........67
543
Escape (CTC) Canada/United States of America, Vehicles Built From: 17-06-2019, enUSA, Edition date: 201906, Third-Printing- Index