vehicle lifting FORD ESCAPE 2020 Owners Manual
[x] Cancel search | Manufacturer: FORD, Model Year: 2020, Model line: ESCAPE, Model: FORD ESCAPE 2020Pages: 553, PDF Size: 7.73 MB
Page 31 of 553
The lower anchors at the center of the
second row rear seat are spaced 18 in
(46 cm) apart. A child restraint with rigid
LATCH attachments cannot be installed
at the center seating position. LATCH
compatible child restraints (with
attachments on belt webbing) can only be
used at this seating position provided that
the child restraint manufacturer's
instructions permit use with the anchor
spacing stated. Do not attach a child
restraint to any lower anchor if an adjacent
child restraint is attached to that anchor.
Each time you use the child restraint, check
that the seat is properly attached to the
lower anchors and tether anchor, if
applicable. Tug the child restraint from side
to side and forward and back where it is
secured to your vehicle. The seat should
move less than
1 in (2.5 cm) when you do
this for a proper installation.
If the child restraint is not anchored
properly, the risk of a child being injured in
a crash greatly increases.
Combining Seatbelt and LATCH Lower
Anchors for Attaching Child Restraints
When used in combination, either the
seatbelt or the LATCH lower anchors may
be attached first, provided a proper
installation is achieved. Attach the tether
strap afterward, if included with the child
restraint.
Using Tether Straps Many forward-facing child
restraints include a tether strap
which extends from the back of
the child restraint and hooks to an
anchoring point called the top tether
anchor. Tether straps are available as an
accessory for many older child restraints. Contact the manufacturer of your child
restraint for information about ordering a
tether strap, or to obtain a longer tether
strap if the tether strap on your child
restraint does not reach the appropriate
top tether anchor in your vehicle.
Once you install the child restraint using
either the seatbelt, the lower anchors of
the LATCH system, or both, you can attach
the top tether strap.
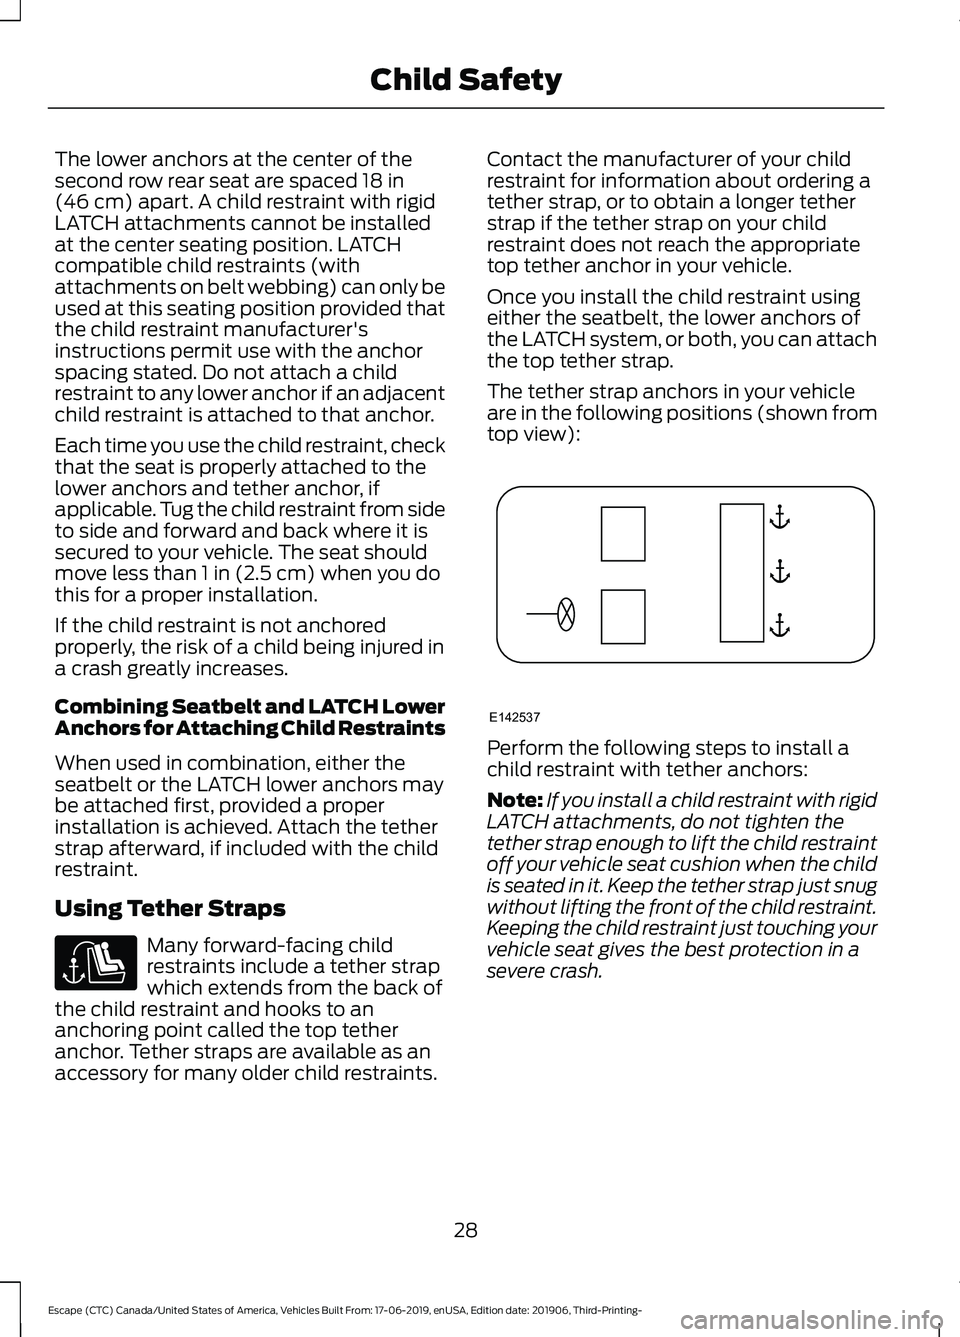
The tether strap anchors in your vehicle
are in the following positions (shown from
top view):
Perform the following steps to install a
child restraint with tether anchors:
Note:
If you install a child restraint with rigid
LATCH attachments, do not tighten the
tether strap enough to lift the child restraint
off your vehicle seat cushion when the child
is seated in it. Keep the tether strap just snug
without lifting the front of the child restraint.
Keeping the child restraint just touching your
vehicle seat gives the best protection in a
severe crash.
28
Escape (CTC) Canada/United States of America, Vehicles Built From: 17-06-2019, enUSA, Edition date: 201906, Third-Printing- Child Safety E142537
Page 103 of 553
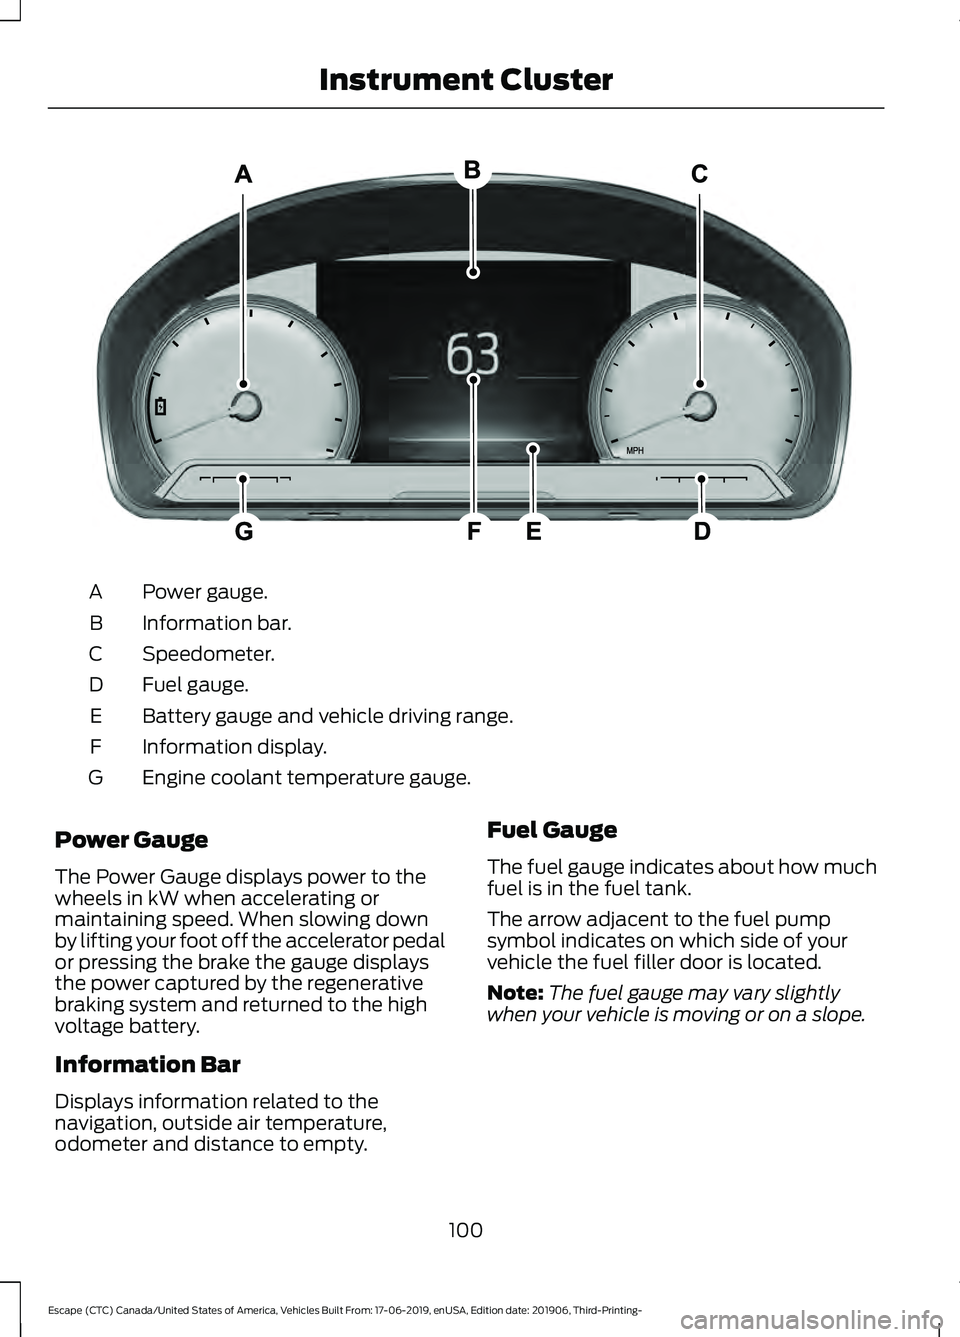
Power gauge.
A
Information bar.
B
Speedometer.
C
Fuel gauge.
D
Battery gauge and vehicle driving range.
E
Information display.
F
Engine coolant temperature gauge.
G
Power Gauge
The Power Gauge displays power to the
wheels in kW when accelerating or
maintaining speed. When slowing down
by lifting your foot off the accelerator pedal
or pressing the brake the gauge displays
the power captured by the regenerative
braking system and returned to the high
voltage battery.
Information Bar
Displays information related to the
navigation, outside air temperature,
odometer and distance to empty. Fuel Gauge
The fuel gauge indicates about how much
fuel is in the fuel tank.
The arrow adjacent to the fuel pump
symbol indicates on which side of your
vehicle the fuel filler door is located.
Note:
The fuel gauge may vary slightly
when your vehicle is moving or on a slope.
100
Escape (CTC) Canada/United States of America, Vehicles Built From: 17-06-2019, enUSA, Edition date: 201906, Third-Printing- Instrument ClusterE307890
Page 107 of 553
Note:
It is normal for vehicle range
estimates to vary due to changes in average
energy usage. This is why you typically see
different range estimates each time you fill
up your fuel tank or fully charge your battery.
Gasoline Distance to Empty
Indicates the approximate distance your
vehicle can travel on the fuel remaining in
the tank.
Electric Range
Indicates the approximate distance your
vehicle can travel on electric power only
with the engine off. Power Gauge
The Power Gauge displays power to the
wheels in kW when accelerating or
maintaining speed. The high voltage
battery power and engine power
contributions are distinguished by color
and added together to indicate total power
to the wheels. When slowing down by
lifting your foot off the accelerator pedal
or pressing the brake, the power captured
by the regenerative braking system and
returned to the high voltage battery is
displayed in green.
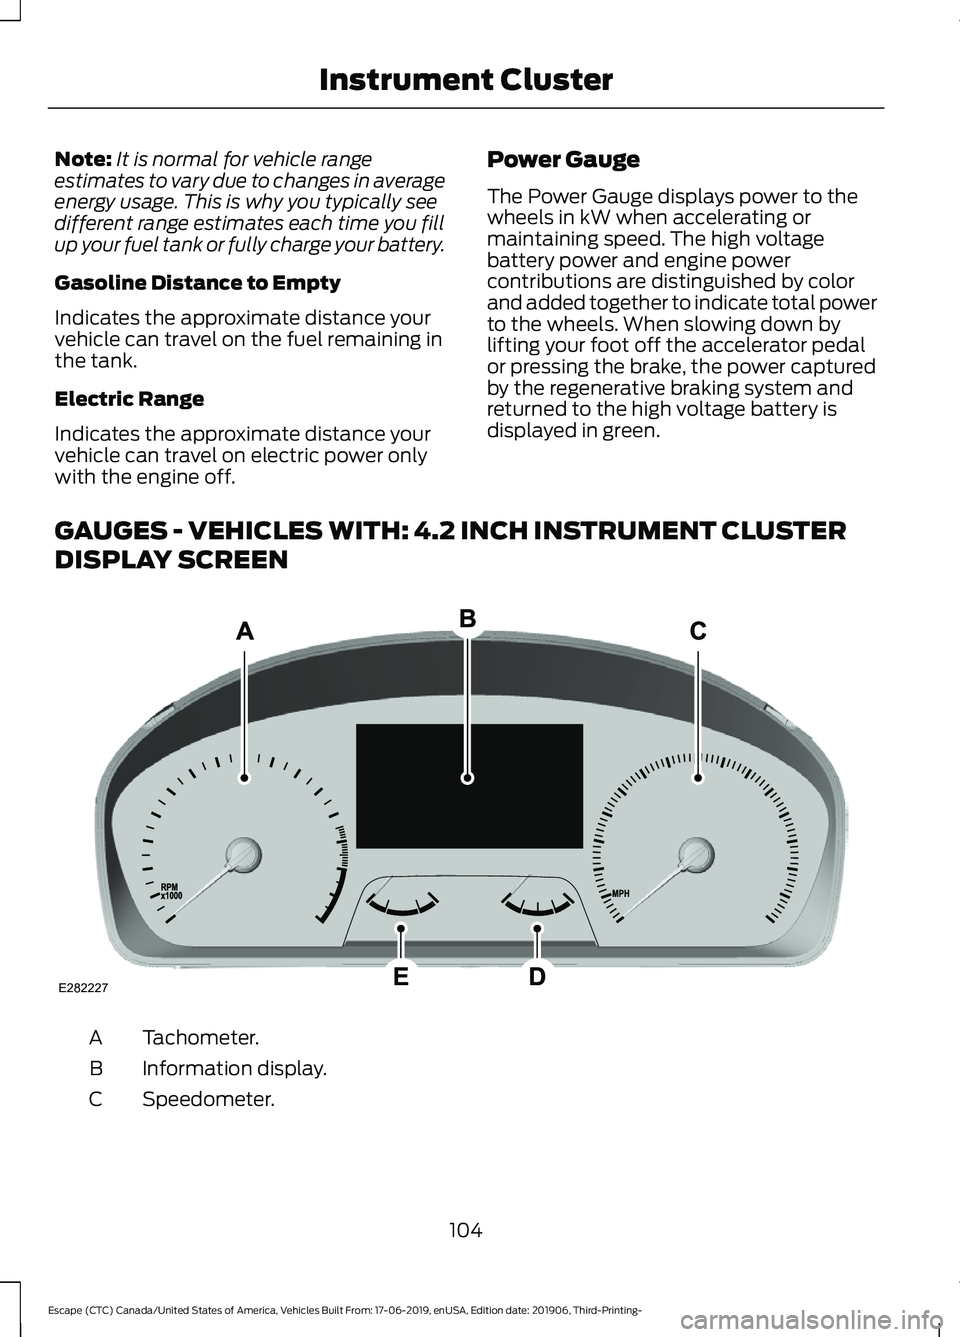
GAUGES - VEHICLES WITH: 4.2 INCH INSTRUMENT CLUSTER
DISPLAY SCREEN Tachometer.
A
Information display.
B
Speedometer.
C
104
Escape (CTC) Canada/United States of America, Vehicles Built From: 17-06-2019, enUSA, Edition date: 201906, Third-Printing- Instrument ClusterE282227
Page 329 of 553
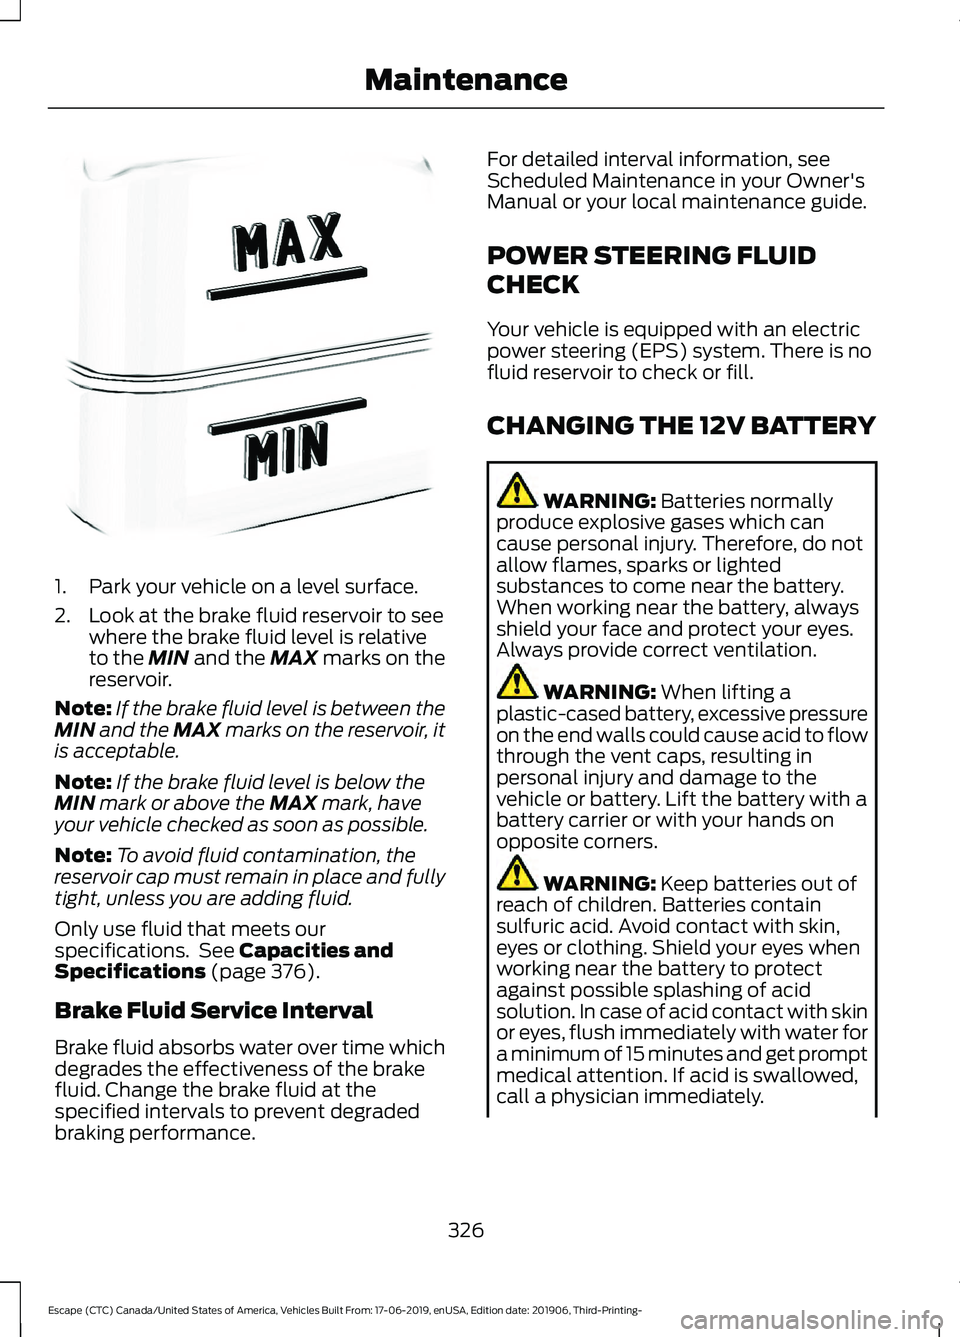
1. Park your vehicle on a level surface.
2. Look at the brake fluid reservoir to see
where the brake fluid level is relative
to the MIN and the MAX marks on the
reservoir.
Note: If the brake fluid level is between the
MIN
and the MAX marks on the reservoir, it
is acceptable.
Note: If the brake fluid level is below the
MIN
mark or above the MAX mark, have
your vehicle checked as soon as possible.
Note: To avoid fluid contamination, the
reservoir cap must remain in place and fully
tight, unless you are adding fluid.
Only use fluid that meets our
specifications. See
Capacities and
Specifications (page 376).
Brake Fluid Service Interval
Brake fluid absorbs water over time which
degrades the effectiveness of the brake
fluid. Change the brake fluid at the
specified intervals to prevent degraded
braking performance. For detailed interval information, see
Scheduled Maintenance in your Owner's
Manual or your local maintenance guide.
POWER STEERING FLUID
CHECK
Your vehicle is equipped with an electric
power steering (EPS) system. There is no
fluid reservoir to check or fill.
CHANGING THE 12V BATTERY
WARNING:
Batteries normally
produce explosive gases which can
cause personal injury. Therefore, do not
allow flames, sparks or lighted
substances to come near the battery.
When working near the battery, always
shield your face and protect your eyes.
Always provide correct ventilation. WARNING:
When lifting a
plastic-cased battery, excessive pressure
on the end walls could cause acid to flow
through the vent caps, resulting in
personal injury and damage to the
vehicle or battery. Lift the battery with a
battery carrier or with your hands on
opposite corners. WARNING:
Keep batteries out of
reach of children. Batteries contain
sulfuric acid. Avoid contact with skin,
eyes or clothing. Shield your eyes when
working near the battery to protect
against possible splashing of acid
solution. In case of acid contact with skin
or eyes, flush immediately with water for
a minimum of 15 minutes and get prompt
medical attention. If acid is swallowed,
call a physician immediately.
326
Escape (CTC) Canada/United States of America, Vehicles Built From: 17-06-2019, enUSA, Edition date: 201906, Third-Printing- MaintenanceE170684
Page 333 of 553
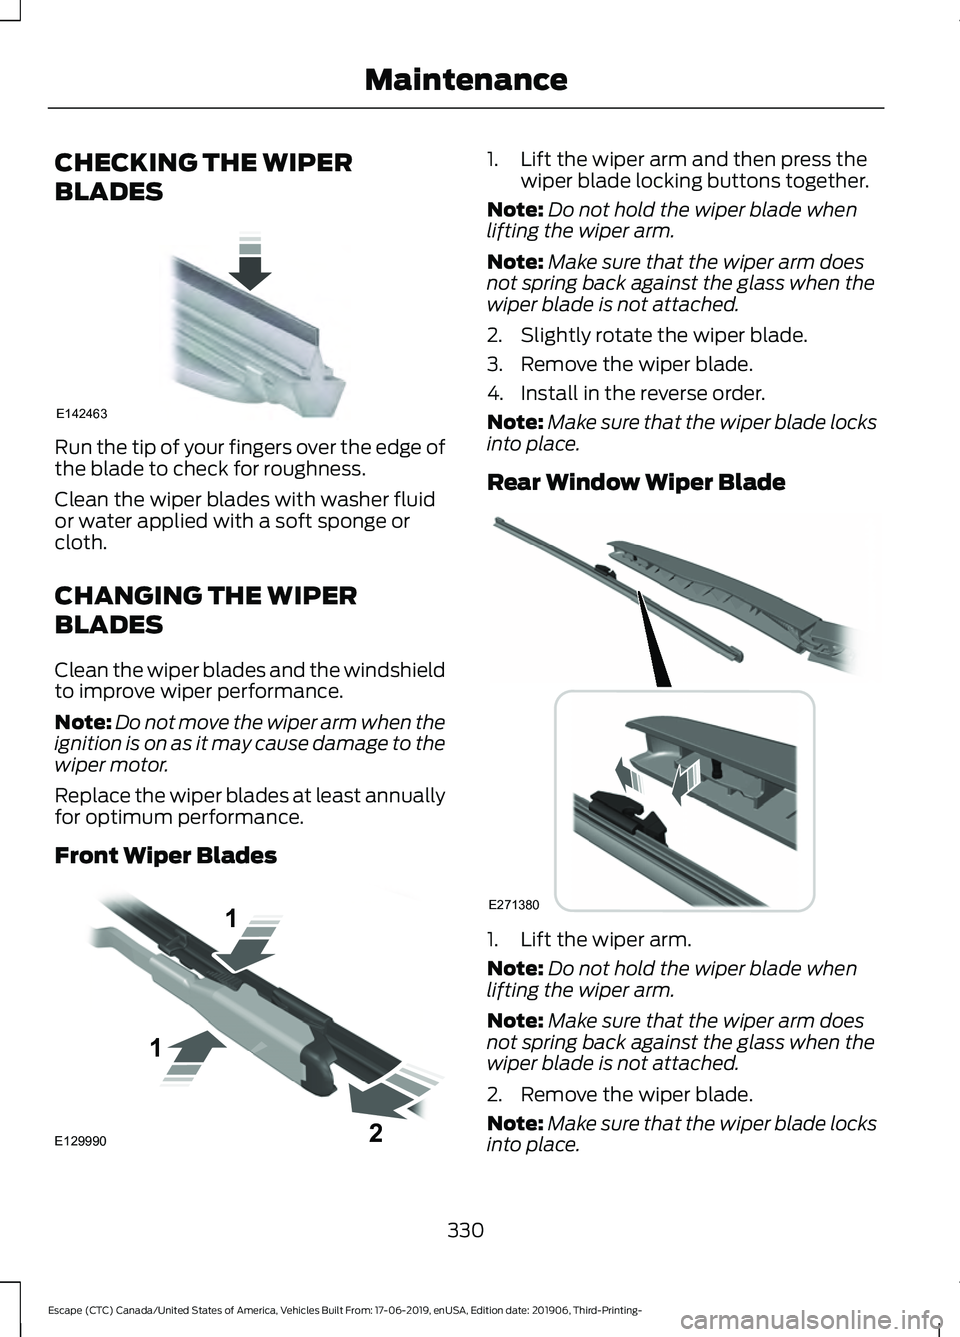
CHECKING THE WIPER
BLADES
Run the tip of your fingers over the edge of
the blade to check for roughness.
Clean the wiper blades with washer fluid
or water applied with a soft sponge or
cloth.
CHANGING THE WIPER
BLADES
Clean the wiper blades and the windshield
to improve wiper performance.
Note:
Do not move the wiper arm when the
ignition is on as it may cause damage to the
wiper motor.
Replace the wiper blades at least annually
for optimum performance.
Front Wiper Blades 1. Lift the wiper arm and then press the
wiper blade locking buttons together.
Note: Do not hold the wiper blade when
lifting the wiper arm.
Note: Make sure that the wiper arm does
not spring back against the glass when the
wiper blade is not attached.
2. Slightly rotate the wiper blade.
3. Remove the wiper blade.
4. Install in the reverse order.
Note: Make sure that the wiper blade locks
into place.
Rear Window Wiper Blade 1. Lift the wiper arm.
Note:
Do not hold the wiper blade when
lifting the wiper arm.
Note: Make sure that the wiper arm does
not spring back against the glass when the
wiper blade is not attached.
2. Remove the wiper blade.
Note: Make sure that the wiper blade locks
into place.
330
Escape (CTC) Canada/United States of America, Vehicles Built From: 17-06-2019, enUSA, Edition date: 201906, Third-Printing- MaintenanceE142463 E129990
1
1 2 E271380
Page 374 of 553
WARNING: To help prevent your
vehicle from moving when changing a
wheel, shift the transmission into park
(P), set the parking brake and use an
appropriate block or wheel chock to
secure the wheel diagonally opposite to
the wheel being changed. For example,
when changing the front left wheel,
place an appropriate block or wheel
chock on the right rear wheel. WARNING: It is recommended that
the wheels of the vehicle be chocked,
and that no person should remain in a
vehicle that is being jacked. WARNING:
Always use the jack
provided as original equipment with your
vehicle. If using a jack other than the one
provided, make sure the jack capacity is
adequate for the vehicle weight,
including any vehicle cargo or
modifications. If you are unsure if the jack
capacity is adequate, contact the
authorized dealer. WARNING:
The jack supplied with
this vehicle is only intended for changing
wheels. Do not use the vehicle jack other
than when you are changing a wheel in
an emergency. WARNING: Check that the vehicle
jack is not damaged or deformed and
the thread is lubricated and clean. WARNING:
The jack should be
used on level firm ground wherever
possible. WARNING:
Use only the specified
jacking points. If you use other positions,
you may damage the body, steering,
suspension, engine, braking system or
the fuel lines. WARNING:
Switch the ignition off
and apply the park brake fully before
lifting vehicle. WARNING:
Park your vehicle so
that you do not obstruct the flow of
traffic or place yourself in any danger and
set up a warning triangle. WARNING:
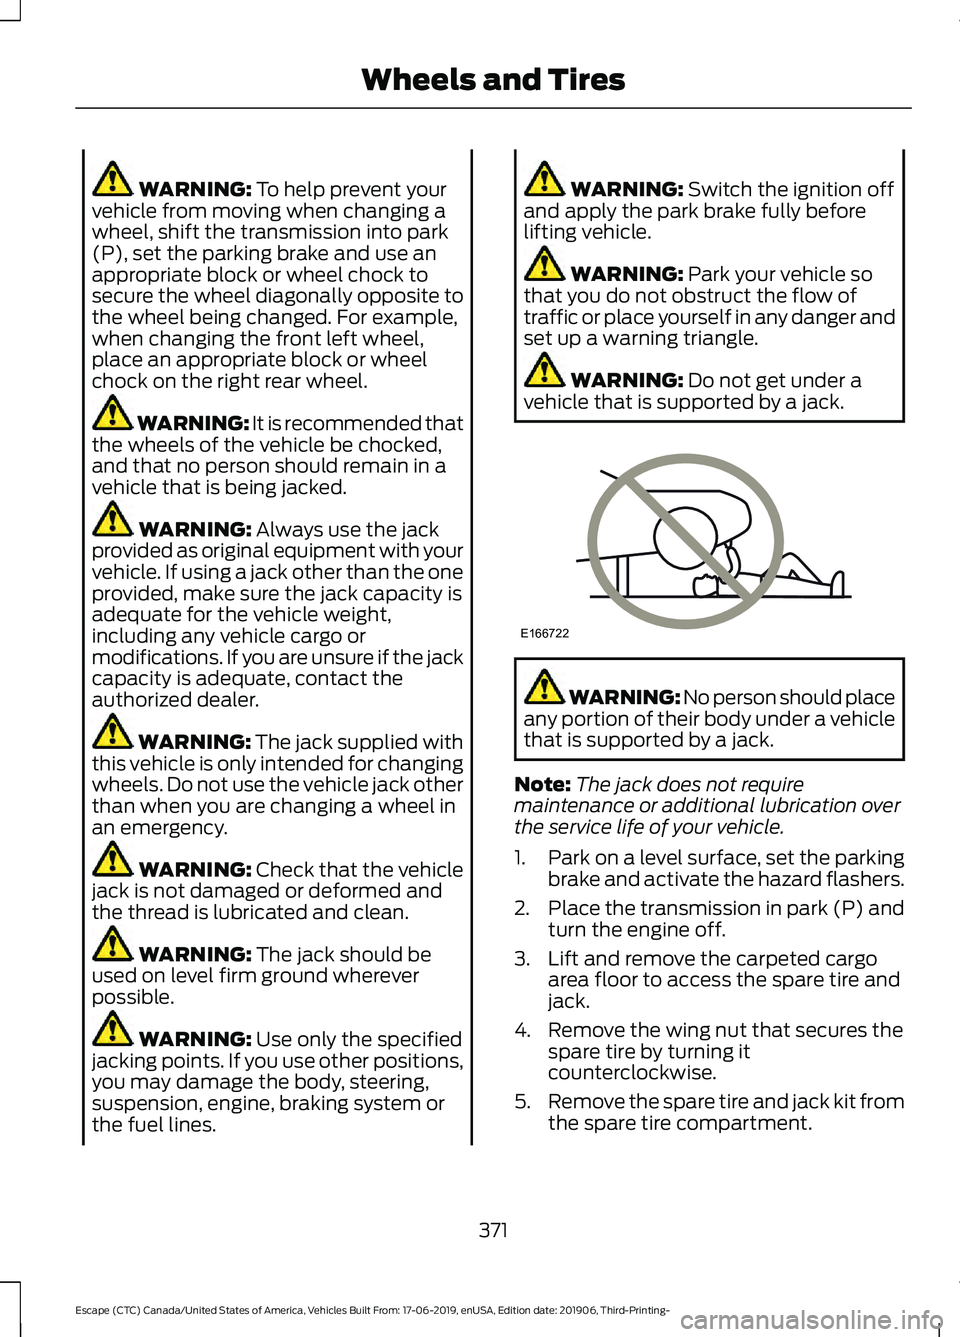
Do not get under a
vehicle that is supported by a jack. WARNING: No person should place
any portion of their body under a vehicle
that is supported by a jack.
Note: The jack does not require
maintenance or additional lubrication over
the service life of your vehicle.
1. Park on a level surface, set the parking
brake and activate the hazard flashers.
2. Place the transmission in park (P) and
turn the engine off.
3. Lift and remove the carpeted cargo area floor to access the spare tire and
jack.
4. Remove the wing nut that secures the spare tire by turning it
counterclockwise.
5. Remove the spare tire and jack kit from
the spare tire compartment.
371
Escape (CTC) Canada/United States of America, Vehicles Built From: 17-06-2019, enUSA, Edition date: 201906, Third-Printing- Wheels and TiresE166722