cold FORD ESCAPE 2022 Owner's Manual
[x] Cancel search | Manufacturer: FORD, Model Year: 2022, Model line: ESCAPE, Model: FORD ESCAPE 2022Pages: 585, PDF Size: 6.15 MB
Page 307 of 585
COLD WEATHER
PRECAUTIONS
The functional operation of some
components and systems can be affected
at temperatures below approximately
-13°F (-25°C).
BREAKING-IN
You need to break in new tires for
approximately 300 mi (480 km). During
this time, your vehicle may exhibit some
unusual driving characteristics.
DRIVING ECONOMICALLY
The following helps to improve fuel
consumption:
• Drive smoothly, accelerate gently andanticipate the road ahead to avoid
heavy braking.
• Regularly check your tire pressures and make sure that they are inflated to the
correct pressure.
• Follow the recommended maintenance schedule and carry out the
recommended checks.
• Plan your journey and check the traffic before you set off. It is more efficient
to combine errands into a single trip
whenever possible.
• Avoid idling the engine in cold weather or for extended periods. Start the
engine only when you are ready to set
off.
• Do not carry unnecessary weight in your vehicle as extra weight wastes fuel.
• Do not add unnecessary accessories to the exterior of your vehicle, for
example running boards. If you use a
roof rack, remember to fold it down or
remove it when not in use. • Do not shift into neutral when you are
braking or when your vehicle is slowing
down.
• Shut all windows when driving at high speeds.
• Switch off all electric systems when not in use, for example air conditioning.
Make sure that you unplug any
accessories from the auxiliary power
points when not in use.
DRIVING IN SPECIAL
CONDITIONS
EMERGENCY MANEUVERS
In an unavoidable emergency where you
must make a sudden sharp maneuver, turn
the steering wheel only as rapidly and as
far as required to avoid the emergency.
Apply smooth pressure to the accelerator
pedal or brake pedal as needed. Avoid
abrupt steering, acceleration and braking
changes. Abrupt changes could increase
the risk of vehicle roll over, loss of vehicle
control and personal injury. If possible, use
any available road surfaces to bring your
vehicle under control.
DRIVING THROUGH MUD AND
WATER
Mud
Be cautious of sudden changes in vehicle
speed or direction when you are driving in
mud. Even all-wheel drive and four-wheel
drive vehicles can lose traction in mud. If
your vehicle slides, steer in the direction of
the slide until you regain control of your
vehicle. After driving through mud, clean
off residue stuck to rotating driveshafts
and tires. Excess residue can cause an
imbalance that could damage drive
components.
304
Driving Hints
Page 337 of 585
3. Add engine oil that meets ourspecifications. See Capacities and
Specifications (page 387).
4. Reinstall the engine oil filler cap. Turn it clockwise until you feel a strong
resistance.
Note: Do not add oil further than the
maximum mark. Oil levels above the
maximum mark may cause engine damage.
Note: Immediately soak up any oil spillage
with an absorbent cloth.
RESETTING THE ENGINE OIL
CHANGE REMINDER
Use the information display controls on
the steering wheel to reset the oil change
reminder.
From the main menu scroll to:
Action and description
Message
Press the right arrow button,
then from this menu scroll
to the following message.
Settings
Press the right arrow button,
then from this menu scroll
to the following message.
Conveni-
ence
Press the right arrow button,
then from this menu scroll
to the following message.
Oil Life
Reset
Press and hold the OK
button until the instrument
cluster displays the
following message.
Hold OK to
Reset
Reset Successful
When the oil change
reminder resets the instru-
ment cluster displays 100%.
Remaining Life
{00}%
Action and description
Message
If the instrument cluster
displays one of the following
messages, repeat the
process.
Not Reset
Reset Cancelled
ENGINE OIL CAPACITY AND
SPECIFICATION
For filling information, please refer to the
Capacities and Specifications section of
your owner's manual. See Engine Oil
Capacity and Specification (page 392).
CHECKING THE COOLANT
When the engine is cold, check the
concentration and level of the coolant at
the intervals listed in the scheduled
maintenance information. See Scheduled
Maintenance (page 482).
Note:Make sure that the coolant level is
between the minimum and maximum marks
on the coolant reservoir.
Note: Coolant expands when it is hot. The
level may extend beyond the MAX mark.
If the coolant level is at or below the
minimum mark, add prediluted coolant
immediately.
Maintain coolant concentration within
48% to 50%, which equates to a freeze
point between -29°F (-34°C) and -35°F
(-37°C). Coolant concentration should be
checked using a refractometer. We do not
recommend the use of hydrometers or
coolant test strips for measuring coolant
concentration.
334
Maintenance
Page 339 of 585
Water alone, without engine coolant, can
cause engine damage from corrosion,
overheating or freezing.
Do not use the following as a coolant
substitute, as they can cause engine
damage from overheating or freezing:
• Alcohol.
• Methanol.
• Brine.
• Any coolant mixed with alcohol ormethanol antifreeze.
Do not add extra inhibitors or additives to
the coolant. These can be harmful and
compromise the corrosion protection of
the coolant.
Severe Climates
If you drive in extremely cold climates, you
may need to increase the coolant
concentration above 50%.
Note: A coolant concentration of 60%
provides improved freeze point protection.
Coolant concentrations above 60%
decrease the overheat protection
characteristics of the coolant and could
cause engine damage.
If you drive in extremely hot climates, you
may need to decrease the coolant
concentration to 40%.
Note: A coolant concentration of 40%
provides improved overheat protection.
Coolant concentrations below 40%
decrease the overheat and corrosion
protection characteristics of the coolant and
could cause engine damage.
Coolant Change
WARNING: Do not dispose of
coolant in the household refuse or the
public sewage system. Use an authorized
waste disposal facility. Change the coolant at specific mileage
intervals. Refer to the scheduled
maintenance information. See Normal
Scheduled Maintenance (page 485).
Note:
Dispose of used coolant in the
appropriate manner.
Follow your community's regulations and
standards for recycling and disposing of
automotive fluids.
Fail-Safe Cooling
Fail-safe cooling allows you to temporarily
drive your vehicle before any incremental
component damage occurs. The fail-safe
distance depends on ambient
temperature, vehicle load and terrain.
How Fail-Safe Cooling Works
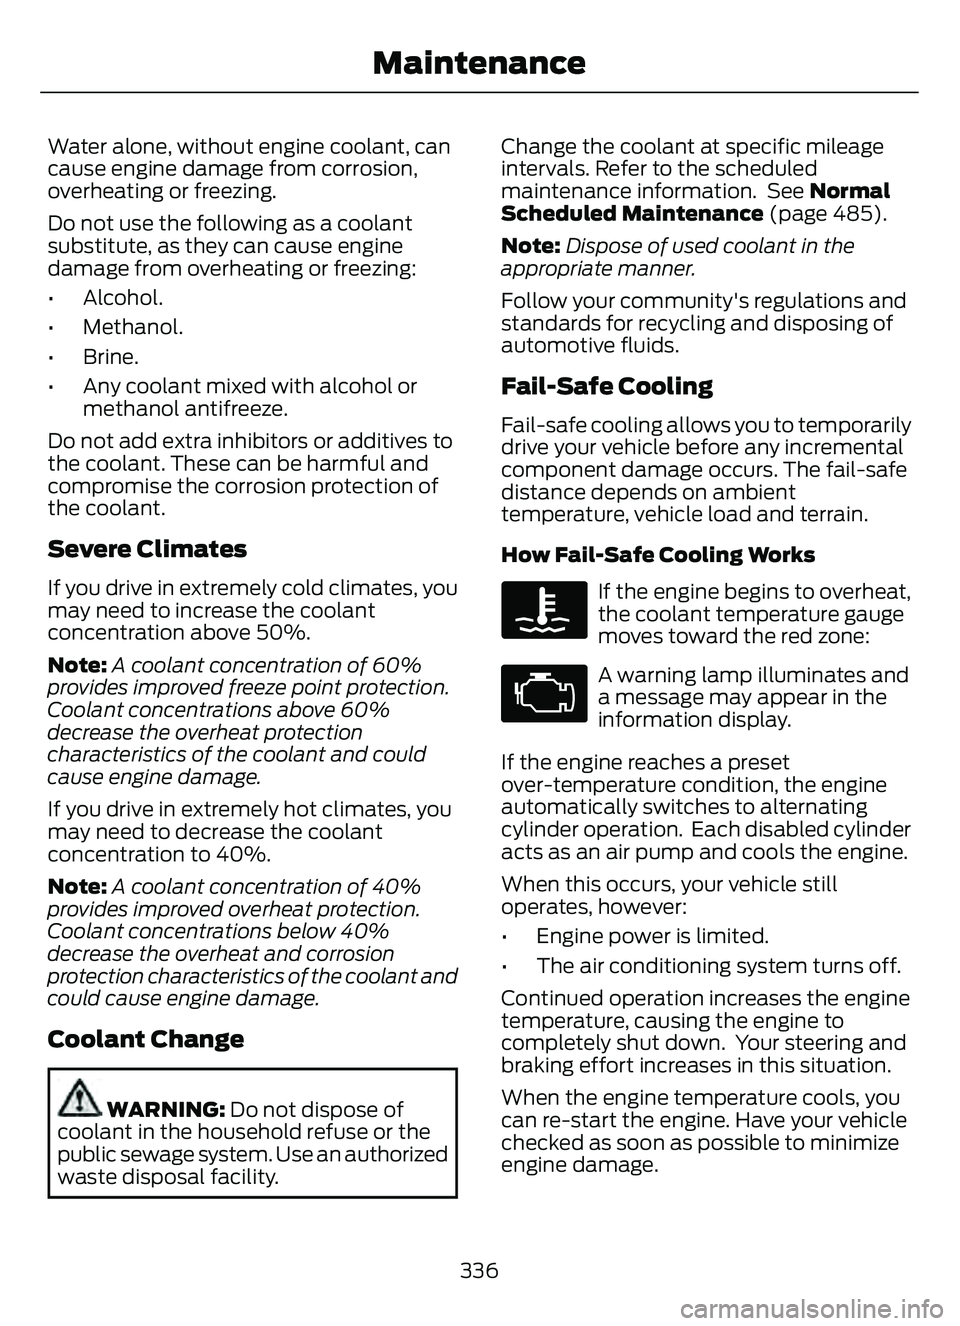
If the engine begins to overheat,
the coolant temperature gauge
moves toward the red zone:
A warning lamp illuminates and
a message may appear in the
information display.
If the engine reaches a preset
over-temperature condition, the engine
automatically switches to alternating
cylinder operation. Each disabled cylinder
acts as an air pump and cools the engine.
When this occurs, your vehicle still
operates, however:
• Engine power is limited.
• The air conditioning system turns off.
Continued operation increases the engine
temperature, causing the engine to
completely shut down. Your steering and
braking effort increases in this situation.
When the engine temperature cools, you
can re-start the engine. Have your vehicle
checked as soon as possible to minimize
engine damage.
336
Maintenance
Page 352 of 585
CLEANING PRODUCTS
Materials
For best results, use the following products
or products of equivalent quality:
Specification
Name
-
Motorcraft® Bug and Tar Remover, ZC-42 (U.S. & Canada)
ESR-M5B194-B
Motorcraft® Custom Bright Metal Cleaner, ZC-15 (U.S. & Canada)
ESR-M14P4-A
Motorcraft® Detail Wash, ZC-3-A (U.S. & Canada)
ESR-M14P3-A
Motorcraft® Engine Shampoo and Degreaser, ZC-20 (U.S.)
-
Motorcraft® Engine Shampoo, CXC-66-A (Canada)
-
Motorcraft® Premium Leather and Vinyl Cleaner, ZC-56 (U.S. &
Canada)
-
Motorcraft® Multi-Purpose Cleaner, CXC-101 (Canada)
WSS-M14P19-A
Motorcraft® Premium Windshield Wash Concentrate with
Bitterant, ZC-32-B2 (U.S.)
WSS-M14P19-A
Motorcraft® Premium Quality Windshield Washer Fluid, CXC-37-
F/M (Canada)
-
Motorcraft® Professional Strength Carpet & Upholstery Cleaner,
ZC-54 (U.S. & Canada)
ESR-M14P5-A
Motorcraft® Premium Glass Cleaner, CXC-100 (Canada)
-
Motorcraft® Spot and Stain Remover, ZC-14 (U.S.)
ESR-M14P5-A
Motorcraft® Ultra-Clear Spray Glass Cleaner, ZC-23 (U.S.)
-
Motorcraft® Wheel and Tire Cleaner, ZC-37-A (U.S. & Canada)
CLEANING THE EXTERIOR
CLEANING THE EXTERIOR
PRECAUTIONS
Immediately remove fuel spillages, additive
residuals, bird droppings, insect deposits
and road tar. These may cause damage to
your vehicle’s paintwork or trim over time. Remove any exterior accessories, for
example antennas, before entering a car
wash.
CLEANING HEADLAMPS AND
REAR LAMPS
We recommend that you only use cold or
lukewarm water containing car shampoo
to clean the headlamps and the rear
lamps.
Do not scrape the lamps.
349
Vehicle Care
Page 354 of 585
Note:If your vehicle has an engine cover
remove the cover before application of
shampoo and degreaser.
• Spray an approved engine shampoo and degreaser on all parts that require
cleaning and rinse with water.
CLEANING STRIPES OR
GRAPHICS
It is recommended to wash your vehicle by
hand however, pressure washing may be
used under the following conditions:
• Use a spray with a 40° wide sprayangle pattern.
• Keep the nozzle at a 12 in (305 mm) distance and 90° angle to your
vehicle's surface.
• Do not use water pressure higher than 2,000 psi (14,000 kPa).
• Do not use water hotter than 179°F (82°C).
Note: Holding the pressure washer nozzle
at an angle to the vehicle's surface may
damage graphics and cause the edges to
peel away from the vehicle's surface.
CLEANING CAMERA LENSES AND
SENSORS
We recommend that you only use
lukewarm or cold water and a soft cloth
to clean the camera lens and sensors.
Note: Do not pressure wash camera lens
and sensors.
CLEANING THE UNDERBODY
Flush the complete underside of your
vehicle frequently. Keep body and door
drain holes free from packed dirt. Rear suspension components may require
regular cleaning with a power washer or a
thorough rinse with a strong stream of
water if the vehicle is operated in dusty or
muddy environments. Rear leaf springs or
other suspension components may emit
squeaking or popping noises while
operating the vehicle if particles, such as
dirt, rocks, or other debris, are present in
the components.
CLEANING THE INTERIOR
CLEANING THE INSTRUMENT
PANEL
WARNING: Do not use chemical
solvents or strong detergents when
cleaning the steering wheel or
instrument panel to avoid contamination
of the airbag system.
We recommend that you only clean the
instrument panel and cluster lens with a
damp soft cloth. Dry the area with a clean,
soft cloth.
For additional information and assistance,
we recommend that you contact an
authorized dealer.
Note: Avoid cleaners or polishes that
increase the gloss of the upper portion of
the instrument panel. The dull finish in this
area helps protect you from undesirable
windshield reflection.
CLEANING PLASTIC
We recommend that you only use a mild
soap and water solution on a soft cloth.
Dry the area with a clean, soft cloth.
351
Vehicle Care
Page 356 of 585
For heavy stains, spot clean the area. If a
ring forms on the fabric, clean the entire
area immediately, but do not oversaturate
or the ring could set.
We recommend that you only clean your
floor mats in the following way:
1. Remove dust and loose dirt with avacuum cleaner.
2. Wash rubber floor mats using mild soap and lukewarm or cold water.
3. Completely dry the floor mat before placing them back in your vehicle.
CLEANING SEATBELTS
WARNING: Do not use cleaning
solvents, bleach or dye on the vehicle's
seatbelts, as these actions may weaken
the belt webbing.
1. Wipe the surface with a soft, damp cloth and a mild soap and water
solution. Dry the area with a clean, soft
cloth.
CLEANING STORAGE
COMPARTMENTS
1. Remove dust and loose dirt with avacuum cleaner.
2. Wipe the surface with a soft, damp cloth and a mild soap and water
solution. Dry the area with a clean, soft
cloth.
CLEANING MOONROOF TRACKS
1. Remove debris from the tracks with avacuum cleaner.
2. Wipe the bulb seal and mating painted roof metal surface with a soft, damp
cloth and a mild soap and water
solution. Note:
The moonroof rail tracks are greased
to maintain proper functionality. Do not
wipe off the grease.
REPAIRING MINOR PAINT
DAMAGE
Authorized dealers have touch-up paint to
match your vehicle’s color. Your vehicle
color code is printed on a sticker on the
front, left-hand side door jamb. Take your
color code to your authorized dealer to
make sure you get the correct color.
Before repairing minor paint damage, use
a cleaner to remove particles such as bird
droppings, tree sap, insect deposits, tar
spots, road salt and industrial fallout.
Read the instructions before using cleaning
products.
WAXING YOUR VEHICLE
Wax the high-gloss painted surface of your
prewashed vehicle once or twice a year.
We recommend that you only use an
approved quality wax that does not
contain abrasives. Follow the
manufacturer's instructions to apply and
remove the wax. For additional information
and assistance, we recommend that you
contact an authorized dealer.
When washing and waxing, park your
vehicle in a shaded area out of direct
sunlight.
Note: Avoid waxing unpainted or low-gloss
black colored parts, they discolor over time.
353
Vehicle Care
Page 364 of 585
*Treadwear The treadwear grade
is a comparative rating based on
the wear rate of the tire when
tested under controlled conditions
on a specified government test
course. For example, a tire graded
150 would wear one and one-half
times as well on the government
course as a tire graded 100.
*Traction: The traction grades,
from highest to lowest are AA, A,
B, and C. The grades represent the
tire's ability to stop on wet
pavement as measured under
controlled conditions on specified
government test surfaces of
asphalt and concrete. A tire
marked C may have poor traction
performance.
*Temperature: The temperature
grades are A (the highest), B and
C, representing the tire's
resistance to the generation of
heat and its ability to dissipate
heat when tested under controlled
conditions on a specified indoor
laboratory test wheel.
M. Maximum Inflation
Pressure: Indicates the tire
manufacturers' maximum
permissible pressure or the
pressure at which the maximum
load can be carried by the tire. This
pressure is normally higher than
the vehicle manufacturer's
recommended cold inflation
pressure which can be found on
the Safety Compliance
Certification Label (affixed to
either the door hinge pillar,
door-latch post, or the door edge that meets the door-latch post,
next to the driver's seating
position), or Tire Label which is
located on the B-Pillar or the edge
of the driver’s door. The cold
inflation pressure should never be
set lower than the recommended
pressure on the vehicle label.
The tire suppliers may have
additional markings, notes or
warnings such as standard load
or radial tubeless.
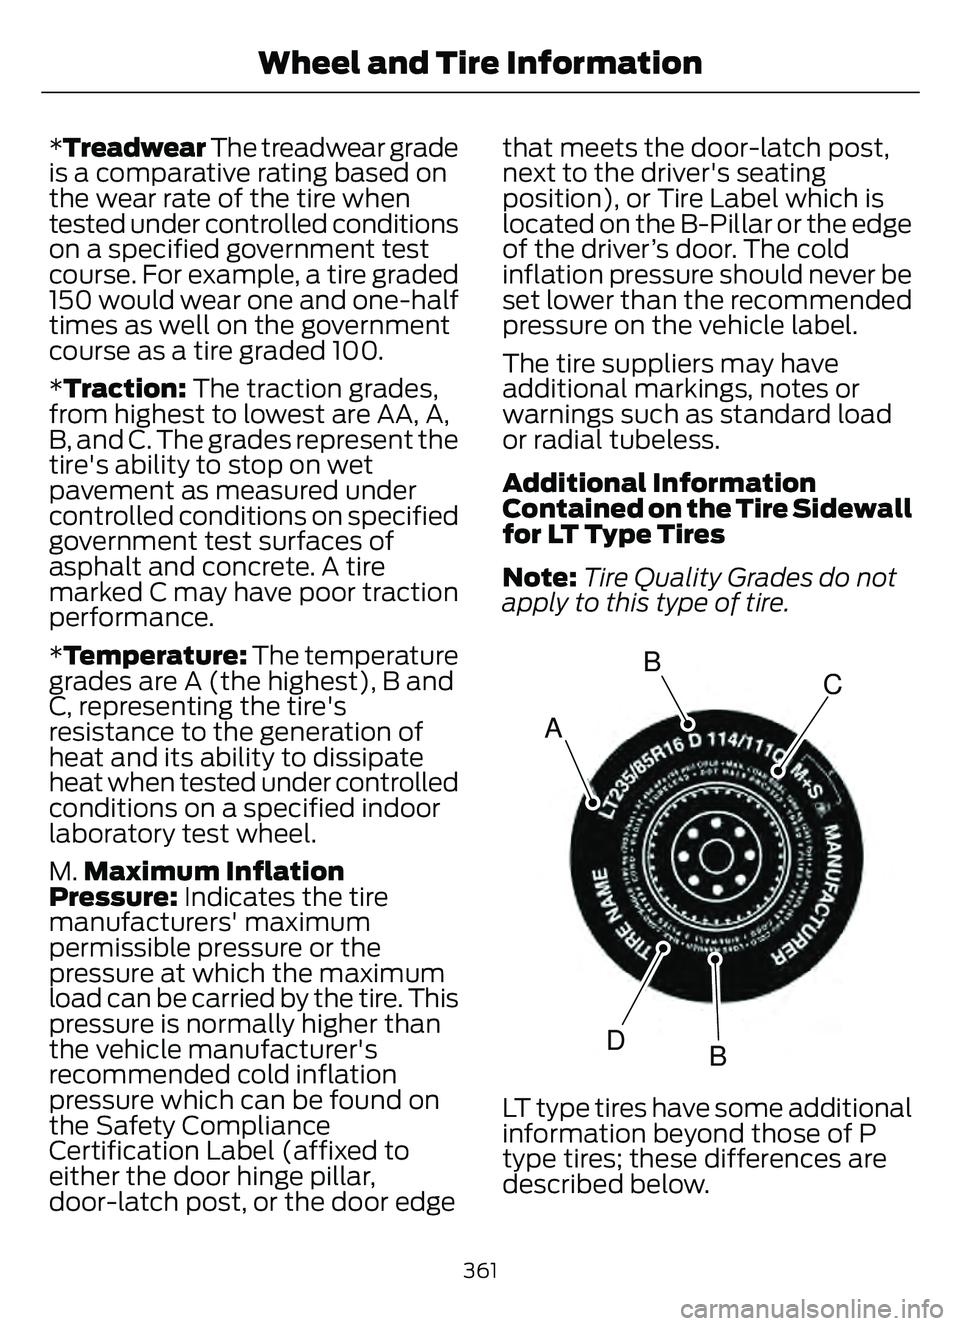
Additional Information
Contained on the Tire Sidewall
for LT Type Tires
Note:
Tire Quality Grades do not
apply to this type of tire.
A
BC
BD
E142544
LT type tires have some additional
information beyond those of P
type tires; these differences are
described below.
361
Wheel and Tire Information
Page 365 of 585
A.LT : Indicates a tire, designated
by the Tire and Rim Association,
that is intended for service on light
trucks.
B. Load Range and Load
Inflation Limits: Indicates the
tire's load-carrying capabilities
and its inflation limits.
C. Maximum Load Dual lb (kg)
at psi (kPa) cold: Indicates the
maximum load and tire pressure
when the tire is used as a dual,
defined as four tires on the rear
axle (a total of six or more tires on
the vehicle).
D. Maximum Load Single lb
(kg) at psi (kPa) cold: Indicates
the maximum load and tire
pressure when the tire is used as
a single, defined as two tires
(total) on the rear axle.
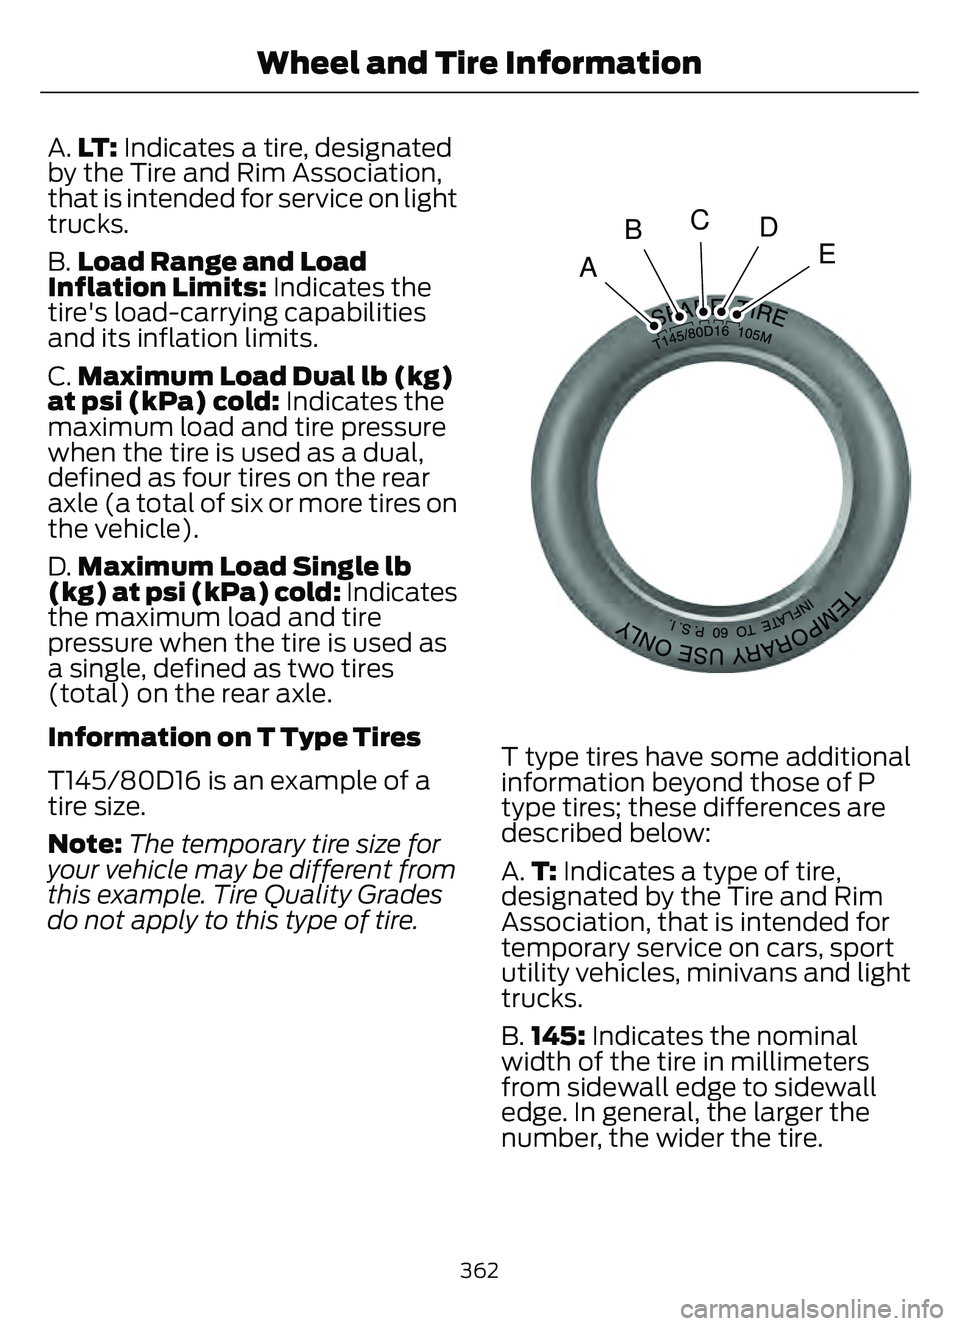
Information on T Type Tires
T145/80D16 is an example of a
tire size.
Note: The temporary tire size for
your vehicle may be different from
this example. Tire Quality Grades
do not apply to this type of tire.
A
BCD
E
E142545
T type tires have some additional
information beyond those of P
type tires; these differences are
described below:
A. T: Indicates a type of tire,
designated by the Tire and Rim
Association, that is intended for
temporary service on cars, sport
utility vehicles, minivans and light
trucks.
B. 145: Indicates the nominal
width of the tire in millimeters
from sidewall edge to sidewall
edge. In general, the larger the
number, the wider the tire.
362
Wheel and Tire Information
Page 366 of 585
C.80: Indicates the aspect ratio
which gives the tire's ratio of
height to width. Numbers of 70 or
lower indicate a short sidewall.
D. D: Indicates a diagonal type tire.
R: Indicates a radial type tire.
E. 16: Indicates the wheel or rim
diameter in inches. If you change
your wheel size, you will have to
purchase new tires to match the
new wheel diameter.
GLOSSARY OF TIRE
TERMINOLOGY
*Tire label: A label showing the
original equipment tire sizes,
recommended inflation pressure
and the maximum weight the
vehicle can carry.
*Tire Identification Number
(TIN): A number on the sidewall
of each tire providing information
about the tire brand and
manufacturing plant, tire size and
date of manufacture. Also referred
to as DOT code.
*Inflation pressure: A measure
of the amount of air in a tire.
*Standard load: A class of
P-metric or Metric tires designed
to carry a maximum load at set
pressure. For example: For
P-metric tires 35 psi (2.4 bar) and
for Metric tires 36 psi (2.5 bar).
Increasing the inflation pressure
beyond this pressure will not
increase the tire’s load carrying
capability. *Extra load:
A class of P-metric
or Metric tires designed to carry a
heavier maximum load at 42 psi
(2.9 bar). Increasing the inflation
pressure beyond this pressure will
not increase the tire’s load
carrying capability.
*kPa: Kilopascal, a metric unit of
air pressure.
*PSI: Pounds per square inch, a
standard unit of air pressure.
*Cold tire pressure: The tire
pressure when the vehicle has
been stationary and out of direct
sunlight for an hour or more and
prior to the vehicle being driven for
1 mi (1.6 km).
*Recommended inflation
pressure: The cold inflation
pressure found on the Safety
Compliance Certification Label
(affixed to either the door hinge
pillar, door-latch post, or the door
edge that meets the door-latch
post, next to the driver's seating
position), or Tire Label located on
the B-Pillar or the edge of the
driver door.
* B-pillar: The structural member
at the side of the vehicle behind
the front door.
*Bead area of the tire: Area of
the tire next to the rim.
* Sidewall of the tire: Area
between the bead area and the
tread.
363
Wheel and Tire Information
Page 371 of 585
CHECKING THE TIRE
PRESSURES
Safe operation of your vehicle
requires that your tires are
properly inflated. Every day before
you drive, check your tires.
At least once a month and before
long trips, inspect each tire and
check the tire pressure with a tire
gauge. Inflate all tires to the
recommended inflation pressure.
See Inflating the Tires (page
368).
INFLATING THE TIRES
WARNING: Under-inflation
is the most common cause of
tire failures and may result in
severe tire cracking, tread
separation or blowout, with
unexpected loss of vehicle
control and increased risk of
injury. Under-inflation increases
sidewall flexing and rolling
resistance, resulting in heat
buildup and internal damage to
the tire. It also may result in
unnecessary tire stress, irregular
wear, loss of vehicle control and
accidents. A tire can lose up to
half of its air pressure and not
appear to be flat!
WARNING: Do not use the
tire pressure displayed in the
information display as a tire
pressure gauge. Failure to follow
this instruction could result in
personal injury or death.
Use the recommended cold
inflation pressure for optimum tire
performance and wear.
Under-inflation or over-inflation
may cause uneven treadwear
patterns.
Inflate your tires to the
recommended inflation pressure
even if it is less than the maximum
inflation pressure information
found on the tire. You can find the
tire label with the recommended
tire inflation pressure next to the
tire size on the B-Pillar or the edge
of the driver door.
The recommended tire inflation
pressure is also found on the
Safety Compliance Certification
Label, affixed to either the door
hinge pillar, door-latch post, or the
door edge that meets the
door-latch on the B-pillar, or on
the edge of the driver door.
Failure to follow the tire pressure
recommendations can cause
uneven treadwear patterns and
adversely affect the way your
vehicle handles.
368
Tire Care