low beam FORD ESCAPE 2022 Owners Manual
[x] Cancel search | Manufacturer: FORD, Model Year: 2022, Model line: ESCAPE, Model: FORD ESCAPE 2022Pages: 585, PDF Size: 6.15 MB
Page 100 of 585
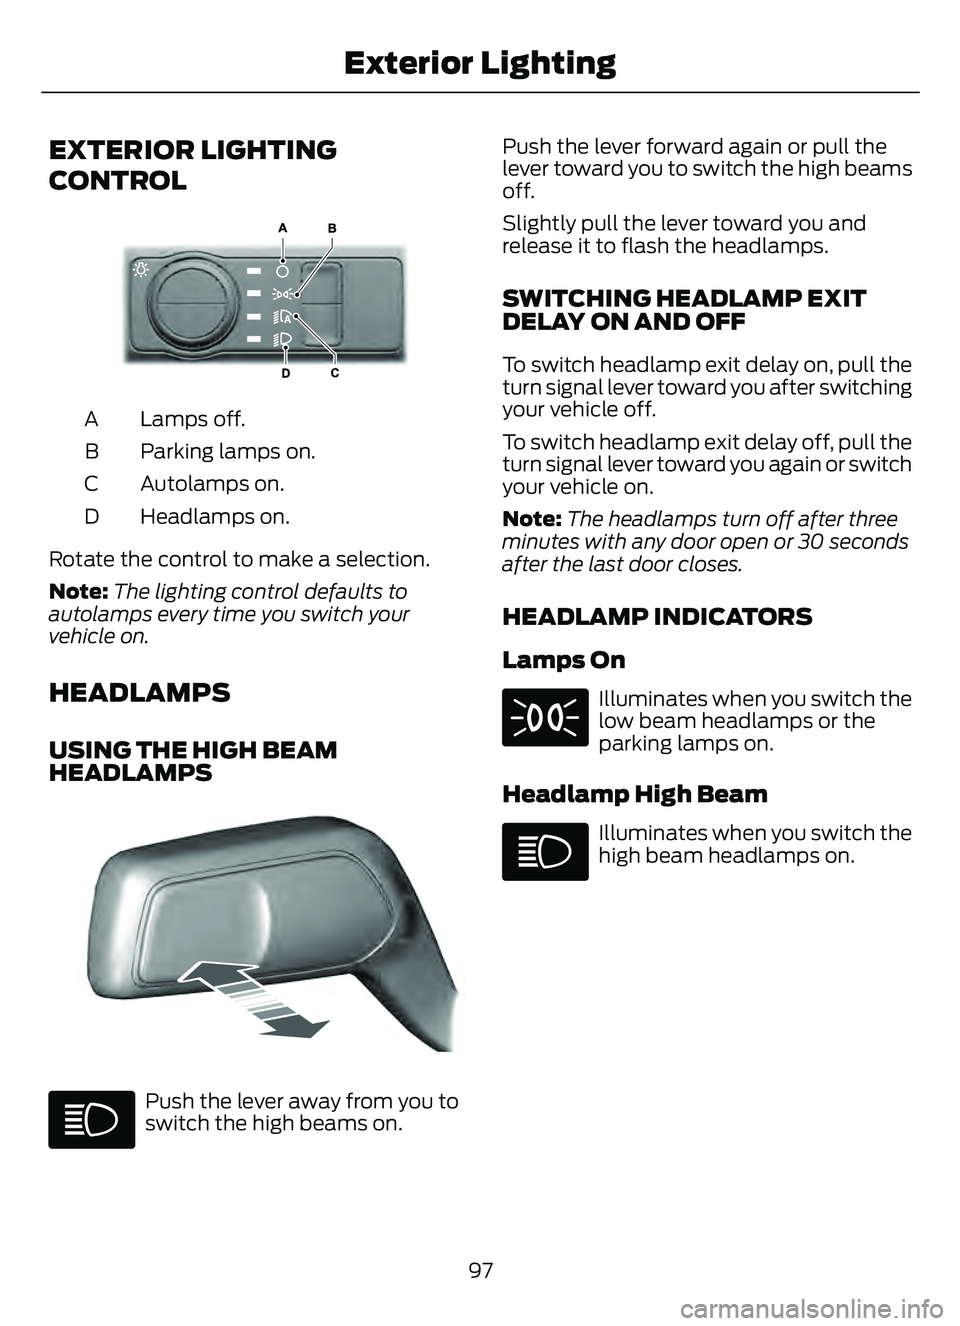
EXTERIOR LIGHTING
CONTROL
E327629E327629
Lamps off.
A
Parking lamps on.
B
Autolamps on.
C
Headlamps on.
D
Rotate the control to make a selection.
Note: The lighting control defaults to
autolamps every time you switch your
vehicle on.
HEADLAMPS
USING THE HIGH BEAM
HEADLAMPS
3853E328253
Push the lever away from you to
switch the high beams on. Push the lever forward again or pull the
lever toward you to switch the high beams
off.
Slightly pull the lever toward you and
release it to flash the headlamps.
SWITCHING HEADLAMP EXIT
DELAY ON AND OFF
To switch headlamp exit delay on, pull the
turn signal lever toward you after switching
your vehicle off.
To switch headlamp exit delay off, pull the
turn signal lever toward you again or switch
your vehicle on.
Note:
The headlamps turn off after three
minutes with any door open or 30 seconds
after the last door closes.
HEADLAMP INDICATORS
Lamps On
Illuminates when you switch the
low beam headlamps or the
parking lamps on.
Headlamp High Beam
Illuminates when you switch the
high beam headlamps on.
97
Exterior Lighting
Page 104 of 585
AUTOMATIC HIGH BEAM
CONTROL PRECAUTIONS
WARNING: The system does not
relieve you of your responsibility to drive
with due care and attention. You may
need to override the system if it does not
turn the high beams on or off.
WARNING: The system may not
switch the high beams off if the lights of
oncoming vehicles are hidden by
obstacles, for example guard rails.
WARNING: Do not use the system
in poor visibility, for example fog, heavy
rain, spray or snow.
WARNING: You may need to
override the system when approaching
other road users.
WARNING: You may need to
override the system during inclement
weather.
AUTOMATIC HIGH BEAM
CONTROL REQUIREMENTS
The system turns the high beams on if all
of the following occur:
• You switch the system on.
• You set the lighting control to the autolamps position.
• The ambient light level is low enough that you require high beams.
• There is no traffic in front of your vehicle.
• The vehicle speed is greater than approximately 32 mph (52 km/h).
AUTOMATIC HIGH BEAM
CONTROL LIMITATIONS
The system turns the high beams off if any
of the following occur:
• You switch the system off.
• You set the lighting control to anyposition except autolamps.
• The ambient light level is high enough that you do not require high beams.
• The system detects an approaching vehicle's headlamps or a leading
vehicle's tail lamps.
• The system detects severe rain, snow or fog.
• The system detects street lighting.
• The camera has reduced visibility.
• The vehicle speed falls below approximately 27 mph (44 km/h).
SWITCHING AUTOMATIC HIGH
BEAM CONTROL ON AND OFF
1. Press Settings on the touchscreen.
2. Press Vehicle Settings .
3. Press Lighting.
4. Switch Auto Highbeam on or off.
AUTOMATIC HIGH BEAM
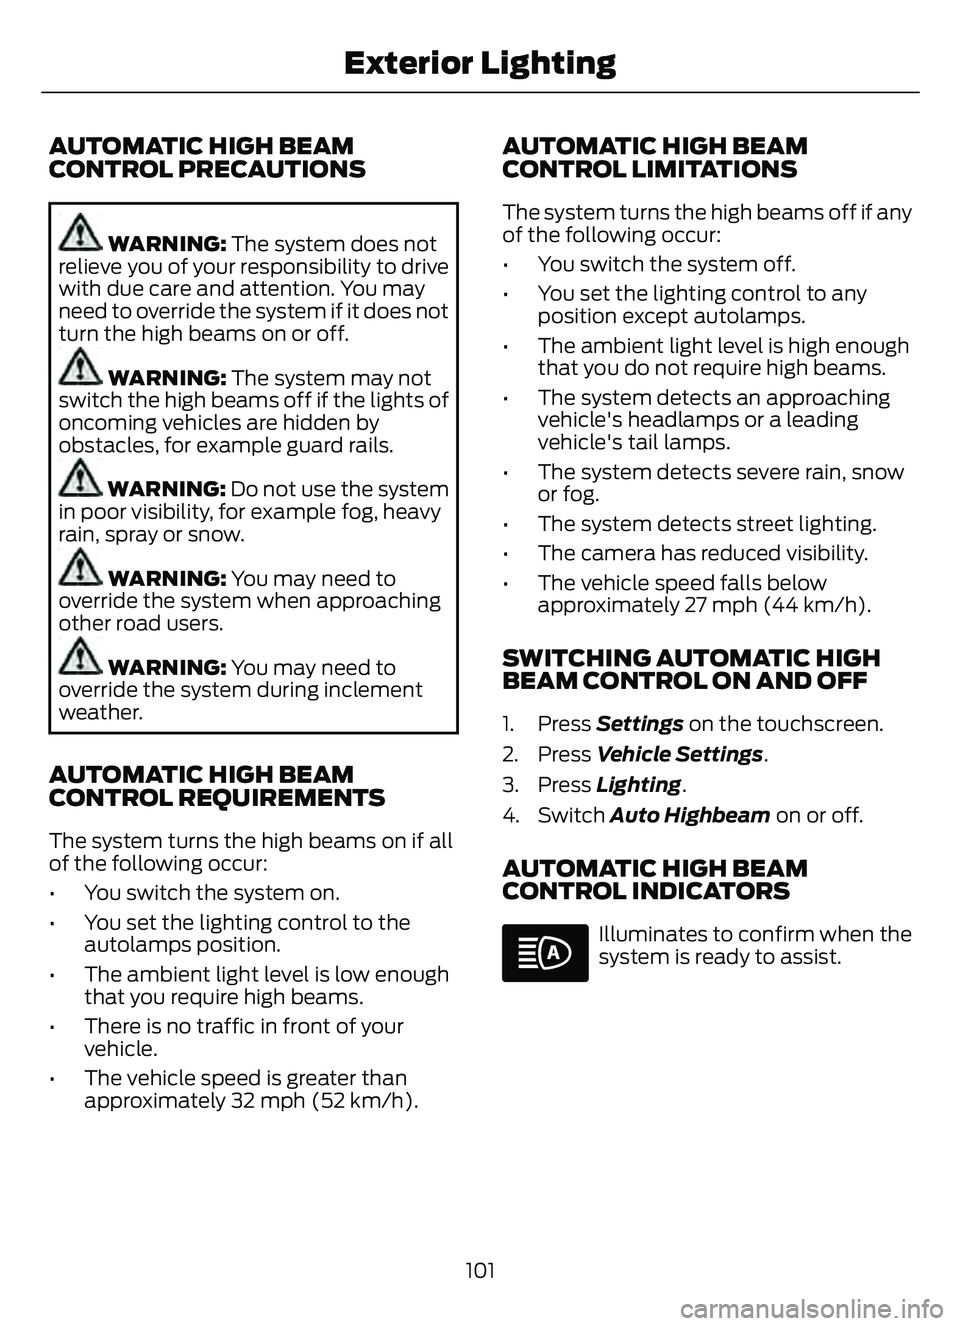
CONTROL INDICATORS
Illuminates to confirm when the
system is ready to assist.
101
Exterior Lighting
Page 105 of 585
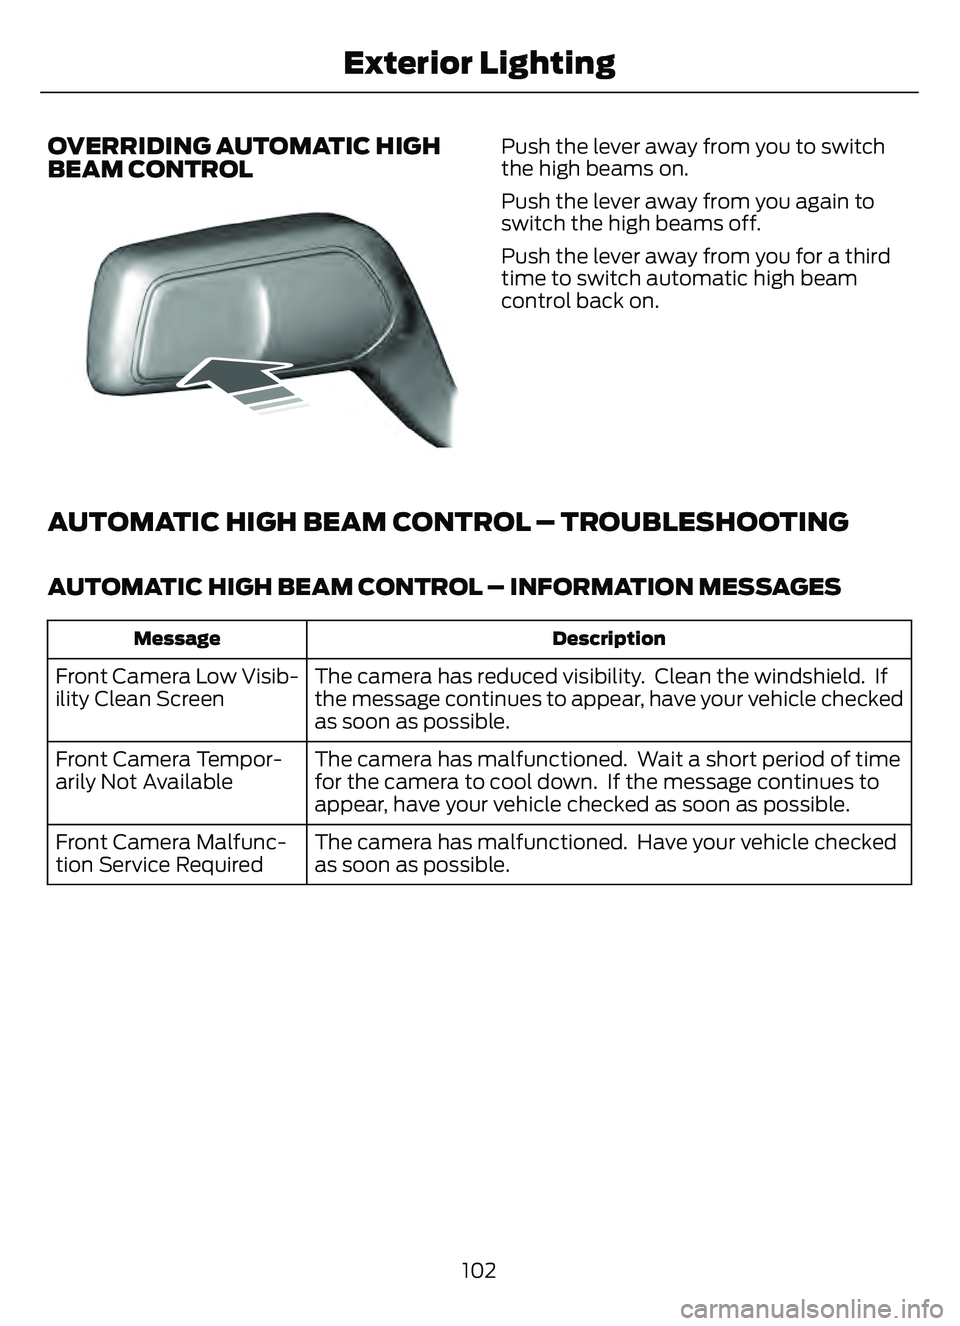
OVERRIDING AUTOMATIC HIGH
BEAM CONTROL
8603E248603
Push the lever away from you to switch
the high beams on.
Push the lever away from you again to
switch the high beams off.
Push the lever away from you for a third
time to switch automatic high beam
control back on.
AUTOMATIC HIGH BEAM CONTROL – TROUBLESHOOTING
AUTOMATIC HIGH BEAM CONTROL – INFORMATION MESSAGES
Description
Message
The camera has reduced visibility. Clean the windshield. If
the message continues to appear, have your vehicle checked
as soon as possible.
Front Camera Low Visib-
ility Clean Screen
The camera has malfunctioned. Wait a short period of time
for the camera to cool down. If the message continues to
appear, have your vehicle checked as soon as possible.
Front Camera Tempor-
arily Not Available
The camera has malfunctioned. Have your vehicle checked
as soon as possible.
Front Camera Malfunc-
tion Service Required
102
Exterior Lighting
Page 124 of 585
Liftgate Ajar
E162453
It illuminates when the ignition
is on and the liftgate is not
completely closed.
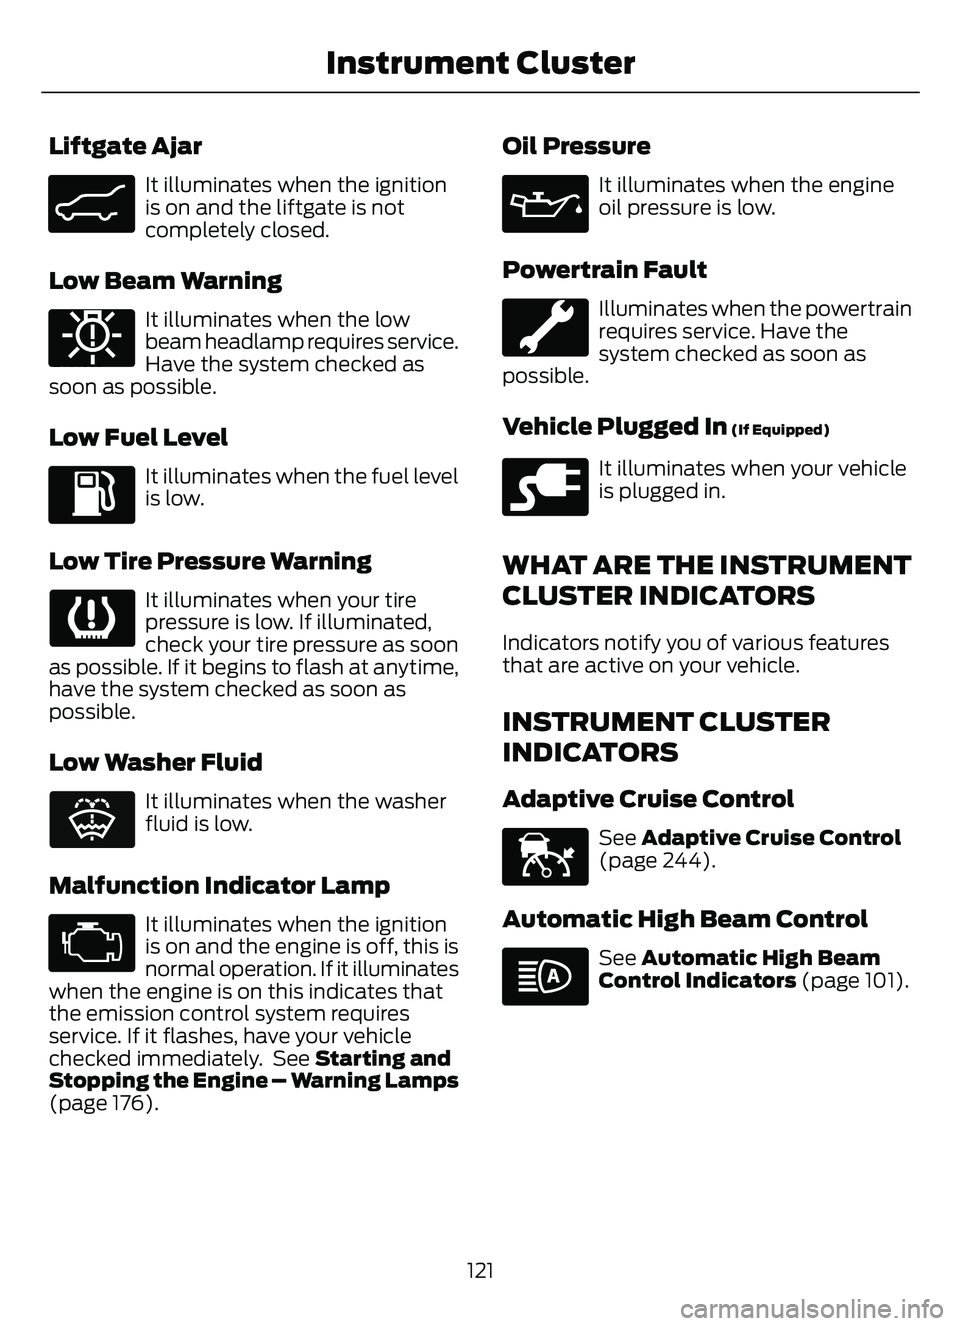
Low Beam Warning
E181350
It illuminates when the low
beam headlamp requires service.
Have the system checked as
soon as possible.
Low Fuel Level
It illuminates when the fuel level
is low.
Low Tire Pressure Warning
It illuminates when your tire
pressure is low. If illuminated,
check your tire pressure as soon
as possible. If it begins to flash at anytime,
have the system checked as soon as
possible.
Low Washer Fluid
E132353
It illuminates when the washer
fluid is low.
Malfunction Indicator Lamp
It illuminates when the ignition
is on and the engine is off, this is
normal operation. If it illuminates
when the engine is on this indicates that
the emission control system requires
service. If it flashes, have your vehicle
checked immediately. See Starting and
Stopping the Engine – Warning Lamps
(page 176).
Oil Pressure
It illuminates when the engine
oil pressure is low.
Powertrain Fault
Illuminates when the powertrain
requires service. Have the
system checked as soon as
possible.
Vehicle Plugged In (If Equipped)
E228962
It illuminates when your vehicle
is plugged in.
WHAT ARE THE INSTRUMENT
CLUSTER INDICATORS
Indicators notify you of various features
that are active on your vehicle.
INSTRUMENT CLUSTER
INDICATORS
Adaptive Cruise Control
E144524
See Adaptive Cruise Control
(page 244).
Automatic High Beam Control
See Automatic High Beam
Control Indicators (page 101).
121
Instrument Cluster
Page 345 of 585
WHAT IS THE BATTERY
MANAGEMENT SYSTEM
The battery management system monitors
battery conditions and takes actions to
extend battery life.
HOW DOES THE BATTERY
MANAGEMENT SYSTEM WORK
If excessive battery drain is detected, the
system temporarily disables some
electrical systems to protect the battery.
Systems included are:
• Heated rear window.
• Heated seats.
• Climate control.
• Heated steering wheel.
• Audio unit.
• Navigation system.
A message could appear in the information
display to alert you that battery protection
actions are active. This message is only for
notification that an action is taking place,
and not intended to indicate an electrical
problem or that the battery requires
replacement.
BATTERY MANAGEMENT SYSTEM
LIMITATIONS
After battery replacement, or in some
cases after charging the battery with an
external charger, the battery management
system requires eight hours of vehicle sleep
time to relearn the battery state of charge.
During this time, your vehicle must remain
fully locked with the ignition switched off.
Note:Prior to relearning the battery state
of charge, the battery management system
could temporarily disable some electrical
systems.
Electrical Accessory Installation
To make sure the battery management
system works correctly, do not connect an
electrical device ground connection
directly to the battery negative post. This
can cause inaccurate measurements of
the battery condition and potential
incorrect system operation.
Note: If you add electrical accessories or
components to the vehicle, it could
adversely affect battery performance and
durability. This could also affect the
performance of other electrical systems in
the vehicle.
RESETTING THE BATTERY
SENSOR
When you install a new battery, reset the
battery sensor by doing the following:
1. Switch the ignition on, and leave the engine off.
Note: Complete Steps 2 and 3 within 10
seconds.
2. Flash the high beam headlamps five times, ending with the high beams off.
3. Press and release the brake pedal three times.
The battery warning lamp flashes three
times to confirm that the reset is
successful.
RECYCLING AND DISPOSING OF
THE 12V BATTERY
E107998
Make sure that you dispose of
old batteries in an
environmentally friendly way.
Seek advice from your local authority
about recycling old batteries.
342
Maintenance
Page 347 of 585
If you disconnect or replace the vehicle
battery, you must reset the following
features:
• Window bounce-back. See Windows(page 105).
• Clock settings.
• Pre-set radio stations.
• Steering angle sensor.
Note: To calibrate the steering angle
sensor, drive the vehicle above 30 mph
(50 km/h) for a minimum of 1.2 mi (2 km).
Make sure to drive straight ahead for a
minimum of 30 seconds. Several vehicle
functions are disabled and a warning light
could appear until the sensor is calibrated.
ADJUSTING THE HEADLAMPS
Vertical Aim Adjustment
The headlamps on your vehicle are
properly aimed at the assembly plant. If
your vehicle has been in an accident, the
alignment of your headlamps should be
checked by your authorized dealer.
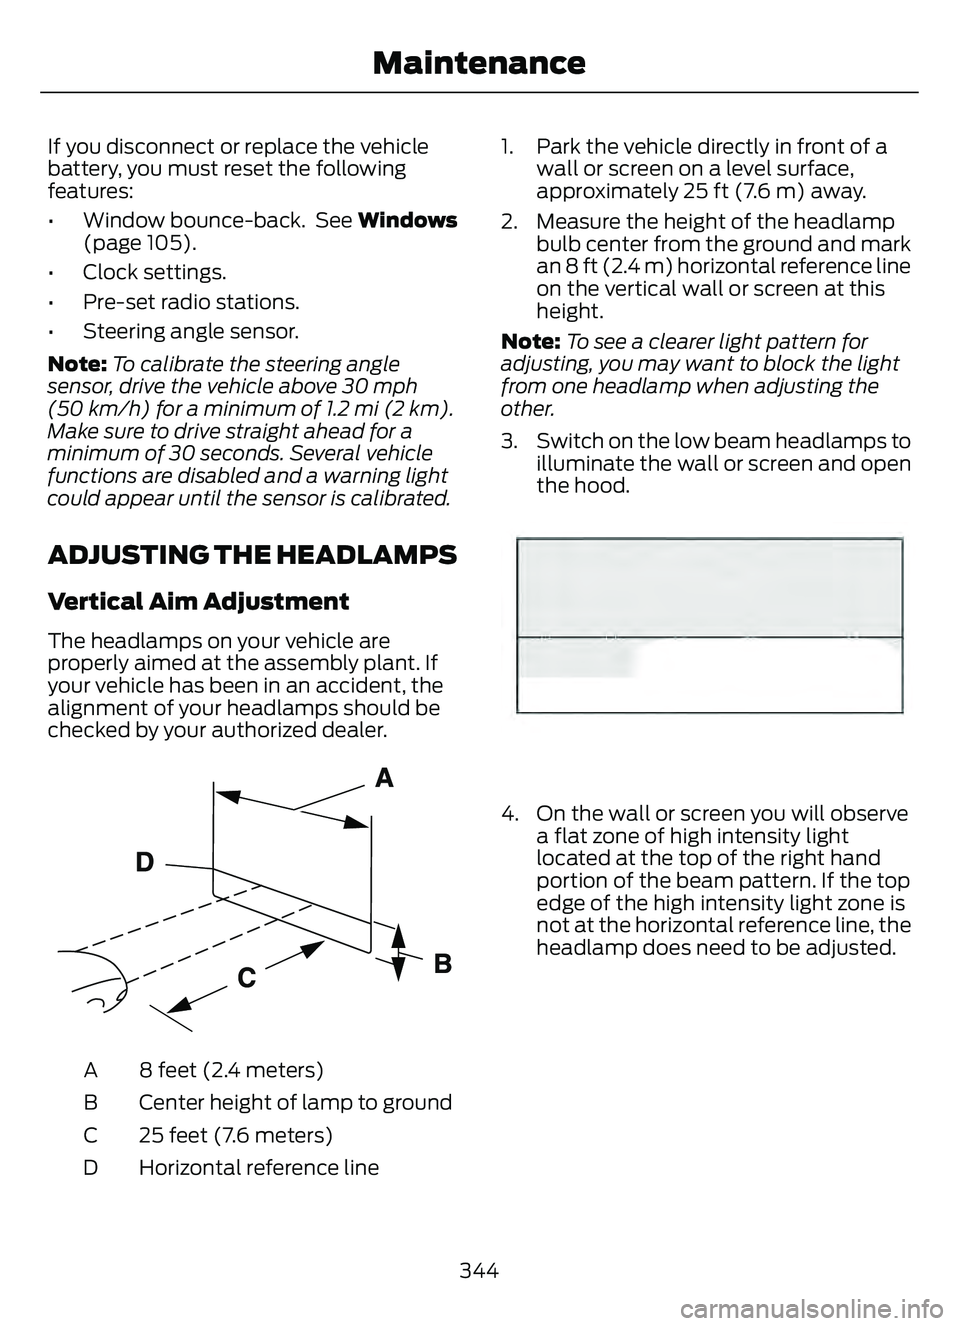
E142592
8 feet (2.4 meters)
A
Center height of lamp to ground
B
25 feet (7.6 meters)
C
Horizontal reference line
D 1. Park the vehicle directly in front of a
wall or screen on a level surface,
approximately 25 ft (7.6 m) away.
2. Measure the height of the headlamp bulb center from the ground and mark
an 8 ft (2.4 m) horizontal reference line
on the vertical wall or screen at this
height.
Note: To see a clearer light pattern for
adjusting, you may want to block the light
from one headlamp when adjusting the
other.
3. Switch on the low beam headlamps to illuminate the wall or screen and open
the hood.
E142465
4. On the wall or screen you will observea flat zone of high intensity light
located at the top of the right hand
portion of the beam pattern. If the top
edge of the high intensity light zone is
not at the horizontal reference line, the
headlamp does need to be adjusted.
344
Maintenance
Page 348 of 585
E3007889E3007889
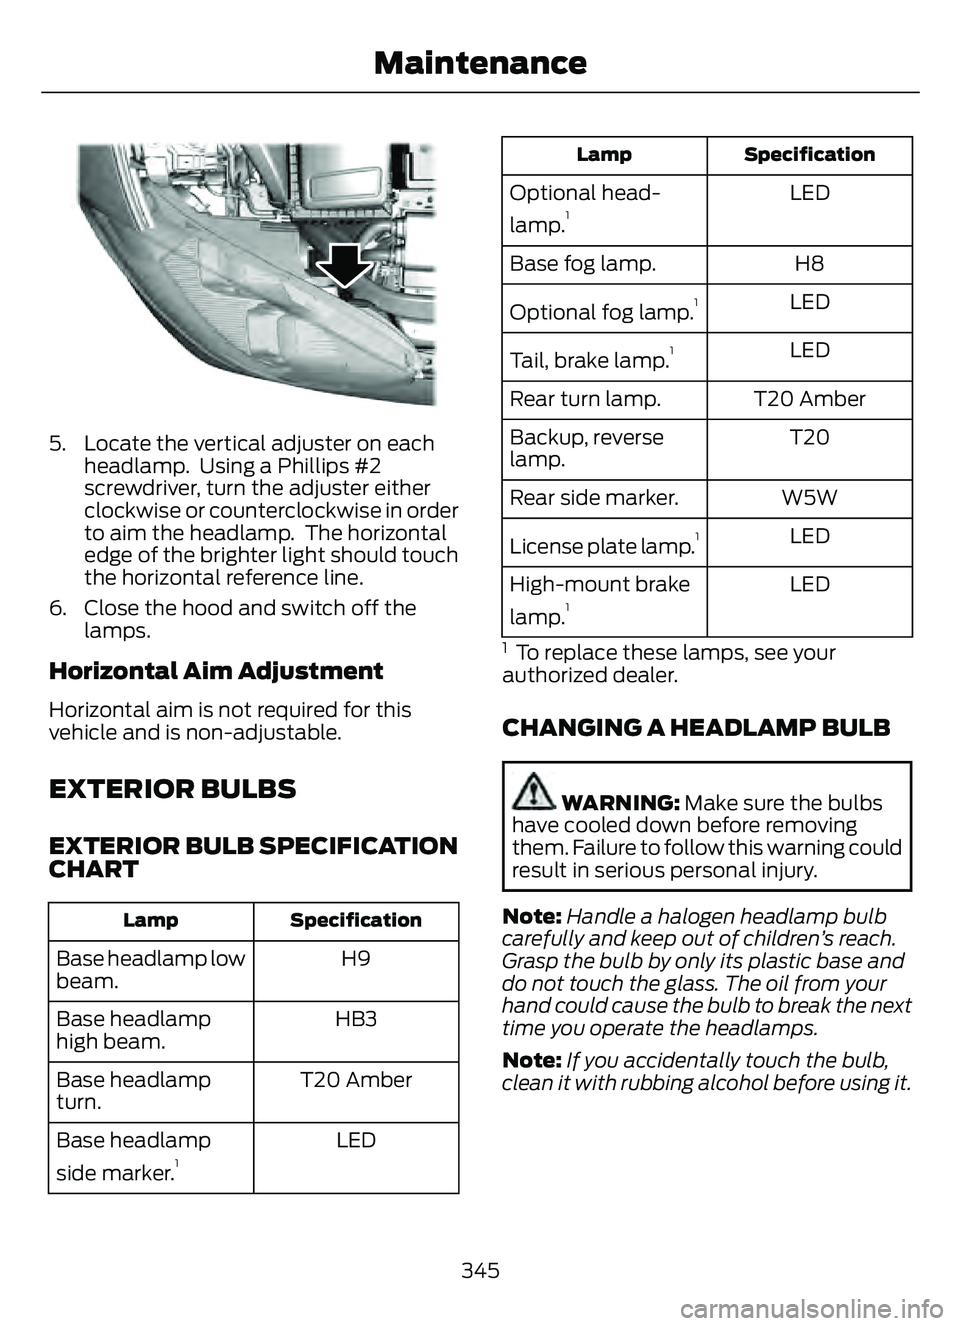
5. Locate the vertical adjuster on eachheadlamp. Using a Phillips #2
screwdriver, turn the adjuster either
clockwise or counterclockwise in order
to aim the headlamp. The horizontal
edge of the brighter light should touch
the horizontal reference line.
6. Close the hood and switch off the lamps.
Horizontal Aim Adjustment
Horizontal aim is not required for this
vehicle and is non-adjustable.
EXTERIOR BULBS
EXTERIOR BULB SPECIFICATION
CHART
Specification
Lamp
H9
Base headlamp low
beam.
HB3
Base headlamp
high beam.
T20 Amber
Base headlamp
turn.
LED
Base headlamp
side marker.
1
Specification
Lamp
LED
Optional head-
lamp.1
H8
Base fog lamp.
LED
Optional fog lamp.
1
LED
Tail, brake lamp.1
T20 Amber
Rear turn lamp.
T20
Backup, reverse
lamp.
W5W
Rear side marker.
LED
License plate lamp.
1
LED
High-mount brake
lamp.1
1 To replace these lamps, see your
authorized dealer.
CHANGING A HEADLAMP BULB
WARNING: Make sure the bulbs
have cooled down before removing
them. Failure to follow this warning could
result in serious personal injury.
Note: Handle a halogen headlamp bulb
carefully and keep out of children’s reach.
Grasp the bulb by only its plastic base and
do not touch the glass. The oil from your
hand could cause the bulb to break the next
time you operate the headlamps.
Note: If you accidentally touch the bulb,
clean it with rubbing alcohol before using it.
345
Maintenance
Page 349 of 585
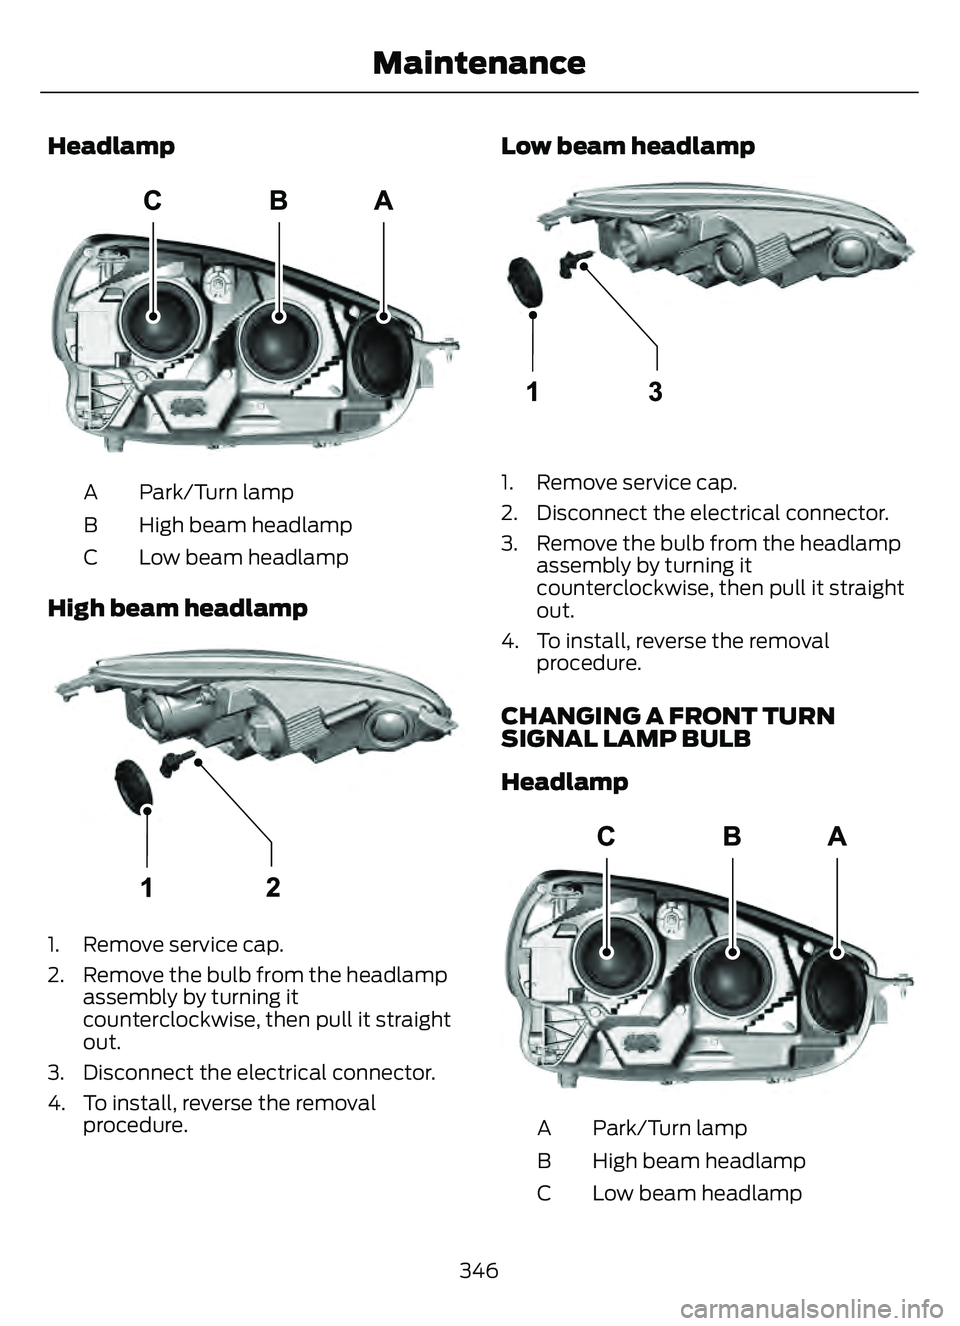
Headlamp
E307881E307881
Park/Turn lamp
A
High beam headlamp
B
Low beam headlamp
C
High beam headlamp
E307882E307882
1. Remove service cap.
2. Remove the bulb from the headlamp
assembly by turning it
counterclockwise, then pull it straight
out.
3. Disconnect the electrical connector.
4. To install, reverse the removal procedure.
Low beam headlamp
E307883E307883
1. Remove service cap.
2. Disconnect the electrical connector.
3. Remove the bulb from the headlampassembly by turning it
counterclockwise, then pull it straight
out.
4. To install, reverse the removal procedure.
CHANGING A FRONT TURN
SIGNAL LAMP BULB
Headlamp
E307881E307881
Park/Turn lamp
A
High beam headlamp
B
Low beam headlamp
C
346
Maintenance
Page 568 of 585
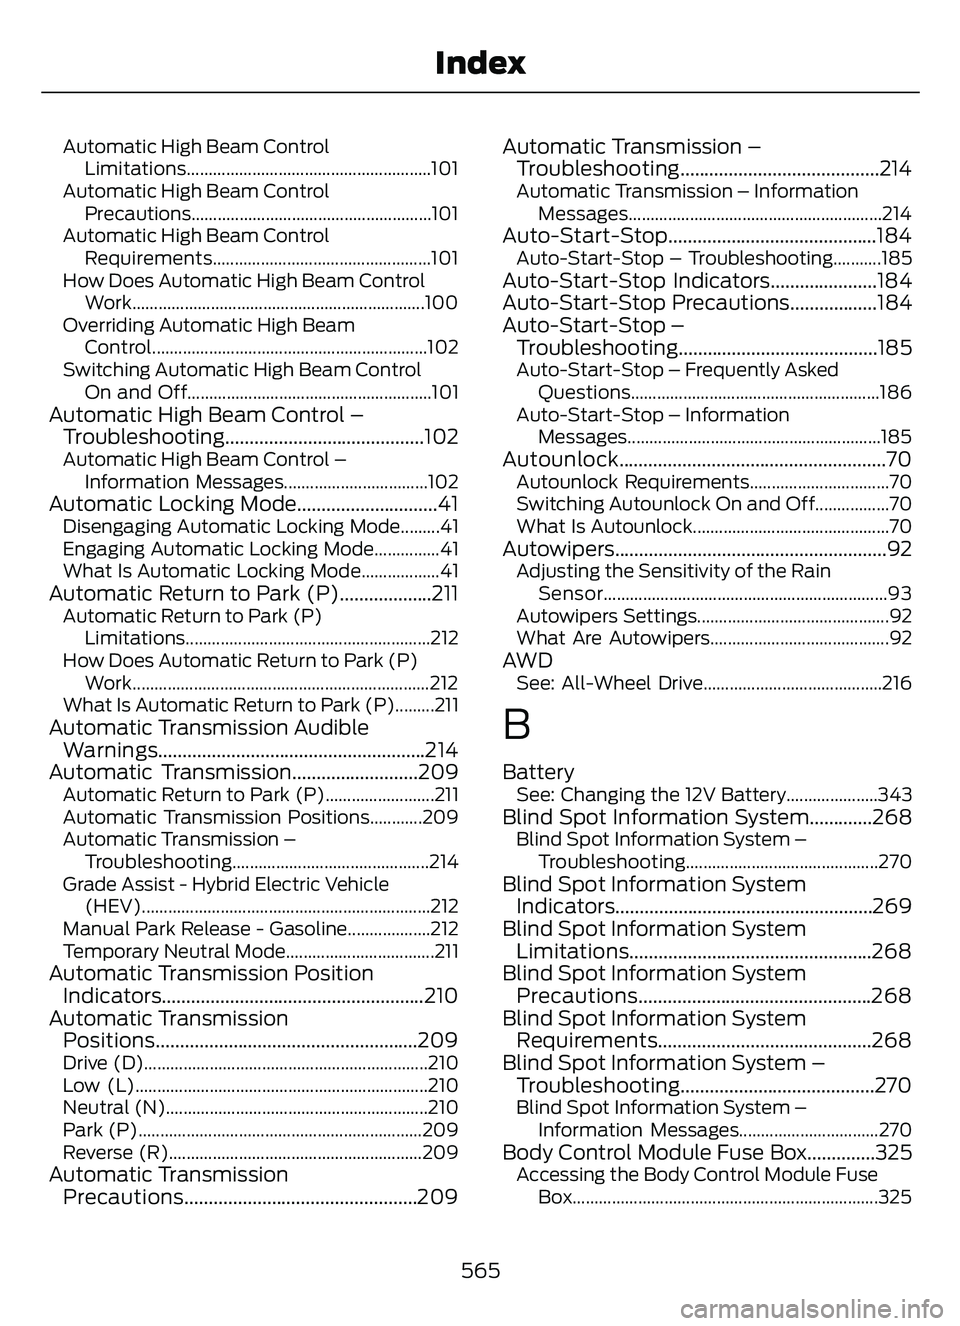
Automatic High Beam ControlLimitations........................................................101
Automatic High Beam Control Precautions.......................................................101
Automatic High Beam Control Requirements..................................................101
How Does Automatic High Beam Control Work...................................................................100
Overriding Automatic High Beam Control............................................................... 102
Switching Automatic High Beam Control On and Off........................................................101
Automatic High Beam Control –Trouble shooting.........................................102
Automatic High Beam Control –
Information Messages.................................102
Automatic Locking Mode.............................41Disengaging Automatic Locking Mode.........41
Engaging Automatic Locking Mode...............41
What Is Automatic Locking Mode..................41
Automatic Return to Park (P)...................211Automatic Return to Park (P)Limitations........................................................212
How Does Automatic Return to Park (P) Work....................................................................212
What Is Automatic Return to Park (P).........211
Automatic Transmission Audible Warnings.......................................................214
Automatic Transmission..........................209
Automatic Return to Park (P).........................211
Automatic Transmission Positions............209
Automatic Transmission –
Troubleshooting .............................................214
Grade Assist - Hybrid Electric Vehicle (HEV)..................................................................212
Manual Park Release - Gasoline...................212
Temporary Neutral Mode..................................211
Automatic Transmission Position Indicator s...................................................... 210
Automatic Transmission Positions......................................................209
Drive (D).................................................................210
Low (L).................................................................\
..210
Neutral (N)............................................................210
Park (P)...............................................................\
..209
Reverse (R)..........................................................209
Automatic TransmissionPrecautions................................................209 Automatic Transmission –
Troubleshooting .........................................214
Automatic Transmission – Information
Messages..........................................................214
Auto-Start-Stop...........................................184Auto-Start-Stop – Troubleshooting...........185Auto-Start-Stop Indicators......................184
Auto-Start-Stop Precautions..................184
Auto-Start-Stop –Troubleshooting.........................................185
Auto-Start-Stop – Frequently Asked
Questions.........................................................186
Auto-Start-Stop – Information Messages..........................................................185
Autounlock.......................................................70Autounlock Requirements................................70
Switching Autounlock On and Off.................70
What Is Autounlock.............................................70
Autowipers........................................................92Adjusting the Sensitivity of the RainSensor.................................................................93
Autowipers Settings............................................92
What Are Autowipers.........................................92
AW DSee: All-Wheel Drive.........................................216
B
BatterySee: Changing the 12V Battery.....................343Blind Spot Information System.............268Blind Spot Information System – Troubleshooti ng............................................270
Blind Spot Information System
Indicator s.....................................................269
Blind Spot Information System Limitations..................................................268
Blind Spot Information System Precautions................................................268
Blind Spot Information System Requirements............................................268
Blind Spot Information System – Troubleshooting ........................................270
Blind Spot Information System –
Information Messages................................270
Body Control Module Fuse Box..............325Accessing the Body Control Module FuseBox......................................................................325
565
Index
Page 573 of 585
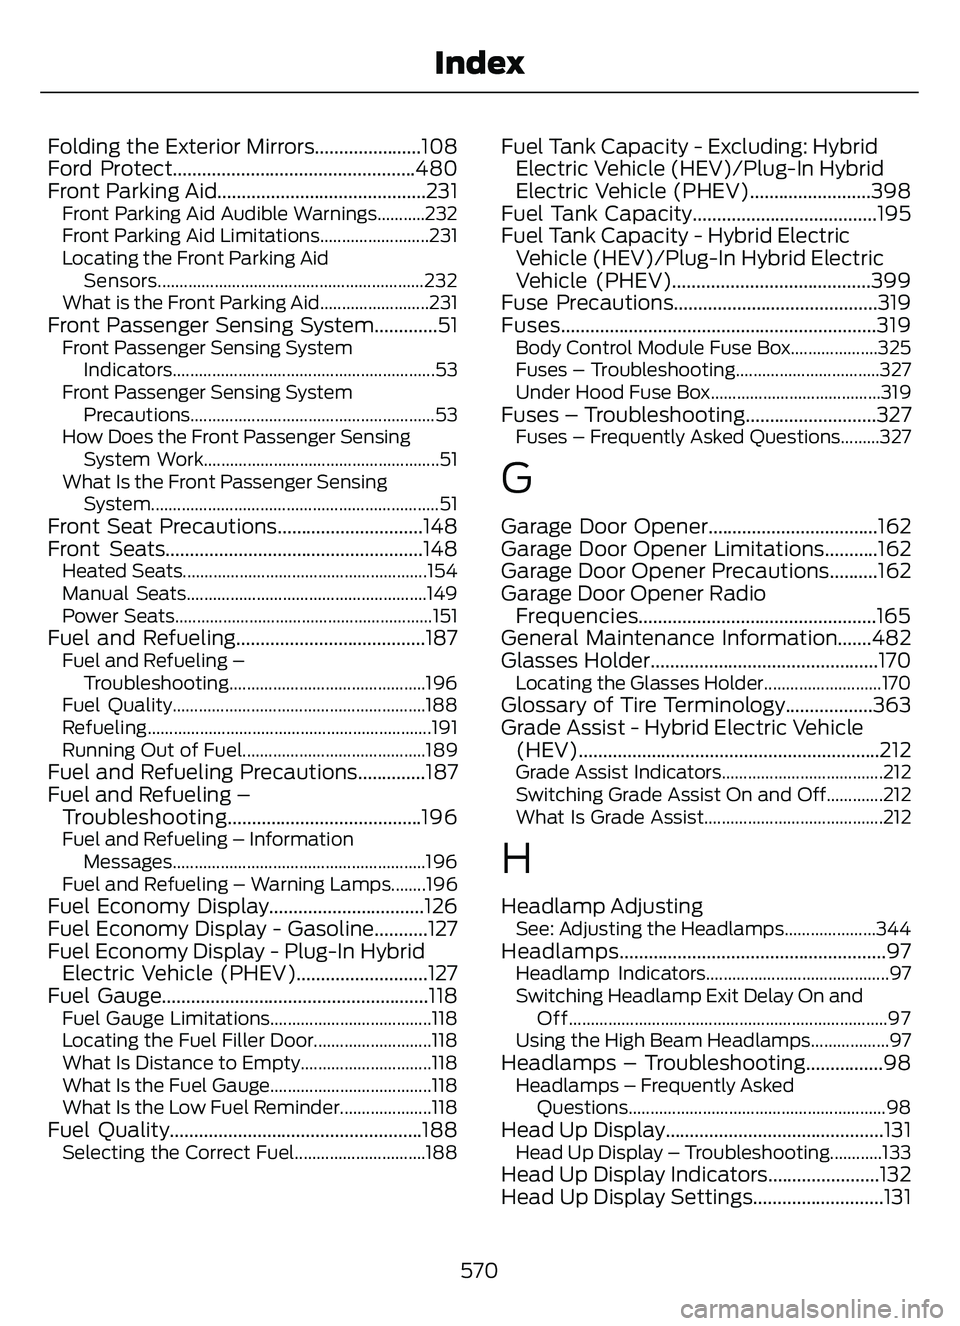
Folding the Exterior Mirrors......................108
Ford Protect..................................................480
Front Parking Aid...........................................231
Front Parking Aid Audible Warnings...........232
Front Parking Aid Limitations.........................231
Locating the Front Parking AidSensors.............................................................232
What is the Front Parking Aid.........................231
Front Passenger Sensing System.............51Front Passenger Sensing System Indicator s............................................................53
Front Passenger Sensing System Precautions........................................................53
How Does the Front Passenger Sensing System Work......................................................51
What Is the Front Passenger Sensing System..................................................................51
Front Seat Precautions..............................148
Front Seats.....................................................148
Heated Seats........................................................154
Manual Seats.......................................................149
Power Seats...........................................................151
Fuel and Refueling.......................................187Fuel and Refueling –Troubleshooting.............................................196
Fuel Quality..........................................................188
Refueling.................................................................191
Running Out of Fuel..........................................189
Fuel and Refueling Precautions..............187
Fuel and Refueling – Troubleshooting........................................196
Fuel and Refueling – Information
Messages..........................................................196
Fuel and Refueling – Warning Lamps........196
Fuel Economy Display................................126
Fuel Economy Display - Gasoline...........127
Fuel Economy Display - Plug-In Hybrid Electric Vehicle (PHEV)...........................127
Fuel Gauge.......................................................118
Fuel Gauge Limitations.....................................118
Locating the Fuel Filler Door...........................118
What Is Distance to Empty..............................118
What Is the Fuel Gauge.....................................118
What Is the Low Fuel Reminder.....................118
Fuel Quality....................................................188Selecting the Correct Fuel..............................188
Fuel Tank Capacity - Excluding: Hybrid Electric Vehicle (HEV)/Plug-In Hybrid
Electric Vehicle (PHEV).........................398
Fuel Tank Capacity......................................195
Fuel Tank Capacity - Hybrid Electric Vehicle (HEV)/Plug-In Hybrid Electric
Vehicle (PHEV).........................................399
Fuse Precautions..........................................319
Fuses.................................................................319
Body Control Module Fuse Box....................325
Fuses – Troubleshooting.................................327
Under Hood Fuse Box.......................................319
Fuses – Troubleshooting...........................327Fuses – Frequently Asked Questions.........327
G
Garage Door Opener...................................162
Garage Door Opener Limitations...........162
Garage Door Opener Precautions..........162
Garage Door Opener Radio Frequencies.................................................165
General Maintenance Information.......482
Glasses Holder...............................................170
Locating the Glasses Holder...........................170Glossary of Tire Terminology..................363
Grade Assist - Hybrid Electric Vehicle (HEV)..............................................................212\
Grade Assist Indicators.....................................212
Switching Grade Assist On and Off.............212
What Is Grade Assist.........................................212
H
Headlamp AdjustingSee: Adjusting the Headlamps.....................344Headlamps.......................................................97Headlamp Indicators..........................................97
Switching Headlamp Exit Delay On and
Off........................................................................\
.97
Using the High Beam Headlamps..................97
Headlamps – Troubleshooting................98Headlamps – Frequently Asked Questions...........................................................98
Head Up Display.............................................131Head Up Display – Troubleshooting............133Head Up Display Indicators.......................132
Head Up Display Settings...........................131
570
Index