clutch FORD ESCORT 1997 6.G Owners Manual
[x] Cancel search | Manufacturer: FORD, Model Year: 1997, Model line: ESCORT, Model: FORD ESCORT 1997 6.GPages: 191, PDF Size: 2.02 MB
Page 28 of 191
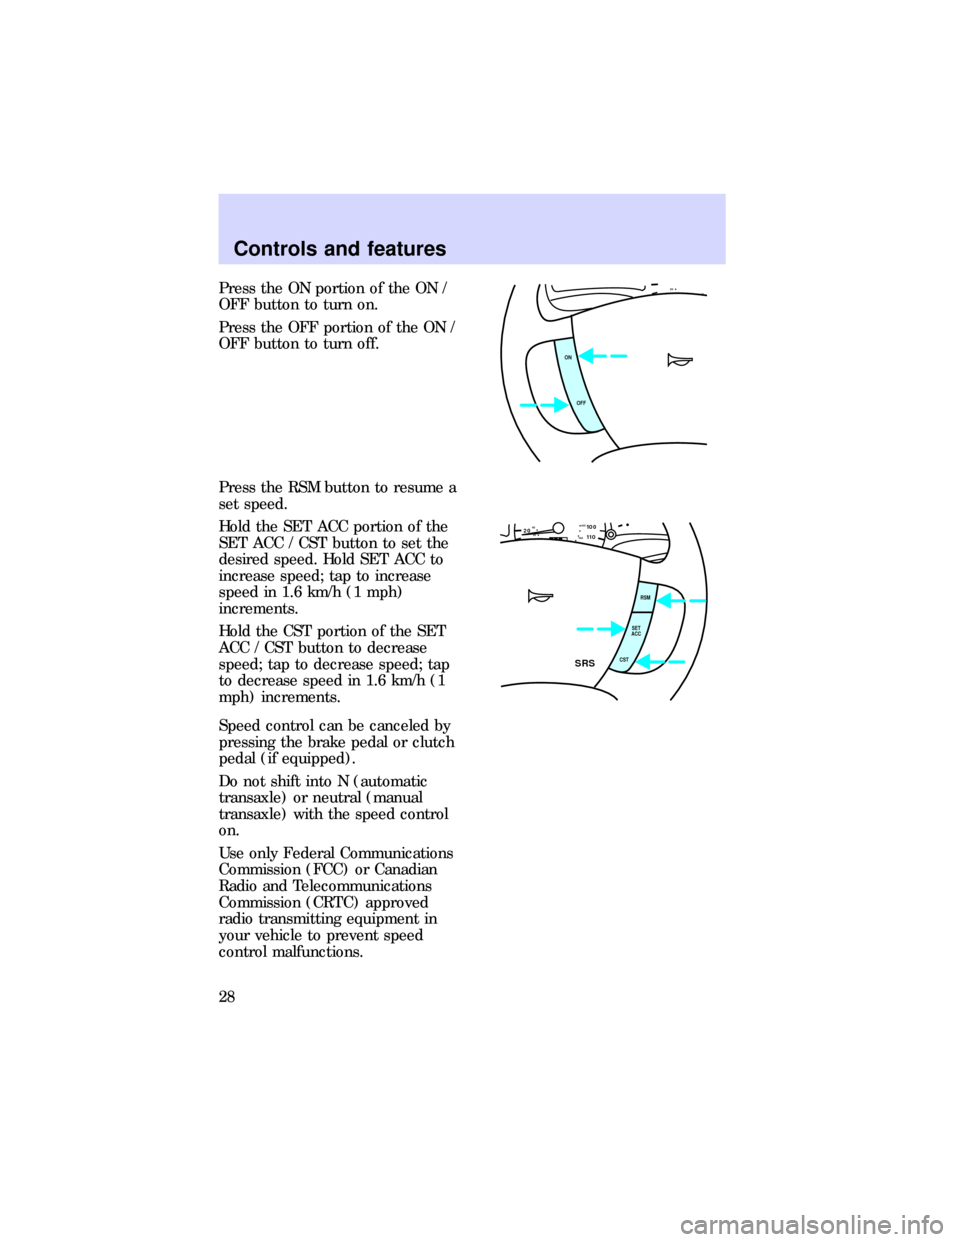
Press the ON portion of the ON /
OFF button to turn on.
Press the OFF portion of the ON /
OFF button to turn off.
Press the RSM button to resume a
set speed.
Hold the SET ACC portion of the
SET ACC / CST button to set the
desired speed. Hold SET ACC to
increase speed; tap to increase
speed in 1.6 km/h (1 mph)
increments.
Hold the CST portion of the SET
ACC / CST button to decrease
speed; tap to decrease speed; tap
to decrease speed in 1.6 km/h (1
mph) increments.
Speed control can be canceled by
pressing the brake pedal or clutch
pedal (if equipped).
Do not shift into N (automatic
transaxle) or neutral (manual
transaxle) with the speed control
on.
Use only Federal Communications
Commission (FCC) or Canadian
Radio and Telecommunications
Commission (CRTC) approved
radio transmitting equipment in
your vehicle to prevent speed
control malfunctions.020
OFF ON
2010 0
11 020 4016 0
18 0
RSM
SET
ACC
CST
SRS
Controls and features
28
Page 42 of 191
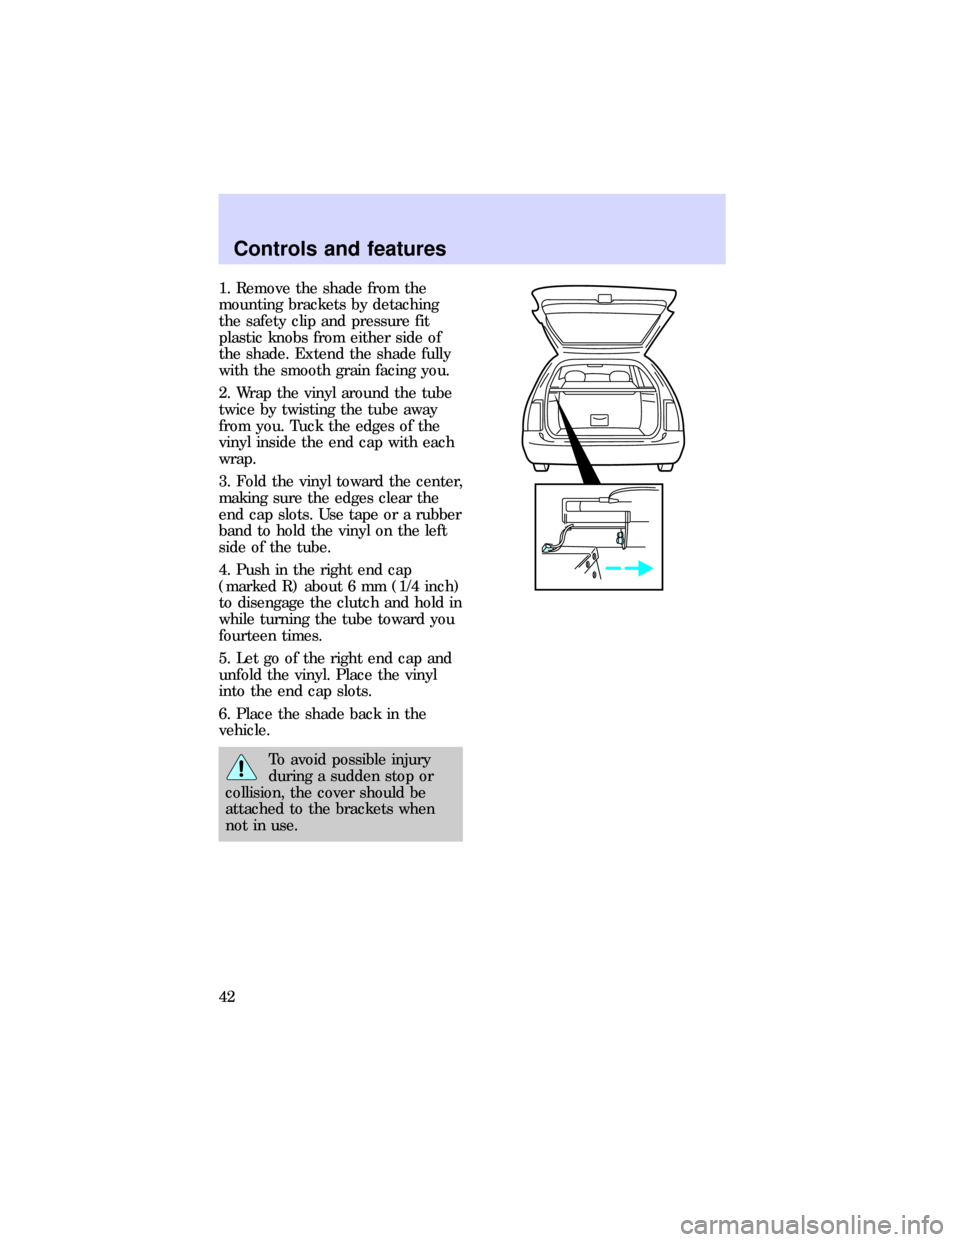
1. Remove the shade from the
mounting brackets by detaching
the safety clip and pressure fit
plastic knobs from either side of
the shade. Extend the shade fully
with the smooth grain facing you.
2. Wrap the vinyl around the tube
twice by twisting the tube away
from you. Tuck the edges of the
vinyl inside the end cap with each
wrap.
3. Fold the vinyl toward the center,
making sure the edges clear the
end cap slots. Use tape or a rubber
band to hold the vinyl on the left
side of the tube.
4. Push in the right end cap
(marked R) about 6 mm (1/4 inch)
to disengage the clutch and hold in
while turning the tube toward you
fourteen times.
5. Let go of the right end cap and
unfold the vinyl. Place the vinyl
into the end cap slots.
6. Place the shade back in the
vehicle.
To avoid possible injury
during a sudden stop or
collision, the cover should be
attached to the brackets when
not in use.
Controls and features
42
Page 87 of 191
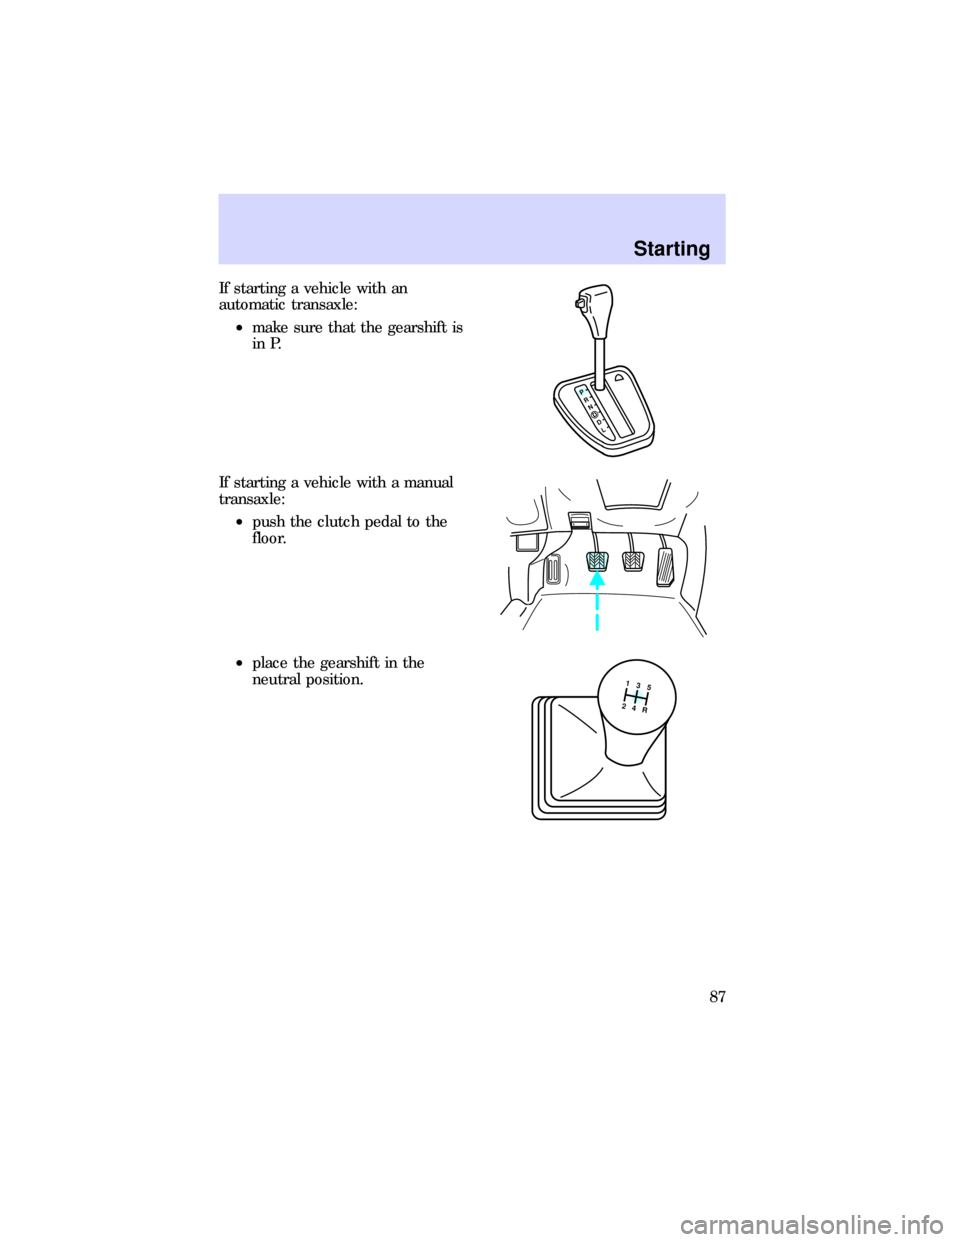
If starting a vehicle with an
automatic transaxle:
²make sure that the gearshift is
in P.
If starting a vehicle with a manual
transaxle:
²push the clutch pedal to the
floor.
²place the gearshift in the
neutral position.
P
R
N
D
D
L
4 25 3 1R
Starting
87
Page 99 of 191
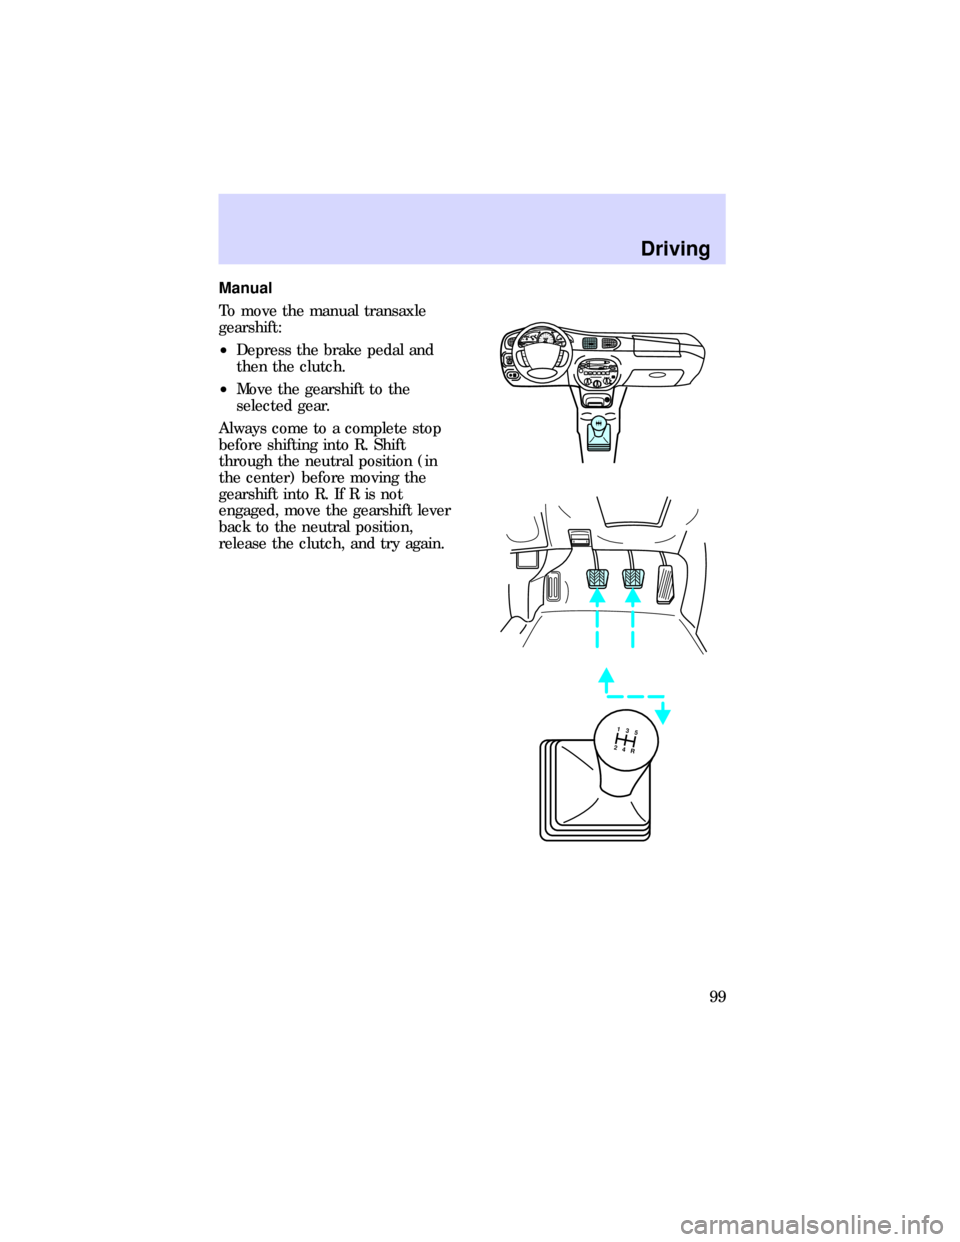
Manual
To move the manual transaxle
gearshift:
²Depress the brake pedal and
then the clutch.
²Move the gearshift to the
selected gear.
Always come to a complete stop
before shifting into R. Shift
through the neutral position (in
the center) before moving the
gearshift into R. If R is not
engaged, move the gearshift lever
back to the neutral position,
release the clutch, and try again.
HI LOOFF*A/C*MAX
A/CTUNE
DISCS
SEEK
TUNE
SCAN
EJ REW FF
BAL BASSTREBFADE TAPE
CD AM
FM
–+1
SIDE 1-22
345
COMP1
SIDE 1-2VOL–
PUSH ONLMIRRORR0000000002030405060
70
80
90
10 0
11 020 40608010 0
12 0
16 0
18 0 140FUEL FILLCHEF1/22
13RPM x 1000RESET
SET
ACC
SET XXXX XXXOFF
4 25 3 1
R
2INT
1 OFF MIST
4 25 3 1
R
Driving
99
Page 101 of 191

²Do not drive with your foot
resting on the clutch pedal and do
not use the clutch pedal to hold
the vehicle at a standstill. These
actions will reduce clutch life.
²Downshift on steep hills to
reduce the vehicle's chances of
stalling and to prevent
unnecessary brake wear.
LOADING YOUR VEHICLE
Before loading a vehicle, familiarize
yourself with these terms:
²Base curb weightÐ weight of
the vehicle including any
standard equipment, fluids,
lubricants, etc. It does not
include passengers or
aftermarket equipment.
²PayloadÐ combined maximum
allowable weight of cargo,
passengers and optional
equipment.
²GVW (Gross vehicle weight)
Ðbase curb weight plus the
payload weight (including
passengers, cargo and optional
equipment). Remember, the
GVW is not a limit or a
specification.
²GVWR (Gross vehicle weight
rating)Ð maximum total
weight of the base vehicle,
passengers, optional equipment,
and cargo. The GVWR is specific
to each vehicle and is listed on
the Safety Compliance
Certification Label on the
driver's door pillar.
Driving
101
Page 111 of 191

Fuse rating Color
10 amp Red
15 amp Blue
20 amp Yellow
30 amp Light Green
30 amp fuse link Pink
40 amp Green
60 amp fuse link Yellow
80 amp fuse link Black
100 amp fuse link Blue
Instrument panel fuse panel
Number Fuse amperage
ratingCircuits protected
1 Stop 15 amp Brakelamps, shift lock
2 Tail 15 amp Instrument cluster
illumination, license
plate lamp, parking
lamps, side marker
lamps, tail lamps,
(radio, climate control
illumination)
3 Sun roof Ð Not used
4 ASC 10 amp Speed control
5 Ð Ð Not used
6 (Door lock) 30 amp Power door locks
7 Horn 15 amp Horn
8 (Air Conditioning) 15 amp A/C, clutch
Roadside emergencies
111
Page 131 of 191

To check the engine oil, follow
these steps:
1. Once the engine is warm, turn
the engine off. Make sure the
vehicle is parked on level ground.
2. Automatic transaxle:
²Engage the parking brake.
²Place the gearshift in P.
Manual transaxle:
²Engage the parking brake.
²Depress the clutch and place
the gearshift in first gear.
3. Open the hood. If you need
assistance, refer toOpening the
Hoodin this chapter. Protect
yourself from engine heat.
4. Remove the engine oil dipstick
and wipe it clean. Insert the
dipstick fully, then remove it again.
The oil level should be in the
range shown on the dipstick.
5. Carefully pull the dipstick out
again. If the oil level is below the
ADD arrow, add engine oil as
necessary. If the engine oil is
beyond the FULL arrow, engine
damage or high oil consumption
may occur and some oil must be
removed from the engine.
6. Put the dipstick back and
ensure that it is properly seated.
ADD FULL
Maintenance and care
131
Page 134 of 191
CHECKING AND ADDING
MANUAL TRANSAXLE CLUTCH
FLUID
The brake fluid reservoir and
clutch master cylinder are part of
the same unit; both are refillable
through the brake fluid reservoir
with brake fluid. During normal
operation, the fluid level in the
brake fluid reservoir will rise
slowly. For more information on
brake fluid maintenance, refer to
Checking and adding brake fluid
in this chapter.
CHECKING AND ADDING
WASHER FLUID
What you should know about
washer fluid
In freezing weather (temperatures
below 0ÉC [32ÉF], washer fluid
containing a small amount of
antifreeze is used. State or local
regulations on volatile organic
compounds may restrict the use of
methanol, a common type of
antifreeze. Use a non-methanol
antifreeze in freezing weather only
if the fluid does not damage the
paint finish, wiper blades, or
washer system.
Washer fluid contains
methanol and is poisonous.
Follow all instructions on the
bottle of washer fluid.
Maintenance and care
134
Page 142 of 191

²Add the fluid in 250 ml (1¤2pint)
increments through the filler
tube. Do not overfill the
automatic transaxle fluid
reservoir. If this occurs, the
excess fluid should be removed
by a qualified technician.
Always dispose of used
automotive fluids in a responsible
manner. Follow your community's
standards for disposing of these
types of fluids. Call your local
recycling center to find out more
about recycling automotive fluids.
Checking and adding manual
transaxle fluid
For information on checking and
adding manual transaxle fluid,
refer toChecking and adding
clutch fluidin this section.
WHAT YOU SHOULD KNOW
ABOUT YOUR BATTERY
If the original equipment
maintenance-free battery needs
replacing, it may be replaced with
a low-maintenance battery. For
information on appropriate
replacement batteries, refer to
Motorcraft part numbersin the
Capacities and specifications
chapter.
Maintenance and care
142
Page 187 of 191

Aiming headlamps ....................173
Air bag supplemental restraint
system ..........................................62
description ...........................62,63
disposal ......................................63
driver air bag ............................64
indicator light ........................7,64
operation ...................................63
tone generator ..........................64
wearing safety belts .................64
Air cleaner filter .......................145
replacing ..................................146
Air conditioning
manual heating and air
conditioning system .................19
Anti-lock brake system (ABS) ...93
noise ..........................................93
see also Brake ...........................93
warning light .............................94
Anti-theft system ........................45
arming the system ....................50
description ................................50
disarming a triggered system ..52
disarming an untriggered
system .......................................51
warning light ...............................9
Automatic transaxle ...................96
driving with ...............................96
fluid, adding ............................141
fluid, checking ........................140
Battery .......................................142
servicing ..................................143
Brakes ..........................................93
anti-lock .....................................93
anti-lock brake system (ABS)
warning light ...............................9
fluid, checking and adding ....133
power braking ...........................93
Break-in period .............................2
Bulbs, replacing ........................160
halogen ....................................161
headlamps ...............................162high-mount brakelamp ...........164
rear lamps ..........164,165,167,168
specifications ..........................172
Cargo area shade ........................41
Changing a tire .........................114
Charging system warning light ....9
Child safety seats
and air bags ............................185
Childproof locks ..........................33
Cleaning your vehicle ...............175
built-in child seat ...................178
engine compartment ..............177
exterior ....................................177
instrument panel ....................177
plastic parts ............................176
safety belts ..............................178
washing ....................................175
waxing .....................................175
wheels ......................................176
wiper blades ............................178
Climate control system ..............17
air conditioning .........................19
air distribution dial ...................19
temperature dial .......................18
Clutch
fluid ..........................................134
Controls ...................15,31,36,39,40
steering column ........................25
Daytime running light system ...26
Defects, reporting .....................186
Disabled vehicle (see Towing) 123
Driving under special
conditions
towing a trailer .......................105
Emergencies, roadside .............107
Emission control system ...157,158
Engine .................................129,182
check engine warning light .......7
Engine block heater ...................91
Engine coolant
checking and adding ..............136
low coolant warning light ........10
Index
187