brake FORD ESCORT 1999 6.G Owner's Guide
[x] Cancel search | Manufacturer: FORD, Model Year: 1999, Model line: ESCORT, Model: FORD ESCORT 1999 6.GPages: 200, PDF Size: 1.82 MB
Page 123 of 200
Downloaded from www.Manualslib.com manuals search engine SERVICE RECOMMENDATIONS
To help you service your vehicle:
²We highlight do-it-yourself items in the engine compartment for easy
location.
²We provide a Scheduled Maintenance Guide which makes tracking
routine service easy.
If your vehicle requires professional service, your dealership can provide
necessary parts and service. Check your ªWarranty Guideº to find out
which parts and services are covered.
Use only recommended fuels, lubricants, fluids and service parts
conforming to specifications. Motorcraft parts are designed and built to
provide the best performance in your vehicle.
PRECAUTIONS WHEN SERVICING YOUR VEHICLE
Be especially careful when inspecting or servicing your vehicle.
²Do not work on a hot engine.
²When the engine is running, keep loose clothing, jewelry or long hair
away from moving parts.
²Do not work on a vehicle with the engine running in an enclosed
space, unless you are sure you have enough ventilation.
²Keep all lit cigarettes, open flames and other lit material away from
the battery and all fuel related parts.
If you disconnect the battery, the engine must ªrelearnº its idle
conditions before your vehicle will drive properly, as explained in the
Batterysection in this chapter.
Working with the engine off
²Automatic transaxle:
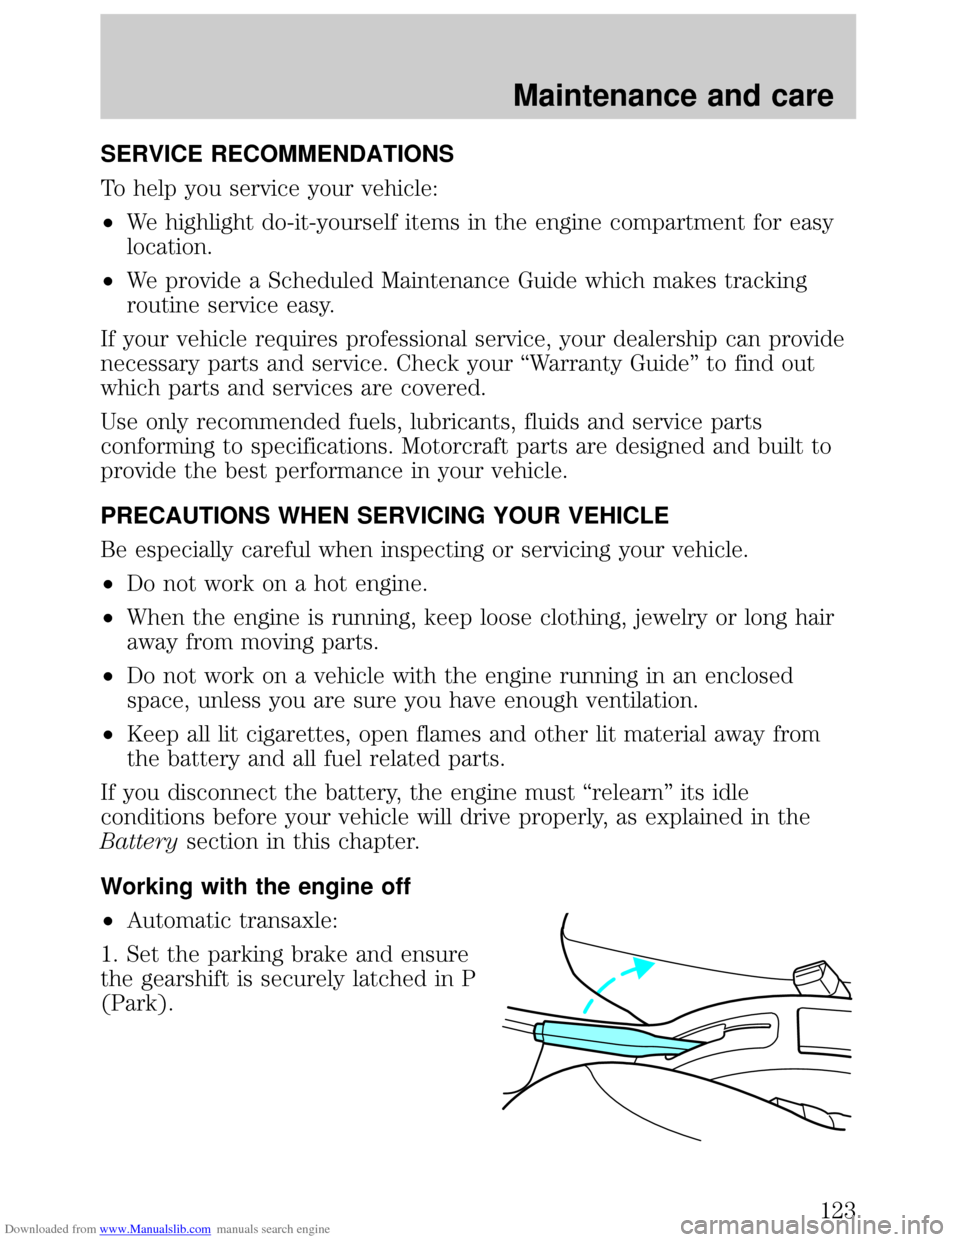
1. Set the parking brake and ensure
the gearshift is securely latched in P
(Park).
Maintenance and care
123
Page 124 of 200
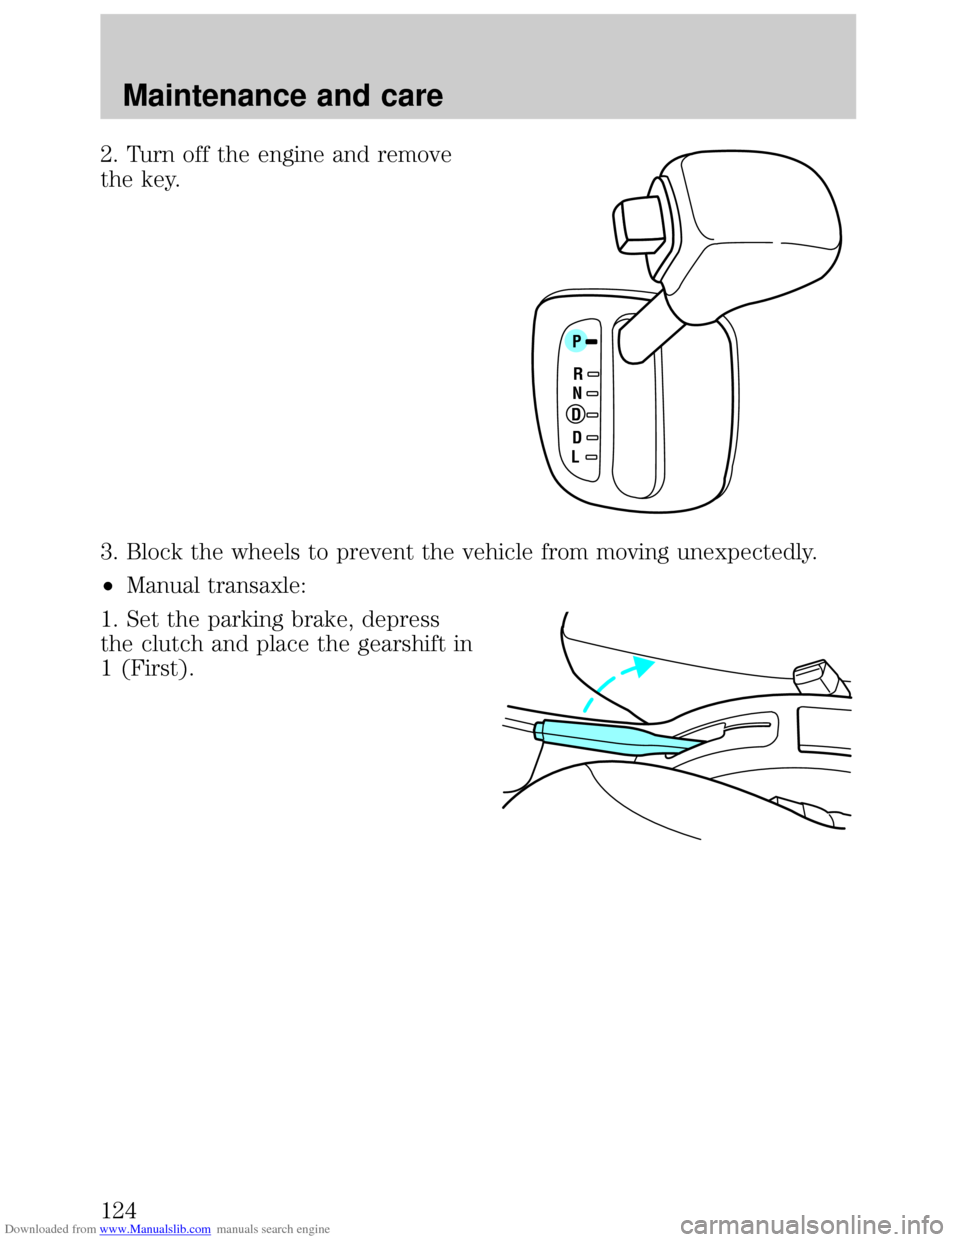
Downloaded from www.Manualslib.com manuals search engine 2. Turn off the engine and remove
the key.
3. Block the wheels to prevent the vehicle from moving unexpectedly.
²Manual transaxle:
1. Set the parking brake, depress
the clutch and place the gearshift in
1 (First).
P
RNDDL
Maintenance and care
124
Page 125 of 200
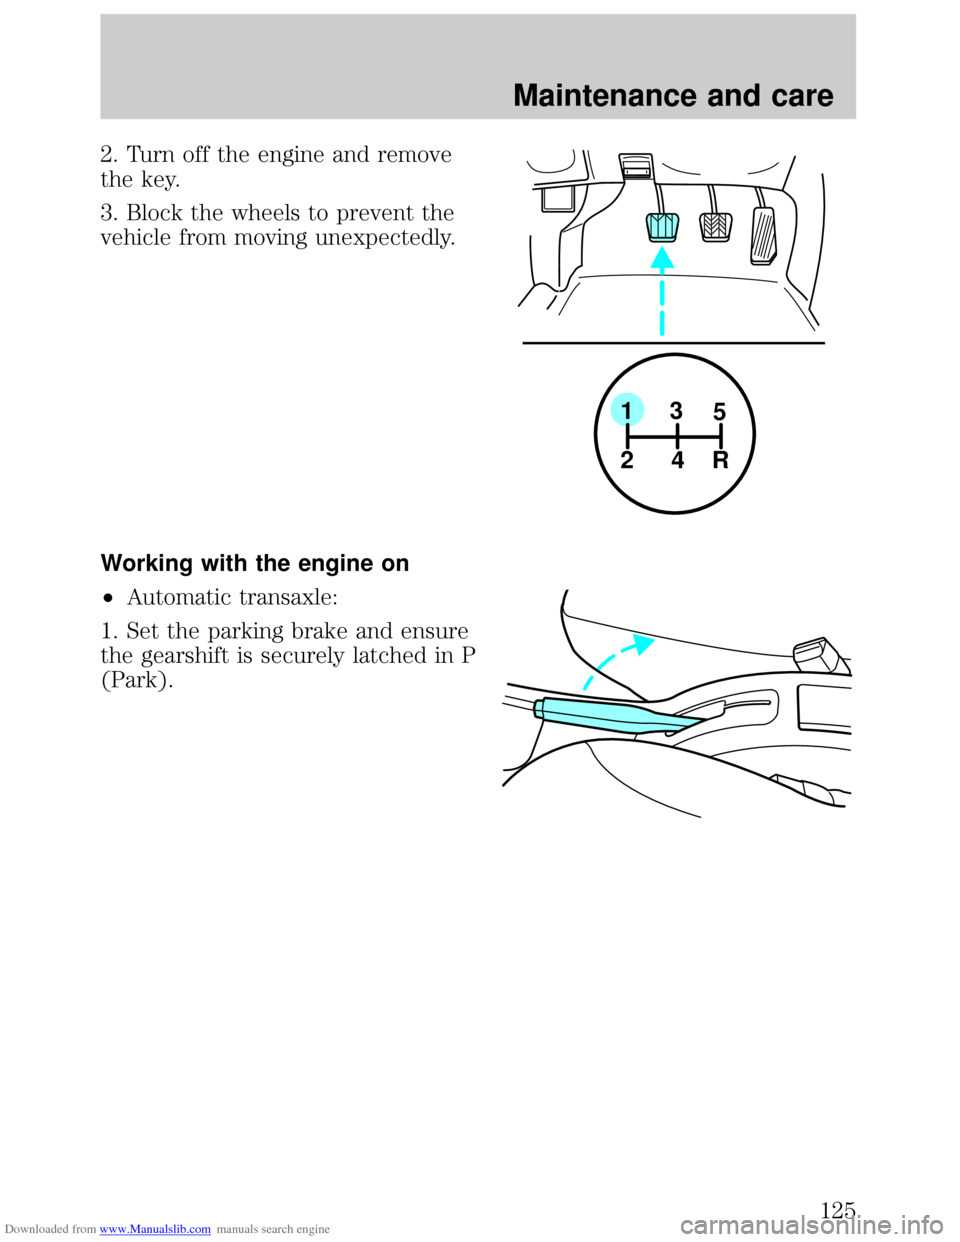
Downloaded from www.Manualslib.com manuals search engine 2. Turn off the engine and remove
the key.
3. Block the wheels to prevent the
vehicle from moving unexpectedly.
Working with the engine on
²Automatic transaxle:
1. Set the parking brake and ensure
the gearshift is securely latched in P
(Park).
1
24R3
5
Maintenance and care
125
Page 126 of 200
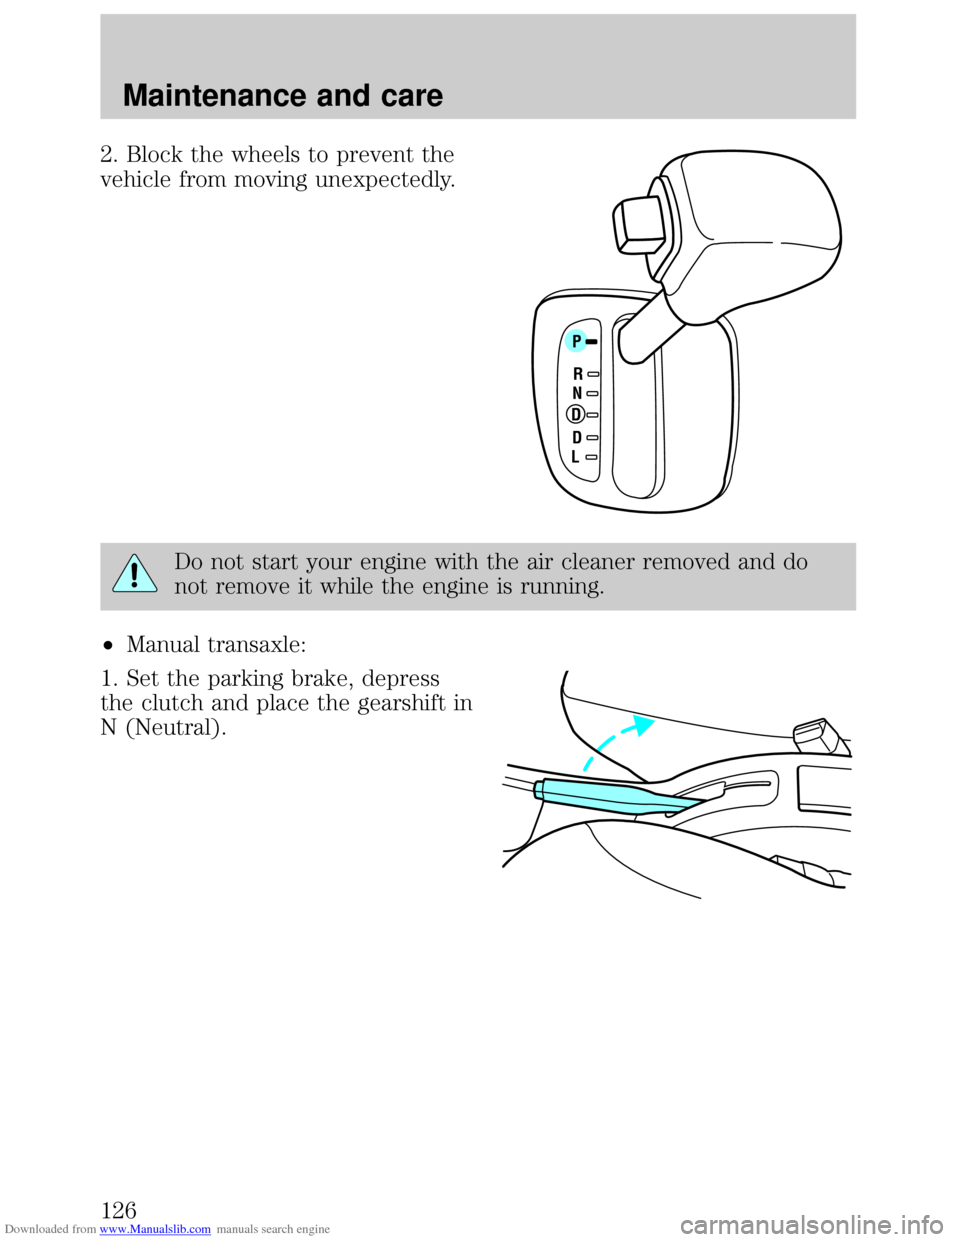
Downloaded from www.Manualslib.com manuals search engine 2. Block the wheels to prevent the
vehicle from moving unexpectedly.
Do not start your engine with the air cleaner removed and do
not remove it while the engine is running.
²Manual transaxle:
1. Set the parking brake, depress
the clutch and place the gearshift in
N (Neutral).
P
RNDDL
Maintenance and care
126
Page 129 of 200
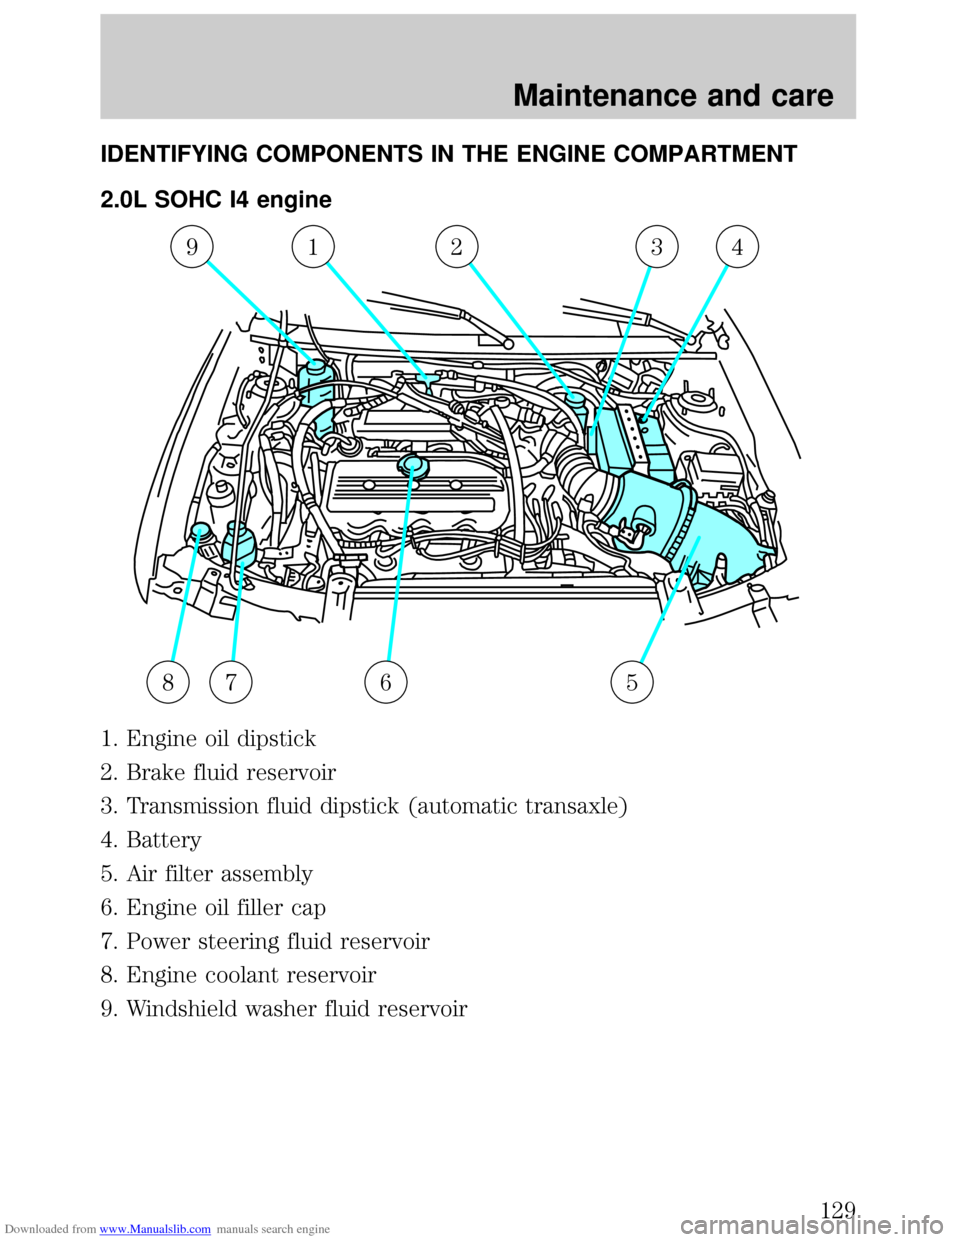
Downloaded from www.Manualslib.com manuals search engine IDENTIFYING COMPONENTS IN THE ENGINE COMPARTMENT
2.0L SOHC I4 engine
1. Engine oil dipstick
2. Brake fluid reservoir
3. Transmission fluid dipstick (automatic transaxle)
4. Battery
5. Air filter assembly
6. Engine oil filler cap
7. Power steering fluid reservoir
8. Engine coolant reservoir
9. Windshield washer fluid reservoir
91234
8756
Maintenance and care
129
Page 130 of 200
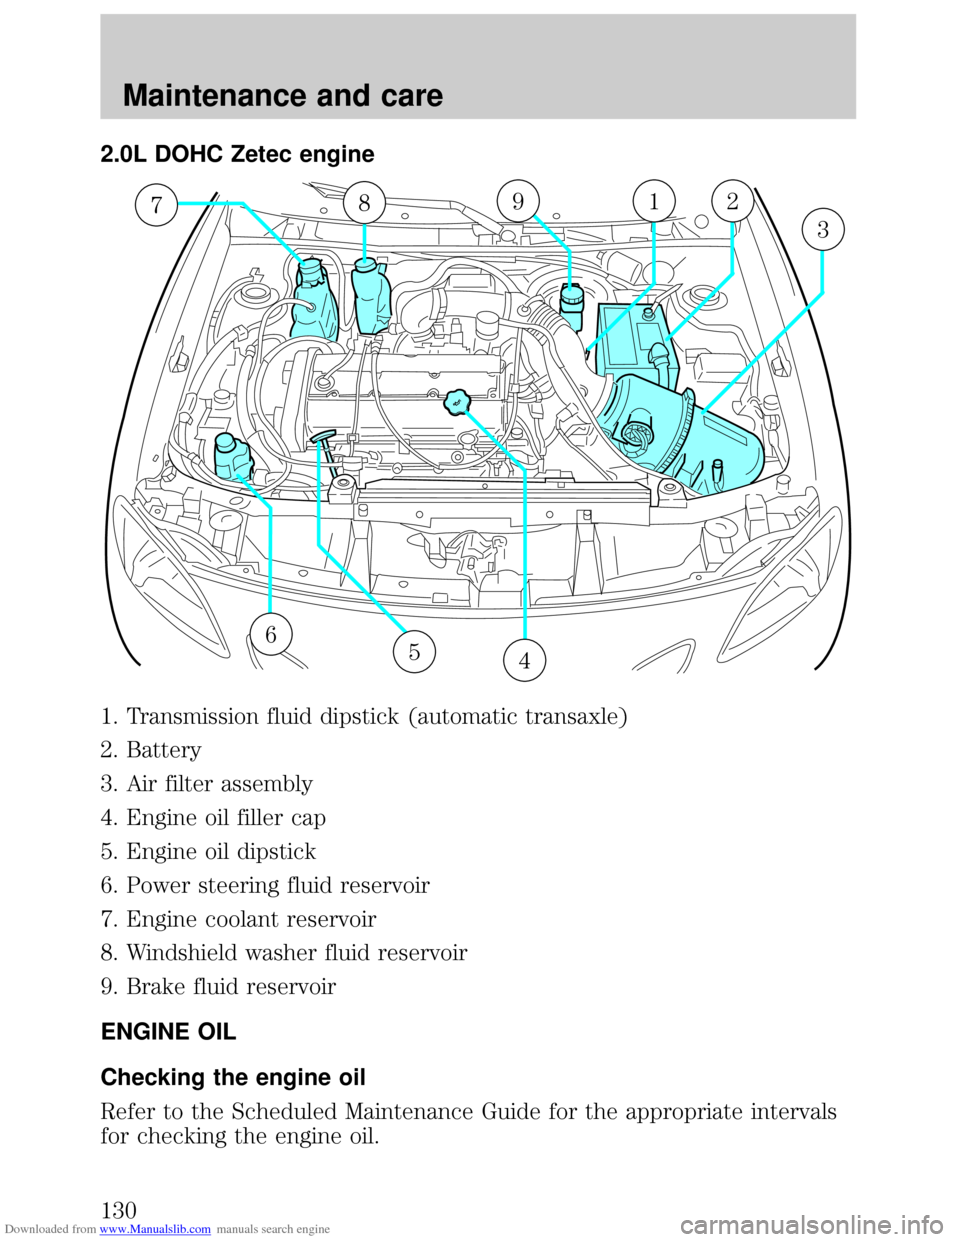
Downloaded from www.Manualslib.com manuals search engine 2.0L DOHC Zetec engine
1. Transmission fluid dipstick (automatic transaxle)
2. Battery
3. Air filter assembly
4. Engine oil filler cap
5. Engine oil dipstick
6. Power steering fluid reservoir
7. Engine coolant reservoir
8. Windshield washer fluid reservoir
9. Brake fluid reservoir
ENGINE OIL
Checking the engine oil
Refer to the Scheduled Maintenance Guide for the appropriate intervals
for checking the engine oil.
98712
3
4
65
Maintenance and care
130
Page 131 of 200
Downloaded from www.Manualslib.com manuals search engine 1. Make sure the vehicle is on level ground.
2. Turn the engine off and wait a few minutes for the oil to drain into the
oil pan.
3. Set the parking brake and ensure the gearshift is securely latched in P
(automatic transaxle) or 1st (manual transaxle).
4. Open the hood. Protect yourself from engine heat.
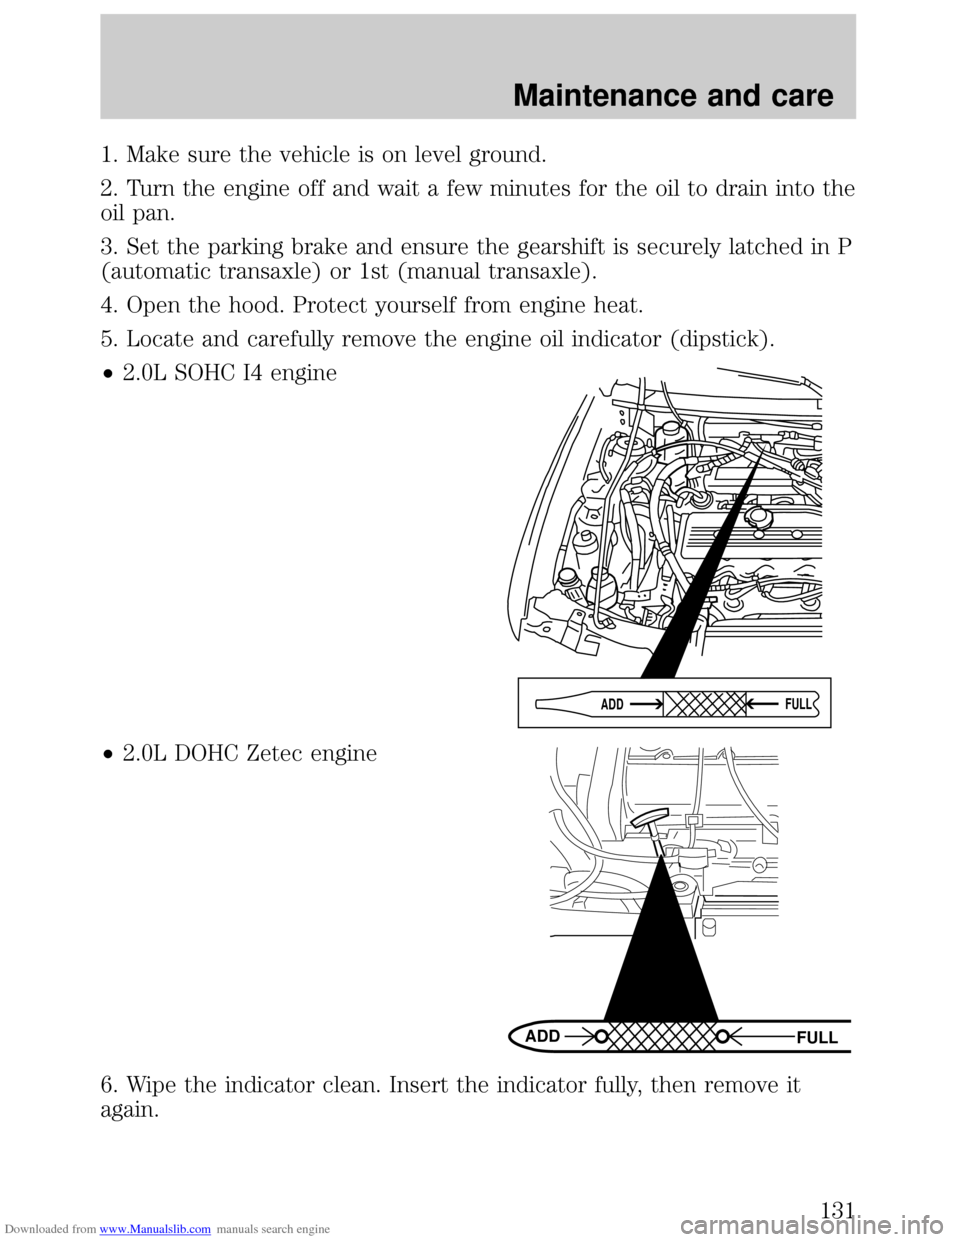
5. Locate and carefully remove the engine oil indicator (dipstick).
²2.0L SOHC I4 engine
²2.0L DOHC Zetec engine
6. Wipe the indicator clean. Insert the indicator fully, then remove it
again.
ADDFULL
FULL ADD
Maintenance and care
131
Page 134 of 200
Downloaded from www.Manualslib.com manuals search engine BRAKE FLUID
Checking and adding brake fluid
Brake fluid should be checked and
refilled as needed. Refer to the
Scheduled Maintenance Guide for
the service interval schedules:
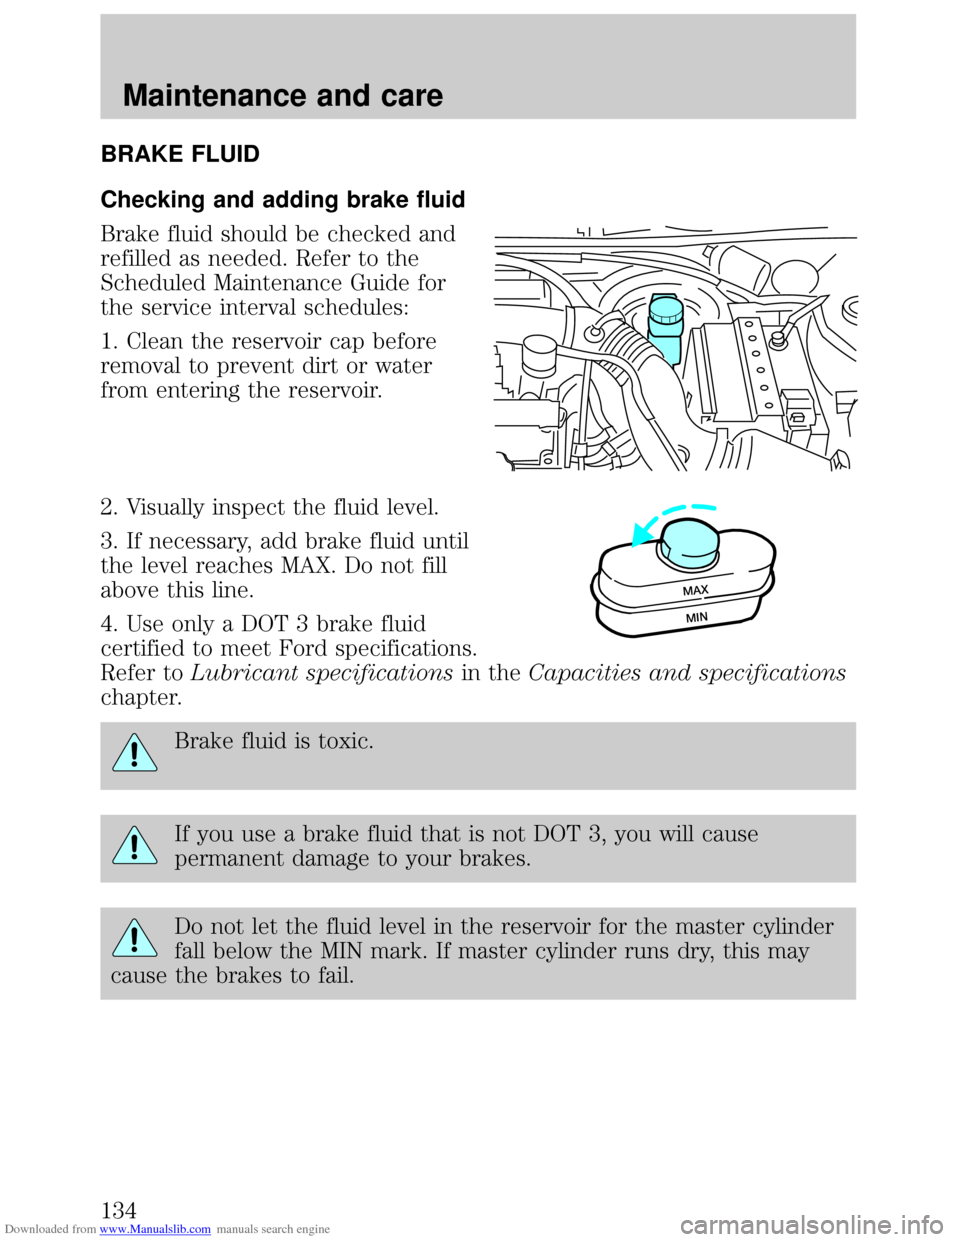
1. Clean the reservoir cap before
removal to prevent dirt or water
from entering the reservoir.
2. Visually inspect the fluid level.
3. If necessary, add brake fluid until
the level reaches MAX. Do not fill
above this line.
4. Use only a DOT 3 brake fluid
certified to meet Ford specifications.
Refer toLubricant specificationsin theCapacities and specifications
chapter.
Brake fluid is toxic.
If you use a brake fluid that is not DOT 3, you will cause
permanent damage to your brakes.
Do not let the fluid level in the reservoir for the master cylinder
fall below the MIN mark. If master cylinder runs dry, this may
cause the brakes to fail.
MAX
MIN
Maintenance and care
134
Page 135 of 200
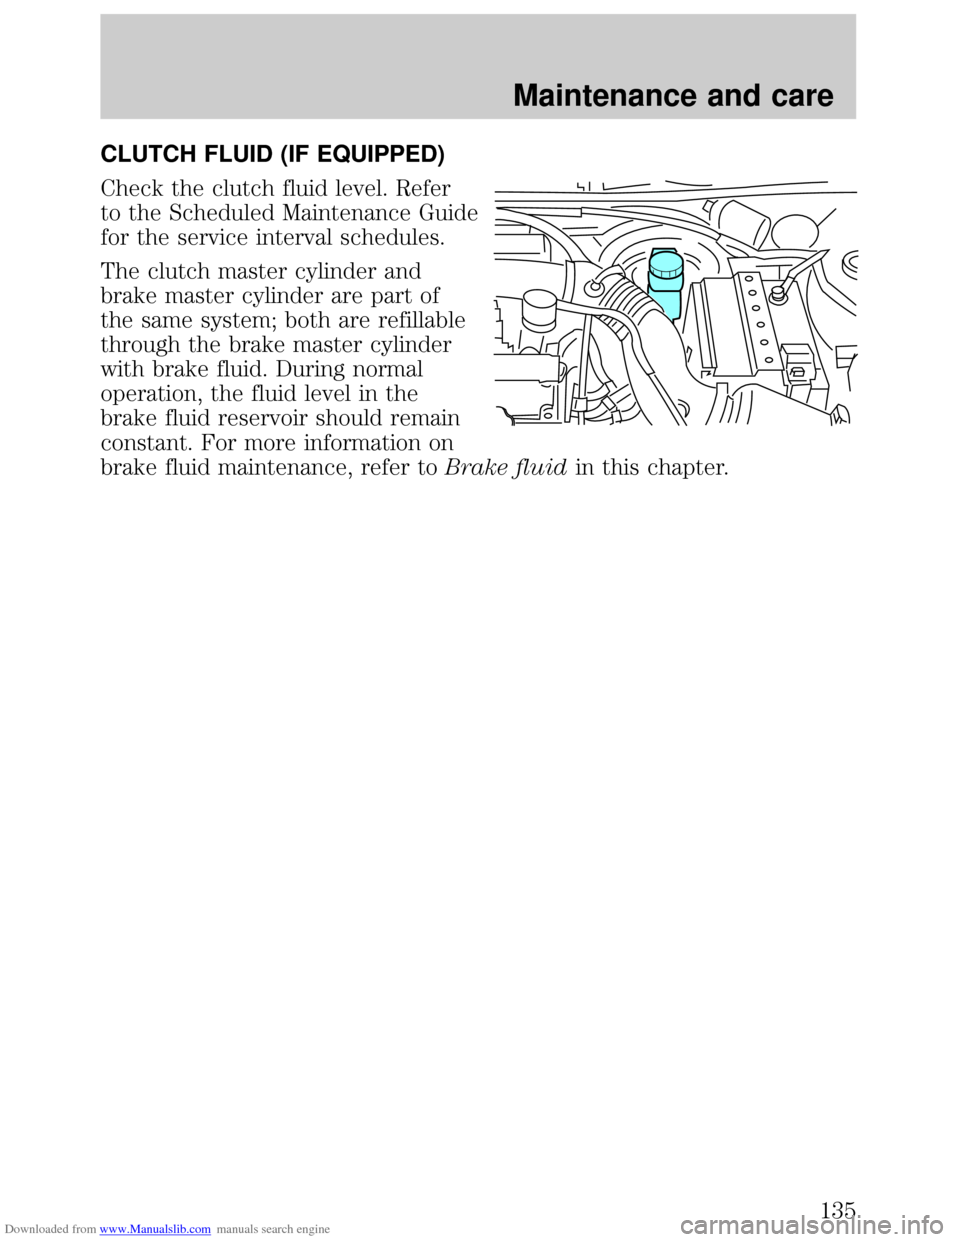
Downloaded from www.Manualslib.com manuals search engine CLUTCH FLUID (IF EQUIPPED)
Check the clutch fluid level. Refer
to the Scheduled Maintenance Guide
for the service interval schedules.
The clutch master cylinder and
brake master cylinder are part of
the same system; both are refillable
through the brake master cylinder
with brake fluid. During normal
operation, the fluid level in the
brake fluid reservoir should remain
constant. For more information on
brake fluid maintenance, refer toBrake fluidin this chapter.
Maintenance and care
135
Page 141 of 200
Downloaded from www.Manualslib.com manuals search engine 2. While the engine idles, turn the steering wheel left and right several
times.
3. Turn the engine off.
4. Check the fluid level in the reservoir. It should be between the MIN
and MAX lines. Do not add fluid if the level is in this range.
5. If the fluid is low, add fluid in small amounts, continuously checking
the level until it reaches the range between the MIN and MAX lines. Be
sure to put the cap back on the reservoir.
TRANSMISSION FLUID
Checking automatic transmission fluid
Refer to your Scheduled Maintenance Guide for scheduled intervals for
fluid checks and changes. Your transaxle does not consume fluid.
However, the fluid level should be checked if the transaxle is not working
properly, i.e., if the transaxle slips or shifts slowly or if you notice some
sign of fluid leakage.
Automatic transmission fluid expands when warmed. To obtain an
accurate fluid check, drive the vehicle until it is warmed up
(approximately 30 km [20 miles]). If your vehicle has been
operated for an extended period at high speeds, in city traffic
during hot weather or pulling a trailer, the vehicle should be
turned off for about 30 minutes to allow fluid to cool before
checking.
1. Drive the vehicle 30 km (20 miles) or until it reaches normal operating
temperature.
2. Park the vehicle on a level surface and engage the parking brake.
3. With the parking brake engaged and your foot on the brake pedal,
start the engine and move the gearshift lever through all of the gear
ranges. Allow sufficient time for each gear to engage.
4. Latch the gearshift lever in P (Park) and leave the engine running.
5. Remove the dipstick, wiping it clean with a clean, dry lint free rag.
6. Install the dipstick making sure it is fully seated in the filler tube.
7. Remove the dipstick and inspect the fluid level. The fluid should be in
the designated areas for normal operating temperature.
Maintenance and care
141