window FORD ESCORT 2001 7.G Owners Manual
[x] Cancel search | Manufacturer: FORD, Model Year: 2001, Model line: ESCORT, Model: FORD ESCORT 2001 7.GPages: 216, PDF Size: 1.78 MB
Page 4 of 216
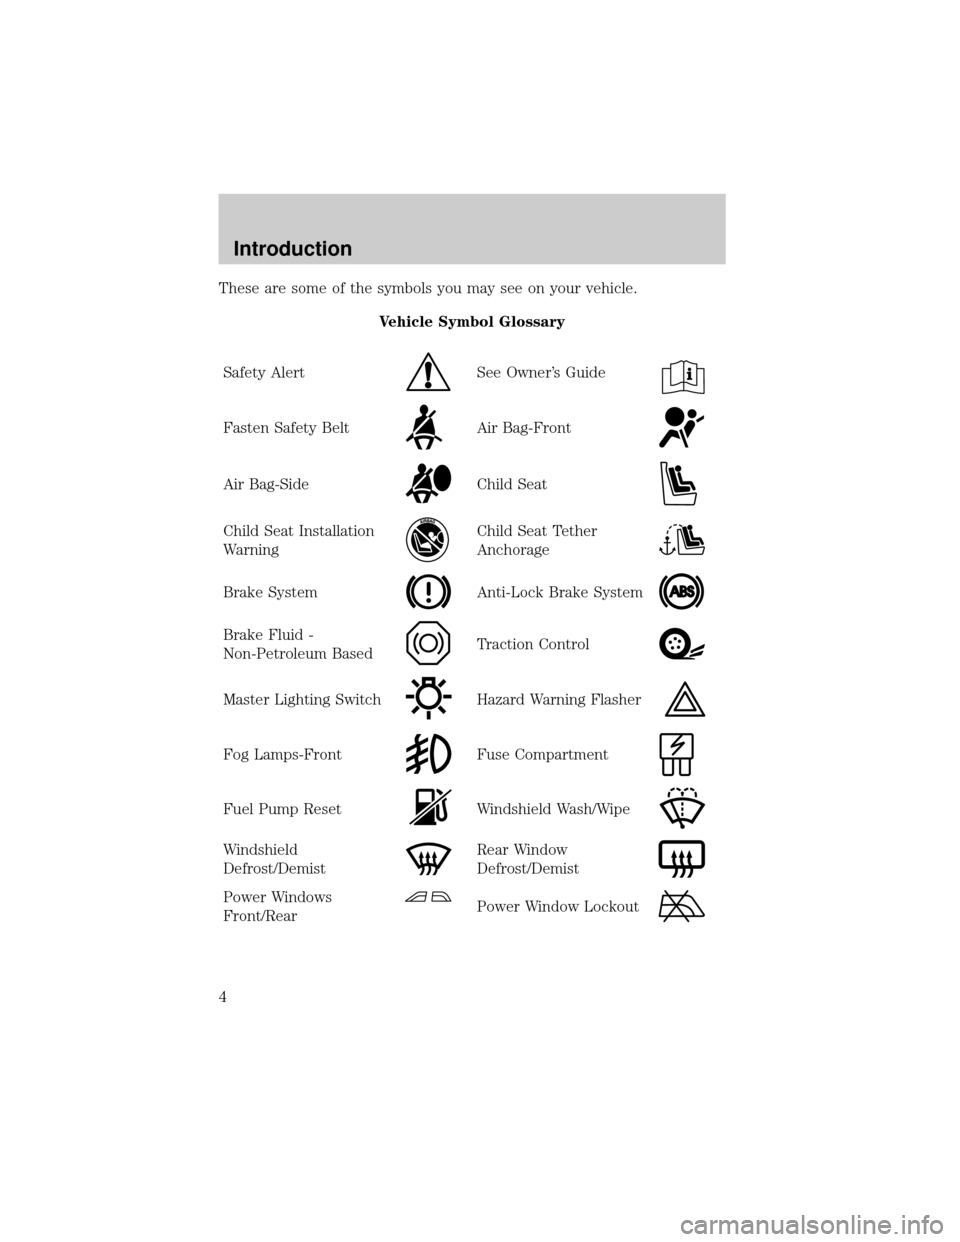
These are some of the symbols you may see on your vehicle.
Vehicle Symbol Glossary
Safety Alert
See Owner's Guide
Fasten Safety BeltAir Bag-Front
Air Bag-SideChild Seat
Child Seat Installation
WarningChild Seat Tether
Anchorage
Brake SystemAnti-Lock Brake System
Brake Fluid -
Non-Petroleum BasedTraction Control
Master Lighting SwitchHazard Warning Flasher
Fog Lamps-FrontFuse Compartment
Fuel Pump ResetWindshield Wash/Wipe
Windshield
Defrost/DemistRear Window
Defrost/Demist
Power Windows
Front/RearPower Window Lockout
Introduction
4
Page 42 of 216
²To reduce humidity buildup inside the vehicle in cold weather
conditions, don't drive with the climate control system in the OFF or
MAX A/C position.
²To reduce humidity buildup inside the vehicle in warm weather
conditions, don't drive with the climate control system in the OFF
position.
²Under normal weather conditions, your vehicle's climate control
system should be left in any position other than MAX A/C or OFF
when the vehicle is parked. This allows the vehicle to ªbreatheº
through the outside air inlet duct.
²Under snowy or dirty weather conditions, your vehicle's climate
control system should be left in the OFF position when the vehicle is
parked. This allows the climate control system to be free from
contamination of outside pollutants.
²If your vehicle has been parked with the windows closed during warm
weather conditions, the air conditioner will perform more efficiently in
cooling the vehicle if driven for two or three minutes with the
windows open. This will force most of the hot, stale air out of the
vehicle. Once the vehicle has been ªaired outº, operate the climate
control system as desired.
²Do not place objects under the front seat that will interfere with the
airflow to the rear seats (if equipped).
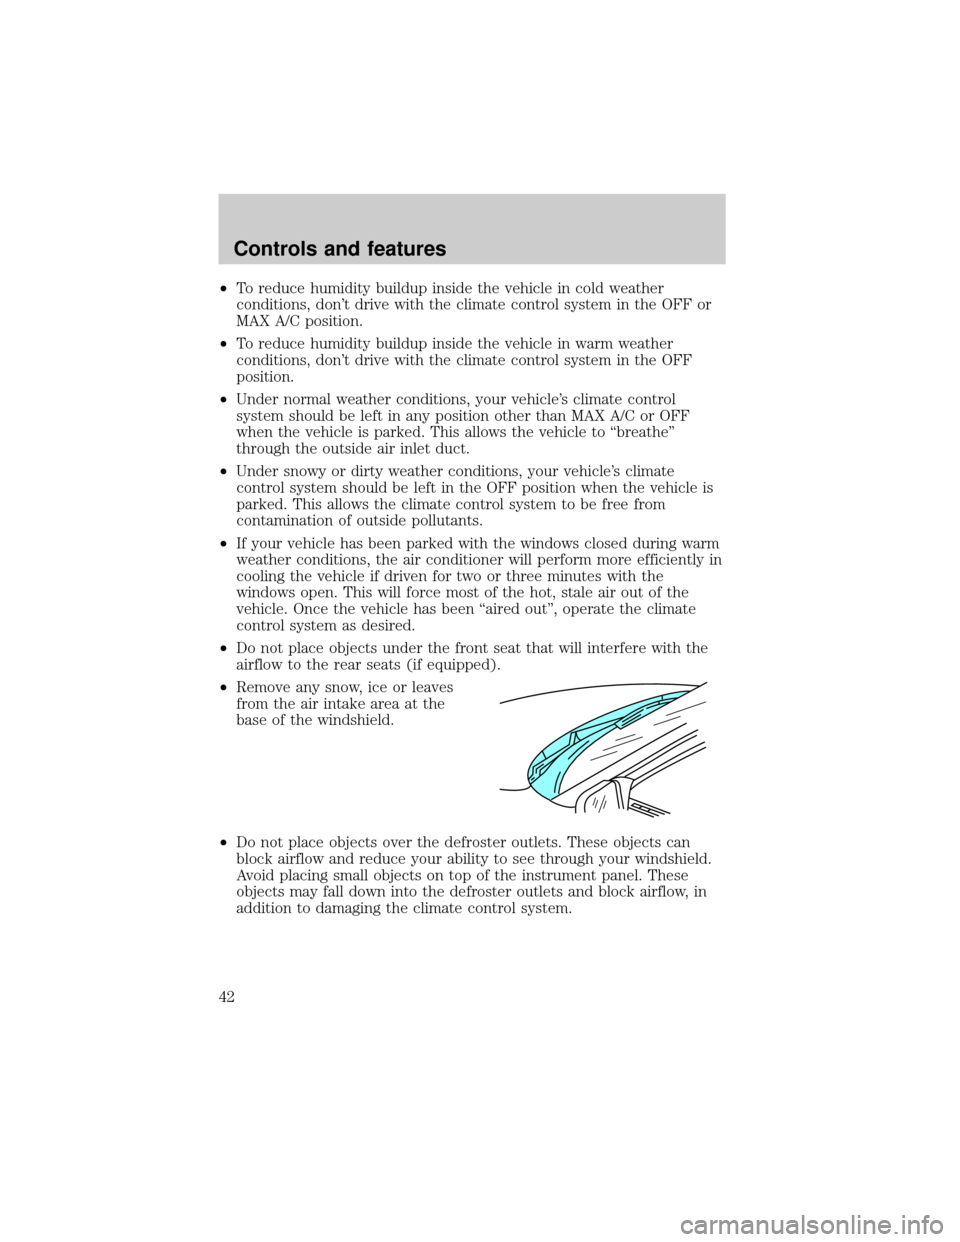
²Remove any snow, ice or leaves
from the air intake area at the
base of the windshield.
²Do not place objects over the defroster outlets. These objects can
block airflow and reduce your ability to see through your windshield.
Avoid placing small objects on top of the instrument panel. These
objects may fall down into the defroster outlets and block airflow, in
addition to damaging the climate control system.
Controls and features
42
Page 43 of 216
To aid in side window defogging/demisting in cold weather conditions:
1. Select
2. Set the temperature control to full heat
3. Set the fan speed to HI
4. Direct the outer panel vents towards to side windows
To increase airflow to the outer panel vents, close the central panel
vents.
Do not place objects on top of the instrument panel, as these
objects may become projectiles in a collision or sudden stop.
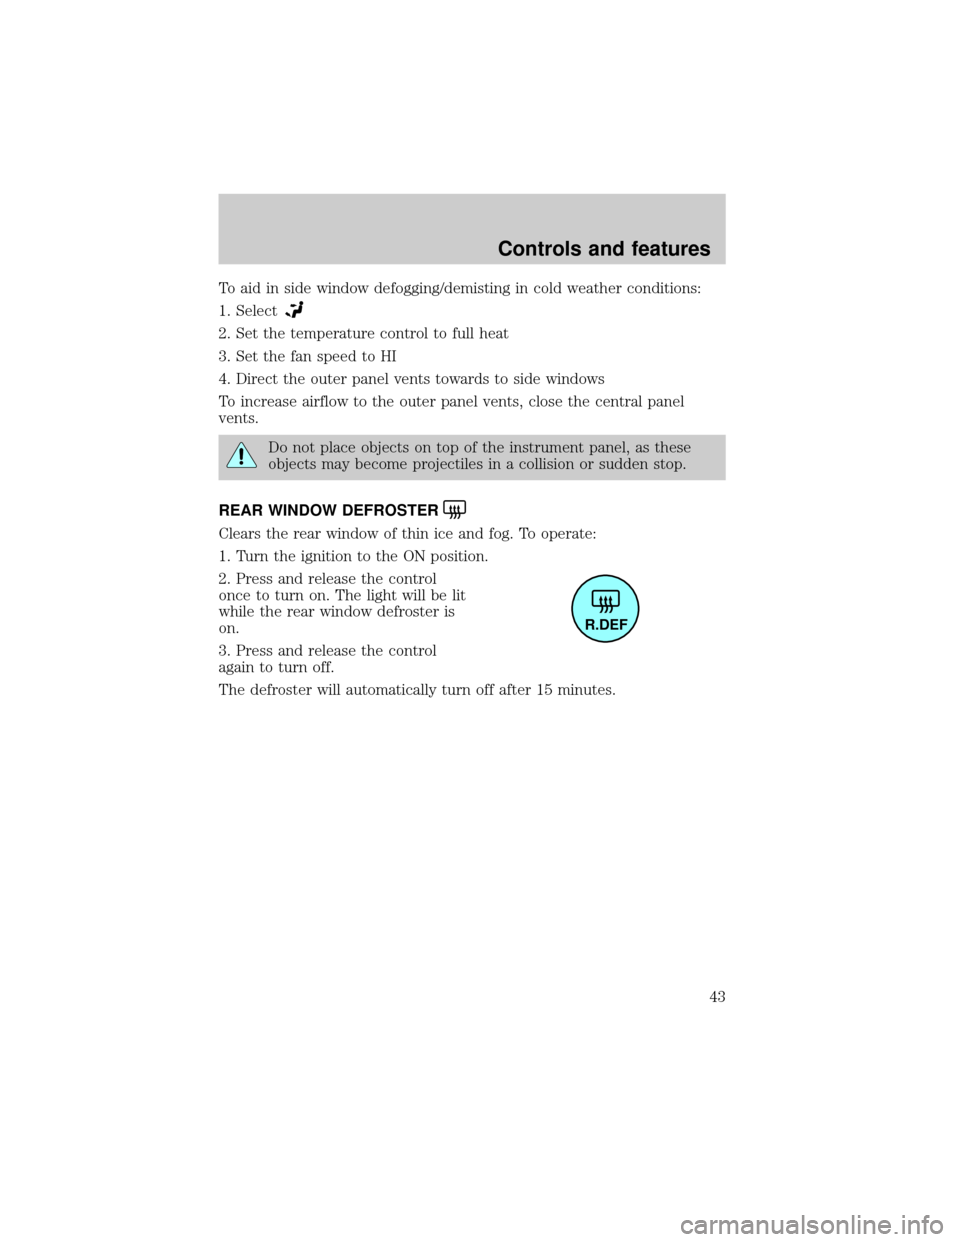
REAR WINDOW DEFROSTER
Clears the rear window of thin ice and fog. To operate:
1. Turn the ignition to the ON position.
2. Press and release the control
once to turn on. The light will be lit
while the rear window defroster is
on.
3. Press and release the control
again to turn off.
The defroster will automatically turn off after 15 minutes.
R.DEF
Controls and features
43
Page 55 of 216
POWER WINDOWS (IF EQUIPPED)
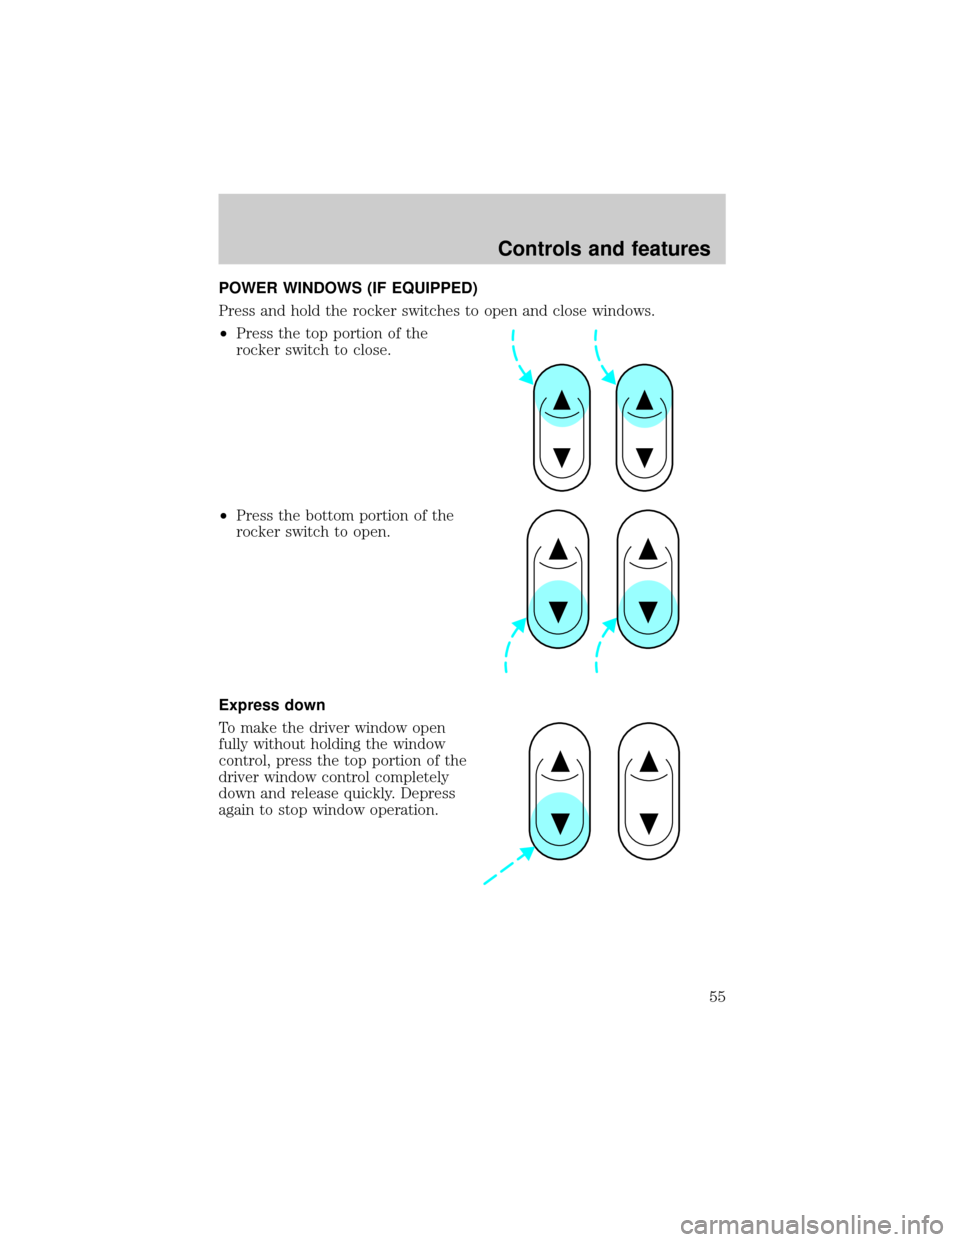
Press and hold the rocker switches to open and close windows.
²Press the top portion of the
rocker switch to close.
²Press the bottom portion of the
rocker switch to open.
Express down
To make the driver window open
fully without holding the window
control, press the top portion of the
driver window control completely
down and release quickly. Depress
again to stop window operation.
Controls and features
55
Page 90 of 216
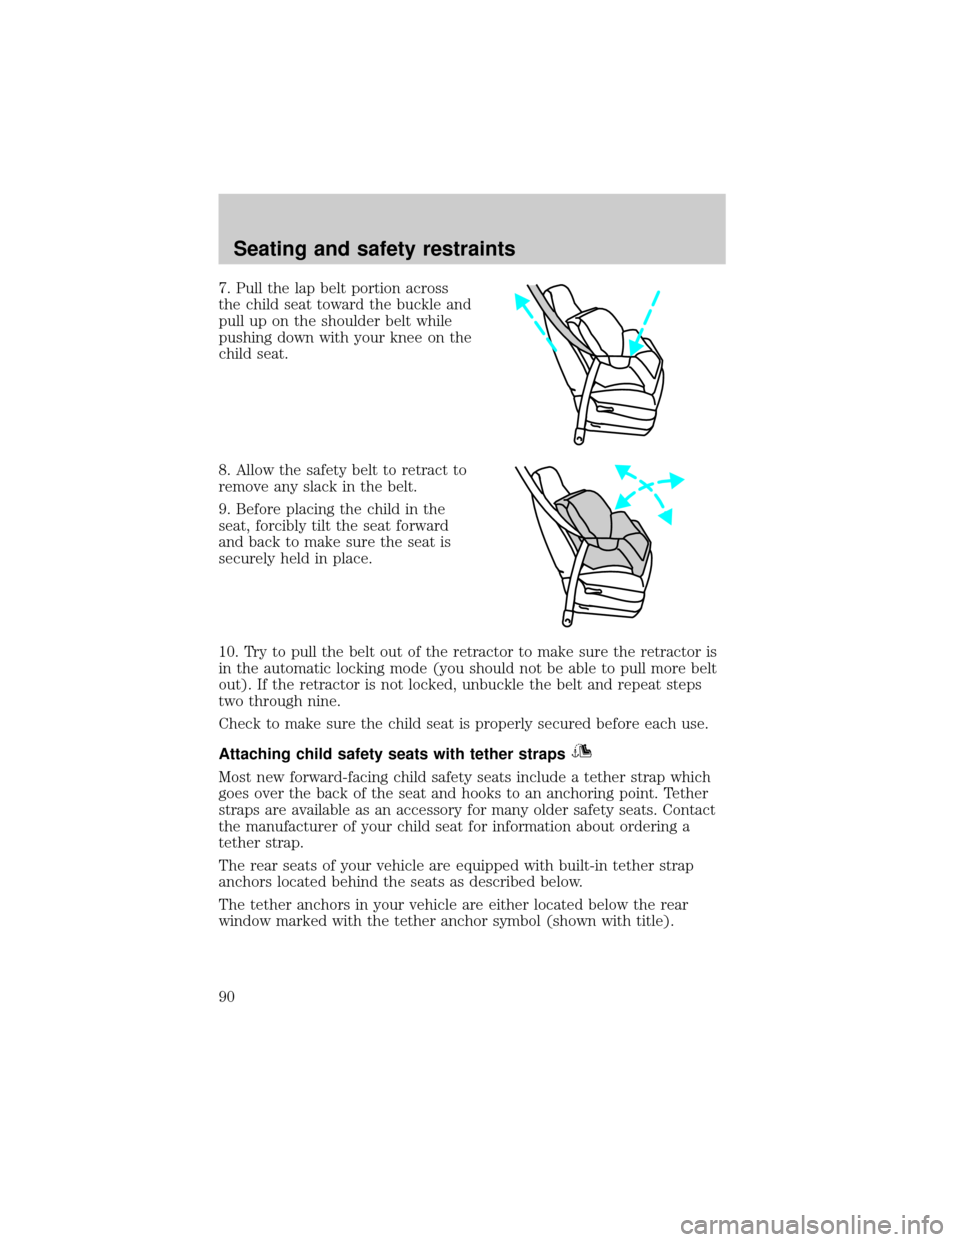
7. Pull the lap belt portion across
the child seat toward the buckle and
pull up on the shoulder belt while
pushing down with your knee on the
child seat.
8. Allow the safety belt to retract to
remove any slack in the belt.
9. Before placing the child in the
seat, forcibly tilt the seat forward
and back to make sure the seat is
securely held in place.
10. Try to pull the belt out of the retractor to make sure the retractor is
in the automatic locking mode (you should not be able to pull more belt
out). If the retractor is not locked, unbuckle the belt and repeat steps
two through nine.
Check to make sure the child seat is properly secured before each use.
Attaching child safety seats with tether straps
Most new forward-facing child safety seats include a tether strap which
goes over the back of the seat and hooks to an anchoring point. Tether
straps are available as an accessory for many older safety seats. Contact
the manufacturer of your child seat for information about ordering a
tether strap.
The rear seats of your vehicle are equipped with built-in tether strap
anchors located behind the seats as described below.
The tether anchors in your vehicle are either located below the rear
window marked with the tether anchor symbol (shown with title).
Seating and safety restraints
90
Page 97 of 216
Guarding against exhaust fumes
Although odorless and colorless, carbon monoxide is present in exhaust
fumes. Take precautions to avoid its dangerous effects.
If you ever smell exhaust fumes of any kind inside your vehicle,
have your dealer inspect and fix your vehicle immediately. Do
not drive if you smell exhaust fumes. These fumes are harmful and
could kill you.
Have the exhaust and body ventilation systems checked whenever:
²the vehicle is raised for service
²the sound of the exhaust system changes
²the vehicle has been damaged in a collision
WARNING:Engine exhaust, some of its constituents, and
certain vehicle components contain or emit chemicals known to
the State of California to cause cancer and birth defects or other
reproductive harm. In addition, certain fluids contained in vehicles and
certain products of component wear contain or emit chemicals known
to the State of California to cause cancer and birth defects or other
reproductive harm.
Important ventilating information
If the engine is idling while the vehicle is stopped in an open area for
long periods of time, open the windows at least 2.5 cm (one inch).
Adjust the heating or air conditioning (if equipped) to bring in fresh air.
Improve vehicle ventilation by keeping all air inlet vents clear of snow,
leaves and other debris.
Starting
97
Page 119 of 216
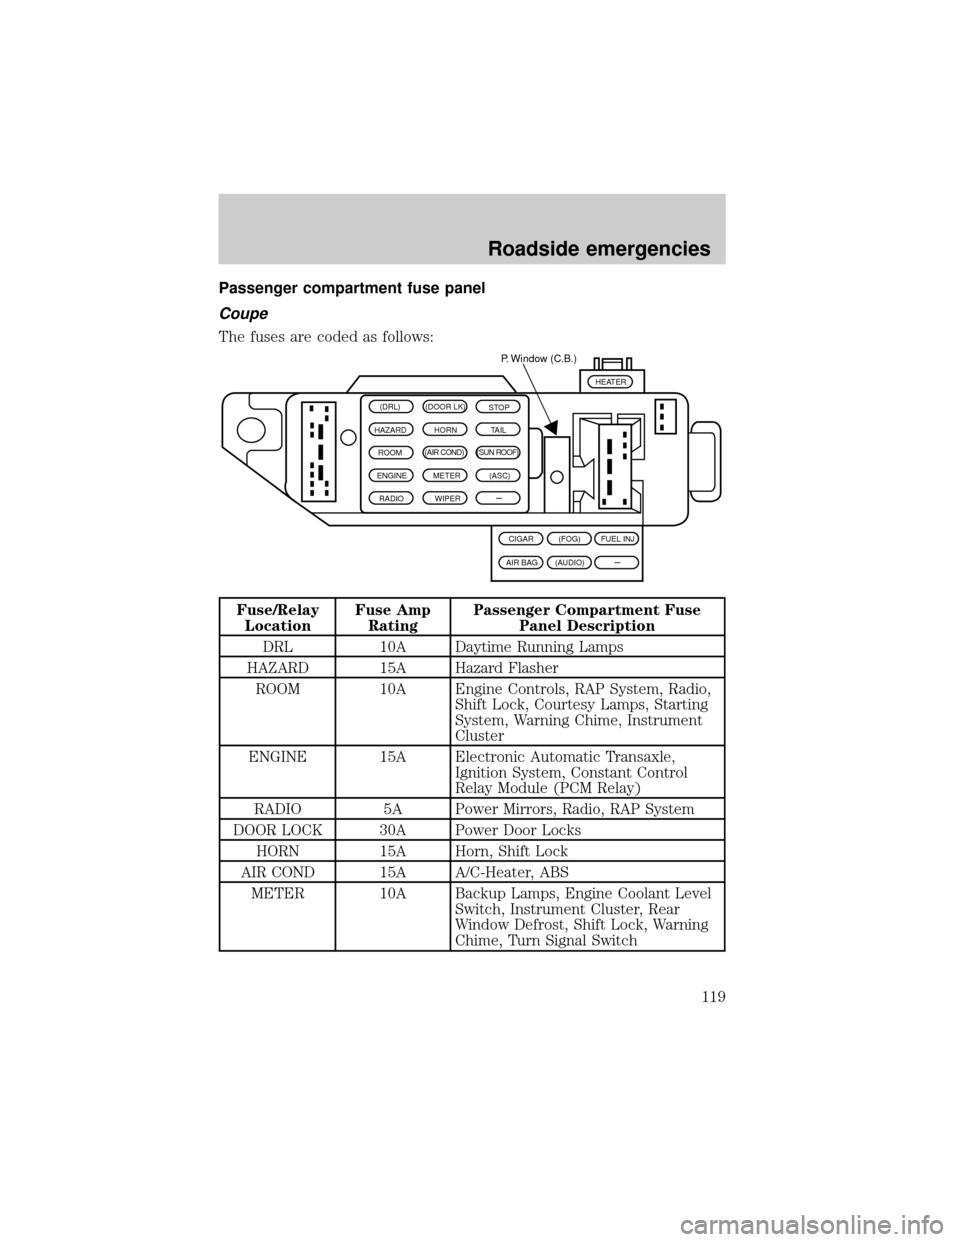
Passenger compartment fuse panel
Coupe
The fuses are coded as follows:
Fuse/Relay
LocationFuse Amp
RatingPassenger Compartment Fuse
Panel Description
DRL 10A Daytime Running Lamps
HAZARD 15A Hazard Flasher
ROOM 10A Engine Controls, RAP System, Radio,
Shift Lock, Courtesy Lamps, Starting
System, Warning Chime, Instrument
Cluster
ENGINE 15A Electronic Automatic Transaxle,
Ignition System, Constant Control
Relay Module (PCM Relay)
RADIO 5A Power Mirrors, Radio, RAP System
DOOR LOCK 30A Power Door Locks
HORN 15A Horn, Shift Lock
AIR COND 15A A/C-Heater, ABS
METER 10A Backup Lamps, Engine Coolant Level
Switch, Instrument Cluster, Rear
Window Defrost, Shift Lock, Warning
Chime, Turn Signal Switch
(DRL) (DOOR LK)
STOP
HAZARD HORN
TAIL
ROOM(AIR COND) (SUN ROOF)
ENGINE METER(ASC)
RADIO
WIPER
–P. Window (C.B.)
(FOG) CIGAR
(AUDIO)
AIR BAGFUEL INJ
HEATER
–
Roadside emergencies
119
Page 120 of 216
Fuse/Relay
LocationFuse Amp
RatingPassenger Compartment Fuse
Panel Description
WIPER 20A Wiper/Washer, Blower Motor Relay
STOP 20A Stop Lamps, Brake Pressure Switch
TAIL 15A Exterior Lamps, Instrument
Illumination
SUN ROOF 15A Power Moonroof
ASC 10A Speed Control
P. WINDOW 30A CB Power Windows
CIGAR 20A Cigar Lighter
AIR BAG 10A Air Bags
FOG 10A Fog Lamps, Daytime Running Lamps
(DRL)
AUDIO 15A Premium Sound Amplifier, CD
Changer
FUEL INJ. 10A H02S, Evaporative Emission Purge
Flow Sensor
BLOWER 30A CB Blower Motor Relay
Roadside emergencies
120
Page 121 of 216
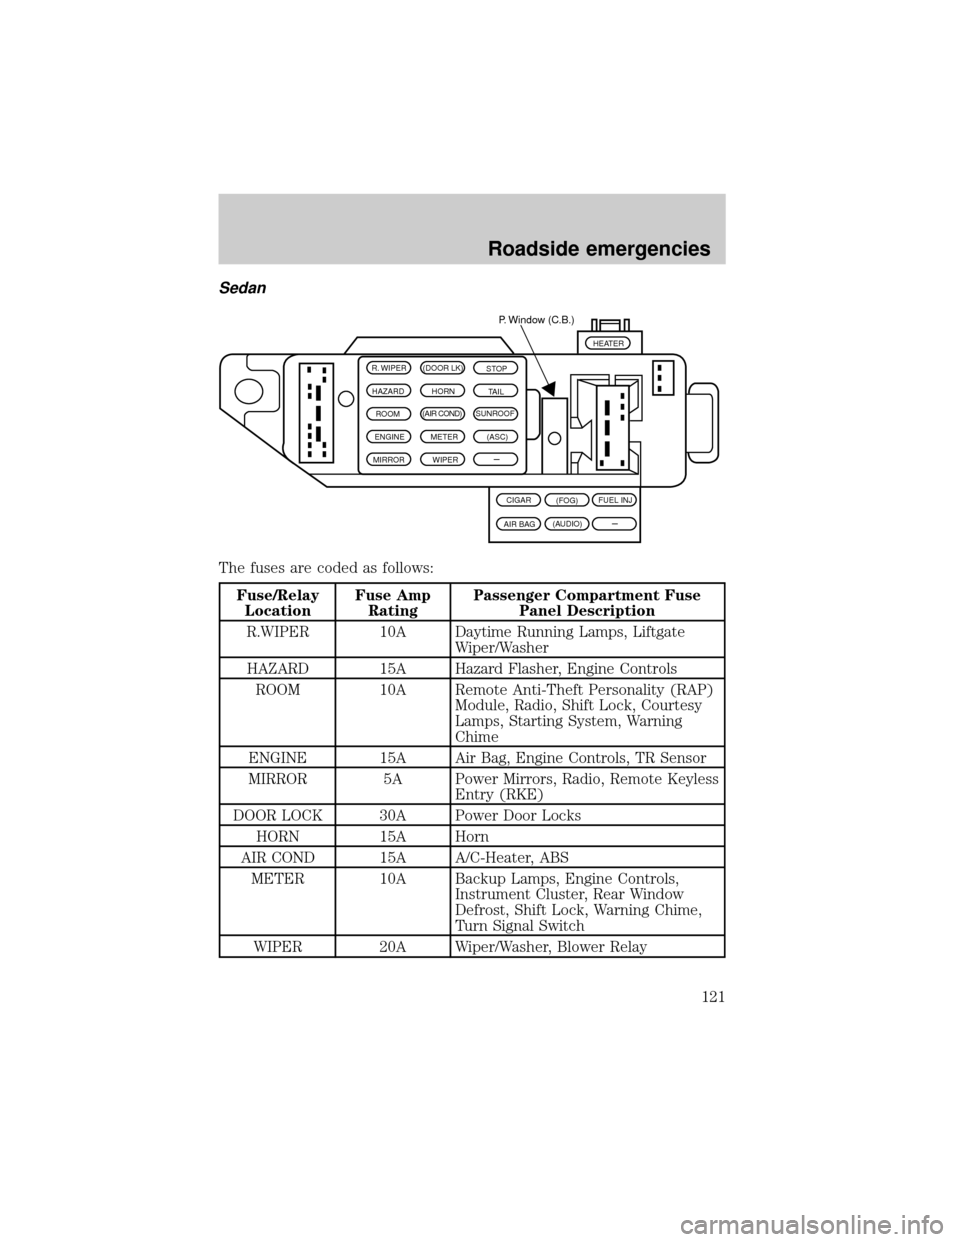
Sedan
The fuses are coded as follows:
Fuse/Relay
LocationFuse Amp
RatingPassenger Compartment Fuse
Panel Description
R.WIPER 10A Daytime Running Lamps, Liftgate
Wiper/Washer
HAZARD 15A Hazard Flasher, Engine Controls
ROOM 10A Remote Anti-Theft Personality (RAP)
Module, Radio, Shift Lock, Courtesy
Lamps, Starting System, Warning
Chime
ENGINE 15A Air Bag, Engine Controls, TR Sensor
MIRROR 5A Power Mirrors, Radio, Remote Keyless
Entry (RKE)
DOOR LOCK 30A Power Door Locks
HORN 15A Horn
AIR COND 15A A/C-Heater, ABS
METER 10A Backup Lamps, Engine Controls,
Instrument Cluster, Rear Window
Defrost, Shift Lock, Warning Chime,
Turn Signal Switch
WIPER 20A Wiper/Washer, Blower Relay
R. WIPER (DOOR LK)
STOP
HAZARD HORN
TAIL
ROOM(AIR COND)SUNROOF
ENGINE METER(ASC)
MIRROR
WIPER
–P. Window (C.B.)
(FOG) CIGAR
(AUDIO)
AIR BAGFUEL INJ
HEATER
–
Roadside emergencies
121
Page 122 of 216
Fuse/Relay
LocationFuse Amp
RatingPassenger Compartment Fuse
Panel Description
STOP 15A Stop Lamps
TAIL 15A Exterior Lamps, Instrument
Illumination
SUN ROOF 15A Power Moonroof
ASC 10A Speed Control
CIGAR 20A Cigar Lighter
AIR BAG 10A Joint Connector, Air Bag Diagnostic
Monitor
FOG 10A Fog Lamps, Daytime Running Lamps
(DRL)
AUDIO 15A Radio
FUEL
INJECTOR10A HO2S, Evaporative Emission Purge
Flow Sensor
P. WINDOW 30A CB Power Windows
BLOWER 30A CB A/C-Heater
Power distribution box
The power distribution box is located in the engine compartment. The
power distribution box contains high-current fuses that protect your
vehicle's main electrical systems from overloads.
Always disconnect the battery before servicing high current
fuses.
Always replace the cover to the Power Distribution Box before
reconnecting the battery or refilling fluid reservoirs.
If the battery has been disconnected and reconnected, refer to the
Batterysection of theMaintenance and carechapter.
Roadside emergencies
122