fog light FORD ESCORT 2003 6.G Owners Manual
[x] Cancel search | Manufacturer: FORD, Model Year: 2003, Model line: ESCORT, Model: FORD ESCORT 2003 6.GPages: 184, PDF Size: 1.28 MB
Page 8 of 184
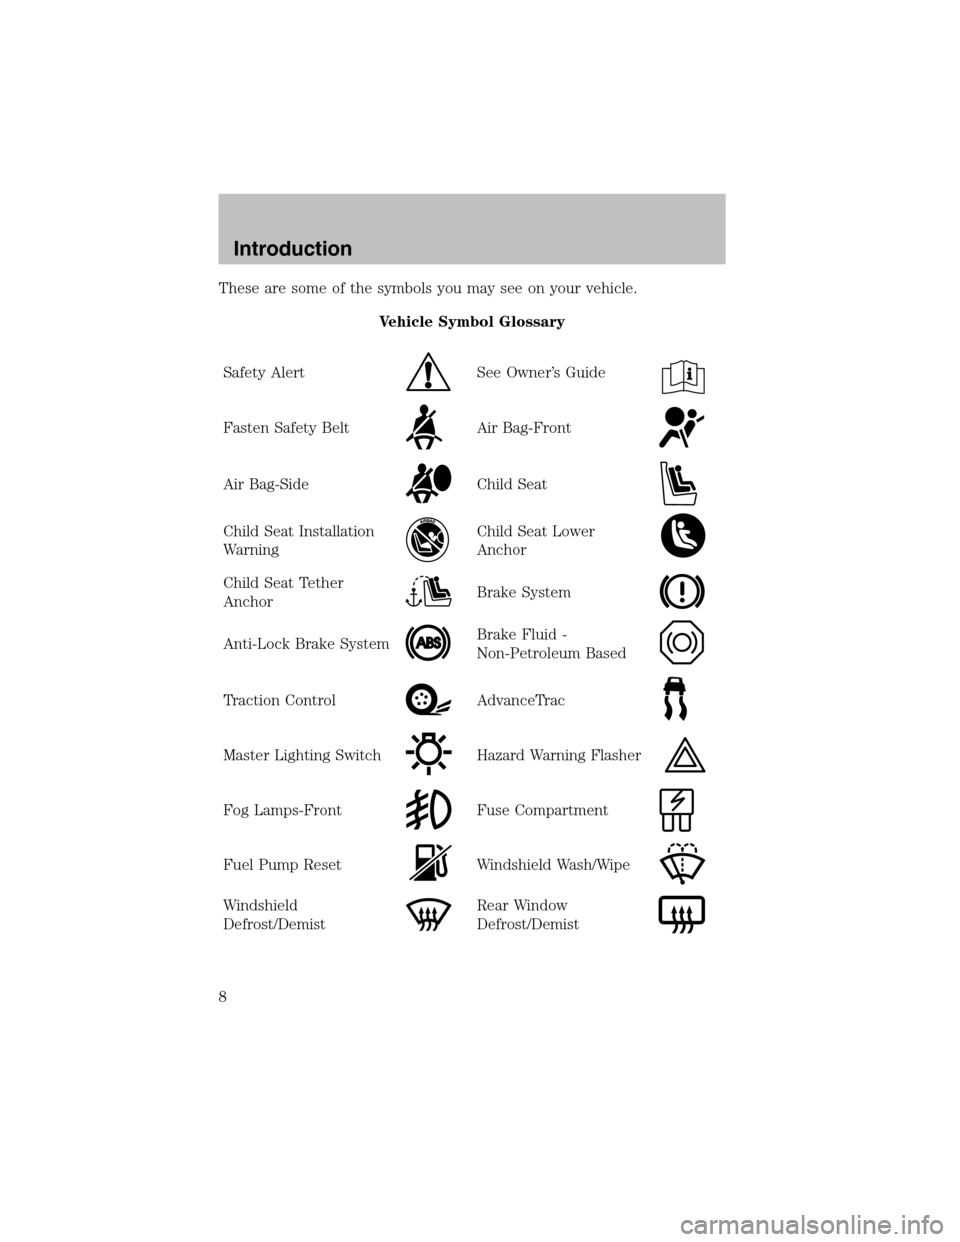
These are some of the symbols you may see on your vehicle.
Vehicle Symbol Glossary
Safety Alert
See Owner’s Guide
Fasten Safety BeltAir Bag-Front
Air Bag-SideChild Seat
Child Seat Installation
WarningChild Seat Lower
Anchor
Child Seat Tether
AnchorBrake System
Anti-Lock Brake SystemBrake Fluid -
Non-PetroleumBased
Traction ControlAdvanceTrac
Master Lighting SwitchHazard Warning Flasher
Fog Lamps-FrontFuse Compartment
Fuel Pump ResetWindshield Wash/Wipe
Windshield
Defrost/DemistRear Window
Defrost/Demist
Introduction
8
Page 31 of 184

•(Floor) – Distributes outside air through the floor ducts.
However, the air will not be cooled below the outside temperature
because the air conditioning does not operate in this mode.
•
(Floor and defrost) – Distributes outside air through the
windshield defroster ducts and the floor ducts. Heating and air
conditioning capabilities are provided in this mode. For added
customer comfort, the air distributed through the floor ducts will be
slightly warmer than the air sent to the windshield defroster ducts. If
the temperature is about 6°C (43°F) or higher, the air conditioner will
automatically dehumidify the air to reduce fogging.
•
(Defrost) – Distributes outside air through the windshield
defroster ducts. It can be used to clear ice or fog fromthe windshield.
If the temperature is about 6°C (43°F) or higher, the air conditioner
will automatically dehumidify the air to reduce fogging.
Operating tips
•In humid weather conditions, place the climate control system in
Defrost mode before driving. This will reduce fogging on your
windshield. Once the windshield has been cleared, operate the climate
control systemas desired.
•To reduce humidity buildup inside the vehicle in cold weather
conditions, don’t drive with the climate control system in the OFF or
MAX A/C position.
•To reduce humidity buildup inside the vehicle in warm weather
conditions, don’t drive with the climate control system in the OFF
position.
•Under normal weather conditions, your vehicle’s climate control
systemshould be left in any position other than the MAX A/C or OFF
when the vehicle is parked. This allows the vehicle to “breathe”
through the outside air inlet duct.
•Under snowy or dirty weather conditions, your vehicle’s climate
control systemshould be left in the OFF position when the vehicle is
parked. This allows the climate control system to be free from
contamination of outside pollutants.
•If your vehicle has been parked with the windows closed during warm
weather conditions, the air conditioner will performmore efficiently in
cooling the vehicle if driven for two or three minutes with the
windows open. This will force most of the hot, stale air out of the
vehicle. Once the vehicle has been “aired out”, operate the climate
control systemas desired.
Climate Controls
31
Page 32 of 184
•Do not put objects under the front seat which may interfere with the
airflow to the rear seats.
•Remove any snow, ice or leaves from the air intake area (at the
bottomof the windshield and underneath the hood).
•Do not place objects over the defroster outlets. These objects can
block airflow and reduce visibility through your windshield. Avoid
placing small objects on top of the instrument panel. These objects
may fall down into the defroster outlets and block airflow, in addition
to, damaging the climate control system.
To aid in side window defogging/demisting in cold weather conditions:
1. Select the position that distributes air through the Panel and Floor.
2. Set the temperature control to full heat.
3. Set the fan speed to full fan.
4. Direct the outer panel vents towards the side windows.
5. To increase airflow to the outer panel vents, close the central panel
vents.
Do not place objects on top of the instrument panel as these
objects may become projectiles in a collision or sudden stop.
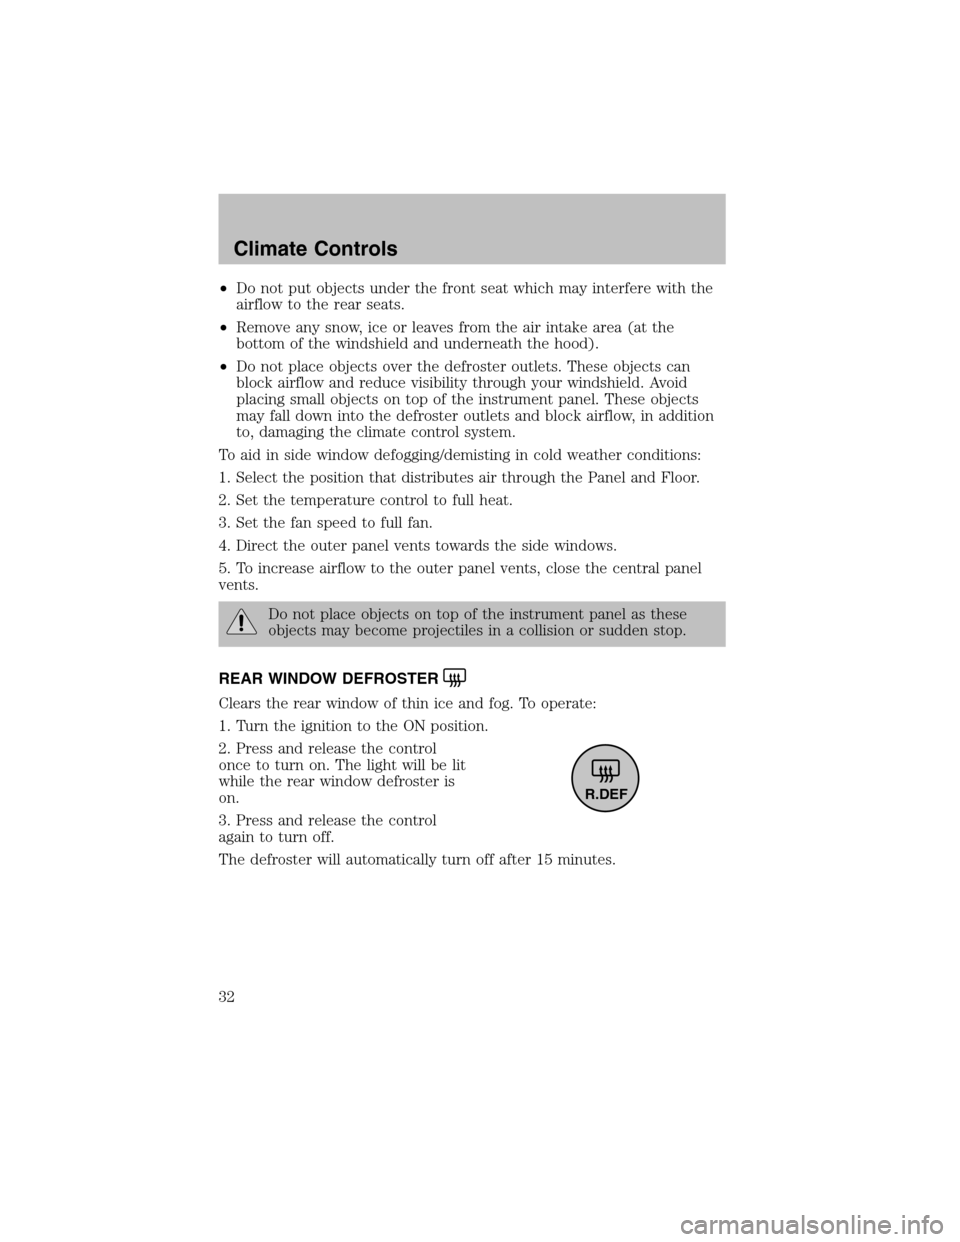
REAR WINDOW DEFROSTER
Clears the rear window of thin ice and fog. To operate:
1. Turn the ignition to the ON position.
2. Press and release the control
once to turn on. The light will be lit
while the rear window defroster is
on.
3. Press and release the control
again to turn off.
The defroster will automatically turn off after 15 minutes.
R.DEF
Climate Controls
32
Page 33 of 184
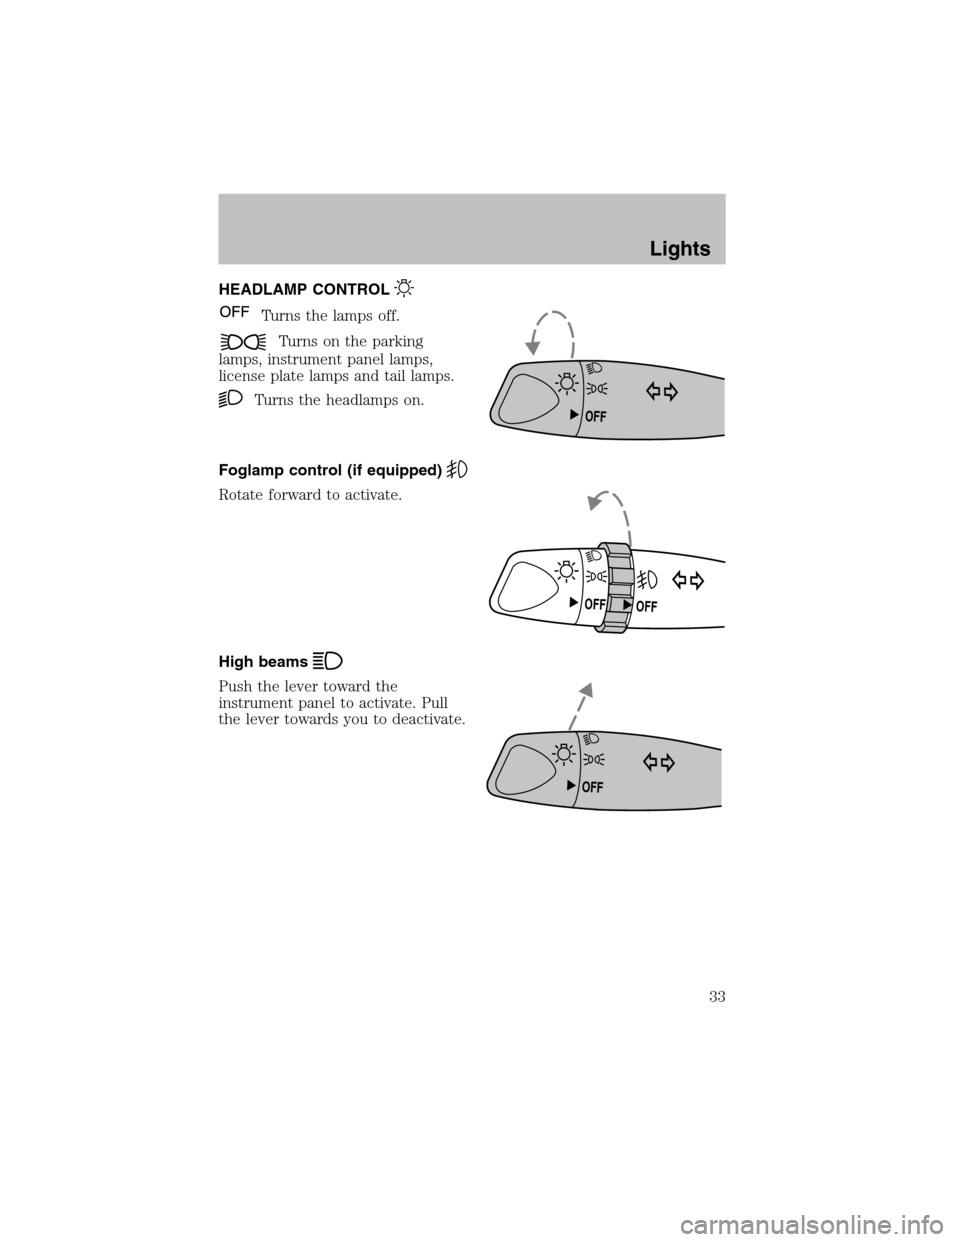
HEADLAMP CONTROL
Turns the lamps off.
Turns on the parking
lamps, instrument panel lamps,
license plate lamps and tail lamps.
Turns the headlamps on.
Foglamp control (if equipped)
Rotate forward to activate.
High beams
Push the lever toward the
instrument panel to activate. Pull
the lever towards you to deactivate.
OFF
OFF OFF
OFF
Lights
33
Page 38 of 184
Function Trade Number
Front park/turn lamps 3157K
Foglamps (if equipped) 881
Headlamps-aero high and low beam 9007
Rear license plate lamps 168
High-mount brake lamp 921
Backup lamps 3156K
Brake lamps 3157K
Interior overhead lamp 12V/10W
All replacement bulbs are clear in color except where noted.
To replace all instrument panel lights - see your dealer
INTERIOR BULBS
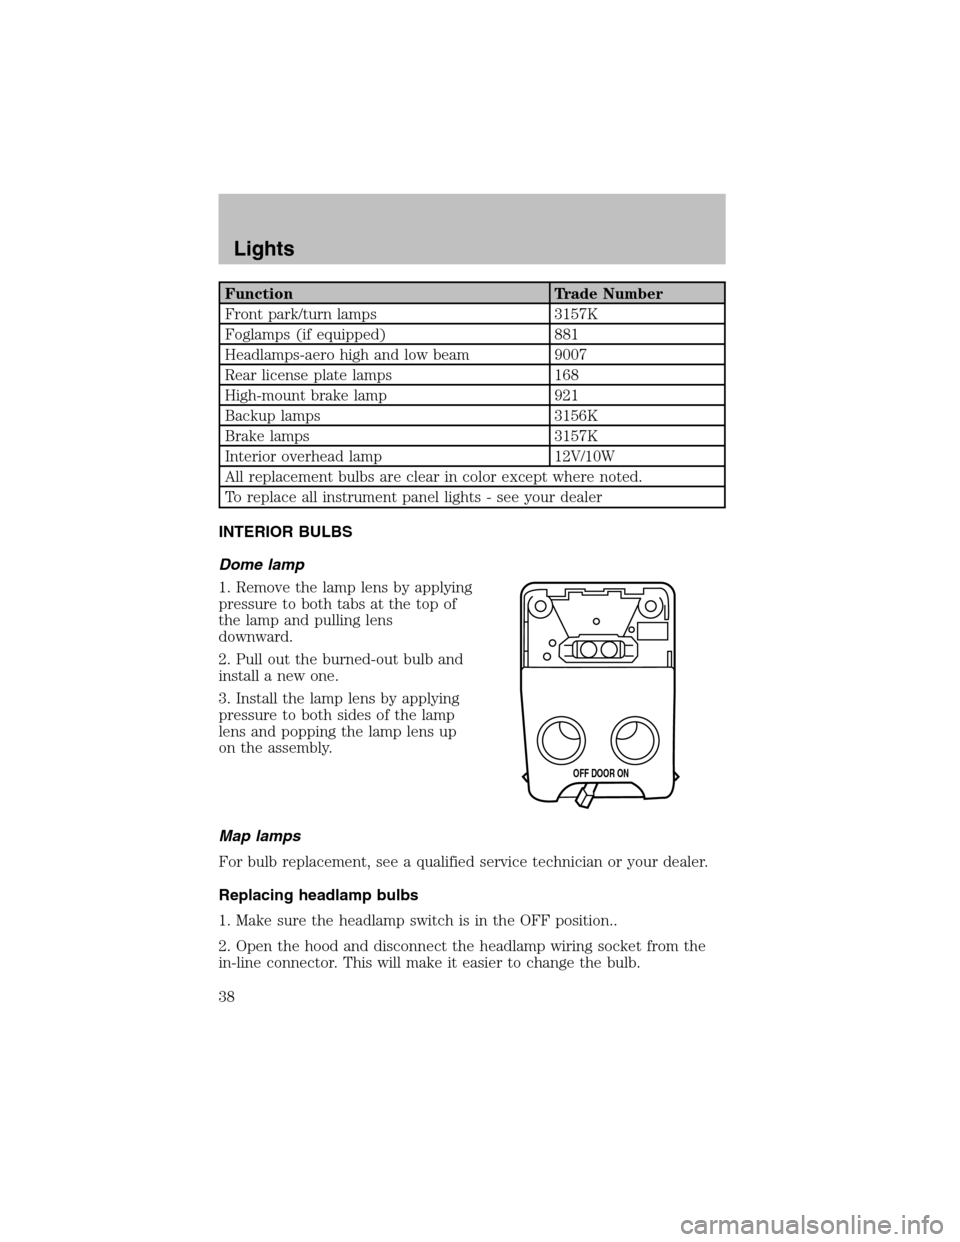
Dome lamp
1. Remove the lamp lens by applying
pressure to both tabs at the top of
the lamp and pulling lens
downward.
2. Pull out the burned-out bulb and
install a new one.
3. Install the lamp lens by applying
pressure to both sides of the lamp
lens and popping the lamp lens up
on the assembly.
Map lamps
For bulb replacement, see a qualified service technician or your dealer.
Replacing headlamp bulbs
1. Make sure the headlamp switch is in the OFF position..
2. Open the hood and disconnect the headlamp wiring socket from the
in-line connector. This will make it easier to change the bulb.
OFF DOOR ON
Lights
38
Page 40 of 184
12. Turn the headlamps on and make sure they work properly. If the
headlamp was correctly aligned before you changed the bulb, you should
not need to align it again.
Replacing front parking lamp/turn signal bulbs
1. Make sure the headlamp switch is in the OFF position.
2. Open the hood and disconnect the headlamp wiring socket from the
in-line connector. This will make it easier to change the bulb.
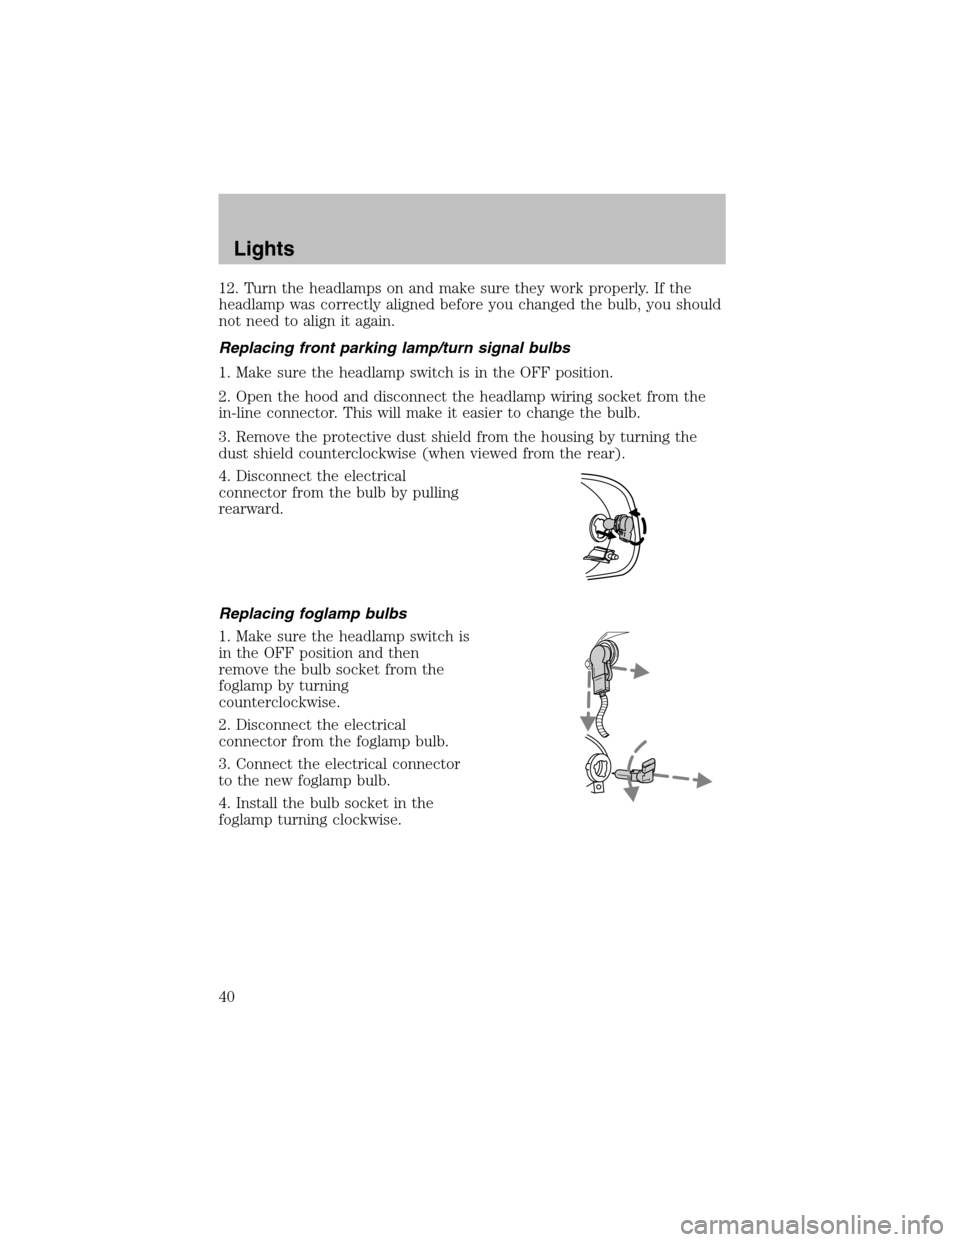
3. Remove the protective dust shield from the housing by turning the
dust shield counterclockwise (when viewed fromthe rear).
4. Disconnect the electrical
connector fromthe bulb by pulling
rearward.
Replacing foglamp bulbs
1. Make sure the headlamp switch is
in the OFF position and then
remove the bulb socket from the
foglamp by turning
counterclockwise.
2. Disconnect the electrical
connector fromthe foglamp bulb.
3. Connect the electrical connector
to the new foglamp bulb.
4. Install the bulb socket in the
foglamp turning clockwise.
Lights
40
Page 108 of 184
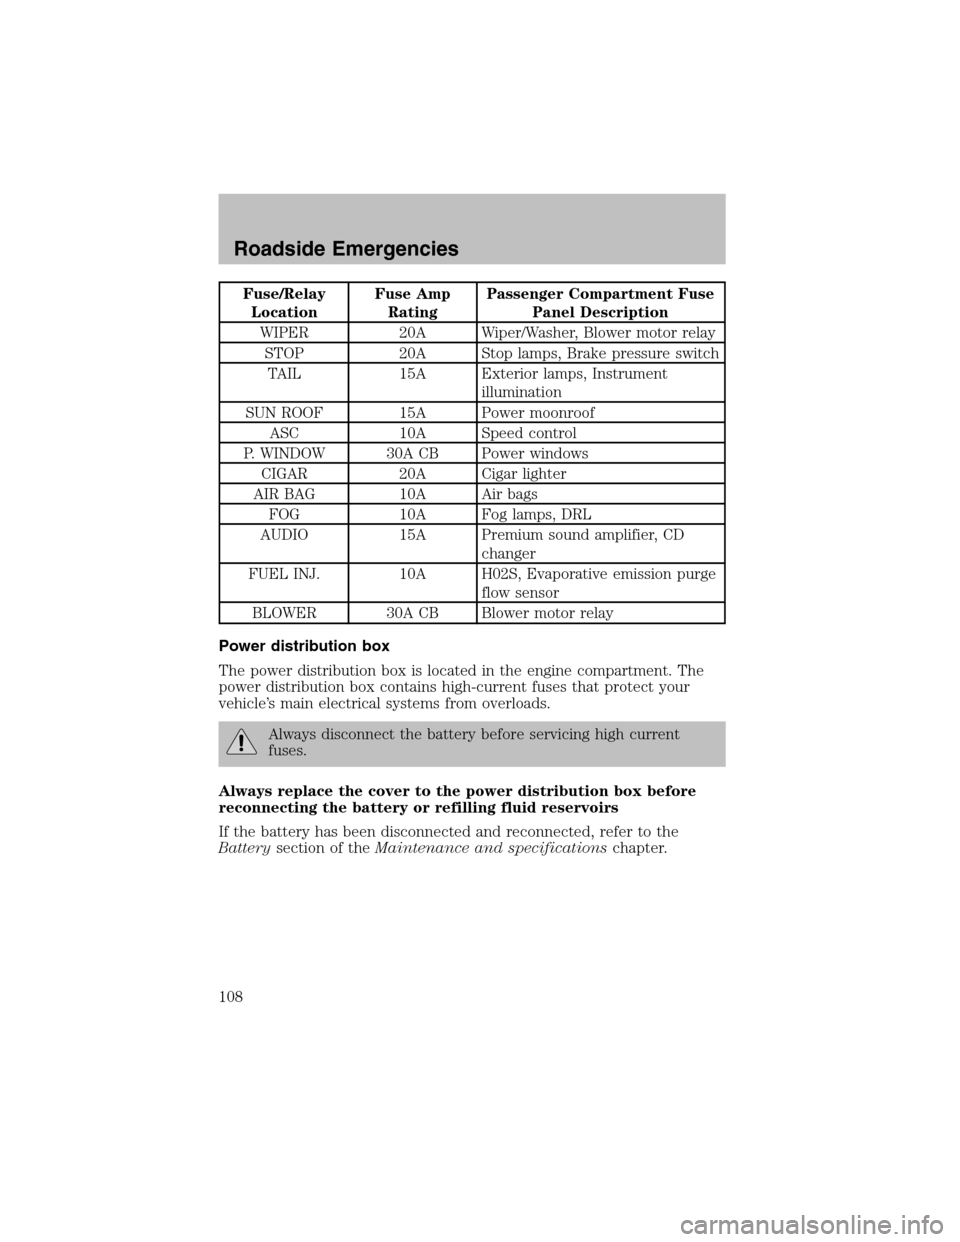
Fuse/Relay
LocationFuse Amp
RatingPassenger Compartment Fuse
Panel Description
WIPER 20A Wiper/Washer, Blower motor relay
STOP 20A Stop lamps, Brake pressure switch
TAIL 15A Exterior lamps, Instrument
illumination
SUN ROOF 15A Power moonroof
ASC 10A Speed control
P. WINDOW 30A CB Power windows
CIGAR 20A Cigar lighter
AIR BAG 10A Air bags
FOG 10A Fog lamps, DRL
AUDIO 15A Premium sound amplifier, CD
changer
FUEL INJ. 10A H02S, Evaporative emission purge
flow sensor
BLOWER 30A CB Blower motor relay
Power distribution box
The power distribution box is located in the engine compartment. The
power distribution box contains high-current fuses that protect your
vehicle’s main electrical systems from overloads.
Always disconnect the battery before servicing high current
fuses.
Always replace the cover to the power distribution box before
reconnecting the battery or refilling fluid reservoirs
If the battery has been disconnected and reconnected, refer to the
Batterysection of theMaintenance and specificationschapter.
Roadside Emergencies
108
Page 182 of 184

cargo lamps ...............................34
fog lamps ...................................33
headlamps ...........................33, 38
headlamps, flash to pass ..........34
instrument panel, dimming .....34
interior lamps .....................37–38
replacing bulbs .............37, 40–42
Lane change indicator
(see Turn signal) ........................36
Lights, warning and indicator ....10
anti-lock brakes (ABS) ............90
Load limits ...................................99
GAWR ........................................99
GVWR ........................................99
trailer towing ............................99
Lubricant specifications ...171–172
M
Manual transaxle
fluid capacities ........................170
lubricant specifications ..........172
Manual transmission ...................97
reverse .......................................98
Mirrors
side view mirrors (power) .......45
Moon roof ....................................48
Motorcraft parts ................155, 169
O
Octane rating ............................154
Oil (see Engine oil) ..................141
P
Parking brake ..............................90
Parts (see Motorcraft parts) ....169Power distribution box
(see Fuses) ...............................108
Power door locks ........................51
Power steering ............................91
fluid, checking and adding ....160
fluid, refill capacity ................170
fluid, specifications .........171–172
Power Windows ...........................44
R
Radio ............................................19
Rear window defroster ...............32
Relays ................................105, 110
Remote entry system .................53
locking/unlocking doors ...........51
opening the trunk .....................54
Roadside assistance ..................103
S
Safety belts
(see Safety restraints) .........60–63
Safety defects, reporting ..........129
Safety restraints ....................60–63
belt minder ...............................65
cleaning the safety belts ..........68
extension assembly ..................64
for adults .............................61–63
for children .........................73–74
warning light and chime ..........64
Safety seats for children ............76
Seat belts (see Safety
restraints) ....................................60
Seats ............................................58
child safety seats ......................76
Servicing your vehicle ..............136
Index
182