fuse FORD ESCORT 2003 7.G Owners Manual
[x] Cancel search | Manufacturer: FORD, Model Year: 2003, Model line: ESCORT, Model: FORD ESCORT 2003 7.GPages: 184, PDF Size: 1.28 MB
Page 2 of 184
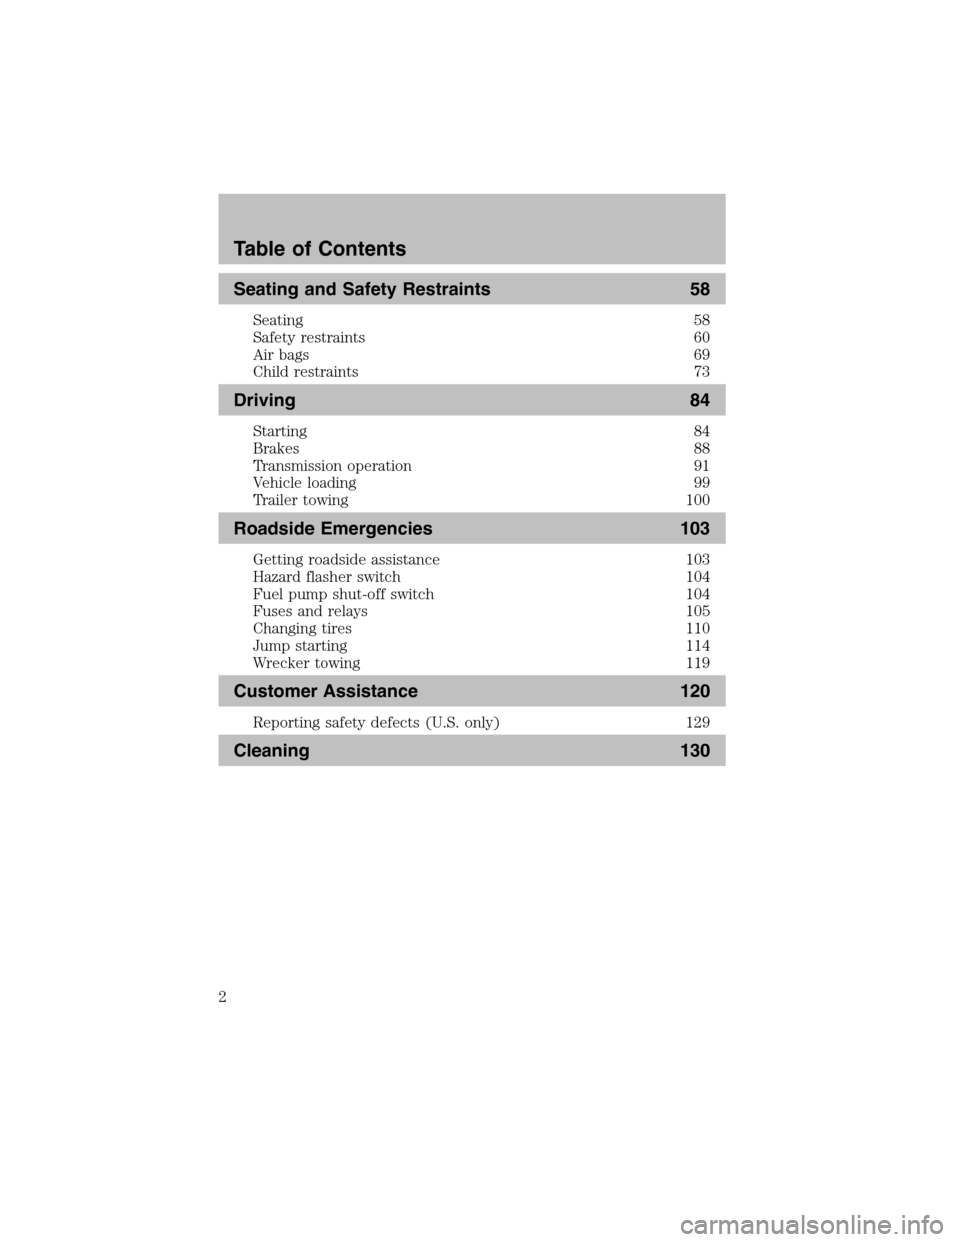
Seating and Safety Restraints 58
Seating 58
Safety restraints 60
Air bags 69
Child restraints 73
Driving 84
Starting 84
Brakes 88
Transmission operation 91
Vehicle loading 99
Trailer towing 100
Roadside Emergencies 103
Getting roadside assistance 103
Hazard flasher switch 104
Fuel pump shut-off switch 104
Fuses and relays 105
Changing tires 110
Jump starting 114
Wrecker towing 119
Customer Assistance 120
Reporting safety defects (U.S. only) 129
Cleaning 130
Table of Contents
2
Page 8 of 184
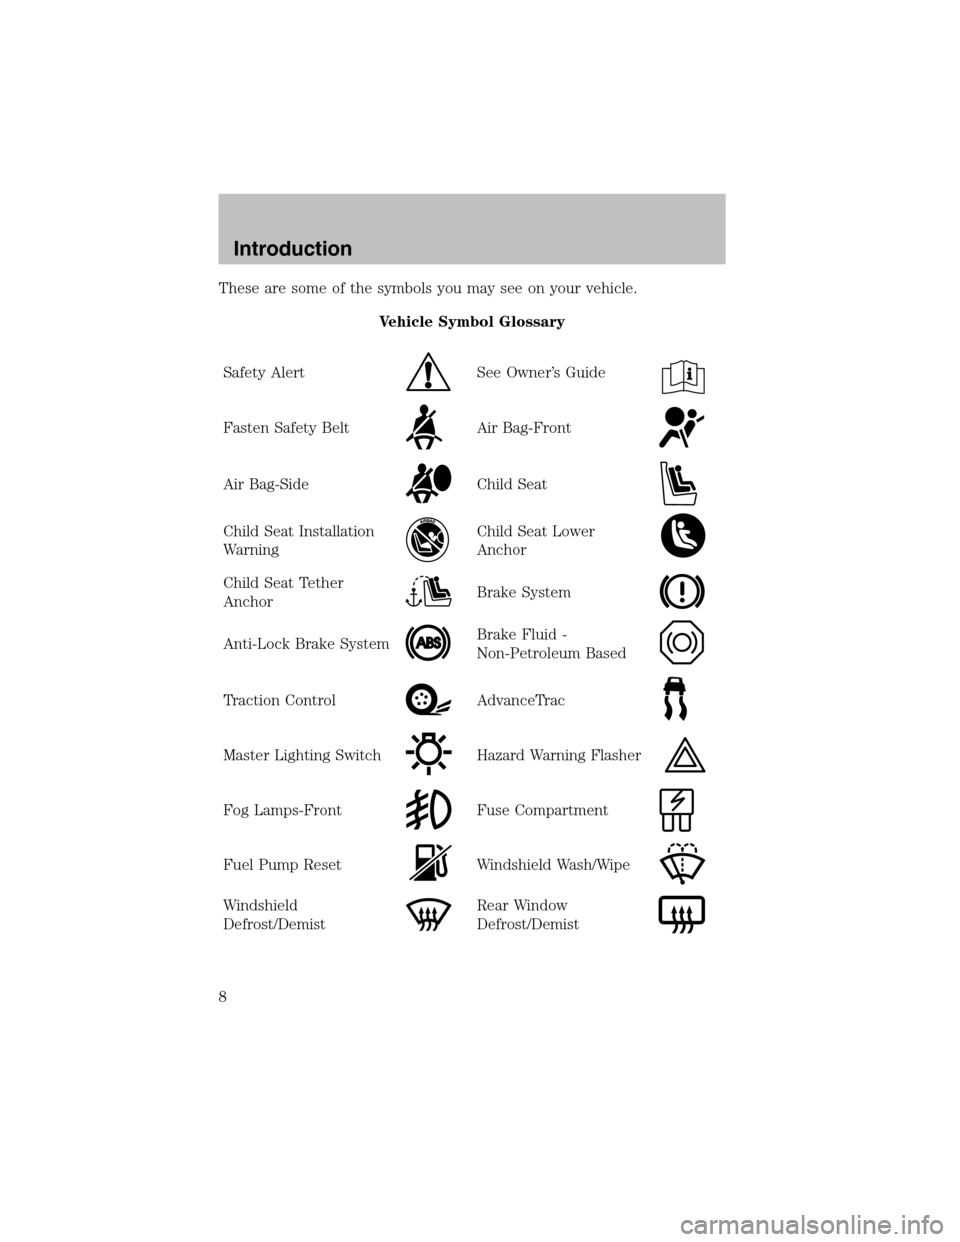
These are some of the symbols you may see on your vehicle.
Vehicle Symbol Glossary
Safety Alert
See Owner’s Guide
Fasten Safety BeltAir Bag-Front
Air Bag-SideChild Seat
Child Seat Installation
WarningChild Seat Lower
Anchor
Child Seat Tether
AnchorBrake System
Anti-Lock Brake SystemBrake Fluid -
Non-PetroleumBased
Traction ControlAdvanceTrac
Master Lighting SwitchHazard Warning Flasher
Fog Lamps-FrontFuse Compartment
Fuel Pump ResetWindshield Wash/Wipe
Windshield
Defrost/DemistRear Window
Defrost/Demist
Introduction
8
Page 24 of 184
Starting auto memory tuning
1. Select a frequency using the AM/FM control.
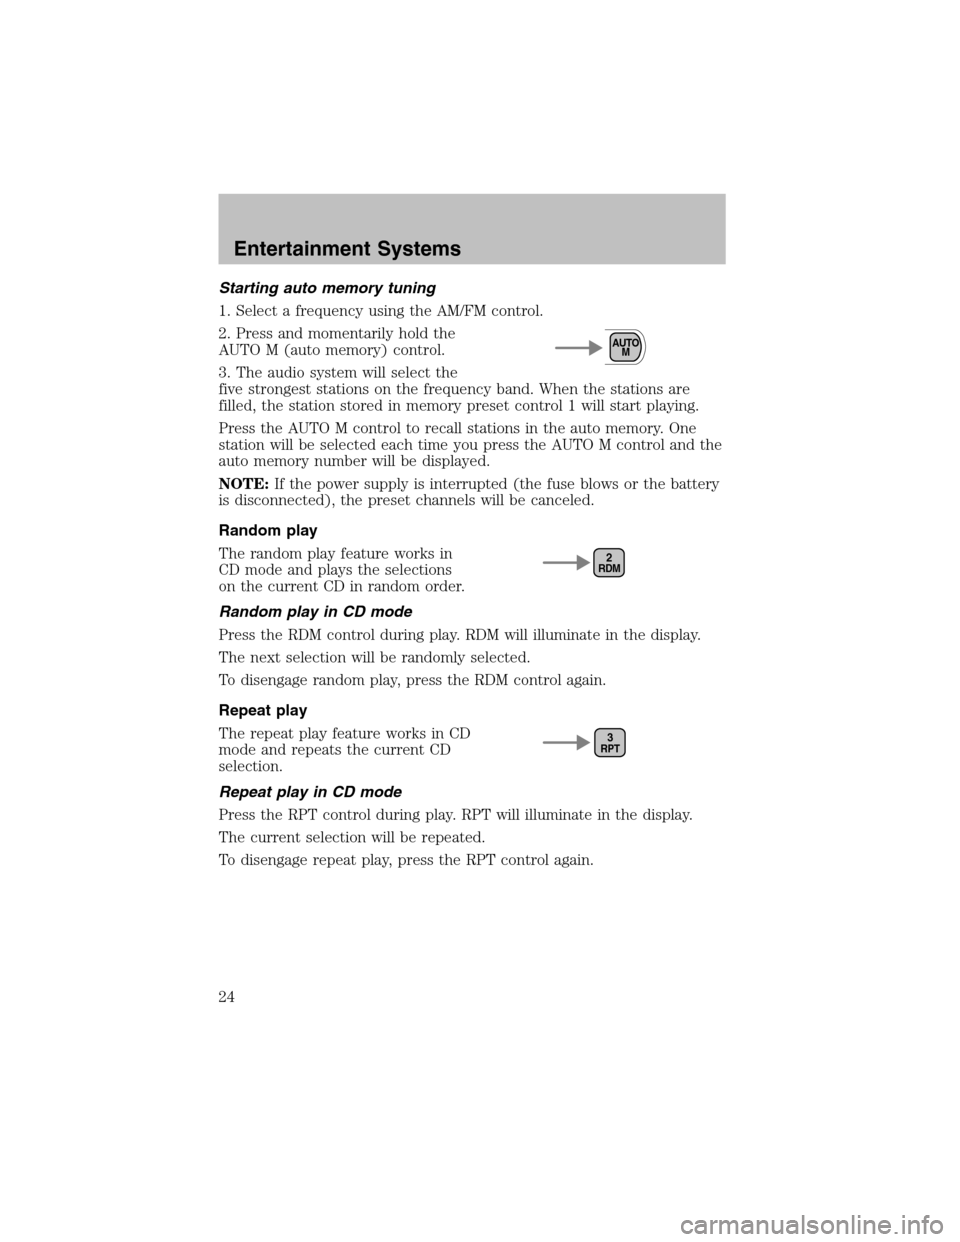
2. Press and momentarily hold the
AUTO M (auto memory) control.
3. The audio systemwill select the
five strongest stations on the frequency band. When the stations are
filled, the station stored in memory preset control 1 will start playing.
Press the AUTO M control to recall stations in the auto memory. One
station will be selected each time you press the AUTO M control and the
auto memory number will be displayed.
NOTE:If the power supply is interrupted (the fuse blows or the battery
is disconnected), the preset channels will be canceled.
Random play
The randomplay feature works in
CD mode and plays the selections
on the current CD in randomorder.
Random play in CD mode
Press the RDM control during play. RDM will illuminate in the display.
The next selection will be randomly selected.
To disengage randomplay, press the RDM control again.
Repeat play
The repeat play feature works in CD
mode and repeats the current CD
selection.
Repeat play in CD mode
Press the RPT control during play. RPT will illuminate in the display.
The current selection will be repeated.
To disengage repeat play, press the RPT control again.
AUTO
M
RDM2
RPT3
Entertainment Systems
24
Page 25 of 184
Eject function
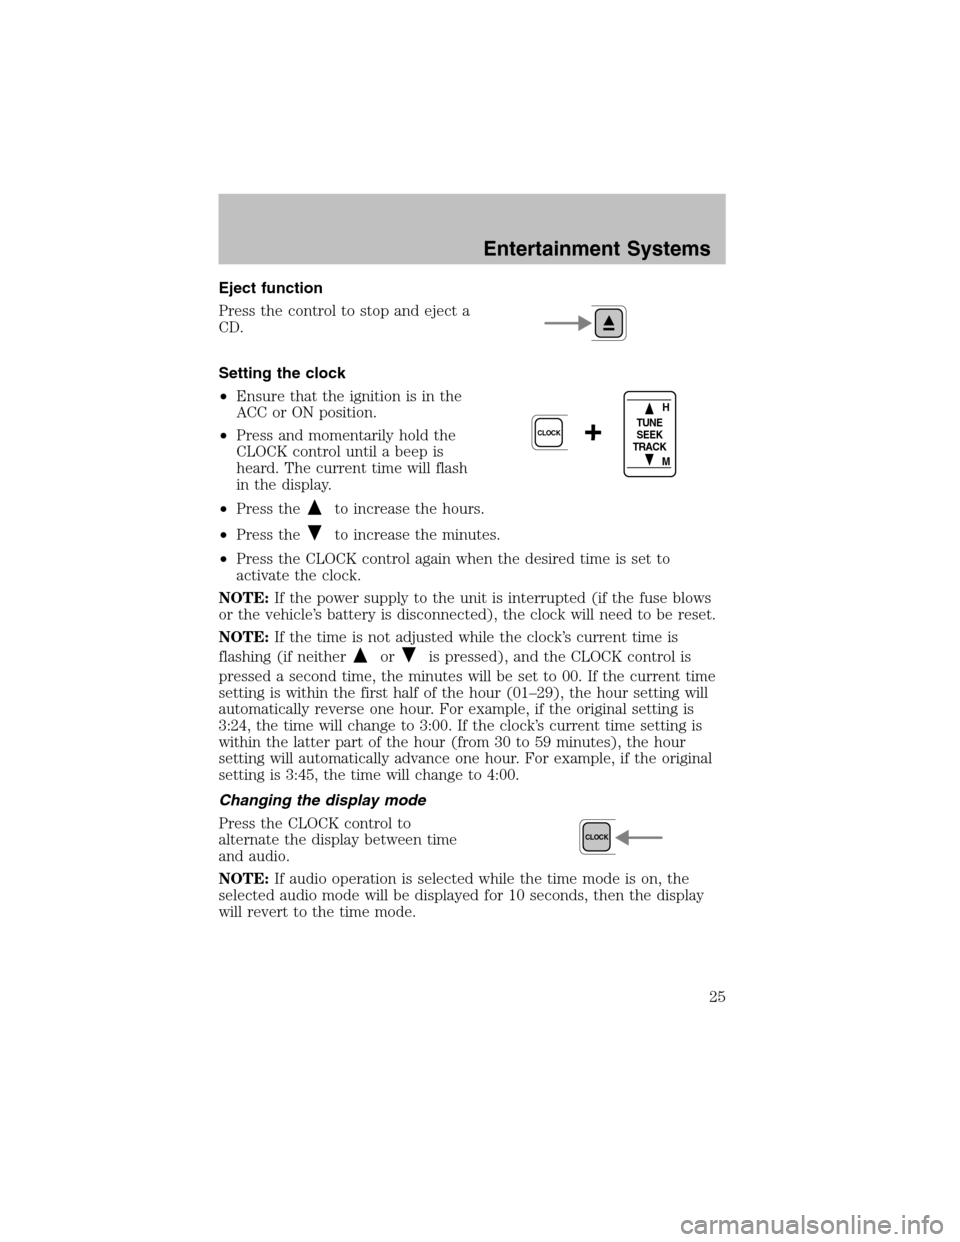
Press the control to stop and eject a
CD.
Setting the clock
•Ensure that the ignition is in the
ACC or ON position.
•Press and momentarily hold the
CLOCK control until a beep is
heard. The current time will flash
in the display.
•Press the
to increase the hours.
•Press the
to increase the minutes.
•Press the CLOCK control again when the desired time is set to
activate the clock.
NOTE:If the power supply to the unit is interrupted (if the fuse blows
or the vehicle’s battery is disconnected), the clock will need to be reset.
NOTE:If the time is not adjusted while the clock’s current time is
flashing (if neither
oris pressed), and the CLOCK control is
pressed a second time, the minutes will be set to 00. If the current time
setting is within the first half of the hour (01–29), the hour setting will
automatically reverse one hour. For example, if the original setting is
3:24, the time will change to 3:00. If the clock’s current time setting is
within the latter part of the hour (from30 to 59 minutes), the hour
setting will automatically advance one hour. For example, if the original
setting is 3:45, the time will change to 4:00.
Changing the display mode
Press the CLOCK control to
alternate the display between time
and audio.
NOTE:If audio operation is selected while the time mode is on, the
selected audio mode will be displayed for 10 seconds, then the display
will revert to the time mode.
+CLOCK
H
M TUNE
SEEK
TRACK
CLOCK
Entertainment Systems
25
Page 70 of 184
Never place your armover the air bag module as a deploying air
bag can result in serious armfractures or other injuries.
To properly position yourself away fromthe air bag:
•Move your seat to the rear as far as you can while still reaching the
pedals comfortably.
•Recline the seat slightly one or two degrees fromthe upright position.
Do not put anything on or over the air bag module. Placing
objects on or over the air bag inflation area may cause those
objects to be propelled by the air bag into your face and torso causing
serious injury.
Do not attempt to service, repair, or modify the air bag
supplemental restraint systems or its fuses. See your Ford or
Lincoln Mercury dealer.
Modifying or adding equipment to the front end of the vehicle
(including frame, bumper, front end body structure and tow
hooks) may affect the performance of the air bag system, increasing
the risk of injury. Do not modify the front end of the vehicle.
Seating and Safety Restraints
70
Page 92 of 184
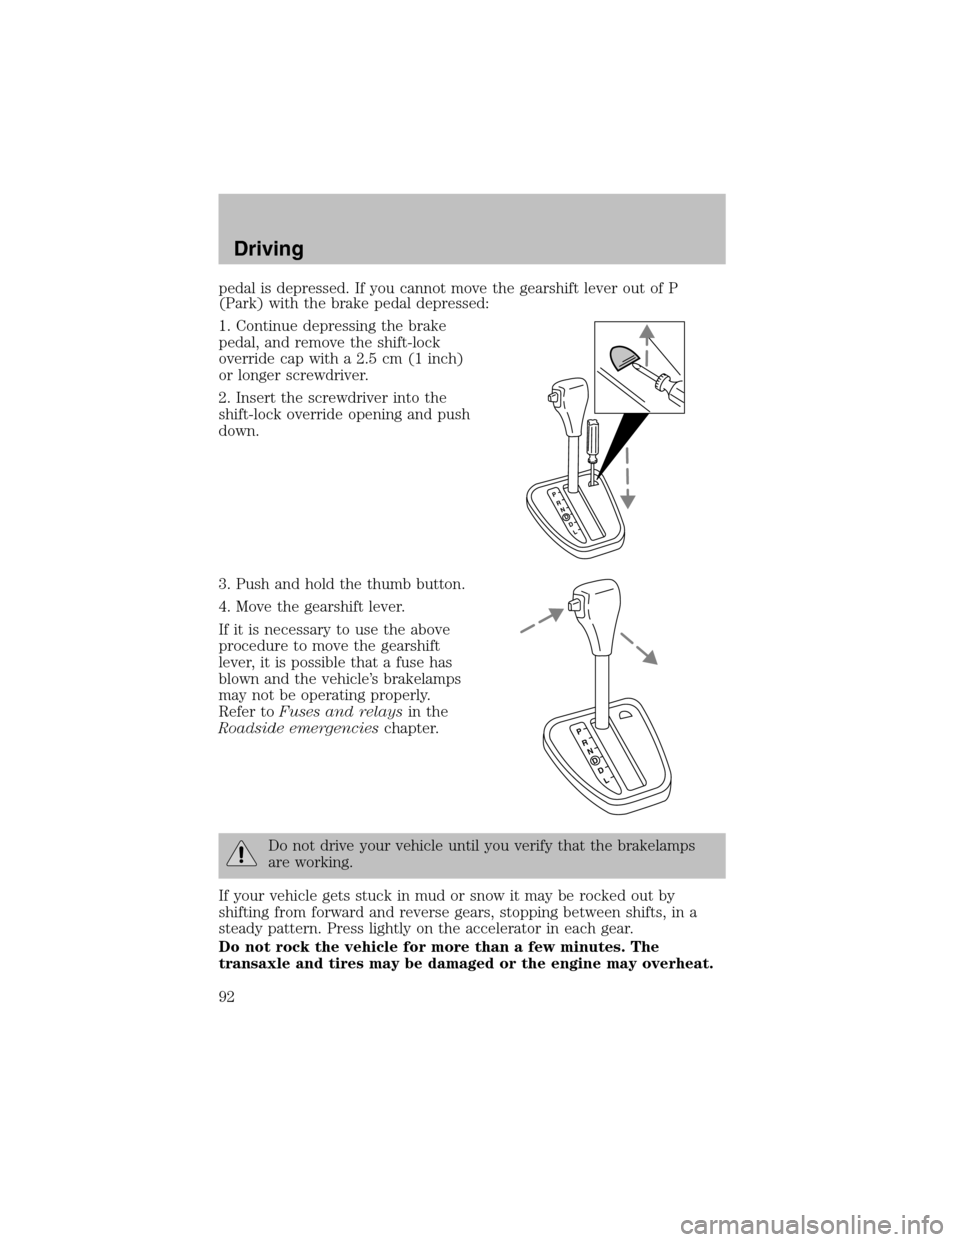
pedal is depressed. If you cannot move the gearshift lever out of P
(Park) with the brake pedal depressed:
1. Continue depressing the brake
pedal, and remove the shift-lock
override cap with a 2.5 cm(1 inch)
or longer screwdriver.
2. Insert the screwdriver into the
shift-lock override opening and push
down.
3. Push and hold the thumb button.
4. Move the gearshift lever.
If it is necessary to use the above
procedure to move the gearshift
lever, it is possible that a fuse has
blown and the vehicle’s brakelamps
may not be operating properly.
Refer toFuses and relaysin the
Roadside emergencieschapter.
Do not drive your vehicle until you verify that the brakelamps
are working.
If your vehicle gets stuck in mud or snow it may be rocked out by
shifting fromforward and reverse gears, stopping between shifts, in a
steady pattern. Press lightly on the accelerator in each gear.
Do not rock the vehicle for more than a few minutes. The
transaxle and tires may be damaged or the engine may overheat.
PRND
DL
PRND
D
L
Driving
92
Page 105 of 184
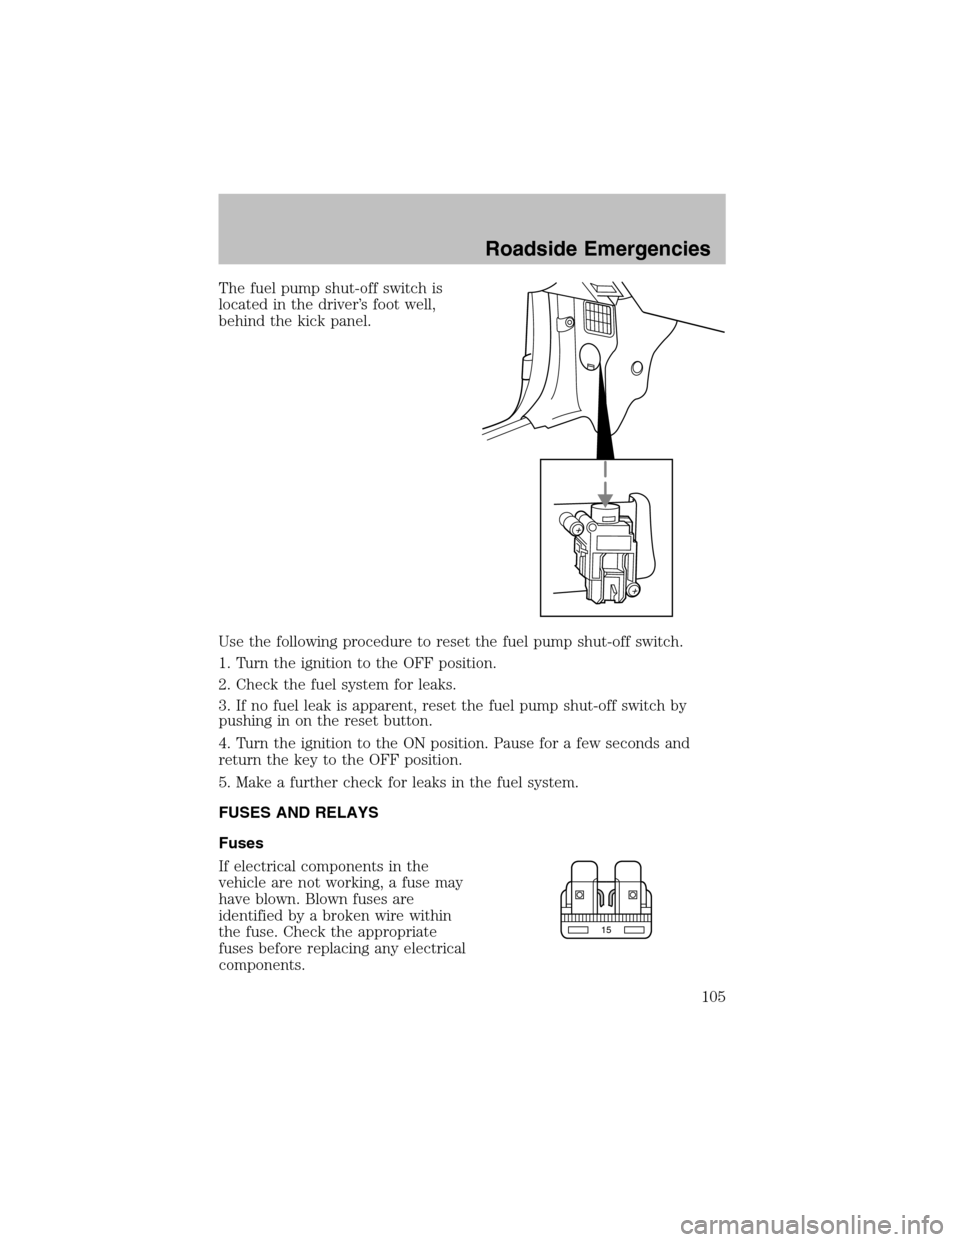
The fuel pump shut-off switch is
located in the driver’s foot well,
behind the kick panel.
Use the following procedure to reset the fuel pump shut-off switch.
1. Turn the ignition to the OFF position.
2. Check the fuel systemfor leaks.
3. If no fuel leak is apparent, reset the fuel pump shut-off switch by
pushing in on the reset button.
4. Turn the ignition to the ON position. Pause for a few seconds and
return the key to the OFF position.
5. Make a further check for leaks in the fuel system.
FUSES AND RELAYS
Fuses
If electrical components in the
vehicle are not working, a fuse may
have blown. Blown fuses are
identified by a broken wire within
the fuse. Check the appropriate
fuses before replacing any electrical
components.
15
Roadside Emergencies
105
Page 106 of 184
Note:Always replace a fuse with one that has the specified amperage
rating. Using a fuse with a higher amperage rating can cause severe wire
damage and could start a fire.
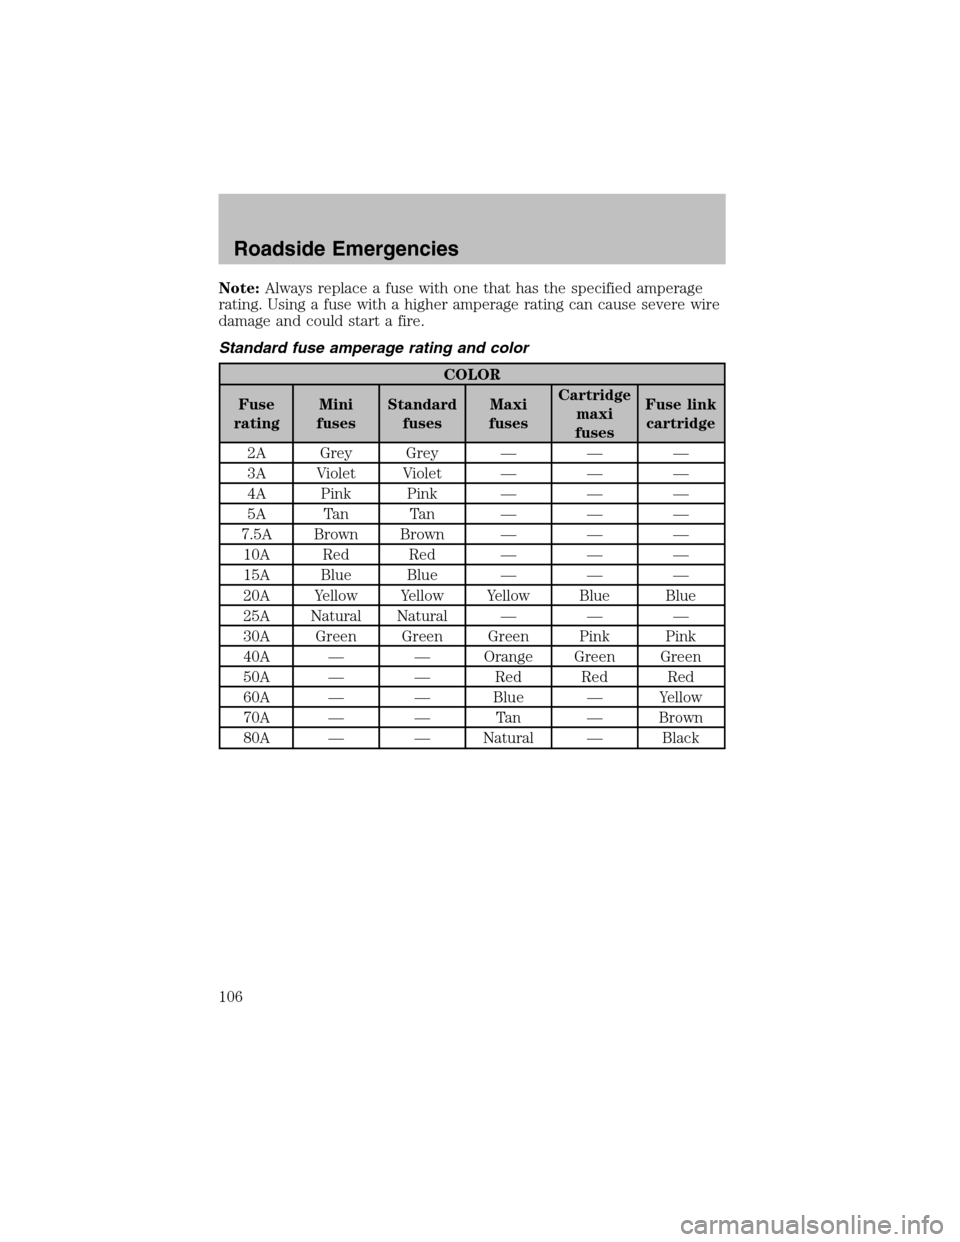
Standard fuse amperage rating and color
COLOR
Fuse
ratingMini
fusesStandard
fusesMaxi
fusesCartridge
maxi
fusesFuse link
cartridge
2A Grey Grey — — —
3A Violet Violet — — —
4A Pink Pink — — —
5A Tan Tan — — —
7.5A Brown Brown — — —
10A Red Red — — —
15A Blue Blue — — —
20A Yellow Yellow Yellow Blue Blue
25A Natural Natural — — —
30A Green Green Green Pink Pink
40A — — Orange Green Green
50A — — Red Red Red
60A — — Blue — Yellow
70A — — Tan — Brown
80A — — Natural — Black
Roadside Emergencies
106
Page 107 of 184

Passenger compartment fuse panel
The fuses are coded as follows:
Fuse/Relay
LocationFuse Amp
RatingPassenger Compartment Fuse
Panel Description
DRL 10A Daytime Running Lamps (DRL)
HAZARD 15A Hazard flasher
ROOM 10A Engine controls, RAP system,
Radio, Shift lock, Courtesy lamps,
Starting system, Warning chime,
Instrument cluster
ENGINE 15A Electronic automatic transaxle,
Ignition system, Constant control
relay module (PCM relay)
RADIO 5A Power mirrors, Radio, RAP system
DOOR LOCK 30A Power door locks
HORN 15A Horn, Shift lock
AIR COND 15A A/C-heater, ABS
METER 10A Backup lamps, Engine coolant
level switch, Instrument cluster,
Rear window defrost, Shift lock,
Warning chime, Turn signal switch
(DRL) (DOOR LK)
STOP
HAZARD HORN
TAIL
ROOM(AIR COND) (SUN ROOF)
ENGINE METER(ASC)
RADIO
WIPER
–P. Window (C.B.)
(FOG) CIGAR
(AUDIO)
AIR BAGFUEL INJ
HEATER
–
Roadside Emergencies
107
Page 108 of 184
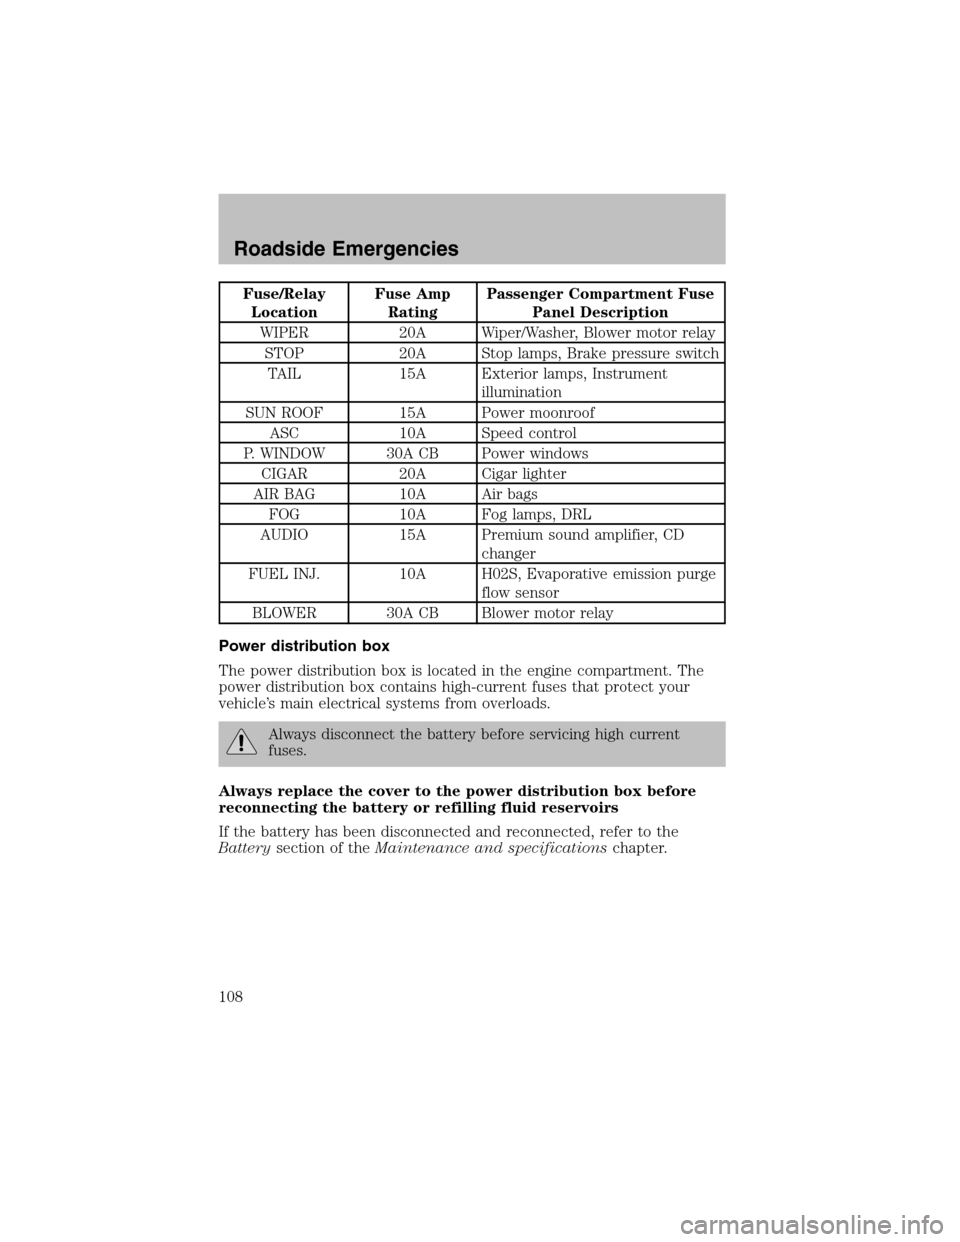
Fuse/Relay
LocationFuse Amp
RatingPassenger Compartment Fuse
Panel Description
WIPER 20A Wiper/Washer, Blower motor relay
STOP 20A Stop lamps, Brake pressure switch
TAIL 15A Exterior lamps, Instrument
illumination
SUN ROOF 15A Power moonroof
ASC 10A Speed control
P. WINDOW 30A CB Power windows
CIGAR 20A Cigar lighter
AIR BAG 10A Air bags
FOG 10A Fog lamps, DRL
AUDIO 15A Premium sound amplifier, CD
changer
FUEL INJ. 10A H02S, Evaporative emission purge
flow sensor
BLOWER 30A CB Blower motor relay
Power distribution box
The power distribution box is located in the engine compartment. The
power distribution box contains high-current fuses that protect your
vehicle’s main electrical systems from overloads.
Always disconnect the battery before servicing high current
fuses.
Always replace the cover to the power distribution box before
reconnecting the battery or refilling fluid reservoirs
If the battery has been disconnected and reconnected, refer to the
Batterysection of theMaintenance and specificationschapter.
Roadside Emergencies
108