ESP FORD EXCURSION 2000 1.G Owners Manual
[x] Cancel search | Manufacturer: FORD, Model Year: 2000, Model line: EXCURSION, Model: FORD EXCURSION 2000 1.GPages: 232, PDF Size: 2.01 MB
Page 19 of 232
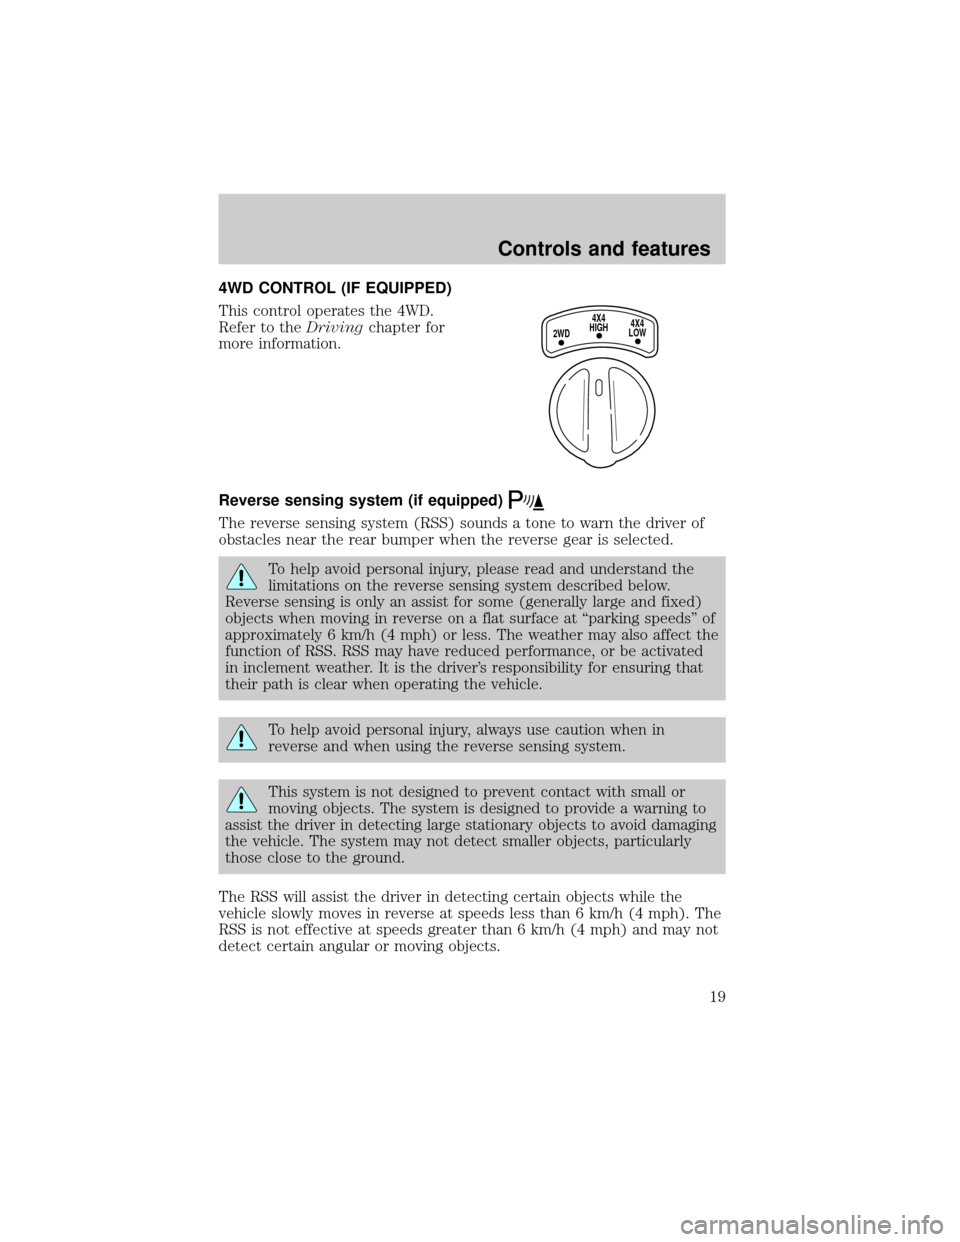
4WD CONTROL (IF EQUIPPED)
This control operates the 4WD.
Refer to theDrivingchapter for
more information.
Reverse sensing system (if equipped)
The reverse sensing system (RSS) sounds a tone to warn the driver of
obstacles near the rear bumper when the reverse gear is selected.
To help avoid personal injury, please read and understand the
limitations on the reverse sensing system described below.
Reverse sensing is only an assist for some (generally large and fixed)
objects when moving in reverse on a flat surface at ªparking speedsº of
approximately 6 km/h (4 mph) or less. The weather may also affect the
function of RSS. RSS may have reduced performance, or be activated
in inclement weather. It is the driver's responsibility for ensuring that
their path is clear when operating the vehicle.
To help avoid personal injury, always use caution when in
reverse and when using the reverse sensing system.
This system is not designed to prevent contact with small or
moving objects. The system is designed to provide a warning to
assist the driver in detecting large stationary objects to avoid damaging
the vehicle. The system may not detect smaller objects, particularly
those close to the ground.
The RSS will assist the driver in detecting certain objects while the
vehicle slowly moves in reverse at speeds less than 6 km/h (4 mph). The
RSS is not effective at speeds greater than 6 km/h (4 mph) and may not
detect certain angular or moving objects.
4X4
HIGH
2WD4X4
LOW
Controls and features
19
Page 66 of 232
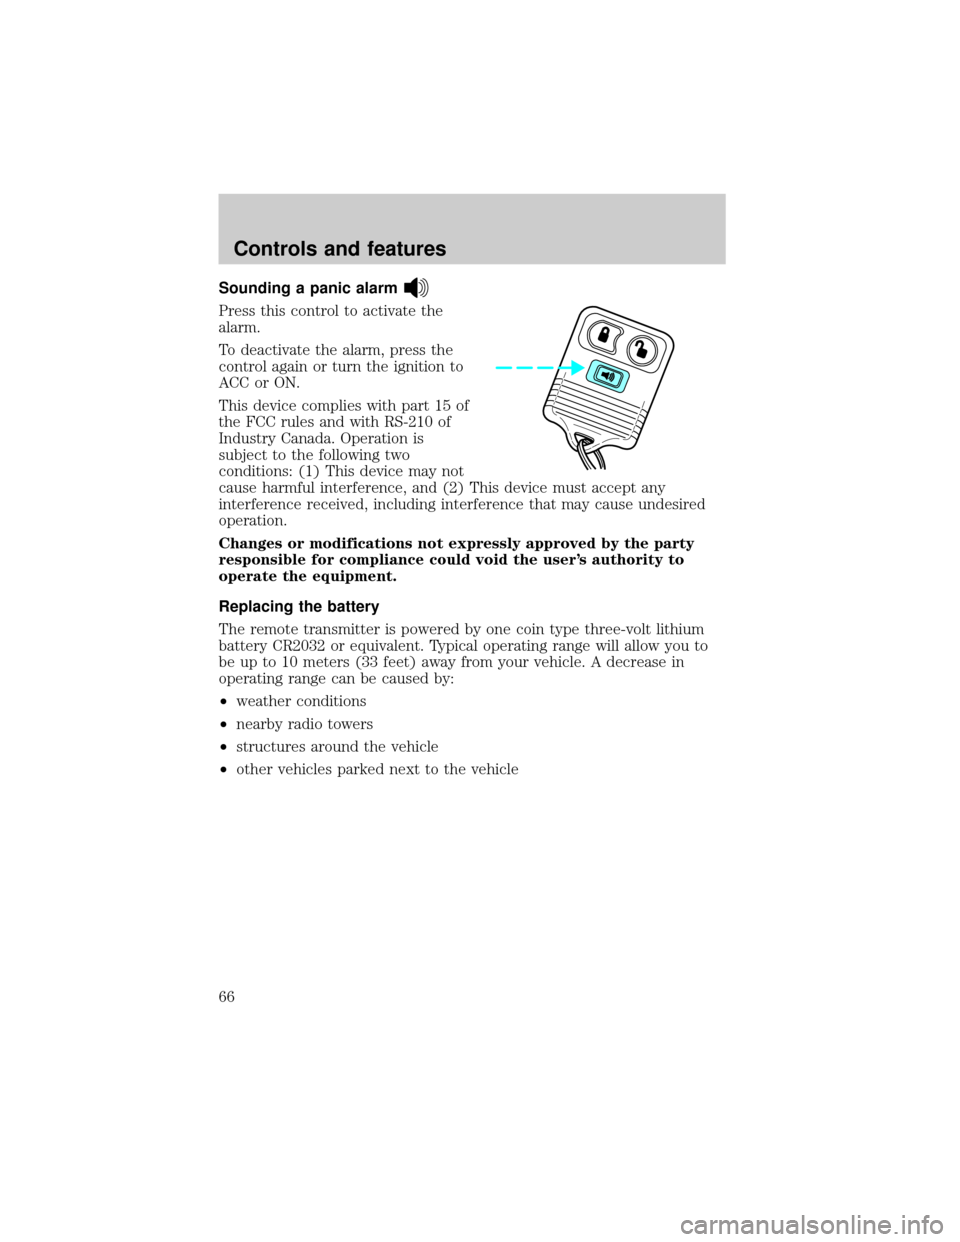
Sounding a panic alarm
Press this control to activate the
alarm.
To deactivate the alarm, press the
control again or turn the ignition to
ACC or ON.
This device complies with part 15 of
the FCC rules and with RS-210 of
Industry Canada. Operation is
subject to the following two
conditions: (1) This device may not
cause harmful interference, and (2) This device must accept any
interference received, including interference that may cause undesired
operation.
Changes or modifications not expressly approved by the party
responsible for compliance could void the user's authority to
operate the equipment.
Replacing the battery
The remote transmitter is powered by one coin type three-volt lithium
battery CR2032 or equivalent. Typical operating range will allow you to
be up to 10 meters (33 feet) away from your vehicle. A decrease in
operating range can be caused by:
²weather conditions
²nearby radio towers
²structures around the vehicle
²other vehicles parked next to the vehicle
Controls and features
66
Page 69 of 232
Keyless entry system
With the keyless entry keypad, you can:
²lock or unlock the vehicle doors without using the key.
Your vehicle has a factory set 5 digit code that operates the keyless entry
system. You can also program your own 5 digit personal entry code. The
factory-set code is located:
²on the owner's wallet card in the glove compartment
When pressing the controls on the keyless entry keypad, press the
middle of the controls to ensure a good activation.
Programming your own personal entry code
To program your own code:
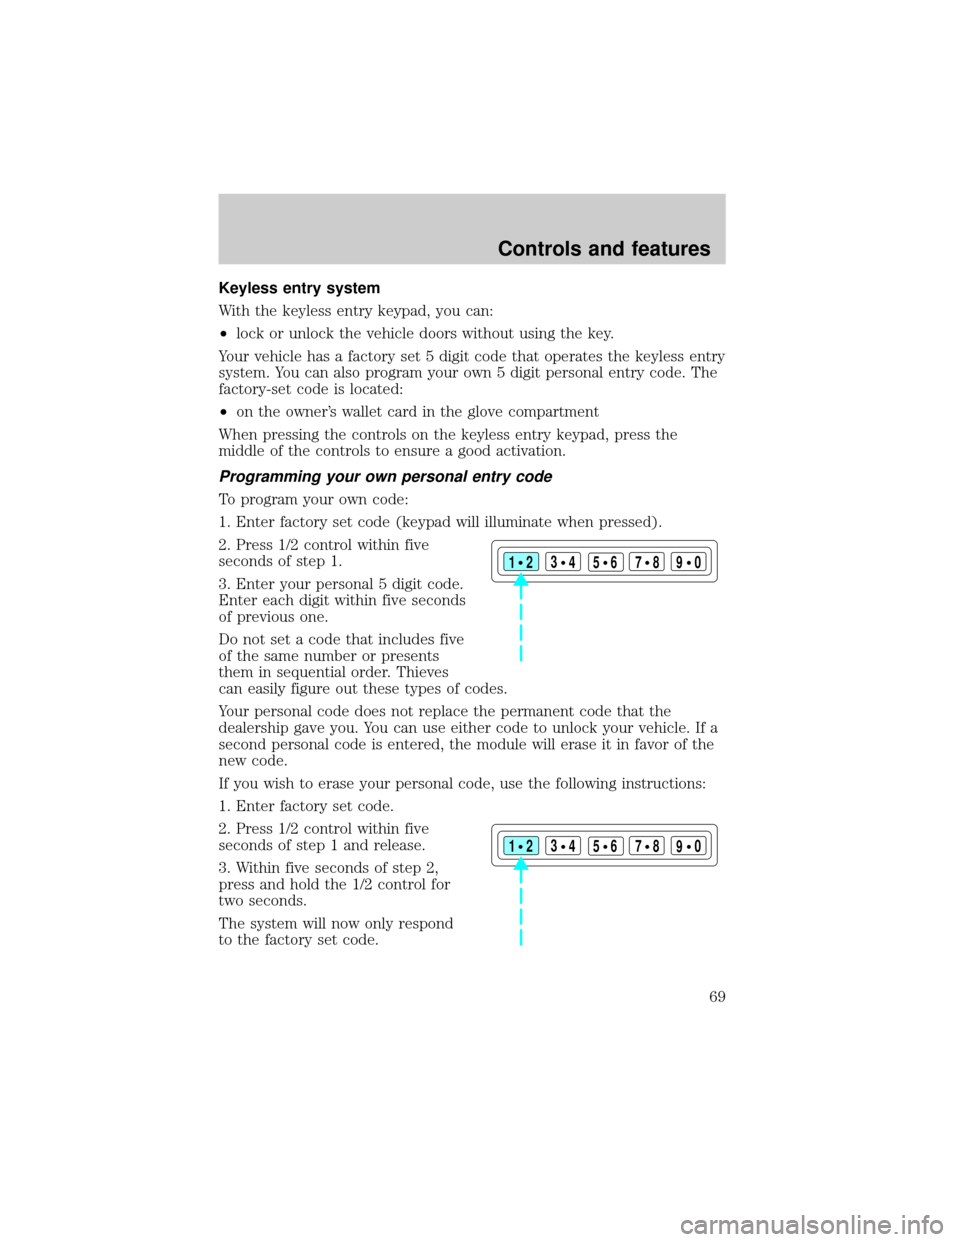
1. Enter factory set code (keypad will illuminate when pressed).
2. Press 1/2 control within five
seconds of step 1.
3. Enter your personal 5 digit code.
Enter each digit within five seconds
of previous one.
Do not set a code that includes five
of the same number or presents
them in sequential order. Thieves
can easily figure out these types of codes.
Your personal code does not replace the permanent code that the
dealership gave you. You can use either code to unlock your vehicle. If a
second personal code is entered, the module will erase it in favor of the
new code.
If you wish to erase your personal code, use the following instructions:
1. Enter factory set code.
2. Press 1/2 control within five
seconds of step 1 and release.
3. Within five seconds of step 2,
press and hold the 1/2 control for
two seconds.
The system will now only respond
to the factory set code.
123
45678
90
123
45678
90
Controls and features
69
Page 85 of 232
Always transport children 12 years old and under in the back
seat and always properly use appropriate child restraints.
Combination lap and shoulder belts
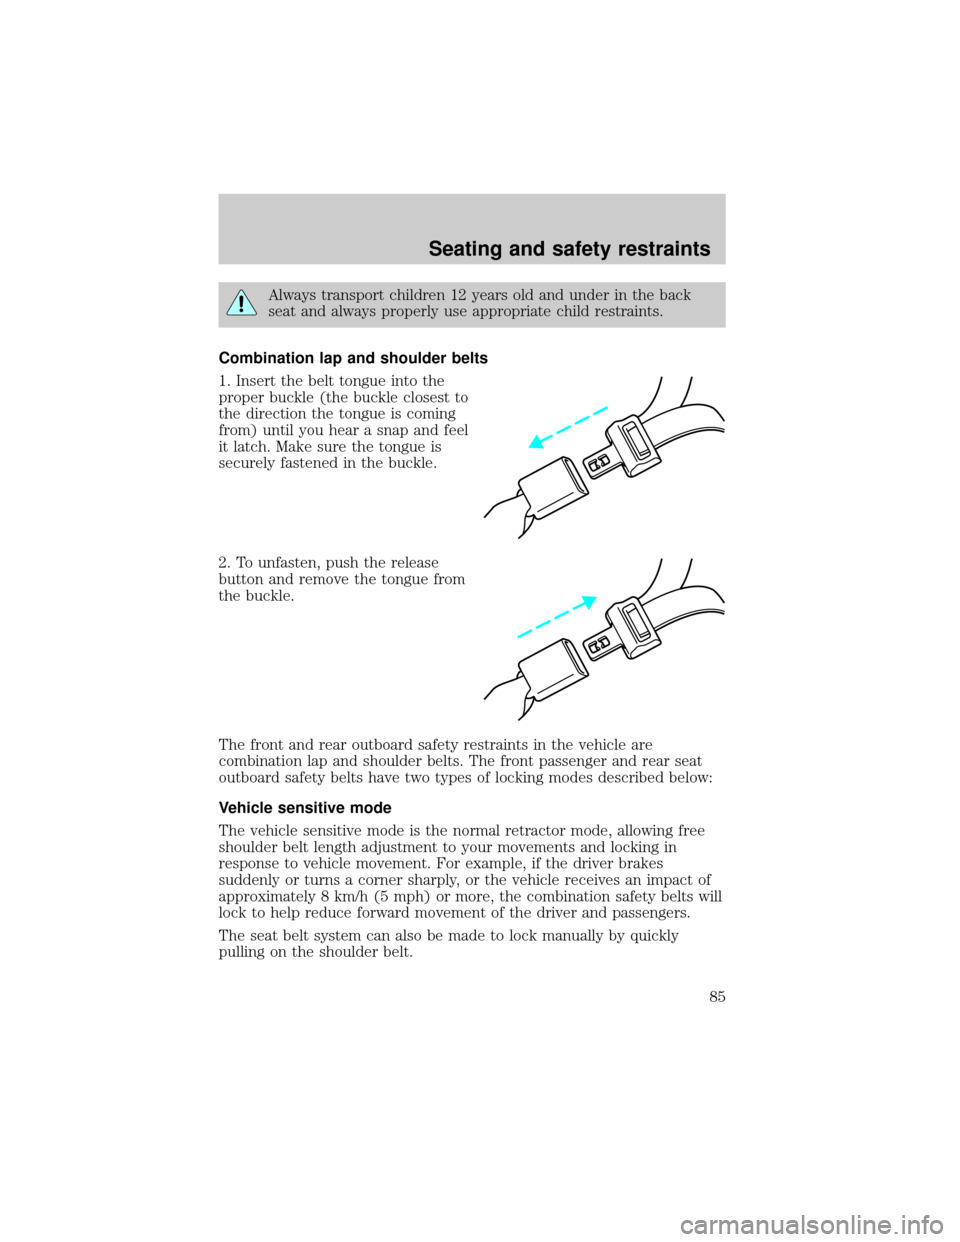
1. Insert the belt tongue into the
proper buckle (the buckle closest to
the direction the tongue is coming
from) until you hear a snap and feel
it latch. Make sure the tongue is
securely fastened in the buckle.
2. To unfasten, push the release
button and remove the tongue from
the buckle.
The front and rear outboard safety restraints in the vehicle are
combination lap and shoulder belts. The front passenger and rear seat
outboard safety belts have two types of locking modes described below:
Vehicle sensitive mode
The vehicle sensitive mode is the normal retractor mode, allowing free
shoulder belt length adjustment to your movements and locking in
response to vehicle movement. For example, if the driver brakes
suddenly or turns a corner sharply, or the vehicle receives an impact of
approximately 8 km/h (5 mph) or more, the combination safety belts will
lock to help reduce forward movement of the driver and passengers.
The seat belt system can also be made to lock manually by quickly
pulling on the shoulder belt.
Seating and safety restraints
85
Page 100 of 232
Important child restraint precautions
You are required by law to use safety restraints for children in the U.S.
and Canada. If small children ride in your vehicle (generally children who
are four years old or younger and who weigh 18 kg [40 lbs] or less), you
must put them in safety seats made especially for children. Check your
local and state or provincial laws for specific requirements regarding the
safety of children in your vehicle.
Never let a passenger hold a child on his or her lap while the
vehicle is moving. The passenger cannot protect the child from
injury in a collision.
Always follow the instructions and warnings that come with any infant or
child restraint you might use.
When possible, always place children under age 12 in the rear seat of
your vehicle. Accident statistics suggest that children are safer when
properly restrained in the rear seating positions than in the front seating
position.
Children and safety belts
If the child is the proper size, restrain the child in a safety seat.
Children who are too large for child safety seats (as specified by your
child safety seat manufacturer) should always wear safety belts.
Follow all the important safety restraint and air bag precautions that
apply to adult passengers in your vehicle.
If the shoulder belt portion of a combination lap and shoulder belt can be
positioned so it does not cross or rest in front of the child's face or neck,
the child should wear the lap and shoulder belt. Moving the child closer to
the center of the vehicle may help provide a good shoulder belt fit.
Do not leave children, unreliable adults, or pets unattended in
your vehicle.
To improve the fit of lap and shoulder belts on children who have
outgrown child safety seats, Ford recommends use of a belt-positioning
booster seat that is labelled as conforming to all Federal motor vehicle
safety standards. Belt-positioning booster seats raise the child and
provide a shorter, firmer seating cushion that encourages safer seating
posture and better fit of lap and shoulder belts on the child.
Seating and safety restraints
100
Page 109 of 232
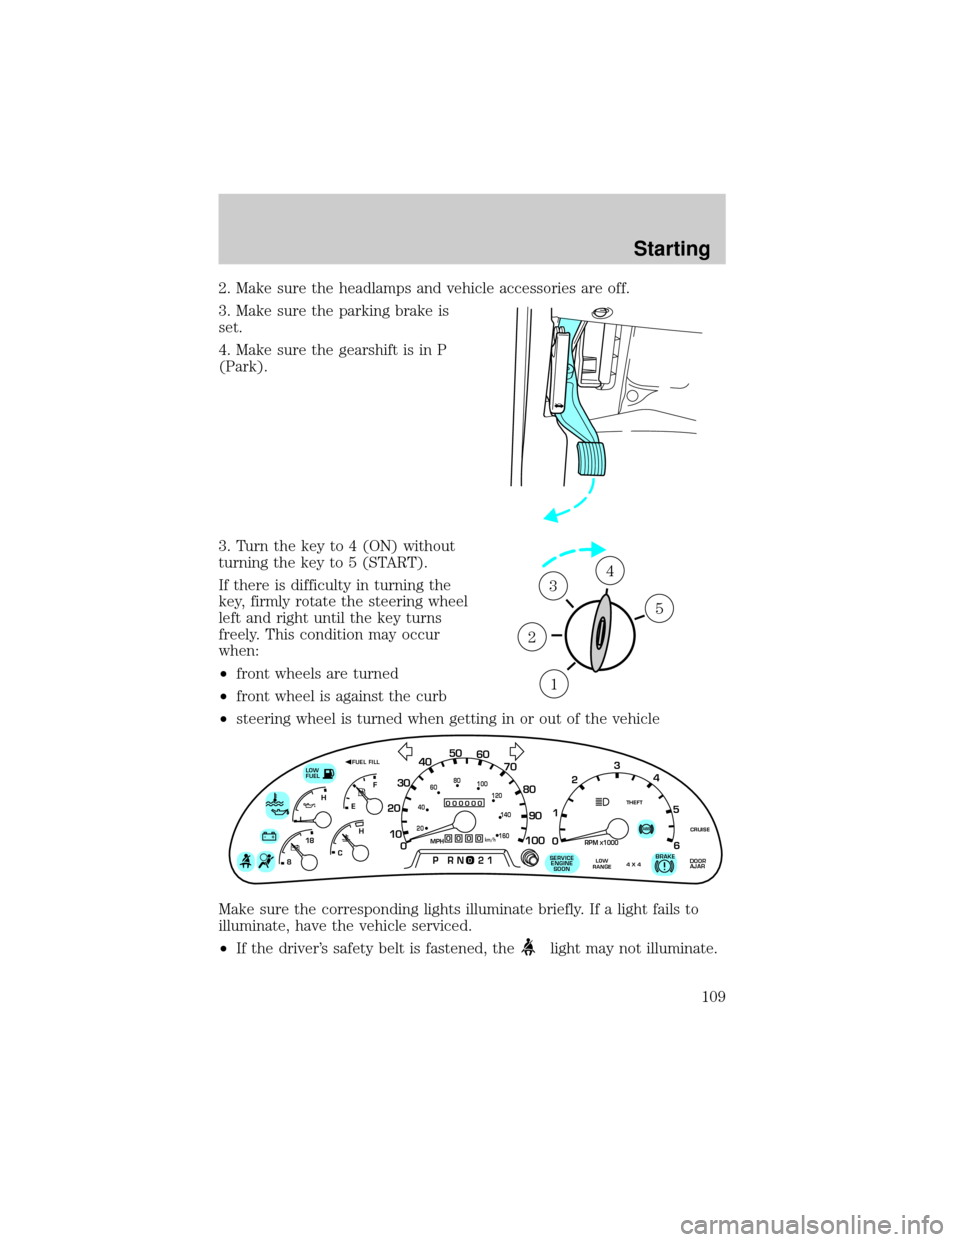
2. Make sure the headlamps and vehicle accessories are off.
3. Make sure the parking brake is
set.
4. Make sure the gearshift is in P
(Park).
3. Turn the key to 4 (ON) without
turning the key to 5 (START).
If there is difficulty in turning the
key, firmly rotate the steering wheel
left and right until the key turns
freely. This condition may occur
when:
²front wheels are turned
²front wheel is against the curb
²steering wheel is turned when getting in or out of the vehicle
Make sure the corresponding lights illuminate briefly. If a light fails to
illuminate, have the vehicle serviced.
²If the driver's safety belt is fastened, the
light may not illuminate.
1
2
34
5
0
000000000
MPH20km/h
406080
100
120
140
160
010 20304050
60
70
80
90
100
LOW
FUEL
CRUISEABS+ -
LEF
H
RPM1000X0123
5
6 4
PRN 218C 18
H
D
FUEL FILL
DOOR
AJARLOW
RANGE4 X 4BRAKE!SERVICE
ENGINE
SOON
THEFT
Starting
109
Page 110 of 232
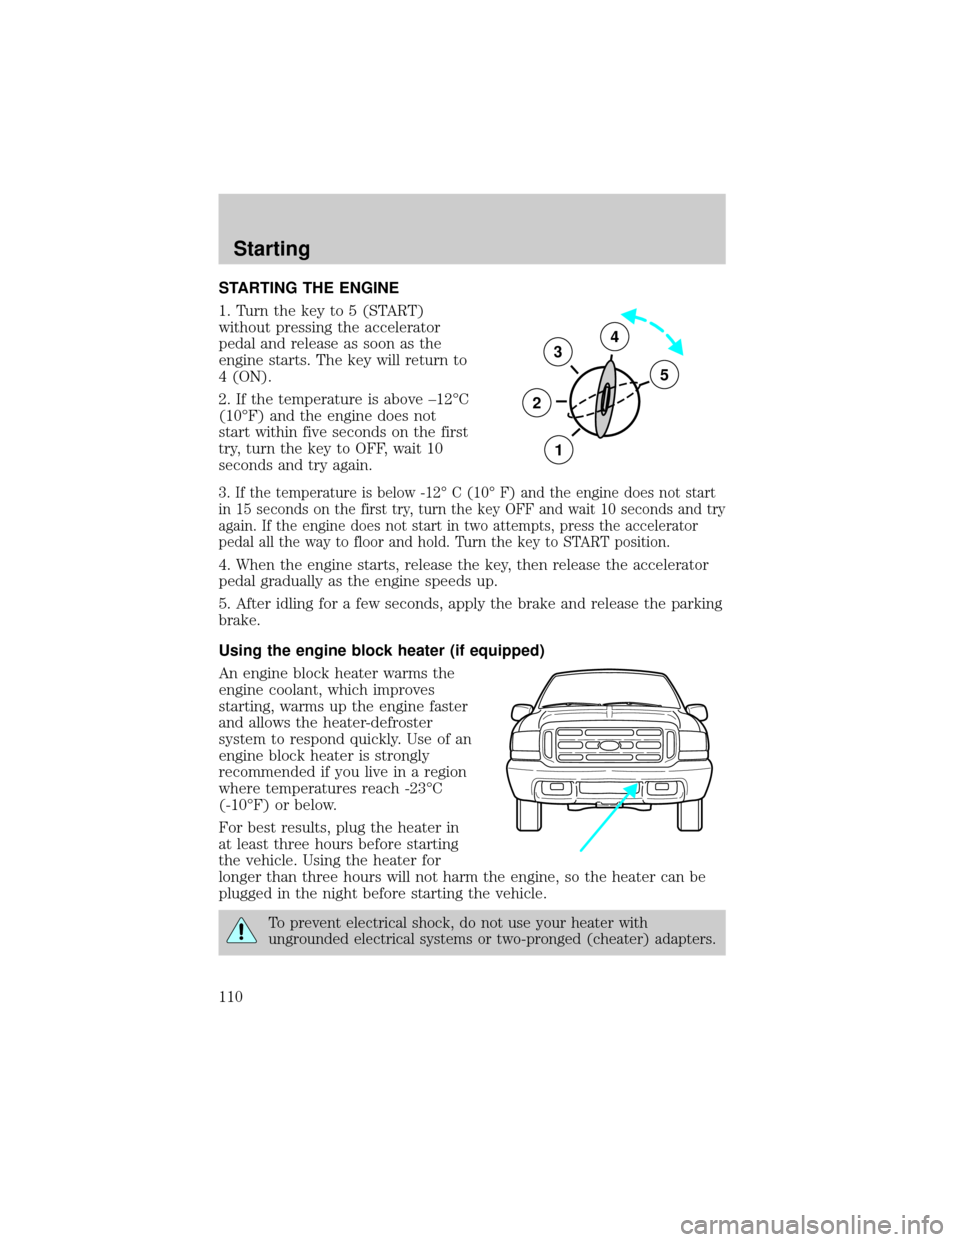
STARTING THE ENGINE
1. Turn the key to 5 (START)
without pressing the accelerator
pedal and release as soon as the
engine starts. The key will return to
4 (ON).
2. If the temperature is above ±12ÉC
(10ÉF) and the engine does not
start within five seconds on the first
try, turn the key to OFF, wait 10
seconds and try again.
3. If the temperature is below -12É C (10É F) and the engine does not start
in 15 seconds on the first try, turn the key OFF and wait 10 seconds and try
again. If the engine does not start in two attempts, press the accelerator
pedal all the way to floor and hold. Turn the key to START position.
4. When the engine starts, release the key, then release the accelerator
pedal gradually as the engine speeds up.
5. After idling for a few seconds, apply the brake and release the parking
brake.
Using the engine block heater (if equipped)
An engine block heater warms the
engine coolant, which improves
starting, warms up the engine faster
and allows the heater-defroster
system to respond quickly. Use of an
engine block heater is strongly
recommended if you live in a region
where temperatures reach -23ÉC
(-10ÉF) or below.
For best results, plug the heater in
at least three hours before starting
the vehicle. Using the heater for
longer than three hours will not harm the engine, so the heater can be
plugged in the night before starting the vehicle.
To prevent electrical shock, do not use your heater with
ungrounded electrical systems or two-pronged (cheater) adapters.
3
2
1
5
4
Starting
110
Page 123 of 232

4. Move the 4WD control to the 4x4
HIGH (4WD high) or 2WD (2WD
high) position.
5. Hold the shift command until the
LOW RANGE indicator light shuts
off.
6. If the LOW RANGE indicator light
does notshut off after 15 seconds,
start the vehicle moving, then
repeat steps 1 through 5 before
reporting any shift concerns to your dealer.
Driving off-road with 4WD
Your vehicle is specially equipped for driving on sand, snow, mud and
rough terrain and has operating characteristics that are somewhat
different from conventional vehicles, both on and off the road.
Maintain steering wheel control at all times, especially in rough terrain.
Since sudden changes in terrain can result in abrupt steering wheel
motion, make sure you grip the steering wheel from the outside. Do not
grip the spokes.
Drive cautiously to avoid vehicle damage from concealed objects such as
rocks and stumps.
You should either know the terrain or examine maps of the area before
driving. Map out your route before driving in the area. For more
information on driving off-road, read the ªFour Wheelingº supplement in
your owner's portfolio.
If your vehicle gets stuck
If the vehicle is stuck it may be rocked out by shifting from forward and
reverse gears, stopping between shifts, in a steady pattern. Press lightly
on the accelerator in each gear.
Do not rock the vehicle if the engine is not at normal operating
temperature or damage to the transmission may occur.
Do not rock the vehicle for more than a few minutes or damage
to the transmission and tires may occur or the engine may
overheat.
2WD4X4
LOW4X4
HIGH
Driving
123
Page 125 of 232

When descending a steep hill, avoid sudden braking. Shift to a lower gear
when added engine braking is desired.
When speed control is on and you are driving uphill, your vehicle speed
may drop considerably, especially if you are carrying a heavy load.
If vehicle speed drops more than 16 km/h (10 mph), the speed control
will cancel automatically. Resume speed with accelerator pedal.
If speed control cancels after climbing the hill, reset speed by pressing
and holding the SET ACCEL button (to resume speeds over 50 km/h [30
mph]).
Automatic transmissions may shift frequently while driving up steep
grades. Eliminate frequent shifting by shifting out of
(Overdrive) into
a lower gear.
Driving on snow and ice
A 4WD vehicle has advantages over 2WD vehicles in snow and ice but
can skid like any other vehicle.
Avoid sudden applications of power and quick changes of direction on
snow and ice. Apply the accelerator slowly and steadily when starting
from a full stop.
Apply the brakes as you normally would. Your 4WD vehicle is equipped
with a Four Wheel Anti-lock Brake System (ABS). In order to allow the
ABS to operate properly when braking, keep steady pressure on the
brake pedal, do not pump the brakes.
When driving on snow or ice with either braking system, allow more
stopping distance and drive slower than usual. Consider using one of the
lower gears.
VEHICLE LOADING
Before loading a vehicle, familiarize yourself with the following terms:
²Base Curb Weight:Weight of the vehicle including any standard
equipment, fluids, lubricants, etc. It does not include passengers or
aftermarket equipment.
²Payload:Combined maximum allowable weight of cargo, passengers
and optional equipment. The payload equals the gross vehicle weight
rating minus base curb weight.
²GVW (Gross Vehicle Weight):Base curb weight plus payload
weight. The GVW is not a limit or a specification.
Driving
125
Page 128 of 232
3. Subtract your loaded vehicle weight from the maximum GCWR on the
following charts. This is the maximum trailer weight your vehicle can tow
and must fall below the maximum shown under maximum trailer weight
on the chart.
DRIVING THROUGH WATER
Do not drive quickly through standing water, especially if the depth is
unknown. Traction or brake capability may be limited and if the ignition
system gets wet, your engine may stall. Water may also enter your
engine's air intake and severely damage your engine.
If driving through deep or standing water is unavoidable, proceed very
slowly. Never drive through water that is higher than the bottom of the
hubs (for trucks) or the bottom of the wheel rims (for cars).
Once through the water, always try the brakes. Wet brakes do not stop
the vehicle as effectively as dry brakes. Drying can be improved by
moving your vehicle slowly while applying light pressure on the brake
pedal.
Driving through deep water where the transmission vent tube is
submerged may allow water into the transmission and cause
internal transmission damage.
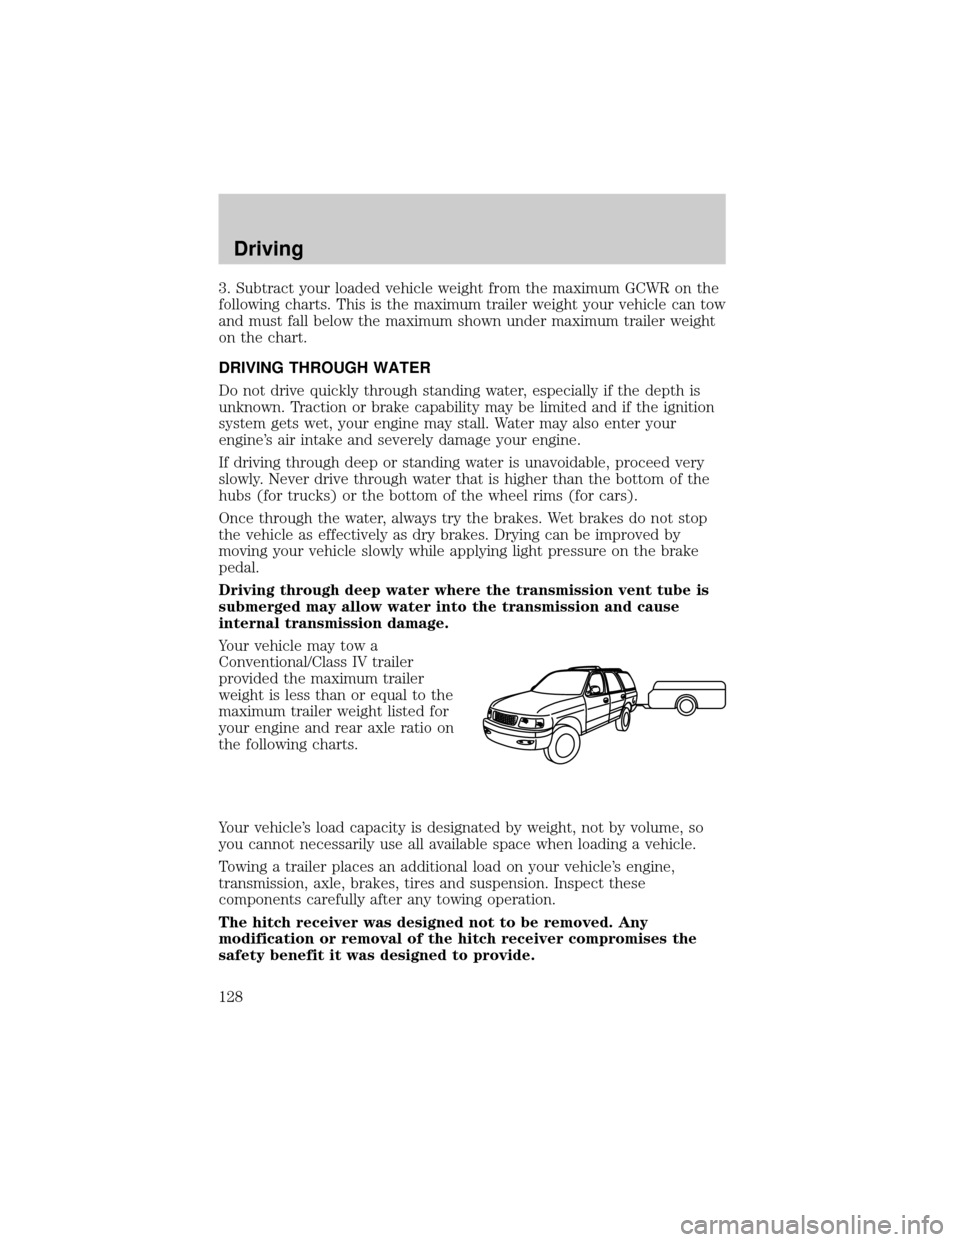
Your vehicle may tow a
Conventional/Class IV trailer
provided the maximum trailer
weight is less than or equal to the
maximum trailer weight listed for
your engine and rear axle ratio on
the following charts.
Your vehicle's load capacity is designated by weight, not by volume, so
you cannot necessarily use all available space when loading a vehicle.
Towing a trailer places an additional load on your vehicle's engine,
transmission, axle, brakes, tires and suspension. Inspect these
components carefully after any towing operation.
The hitch receiver was designed not to be removed. Any
modification or removal of the hitch receiver compromises the
safety benefit it was designed to provide.
Driving
128