window FORD EXCURSION 2002 1.G User Guide
[x] Cancel search | Manufacturer: FORD, Model Year: 2002, Model line: EXCURSION, Model: FORD EXCURSION 2002 1.GPages: 272, PDF Size: 5.06 MB
Page 67 of 272
20815.psp Ford O/G 2002 Excursion English 4th Print 2C3J-19A321-HB 04/24/2003 09:14:57 34 A
•To reduce humidity buildup inside the vehicle in warm weather
conditions, don’t drive with the climate control system in the OFF
position.
•Under normal weather conditions, your vehicle’s climate control
system should be left in any position other than OFF or
when
the vehicle is parked. This allows the vehicle to “breathe” through the
outside air inlet duct.
•Under snowy or dirty weather conditions, your vehicle’s climate
control system should be left in the OFF position when the vehicle is
parked. This allows the climate control system to be free from
contamination of outside pollutants.
•If your vehicle has been parked with the windows closed during warm
weather conditions, the air conditioner will perform more efficiently in
cooling the vehicle if driven for two or three minutes with the
windows open. This will force most of the hot, stale air out of the
vehicle. Once the vehicle has been “aired out”, operate the climate
control system as desired.
•Don’t put objects under the front seat that will interfere with the
airflow to the rear seats.
•Remove any snow, ice or leaves from the air intake area at the area
(at the bottom of the windshield and underneath the hood).
•Do not place objects over the defroster outlets. These objects can
block airflow and reduce your ability to see through your windshield.
Avoid placing small objects on top of the instrument panel. These
objects may fall down into the defroster outlets and block airflow, in
addition to damaging the climate control system.
To aid in side window defogging/demisting in cold weather conditions:
1. Select
2. Set the temperature control to full heat
3. Select A/C
4. Set the fan speed to HI
5. Direct the outer panel vents towards to side windows
6. To increase airflow to the outer panel vents, close the central panel
vents.
Do not place objects on top of the instrument panel, as these
objects may become projectiles in a collision or sudden stop.
Climate Controls
67
Page 70 of 272
20815.psp Ford O/G 2002 Excursion English 4th Print 2C3J-19A321-HB 04/24/2003 09:14:57 35 B
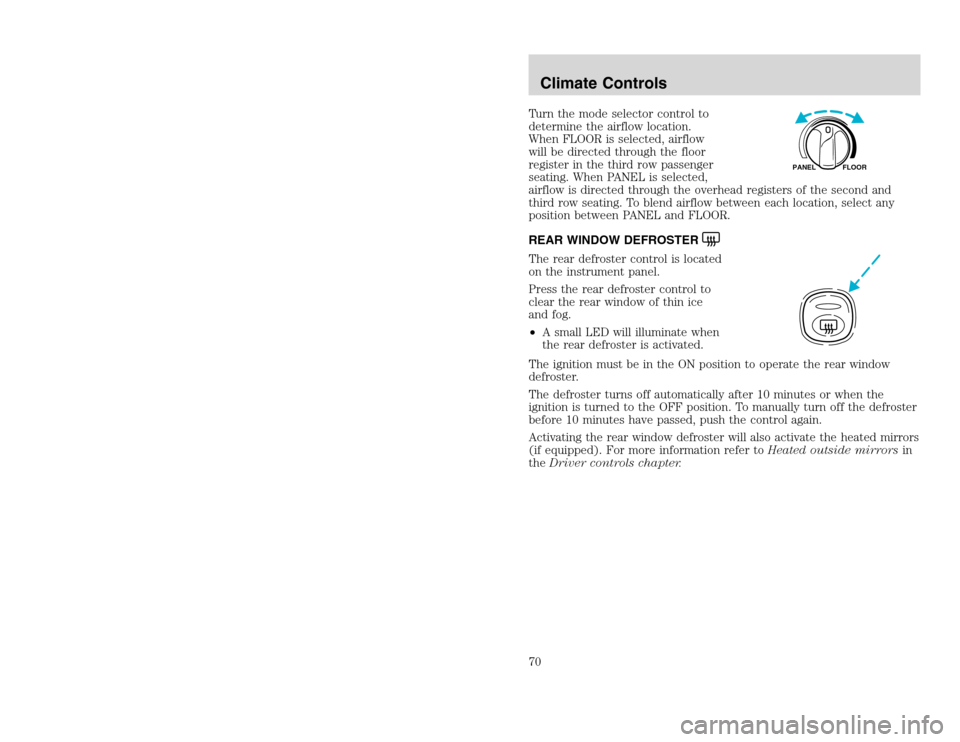
Turn the mode selector control to
determine the airflow location.
When FLOOR is selected, airflow
will be directed through the floor
register in the third row passenger
seating. When PANEL is selected,
airflow is directed through the overhead registers of the second and
third row seating. To blend airflow between each location, select any
position between PANEL and FLOOR.
REAR WINDOW DEFROSTERThe rear defroster control is located
on the instrument panel.
Press the rear defroster control to
clear the rear window of thin ice
and fog.
•A small LED will illuminate when
the rear defroster is activated.
The ignition must be in the ON position to operate the rear window
defroster.
The defroster turns off automatically after 10 minutes or when the
ignition is turned to the OFF position. To manually turn off the defroster
before 10 minutes have passed, push the control again.
Activating the rear window defroster will also activate the heated mirrors
(if equipped). For more information refer toHeated outside mirrorsin
theDriver controls chapter.
FLOOR PANEL
Climate Controls70
Page 80 of 272
20815.psp Ford O/G 2002 Excursion English 4th Print 2C3J-19A321-HB 04/24/2003 09:14:57 40 B
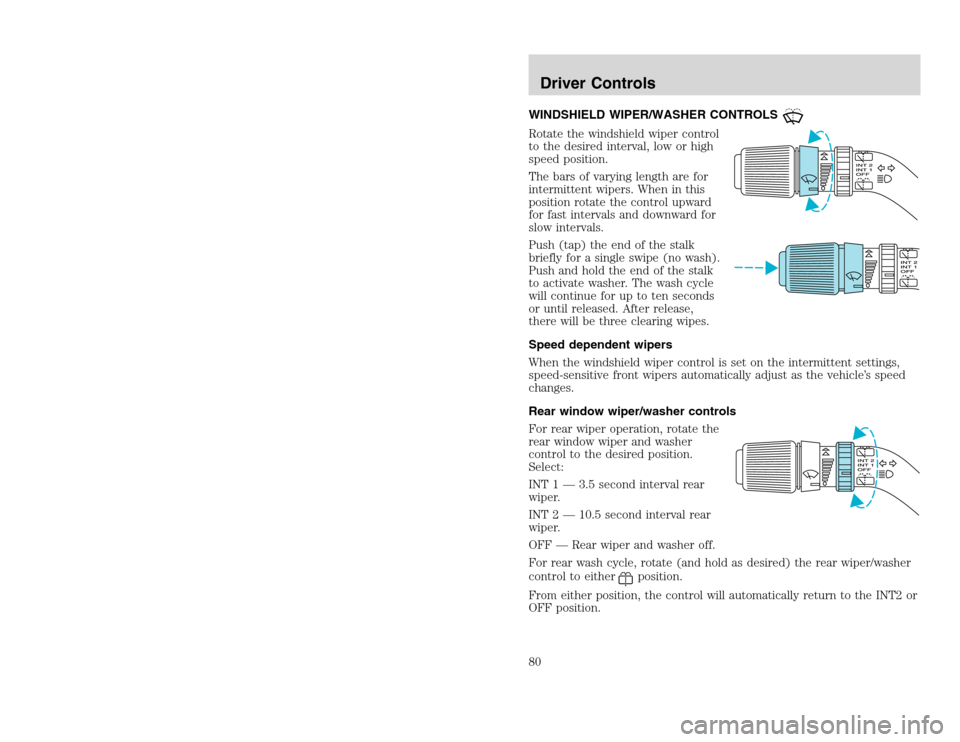
WINDSHIELD WIPER/WASHER CONTROLSRotate the windshield wiper control
to the desired interval, low or high
speed position.
The bars of varying length are for
intermittent wipers. When in this
position rotate the control upward
for fast intervals and downward for
slow intervals.
Push (tap) the end of the stalk
briefly for a single swipe (no wash).
Push and hold the end of the stalk
to activate washer. The wash cycle
will continue for up to ten seconds
or until released. After release,
there will be three clearing wipes.
Speed dependent wipers
When the windshield wiper control is set on the intermittent settings,
speed-sensitive front wipers automatically adjust as the vehicle’s speed
changes.
Rear window wiper/washer controls
For rear wiper operation, rotate the
rear window wiper and washer
control to the desired position.
Select:
INT 1 — 3.5 second interval rear
wiper.
INT 2 — 10.5 second interval rear
wiper.
OFF — Rear wiper and washer off.
For rear wash cycle, rotate (and hold as desired) the rear wiper/washer
control to either
position.
From either position, the control will automatically return to the INT2 or
OFF position.
Driver Controls80
Page 81 of 272
20815.psp Ford O/G 2002 Excursion English 4th Print 2C3J-19A321-HB 04/24/2003 09:14:57 41 A
Windshield wiper blades
Check the wiper blades for wear at least twice a year or when they seem
less effective. Substances such as tree sap and some hot wax treatments
used by commercial car washes reduce the effectiveness of wiper blades.
Checking the wiper blades
If the wiper blades do not wipe properly, clean both the windshield and
wiper blades using undiluted windshield wiper solution or a mild
detergent. Rinse thoroughly with clean water. To avoid damaging the
blades, do not use fuel, kerosene, paint thinner or other solvents.
Changing the wiper blades
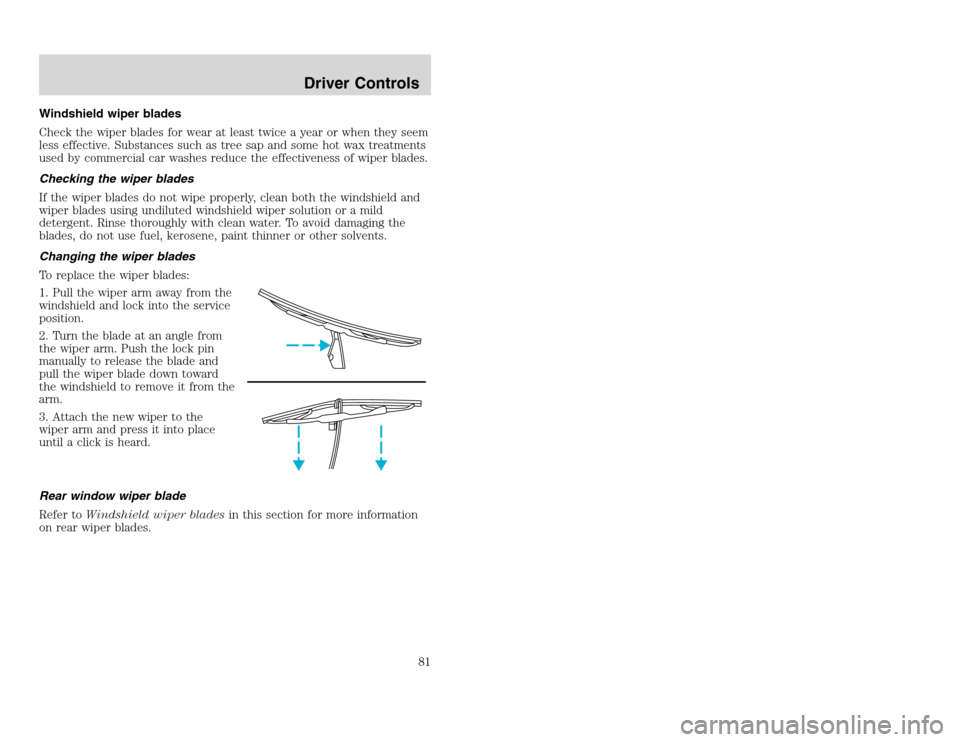
To replace the wiper blades:
1. Pull the wiper arm away from the
windshield and lock into the service
position.
2. Turn the blade at an angle from
the wiper arm. Push the lock pin
manually to release the blade and
pull the wiper blade down toward
the windshield to remove it from the
arm.
3. Attach the new wiper to the
wiper arm and press it into place
until a click is heard.
Rear window wiper blade
Refer toWindshield wiper bladesin this section for more information
on rear wiper blades.
Driver Controls
81
Page 83 of 272
20815.psp Ford O/G 2002 Excursion English 4th Print 2C3J-19A321-HB 04/24/2003 09:14:57 42 A
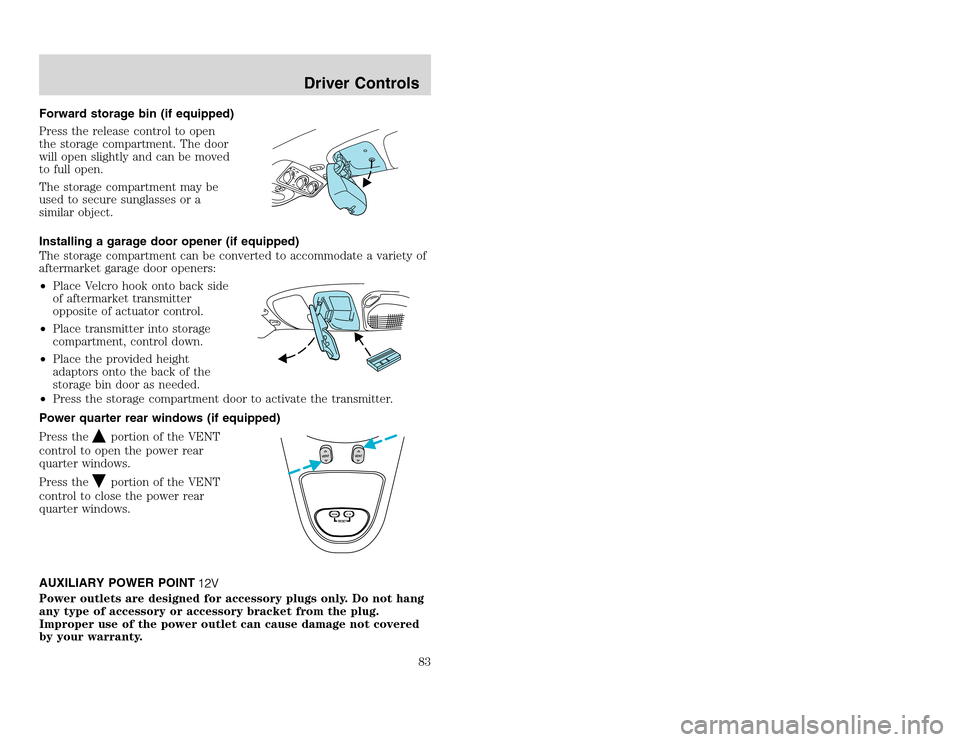
Forward storage bin (if equipped)
Press the release control to open
the storage compartment. The door
will open slightly and can be moved
to full open.
The storage compartment may be
used to secure sunglasses or a
similar object.
Installing a garage door opener (if equipped)
The storage compartment can be converted to accommodate a variety of
aftermarket garage door openers:
•Place Velcro hook onto back side
of aftermarket transmitter
opposite of actuator control.
•Place transmitter into storage
compartment, control down.
•Place the provided height
adaptors onto the back of the
storage bin door as needed.
•Press the storage compartment door to activate the transmitter.
Power quarter rear windows (if equipped)
Press the
portion of the VENT
control to open the power rear
quarter windows.
Press theportion of the VENT
control to close the power rear
quarter windows.
AUXILIARY POWER POINT
Power outlets are designed for accessory plugs only. Do not hang
any type of accessory or accessory bracket from the plug.
Improper use of the power outlet can cause damage not covered
by your warranty.
RESET
VENT
VENT
MODE E/M
Driver Controls
83
Page 85 of 272
20815.psp Ford O/G 2002 Excursion English 4th Print 2C3J-19A321-HB 04/24/2003 09:14:57 43 A
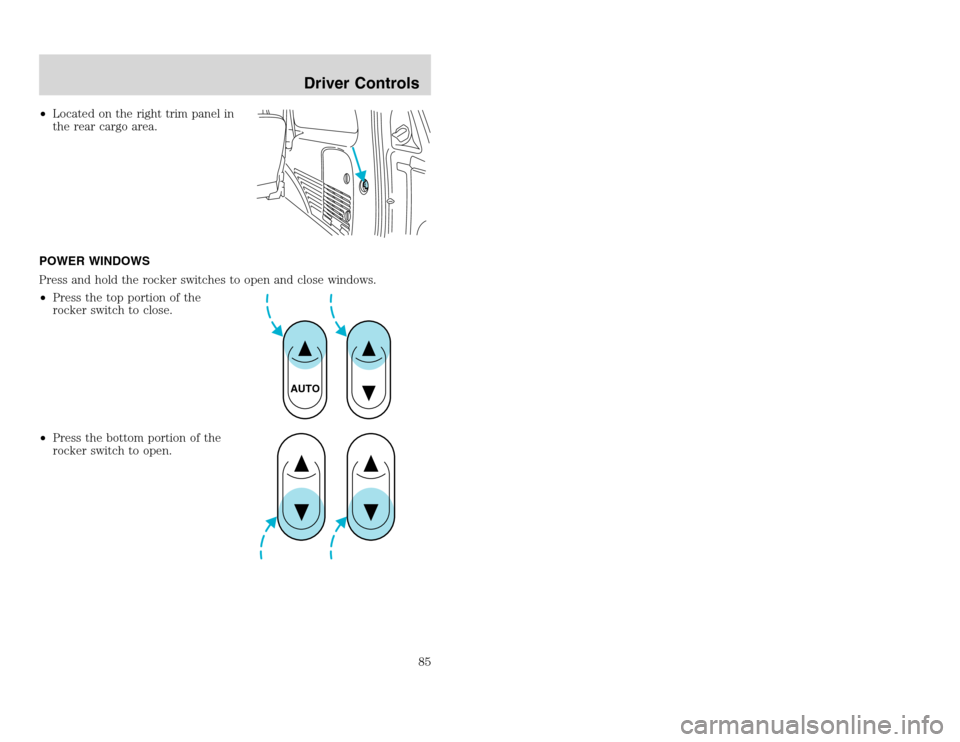
•Located on the right trim panel in
the rear cargo area.
POWER WINDOWS
Press and hold the rocker switches to open and close windows.
•Press the top portion of the
rocker switch to close.
•Press the bottom portion of the
rocker switch to open.
AUTO
Driver Controls
85
•Located on the right trim panel in
the rear cargo area.
POWER WINDOWS
Press and hold the rocker switches to open and close windows.
•Press the top portion of the
rocker switch to close.
•Press the bottom portion of the
rocker switch to open.
AUTO
Driver Controls
85
Page 86 of 272
20815.psp Ford O/G 2002 Excursion English 4th Print 2C3J-19A321-HB 04/24/2003 09:14:57 43 B
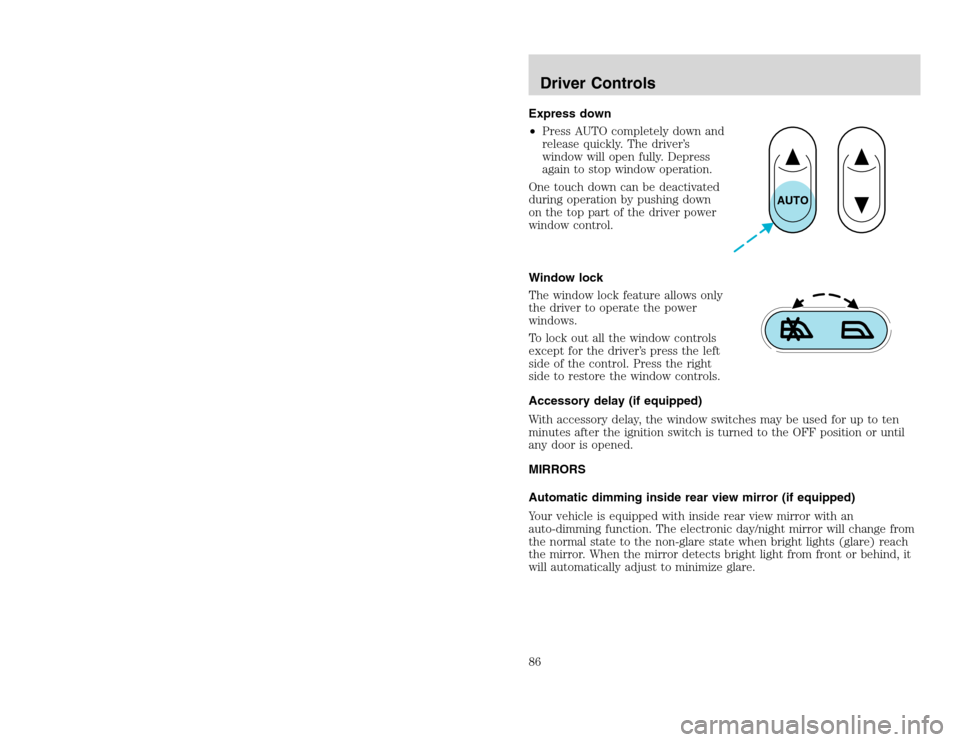
Express down
•Press AUTO completely down and
release quickly. The driver’s
window will open fully. Depress
again to stop window operation.
One touch down can be deactivated
during operation by pushing down
on the top part of the driver power
window control.
Window lock
The window lock feature allows only
the driver to operate the power
windows.
To lock out all the window controls
except for the driver’s press the left
side of the control. Press the right
side to restore the window controls.
Accessory delay (if equipped)
With accessory delay, the window switches may be used for up to ten
minutes after the ignition switch is turned to the OFF position or until
any door is opened.
MIRRORS
Automatic dimming inside rear view mirror (if equipped)
Your vehicle is equipped with inside rear view mirror with an
auto-dimming function. The electronic day/night mirror will change from
the normal state to the non-glare state when bright lights (glare) reach
the mirror. When the mirror detects bright light from front or behind, it
will automatically adjust to minimize glare.
AUTO
Driver Controls86
Page 88 of 272
20815.psp Ford O/G 2002 Excursion English 4th Print 2C3J-19A321-HB 04/24/2003 09:14:57 44 B
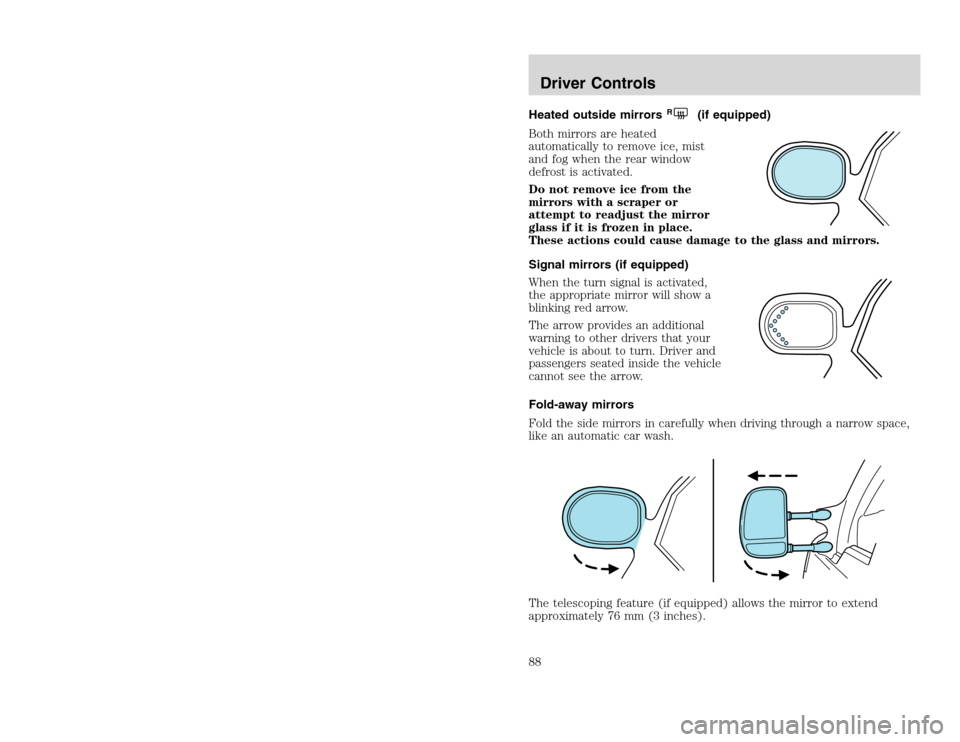
Heated outside mirrors
R
(if equipped)
Both mirrors are heated
automatically to remove ice, mist
and fog when the rear window
defrost is activated.
Do not remove ice from the
mirrors with a scraper or
attempt to readjust the mirror
glass if it is frozen in place.
These actions could cause damage to the glass and mirrors.
Signal mirrors (if equipped)
When the turn signal is activated,
the appropriate mirror will show a
blinking red arrow.
The arrow provides an additional
warning to other drivers that your
vehicle is about to turn. Driver and
passengers seated inside the vehicle
cannot see the arrow.
Fold-away mirrors
Fold the side mirrors in carefully when driving through a narrow space,
like an automatic car wash.
The telescoping feature (if equipped) allows the mirror to extend
approximately 76 mm (3 inches).
Driver Controls88
Page 103 of 272
20815.psp Ford O/G 2002 Excursion English 4th Print 2C3J-19A321-HB 04/24/2003 09:14:57 52 A
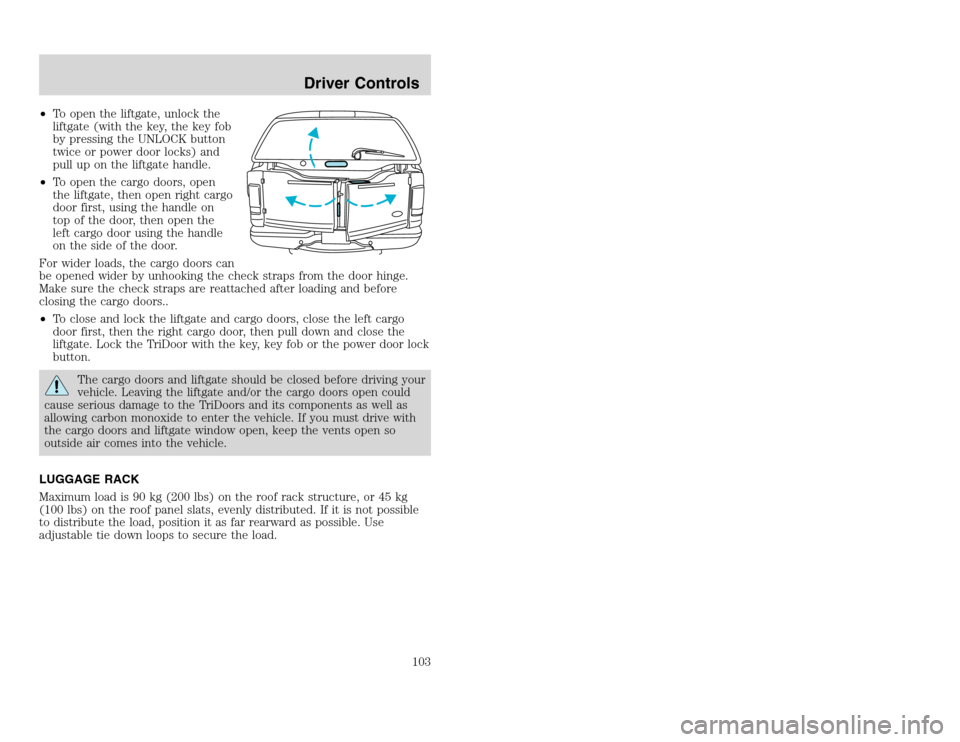
•To open the liftgate, unlock the
liftgate (with the key, the key fob
by pressing the UNLOCK button
twice or power door locks) and
pull up on the liftgate handle.
•To open the cargo doors, open
the liftgate, then open right cargo
door first, using the handle on
top of the door, then open the
left cargo door using the handle
on the side of the door.
For wider loads, the cargo doors can
be opened wider by unhooking the check straps from the door hinge.
Make sure the check straps are reattached after loading and before
closing the cargo doors..
•To close and lock the liftgate and cargo doors, close the left cargo
door first, then the right cargo door, then pull down and close the
liftgate. Lock the TriDoor with the key, key fob or the power door lock
button.
The cargo doors and liftgate should be closed before driving your
vehicle. Leaving the liftgate and/or the cargo doors open could
cause serious damage to the TriDoors and its components as well as
allowing carbon monoxide to enter the vehicle. If you must drive with
the cargo doors and liftgate window open, keep the vents open so
outside air comes into the vehicle.
LUGGAGE RACK
Maximum load is 90 kg (200 lbs) on the roof rack structure, or 45 kg
(100 lbs) on the roof panel slats, evenly distributed. If it is not possible
to distribute the load, position it as far rearward as possible. Use
adjustable tie down loops to secure the load.
Driver Controls
103
Page 126 of 272
20815.psp Ford O/G 2002 Excursion English 4th Print 2C3J-19A321-HB 04/24/2003 09:14:57 63 B
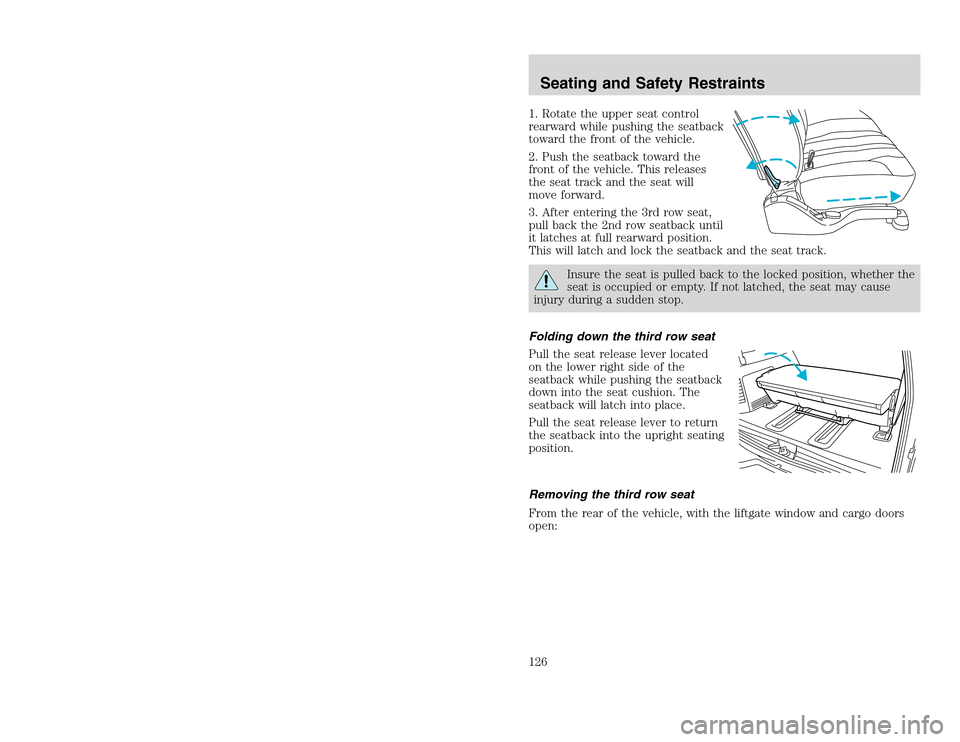
1. Rotate the upper seat control
rearward while pushing the seatback
toward the front of the vehicle.
2. Push the seatback toward the
front of the vehicle. This releases
the seat track and the seat will
move forward.
3. After entering the 3rd row seat,
pull back the 2nd row seatback until
it latches at full rearward position.
This will latch and lock the seatback and the seat track.
Insure the seat is pulled back to the locked position, whether the
seat is occupied or empty. If not latched, the seat may cause
injury during a sudden stop.
Folding down the third row seat
Pull the seat release lever located
on the lower right side of the
seatback while pushing the seatback
down into the seat cushion. The
seatback will latch into place.
Pull the seat release lever to return
the seatback into the upright seating
position.
Removing the third row seat
From the rear of the vehicle, with the liftgate window and cargo doors
open:
Seating and Safety Restraints126