change time FORD EXCURSION 2002 1.G Owners Manual
[x] Cancel search | Manufacturer: FORD, Model Year: 2002, Model line: EXCURSION, Model: FORD EXCURSION 2002 1.GPages: 272, PDF Size: 5.06 MB
Page 24 of 272
20815.psp Ford O/G 2002 Excursion English 4th Print 2C3J-19A321-HB 04/24/2003 09:14:57 12 B
•
to decrease minutes and
•to increase minutes.
If your vehicle has a separate clock, (other than the digital radio
display), the CLK control will not function in the above manner.
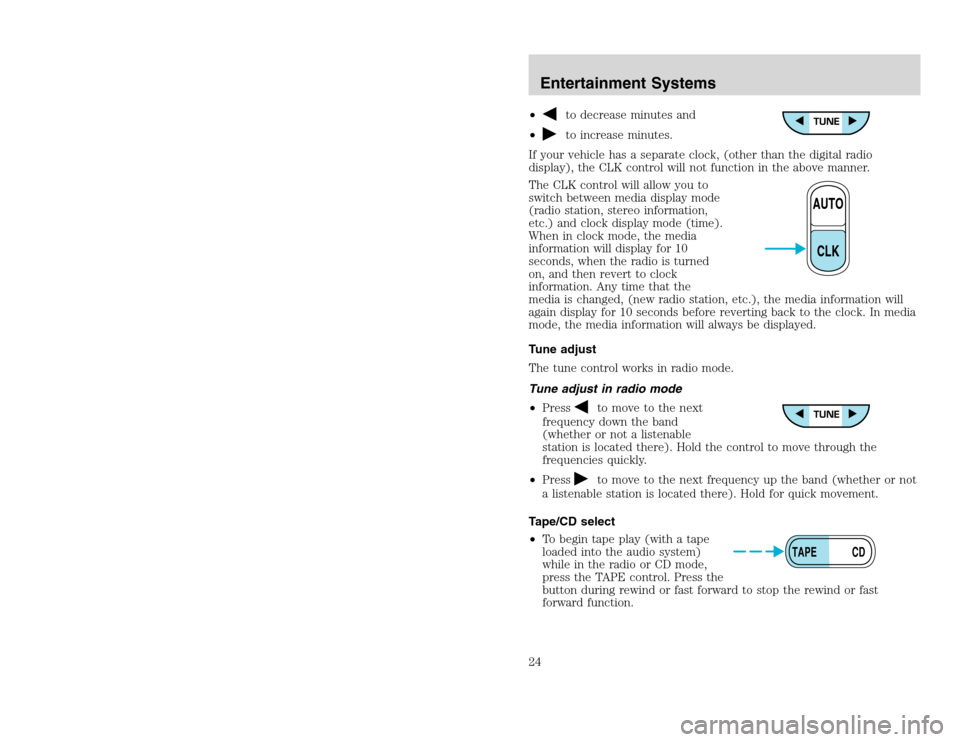
The CLK control will allow you to
switch between media display mode
(radio station, stereo information,
etc.) and clock display mode (time).
When in clock mode, the media
information will display for 10
seconds, when the radio is turned
on, and then revert to clock
information. Any time that the
media is changed, (new radio station, etc.), the media information will
again display for 10 seconds before reverting back to the clock. In media
mode, the media information will always be displayed.
Tune adjust
The tune control works in radio mode.
Tune adjust in radio mode
•Press
to move to the next
frequency down the band
(whether or not a listenable
station is located there). Hold the control to move through the
frequencies quickly.
•Pressto move to the next frequency up the band (whether or not
a listenable station is located there). Hold for quick movement.
Tape/CD select
•To begin tape play (with a tape
loaded into the audio system)
while in the radio or CD mode,
press the TAPE control. Press the
button during rewind or fast forward to stop the rewind or fast
forward function.
AUTO
CLK
TAPE CD
Entertainment Systems24
Page 40 of 272
20815.psp Ford O/G 2002 Excursion English 4th Print 2C3J-19A321-HB 04/24/2003 09:14:57 20 B
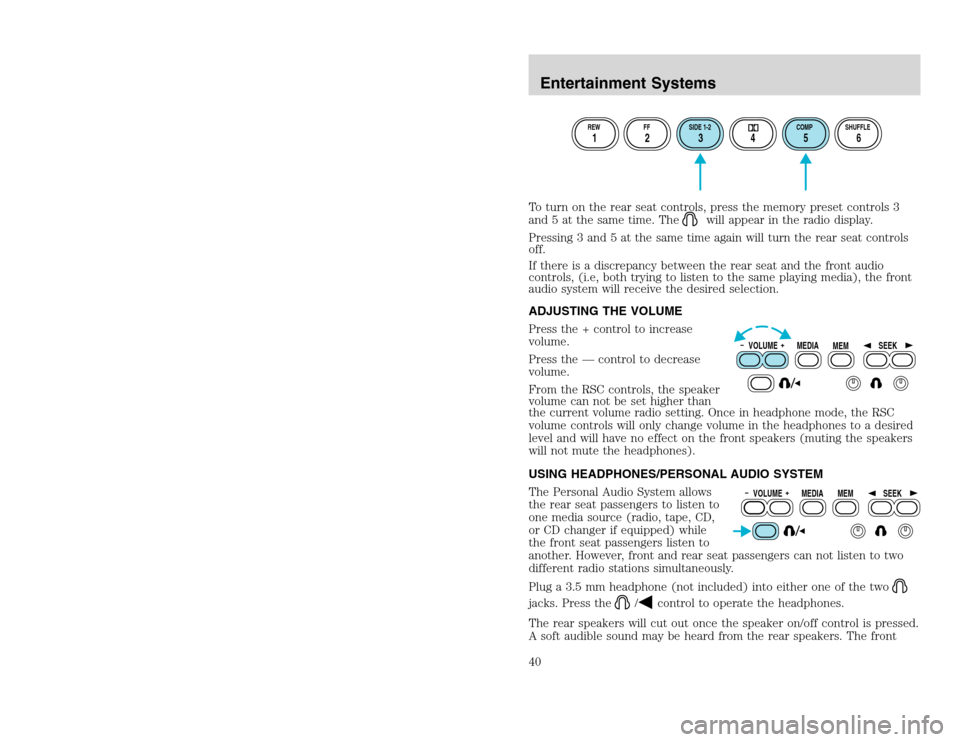
To turn on the rear seat controls, press the memory preset controls 3
and 5 at the same time. The
will appear in the radio display.
Pressing 3 and 5 at the same time again will turn the rear seat controls
off.
If there is a discrepancy between the rear seat and the front audio
controls, (i.e, both trying to listen to the same playing media), the front
audio system will receive the desired selection.
ADJUSTING THE VOLUME
Press the + control to increase
volume.
Press the — control to decrease
volume.
From the RSC controls, the speaker
volume can not be set higher than
the current volume radio setting. Once in headphone mode, the RSC
volume controls will only change volume in the headphones to a desired
level and will have no effect on the front speakers (muting the speakers
will not mute the headphones).
USING HEADPHONES/PERSONAL AUDIO SYSTEM
The Personal Audio System allows
the rear seat passengers to listen to
one media source (radio, tape, CD,
or CD changer if equipped) while
the front seat passengers listen to
another. However, front and rear seat passengers can not listen to two
different radio stations simultaneously.
Plug a 3.5 mm headphone (not included) into either one of the two
jacks. Press the
/
control to operate the headphones.
The rear speakers will cut out once the speaker on/off control is pressed.
A soft audible sound may be heard from the rear speakers. The front
REW FF SIDE 1-2 COMP SHUFFLE12 3456
VOLUME MEDIA
MEMSEEKVOLUME MEDIA
MEMSEEK
Entertainment Systems40
Page 52 of 272
20815.psp Ford O/G 2002 Excursion English 4th Print 2C3J-19A321-HB 04/24/2003 09:14:57 26 B
If the CD/DVD is not removed within the allotted time, the system will
pull the CD/DVD back into the system for safety purposes. If the
CD/DVD will not eject from the system, press and hold the EJECT
control for approximately 2 seconds. The disc should eject whether the
vehicle ignition is ON or OFF.
Playing a video game/auxiliary device
1. Connect the video line from your video game device to the YELLOW
auxiliary input jack.
2. Connect the left and right audio lines to the WHITE and RED auxiliary
input jacks respectively.
3. Press the MODE control until DVD/CD AUX (no disc in player) or
DVD/CD play (disc in player) illuminates in the radio display. If a disc is
in the system, playback should begin. To enable the aux inputs, press the
STOP control or press the AUX control on the DVD player.
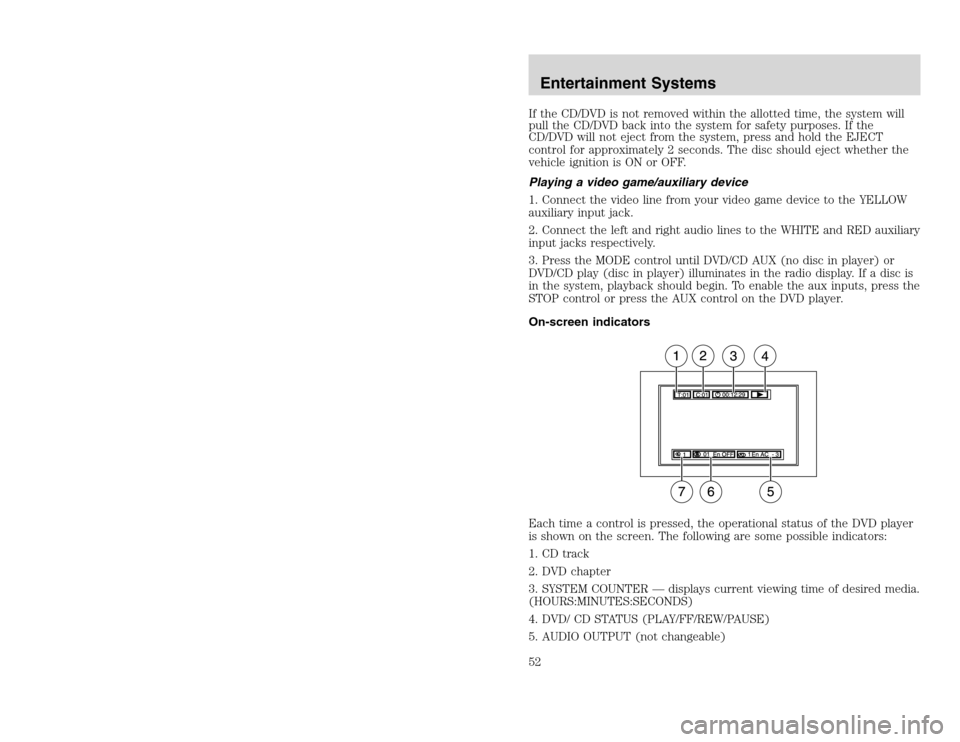
On-screen indicators
Each time a control is pressed, the operational status of the DVD player
is shown on the screen. The following are some possible indicators:
1. CD track
2. DVD chapter
3. SYSTEM COUNTER — displays current viewing time of desired media.
(HOURS:MINUTES:SECONDS)
4. DVD/ CD STATUS (PLAY/FF/REW/PAUSE)
5. AUDIO OUTPUT (not changeable)Entertainment Systems52
Page 53 of 272
20815.psp Ford O/G 2002 Excursion English 4th Print 2C3J-19A321-HB 04/24/2003 09:14:57 27 A
6. Subtitles (specific language type - English or Spanish, dependent of
disc capability and ON/OFF selection.)
7. Camera angle (of picture) - Adjustable with cursor controls and
ENTER control.
Safety information
Read all of the safety and operating instructions before operating the
system and retain for future reference.
Do not attempt to service, repair or modify the Rear Seat Entertainment
DVD System. See your Ford or Lincoln Mercury dealer.
Do not insert foreign objects into the DVD compartment.
The front glass on the liquid crystal display (LCD) flip-down
screen may break when hit with a hard surface. If the glass
breaks, do not touch the liquid crystalline material. In case of contact
with skin, wash immediately with soap and water.
Do not expose the liquid crystal display (LCD) flip-down screen
to direct sunlight or intensive ultraviolet rays for extensive
periods of time. Ultraviolet rays deteriorate the liquid crystal.
Be sure to review User Manuals for video games and video game
equipment when used as auxiliary inputs for your Rear Seat
Entertainment DVD System.
Do not operate video games or video equipment if the power cords
and/or cables are broken, split or damaged. Carefully place cords and/or
cables where they will not be stepped on or interfere with the operation
of seats and/or compartments.
Disconnect video games and video equipment power cords and/or cables
when not in use.
Avoid touching auxiliary input jacks with your fingers. Do not blow on
them or allow them to get wet or dirty.
Do not clean any part of the DVD layer with benzene, paint thinner or
any other solvent.
Federal Communication Commission (FCC) Compliance
Changes or modifications not approved by Ford Lincoln Mercury could void
user’s authority to operate the equipment. This equipment has been tested
and found to comply with the limits for a Class B digital device, pursuant
to Part 15 of the FCC Rules. These limits are designed to provide
Entertainment Systems
53
Page 55 of 272
20815.psp Ford O/G 2002 Excursion English 4th Print 2C3J-19A321-HB 04/24/2003 09:14:57 28 A
Foreign substances
Exercise care to prevent dirt and foreign objects from entering the DVD
player compartment. Be especially careful not to spill liquids of any kind
onto the media controls or into the videocassette player. If liquid is
accidentally spilled onto the system, immediately turn the system OFF
and consult a qualified service technician.
Cleaning compact discs
Inspect all discs for contamination before playing. If necessary, clean
discs only with an approved CD cleaner and wipe from the center out to
the edge. Do not use circular motion.
Cleaning the DVD player
Clean the exterior of the DVD player with a damp cloth. Do not use CD
cleaning kits or CDs intended to clean the interior of your DVD player.
Use of these products may damage your system.
CLEANING COMPACT DISCS
Inspect all discs for contamination before playing. If necessary, clean
discs only with an approved CD cleaner and wipe from the center out to
the edge. Do not use circular motion.
CD AND CD CHANGER CARE
•Handle discs by their edges only. Never touch the playing surface.
•Do not expose discs to direct sunlight or heat sources for extended
periods of time.
•Do not insert more than one disc into each slot of the CD changer
magazine.
CD units are designed to play commercially pressed 12 cm (4.75
in) audio compact discs only. Due to technical incompatibility,
certain recordable and re-recordable compact discs may not
function correctly when used in Ford CD players. Irregular
shaped CDs, CDs with a scratch protection film attached, and CDs
with homemade paper (adhesive) labels should not be inserted
into the CD player. The label may peel and cause the CD to
become jammed. It is recommended that homemade CDs be
identified with permanent felt tip marker rather than adhesive
labels. Ball point pens may damage CDs. Please contact your
dealer for further information.
CLEANING CASSETTE PLAYER (IF EQUIPPED)
Clean the tape player head with a cassette cleaning cartridge after 10 to
12 hours of play in order to maintain the best sound and operation.
Entertainment Systems
55
Page 71 of 272
20815.psp Ford O/G 2002 Excursion English 4th Print 2C3J-19A321-HB 04/24/2003 09:14:57 36 A
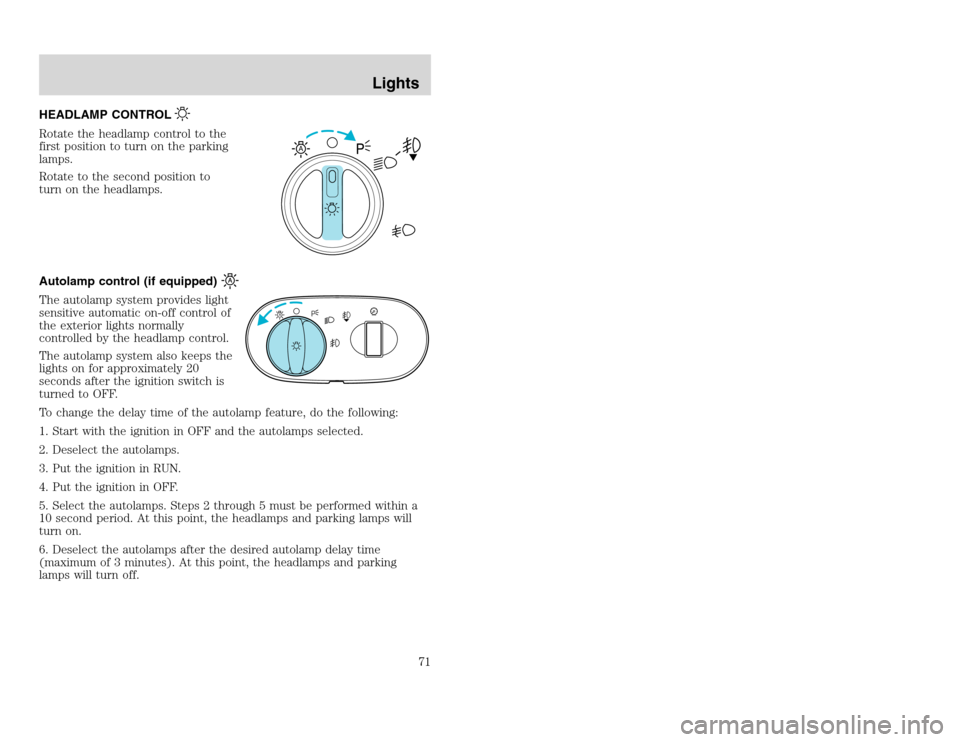
HEADLAMP CONTROLRotate the headlamp control to the
first position to turn on the parking
lamps.
Rotate to the second position to
turn on the headlamps.
Autolamp control (if equipped)The autolamp system provides light
sensitive automatic on-off control of
the exterior lights normally
controlled by the headlamp control.
The autolamp system also keeps the
lights on for approximately 20
seconds after the ignition switch is
turned to OFF.
To change the delay time of the autolamp feature, do the following:
1. Start with the ignition in OFF and the autolamps selected.
2. Deselect the autolamps.
3. Put the ignition in RUN.
4. Put the ignition in OFF.
5. Select the autolamps. Steps 2 through 5 must be performed within a
10 second period. At this point, the headlamps and parking lamps will
turn on.
6. Deselect the autolamps after the desired autolamp delay time
(maximum of 3 minutes). At this point, the headlamps and parking
lamps will turn off.
A
A
Lights
71
Page 107 of 272
20815.psp Ford O/G 2002 Excursion English 4th Print 2C3J-19A321-HB 04/24/2003 09:14:57 54 A
Changes or modifications not expressly approved by the party
responsible for compliance could void the user’s authority to
operate the equipment.
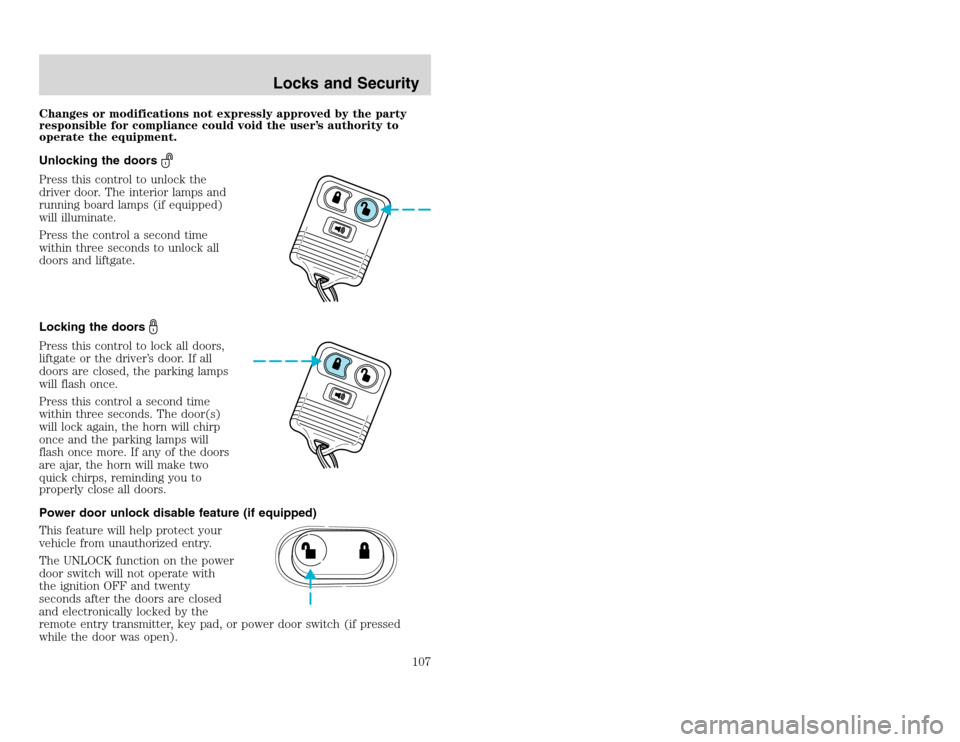
Unlocking the doorsPress this control to unlock the
driver door. The interior lamps and
running board lamps (if equipped)
will illuminate.
Press the control a second time
within three seconds to unlock all
doors and liftgate.
Locking the doorsPress this control to lock all doors,
liftgate or the driver’s door. If all
doors are closed, the parking lamps
will flash once.
Press this control a second time
within three seconds. The door(s)
will lock again, the horn will chirp
once and the parking lamps will
flash once more. If any of the doors
are ajar, the horn will make two
quick chirps, reminding you to
properly close all doors.
Power door unlock disable feature (if equipped)
This feature will help protect your
vehicle from unauthorized entry.
The UNLOCK function on the power
door switch will not operate with
the ignition OFF and twenty
seconds after the doors are closed
and electronically locked by the
remote entry transmitter, key pad, or power door switch (if pressed
while the door was open).
Locks and Security
107
Page 108 of 272
20815.psp Ford O/G 2002 Excursion English 4th Print 2C3J-19A321-HB 04/24/2003 09:14:57 54 B
The UNLOCK function will operate again after you unlock the vehicle
using the remote entry transmitter or key pad, turn the ignition to ON,
or open the door from inside of the vehicle.
Power door unlock disable feature — activation/deactivation
1. Turn the ignition key to ON.
2. Press the UNLOCK button 3 times.
3. Turn the ignition key to OFF.
4. Press the UNLOCK button 3 times.
5. Turn the ignition key to ON. The horn will chirp.
6. Press the LOCK button 2 times. You should receive 2 horn chirps to
indicate the system has been disabled, or 2 chirps followed by a honk to
indicate the system has been enabled.
Note:Pressing the power door LOCK button two times again will turn
the feature ON if it was previously OFF, or OFF if it was previously ON.
Every two consecutive presses of the LOCK button after successfully
entering the configuration mode will change the enable/disable condition
of the feature.
7. Turn ignition to OFF to exit programming. The horn will chirp once to
confirm the procedure is complete.
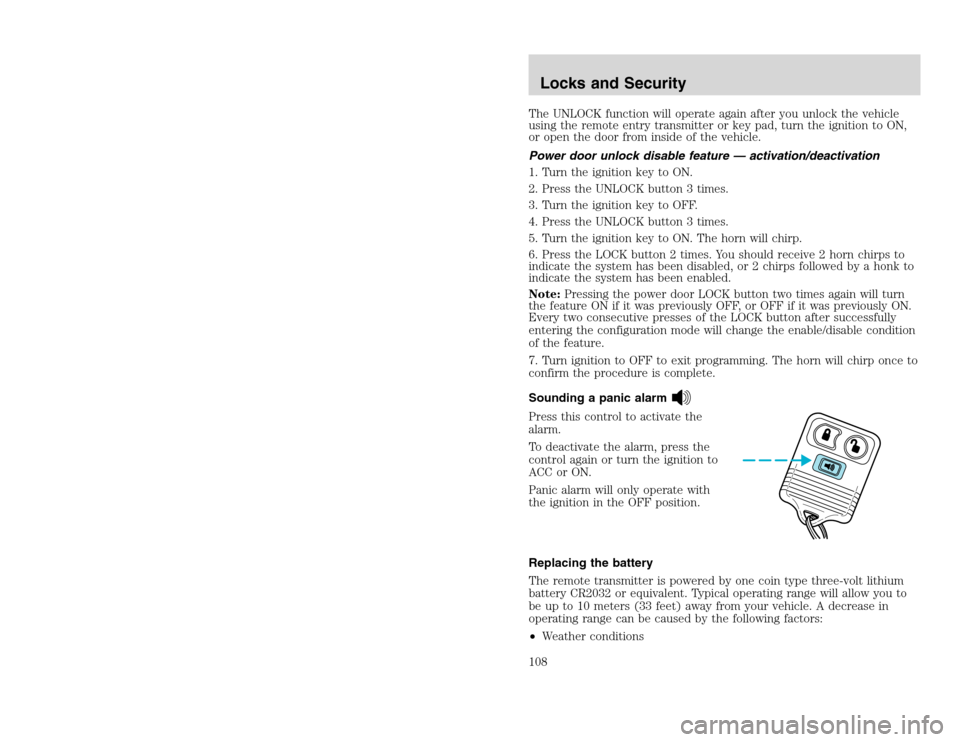
Sounding a panic alarmPress this control to activate the
alarm.
To deactivate the alarm, press the
control again or turn the ignition to
ACC or ON.
Panic alarm will only operate with
the ignition in the OFF position.
Replacing the battery
The remote transmitter is powered by one coin type three-volt lithium
battery CR2032 or equivalent. Typical operating range will allow you to
be up to 10 meters (33 feet) away from your vehicle. A decrease in
operating range can be caused by the following factors:
•Weather conditionsLocks and Security108
Page 139 of 272
20815.psp Ford O/G 2002 Excursion English 4th Print 2C3J-19A321-HB 04/24/2003 09:14:57 70 A
8. Confirmation of enabling BeltMinder is provided by flashing the safety
belt warning light four times per second for three seconds, followed by
three seconds with the safety belt warning light off, then followed by
flashing the safety belt warning light four times per second for three
seconds again.
9. After receiving confirmation, the deactivation/activation procedure is
complete.
Safety belt extension assembly
If the safety belt is too short when fully extended, there is a 20 cm (8
inch) safety belt extension assembly that can be added (part number
611C22). This assembly can be obtained from your dealer at no cost.
Use only extensions manufactured by the same supplier as the safety
belt. Manufacturer identification is located at the end of the webbing on
the label. Also, use the safety belt extension only if the safety belt is too
short for you when fully extended.
Do not use extensions to change the fit of the shoulder belt across the
torso.
Safety belt maintenance
Inspect the safety belt systems periodically to make sure they work
properly and are not damaged. Inspect the safety belts to make sure
there are no nicks, tears or cuts. Replace if necessary. All safety belt
assemblies, including retractors, buckles, front seat belt buckle
assemblies, buckle support assemblies (slide bar-if equipped), shoulder
belt height adjusters (if equipped), shoulder belt guide on seatback (if
equipped), child safety seat tether bracket assemblies (if equipped),
LATCH child seat tether anchors and lower anchors (if equipped), and
attaching hardware, should be inspected after a collision. Ford Motor
Company recommends that all safety belt assemblies used in vehicles
involved in a collision be replaced. However, if the collision was minor
and a qualified technician finds that the belts do not show damage and
continue to operate properly, they do not need to be replaced. Safety
belt assemblies not in use during a collision should also be inspected and
replaced if either damage or improper operation is noted.
Failure to inspect and if necessary replace the safety belt
assembly under the above conditions could result in severe
personal injuries in the event of a collision.
Refer toCleaning and maintaining the safety beltsin theCleaning
chapter.
Seating and Safety Restraints
139
Page 156 of 272
20815.psp Ford O/G 2002 Excursion English 4th Print 2C3J-19A321-HB 04/24/2003 09:14:57 78 B
Have the exhaust and body ventilation systems checked whenever:
•the vehicle is raised for service.
•the sound of the exhaust system changes.
•the vehicle has been damaged in a collision.
WARNING:Engine exhaust, some of its constituents, and
certain vehicle components contain or emit chemicals known to
the State of California to cause cancer and birth defects or other
reproductive harm. In addition, certain fluids contained in vehicles and
certain products of component wear contain or emit chemicals known
to the State of California to cause cancer and birth defects or other
reproductive harm.
Important ventilating information
If the engine is idling while the vehicle is stopped in an open area for
long periods of time, open the windows at least 2.5 cm (one inch).
Adjust the heating or air conditioning (if equipped) to bring in fresh air.
Improve vehicle ventilation by keeping all air inlet vents clear of snow,
leaves and other debris.
BRAKES
Your service brakes are self-adjusting. Refer to the scheduled
maintenance guide for scheduled maintenance.
Occasional brake noise is normal and often does not indicate a
performance concern with the vehicle’s brake system. In normal
operation, automotive brake systems may emit occasional or intermittent
squeal or groan noises when the brakes are applied. Such noises are
usually heard during the first few brake applications in the morning;
however, they may be heard at any time while braking and can be
aggravated by environmental conditions such as cold, heat, moisture,
road dust, salt or mud. If a “metal-to-metal,” “continuous grinding” or
“continuous squeal” sound is present while braking, the brake linings
may be worn-out and should be inspected by a qualified service
technician.If you are driving down a long or steep hill, shift to a lower gear.
Do not apply your brakes continuously, as they may overheat
and become less effective.
Driving156