clock FORD EXCURSION 2003 1.G Owners Manual
[x] Cancel search | Manufacturer: FORD, Model Year: 2003, Model line: EXCURSION, Model: FORD EXCURSION 2003 1.GPages: 240, PDF Size: 2.2 MB
Page 18 of 240
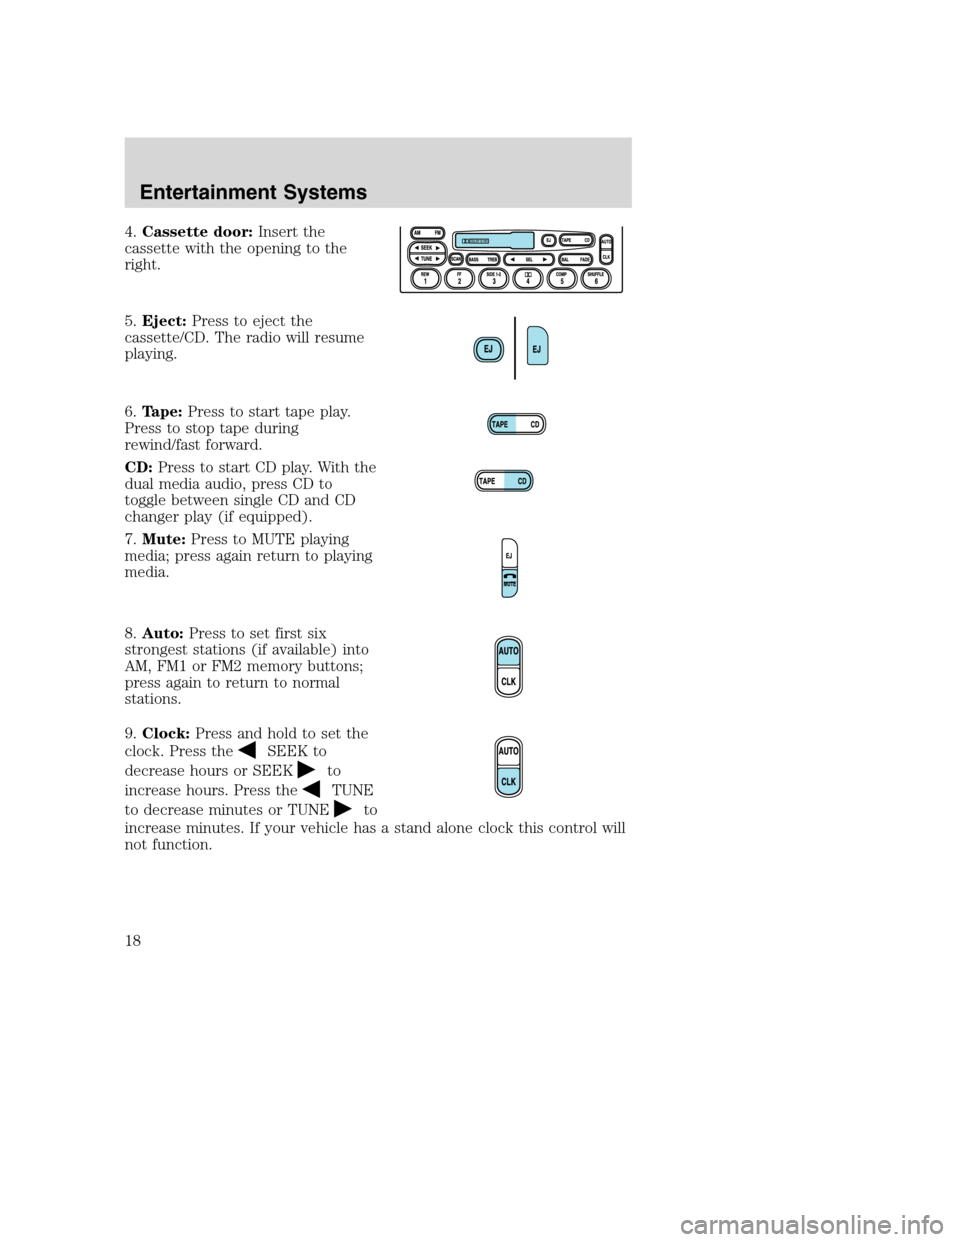
4.Cassette door:Insert the
cassette with the opening to the
right.
5.Eject:Press to eject the
cassette/CD. The radio will resume
playing.
6.Tape:Press to start tape play.
Press to stop tape during
rewind/fast forward.
CD:Press to start CD play. With the
dual media audio, press CD to
toggle between single CD and CD
changer play (if equipped).
7.Mute:Press to MUTE playing
media; press again return to playing
media.
8.Auto:Press to set first six
strongest stations (if available) into
AM, FM1 or FM2 memory buttons;
press again to return to normal
stations.
9.Clock:Press and hold to set the
clock. Press the
SEEK to
decrease hours or SEEK
to
increase hours. Press the
TUNE
to decrease minutes or TUNE
to
increase minutes. If your vehicle has a stand alone clock this control will
not function.
Entertainment Systems
18
Page 22 of 240
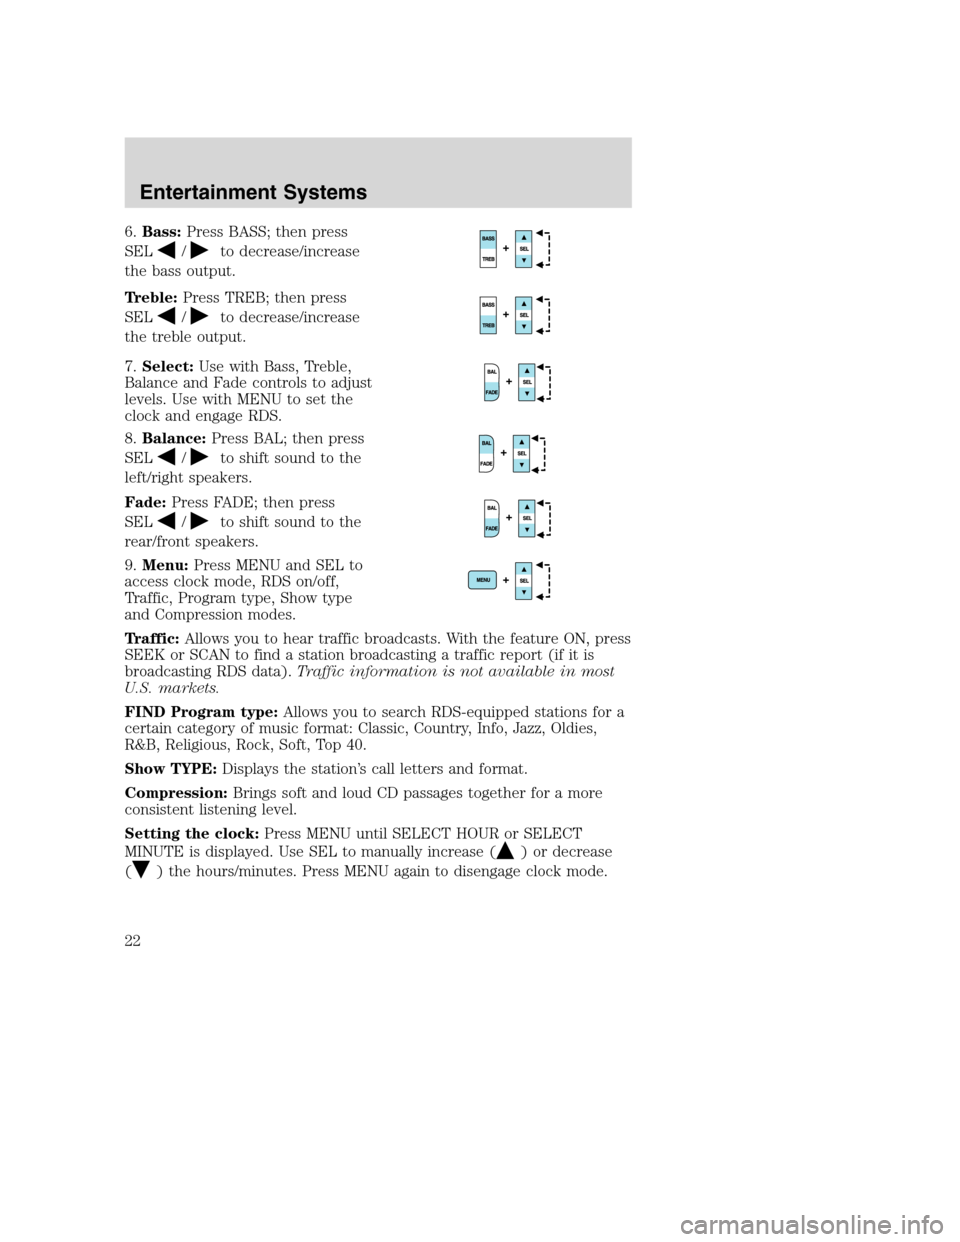
6.Bass:Press BASS; then press
SEL
/to decrease/increase
the bass output.
Treble:Press TREB; then press
SEL
/to decrease/increase
the treble output.
7.Select:Use with Bass, Treble,
Balance and Fade controls to adjust
levels. Use with MENU to set the
clock and engage RDS.
8.Balance:Press BAL; then press
SEL
/to shift sound to the
left/right speakers.
Fade:Press FADE; then press
SEL
/to shift sound to the
rear/front speakers.
9.Menu:Press MENU and SEL to
access clock mode, RDS on/off,
Traffic, Program type, Show type
and Compression modes.
Traffic:Allows you to hear traffic broadcasts. With the feature ON, press
SEEK or SCAN to find a station broadcasting a traffic report (if it is
broadcasting RDS data).Traffic information is not available in most
U.S. markets.
FIND Program type:Allows you to search RDS-equipped stations for a
certain category of music format: Classic, Country, Info, Jazz, Oldies,
R&B, Religious, Rock, Soft, Top 40.
Show TYPE:Displays the station’s call letters and format.
Compression:Brings soft and loud CD passages together for a more
consistent listening level.
Setting the clock:Press MENU until SELECT HOUR or SELECT
MINUTE is displayed. Use SEL to manually increase (
) or decrease
(
) the hours/minutes. Press MENU again to disengage clock mode.
Entertainment Systems
22
Page 50 of 240
Function Number of
bulbsTrade number
Second row reading lamp 2 578
Third row reading lamp 2 211-2
License lamp 2 168
All replacement bulbs are clear in color except where noted.
To replace all instrument panel lights - see your dealer
Interior bulbs
Check the operation of all bulbs frequently.
Replacing headlamp bulbs
1. Make sure that the headlamp control is in the OFF position then open
the hood.
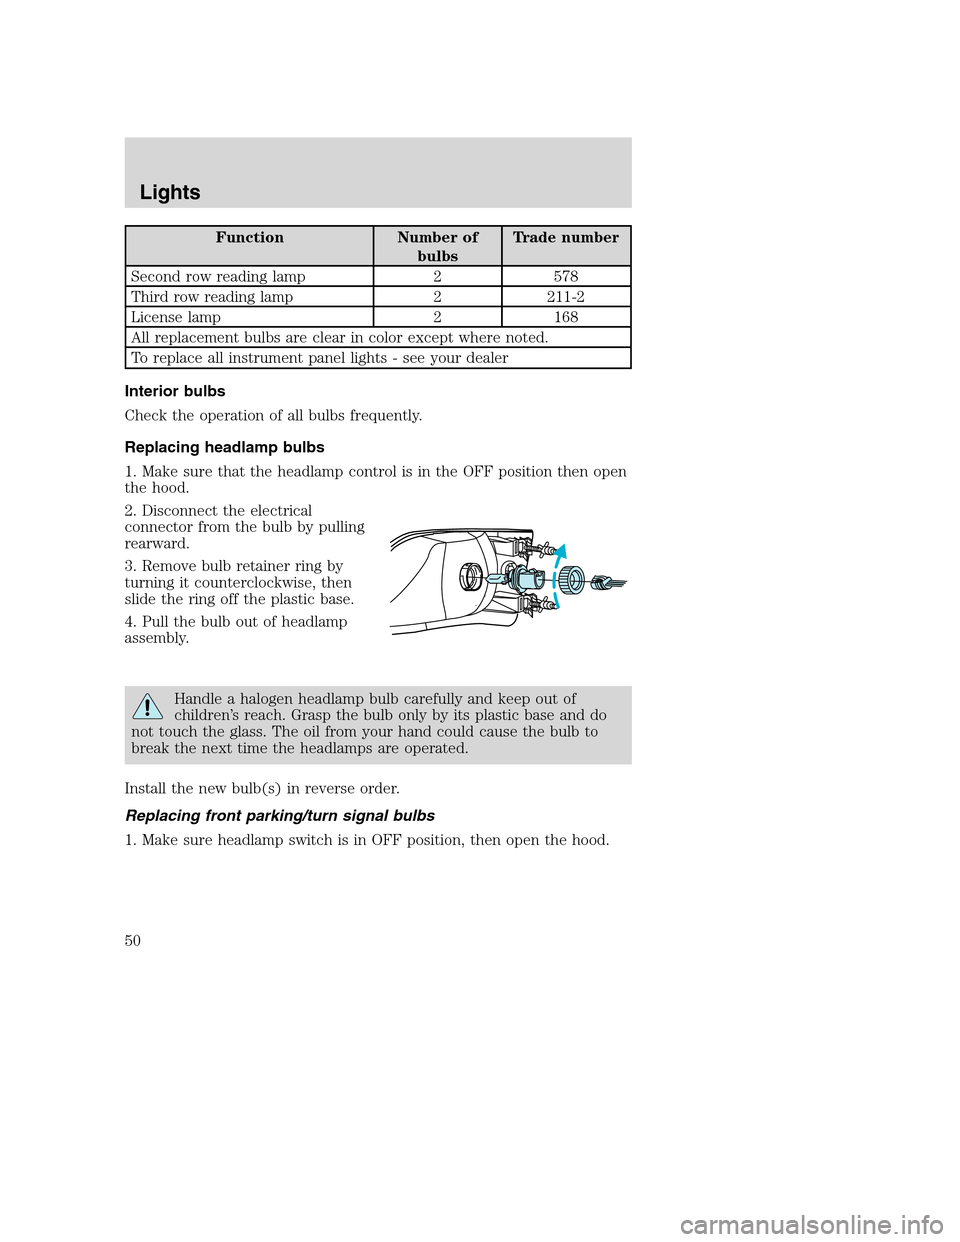
2. Disconnect the electrical
connector from the bulb by pulling
rearward.
3. Remove bulb retainer ring by
turning it counterclockwise, then
slide the ring off the plastic base.
4. Pull the bulb out of headlamp
assembly.
Handle a halogen headlamp bulb carefully and keep out of
children’s reach. Grasp the bulb only by its plastic base and do
not touch the glass. The oil from your hand could cause the bulb to
break the next time the headlamps are operated.
Install the new bulb(s) in reverse order.
Replacing front parking/turn signal bulbs
1. Make sure headlamp switch is in OFF position, then open the hood.
Lights
50
Page 51 of 240
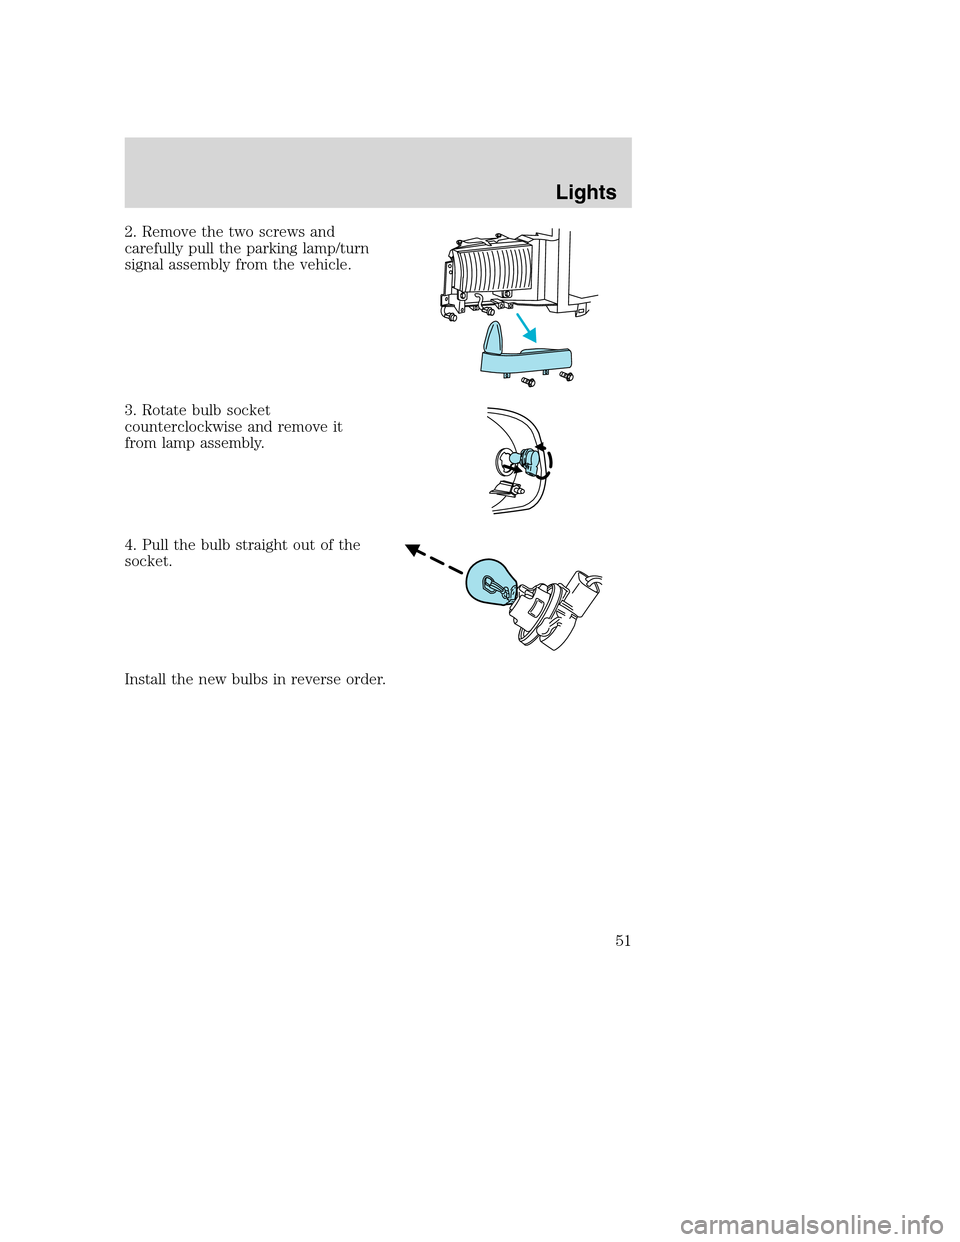
2. Remove the two screws and
carefully pull the parking lamp/turn
signal assembly from the vehicle.
3. Rotate bulb socket
counterclockwise and remove it
from lamp assembly.
4. Pull the bulb straight out of the
socket.
Install the new bulbs in reverse order.
Lights
51
Page 52 of 240
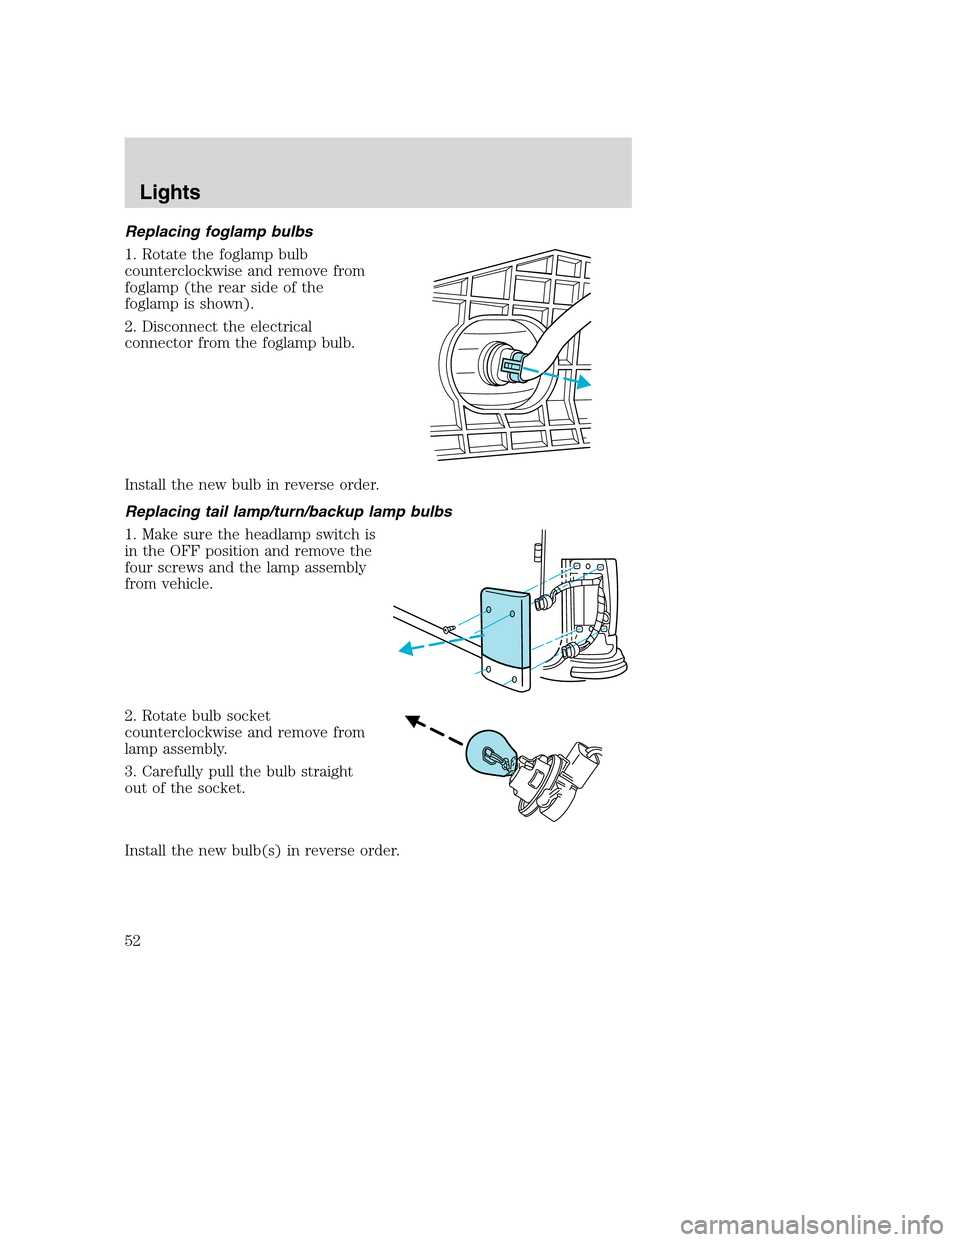
Replacing foglamp bulbs
1. Rotate the foglamp bulb
counterclockwise and remove from
foglamp (the rear side of the
foglamp is shown).
2. Disconnect the electrical
connector from the foglamp bulb.
Install the new bulb in reverse order.
Replacing tail lamp/turn/backup lamp bulbs
1. Make sure the headlamp switch is
in the OFF position and remove the
four screws and the lamp assembly
from vehicle.
2. Rotate bulb socket
counterclockwise and remove from
lamp assembly.
3. Carefully pull the bulb straight
out of the socket.
Install the new bulb(s) in reverse order.
Lights
52
Page 53 of 240
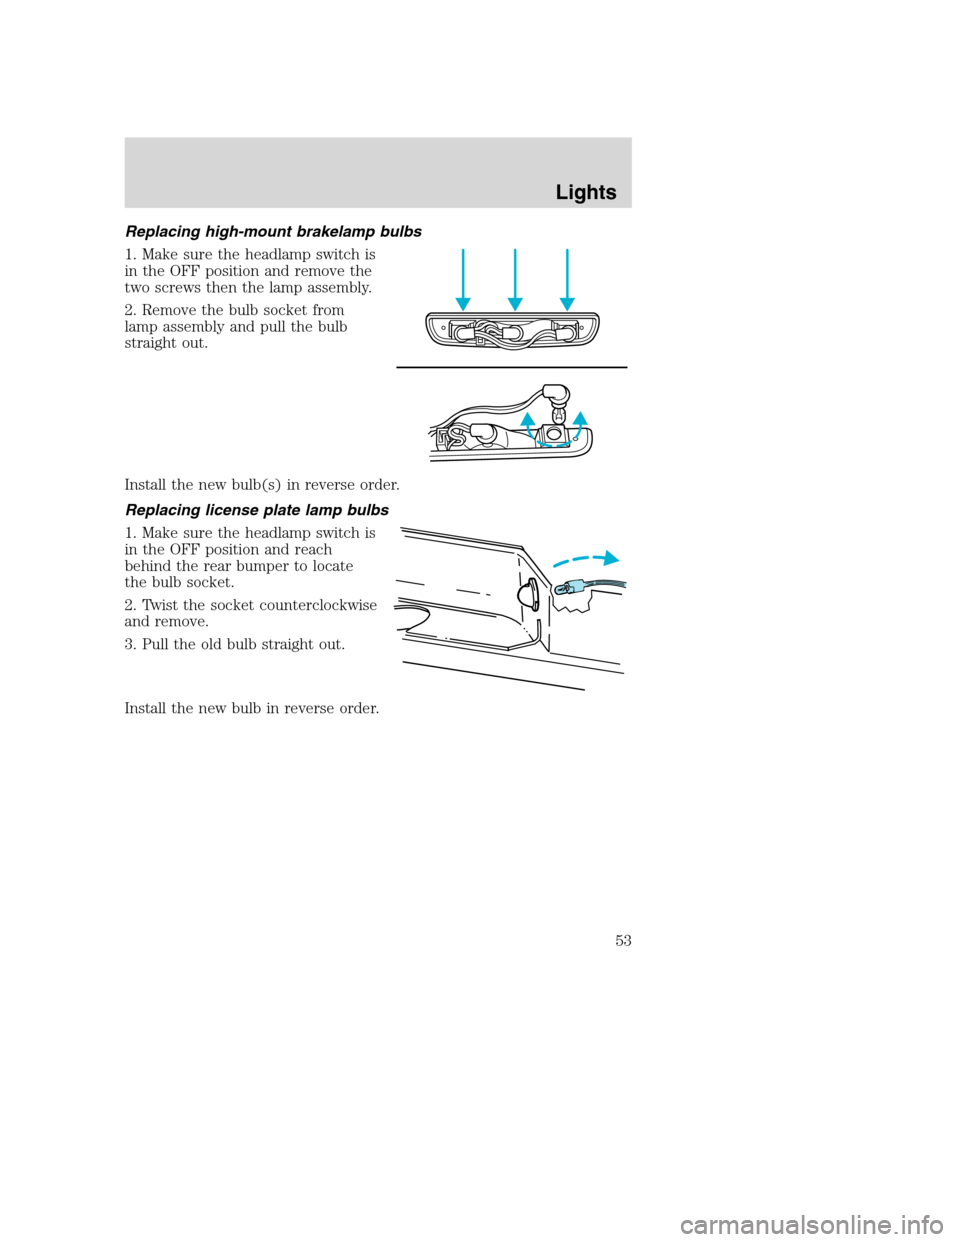
Replacing high-mount brakelamp bulbs
1. Make sure the headlamp switch is
in the OFF position and remove the
two screws then the lamp assembly.
2. Remove the bulb socket from
lamp assembly and pull the bulb
straight out.
Install the new bulb(s) in reverse order.
Replacing license plate lamp bulbs
1. Make sure the headlamp switch is
in the OFF position and reach
behind the rear bumper to locate
the bulb socket.
2. Twist the socket counterclockwise
and remove.
3. Pull the old bulb straight out.
Install the new bulb in reverse order.
Lights
53
Page 157 of 240
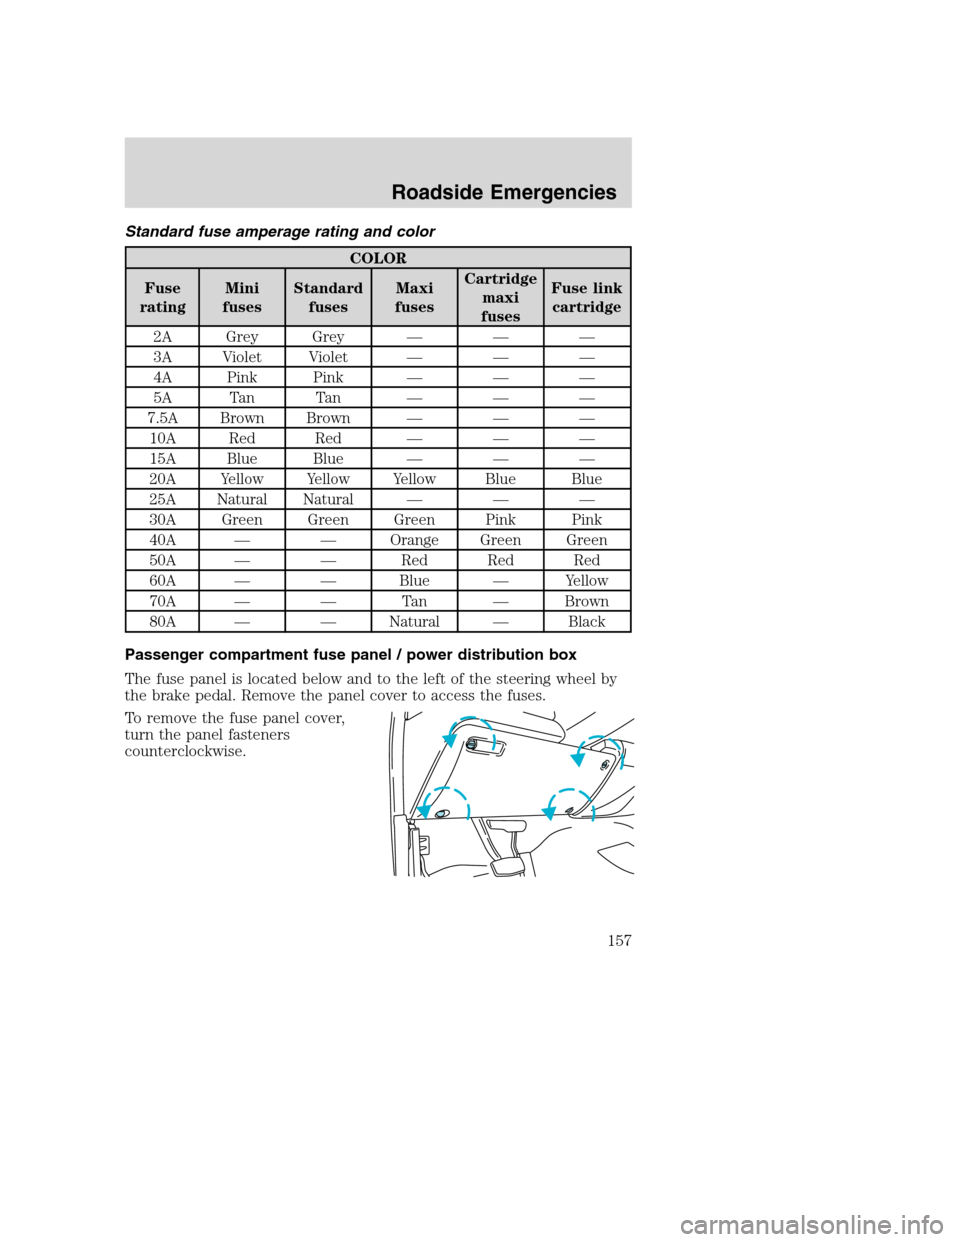
Standard fuse amperage rating and color
COLOR
Fuse
ratingMini
fusesStandard
fusesMaxi
fusesCartridge
maxi
fusesFuse link
cartridge
2A Grey Grey — — —
3A Violet Violet — — —
4A Pink Pink — — —
5A Tan Tan — — —
7.5A Brown Brown — — —
10A Red Red — — —
15A Blue Blue — — —
20A Yellow Yellow Yellow Blue Blue
25A Natural Natural — — —
30A Green Green Green Pink Pink
40A — — Orange Green Green
50A — — Red Red Red
60A — — Blue — Yellow
70A — — Tan — Brown
80A — — Natural — Black
Passenger compartment fuse panel / power distribution box
The fuse panel is located below and to the left of the steering wheel by
the brake pedal. Remove the panel cover to access the fuses.
To remove the fuse panel cover,
turn the panel fasteners
counterclockwise.
Roadside Emergencies
157
Page 163 of 240
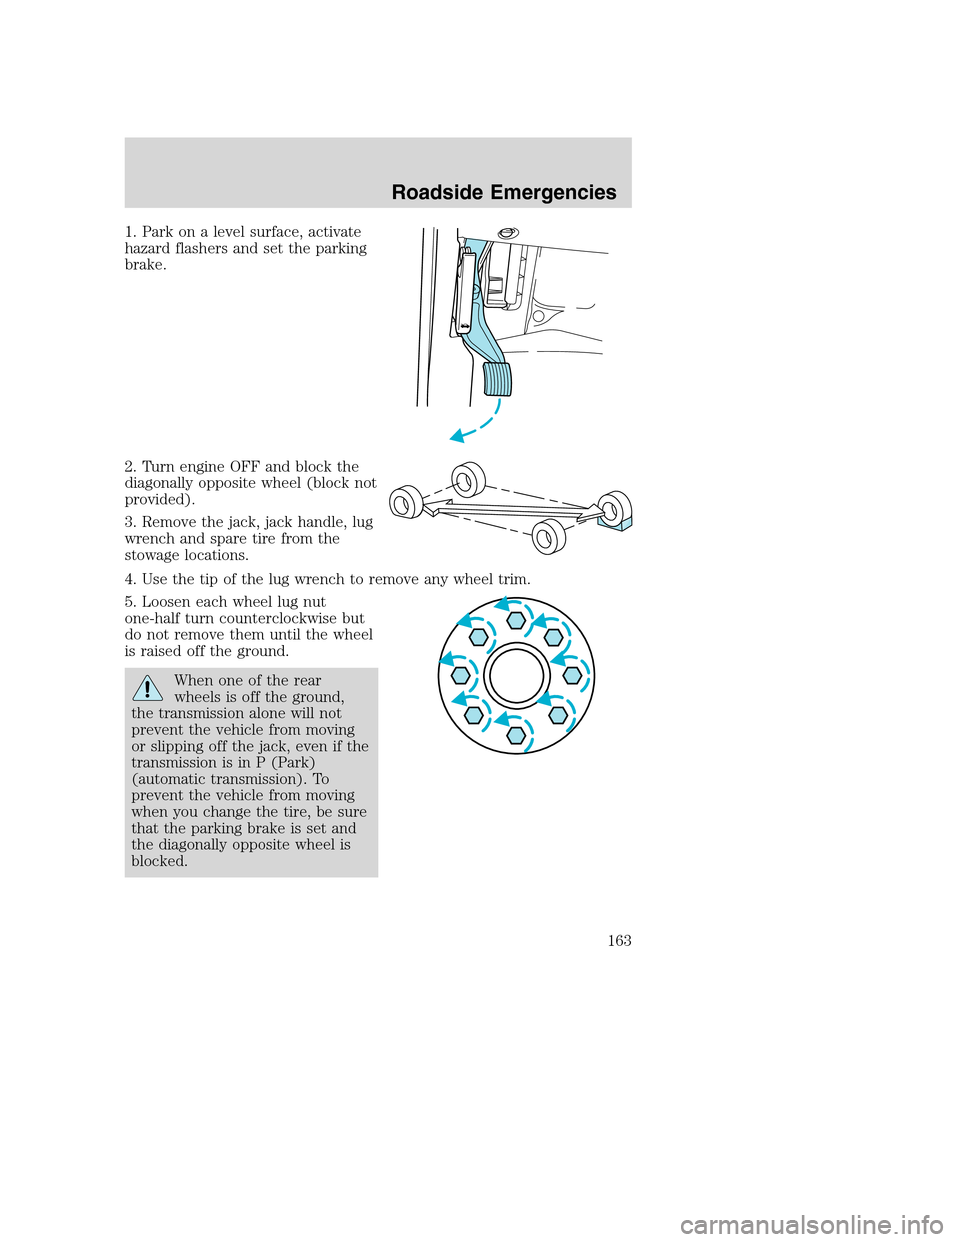
1. Park on a level surface, activate
hazard flashers and set the parking
brake.
2. Turn engine OFF and block the
diagonally opposite wheel (block not
provided).
3. Remove the jack, jack handle, lug
wrench and spare tire from the
stowage locations.
4. Use the tip of the lug wrench to remove any wheel trim.
5. Loosen each wheel lug nut
one-half turn counterclockwise but
do not remove them until the wheel
is raised off the ground.
When one of the rear
wheels is off the ground,
the transmission alone will not
prevent the vehicle from moving
or slipping off the jack, even if the
transmission is in P (Park)
(automatic transmission). To
prevent the vehicle from moving
when you change the tire, be sure
that the parking brake is set and
the diagonally opposite wheel is
blocked.
Roadside Emergencies
163
Page 165 of 240
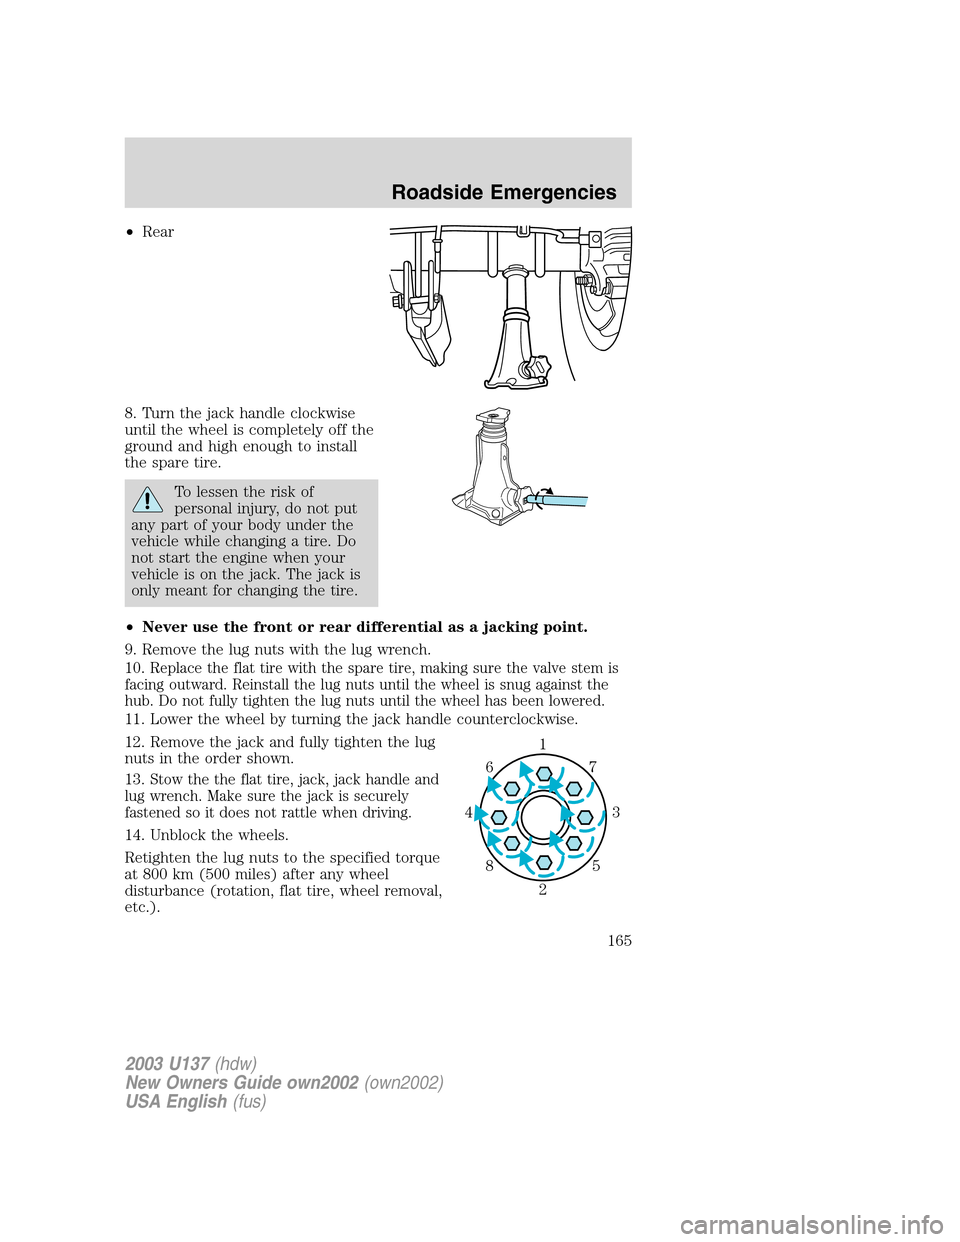
•Rear
8. Turn the jack handle clockwise
until the wheel is completely off the
ground and high enough to install
the spare tire.
To lessen the risk of
personal injury, do not put
any part of your body under the
vehicle while changing a tire. Do
not start the engine when your
vehicle is on the jack. The jack is
only meant for changing the tire.
•Never use the front or rear differential as a jacking point.
9. Remove the lug nuts with the lug wrench.
10.
Replace the flat tire with the spare tire, making sure the valve stem is
facing outward. Reinstall the lug nuts until the wheel is snug against the
hub. Do not fully tighten the lug nuts until the wheel has been lowered.
11. Lower the wheel by turning the jack handle counterclockwise.
12. Remove the jack and fully tighten the lug
nuts in the order shown.
13.
Stow the the flat tire, jack, jack handle and
lug wrench. Make sure the jack is securely
fastened so it does not rattle when driving.
14. Unblock the wheels.
Retighten the lug nuts to the specified torque
at 800 km (500 miles) after any wheel
disturbance (rotation, flat tire, wheel removal,
etc.).
1
3 4
27 6
5 8
2003 U137(hdw)
New Owners Guide own2002(own2002)
USA English(fus)
Roadside Emergencies
165
Page 194 of 240
3. Recheck the engine oil level. Make sure the oil level is not above the
MAX mark on the engine oil level indicator (dipstick).
4. Install the indicator and ensure it is fully seated.
5. Fully install the engine oil filler cap by turning the filler cap clockwise
1/4 of a turn until three clicks are heard or until the cap is fully seated.
To avoid possible oil loss, DO NOT operate the vehicle with the
engine oil level indicator and/or the engine oil filler cap removed.
Engine oil and filter recommendations
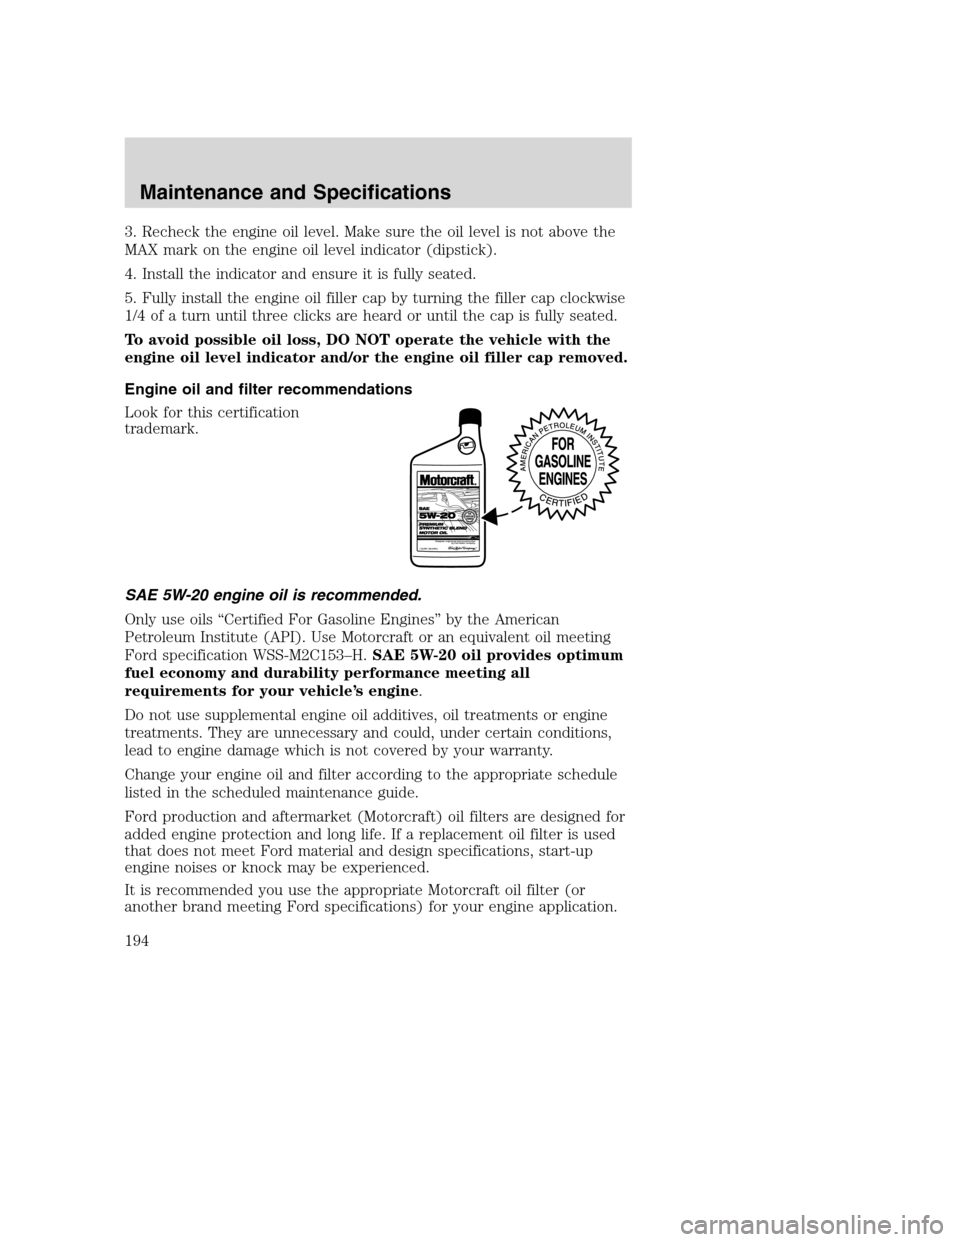
Look for this certification
trademark.
SAE 5W-20 engine oil is recommended.
Only use oils “Certified For Gasoline Engines” by the American
Petroleum Institute (API). Use Motorcraft or an equivalent oil meeting
Ford specification WSS-M2C153–H.SAE 5W-20 oil provides optimum
fuel economy and durability performance meeting all
requirements for your vehicle’s engine.
Do not use supplemental engine oil additives, oil treatments or engine
treatments. They are unnecessary and could, under certain conditions,
lead to engine damage which is not covered by your warranty.
Change your engine oil and filter according to the appropriate schedule
listed in the scheduled maintenance guide.
Ford production and aftermarket (Motorcraft) oil filters are designed for
added engine protection and long life. If a replacement oil filter is used
that does not meet Ford material and design specifications, start-up
engine noises or knock may be experienced.
It is recommended you use the appropriate Motorcraft oil filter (or
another brand meeting Ford specifications) for your engine application.
Maintenance and Specifications
194