change FORD EXCURSION 2004 1.G User Guide
[x] Cancel search | Manufacturer: FORD, Model Year: 2004, Model line: EXCURSION, Model: FORD EXCURSION 2004 1.GPages: 272, PDF Size: 1.82 MB
Page 53 of 272
6. Subtitles (specific language type - English or Spanish, dependent of
disc capability and ON/OFF selection.)
7. Camera angle (of picture) - Adjustable with cursor controls and
ENTER control.
Safety information
Read all of the safety and operating instructions before operating the
system and retain for future reference.
Do not attempt to service, repair or modify the Rear Seat Entertainment
DVD System. See your Ford or Lincoln Mercury dealer.
Do not insert foreign objects into the DVD compartment.
The front glass on the liquid crystal display (LCD) flip-down
screen may break when hit with a hard surface. If the glass
breaks, do not touch the liquid crystalline material. In case of contact
with skin, wash immediately with soap and water.
Do not expose the liquid crystal display (LCD) flip-down screen
to direct sunlight or intensive ultraviolet rays for extensive
periods of time. Ultraviolet rays deteriorate the liquid crystal.
Be sure to review User Manuals for video games and video game
equipment when used as auxiliary inputs for your Rear Seat
Entertainment DVD System.
Do not operate video games or video equipment if the power cords
and/or cables are broken, split or damaged. Carefully place cords and/or
cables where they will not be stepped on or interfere with the operation
of seats and/or compartments.
Disconnect video games and video equipment power cords and/or cables
when not in use.
Avoid touching auxiliary input jacks with your fingers. Do not blow on
them or allow them to get wet or dirty.
Do not clean any part of the DVD layer with benzene, paint thinner or
any other solvent.
Federal Communication Commission (FCC) Compliance
Changes or modifications not approved by Ford Lincoln Mercury could void
user’s authority to operate the equipment. This equipment has been tested
and found to comply with the limits for a Class B digital device, pursuant
to Part 15 of the FCC Rules. These limits are designed to provide
Entertainment Systems
53
Page 55 of 272
Foreign substances
Exercise care to prevent dirt and foreign objects from entering the DVD
player compartment. Be especially careful not to spill liquids of any kind
onto the media controls or into the videocassette player. If liquid is
accidentally spilled onto the system, immediately turn the system OFF
and consult a qualified service technician.
Cleaning compact discs
Inspect all discs for contamination before playing. If necessary, clean
discs only with an approved CD cleaner and wipe from the center out to
the edge. Do not use circular motion.
Cleaning the DVD player
Clean the exterior of the DVD player with a damp cloth. Do not use CD
cleaning kits or CDs intended to clean the interior of your DVD player.
Use of these products may damage your system.
CLEANING COMPACT DISCS
Inspect all discs for contamination before playing. If necessary, clean
discs only with an approved CD cleaner and wipe from the center out to
the edge. Do not use circular motion.
CD AND CD CHANGER CARE
•Handle discs by their edges only. Never touch the playing surface.
•Do not expose discs to direct sunlight or heat sources for extended
periods of time.
•Do not insert more than one disc into each slot of the CD changer
magazine.
CD units are designed to play commercially pressed 12 cm (4.75
in) audio compact discs only. Due to technical incompatibility,
certain recordable and re-recordable compact discs may not
function correctly when used in Ford CD players. Irregular
shaped CDs, CDs with a scratch protection film attached, and CDs
with homemade paper (adhesive) labels should not be inserted
into the CD player. The label may peel and cause the CD to
become jammed. It is recommended that homemade CDs be
identified with permanent felt tip marker rather than adhesive
labels. Ball point pens may damage CDs. Please contact your
dealer for further information.
CLEANING CASSETTE PLAYER (IF EQUIPPED)
Clean the tape player head with a cassette cleaning cartridge after 10 to
12 hours of play in order to maintain the best sound and operation.
Entertainment Systems
55
Page 61 of 272
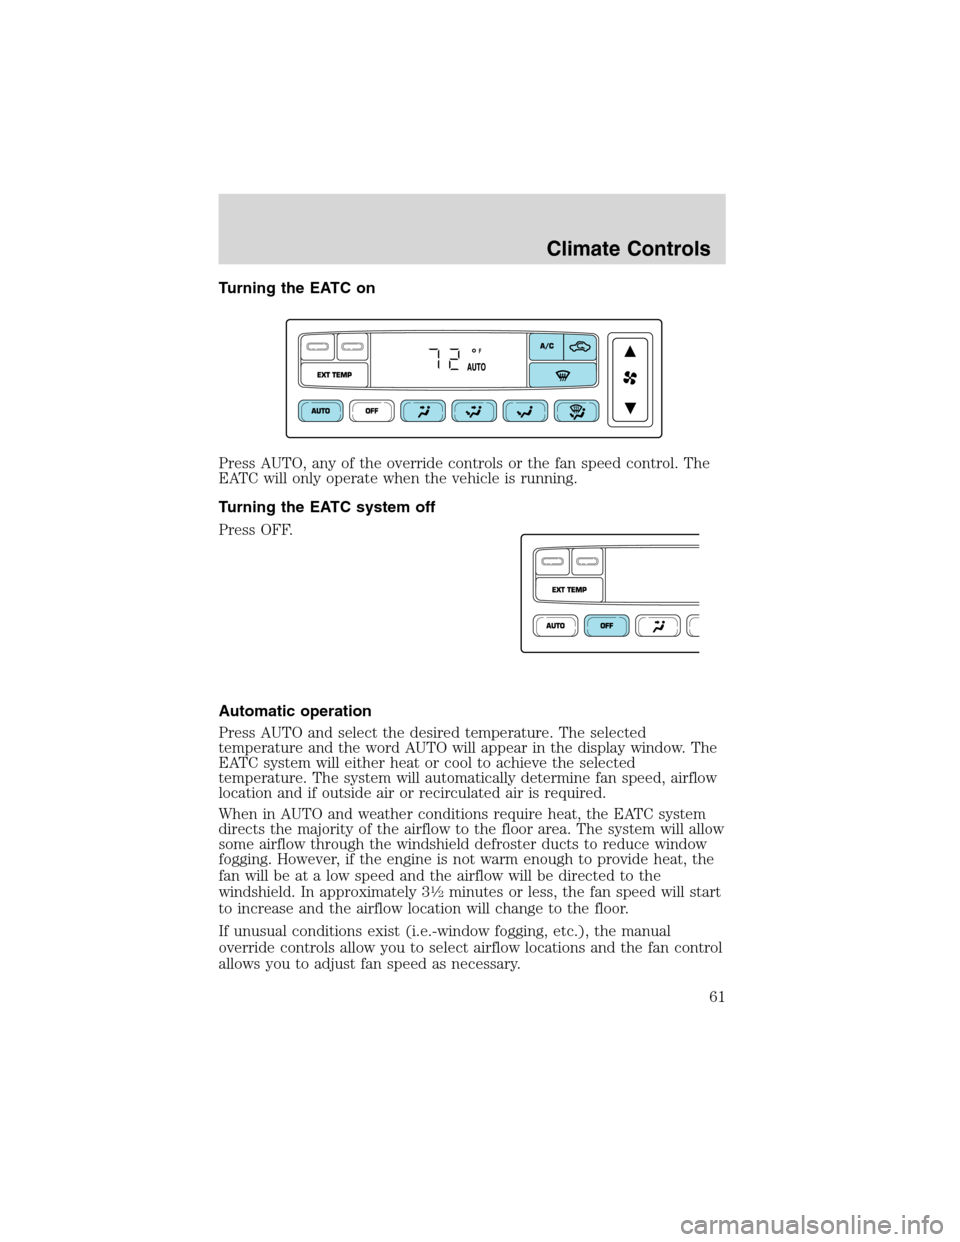
Turning the EATC on
Press AUTO, any of the override controls or the fan speed control. The
EATC will only operate when the vehicle is running.
Turning the EATC system off
Press OFF.
Automatic operation
Press AUTO and select the desired temperature. The selected
temperature and the word AUTO will appear in the display window. The
EATC system will either heat or cool to achieve the selected
temperature. The system will automatically determine fan speed, airflow
location and if outside air or recirculated air is required.
When in AUTO and weather conditions require heat, the EATC system
directs the majority of the airflow to the floor area. The system will allow
some airflow through the windshield defroster ducts to reduce window
fogging. However, if the engine is not warm enough to provide heat, the
fan will be at a low speed and the airflow will be directed to the
windshield. In approximately 3
12minutes or less, the fan speed will start
to increase and the airflow location will change to the floor.
If unusual conditions exist (i.e.-window fogging, etc.), the manual
override controls allow you to select airflow locations and the fan control
allows you to adjust fan speed as necessary.
Climate Controls
61
Page 71 of 272
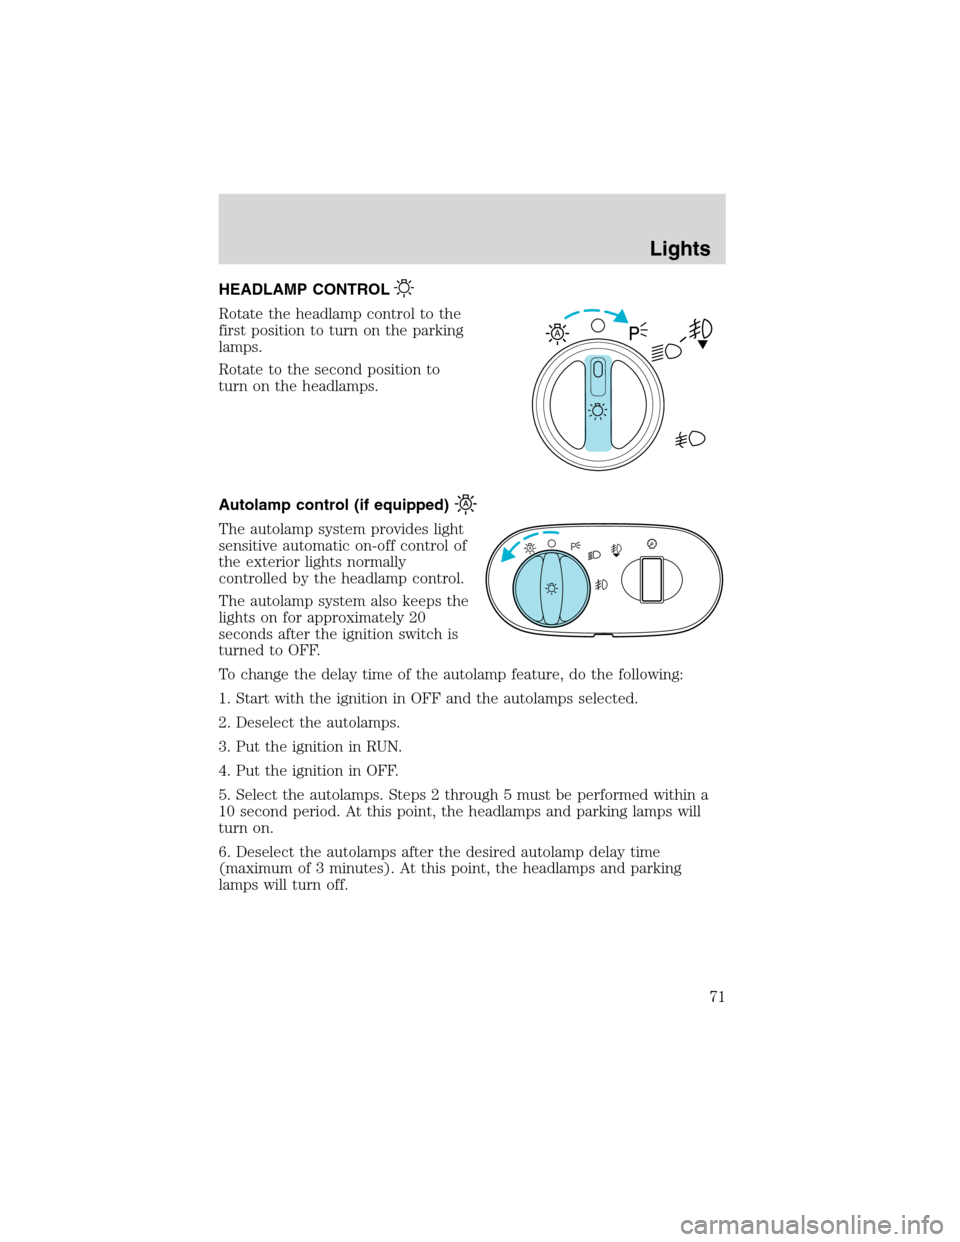
HEADLAMP CONTROL
Rotate the headlamp control to the
first position to turn on the parking
lamps.
Rotate to the second position to
turn on the headlamps.
Autolamp control (if equipped)
The autolamp system provides light
sensitive automatic on-off control of
the exterior lights normally
controlled by the headlamp control.
The autolamp system also keeps the
lights on for approximately 20
seconds after the ignition switch is
turned to OFF.
To change the delay time of the autolamp feature, do the following:
1. Start with the ignition in OFF and the autolamps selected.
2. Deselect the autolamps.
3. Put the ignition in RUN.
4. Put the ignition in OFF.
5. Select the autolamps. Steps 2 through 5 must be performed within a
10 second period. At this point, the headlamps and parking lamps will
turn on.
6. Deselect the autolamps after the desired autolamp delay time
(maximum of 3 minutes). At this point, the headlamps and parking
lamps will turn off.
A
A
Lights
71
Page 79 of 272
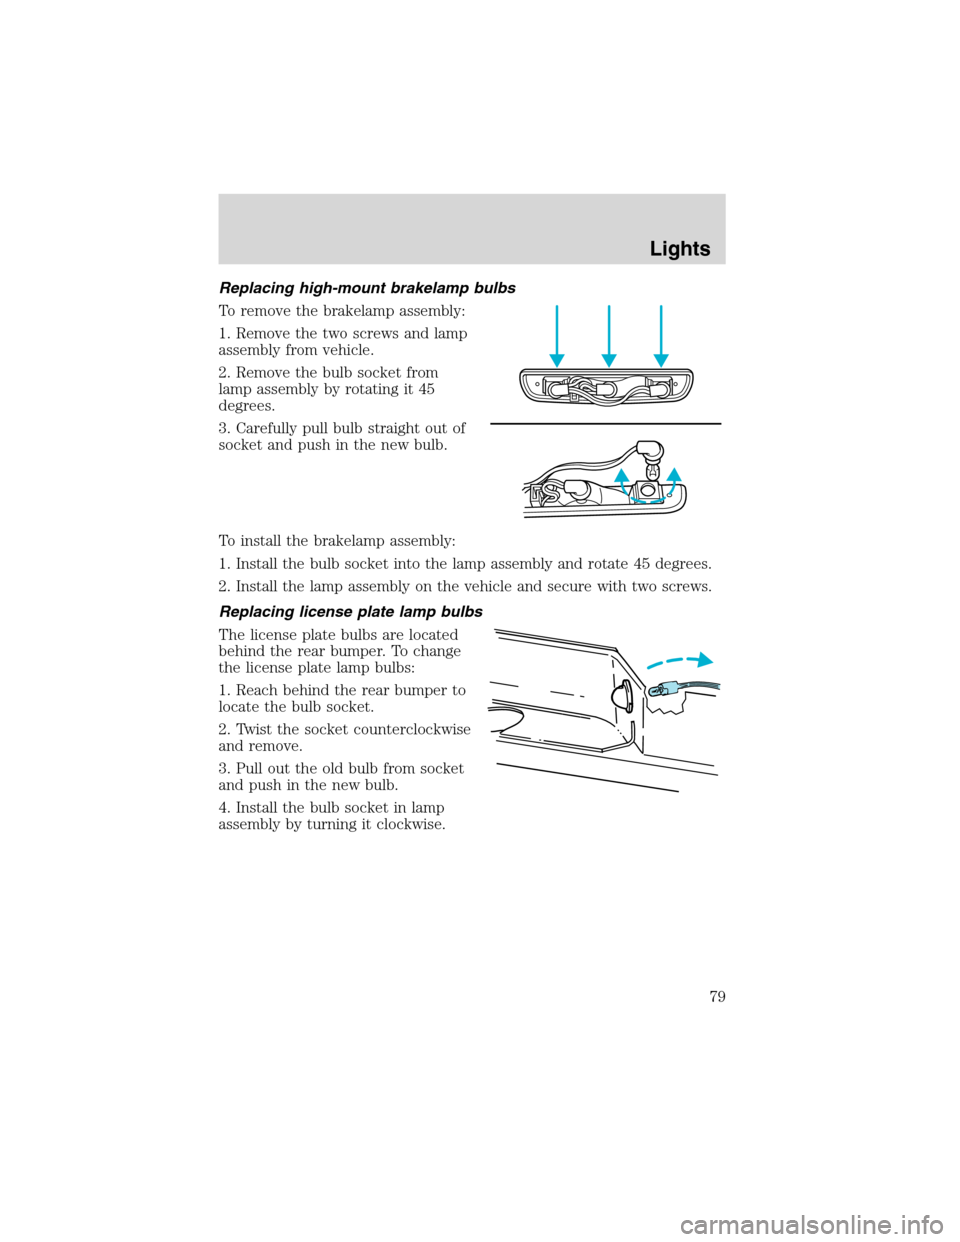
Replacing high-mount brakelamp bulbs
To remove the brakelamp assembly:
1. Remove the two screws and lamp
assembly from vehicle.
2. Remove the bulb socket from
lamp assembly by rotating it 45
degrees.
3. Carefully pull bulb straight out of
socket and push in the new bulb.
To install the brakelamp assembly:
1. Install the bulb socket into the lamp assembly and rotate 45 degrees.
2. Install the lamp assembly on the vehicle and secure with two screws.
Replacing license plate lamp bulbs
The license plate bulbs are located
behind the rear bumper. To change
the license plate lamp bulbs:
1. Reach behind the rear bumper to
locate the bulb socket.
2. Twist the socket counterclockwise
and remove.
3. Pull out the old bulb from socket
and push in the new bulb.
4. Install the bulb socket in lamp
assembly by turning it clockwise.
Lights
79
Page 80 of 272
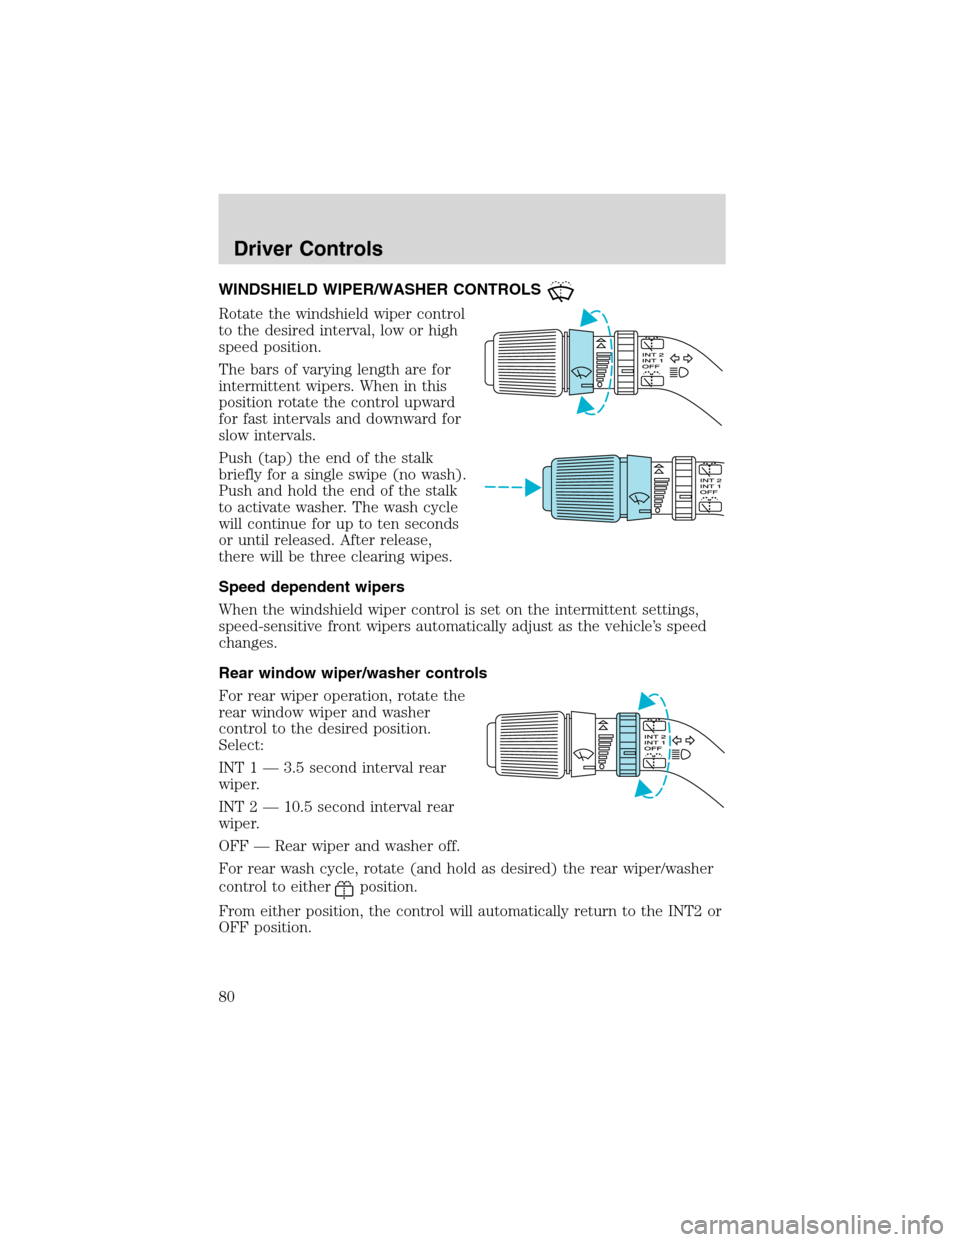
WINDSHIELD WIPER/WASHER CONTROLS
Rotate the windshield wiper control
to the desired interval, low or high
speed position.
The bars of varying length are for
intermittent wipers. When in this
position rotate the control upward
for fast intervals and downward for
slow intervals.
Push (tap) the end of the stalk
briefly for a single swipe (no wash).
Push and hold the end of the stalk
to activate washer. The wash cycle
will continue for up to ten seconds
or until released. After release,
there will be three clearing wipes.
Speed dependent wipers
When the windshield wiper control is set on the intermittent settings,
speed-sensitive front wipers automatically adjust as the vehicle’s speed
changes.
Rear window wiper/washer controls
For rear wiper operation, rotate the
rear window wiper and washer
control to the desired position.
Select:
INT 1 — 3.5 second interval rear
wiper.
INT 2 — 10.5 second interval rear
wiper.
OFF — Rear wiper and washer off.
For rear wash cycle, rotate (and hold as desired) the rear wiper/washer
control to either
position.
From either position, the control will automatically return to the INT2 or
OFF position.
Driver Controls
80
Page 86 of 272
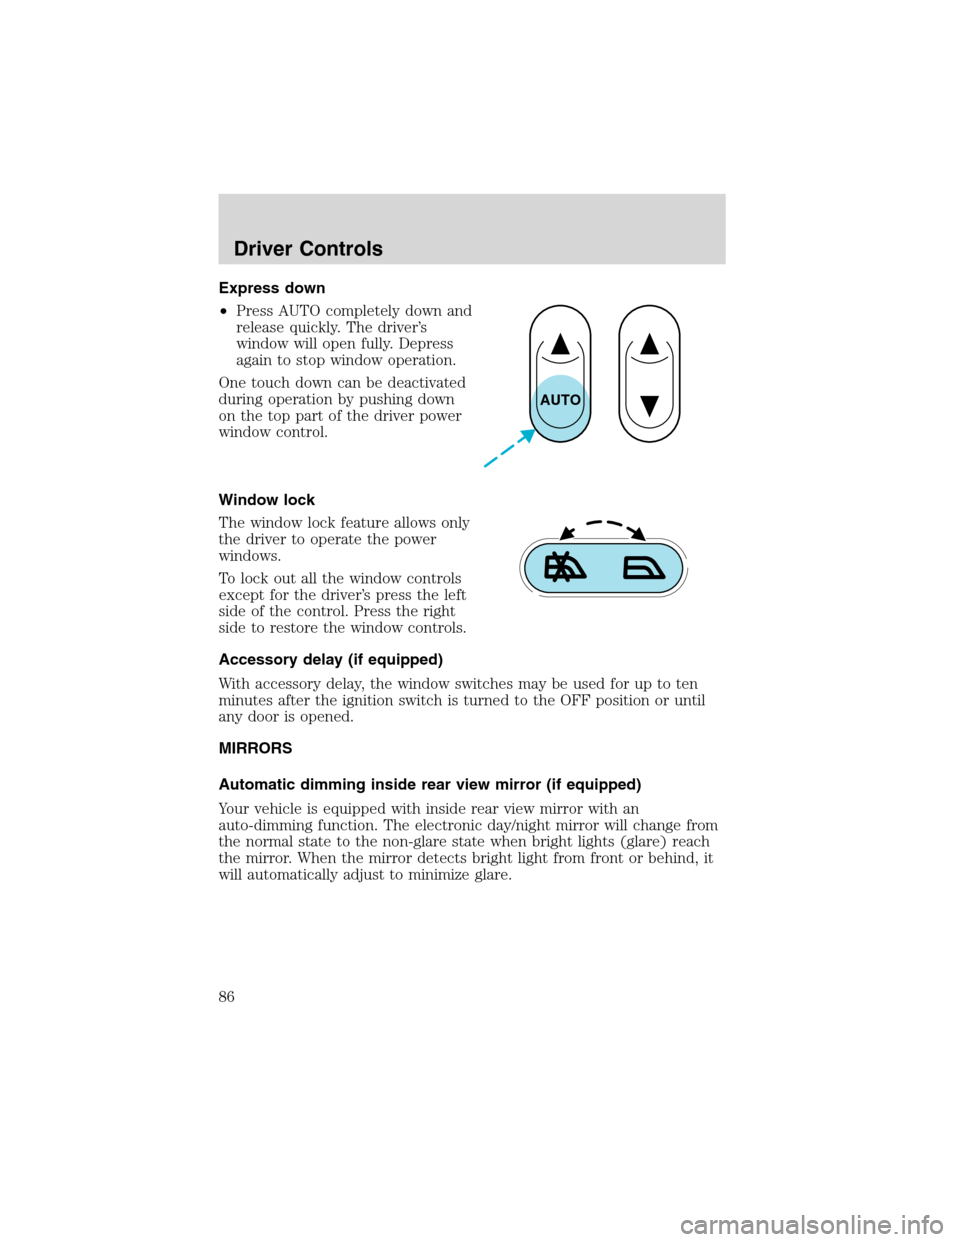
Express down
•Press AUTO completely down and
release quickly. The driver’s
window will open fully. Depress
again to stop window operation.
One touch down can be deactivated
during operation by pushing down
on the top part of the driver power
window control.
Window lock
The window lock feature allows only
the driver to operate the power
windows.
To lock out all the window controls
except for the driver’s press the left
side of the control. Press the right
side to restore the window controls.
Accessory delay (if equipped)
With accessory delay, the window switches may be used for up to ten
minutes after the ignition switch is turned to the OFF position or until
any door is opened.
MIRRORS
Automatic dimming inside rear view mirror (if equipped)
Your vehicle is equipped with inside rear view mirror with an
auto-dimming function. The electronic day/night mirror will change from
the normal state to the non-glare state when bright lights (glare) reach
the mirror. When the mirror detects bright light from front or behind, it
will automatically adjust to minimize glare.
AUTO
Driver Controls
86
Page 94 of 272
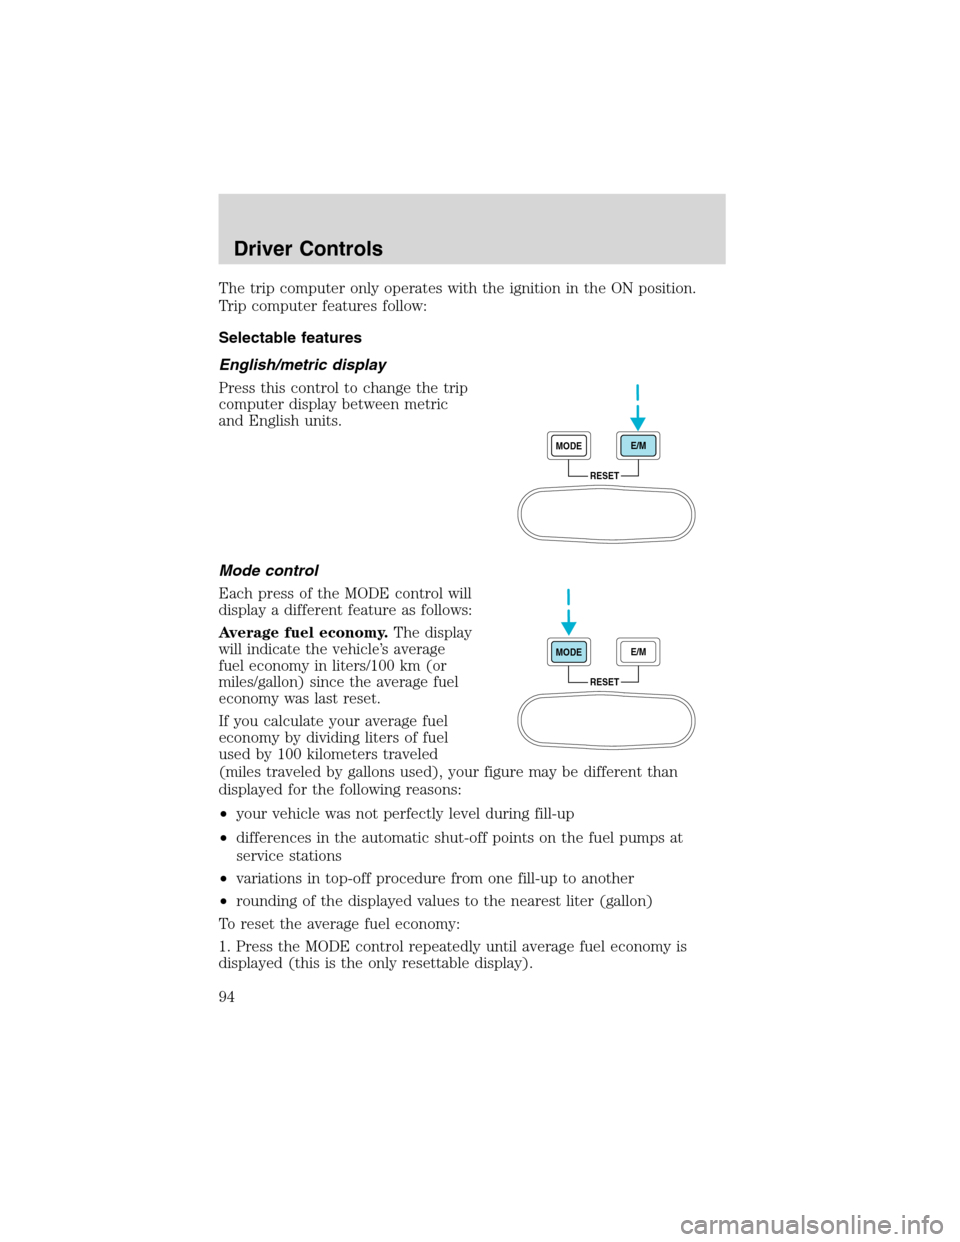
The trip computer only operates with the ignition in the ON position.
Trip computer features follow:
Selectable features
English/metric display
Press this control to change the trip
computer display between metric
and English units.
Mode control
Each press of the MODE control will
display a different feature as follows:
Average fuel economy.
The display
will indicate the vehicle’s average
fuel economy in liters/100 km (or
miles/gallon) since the average fuel
economy was last reset.
If you calculate your average fuel
economy by dividing liters of fuel
used by 100 kilometers traveled
(miles traveled by gallons used), your figure may be different than
displayed for the following reasons:
•your vehicle was not perfectly level during fill-up
•differences in the automatic shut-off points on the fuel pumps at
service stations
•variations in top-off procedure from one fill-up to another
•rounding of the displayed values to the nearest liter (gallon)
To reset the average fuel economy:
1. Press the MODE control repeatedly until average fuel economy is
displayed (this is the only resettable display).
RESET MODEE/M
RESET MODEE/M
Driver Controls
94
Page 95 of 272
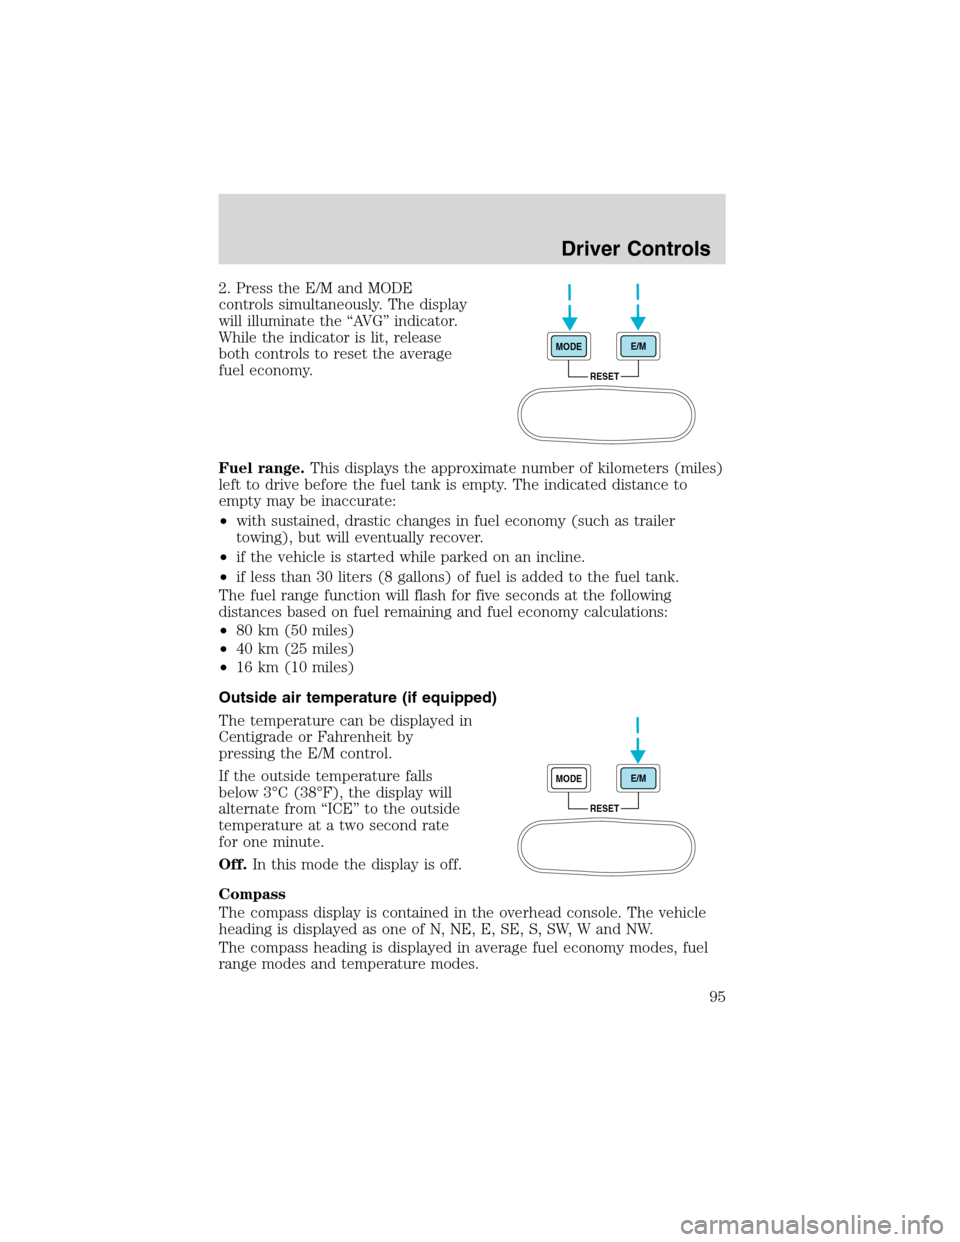
2. Press the E/M and MODE
controls simultaneously. The display
will illuminate the “AVG” indicator.
While the indicator is lit, release
both controls to reset the average
fuel economy.
Fuel range.This displays the approximate number of kilometers (miles)
left to drive before the fuel tank is empty. The indicated distance to
empty may be inaccurate:
•with sustained, drastic changes in fuel economy (such as trailer
towing), but will eventually recover.
•if the vehicle is started while parked on an incline.
•if less than 30 liters (8 gallons) of fuel is added to the fuel tank.
The fuel range function will flash for five seconds at the following
distances based on fuel remaining and fuel economy calculations:
•80 km (50 miles)
•40 km (25 miles)
•16 km (10 miles)
Outside air temperature (if equipped)
The temperature can be displayed in
Centigrade or Fahrenheit by
pressing the E/M control.
If the outside temperature falls
below 3°C (38°F), the display will
alternate from “ICE” to the outside
temperature at a two second rate
for one minute.
Off.In this mode the display is off.
Compass
The compass display is contained in the overhead console. The vehicle
heading is displayed as one of N, NE, E, SE, S, SW, W and NW.
The compass heading is displayed in average fuel economy modes, fuel
range modes and temperature modes.
RESET MODEE/M
RESET MODEE/M
Driver Controls
95
Page 107 of 272
Changes or modifications not expressly approved by the party
responsible for compliance could void the user’s authority to
operate the equipment.
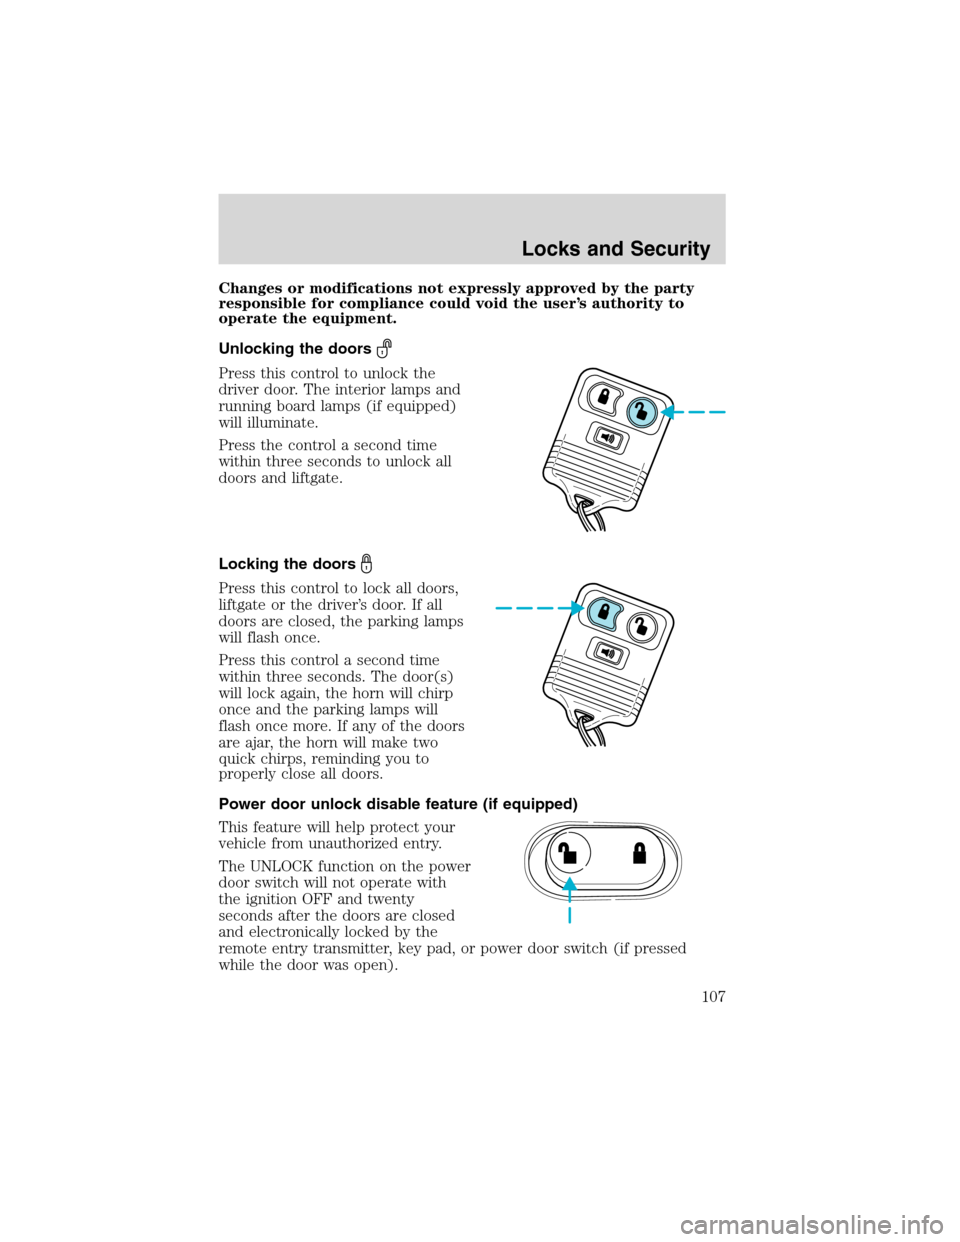
Unlocking the doors
Press this control to unlock the
driver door. The interior lamps and
running board lamps (if equipped)
will illuminate.
Press the control a second time
within three seconds to unlock all
doors and liftgate.
Locking the doors
Press this control to lock all doors,
liftgate or the driver’s door. If all
doors are closed, the parking lamps
will flash once.
Press this control a second time
within three seconds. The door(s)
will lock again, the horn will chirp
once and the parking lamps will
flash once more. If any of the doors
are ajar, the horn will make two
quick chirps, reminding you to
properly close all doors.
Power door unlock disable feature (if equipped)
This feature will help protect your
vehicle from unauthorized entry.
The UNLOCK function on the power
door switch will not operate with
the ignition OFF and twenty
seconds after the doors are closed
and electronically locked by the
remote entry transmitter, key pad, or power door switch (if pressed
while the door was open).
Locks and Security
107