warning FORD EXCURSION 2005 1.G User Guide
[x] Cancel search | Manufacturer: FORD, Model Year: 2005, Model line: EXCURSION, Model: FORD EXCURSION 2005 1.GPages: 280, PDF Size: 2.76 MB
Page 16 of 280
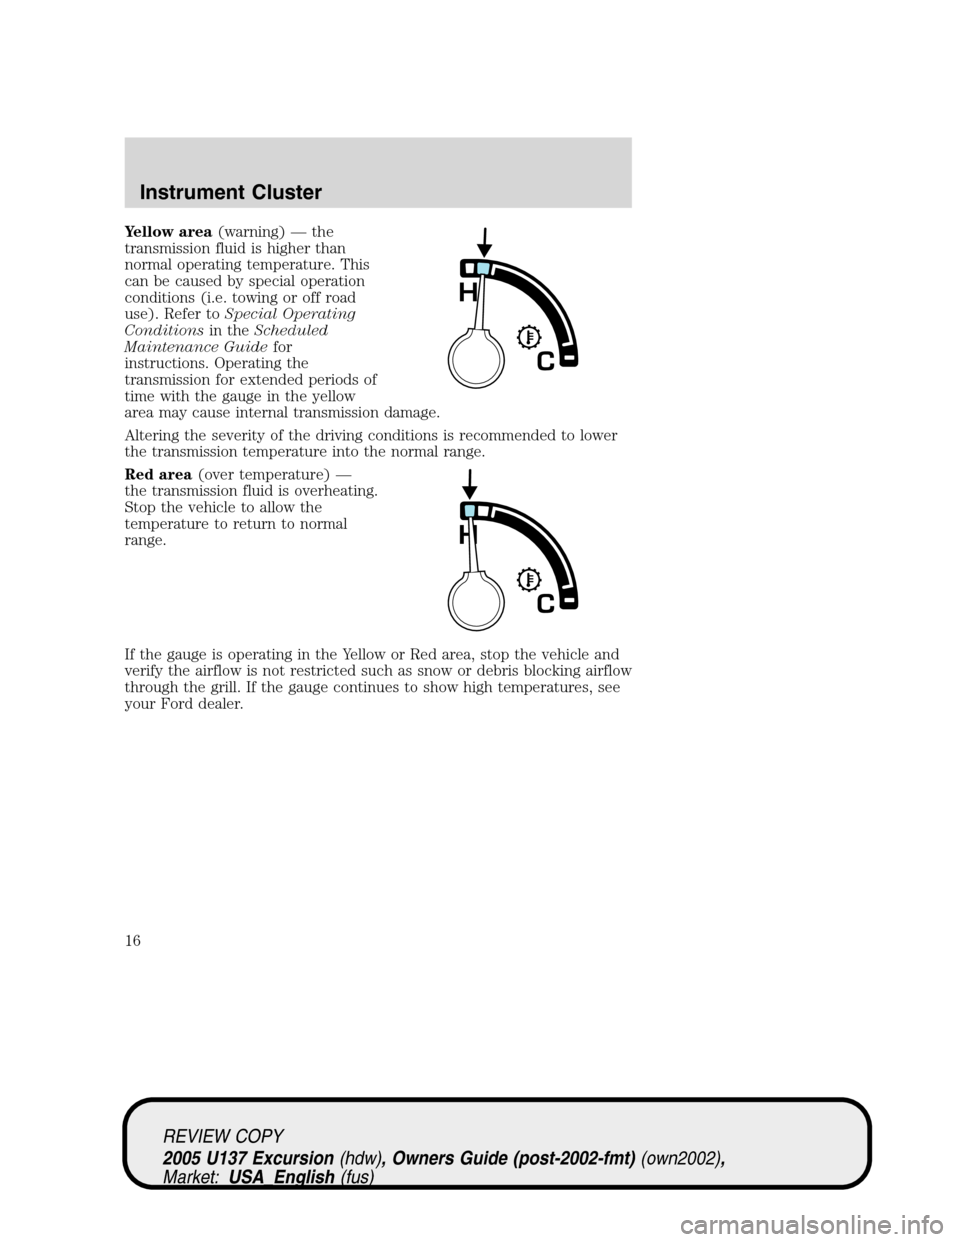
Yellow area(warning)—the
transmission fluid is higher than
normal operating temperature. This
can be caused by special operation
conditions (i.e. towing or off road
use). Refer toSpecial Operating
Conditionsin theScheduled
Maintenance Guidefor
instructions. Operating the
transmission for extended periods of
time with the gauge in the yellow
area may cause internal transmission damage.
Altering the severity of the driving conditions is recommended to lower
the transmission temperature into the normal range.
Red area(over temperature)—
the transmission fluid is overheating.
Stop the vehicle to allow the
temperature to return to normal
range.
If the gauge is operating in the Yellow or Red area, stop the vehicle and
verify the airflow is not restricted such as snow or debris blocking airflow
through the grill. If the gauge continues to show high temperatures, see
your Ford dealer.
REVIEW COPY
2005 U137 Excursion(hdw), Owners Guide (post-2002-fmt)(own2002),
Market:USA_English(fus)
Instrument Cluster
16
Page 68 of 280
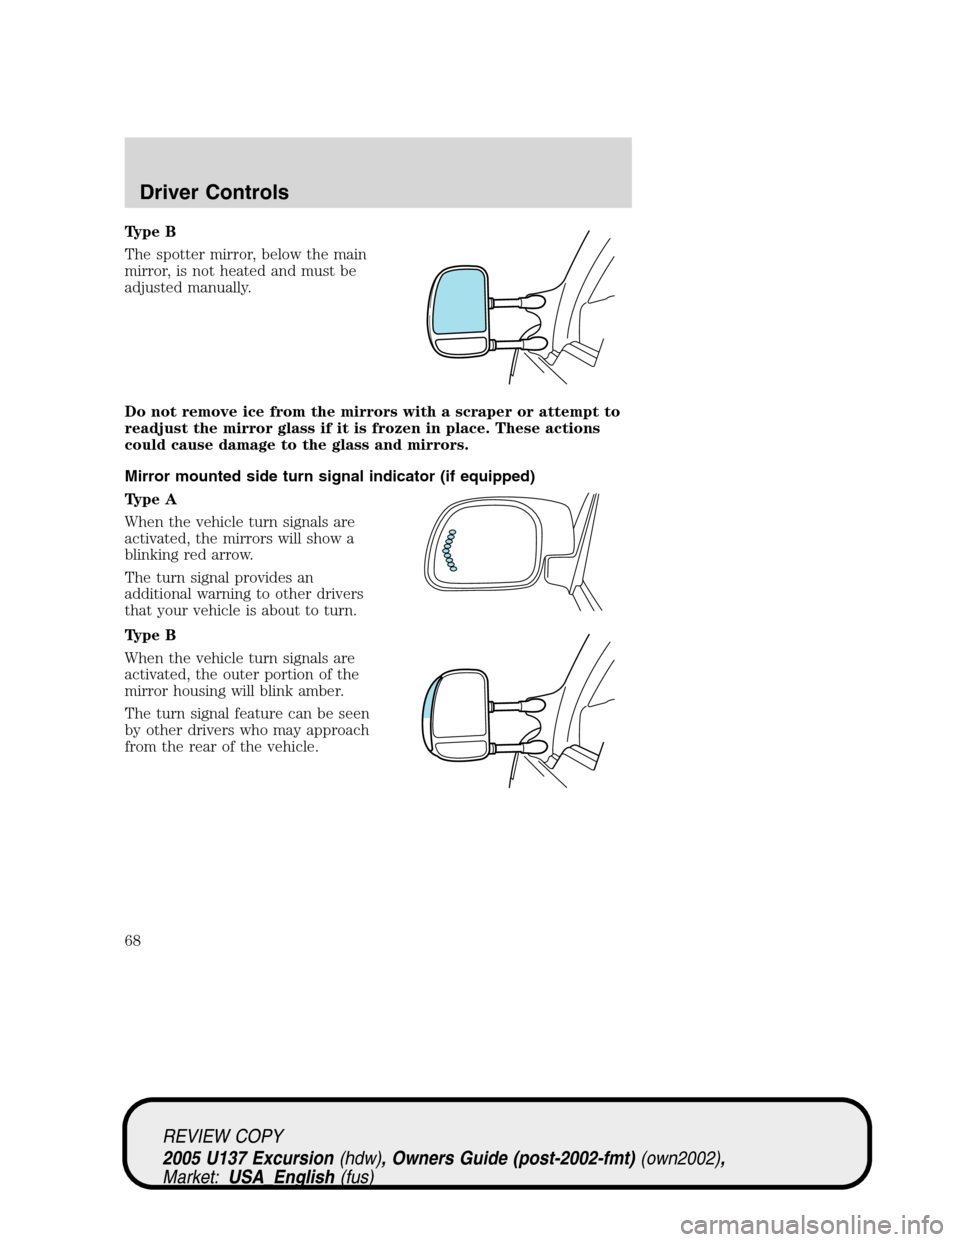
Type B
The spotter mirror, below the main
mirror, is not heated and must be
adjusted manually.
Do not remove ice from the mirrors with a scraper or attempt to
readjust the mirror glass if it is frozen in place. These actions
could cause damage to the glass and mirrors.
Mirror mounted side turn signal indicator (if equipped)
Type A
When the vehicle turn signals are
activated, the mirrors will show a
blinking red arrow.
The turn signal provides an
additional warning to other drivers
that your vehicle is about to turn.
Type B
When the vehicle turn signals are
activated, the outer portion of the
mirror housing will blink amber.
The turn signal feature can be seen
by other drivers who may approach
from the rear of the vehicle.
REVIEW COPY
2005 U137 Excursion(hdw), Owners Guide (post-2002-fmt)(own2002),
Market:USA_English(fus)
Driver Controls
68
Page 105 of 280
To reduce the risk of personal injury, the second row seat should
not be left in the forward, E-Z entry position while the vehicle is
in motion. Please ensure that the seat is in the upright, fully latched
rearward position before putting the vehicle in motion. Refer to the
warning label on the seat side shield.
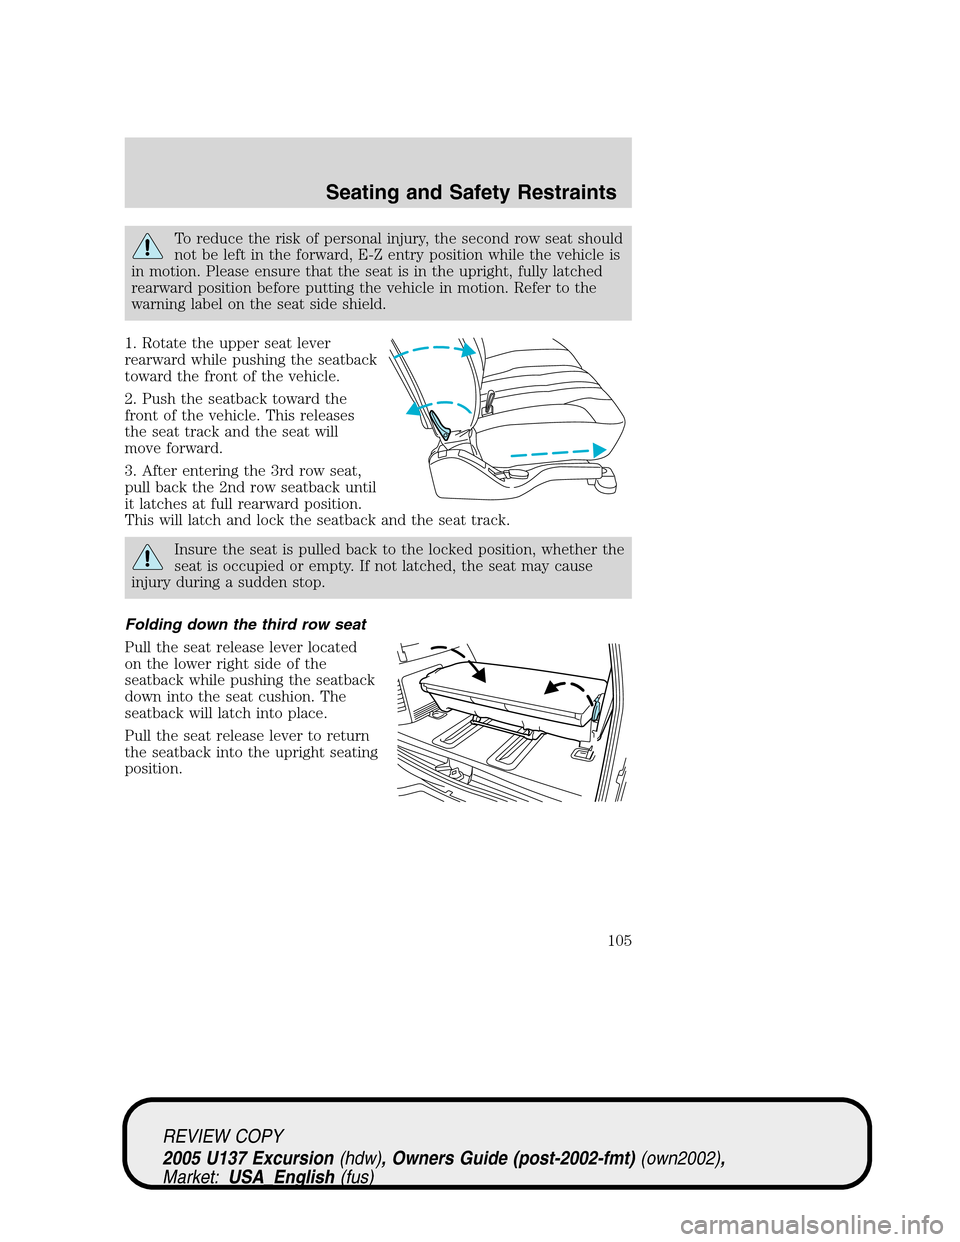
1. Rotate the upper seat lever
rearward while pushing the seatback
toward the front of the vehicle.
2. Push the seatback toward the
front of the vehicle. This releases
the seat track and the seat will
move forward.
3. After entering the 3rd row seat,
pull back the 2nd row seatback until
it latches at full rearward position.
This will latch and lock the seatback and the seat track.
Insure the seat is pulled back to the locked position, whether the
seat is occupied or empty. If not latched, the seat may cause
injury during a sudden stop.
Folding down the third row seat
Pull the seat release lever located
on the lower right side of the
seatback while pushing the seatback
down into the seat cushion. The
seatback will latch into place.
Pull the seat release lever to return
the seatback into the upright seating
position.
REVIEW COPY
2005 U137 Excursion(hdw), Owners Guide (post-2002-fmt)(own2002),
Market:USA_English(fus)
Seating and Safety Restraints
105
Page 106 of 280
Removing the third row seat
From the rear of the vehicle, with the liftgate window and cargo doors
open:
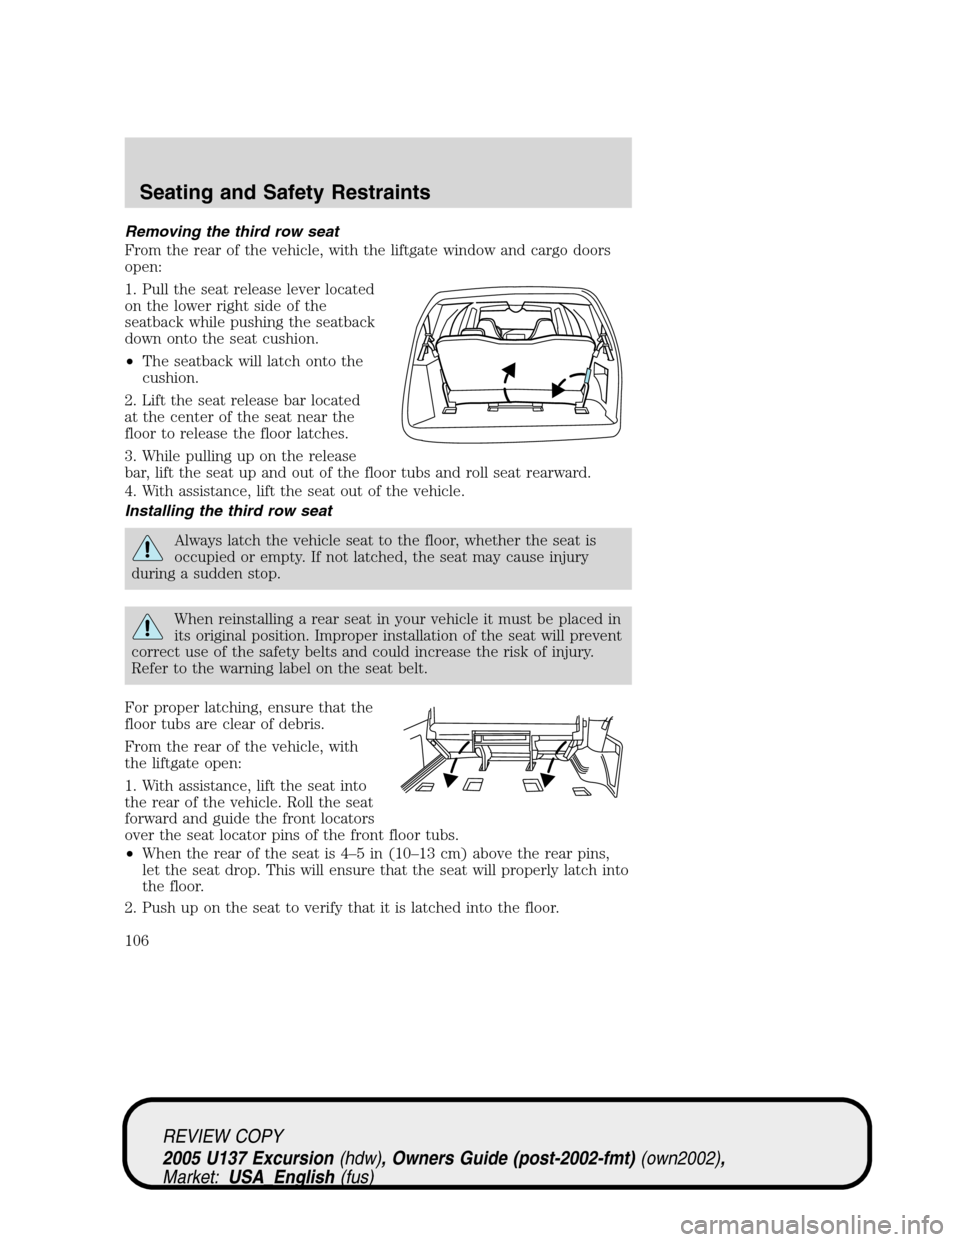
1. Pull the seat release lever located
on the lower right side of the
seatback while pushing the seatback
down onto the seat cushion.
•The seatback will latch onto the
cushion.
2. Lift the seat release bar located
at the center of the seat near the
floor to release the floor latches.
3. While pulling up on the release
bar, lift the seat up and out of the floor tubs and roll seat rearward.
4. With assistance, lift the seat out of the vehicle.
Installing the third row seat
Always latch the vehicle seat to the floor, whether the seat is
occupied or empty. If not latched, the seat may cause injury
during a sudden stop.
When reinstalling a rear seat in your vehicle it must be placed in
its original position. Improper installation of the seat will prevent
correct use of the safety belts and could increase the risk of injury.
Refer to the warning label on the seat belt.
For proper latching, ensure that the
floor tubs are clear of debris.
From the rear of the vehicle, with
the liftgate open:
1. With assistance, lift the seat into
the rear of the vehicle. Roll the seat
forward and guide the front locators
over the seat locator pins of the front floor tubs.
•When the rear of the seat is 4–5in(10–13 cm) above the rear pins,
let the seat drop. This will ensure that the seat will properly latch into
the floor.
2. Push up on the seat to verify that it is latched into the floor.
REVIEW COPY
2005 U137 Excursion(hdw), Owners Guide (post-2002-fmt)(own2002),
Market:USA_English(fus)
Seating and Safety Restraints
106
Page 112 of 280
The lap belt will not adjust automatically. To fasten, grasp the tongue,
and with a continuous motion, pull out enough webbing to buckle the
tongue into the correct buckle. If you did not pull out enough webbing to
reach the buckle, allow the tongue to retract fully before trying to pull it
out again.
Safety belt warning light and indicator chime
The safety belt warning light illuminates in the instrument cluster and a
chime sounds to remind the occupants to fasten their safety belts.
Conditions of operation
If... Then...
The driver’s safety belt is not
buckled before the ignition
switch is turned to the ON
position...The safety belt warning light
illuminates 1-2 minutes and the
warning chime sounds 4-8 seconds.
The driver’s safety belt is
buckled while the indicator
light is illuminated and the
warning chime is sounding...The safety belt warning light and
warning chime turn off.
The driver’s safety belt is
buckled before the ignition
switch is turned to the ON
position...The safety belt warning light and
indicator chime remain off.
BeltMinder
The BeltMinder feature is a supplemental warning to the safety belt
warning function. This feature provides additional reminders to the
driver that the driver’s safety belt is unbuckled by intermittently
sounding a chime and illuminating the safety belt warning lamp in the
instrument cluster.
REVIEW COPY
2005 U137 Excursion(hdw), Owners Guide (post-2002-fmt)(own2002),
Market:USA_English(fus)
Seating and Safety Restraints
112
Page 113 of 280
If... Then...
The driver’s safety belt is not
buckled before the vehicle has
reached at least 3 mph (5 km/h)
and 1-2 minutes have elapsed
since the ignition switch has been
turned to ON...The BeltMinder feature is
activated - the safety belt warning
light illuminates and the warning
chime sounds for 6 seconds every
30 seconds, repeating for
approximately 5 minutes or until
safety belt is buckled.
The driver’s safety belt is buckled
while the safety belt indicator light
is illuminated and the safety belt
warning chime is sounding...The BeltMinder feature will not
activate.
The driver’s safety belt is buckled
before the ignition switch is turned
to the ON position...The BeltMinder feature will not
activate.
The following are reasons most often given for not wearing safety belts:
(All statistics based on U.S. data)
Reasons given... Consider...
“Crashes are rare events”36700 crashes occur every day.The
more we drive, the more we are
exposed to“rare”events, even for
good drivers.1 in 4 of us will be
seriously injured in a crash during
our lifetime.
“I’m not going far”3of4fatal crashes occur within25
miles (40 km) of home.
“Belts are uncomfortable”We design our safety belts to enhance
comfort. If you are uncomfortable -
try different positions for the safety
belt upper anchorage and seatback
which should be as upright as
possible; this can improve comfort.
“I was in a hurry”Prime time for an accident.
BeltMinder reminds us to take a few
seconds to buckle up.
REVIEW COPY
2005 U137 Excursion(hdw), Owners Guide (post-2002-fmt)(own2002),
Market:USA_English(fus)
Seating and Safety Restraints
113
Page 115 of 280
The BeltMinder feature can be deactivated/activated by performing the
following procedure:
Before following the procedure, make sure that:
•the parking brake is set
•the gearshift is in P (Park) (automatic transmission)
•the ignition switch is in the OFF position
•all vehicle doors are closed
•the driver’s safety belt is unbuckled
•the parklamps/headlamps are in OFF position
To reduce the risk of injury, do not deactivate/activate the Belt
Minder feature while driving the vehicle.
1. Turn the ignition switch to the RUN (or ON) position. (DO NOT
START THE ENGINE)
2. Wait until the safety belt warning light turns off. (Approximately 1
minute)
•Step 3 must be completed within 60 seconds after the safety belt
warning light turns off.
3. Buckle then unbuckle the safety belt 9 times, ending with the safety
belt in the unbuckled state.
•After step 3 is complete, the safety belt warning light will be turned
on for 3 seconds.
•If step 4 does not occur within 10 seconds at the end of step 3,
Beltminder will automatically exit programming mode without
changing its enable status.
4. Within 10 seconds of the light turning on, buckle then unbuckle the
safety belt.
•This will disable the BeltMinder feature if it is currently enabled. As
confirmation, the safety belt warning light will flash 4 times per
second for 3 seconds.
•This will enable the BeltMinder feature if it is currently disabled. As
confirmation, the safety belt warning light will flash 4 times per
second for 3 seconds, followed by 3 seconds with the light off, then
followed by the safety belt warning light flashing 4 times per second
for 3 seconds again.
5. After receiving confirmation, the deactivation/activation procedure is
complete.
REVIEW COPY
2005 U137 Excursion(hdw), Owners Guide (post-2002-fmt)(own2002),
Market:USA_English(fus)
Seating and Safety Restraints
115
Page 122 of 280
Never let a passenger hold a child on his or her lap while the
vehicle is moving. The passenger cannot protect the child from
injury in a collision.
Always follow the instructions and warnings that come with any infant or
child restraint you might use.
Children and safety belts
If the child is the proper size, restrain the child in a safety seat. Children
who are too large for child safety seats (as specified by your child safety
seat manufacturer) should always wear safety belts.
Follow all the important safety restraint and air bag precautions that
apply to adult passengers in your vehicle.
If the shoulder belt portion of a combination lap and shoulder belt can
be positioned so it does not cross or rest in front of the child’s face or
neck, the child should wear the lap and shoulder belt. Moving the child
closer to the center of the vehicle may help provide a good shoulder belt
fit.
Do not leave children, unreliable adults, or pets unattended in
your vehicle.
Child booster seats
Children outgrow a typical convertible or toddler seat when they weigh
40 pounds (18 kg) and are around 4 years of age. Although the
lap/shoulder belt will provide some protection, these children are still too
small for lap/shoulder belts to fit properly, which could increase the risk
of serious injury.
To improve the fit of both the lap and shoulder belt on children who
have outgrown child safety seats, Ford Motor Company recommends use
of a belt-positioning booster.
Booster seats position a child so that safety belts fit better. They lift the
child up so that the lap belt rests low across the hips and the knees
bend comfortably. Booster seats also make the shoulder belt fit better
and more comfortably for growing children.
When children should use booster seats
Children need to use booster seats from the time they outgrow the
toddler seat until they are big enough for the vehicle seat and
lap/shoulder belt to fit properly. Generally this is when they weigh about
80 lbs (36 kg) (about 8 to 12 years old).
REVIEW COPY
2005 U137 Excursion(hdw), Owners Guide (post-2002-fmt)(own2002),
Market:USA_English(fus)
Seating and Safety Restraints
122
Page 139 of 280
5. Repeat this procedure for each tire, including the spare.
Note:Some spare tires require higher inflation pressure than the other
tires. Check the tire label on the B pillar or the edge of the driver’s door
for the recommended spare tire pressure.
6. Visually inspect the tires to make sure there are no nails or other
objects embedded that could poke a hole in the tire and cause an air
leak.
7. Check the sidewalls to make sure there are no gouges, cuts or bulges.
Tire inflation information
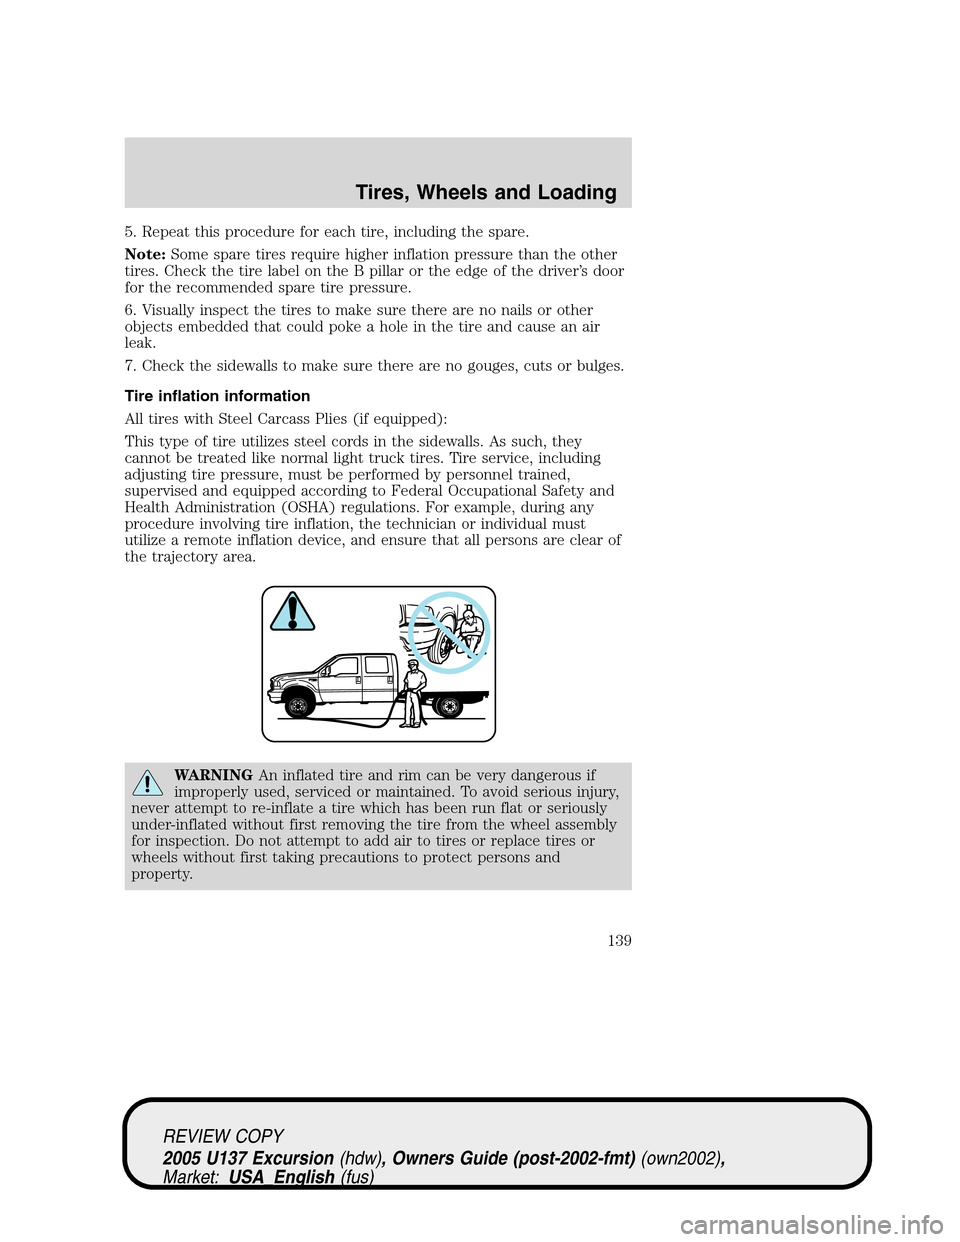
All tires with Steel Carcass Plies (if equipped):
This type of tire utilizes steel cords in the sidewalls. As such, they
cannot be treated like normal light truck tires. Tire service, including
adjusting tire pressure, must be performed by personnel trained,
supervised and equipped according to Federal Occupational Safety and
Health Administration (OSHA) regulations. For example, during any
procedure involving tire inflation, the technician or individual must
utilize a remote inflation device, and ensure that all persons are clear of
the trajectory area.
WARNINGAn inflated tire and rim can be very dangerous if
improperly used, serviced or maintained. To avoid serious injury,
never attempt to re-inflate a tire which has been run flat or seriously
under-inflated without first removing the tire from the wheel assembly
for inspection. Do not attempt to add air to tires or replace tires or
wheels without first taking precautions to protect persons and
property.
REVIEW COPY
2005 U137 Excursion(hdw), Owners Guide (post-2002-fmt)(own2002),
Market:USA_English(fus)
Tires, Wheels and Loading
139
Page 149 of 280
11.Maximum Load:Indicates the maximum load in kilograms and
pounds that can be carried by the tire. Refer to the tire label or the
safety certification label, which is located on the B-Pillar or the edge of
the driver’s door, for the correct tire pressure for your vehicle.
12.Treadwear, Traction and Temperature Grades
•Treadwear:The treadwear grade is a comparative rating based on the
wear rate of the tire when tested under controlled conditions on a
specified government test course. For example, a tire graded 150
would wear one and one-half (1
1⁄2) times as well on the government
course as a tire graded 100.
•Traction:The traction grades, from highest to lowest are AA, A, B,
and C. The grades represent the tire’s ability to stop on wet pavement
as measured under controlled conditions on specified government test
surfaces of asphalt and concrete. A tire marked C may have poor
traction performance.
•Temperature:The temperature grades are A (the highest), B and C,
representing the tire’s resistance to the generation of heat and its
ability to dissipate heat when tested under controlled conditions on a
specified indoor laboratory test wheel.
13.Maximum Permissible Inflation Pressure:Indicates the tire
manufacturers’ maximum permissible pressure and/or the pressure at
which the maximum load can be carried by the tire. This pressure is
normally higher than the manufacturer’s recommended cold inflation
pressure which can be found on either the tire label or certification label
which is located on the B-Pillar or the edge of the driver’s door. The cold
inflation pressure should never be set lower than the recommended
pressure on the vehicle label.
The tire suppliers may have additional markings, notes or warnings such
as standard load, radial tubeless, etc.
REVIEW COPY
2005 U137 Excursion(hdw), Owners Guide (post-2002-fmt)(own2002),
Market:USA_English(fus)
Tires, Wheels and Loading
149