fog light FORD EXPEDITION 1999 1.G Owners Manual
[x] Cancel search | Manufacturer: FORD, Model Year: 1999, Model line: EXPEDITION, Model: FORD EXPEDITION 1999 1.GPages: 216, PDF Size: 1.8 MB
Page 17 of 216
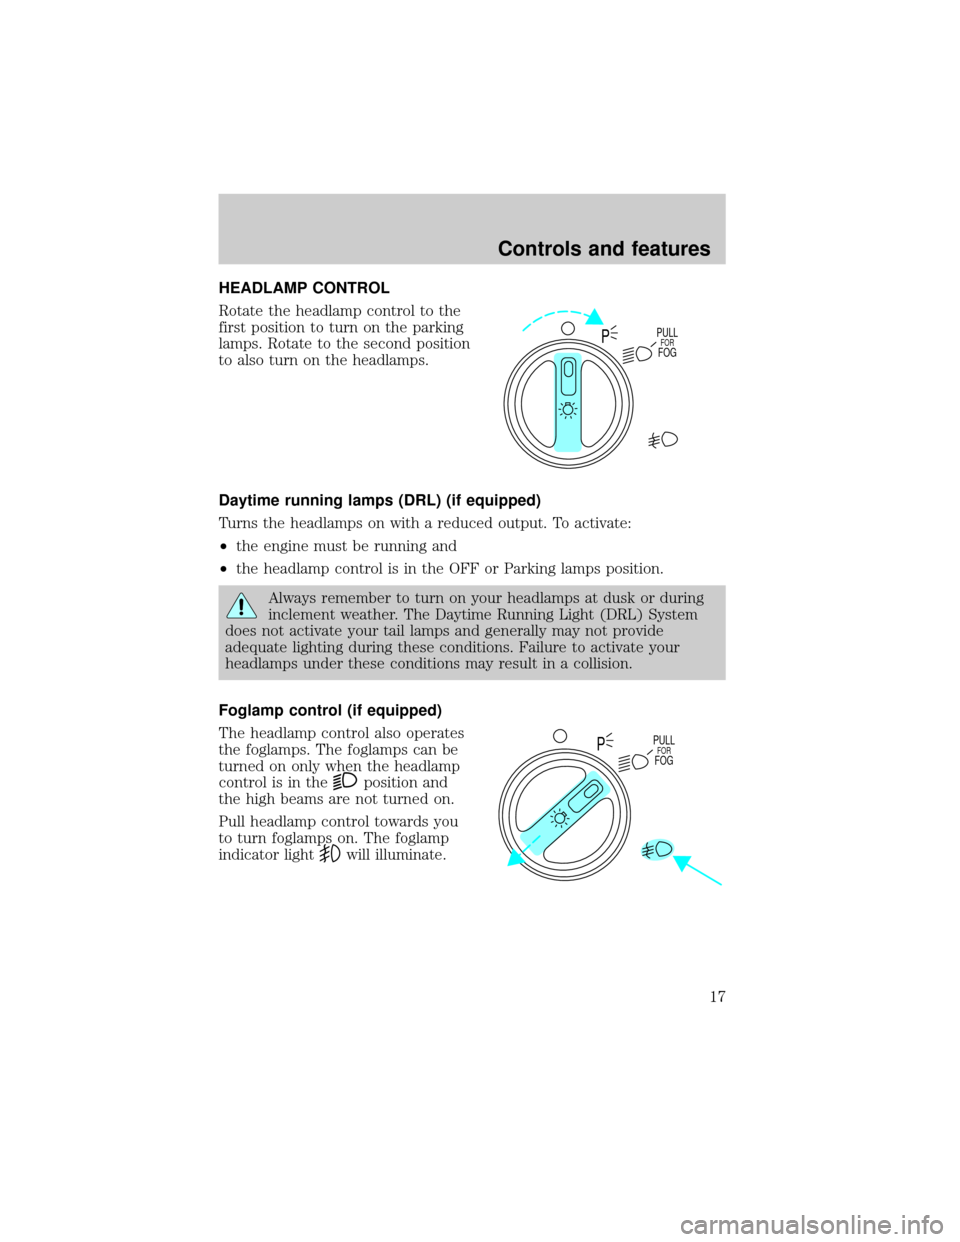
HEADLAMP CONTROL
Rotate the headlamp control to the
first position to turn on the parking
lamps. Rotate to the second position
to also turn on the headlamps.
Daytime running lamps (DRL) (if equipped)
Turns the headlamps on with a reduced output. To activate:
²the engine must be running and
²the headlamp control is in the OFF or Parking lamps position.
Always remember to turn on your headlamps at dusk or during
inclement weather. The Daytime Running Light (DRL) System
does not activate your tail lamps and generally may not provide
adequate lighting during these conditions. Failure to activate your
headlamps under these conditions may result in a collision.
Foglamp control (if equipped)
The headlamp control also operates
the foglamps. The foglamps can be
turned on only when the headlamp
control is in the
position and
the high beams are not turned on.
Pull headlamp control towards you
to turn foglamps on. The foglamp
indicator light
will illuminate.
PULLFORFOGP
PULLFORFOGP
Controls and features
17
Page 18 of 216
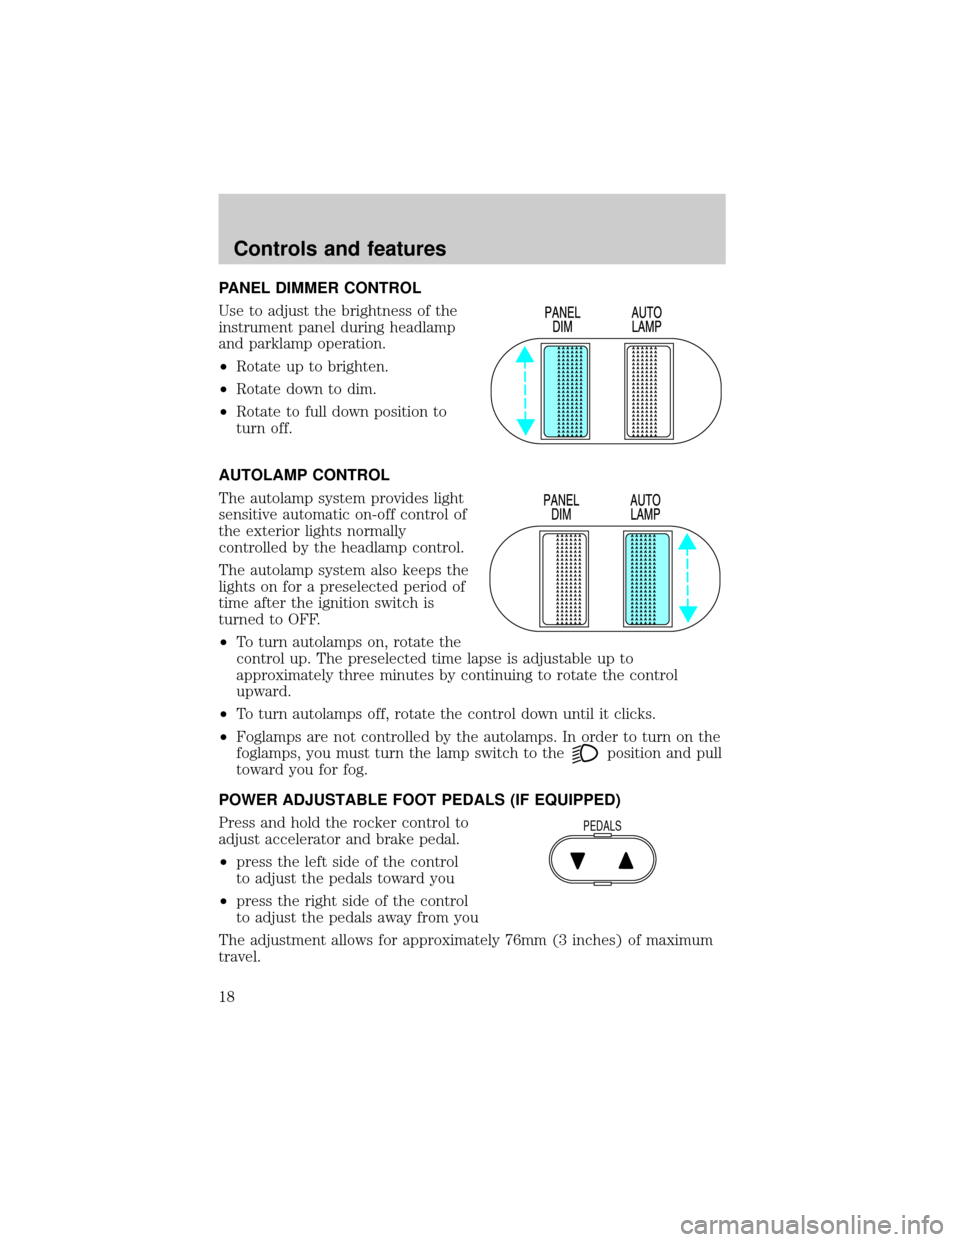
PANEL DIMMER CONTROL
Use to adjust the brightness of the
instrument panel during headlamp
and parklamp operation.
²Rotate up to brighten.
²Rotate down to dim.
²Rotate to full down position to
turn off.
AUTOLAMP CONTROL
The autolamp system provides light
sensitive automatic on-off control of
the exterior lights normally
controlled by the headlamp control.
The autolamp system also keeps the
lights on for a preselected period of
time after the ignition switch is
turned to OFF.
²To turn autolamps on, rotate the
control up. The preselected time lapse is adjustable up to
approximately three minutes by continuing to rotate the control
upward.
²To turn autolamps off, rotate the control down until it clicks.
²Foglamps are not controlled by the autolamps. In order to turn on the
foglamps, you must turn the lamp switch to the
position and pull
toward you for fog.
POWER ADJUSTABLE FOOT PEDALS (IF EQUIPPED)
Press and hold the rocker control to
adjust accelerator and brake pedal.
²press the left side of the control
to adjust the pedals toward you
²press the right side of the control
to adjust the pedals away from you
The adjustment allows for approximately 76mm (3 inches) of maximum
travel.
PEDALS
Controls and features
18
Page 19 of 216
Never adjust the accelerator and brake pedal with feet on pedals
or while the vehicle is moving.
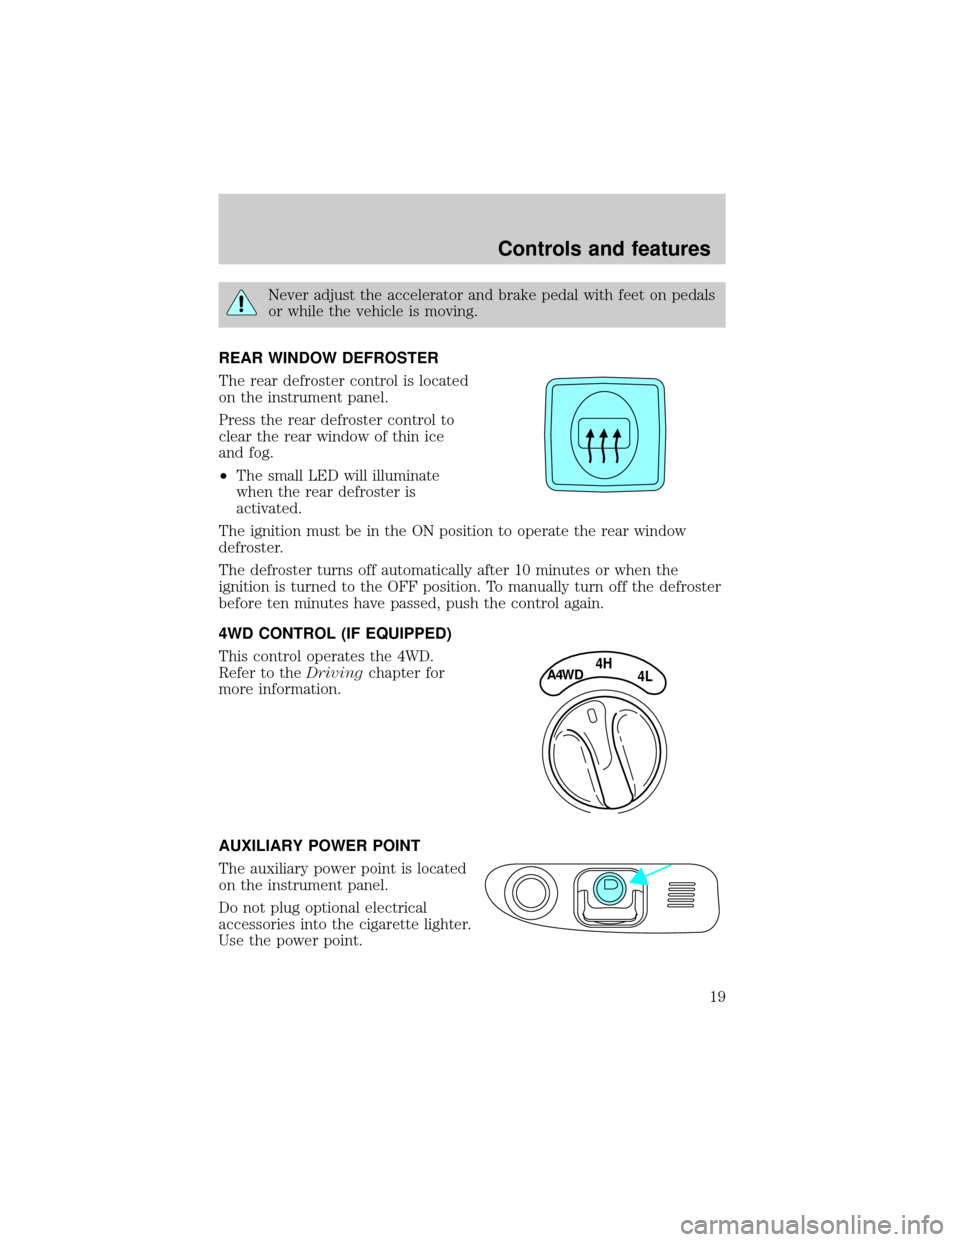
REAR WINDOW DEFROSTER
The rear defroster control is located
on the instrument panel.
Press the rear defroster control to
clear the rear window of thin ice
and fog.
²The small LED will illuminate
when the rear defroster is
activated.
The ignition must be in the ON position to operate the rear window
defroster.
The defroster turns off automatically after 10 minutes or when the
ignition is turned to the OFF position. To manually turn off the defroster
before ten minutes have passed, push the control again.
4WD CONTROL (IF EQUIPPED)
This control operates the 4WD.
Refer to theDrivingchapter for
more information.
AUXILIARY POWER POINT
The auxiliary power point is located
on the instrument panel.
Do not plug optional electrical
accessories into the cigarette lighter.
Use the power point.
4HA4WD4L
Controls and features
19
Page 39 of 216
²MAX A/C-Uses recirculated air to cool the vehicle. MAX A/C is noisier
than A/C but more economical and will cool the inside of the vehicle
faster. Airflow will be from the instrument panel registers. This mode
can also be used to prevent undesirable odors from entering the
vehicle.
²A/C-Uses outside air to cool the vehicle. It is quieter than MAX A/C
but not as economical. Airflow will be from the instrument panel
registers.
²PANEL-Distributes outside air through the instrument panel registers.
However, the air will not be cooled below the outside temperature
because the air conditioning does not operate in this mode.
²OFF-Outside air is shut out and the fan will not operate. For short
periods of time only, use this mode to prevent undesirable odors from
entering the vehicle.
²PANEL & FLOOR-Distributes outside air through the instrument panel
registers and the floor ducts. Heating and air conditioning capabilities
are provided in this mode. For added customer comfort, when the
temperature control knob is anywhere in between the full hot and full
cold positions, the air distributed through the floor ducts will be
slightly warmer than the air sent to the instrument panel registers.
²FLOOR-Allows for maximum heating by distributing outside air
through the floor ducts. However, the air will not be cooled below the
outside temperature because the air conditioning does not operate in
this mode.
²FLR & DEF-Distributes outside air through the windshield defroster
ducts and the floor ducts. Heating and air conditioning capabilities are
provided in this mode. For added customer comfort, the air
distributed through the floor ducts will be slightly warmer than the air
sent to the windshield defroster ducts. If the temperature is about
10ÉC (50ÉF) or higher, the air conditioner will automatically
dehumidify the air to prevent fogging.
²DEF
-Distributes outside air through the windshield defroster
ducts. It can be used to clear ice or fog from the windshield. If the
temperature is about 10ÉC (50ÉF) or higher, the air conditioner will
automatically dehumidify the air to prevent fogging.
Controls and features
39
Page 44 of 216
²MAX A/C-Uses recirculated air to cool the vehicle. The temperature
will display 16ÉC (60ÉF). To exit, press AUTOMATIC or any other
override controls. MAX A/C is noisier than normal A/C but more
economical and will cool the inside of the vehicle faster. Airflow is
from the instrument panel registers. This mode can also be used to
prevent undesirable odors from entering the vehicle.
²VENT-Distributes outside air through the instrument panel registers.
However, the air cannot be cooled below the outside temperature
because the air conditioning does not operate in this mode.
²PNL²FLR-Distributes outside air through the instrument panel
registers and the floor ducts. Heating and air conditioning capabilities
are provided in this mode. The air will be heated or cooled based on
the temperature selection. For added customer comfort, the air
distributed through the floor ducts will be slightly warmer than the air
sent to the instrument panel registers.
²FLOOR-Allows for maximum heating by distributing outside air
through the floor ducts. However, the air cannot be cooled below the
outside temperature because the air conditioning does not operate this
mode.
²FLR²DEF-Distributes outside air through the windshield defroster
ducts and the floor ducts. Heating and air conditioning capabilities are
provided in this mode. The air will be heated or cooled based on the
temperature selection. For added customer comfort, the air
distributed through the floor ducts will be slightly warmer than the air
sent to the windshield defroster ducts. If the temperature is about
10ÉC (50ÉF) or higher, the air conditioner will automatically
dehumidify the air to prevent fogging.
²DEF
-Distributes outside air through the windshield defroster
ducts. It can be used to clear ice or fog from the windshield. If the
outside air temperature is about 10ÉC (50ÉF) or higher, the air
conditioner will automatically dehumidify the air to prevent fogging.
²OFF-Outside air is shut out and the fan will not operate. For short
periods of time only, use this mode to prevent undesirable odors from
entering the vehicle.
Controls and features
44
Page 179 of 216

Please consult your ªWarranty Guideº for complete emission warranty
information.
Readiness for Inspection/Maintenance (I/M) testing
In some localities, it may be a legal requirement to pass an I/M test of
the on-board diagnostics system. If your ªCheck Engine/Service Engine
Soonº light is on, refer to the description in theWarning Lights and
Chimessection of theInstrumentationchapter. Your vehicle may not
pass the I/M test with the ªCheck Engine/Service Engine Soonº light on.
If the vehicle's powertrain system or its battery has just been serviced,
the on-board diagnostics system is reset to a ªnot ready for I/M testº
condition. To ready the on-board diagnostics system for I/M testing, a
minimum of 30 minutes of city and highway driving is necessary as
described below:
²First, at least 10 minutes of driving on an expressway or highway.
²Next, at least 20 minutes driving in stop-and-go, city-type traffic with
at least four idle periods.
Allow the vehicle to sit for at least eight hours without starting the
engine. Then, start the engine and complete the above driving cycle. The
engine must warm up to its normal operating temperature. Once started,
do not turn off the engine until the above driving cycle is complete.
EXTERIOR BULBS
Replacing exterior bulbs
Check the operation of the following lamps frequently:
²Headlamps
²Foglamps
²High-mount brakelamp
²Brakelamps
²Parking lamps
²Turn signals
²License plate lamp
²Tail lamps
²Back-up lamps
Maintenance and care
179
Page 184 of 216
Using the right bulbs
Function Number of bulbs Trade number
Headlamps 2 9007
Front park/turn lamps 2 3157NAK
Front sidemarker 2 194NA
Foglamps 2 899
Turn/tail/brake lamps 2 3157K
Liftgate lamp 2 916
Backup lamp 2 3156K
License lamp 2 168
High-mount brake lamp 3 912
To replace all instrument panel lights - see your dealer
REPLACING THE INTERIOR BULBS
Check the operation of the following interior bulbs frequently:
²interior overhead lamp
²map lamp
Map lamps
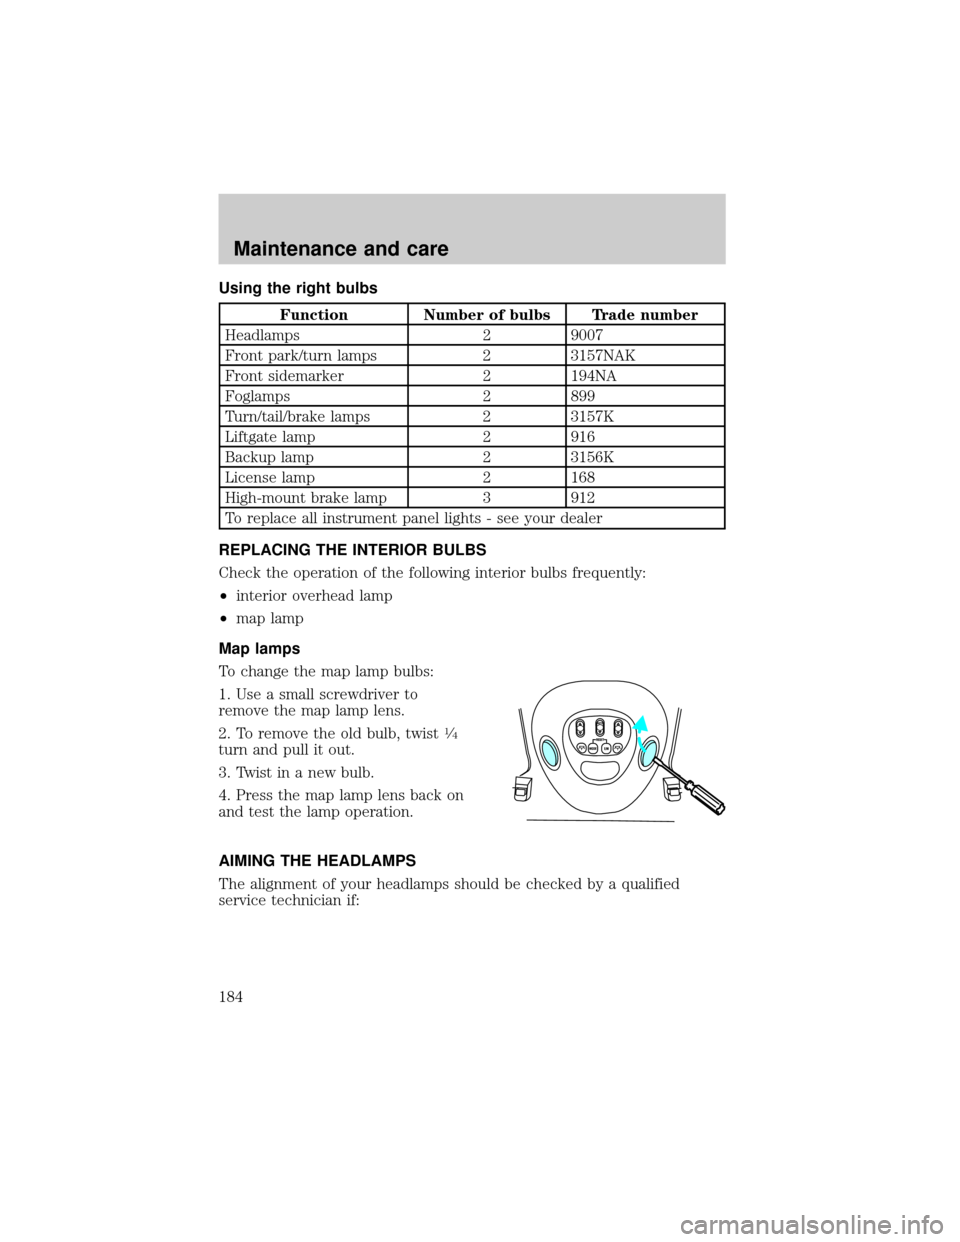
To change the map lamp bulbs:
1. Use a small screwdriver to
remove the map lamp lens.
2. To remove the old bulb, twist
1¤4
turn and pull it out.
3. Twist in a new bulb.
4. Press the map lamp lens back on
and test the lamp operation.
AIMING THE HEADLAMPS
The alignment of your headlamps should be checked by a qualified
service technician if:
Maintenance and care
184
Page 208 of 216

Travel equipment
Console
Console armrest
Daytime running lights
Factory luggage rack
Factory luggage rack adaptors
Fog lights
Framed luggage covers
Heavy-duty battery
Neutral towing transfer case kit (Explorer 4.0L only)
Off road lights
Pickup box rails
Removable luggage rack
Removable luggage rack adapters
Retractable bed hooks and loops
Running boards
Snow traction cables
Soft luggage cover
Speed control
Towing mirrors
Trailer hitch
Trailer hitch bars and balls
Trailer hitch wiring adaptor
Protection and appearance equipment
Air bag anti-theft locks
Bed mat/bedliner tailgate covers
Bed mats
Bedliners
Car/truck covers
Cargo liners, interior
Customer assistance
208
Page 213 of 216

Engine oil
checking and adding ..............152
dipstick ....................................150
specifications ...................150,152
Exhaust fumes ..........................103
Fail safe cooling ........................157
Floor mats ...................................64
Four-Wheel Drive vehicles ..10,114
control trac .............................115
description ..............................115
driving off road .......................117
electronic shift ............19,116,117
indicator light ...........................10
Fuel
choosing the right fuel ...........172
comparisons with EPA fuel
economy estimates .................177
detergent in fuel .....................173
filling your vehicle
with fuel ...........................170,173
quality ......................................172
running out of fuel .................173
safety information relating to
automotive fuels .....................170
Fuses ...................................129,130
Garage door opener ....................56
Gas mileage (see Fuel
economy) ..............174,175,176,177
Gauges .........................................11
battery voltage gauge ...............14
engine coolant temperature
gauge .........................................12
engine oil pressure gauge ........14
fuel gauge ..................................12
odometer ...................................13
speedometer .............................12
tachometer ................................13
trip odometer ............................13
GVWR
(Gross Vehicle Weight Rating)
calculating ...............................121
Hazard flashers .........................128Head
restraints .......74,77,78,79,80,81,82
Headlamps
aiming ......................................184
bulb specifications ..................184
high beam ..............................9,54
Heating ........................................38
heating and air
conditioning system ............38,40
Hood ..........................................149
Ignition .......................................196
Inspection/maintenance
(I/M) testing ..............................179
Instrument panel
cleaning ...................................188
Keyless entry system
locking and unlocking doors ....73
programming entry code .........72
Keys
positions of the ignition ...........48
Lamps
autolamp system .......................18
daytime running light ...............17
fog lamps ...................................17
headlamps .................................17
headlamps, flash to pass ..........55
instrument panel, dimming .....18
interior lamps .........................184
replacing
bulbs ............179,180,181,182,183
Lane change indicator
(see Turn signal) ........................48
Liftgate ........................................64
Lights, warning and indicator ......6
air bag ..........................................7
air suspension .........................110
anti-lock brakes (ABS) ..............8
anti-theft .....................................9
brake ............................................8
charging system ..........................9
door ajar ....................................10
engine oil pressure .....................9
Index
213