wipers FORD EXPEDITION 1999 1.G Owners Manual
[x] Cancel search | Manufacturer: FORD, Model Year: 1999, Model line: EXPEDITION, Model: FORD EXPEDITION 1999 1.GPages: 216, PDF Size: 1.8 MB
Page 53 of 216
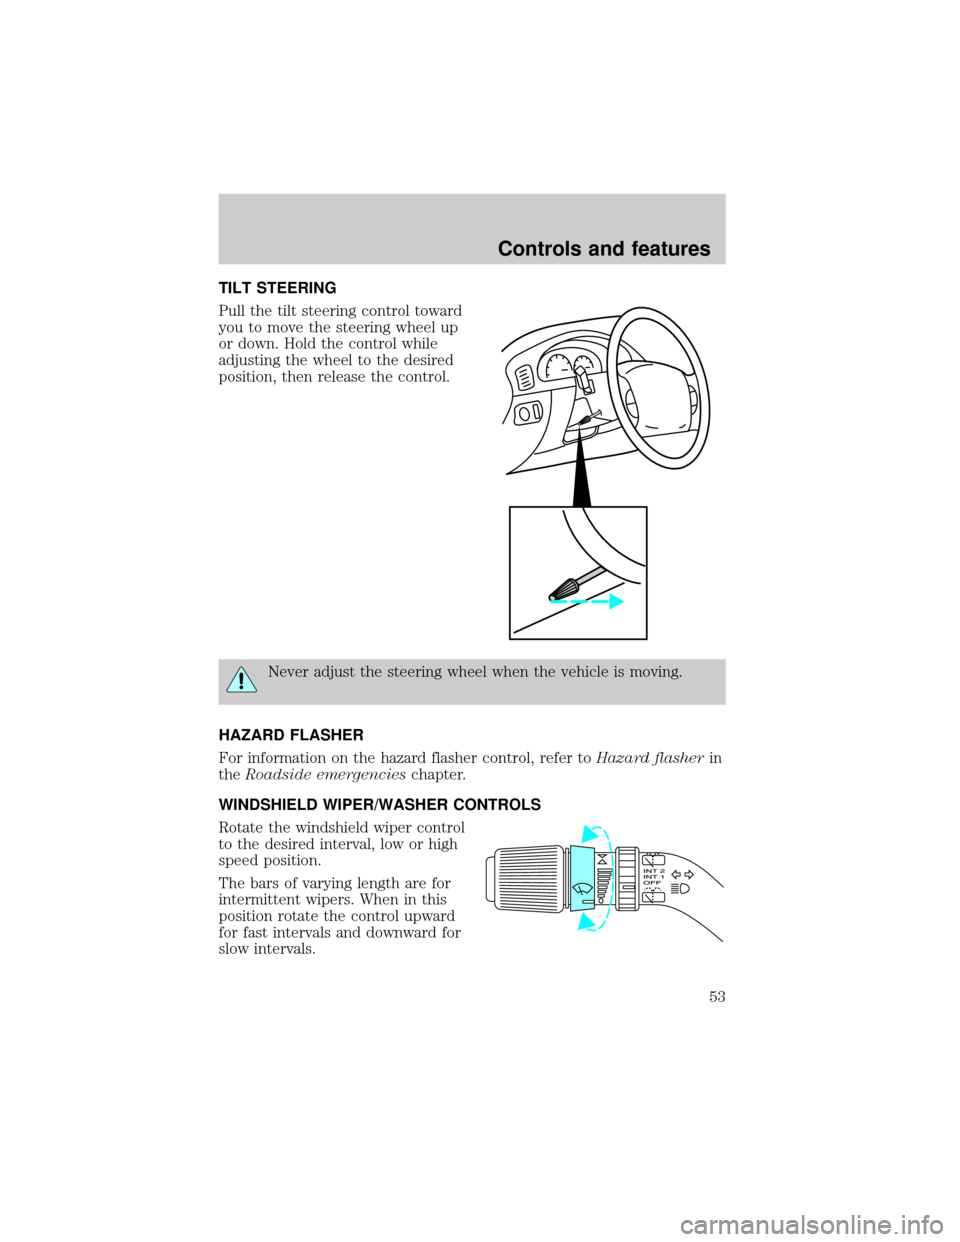
TILT STEERING
Pull the tilt steering control toward
you to move the steering wheel up
or down. Hold the control while
adjusting the wheel to the desired
position, then release the control.
Never adjust the steering wheel when the vehicle is moving.
HAZARD FLASHER
For information on the hazard flasher control, refer toHazard flasherin
theRoadside emergencieschapter.
WINDSHIELD WIPER/WASHER CONTROLS
Rotate the windshield wiper control
to the desired interval, low or high
speed position.
The bars of varying length are for
intermittent wipers. When in this
position rotate the control upward
for fast intervals and downward for
slow intervals.
Controls and features
53
Page 54 of 216
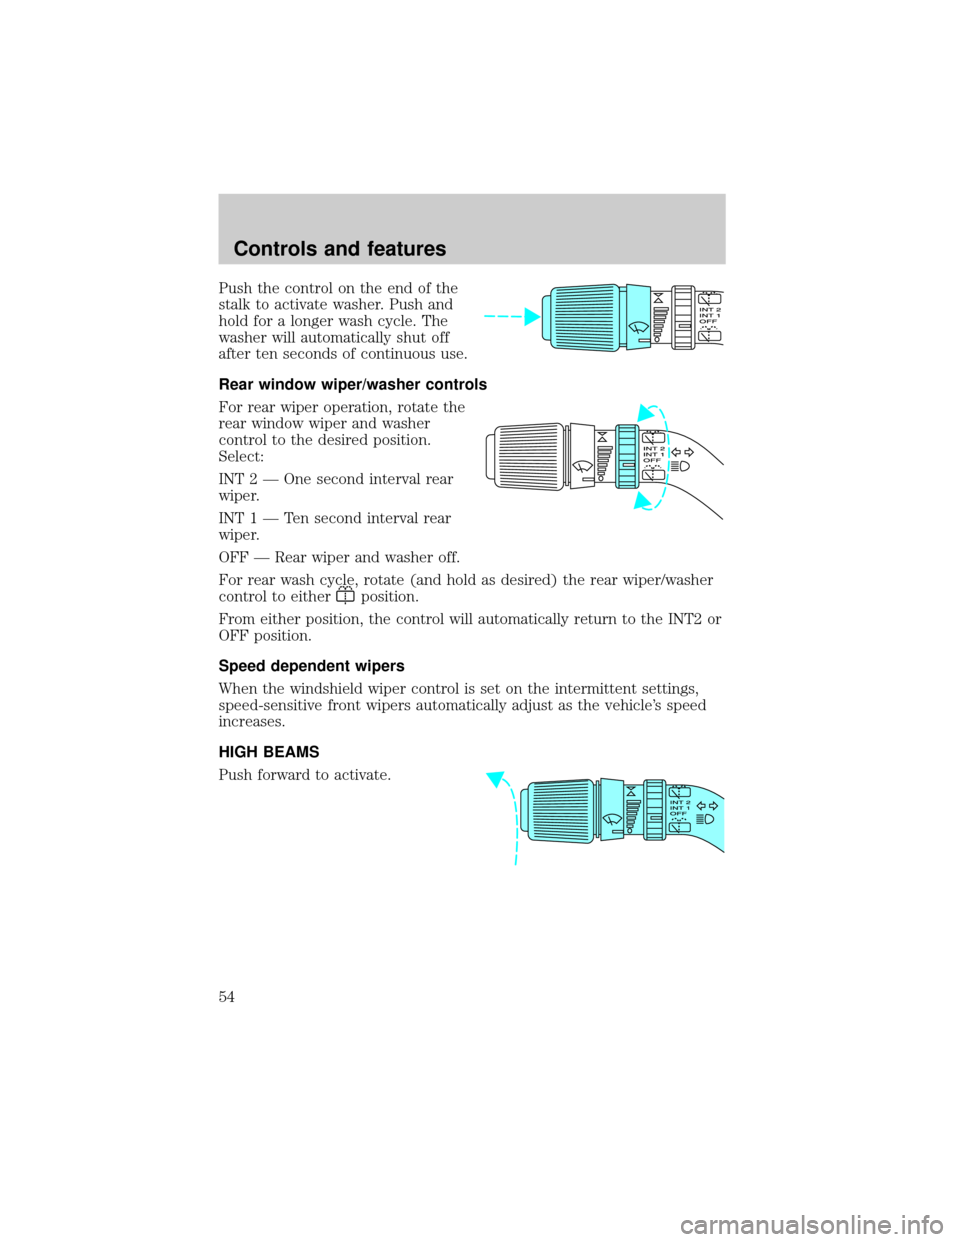
Push the control on the end of the
stalk to activate washer. Push and
hold for a longer wash cycle. The
washer will automatically shut off
after ten seconds of continuous use.
Rear window wiper/washer controls
For rear wiper operation, rotate the
rear window wiper and washer
control to the desired position.
Select:
INT 2 Ð One second interval rear
wiper.
INT1ÐTensecond interval rear
wiper.
OFF Ð Rear wiper and washer off.
For rear wash cycle, rotate (and hold as desired) the rear wiper/washer
control to either
position.
From either position, the control will automatically return to the INT2 or
OFF position.
Speed dependent wipers
When the windshield wiper control is set on the intermittent settings,
speed-sensitive front wipers automatically adjust as the vehicle's speed
increases.
HIGH BEAMS
Push forward to activate.
Controls and features
54
Page 59 of 216
Compass calibration adjustment
Perform this adjustment in an open area free from steel structures and
high voltage lines.
For optimum calibration, turn off all electrical accessories (heater/air
conditioning, wipers, etc.) and make sure all vehicle doors are shut.
1. Start the vehicle.
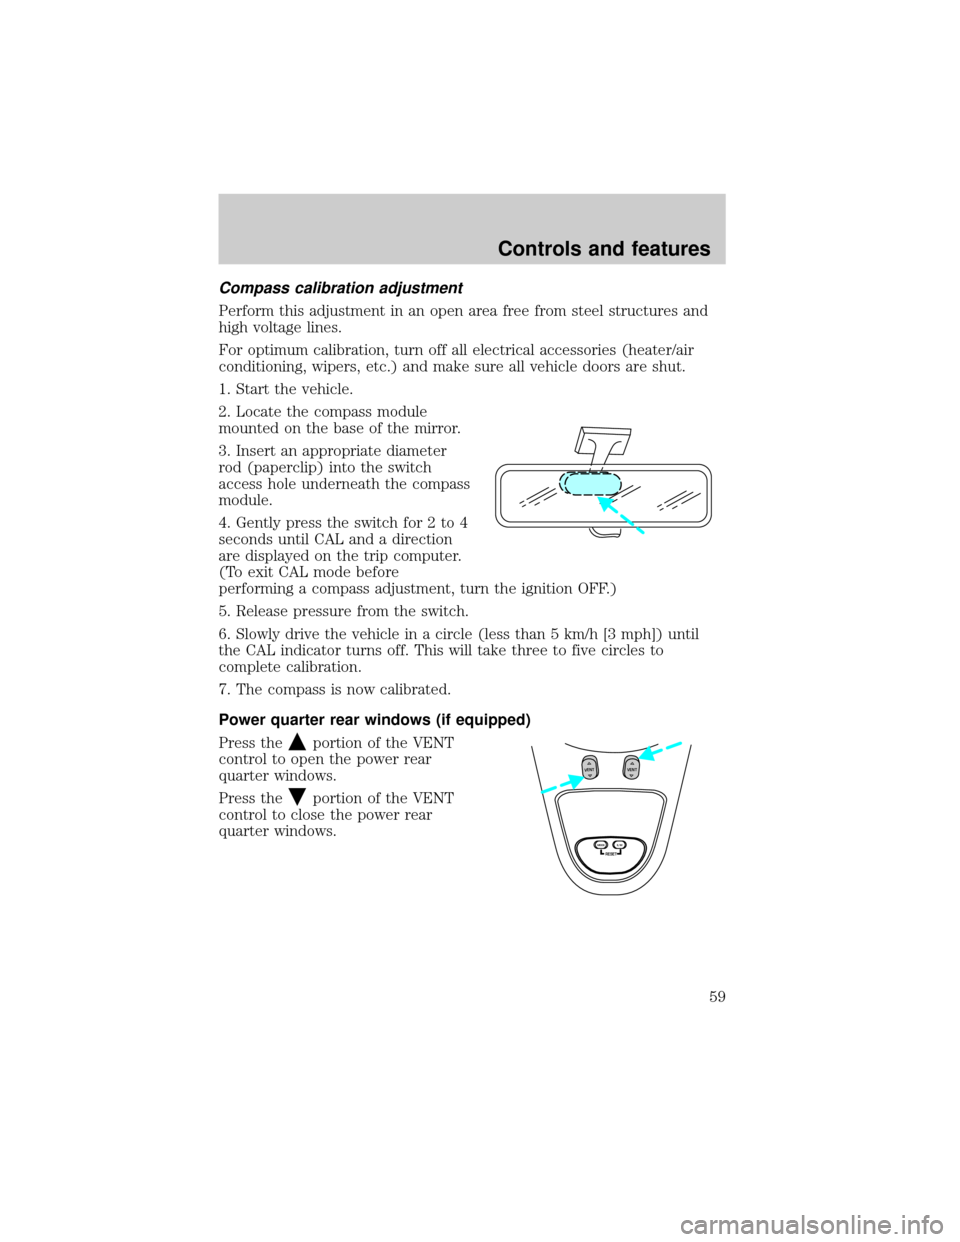
2. Locate the compass module
mounted on the base of the mirror.
3. Insert an appropriate diameter
rod (paperclip) into the switch
access hole underneath the compass
module.
4. Gently press the switch for 2 to 4
seconds until CAL and a direction
are displayed on the trip computer.
(To exit CAL mode before
performing a compass adjustment, turn the ignition OFF.)
5. Release pressure from the switch.
6. Slowly drive the vehicle in a circle (less than 5 km/h [3 mph]) until
the CAL indicator turns off. This will take three to five circles to
complete calibration.
7. The compass is now calibrated.
Power quarter rear windows (if equipped)
Press the
portion of the VENT
control to open the power rear
quarter windows.
Press the
portion of the VENT
control to close the power rear
quarter windows.
RESET
VENTVENT
MODE E/M
Controls and features
59
Page 132 of 216
Fuse/Relay
LocationFuse Amp
RatingDescription
7 5A Aux A/C Blower Relay, Console Blower
8 5A Radio, Remote Entry Module, GEM Module
9 Ð Not Used
10 Ð Not Used
11 30A Front Washer Pump Relay, Wiper Run/Park
Relay, Wiper Hi/LO Relay, Windshield Wiper
Motor, Rear Washer Pump Relay
12 Ð Not Used
13 20A Stop Lamp Switch (Lamps), Turn/Hazard
Flasher, Speed Control Module
14 15A Rear Wipers, Running Board Lamps,
Battery Saver Relay, Interior Lamp Relay,
Accessory Delay Relay (Power Windows)
15 5A Stop Lamp Switch, (Speed Control, Brake
Shift Interlock, ABS, PCM Module Inputs),
GEM Module
16 20A Headlamps (Hi Beams), Cluster (Hi Beam
Indicator)
17 10A Heated Mirrors, Heated Grid Switch
Indicator
18 5A Instrument Illumination (Dimmer Switch
Power)
19 Ð Not Used
20 5A Audio, Four Wheel Air Suspension (4WAS)
Module, GEM Module
21 15A Starter Relay, Fuse 20
22 10A Air Bag Module
23 10A Aux A/C, Heated Seats, Trailer Tow Battery
Charge, Turn/Hazard Flasher, Console
Blower Door Actuator
24 10A Climate Mode Switch (Blower Relay),
EATC (via fuse 7), EATC Blower Relay
25 5A 4 Wheel Anti-Lock Brake System (4WABS)
Module
Roadside emergencies
132
Page 135 of 216
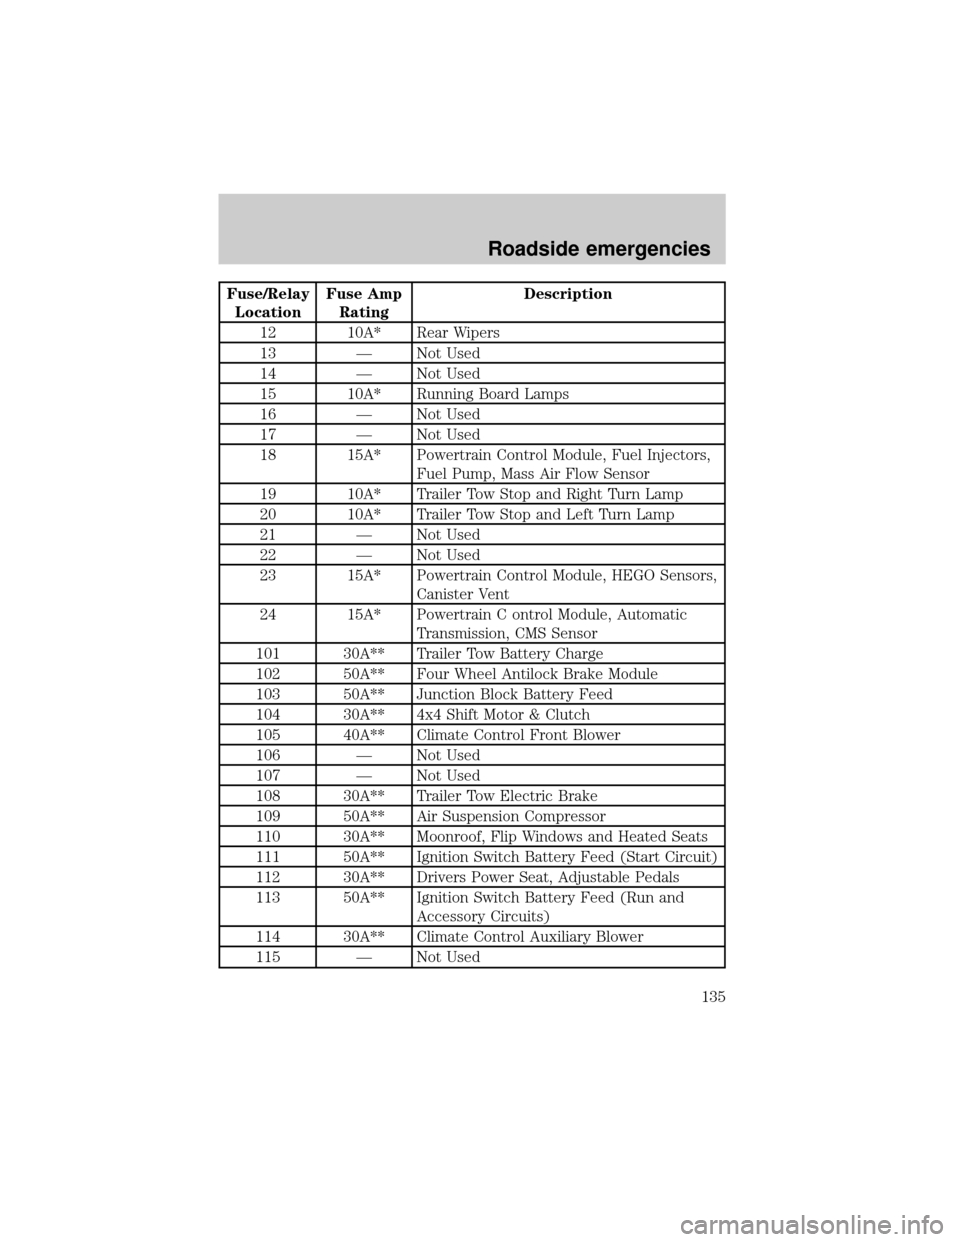
Fuse/Relay
LocationFuse Amp
RatingDescription
12 10A* Rear Wipers
13 Ð Not Used
14 Ð Not Used
15 10A* Running Board Lamps
16 Ð Not Used
17 Ð Not Used
18 15A* Powertrain Control Module, Fuel Injectors,
Fuel Pump, Mass Air Flow Sensor
19 10A* Trailer Tow Stop and Right Turn Lamp
20 10A* Trailer Tow Stop and Left Turn Lamp
21 Ð Not Used
22 Ð Not Used
23 15A* Powertrain Control Module, HEGO Sensors,
Canister Vent
24 15A* Powertrain C ontrol Module, Automatic
Transmission, CMS Sensor
101 30A** Trailer Tow Battery Charge
102 50A** Four Wheel Antilock Brake Module
103 50A** Junction Block Battery Feed
104 30A** 4x4 Shift Motor & Clutch
105 40A** Climate Control Front Blower
106 Ð Not Used
107 Ð Not Used
108 30A** Trailer Tow Electric Brake
109 50A** Air Suspension Compressor
110 30A** Moonroof, Flip Windows and Heated Seats
111 50A** Ignition Switch Battery Feed (Start Circuit)
112 30A** Drivers Power Seat, Adjustable Pedals
113 50A** Ignition Switch Battery Feed (Run and
Accessory Circuits)
114 30A** Climate Control Auxiliary Blower
115 Ð Not Used
Roadside emergencies
135
Page 215 of 216

Ventilating your vehicle ...........104
Warning chimes ...........................11
Washer fluid ..............................154
Water, Driving through .............119
Windows ............................59,60,61
rear wiper/washer .....................54Windshield washer fluid and
wipers
checking and cleaning ............165
operation ...................................53
replacing wiper blades ...........166
Index
215