clock FORD EXPEDITION 2000 1.G User Guide
[x] Cancel search | Manufacturer: FORD, Model Year: 2000, Model line: EXPEDITION, Model: FORD EXPEDITION 2000 1.GPages: 256, PDF Size: 2.08 MB
Page 190 of 256
Do not put engine coolant in the windshield washer fluid
reservoir. If engine coolant is sprayed onto the windshield, it
could make it difficult to see through the windshield.
When the engine is cool, add a50/50 mixtureof engine coolant and
distilled water to the engine coolant reservoir, until the coolant is at the
ªcold fill levelº or within the ªcold fill rangeº as listed in the engine
coolant reservoir (depending upon application).
²NEVER increase the coolant concentration above 60%.
²NEVER decrease the coolant concentration below 40%.
²Engine coolant concentrations above 60% or below 40% will
decrease the freeze protection characteristics of the engine
coolant and may cause engine damage.
Plain water may be added in an emergency, but youmustreplace it with
a 50/50 mixture of engine coolant and distilled water as soon as possible.
Check the coolant level in the reservoir before you drive your vehicle the
next few times (with the engine cool). If necessary, add a50/50
mixtureof engine coolant and distilled water to the engine coolant
reservoir until the coolant level is at the ªcold fill levelº or within the
ªcold fill rangeº as listed on the reservoir (depending upon application).
Have your dealer check the engine cooling system for leaks if you have
to add more than 1.0 liter (1.0 quart) of engine coolant per month.
To avoid scalding hot steam or coolant from being released from
the engine cooling system, never remove the pressure relief cap
from the engine coolant reservoir while the engine is running or hot.
Failure to follow this warning may result in damage to the engine's
cooling system and possible severe personal injury.
If you must remove the pressure relief cap from the engine coolant
reservoir, follow these steps to avoid personal injury:
1. Before you remove the cap, turn the engine off and let it cool.
2. When the engine is cool, wrap a thick cloth around the cap. Slowly
turn cap counterclockwise until pressure begins to release.
3. Step back while the pressure releases.
4. When you are sure that all the pressure has been released, use the
cloth to turn it counterclockwise and remove the cap.
Maintenance and care
190
Page 199 of 256
7. Drive the vehicle to complete the relearning process.
²The vehicle may need to be driven 16 km (10 miles) or more to
relearn the idle and fuel trim strategy.
²If you do not allow the engine to relearn its idle trim, the idle
quality of your vehicle may be adversely affected until the idle
trim is eventually relearned.
If the battery has been disconnected or a new battery has been installed,
the clock and the preset radio stations must be reset once the battery is
reconnected.
²Always dispose of automotive
batteries in a responsible manner.
Follow your local authorized
standards for disposal. Call your
local authorized recycling center
to find out more about recycling
automotive batteries.
AIR FILTER MAINTENANCE
Refer to the Scheduled Maintenance Guide for the appropriate intervals
for changing the air filter element.
When changing the air filter element, use only the Motorcraft air filter
element listed. Refer toMotorcraft Part Numbersin theCapacities and
specificationschapter.
Do not start your engine with the air cleaner removed and do
not remove it while the engine is running.
LEAD
RETURN
RECYCLE
Maintenance and care
199
Page 209 of 256
Cleaner air
Ford approves the use of reformulated ªcleaner-burningº gasolines to
improve air quality. These gasolines may contain oxygenates up to 10%
ethanol or 15% MTBE.
Running out of fuel
Avoid running out of fuel because this situation may have an adverse
affect on powertrain components.
If you have run out of fuel:
²You may need to cycle the ignition from OFF to ON several times after
refueling, to allow the fuel system to pump the fuel from the tank to
the engine.
²Your ªService Engine Soonº indicator may come on. For more
information on the ªService Engine Soonº indicator, refer to the
Instrumentationchapter.
Fuel Filler Cap
Your fuel tank filler cap has an indexed design with a 1/8 turn on/off
feature.
When fueling your vehicle:
1. Turn the engine off.
2. Carefully turn the filler cap counterclockwise 1/8 of a turn until it
stops.
3. Pull to remove the cap from the fuel filler pipe.
4. To install the cap, align the tabs on the cap with the notches on the
filler pipe.
5. Turn the filler cap clockwise 1/8 of a turn until it stops.
If the ªService Engine Soon/Check Engineº indicator comes on and stays
on when you start the engine, the fuel filler cap may not be properly
installed. Turn off the engine, remove the fuel filler cap, align the cap
properly and reinstall it.
If you must replace the fuel filler cap, replace it with a fuel filler
cap that is designed for your vehicle. The customer warranty may
be void for any damage to the fuel tank or fuel system if the
correct genuine Ford or Motorcraft fuel filler cap is not used.
Maintenance and care
209
Page 216 of 256
Replacing headlamp bulbs
1. Make sure that the headlamp control is in the OFF position.
2. Open the hood.
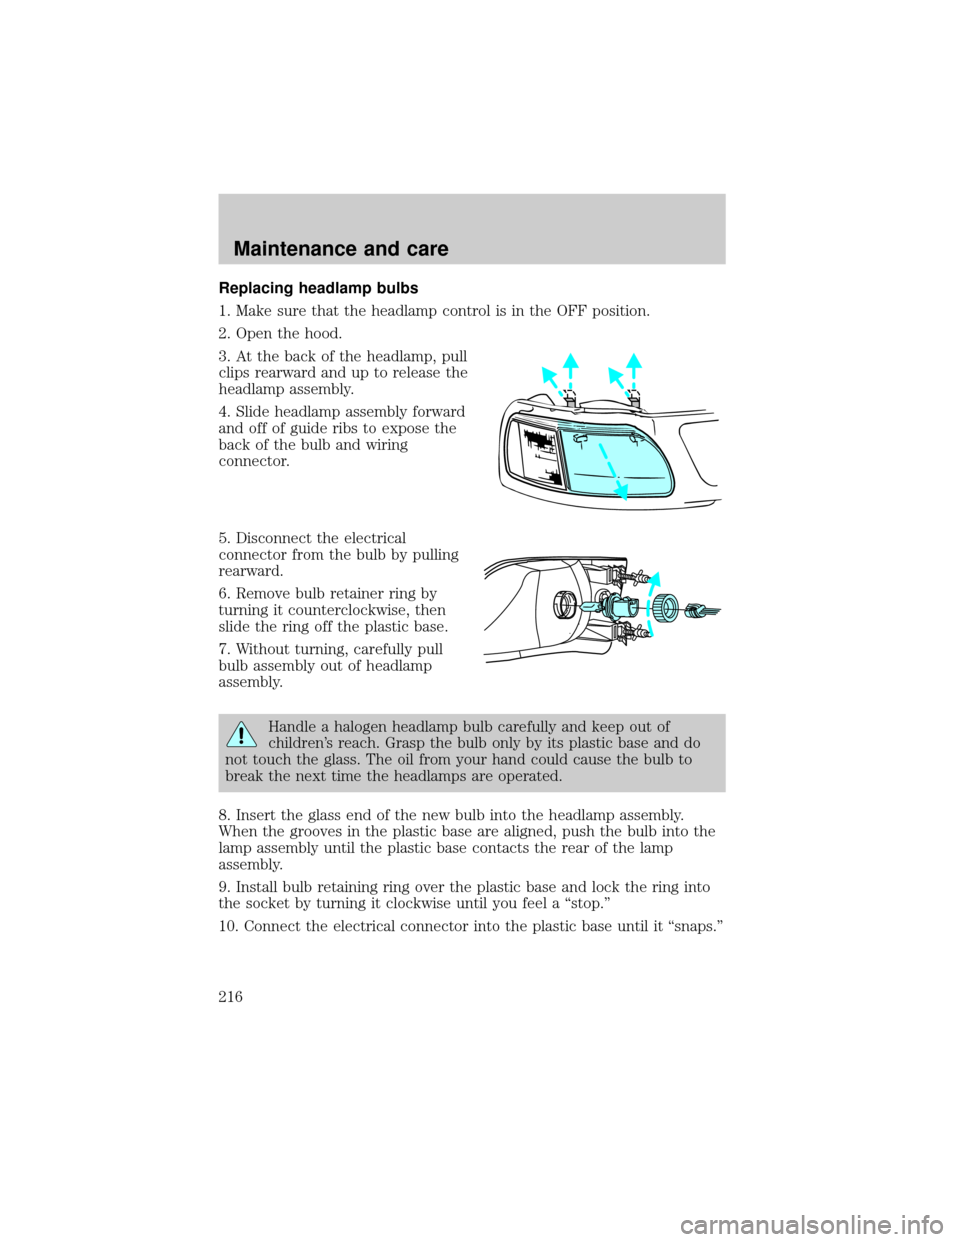
3. At the back of the headlamp, pull
clips rearward and up to release the
headlamp assembly.
4. Slide headlamp assembly forward
and off of guide ribs to expose the
back of the bulb and wiring
connector.
5. Disconnect the electrical
connector from the bulb by pulling
rearward.
6. Remove bulb retainer ring by
turning it counterclockwise, then
slide the ring off the plastic base.
7. Without turning, carefully pull
bulb assembly out of headlamp
assembly.
Handle a halogen headlamp bulb carefully and keep out of
children's reach. Grasp the bulb only by its plastic base and do
not touch the glass. The oil from your hand could cause the bulb to
break the next time the headlamps are operated.
8. Insert the glass end of the new bulb into the headlamp assembly.
When the grooves in the plastic base are aligned, push the bulb into the
lamp assembly until the plastic base contacts the rear of the lamp
assembly.
9. Install bulb retaining ring over the plastic base and lock the ring into
the socket by turning it clockwise until you feel a ªstop.º
10. Connect the electrical connector into the plastic base until it ªsnaps.º
Maintenance and care
216
Page 217 of 256
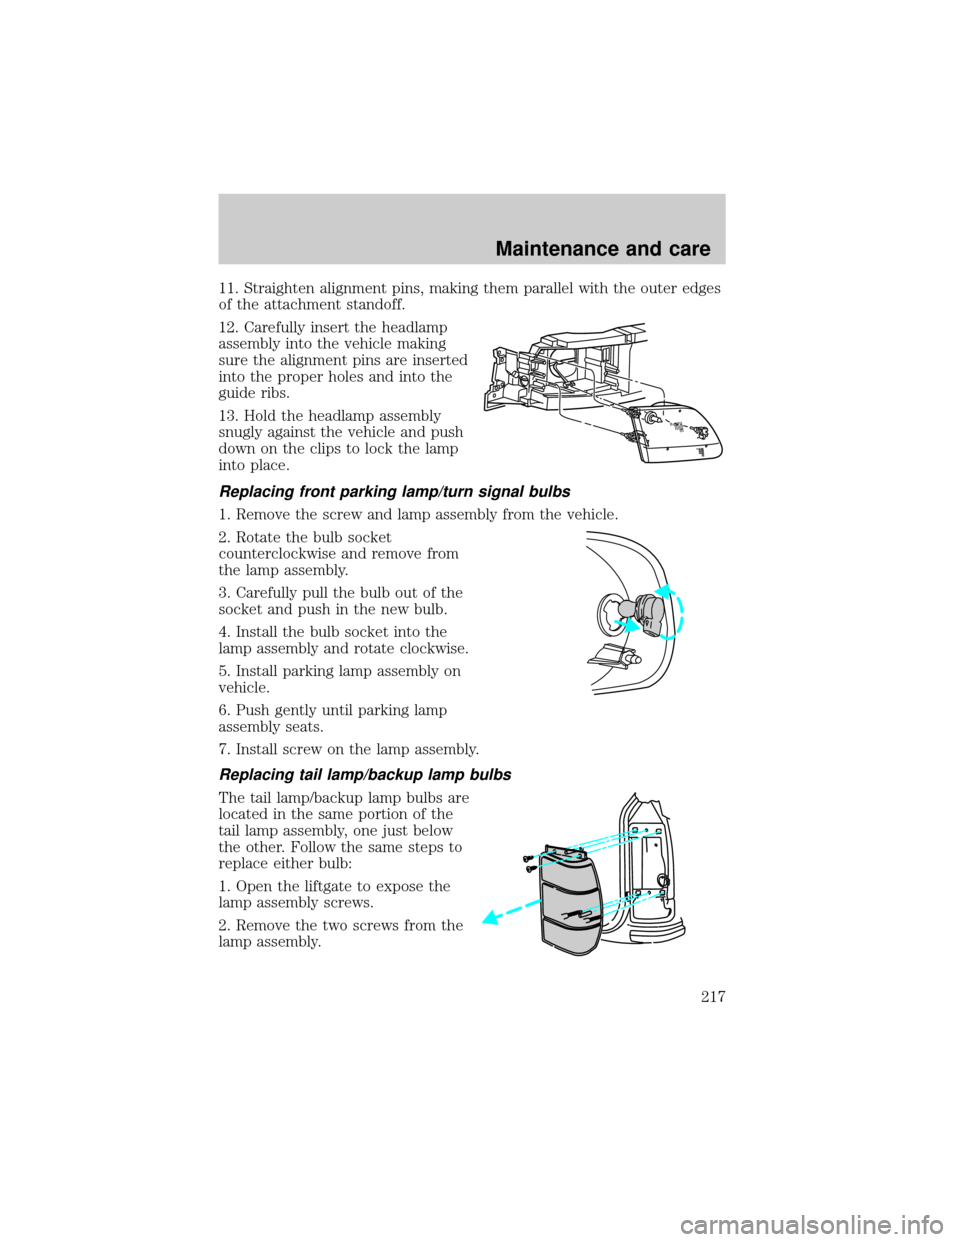
11. Straighten alignment pins, making them parallel with the outer edges
of the attachment standoff.
12. Carefully insert the headlamp
assembly into the vehicle making
sure the alignment pins are inserted
into the proper holes and into the
guide ribs.
13. Hold the headlamp assembly
snugly against the vehicle and push
down on the clips to lock the lamp
into place.
Replacing front parking lamp/turn signal bulbs
1. Remove the screw and lamp assembly from the vehicle.
2. Rotate the bulb socket
counterclockwise and remove from
the lamp assembly.
3. Carefully pull the bulb out of the
socket and push in the new bulb.
4. Install the bulb socket into the
lamp assembly and rotate clockwise.
5. Install parking lamp assembly on
vehicle.
6. Push gently until parking lamp
assembly seats.
7. Install screw on the lamp assembly.
Replacing tail lamp/backup lamp bulbs
The tail lamp/backup lamp bulbs are
located in the same portion of the
tail lamp assembly, one just below
the other. Follow the same steps to
replace either bulb:
1. Open the liftgate to expose the
lamp assembly screws.
2. Remove the two screws from the
lamp assembly.
Maintenance and care
217
Page 218 of 256
3. Carefully pry the lamp assembly away from the vehicle to expose the
bulb sockets.
4. Rotate the bulb socket counterclockwise and remove from lamp
assembly.
5. Pull bulb straight out of socket and push in the new bulb.
6. Install the bulb socket into the lamp assembly and rotate clockwise.
7. Carefully install the tail lamp assembly on the vehicle snapping the
three retaining tabs into place.
8. Secure the lamp assembly with two screws.
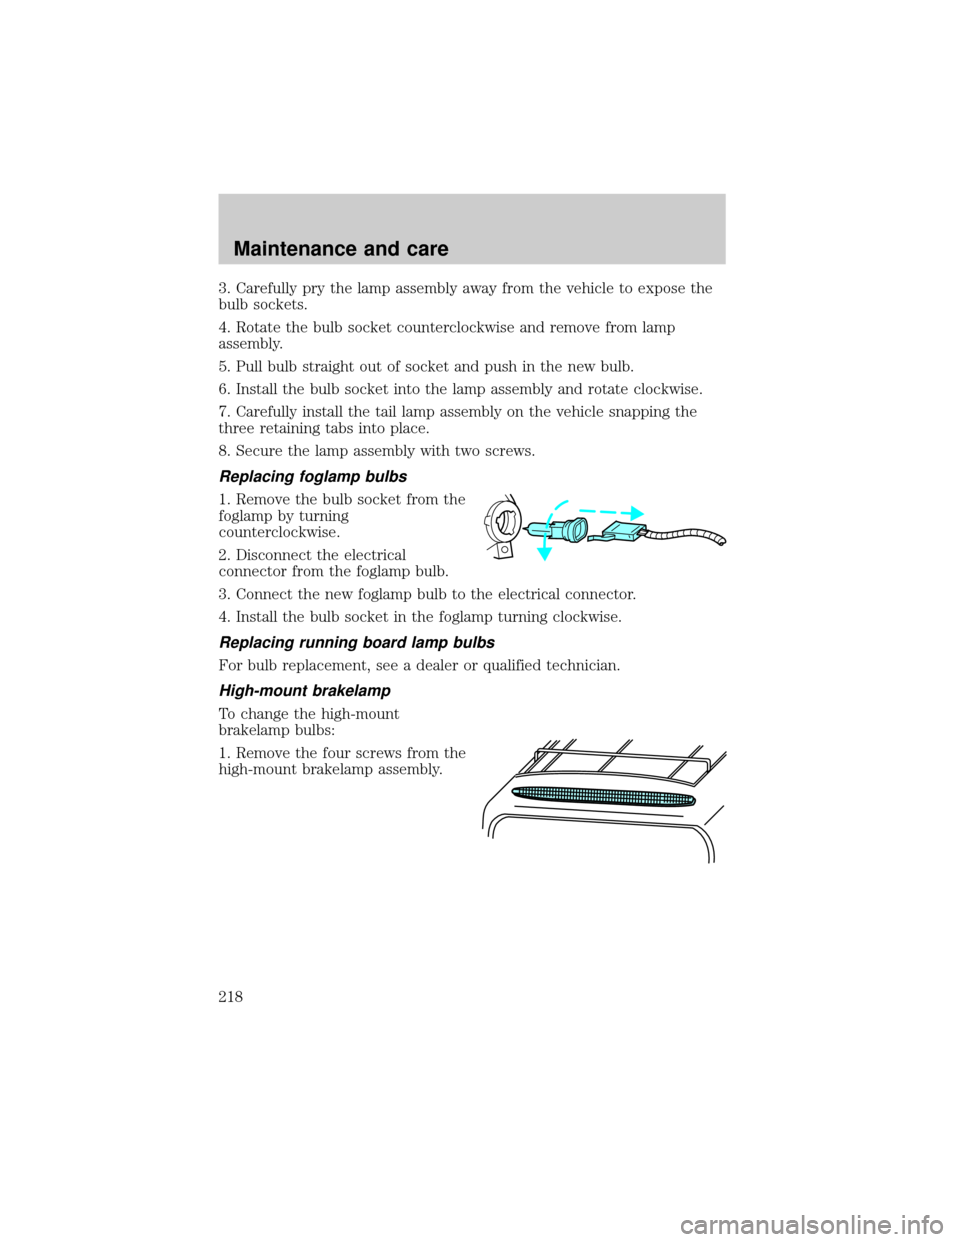
Replacing foglamp bulbs
1. Remove the bulb socket from the
foglamp by turning
counterclockwise.
2. Disconnect the electrical
connector from the foglamp bulb.
3. Connect the new foglamp bulb to the electrical connector.
4. Install the bulb socket in the foglamp turning clockwise.
Replacing running board lamp bulbs
For bulb replacement, see a dealer or qualified technician.
High-mount brakelamp
To change the high-mount
brakelamp bulbs:
1. Remove the four screws from the
high-mount brakelamp assembly.
Maintenance and care
218
Page 219 of 256
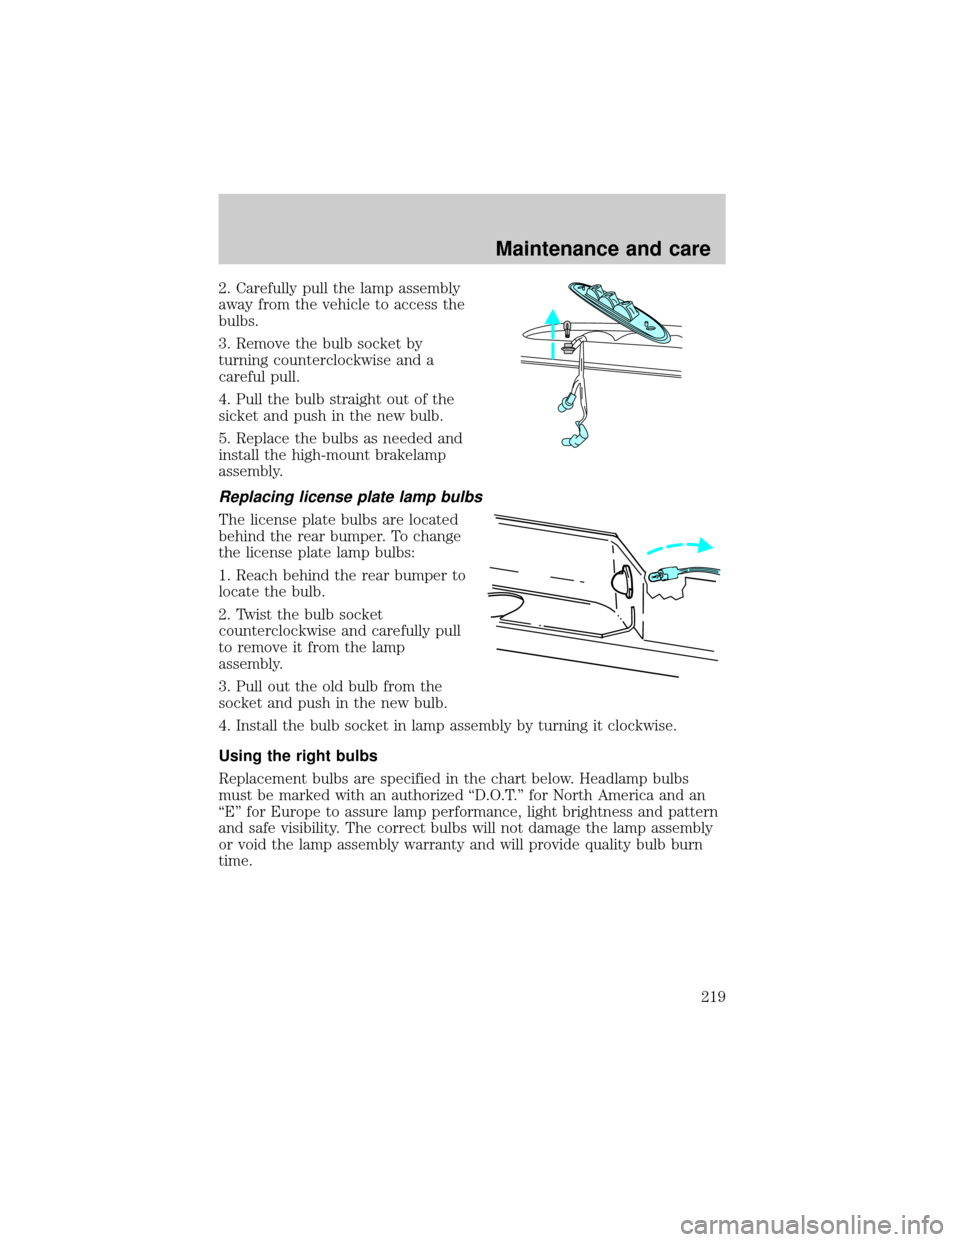
2. Carefully pull the lamp assembly
away from the vehicle to access the
bulbs.
3. Remove the bulb socket by
turning counterclockwise and a
careful pull.
4. Pull the bulb straight out of the
sicket and push in the new bulb.
5. Replace the bulbs as needed and
install the high-mount brakelamp
assembly.
Replacing license plate lamp bulbs
The license plate bulbs are located
behind the rear bumper. To change
the license plate lamp bulbs:
1. Reach behind the rear bumper to
locate the bulb.
2. Twist the bulb socket
counterclockwise and carefully pull
to remove it from the lamp
assembly.
3. Pull out the old bulb from the
socket and push in the new bulb.
4. Install the bulb socket in lamp assembly by turning it clockwise.
Using the right bulbs
Replacement bulbs are specified in the chart below. Headlamp bulbs
must be marked with an authorized ªD.O.T.º for North America and an
ªEº for Europe to assure lamp performance, light brightness and pattern
and safe visibility. The correct bulbs will not damage the lamp assembly
or void the lamp assembly warranty and will provide quality bulb burn
time.
Maintenance and care
219
Page 249 of 256
washing ....................................221
waxing .....................................221
wheels ......................................222
wiper blades ............................223
Climate control (see Air
conditioning or Heating) ............51
Clock .......................................35,44
Compass, electronic ....................71
calibration .................................73
set zone adjustment .................72
Console ........................................80
overhead ...............................69,74
rear ............................................81
Controls
power seat .................................94
Coolant
checking and adding ..............187
refill capacities .................191,226
specifications ...................229,232
Cruise control
(see Speed control) ....................63
Customer Assistance ................159
Ford accessories for your
vehicle .....................................242
Ford Extended
Service Plan ............................235
Getting assistance outside
the U.S. and Canada ..............241
Getting roadside assistance ...159
Getting the
service you need ....................235
Ordering additional
owner's literature ...................246
The Dispute
Settlement Board ...................238
Utilizing the Mediation/
Arbitration Program ...............241
Daytime running lamps
(see Lamps) ................................19
Defrost
rear window ..............................21Dipstick
automatic
transmission fluid ...................194
engine oil .................................183
Doors
door ajar warning .....................12
lubricant specifications ..........229
Driveline universal
joint and slip yoke ....................196
Driving under special
conditions ..................................148
mud ..........................................147
sand .........................................147
snow and ice ...........................149
through water ..................147,149
Emergencies, roadside
jump-starting ..........................175
Emission control system ..........213
Engine ........................................232
check engine/
service engine soon light ...........8
cleaning ...................................222
coolant .....................................187
fail-safe coolant ......................192
idle speed control ...................197
lubrication
specifications ...................229,232
refill capacities ........................226
service points ..........................183
starting after a collision .........160
Engine block heater .................131
Engine oil ..................................183
change oil soon warning,
message center .......................183
checking and adding ..............183
dipstick ....................................183
filter, specifications .........185,226
recommendations ...................185
refill capacities ........................226
specifications ...................229,232
Exhaust fumes ..........................132
Fail safe cooling ........................192
Index
249