reset FORD EXPEDITION 2001 1.G Owners Manual
[x] Cancel search | Manufacturer: FORD, Model Year: 2001, Model line: EXPEDITION, Model: FORD EXPEDITION 2001 1.GPages: 280, PDF Size: 1.79 MB
Page 6 of 280
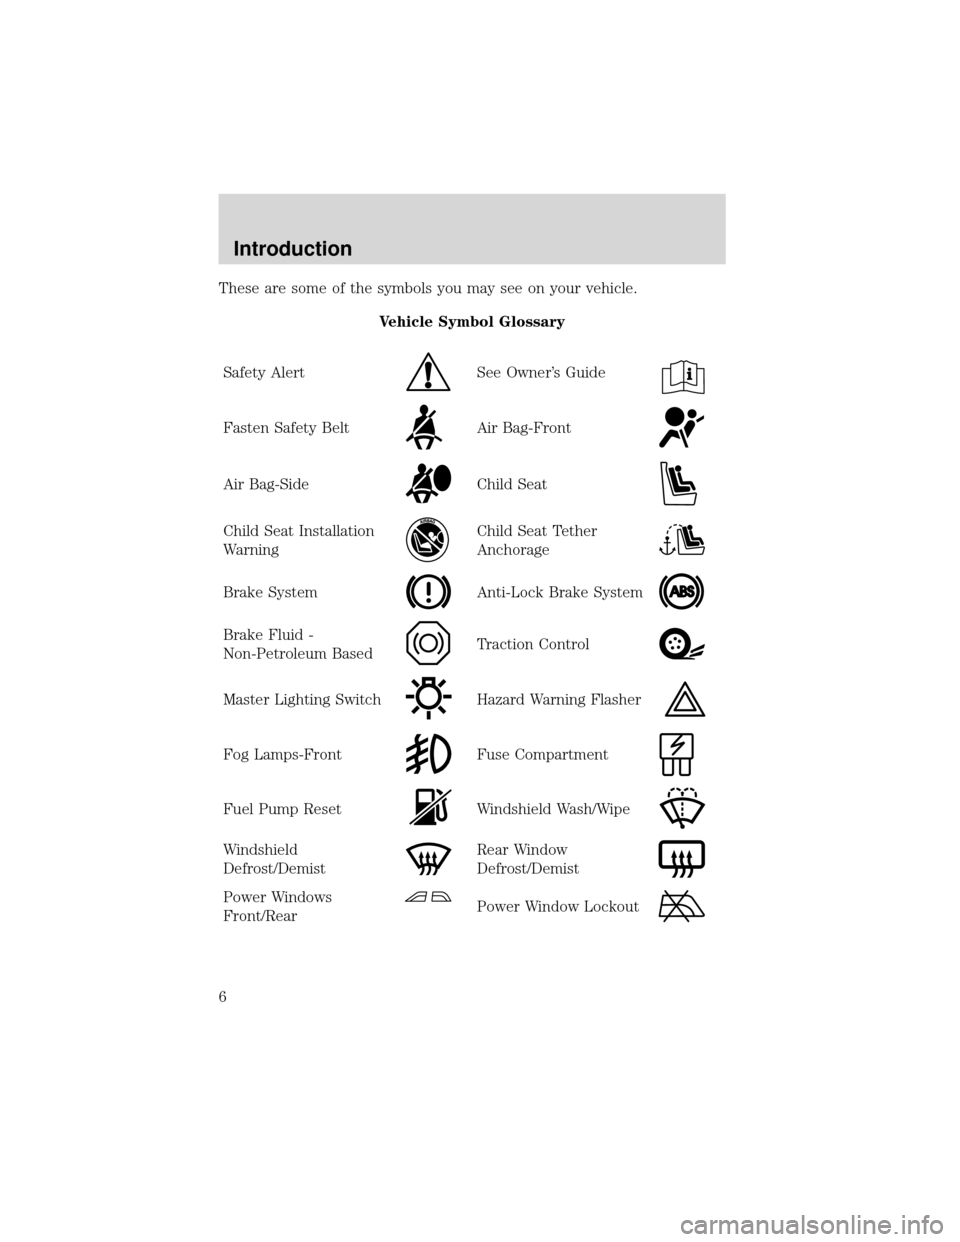
These are some of the symbols you may see on your vehicle.
Vehicle Symbol Glossary
Safety Alert
See Owner’s Guide
Fasten Safety BeltAir Bag-Front
Air Bag-SideChild Seat
Child Seat Installation
WarningChild Seat Tether
Anchorage
Brake SystemAnti-Lock Brake System
Brake Fluid -
Non-Petroleum BasedTraction Control
Master Lighting SwitchHazard Warning Flasher
Fog Lamps-FrontFuse Compartment
Fuel Pump ResetWindshield Wash/Wipe
Windshield
Defrost/DemistRear Window
Defrost/Demist
Power Windows
Front/RearPower Window Lockout
Introduction
6
Page 8 of 280
D
LHLH
EFCHBRAKEPRND2CRUISE DOOR
AJAR
SELECT/RESET
THEFT
FUEL DOOR
0MPHRPMX1000km/h
20406080
00
20
40
60
ON
OFFRES
SET
ACCEL
COAST
D
PEDALS
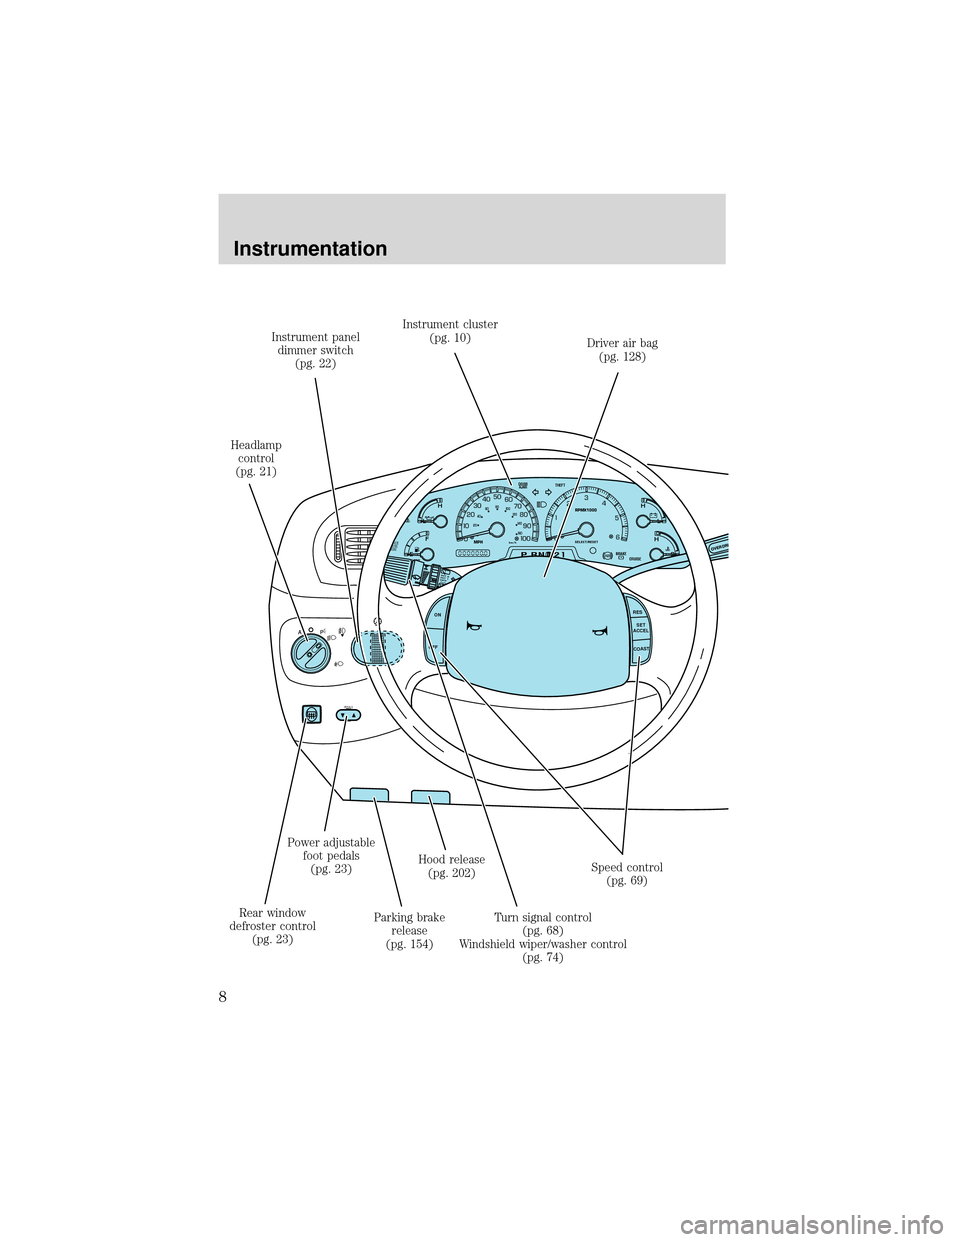
Headlamp
control
(pg. 21)Instrument panel
dimmer switch
(pg. 22)Instrument cluster
(pg. 10)
Driver air bag
(pg. 128)
Speed control
(pg. 69)
Turn signal control
(pg. 68)
Windshield wiper/washer control
(pg. 74) Hood release
(pg. 202)
Parking brake
release
(pg. 154) Power adjustable
foot pedals
(pg. 23)
Rear window
defroster control
(pg. 23)
Instrumentation
8
Page 10 of 280
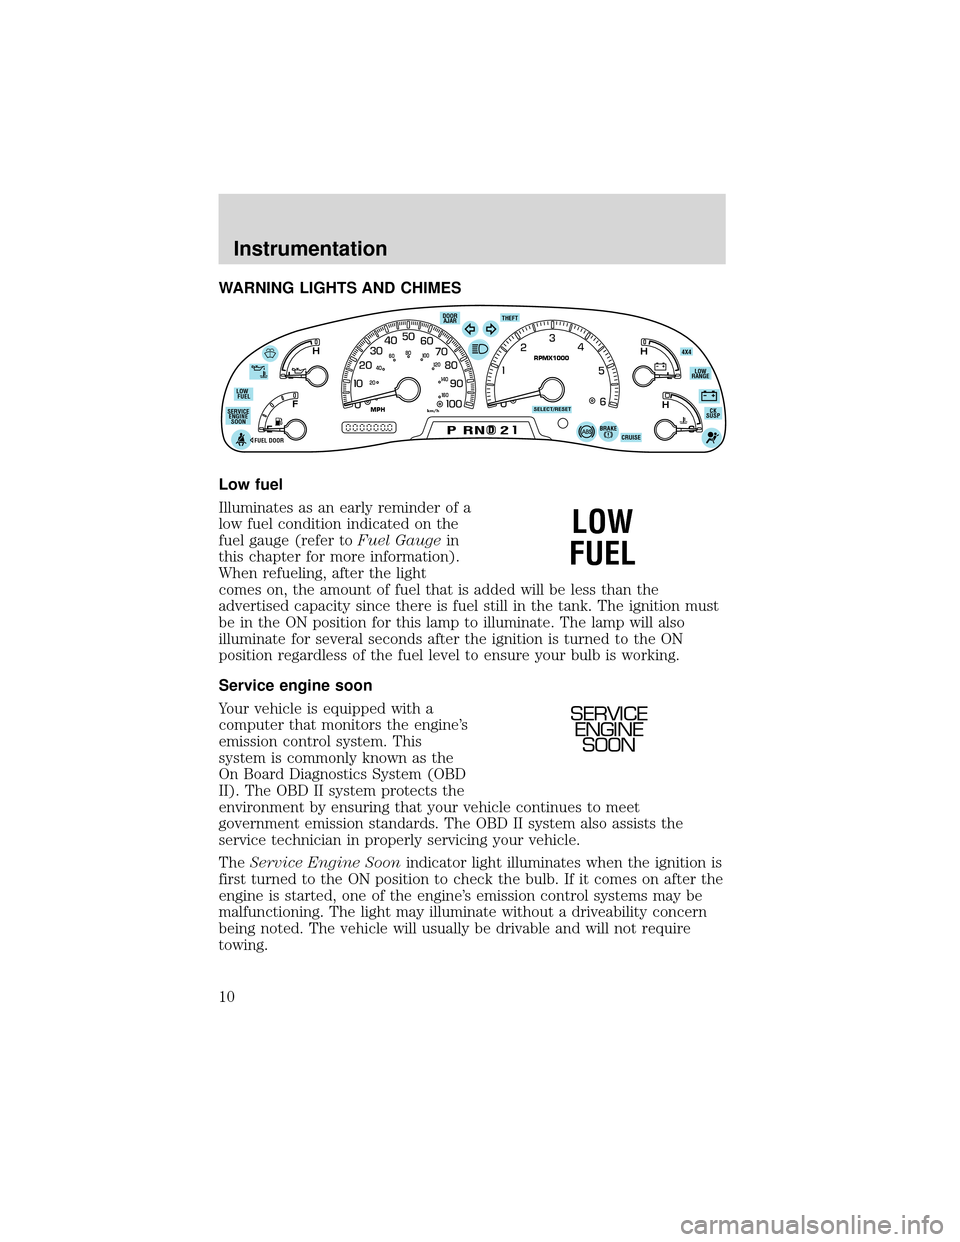
WARNING LIGHTS AND CHIMES
Low fuel
Illuminates as an early reminder of a
low fuel condition indicated on the
fuel gauge (refer toFuel Gaugein
this chapter for more information).
When refueling, after the light
comes on, the amount of fuel that is added will be less than the
advertised capacity since there is fuel still in the tank. The ignition must
be in the ON position for this lamp to illuminate. The lamp will also
illuminate for several seconds after the ignition is turned to the ON
position regardless of the fuel level to ensure your bulb is working.
Service engine soon
Your vehicle is equipped with a
computer that monitors the engine’s
emission control system. This
system is commonly known as the
On Board Diagnostics System (OBD
II). The OBD II system protects the
environment by ensuring that your vehicle continues to meet
government emission standards. The OBD II system also assists the
service technician in properly servicing your vehicle.
TheService Engine Soonindicator light illuminates when the ignition is
first turned to the ON position to check the bulb. If it comes on after the
engine is started, one of the engine’s emission control systems may be
malfunctioning. The light may illuminate without a driveability concern
being noted. The vehicle will usually be drivable and will not require
towing.
D
L
H
L
H
E
F
C
H
BRAKEPRND2CRUISE DOOR
AJAR
SELECT/RESET
4X4
LOW
RANGE
CK
SUSP THEFT
FUEL DOOR SERVICE
ENGINE
SOONLOW
FUEL
0MPHRPMX1000km/h
20406080
00
20
40
60
LOW
FUEL
SERVICE
ENGINE
SOON
Instrumentation
10
Page 16 of 280
GAUGES
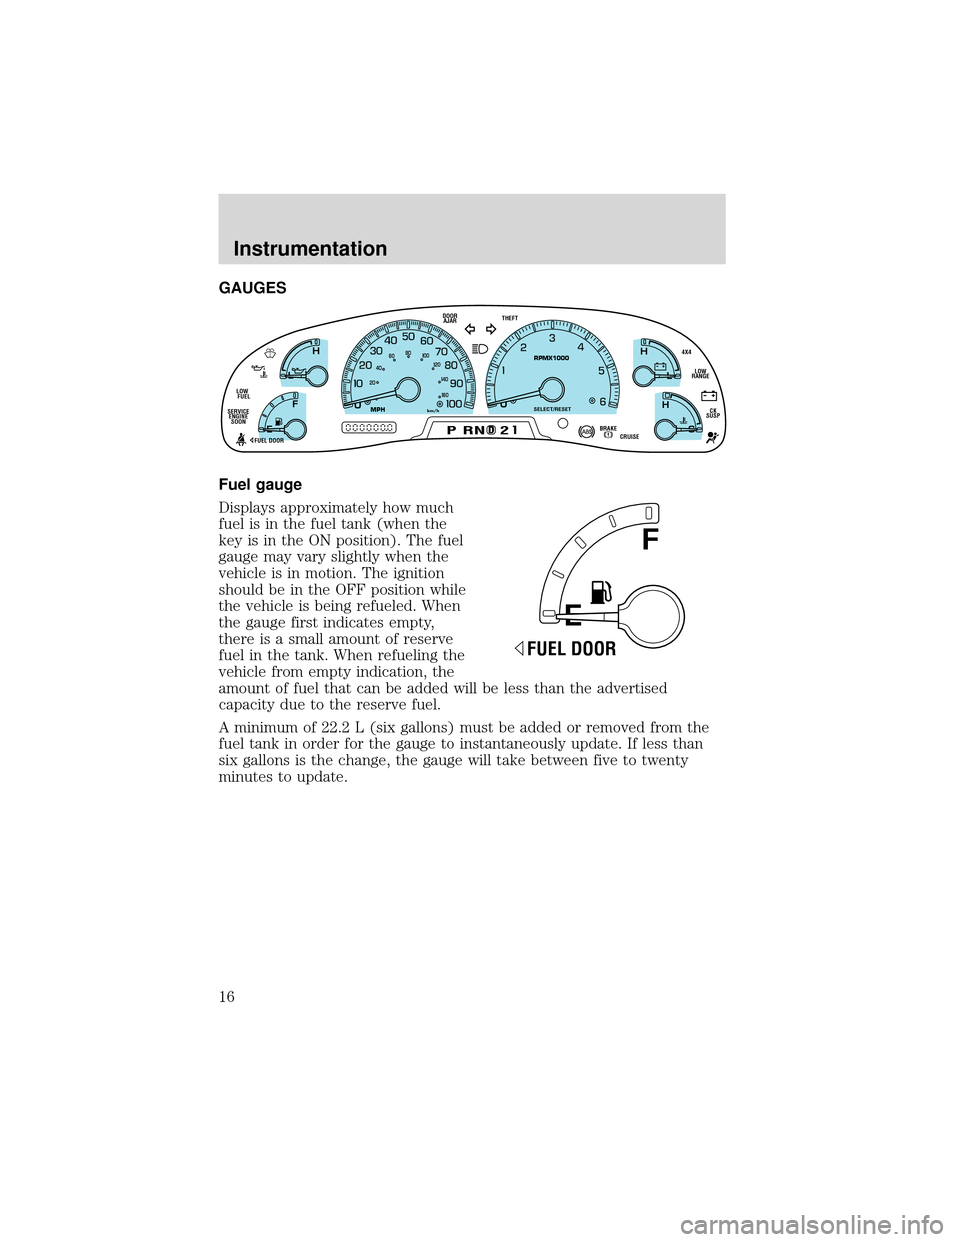
Fuel gauge
Displays approximately how much
fuel is in the fuel tank (when the
key is in the ON position). The fuel
gauge may vary slightly when the
vehicle is in motion. The ignition
should be in the OFF position while
the vehicle is being refueled. When
the gauge first indicates empty,
there is a small amount of reserve
fuel in the tank. When refueling the
vehicle from empty indication, the
amount of fuel that can be added will be less than the advertised
capacity due to the reserve fuel.
A minimum of 22.2 L (six gallons) must be added or removed from the
fuel tank in order for the gauge to instantaneously update. If less than
six gallons is the change, the gauge will take between five to twenty
minutes to update.
D
L
H
L
H
E
F
C
H
BRAKEPRND2CRUISE DOOR
AJAR
SELECT/RESET
4X4
LOW
RANGE
CK
SUSP THEFT
FUEL DOOR SERVICE
ENGINE
SOONLOW
FUEL
0MPHRPMX1000km/h
20406080
00
20
40
60
E
F
FUEL DOOR
Instrumentation
16
Page 18 of 280
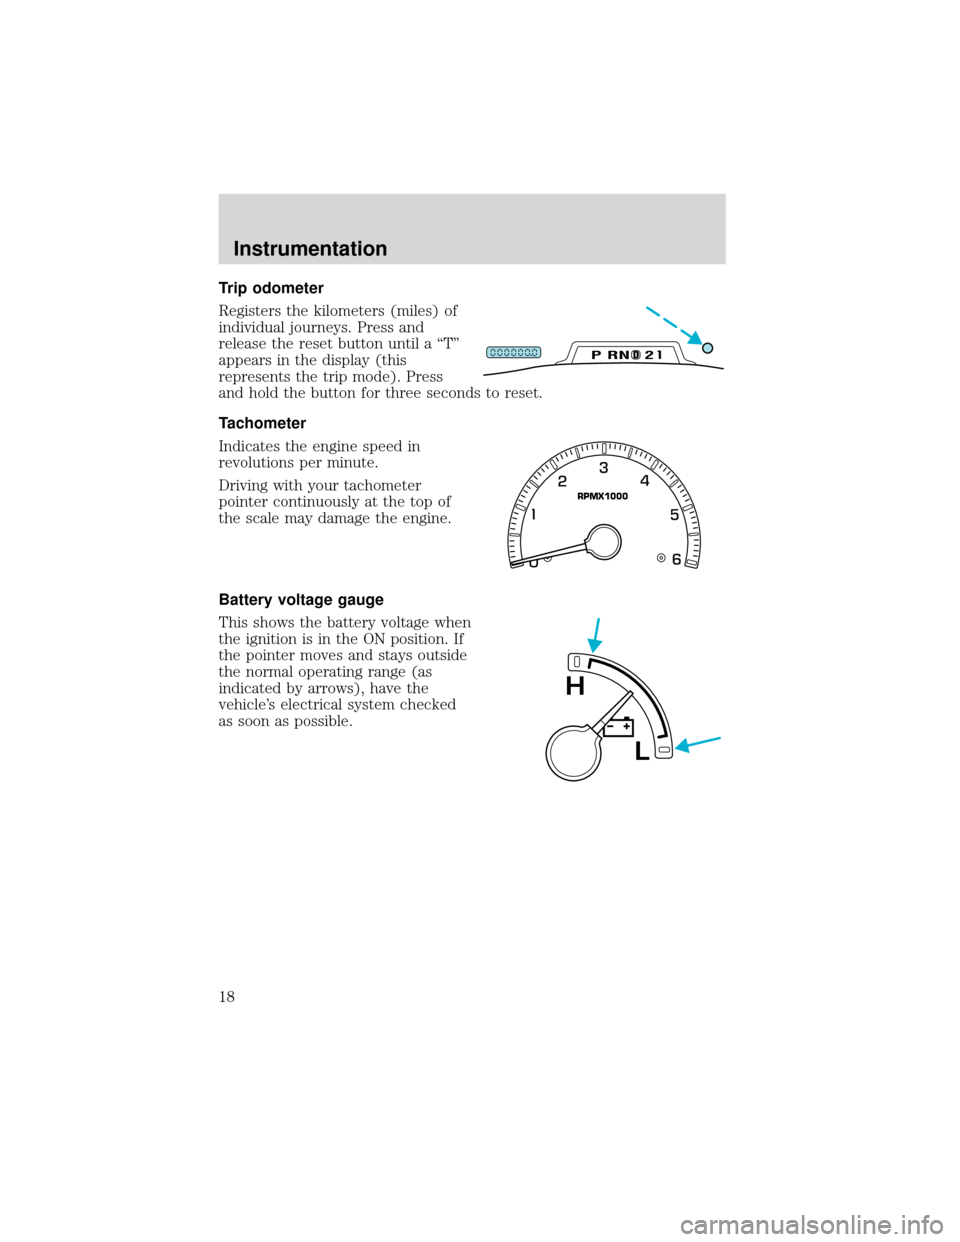
Trip odometer
Registers the kilometers (miles) of
individual journeys. Press and
release the reset button until a“T”
appears in the display (this
represents the trip mode). Press
and hold the button for three seconds to reset.
Tachometer
Indicates the engine speed in
revolutions per minute.
Driving with your tachometer
pointer continuously at the top of
the scale may damage the engine.
Battery voltage gauge
This shows the battery voltage when
the ignition is in the ON position. If
the pointer moves and stays outside
the normal operating range (as
indicated by arrows), have the
vehicle’s electrical system checked
as soon as possible.
DPRND2
RPMX1000
L
H
Instrumentation
18
Page 20 of 280
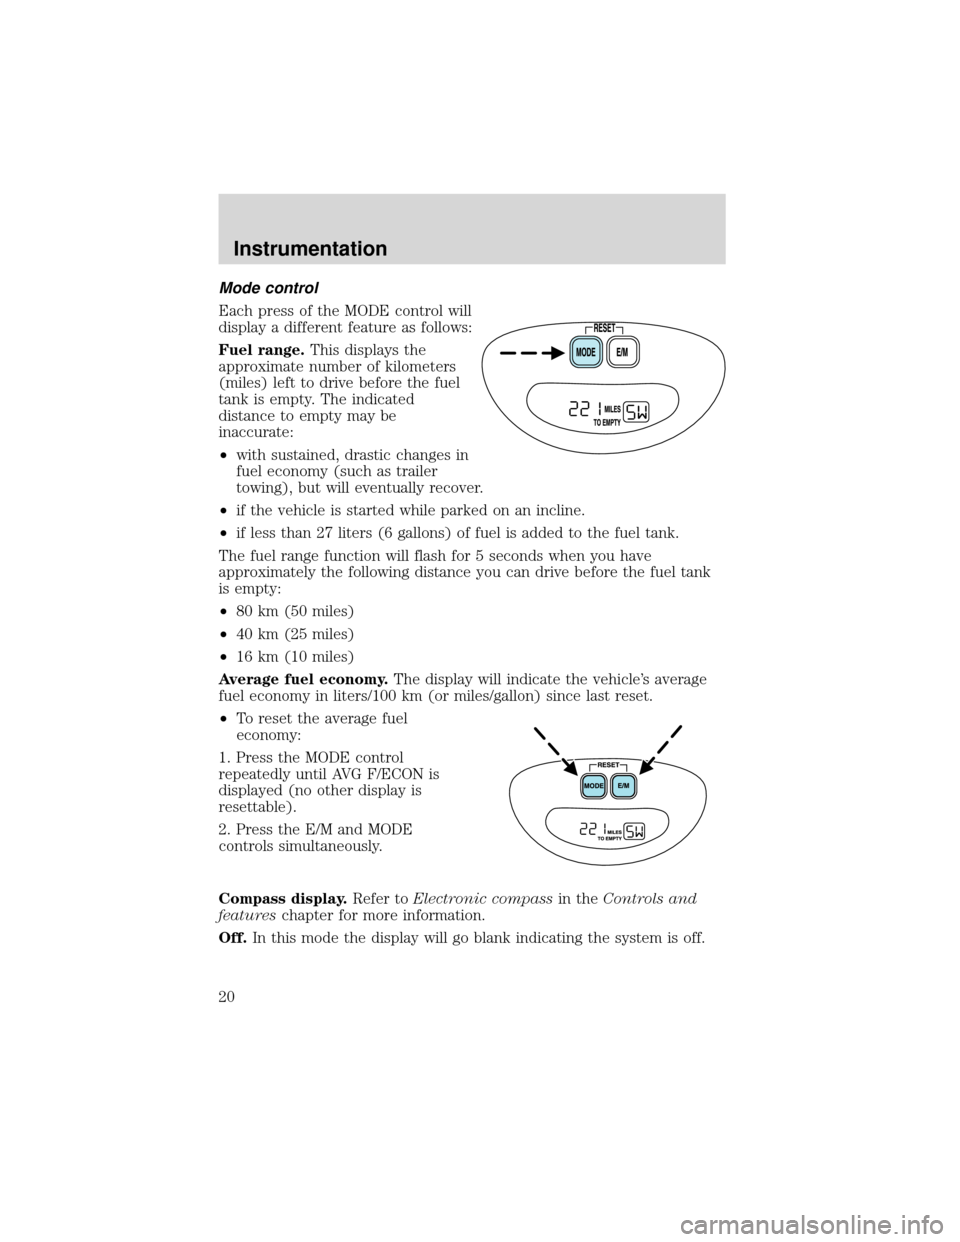
Mode control
Each press of the MODE control will
display a different feature as follows:
Fuel range.This displays the
approximate number of kilometers
(miles) left to drive before the fuel
tank is empty. The indicated
distance to empty may be
inaccurate:
•with sustained, drastic changes in
fuel economy (such as trailer
towing), but will eventually recover.
•if the vehicle is started while parked on an incline.
•if less than 27 liters (6 gallons) of fuel is added to the fuel tank.
The fuel range function will flash for 5 seconds when you have
approximately the following distance you can drive before the fuel tank
is empty:
•80 km (50 miles)
•40 km (25 miles)
•16 km (10 miles)
Average fuel economy.The display will indicate the vehicle’s average
fuel economy in liters/100 km (or miles/gallon) since last reset.
•To reset the average fuel
economy:
1. Press the MODE control
repeatedly until AVG F/ECON is
displayed (no other display is
resettable).
2. Press the E/M and MODE
controls simultaneously.
Compass display.Refer toElectronic compassin theControls and
featureschapter for more information.
Off.In this mode the display will go blank indicating the system is off.
Instrumentation
20
Page 30 of 280
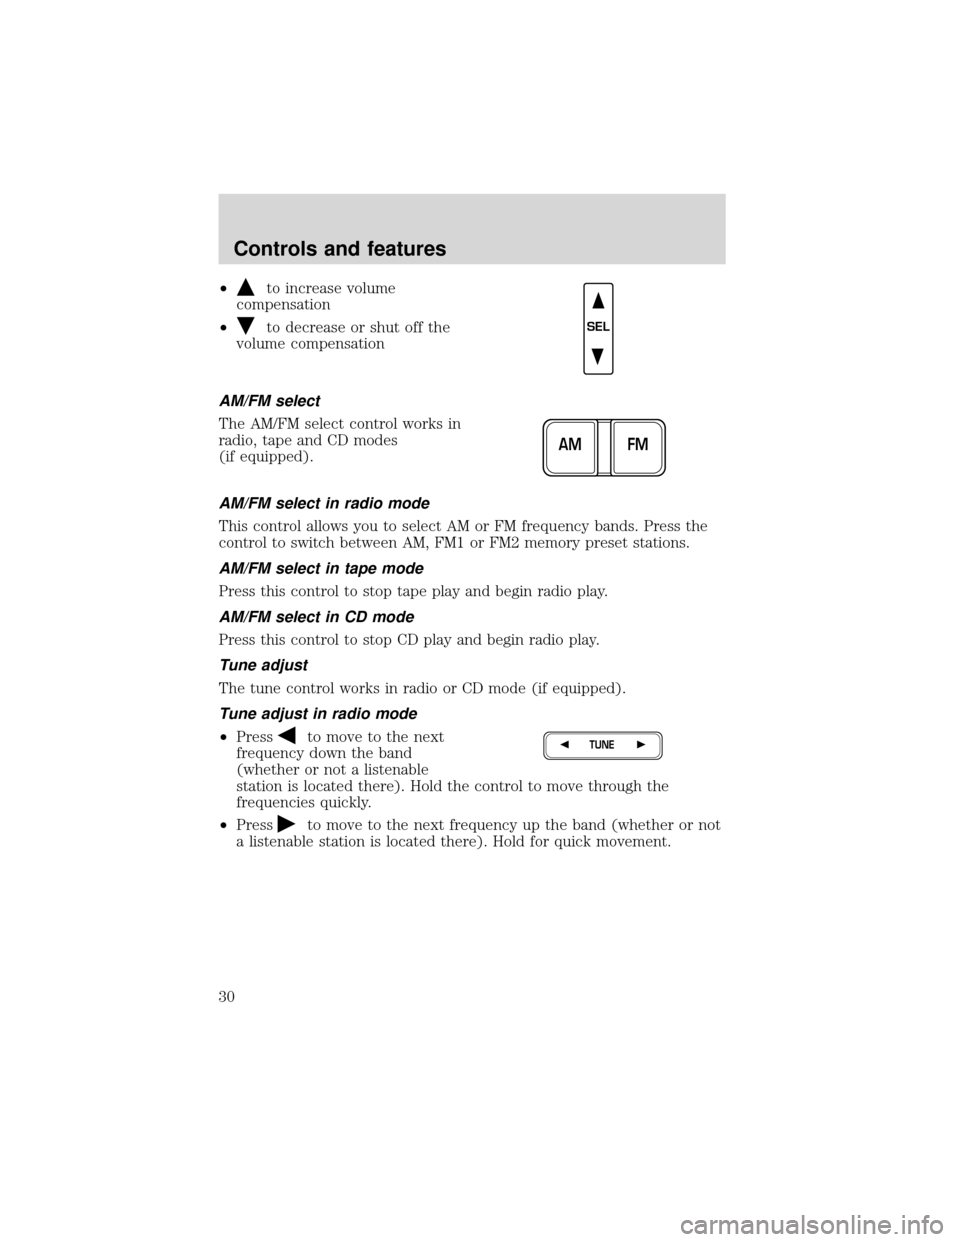
•to increase volume
compensation
•
to decrease or shut off the
volume compensation
AM/FM select
The AM/FM select control works in
radio, tape and CD modes
(if equipped).
AM/FM select in radio mode
This control allows you to select AM or FM frequency bands. Press the
control to switch between AM, FM1 or FM2 memory preset stations.
AM/FM select in tape mode
Press this control to stop tape play and begin radio play.
AM/FM select in CD mode
Press this control to stop CD play and begin radio play.
Tune adjust
The tune control works in radio or CD mode (if equipped).
Tune adjust in radio mode
•Press
to move to the next
frequency down the band
(whether or not a listenable
station is located there). Hold the control to move through the
frequencies quickly.
•Press
to move to the next frequency up the band (whether or not
a listenable station is located there). Hold for quick movement.
SEL
FM AM
TUNE
Controls and features
30
Page 32 of 280
Scan function
The scan function works in radio,
tape or CD mode (if equipped).
Scan function in radio mode
Press the SCAN control to hear a brief sampling of all listenable stations
on the frequency band. Press the SCAN control again to stop the scan
mode.
Scan function in tape mode
Press the SCAN control to hear a short sampling of all selections on the
tape. (The tape scans in a forward direction. At the end of the tape’s
first side, direction automatically reverses to the opposite side of the
tape.) To stop on a particular selection, press the control again.
Scan function in CD mode
Press the SCAN control to hear a short sampling of all selections on the
CD. (The CD scans in a forward direction, wrapping back to the first
track at the end of the CD.) To stop on a particular selection, press the
control again.
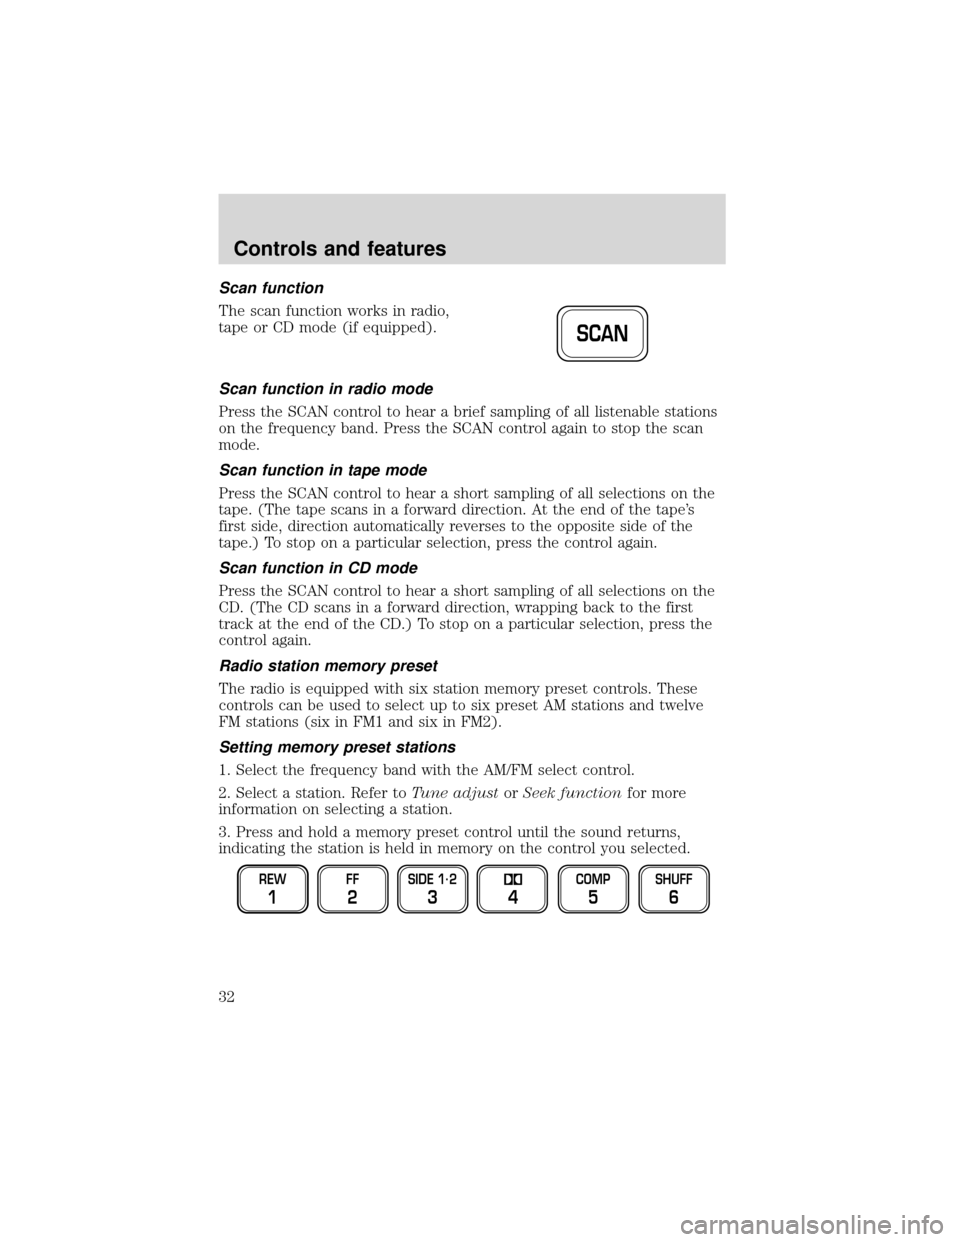
Radio station memory preset
The radio is equipped with six station memory preset controls. These
controls can be used to select up to six preset AM stations and twelve
FM stations (six in FM1 and six in FM2).
Setting memory preset stations
1. Select the frequency band with the AM/FM select control.
2. Select a station. Refer toTune adjustorSeek functionfor more
information on selecting a station.
3. Press and hold a memory preset control until the sound returns,
indicating the station is held in memory on the control you selected.
SCAN
REW
1
FF
2
SIDE 1.
2
34
COMP
5
SHUFF
6
Controls and features
32
Page 33 of 280
Autoset memory preset
Autoset allows you to set strong radio stations without losing your
original manually set preset stations. This feature is helpful on trips
when you travel between cities with different radio stations.
Starting autoset memory preset
1. Select a frequency using the AM/FM select controls.
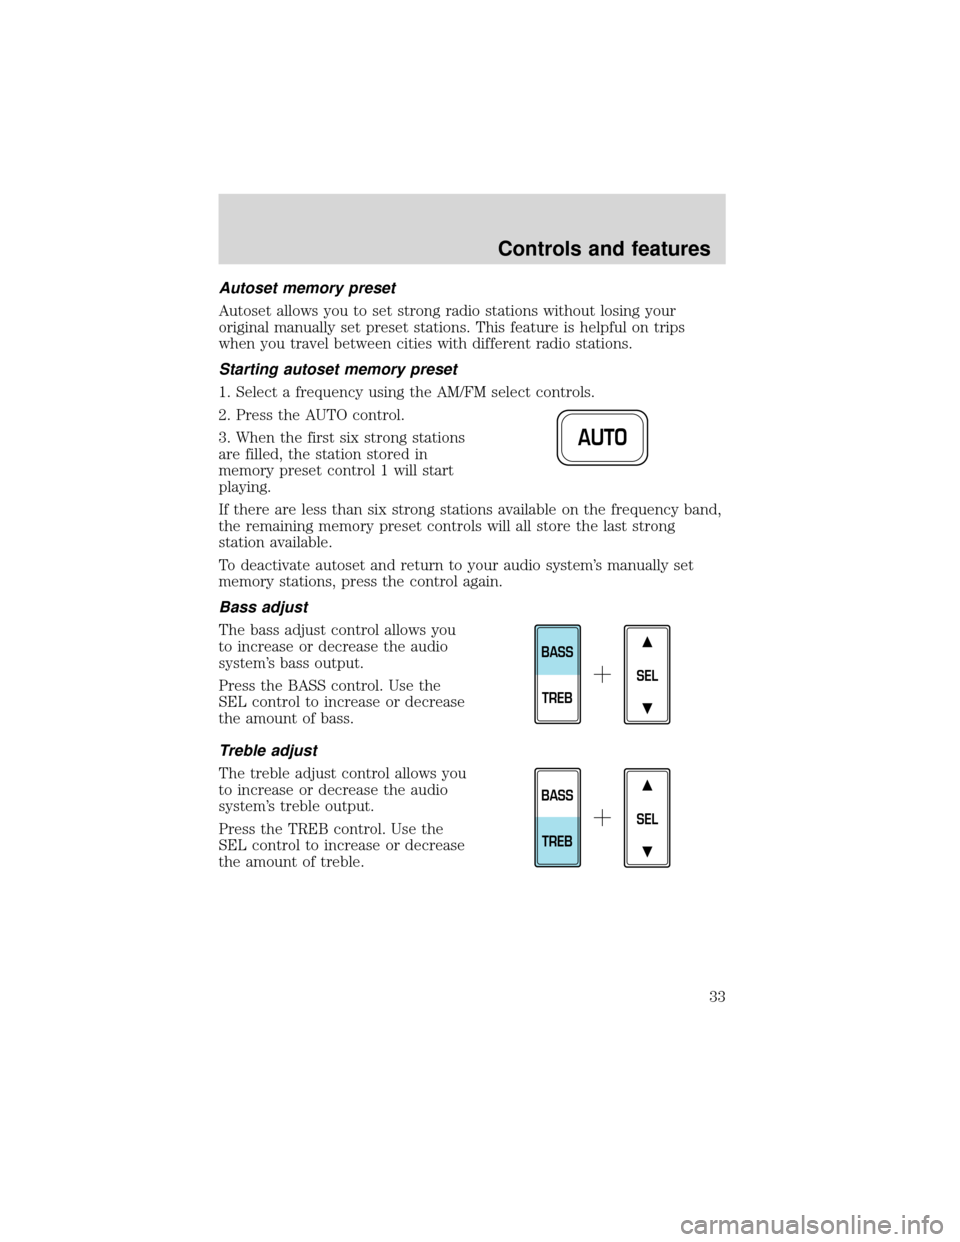
2. Press the AUTO control.
3. When the first six strong stations
are filled, the station stored in
memory preset control 1 will start
playing.
If there are less than six strong stations available on the frequency band,
the remaining memory preset controls will all store the last strong
station available.
To deactivate autoset and return to your audio system’s manually set
memory stations, press the control again.
Bass adjust
The bass adjust control allows you
to increase or decrease the audio
system’s bass output.
Press the BASS control. Use the
SEL control to increase or decrease
the amount of bass.
Treble adjust
The treble adjust control allows you
to increase or decrease the audio
system’s treble output.
Press the TREB control. Use the
SEL control to increase or decrease
the amount of treble.
AUTO
SEL
BASS
TREB
SEL
BASS
TREB
Controls and features
33
Page 42 of 280
AM/FM select in radio mode
This control allows you to select AM or FM frequency bands. Press the
control to switch between AM, FM1 or FM2 memory preset stations.
AM/FM select in CD or CD changer mode (if equipped)
Press this control to stop CD play and begin radio play.
CD select
To begin CD play (if CD[s] are loaded), press the CD control. The first
track of the disc will begin playing. After that, CD play will begin where
it stopped last. Press the CD control again to toggle between CD and CD
changer mode (if equipped).
Do not insert any promotional (odd shaped or sized) discs, or
discs with removable labels into the CD player as jamming may
occur.
Tune adjust
The tune control works in radio or CD changer mode (if equipped).
Tune adjust in radio mode
•Press
to move to the next
frequency down the band
(whether or not a listenable
station is located there). Hold the control to move through the
frequencies quickly.
•Press
to move to the next frequency up the band (whether or not
a listenable station is located there). Hold for quick movement.
Tune adjust for CD changer
•Press
to select the previous
disc in the CD changer. (Play will
begin on the first track of the
disc unless the CD changer is in shuffle mode.) Refer toShuffle
featurefor more information. Hold the control to continue reversing
through the disc.
•Press
to select the next disc in the CD changer. Hold the control
to fast-forward through the remaining discs.
TUNE
TUNE
Controls and features
42