brake light FORD EXPEDITION 2002 1.G Owners Manual
[x] Cancel search | Manufacturer: FORD, Model Year: 2002, Model line: EXPEDITION, Model: FORD EXPEDITION 2002 1.GPages: 280, PDF Size: 2.32 MB
Page 8 of 280
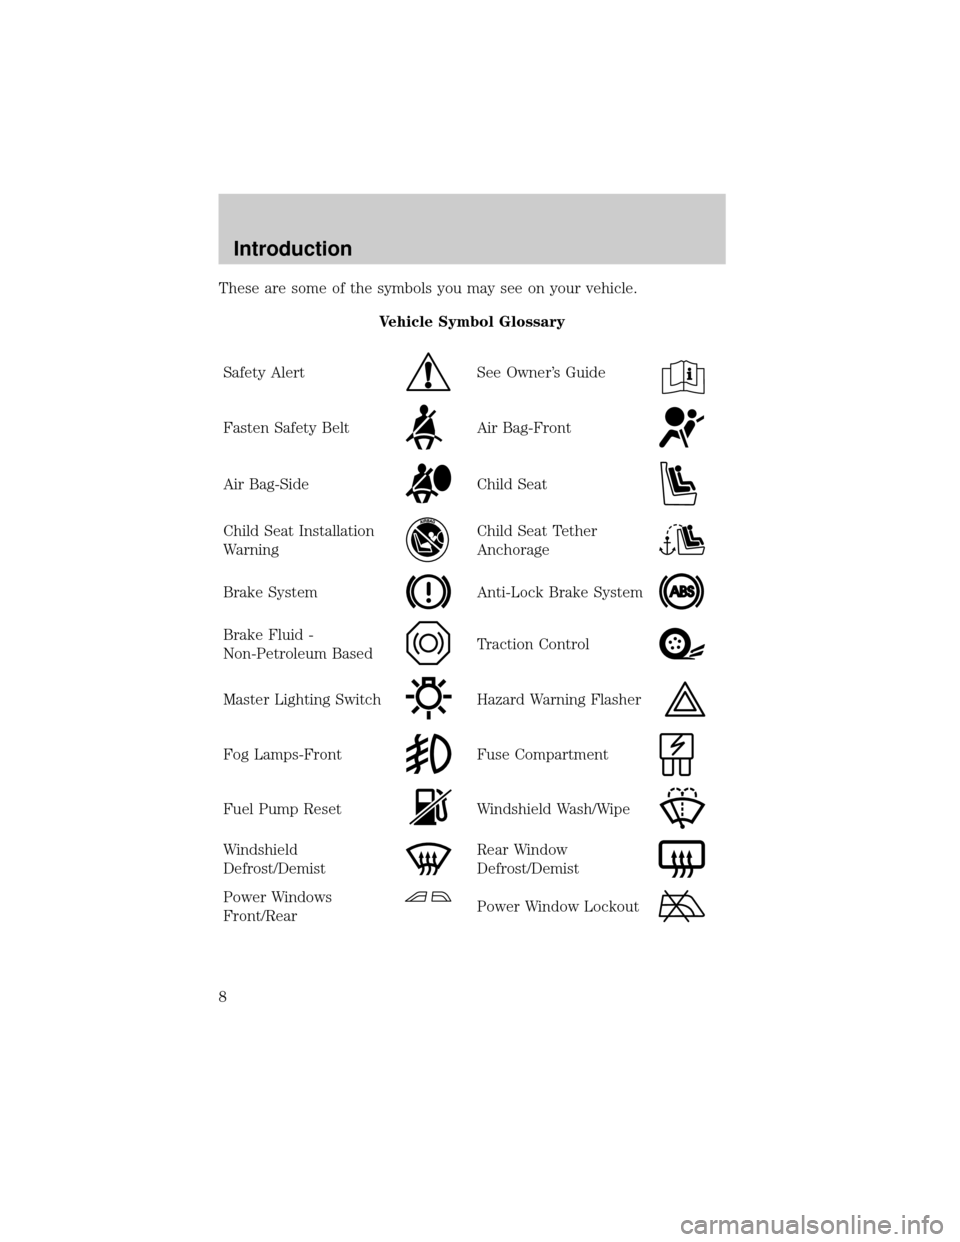
These are some of the symbols you may see on your vehicle.
Vehicle Symbol Glossary
Safety Alert
See Owner's Guide
Fasten Safety BeltAir Bag-Front
Air Bag-SideChild Seat
Child Seat Installation
WarningChild Seat Tether
Anchorage
Brake SystemAnti-Lock Brake System
Brake Fluid -
Non-Petroleum BasedTraction Control
Master Lighting SwitchHazard Warning Flasher
Fog Lamps-FrontFuse Compartment
Fuel Pump ResetWindshield Wash/Wipe
Windshield
Defrost/DemistRear Window
Defrost/Demist
Power Windows
Front/RearPower Window Lockout
Introduction
8
Page 10 of 280
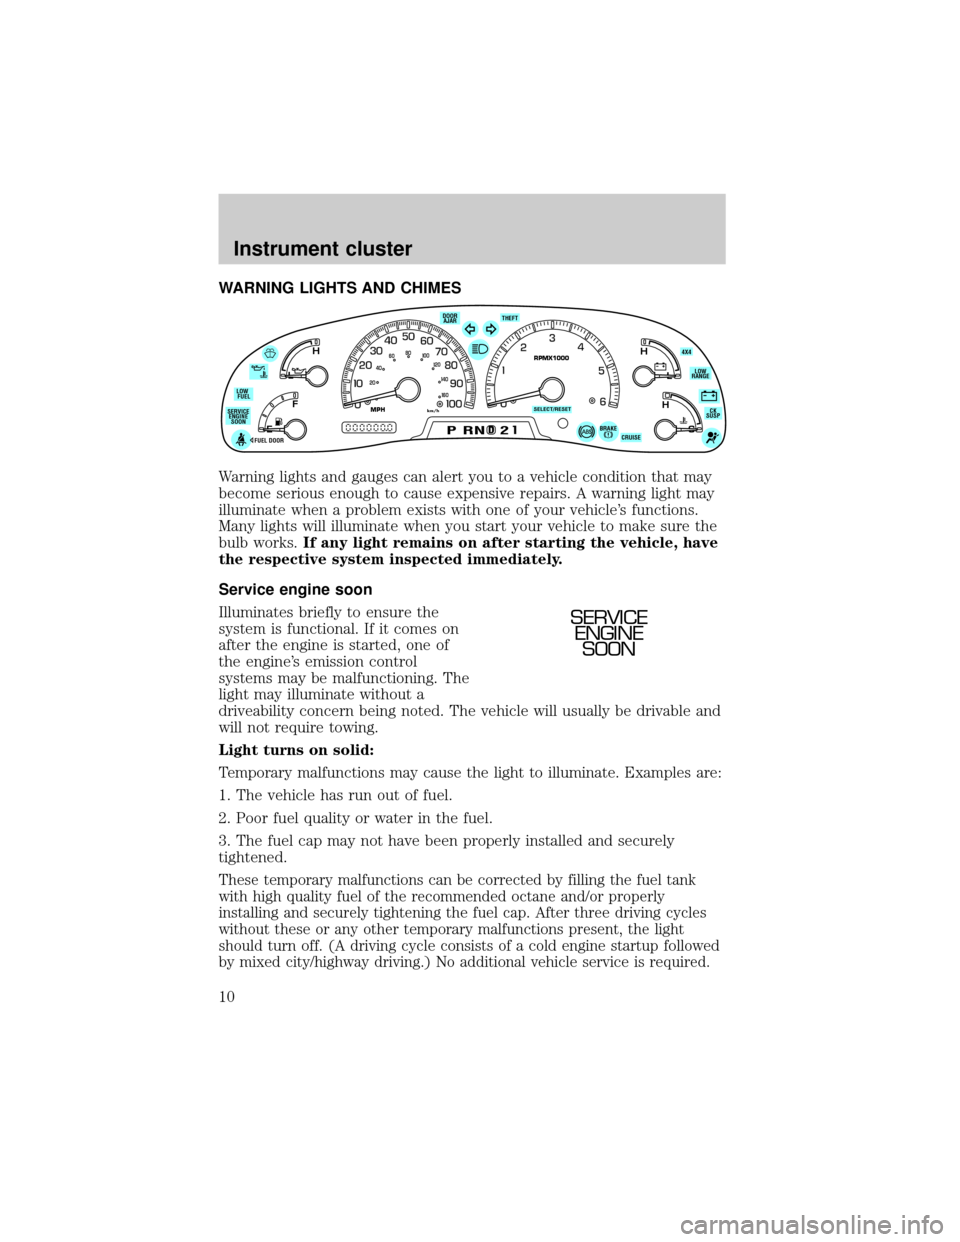
WARNING LIGHTS AND CHIMES
Warning lights and gauges can alert you to a vehicle condition that may
become serious enough to cause expensive repairs. A warning light may
illuminate when a problem exists with one of your vehicle's functions.
Many lights will illuminate when you start your vehicle to make sure the
bulb works.If any light remains on after starting the vehicle, have
the respective system inspected immediately.
Service engine soon
Illuminates briefly to ensure the
system is functional. If it comes on
after the engine is started, one of
the engine's emission control
systems may be malfunctioning. The
light may illuminate without a
driveability concern being noted. The vehicle will usually be drivable and
will not require towing.
Light turns on solid:
Temporary malfunctions may cause the light to illuminate. Examples are:
1. The vehicle has run out of fuel.
2. Poor fuel quality or water in the fuel.
3. The fuel cap may not have been properly installed and securely
tightened.
These temporary malfunctions can be corrected by filling the fuel tank
with high quality fuel of the recommended octane and/or properly
installing and securely tightening the fuel cap. After three driving cycles
without these or any other temporary malfunctions present, the light
should turn off. (A driving cycle consists of a cold engine startup followed
by mixed city/highway driving.) No additional vehicle service is required.
D
L
H
L
H
E
F
C
H
BRAKEPRND2CRUISE DOOR
AJAR
SELECT/RESET
4X4
LOW
RANGE
CK
SUSP THEFT
FUEL DOOR SERVICE
ENGINE
SOONLOW
FUEL
0MPHRPMX1000km/h
20406080
00
20
40
60
SERVICE
ENGINE
SOON
Instrument cluster
10
Page 11 of 280
If the light remains on, have your vehicle serviced at the first available
opportunity.
Light is blinking:
Engine misfire is occurring which could damage your catalytic converter.
You should drive in a moderate fashion (avoid heavy acceleration and
deceleration) and have your vehicle serviced at the first available
opportunity.
Under engine misfire conditions, excessive exhaust temperatures
could damage the catalytic converter, the fuel system, interior
floor coverings or other vehicle components, possibly causing a fire.
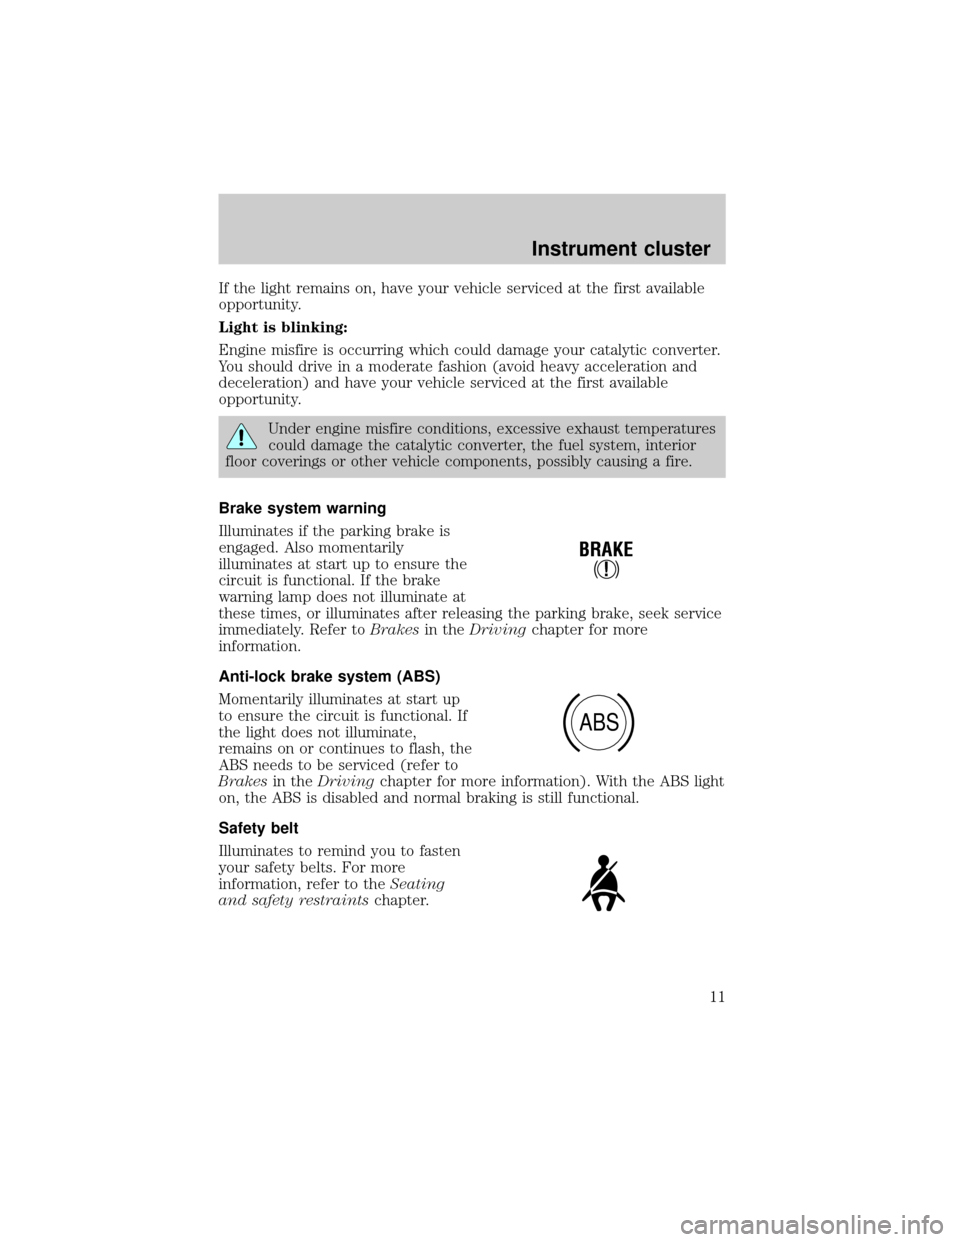
Brake system warning
Illuminates if the parking brake is
engaged. Also momentarily
illuminates at start up to ensure the
circuit is functional. If the brake
warning lamp does not illuminate at
these times, or illuminates after releasing the parking brake, seek service
immediately. Refer toBrakesin theDrivingchapter for more
information.
Anti-lock brake system (ABS)
Momentarily illuminates at start up
to ensure the circuit is functional. If
the light does not illuminate,
remains on or continues to flash, the
ABS needs to be serviced (refer to
Brakesin theDrivingchapter for more information). With the ABS light
on, the ABS is disabled and normal braking is still functional.
Safety belt
Illuminates to remind you to fasten
your safety belts. For more
information, refer to theSeating
and safety restraintschapter.
!
BRAKE
ABS
Instrument cluster
11
Page 14 of 280
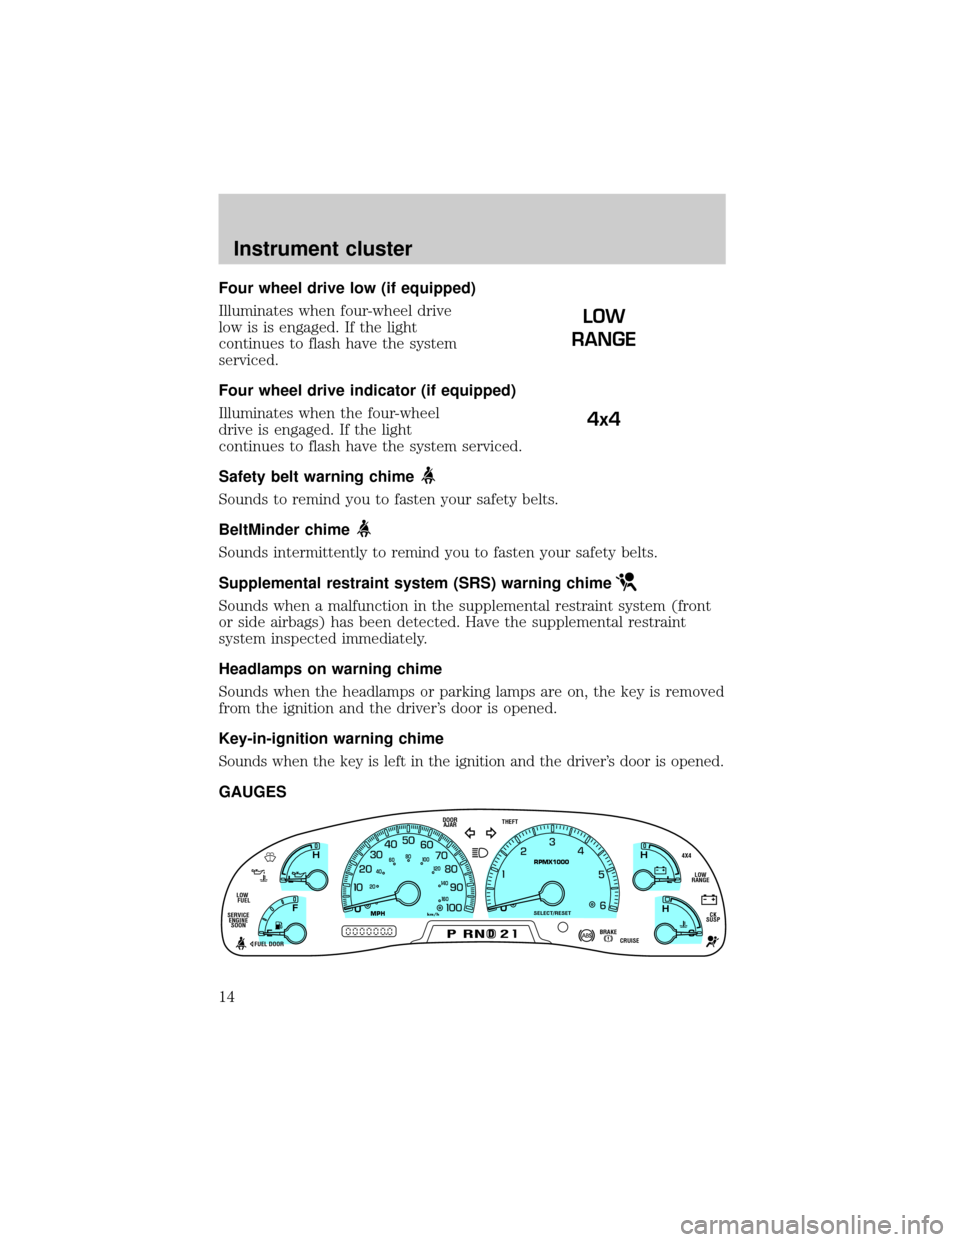
Four wheel drive low (if equipped)
Illuminates when four-wheel drive
low is is engaged. If the light
continues to flash have the system
serviced.
Four wheel drive indicator (if equipped)
Illuminates when the four-wheel
drive is engaged. If the light
continues to flash have the system serviced.
Safety belt warning chime
Sounds to remind you to fasten your safety belts.
BeltMinder chime
Sounds intermittently to remind you to fasten your safety belts.
Supplemental restraint system (SRS) warning chime
Sounds when a malfunction in the supplemental restraint system (front
or side airbags) has been detected. Have the supplemental restraint
system inspected immediately.
Headlamps on warning chime
Sounds when the headlamps or parking lamps are on, the key is removed
from the ignition and the driver's door is opened.
Key-in-ignition warning chime
Sounds when the key is left in the ignition and the driver's door is opened.
GAUGES
LOW
RANGE
4x4
D
L
H
L
H
E
F
C
H
BRAKEPRND2CRUISE DOOR
AJAR
SELECT/RESET
4X4
LOW
RANGE
CK
SUSP THEFT
FUEL DOOR SERVICE
ENGINE
SOONLOW
FUEL
0MPHRPMX1000km/h
20406080
00
20
40
60
Instrument cluster
14
Page 62 of 280
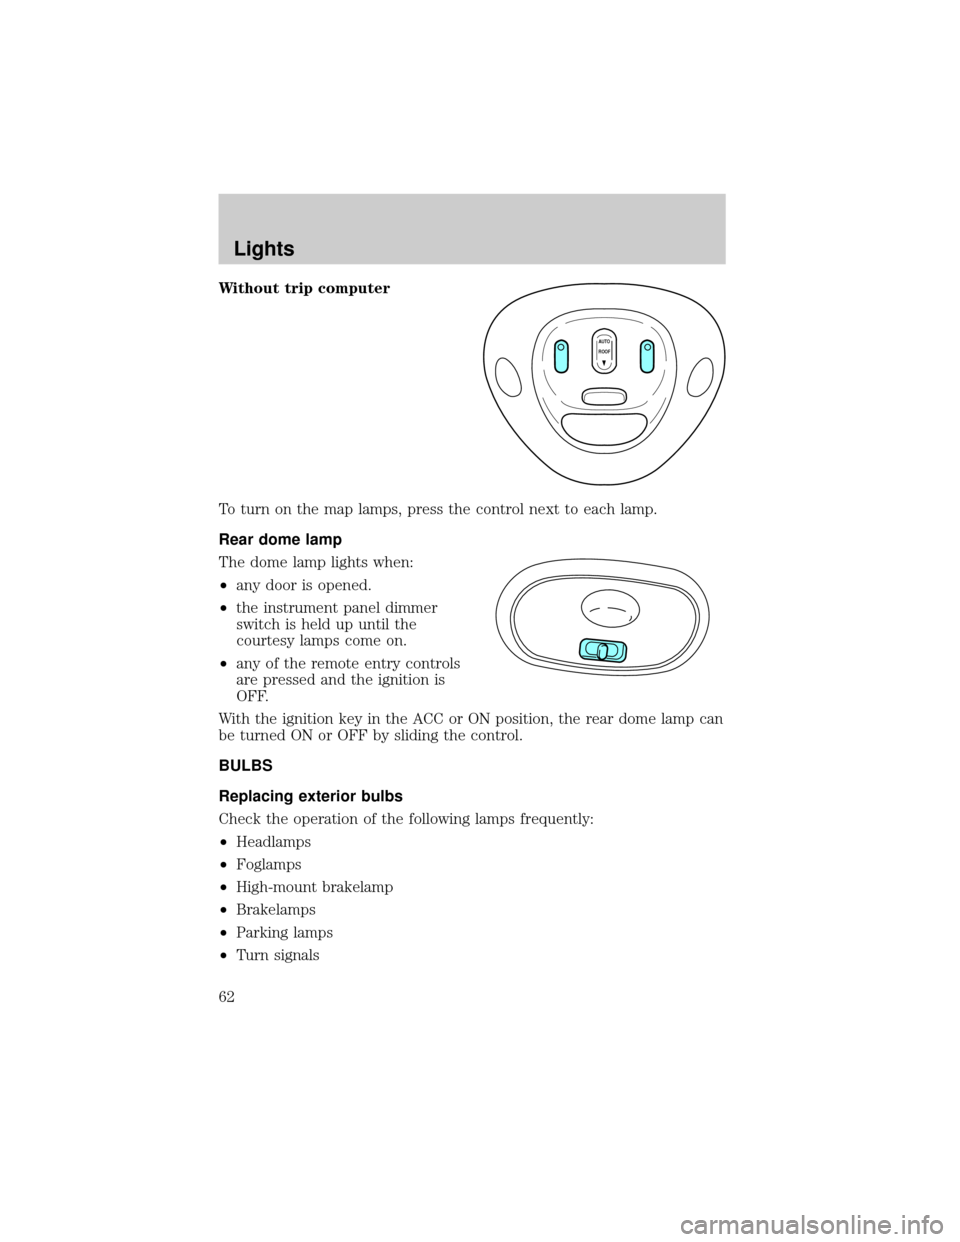
Without trip computer
To turn on the map lamps, press the control next to each lamp.
Rear dome lamp
The dome lamp lights when:
²any door is opened.
²the instrument panel dimmer
switch is held up until the
courtesy lamps come on.
²any of the remote entry controls
are pressed and the ignition is
OFF.
With the ignition key in the ACC or ON position, the rear dome lamp can
be turned ON or OFF by sliding the control.
BULBS
Replacing exterior bulbs
Check the operation of the following lamps frequently:
²Headlamps
²Foglamps
²High-mount brakelamp
²Brakelamps
²Parking lamps
²Turn signals
AUTO
ROOF
Lights
62
Page 63 of 280
²License plate lamp
²Tail lamps
²Back-up lamps
Do not remove lamp bulbs unless they can be replaced immediately with
new ones. If a bulb is removed for an extended period of time,
contaminants may enter the lamp housings and affect lamp performance.
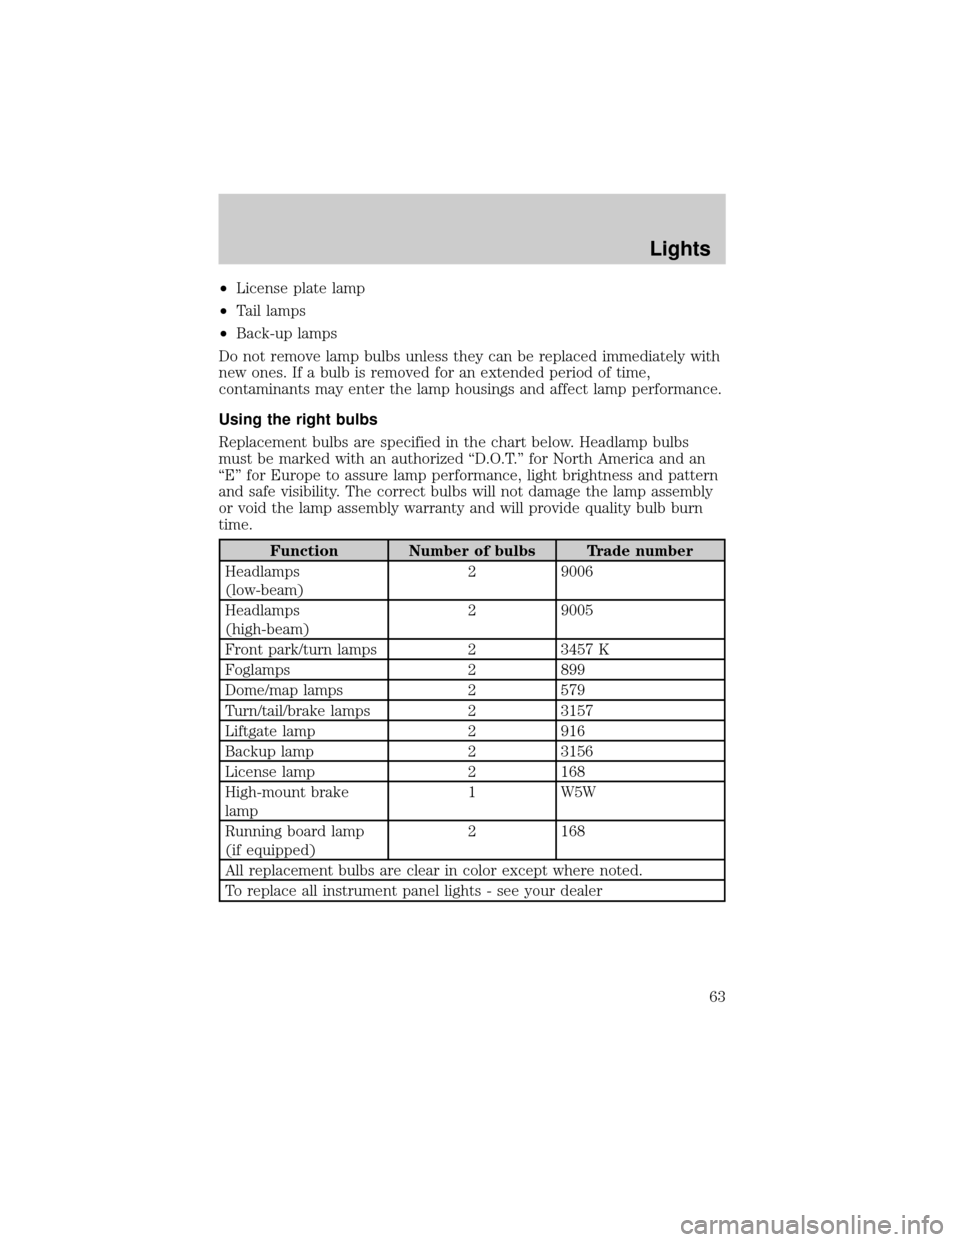
Using the right bulbs
Replacement bulbs are specified in the chart below. Headlamp bulbs
must be marked with an authorized ªD.O.T.º for North America and an
ªEº for Europe to assure lamp performance, light brightness and pattern
and safe visibility. The correct bulbs will not damage the lamp assembly
or void the lamp assembly warranty and will provide quality bulb burn
time.
Function Number of bulbs Trade number
Headlamps
(low-beam)2 9006
Headlamps
(high-beam)2 9005
Front park/turn lamps 2 3457 K
Foglamps 2 899
Dome/map lamps 2 579
Turn/tail/brake lamps 2 3157
Liftgate lamp 2 916
Backup lamp 2 3156
License lamp 2 168
High-mount brake
lamp1 W5W
Running board lamp
(if equipped)2 168
All replacement bulbs are clear in color except where noted.
To replace all instrument panel lights - see your dealer
Lights
63
Page 67 of 280
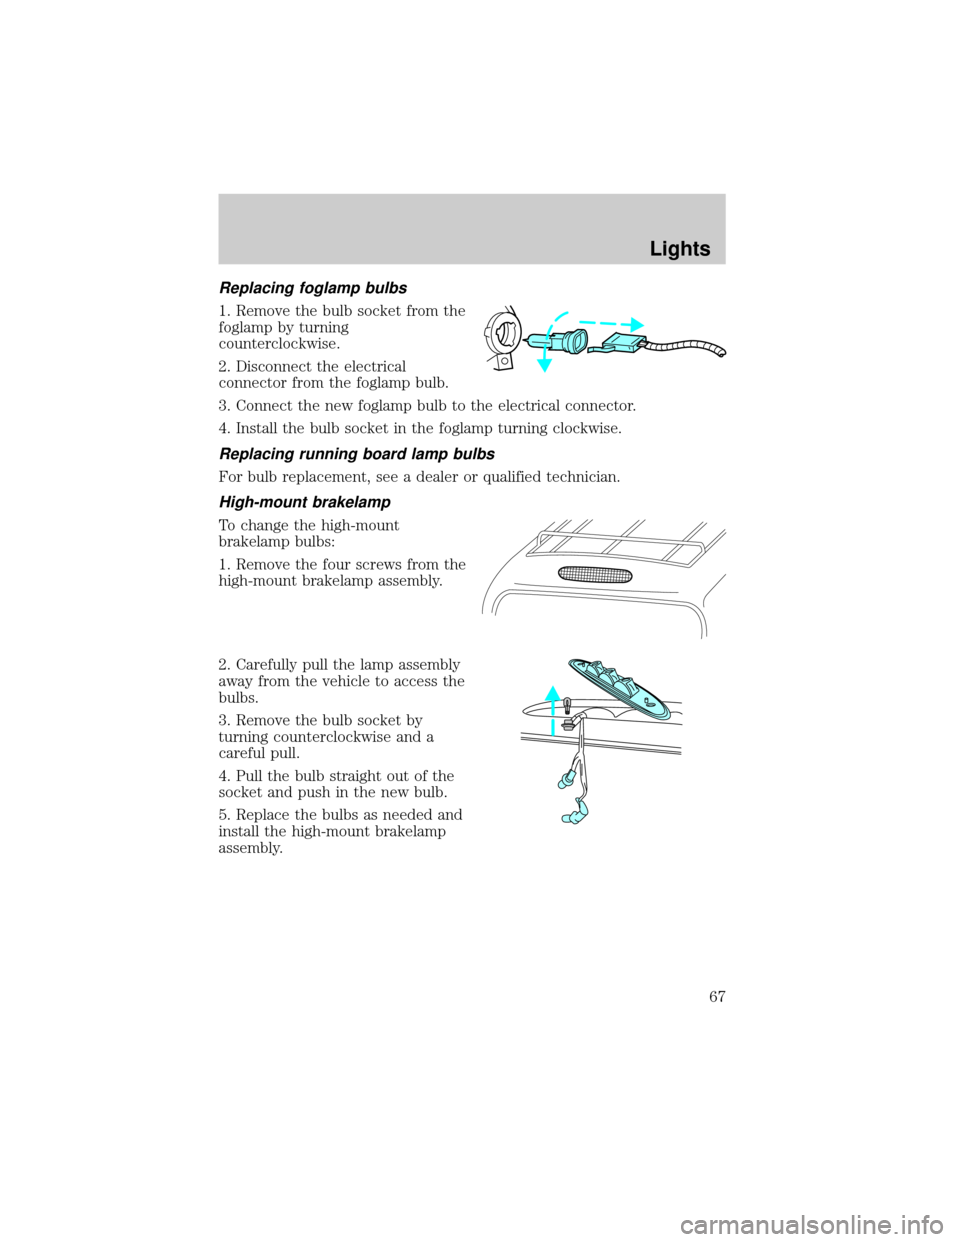
Replacing foglamp bulbs
1. Remove the bulb socket from the
foglamp by turning
counterclockwise.
2. Disconnect the electrical
connector from the foglamp bulb.
3. Connect the new foglamp bulb to the electrical connector.
4. Install the bulb socket in the foglamp turning clockwise.
Replacing running board lamp bulbs
For bulb replacement, see a dealer or qualified technician.
High-mount brakelamp
To change the high-mount
brakelamp bulbs:
1. Remove the four screws from the
high-mount brakelamp assembly.
2. Carefully pull the lamp assembly
away from the vehicle to access the
bulbs.
3. Remove the bulb socket by
turning counterclockwise and a
careful pull.
4. Pull the bulb straight out of the
socket and push in the new bulb.
5. Replace the bulbs as needed and
install the high-mount brakelamp
assembly.
Lights
67
Page 86 of 280
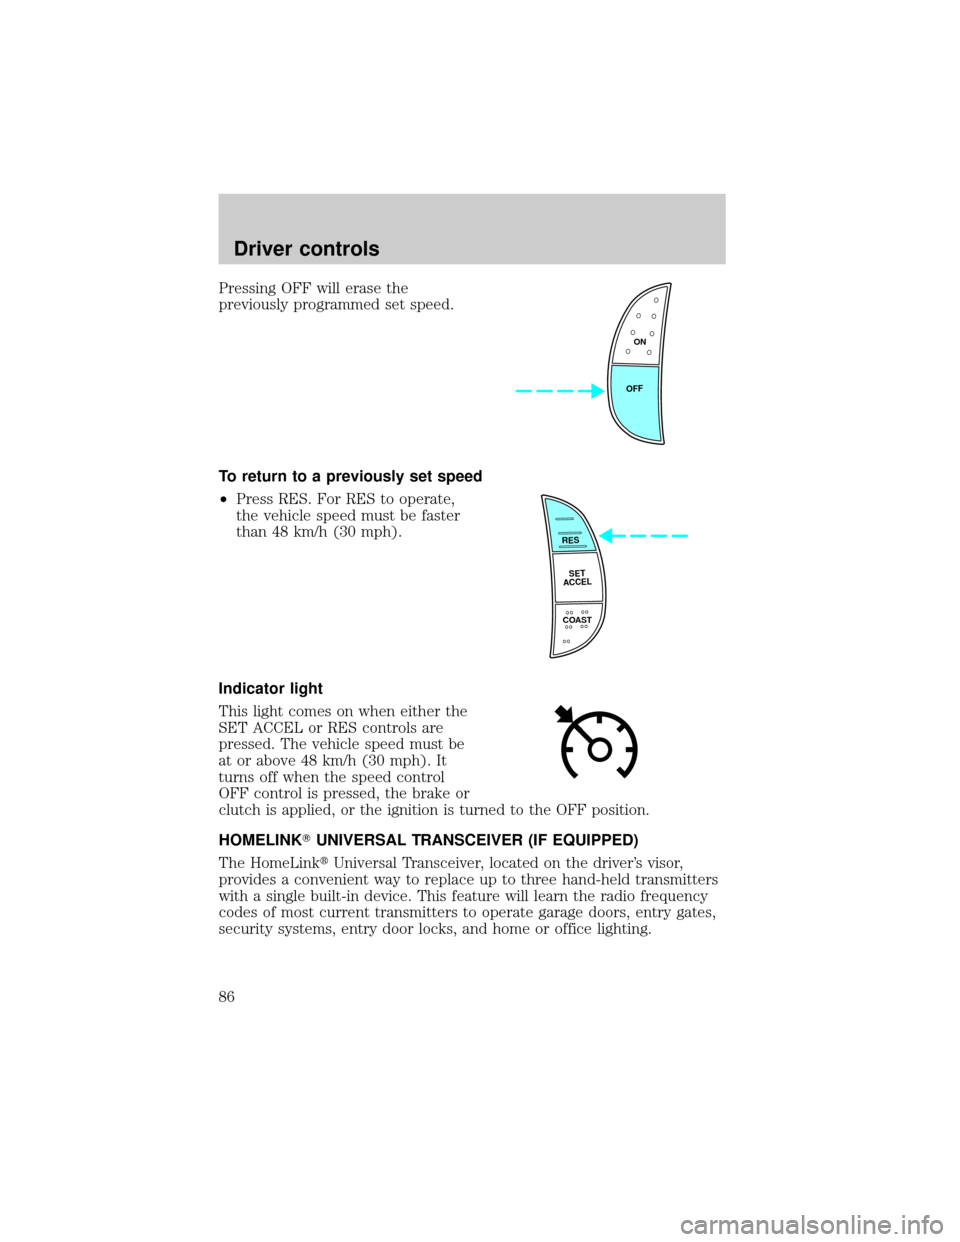
Pressing OFF will erase the
previously programmed set speed.
To return to a previously set speed
²Press RES. For RES to operate,
the vehicle speed must be faster
than 48 km/h (30 mph).
Indicator light
This light comes on when either the
SET ACCEL or RES controls are
pressed. The vehicle speed must be
at or above 48 km/h (30 mph). It
turns off when the speed control
OFF control is pressed, the brake or
clutch is applied, or the ignition is turned to the OFF position.
HOMELINKTUNIVERSAL TRANSCEIVER (IF EQUIPPED)
The HomeLinktUniversal Transceiver, located on the driver's visor,
provides a convenient way to replace up to three hand-held transmitters
with a single built-in device. This feature will learn the radio frequency
codes of most current transmitters to operate garage doors, entry gates,
security systems, entry door locks, and home or office lighting.
ON
OFF
RES
SET
ACCEL
COAST
Driver controls
86
Page 130 of 280
One time disable
Any time the safety belt is buckled and then unbuckled during an
ignition ON cycle, BeltMinder will be disabled for that ignition cycle only.
Deactivating/activating the BeltMinder feature
Read steps1-9thoroughly before proceeding with the
deactivation/activation programming procedure.
The BeltMinder feature can be deactivated/activated by performing the
following procedure:
Before following the procedure, make sure that:
²the parking brake is set
²the gearshift is in P (Park) (automatic transmission)
²the ignition switch is in the OFF position
²all vehicle doors are closed
²the driver's safety belt is unbuckled
²the parklamps/headlamps are in OFF position (If vehicle is equipped
with Autolamps, this will not affect the procedure.)
To reduce the risk of injury, do not deactivate/activate the Belt
Minder feature while driving the vehicle.
1. Turn the ignition switch to the RUN (or ON) position. (DO NOT
START THE ENGINE)
2. Wait until the safety belt warning light turns off. (Approximately 1±2
minutes)
²Steps 3±5 must be completed within 60 seconds or the procedure will
have to be repeated.
3. Buckle then unbuckle the safety belt three times, ending with the
safety belt unbuckled. This can be done before or during BeltMinder
warning activation.
4. Turn on the parklamps/headlamps, turn off the parklamps/headlamps.
5. Buckle then unbuckle the safety belt three times, ending with the
safety belt unbuckled.
²After step 5 the safety belt warning light will be turned on for three
seconds.
Seating and safety restraints
130
Page 152 of 280
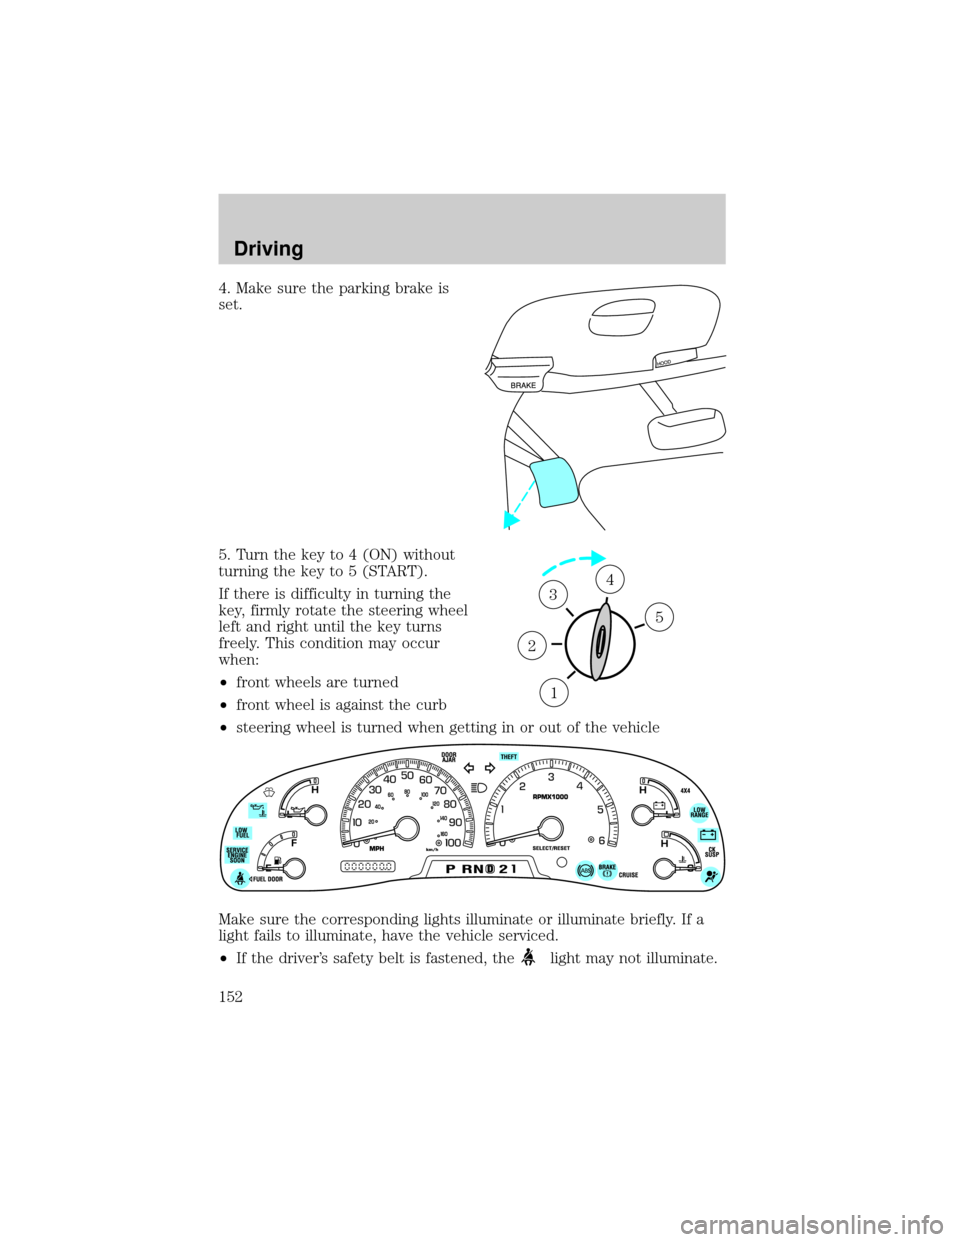
4. Make sure the parking brake is
set.
5. Turn the key to 4 (ON) without
turning the key to 5 (START).
If there is difficulty in turning the
key, firmly rotate the steering wheel
left and right until the key turns
freely. This condition may occur
when:
²front wheels are turned
²front wheel is against the curb
²steering wheel is turned when getting in or out of the vehicle
Make sure the corresponding lights illuminate or illuminate briefly. If a
light fails to illuminate, have the vehicle serviced.
²If the driver's safety belt is fastened, the
light may not illuminate.
1
2
34
5
Driving
152