jacking FORD EXPEDITION 2003 2.G Owners Manual
[x] Cancel search | Manufacturer: FORD, Model Year: 2003, Model line: EXPEDITION, Model: FORD EXPEDITION 2003 2.GPages: 320, PDF Size: 3.67 MB
Page 237 of 320

Location of the spare tire and tools
The spare tire and tools for your vehicle are stowed in the following
locations:
Item Location
Spare tire Under the vehicle, just forward of
the rear bumper
Jack tools and jacking instructions Under the access panel located in
the floor compartment behind the
rear seat
Removing the jack and tools
1. Open the liftgate, then locate the access panel behind the rear seat.
Unlatch and remove the panel.
2. Remove the jack and tools assembly tray from the compartment by
turning the T-nut counterclockwise to relieve tension against the jack
assembly tray.
3. Unsnap the wheel lug nut wrench, jack extension and handle from the
plastic tray. Remove the jack and instruction sheet from the tray
assembly.
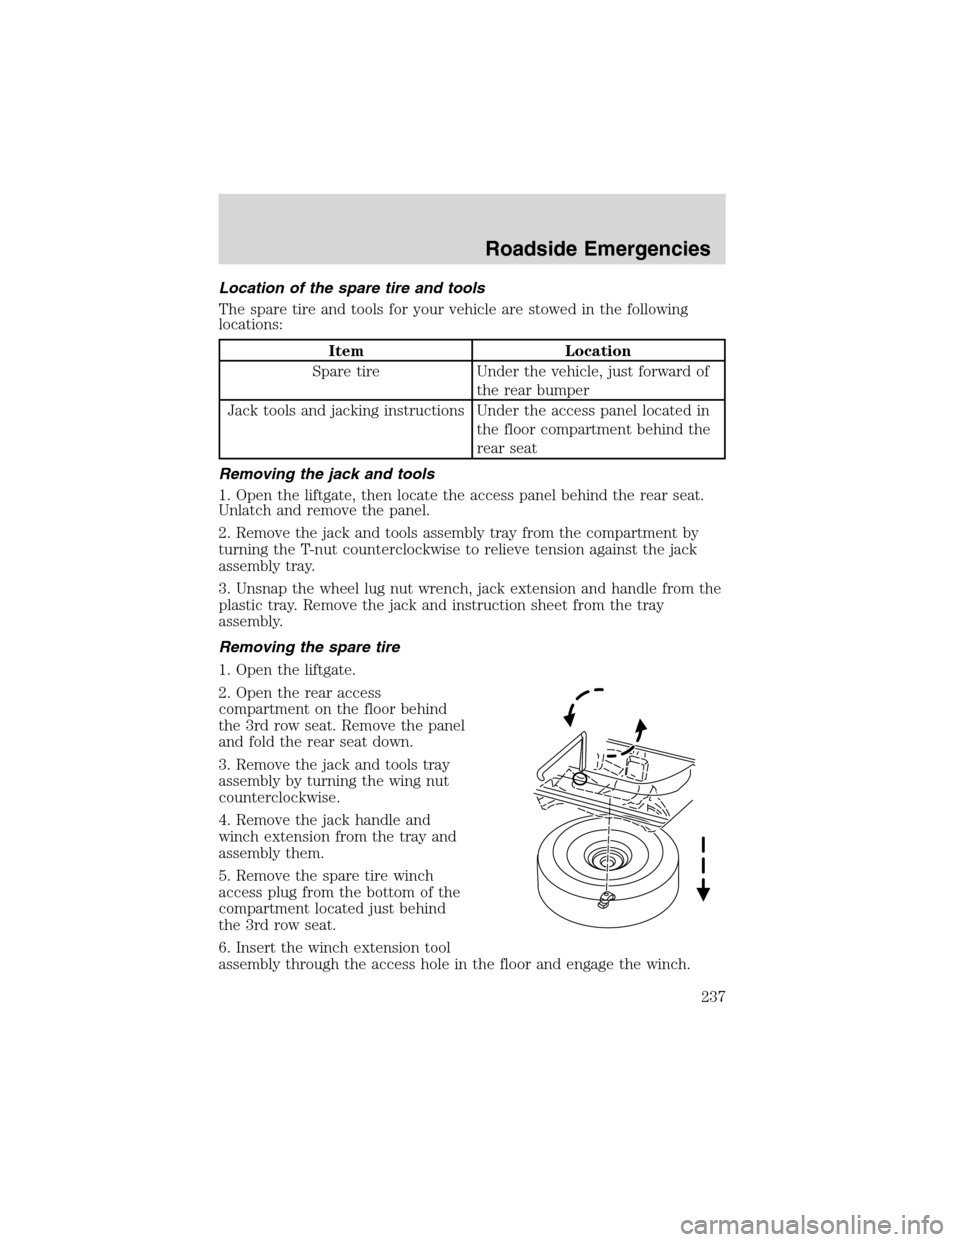
Removing the spare tire
1. Open the liftgate.
2. Open the rear access
compartment on the floor behind
the 3rd row seat. Remove the panel
and fold the rear seat down.
3. Remove the jack and tools tray
assembly by turning the wing nut
counterclockwise.
4. Remove the jack handle and
winch extension from the tray and
assembly them.
5. Remove the spare tire winch
access plug from the bottom of the
compartment located just behind
the 3rd row seat.
6. Insert the winch extension tool
assembly through the access hole in the floor and engage the winch.
Roadside Emergencies
237
Page 238 of 320

7. To remove the spare tire, turn the handle counterclockwise until the
tire is lowered to the ground and the cable is slightly slack.
8. Slide the retainer through the center of the spare tire wheel.
Tire change procedure
To prevent the vehicle from moving when you change a tire, be
sure the parking brake is set, then block (in both directions) the
wheel that is diagonally opposite (other side and end of the vehicle) to
the tire being changed.
If the vehicle slips off the jack, you or someone else could be
seriously injured.
On vehicles equipped with Air Suspension, turn OFF the Air
Suspension switch prior to jacking, hoisting or towing your
vehicle.
Refer to the instruction sheet (located in the rear floor compartment
behind the 3rd row seat with the jack tray tools assembly kit) for
detailed tire change instructions.
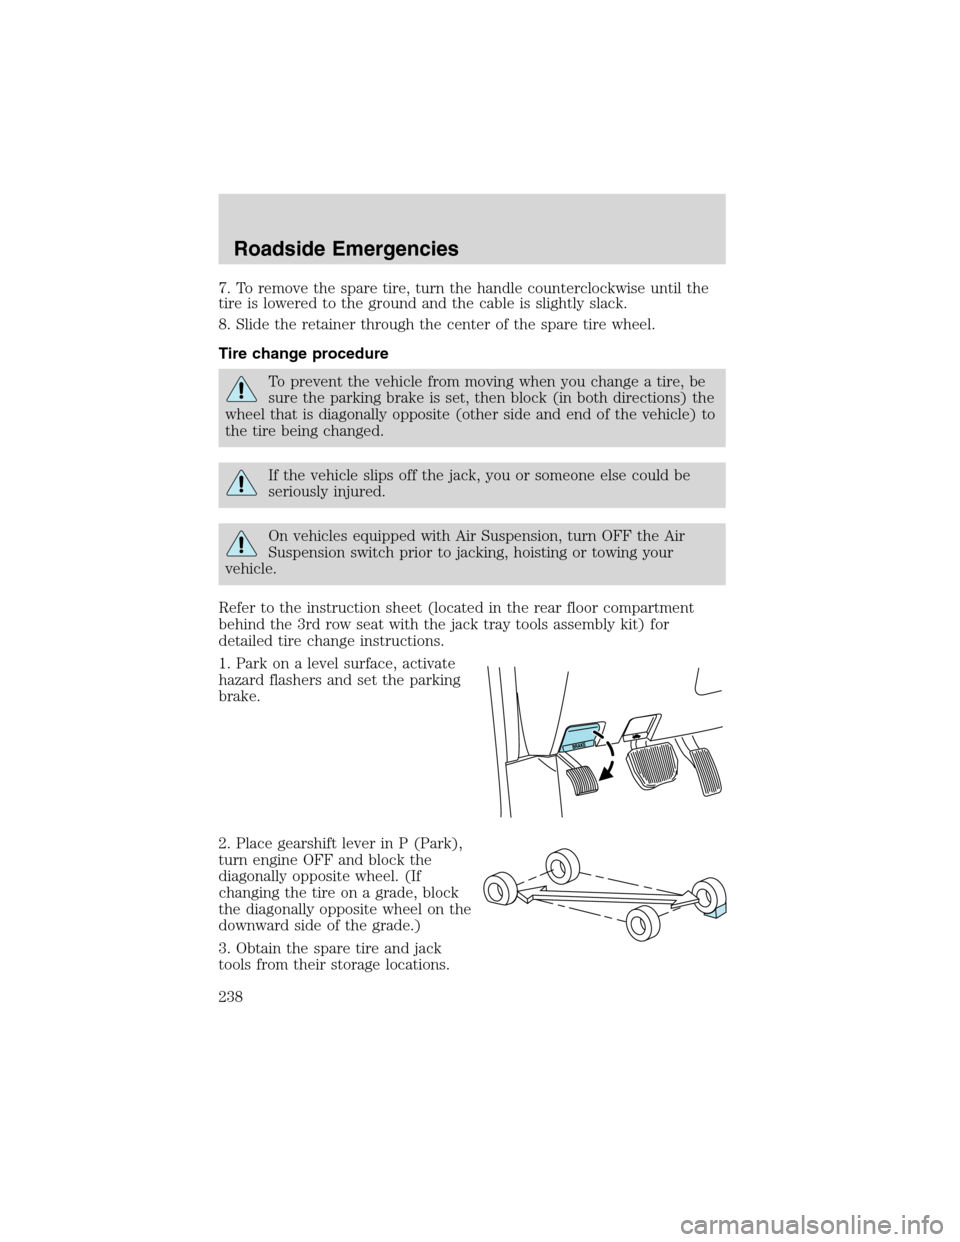
1. Park on a level surface, activate
hazard flashers and set the parking
brake.
2. Place gearshift lever in P (Park),
turn engine OFF and block the
diagonally opposite wheel. (If
changing the tire on a grade, block
the diagonally opposite wheel on the
downward side of the grade.)
3. Obtain the spare tire and jack
tools from their storage locations.
Roadside Emergencies
238
Page 240 of 320

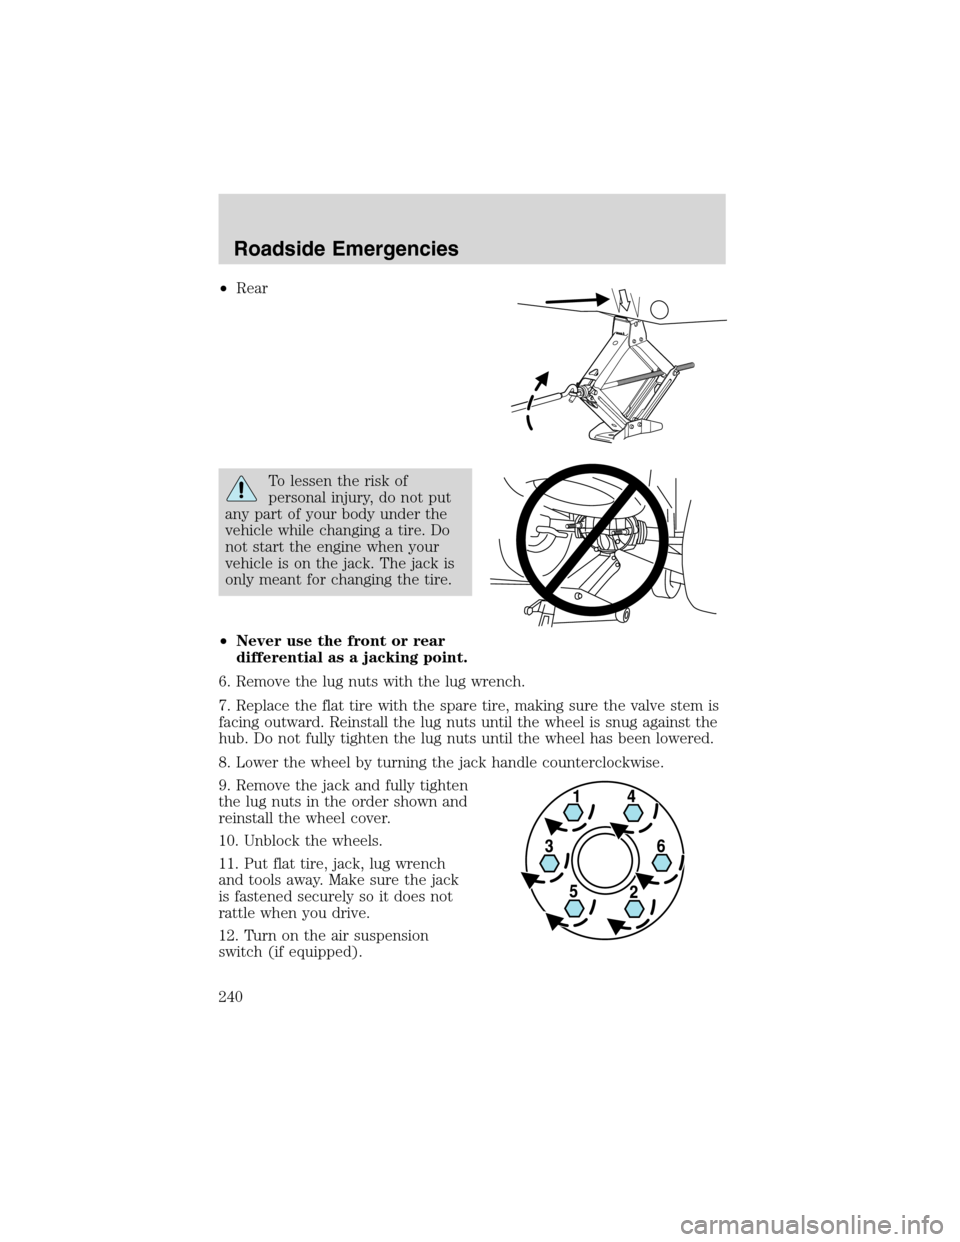
•Rear
To lessen the risk of
personal injury, do not put
any part of your body under the
vehicle while changing a tire. Do
not start the engine when your
vehicle is on the jack. The jack is
only meant for changing the tire.
•Never use the front or rear
differential as a jacking point.
6. Remove the lug nuts with the lug wrench.
7. Replace the flat tire with the spare tire, making sure the valve stem is
facing outward. Reinstall the lug nuts until the wheel is snug against the
hub. Do not fully tighten the lug nuts until the wheel has been lowered.
8. Lower the wheel by turning the jack handle counterclockwise.
9. Remove the jack and fully tighten
the lug nuts in the order shown and
reinstall the wheel cover.
10. Unblock the wheels.
11. Put flat tire, jack, lug wrench
and tools away. Make sure the jack
is fastened securely so it does not
rattle when you drive.
12. Turn on the air suspension
switch (if equipped).
Roadside Emergencies
240