ESP FORD EXPEDITION 2004 2.G Owners Manual
[x] Cancel search | Manufacturer: FORD, Model Year: 2004, Model line: EXPEDITION, Model: FORD EXPEDITION 2004 2.GPages: 344, PDF Size: 11.56 MB
Page 5 of 344
SAFETY AND ENVIRONMENT PROTECTION
Warning symbols in this guide
How can you reduce the risk of personal injury and prevent possible
damage to others, your vehicle and its equipment? In this guide, answers
to such questions are contained in comments highlighted by the warning
triangle symbol. These comments should be read and observed.
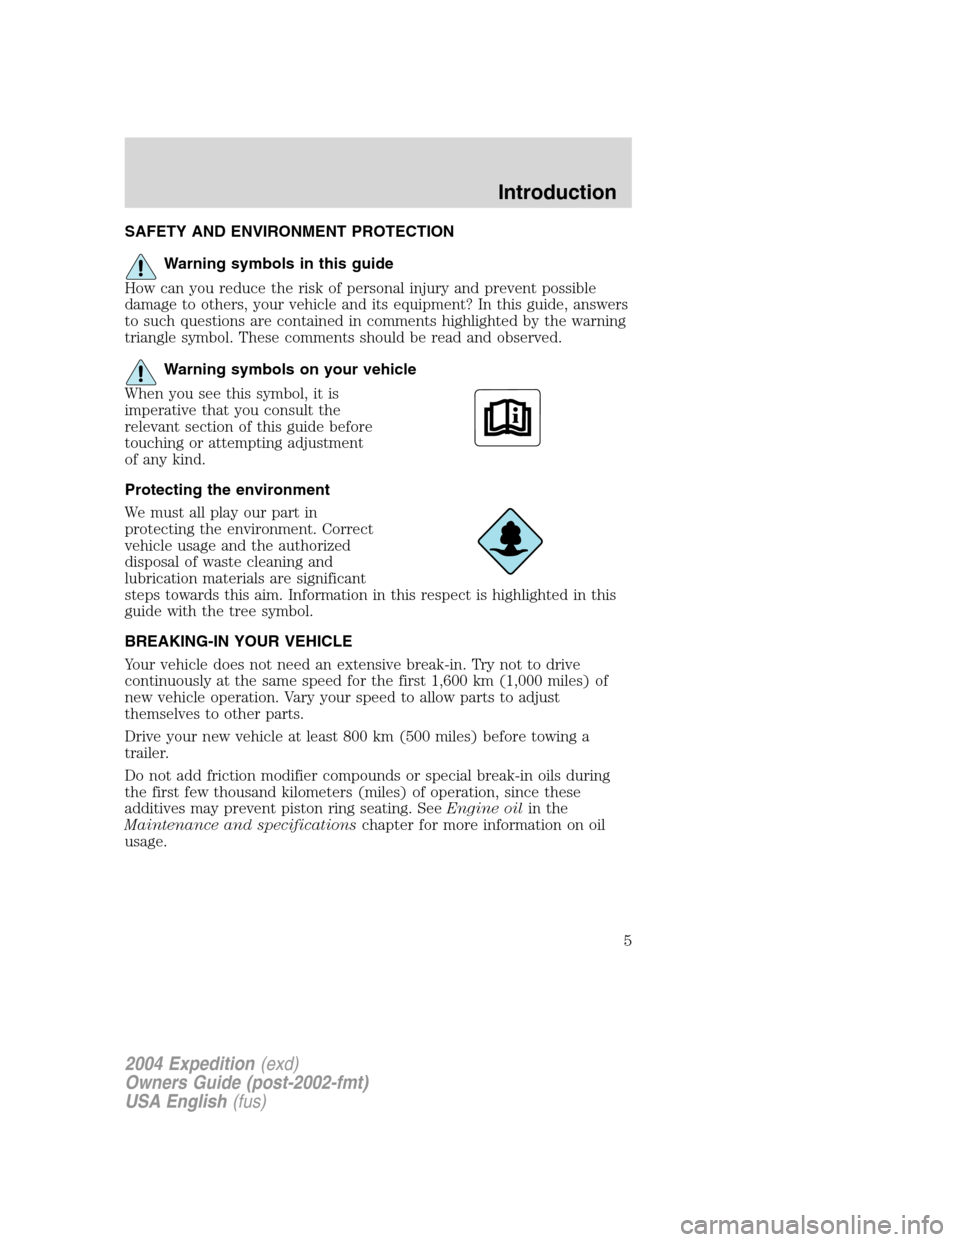
Warning symbols on your vehicle
When you see this symbol, it is
imperative that you consult the
relevant section of this guide before
touching or attempting adjustment
of any kind.
Protecting the environment
We must all play our part in
protecting the environment. Correct
vehicle usage and the authorized
disposal of waste cleaning and
lubrication materials are significant
steps towards this aim. Information in this respect is highlighted in this
guide with the tree symbol.
BREAKING-IN YOUR VEHICLE
Your vehicle does not need an extensive break-in. Try not to drive
continuously at the same speed for the first 1,600 km (1,000 miles) of
new vehicle operation. Vary your speed to allow parts to adjust
themselves to other parts.
Drive your new vehicle at least 800 km (500 miles) before towing a
trailer.
Do not add friction modifier compounds or special break-in oils during
the first few thousand kilometers (miles) of operation, since these
additives may prevent piston ring seating. SeeEngine oilin the
Maintenance and specificationschapter for more information on oil
usage.
2004 Expedition(exd)
Owners Guide (post-2002-fmt)
USA English(fus)
Introduction
5
Page 10 of 344
WARNING LIGHTS AND CHIMES
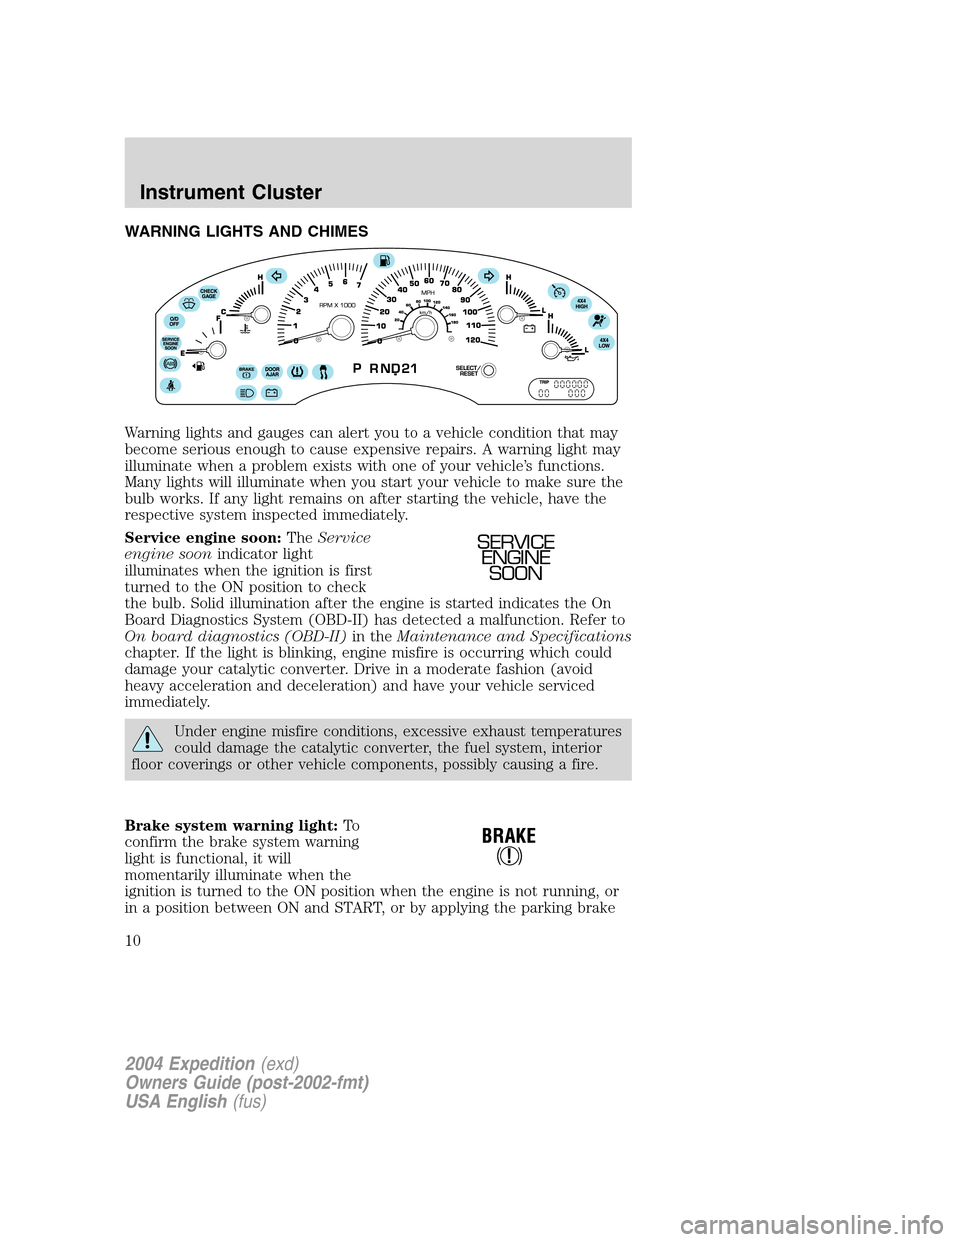
Warning lights and gauges can alert you to a vehicle condition that may
become serious enough to cause expensive repairs. A warning light may
illuminate when a problem exists with one of your vehicle’s functions.
Many lights will illuminate when you start your vehicle to make sure the
bulb works. If any light remains on after starting the vehicle, have the
respective system inspected immediately.
Service engine soon:TheService
engine soonindicator light
illuminates when the ignition is first
turned to the ON position to check
the bulb. Solid illumination after the engine is started indicates the On
Board Diagnostics System (OBD-II) has detected a malfunction. Refer to
On board diagnostics (OBD-II)in theMaintenance and Specifications
chapter. If the light is blinking, engine misfire is occurring which could
damage your catalytic converter. Drive in a moderate fashion (avoid
heavy acceleration and deceleration) and have your vehicle serviced
immediately.
Under engine misfire conditions, excessive exhaust temperatures
could damage the catalytic converter, the fuel system, interior
floor coverings or other vehicle components, possibly causing a fire.
Brake system warning light:To
confirm the brake system warning
light is functional, it will
momentarily illuminate when the
ignition is turned to the ON position when the engine is not running, or
in a position between ON and START, or by applying the parking brake
SERVICE
ENGINE
SOON
2004 Expedition(exd)
Owners Guide (post-2002-fmt)
USA English(fus)
Instrument Cluster
Instrument Cluster
10
Page 41 of 344
Removing a CD/DVD
1. Press the STOP/EJECT control to stop playback.
2. Press the STOP/EJECT control again to eject the CD/DVD.
If the CD/DVD is not removed within the allotted time, the system will
pull the CD/DVD back into the system for safety purposes. If the
CD/DVD will not eject from the system, press and hold the EJECT
control for approximately 2 seconds. The disc should eject whether the
vehicle ignition is ON or OFF.
Playing a video game/auxiliary device
1. Connect the video line from your video game device to the YELLOW
auxiliary input jack.
2. Connect the left and right audio lines to the WHITE and RED auxiliary
input jacks respectively.
3. Press the MODE control until DVD/CD AUX (no disc in player) or
DVD/CD play (disc in player) illuminates in the radio display. If a disc is
in the system, playback should begin. To enable the aux inputs, press the
STOP control or press the AUX control on the DVD player.
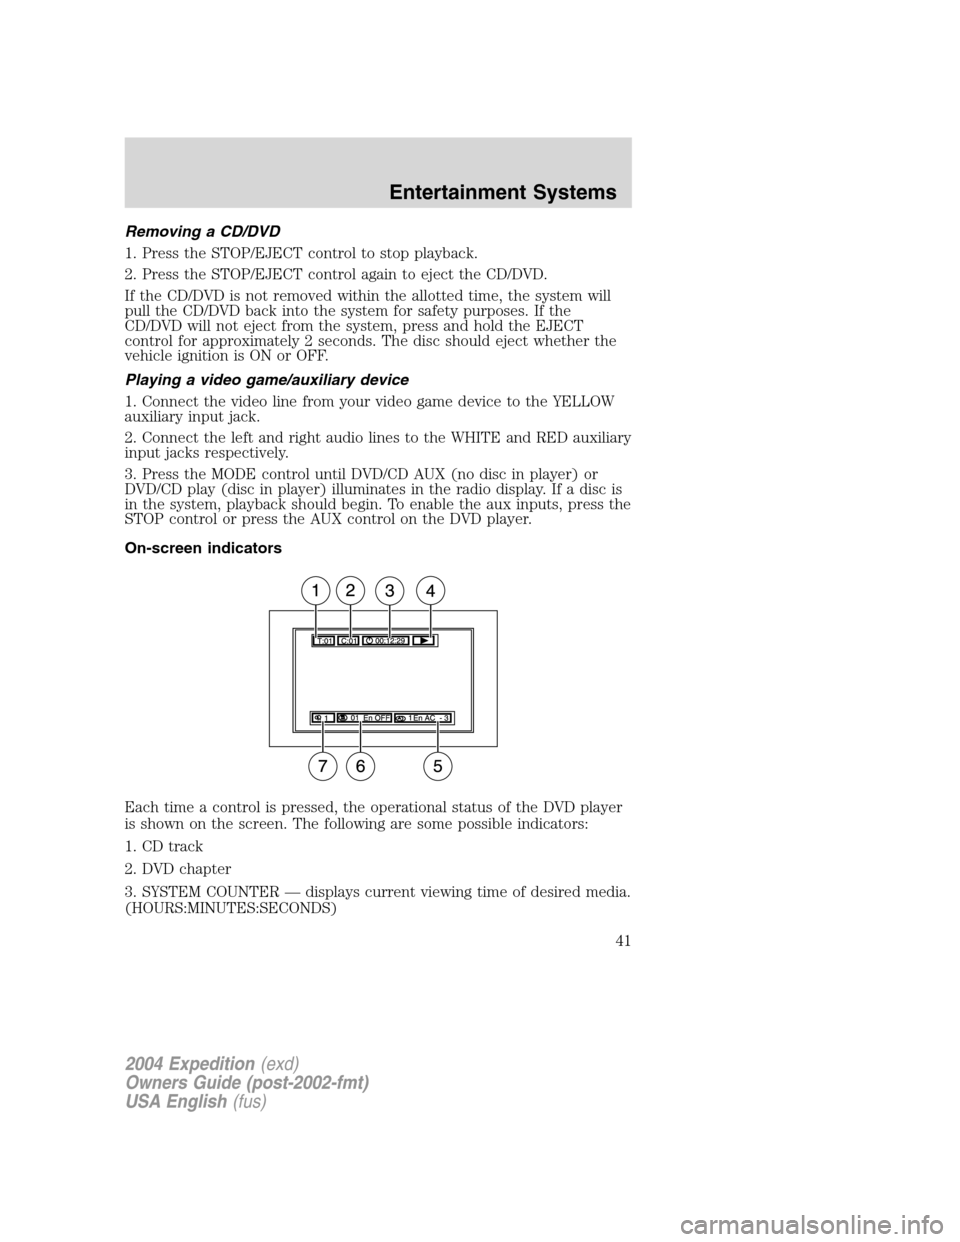
On-screen indicators
Each time a control is pressed, the operational status of the DVD player
is shown on the screen. The following are some possible indicators:
1. CD track
2. DVD chapter
3. SYSTEM COUNTER—displays current viewing time of desired media.
(HOURS:MINUTES:SECONDS)
2004 Expedition(exd)
Owners Guide (post-2002-fmt)
USA English(fus)
Entertainment Systems
41
Page 55 of 344
Seek in CD or CD DJ mode
•Press
to seek to the previous track of the current disc. If a
selection has been playing for three seconds or more and you
press
, the CD changer will replay that selection from the
beginning.
•Press
to seek forward to the next track of the current disc. After
the last track has been completed, the first track of the current disc
will automatically replay.
Seek in navigation mode
•Press
orto access the next audio station if in radio mode, and
next track if in CD mode.
Radio station memory preset
The radio is equipped with six station memory preset controls. These
controls can be used to select up to six preset AM stations and twelve
FM stations (six in FM1 and six in FM2).
The presets will also allow you to access CDs which are loaded in the CD
DJ. When in CD mode, simply press the preset number which
corresponds to the desired disc.
Setting memory preset stations
1. Select the frequency band with the AM/FM select control.
2. Select a station. Refer toTune adjustorSeek functionfor more
information on selecting a station.
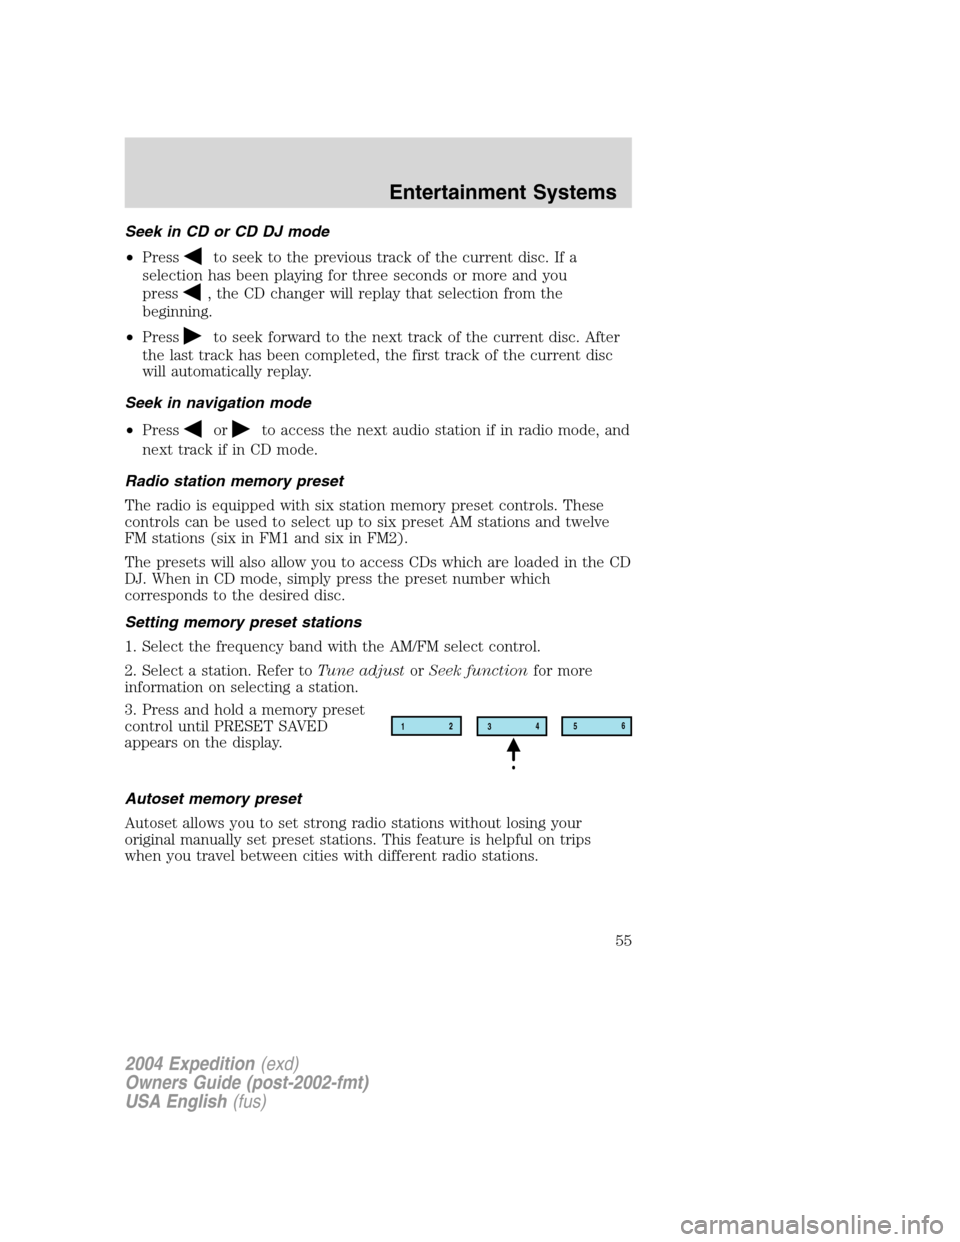
3. Press and hold a memory preset
control until PRESET SAVED
appears on the display.
Autoset memory preset
Autoset allows you to set strong radio stations without losing your
original manually set preset stations. This feature is helpful on trips
when you travel between cities with different radio stations.
12
3456
2004 Expedition(exd)
Owners Guide (post-2002-fmt)
USA English(fus)
Entertainment Systems
55
Page 65 of 344
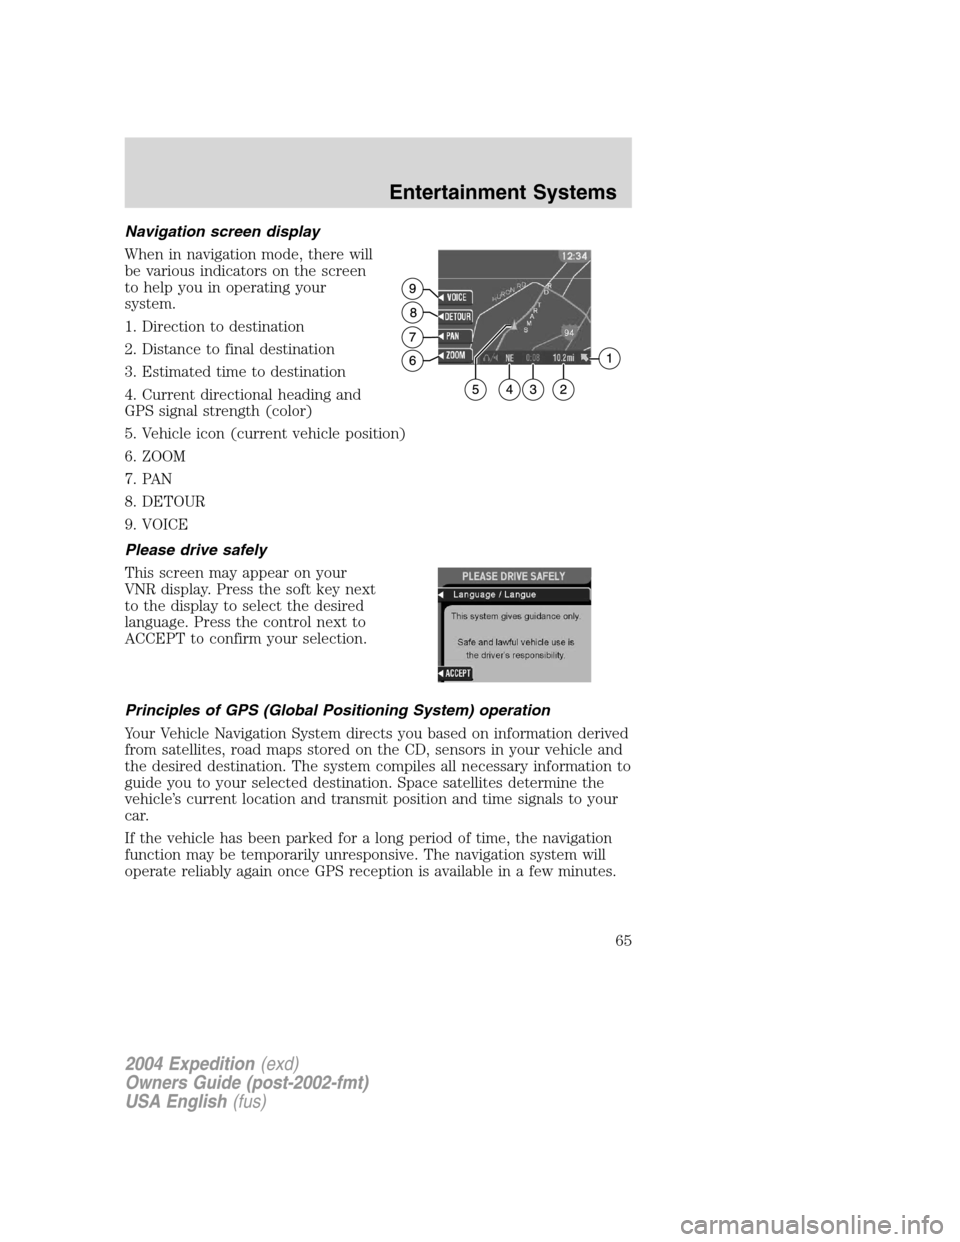
Navigation screen display
When in navigation mode, there will
be various indicators on the screen
to help you in operating your
system.
1. Direction to destination
2. Distance to final destination
3. Estimated time to destination
4. Current directional heading and
GPS signal strength (color)
5. Vehicle icon (current vehicle position)
6. ZOOM
7. PAN
8. DETOUR
9. VOICE
Please drive safely
This screen may appear on your
VNR display. Press the soft key next
to the display to select the desired
language. Press the control next to
ACCEPT to confirm your selection.
Principles of GPS (Global Positioning System) operation
Your Vehicle Navigation System directs you based on information derived
from satellites, road maps stored on the CD, sensors in your vehicle and
the desired destination. The system compiles all necessary information to
guide you to your selected destination. Space satellites determine the
vehicle’s current location and transmit position and time signals to your
car.
If the vehicle has been parked for a long period of time, the navigation
function may be temporarily unresponsive. The navigation system will
operate reliably again once GPS reception is available in a few minutes.
2004 Expedition(exd)
Owners Guide (post-2002-fmt)
USA English(fus)
Entertainment Systems
65
Page 66 of 344
Limited GPS reception
System performance may be adversely affected if GPS reception is
interrupted or interference occurs over a distance of several miles. The
following are possible causes for GPS reception being interrupted. If the
vehicle is:
•in multi-story parking garages
•in tunnels and under bridges
•in between high buildings
•by forests or tree-lined avenues
•in heavy rain showers and thunderstorms
•in valleys and in mountainous regions
The GPS signal strength may vary. The directional heading indicator at
the bottom of the screen might change color to indicate this signal
strength. The colors are as follows:
•Green—A clear GPS signal is being received.
•Yellow—The GPS signal is partially blocked.
•Red—The GPS signal is unavailable and may be temporarily blocked.
To enter navigation mode
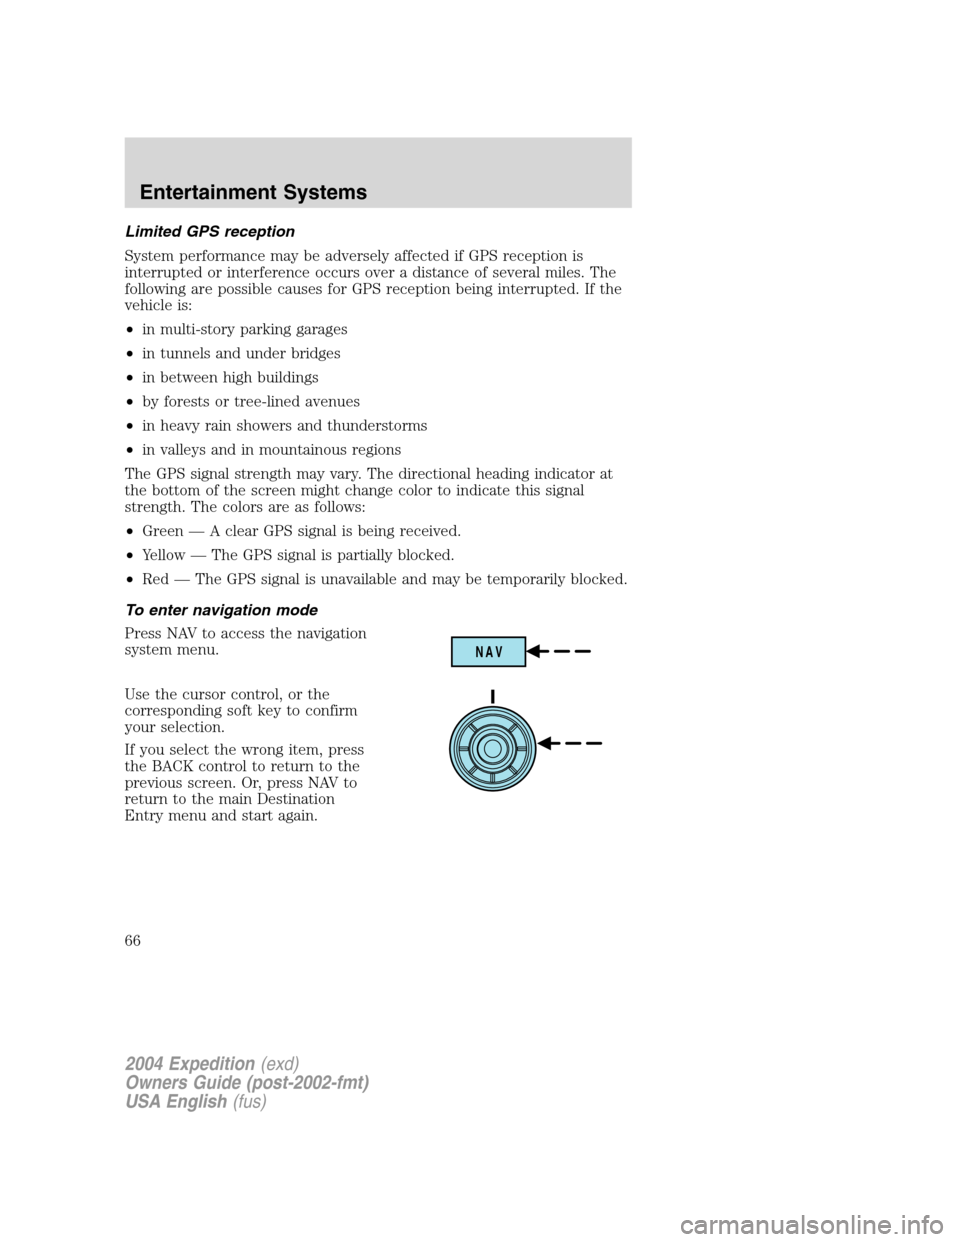
Press NAV to access the navigation
system menu.
Use the cursor control, or the
corresponding soft key to confirm
your selection.
If you select the wrong item, press
the BACK control to return to the
previous screen. Or, press NAV to
return to the main Destination
Entry menu and start again.
NAV
2004 Expedition(exd)
Owners Guide (post-2002-fmt)
USA English(fus)
Entertainment Systems
66
Page 72 of 344
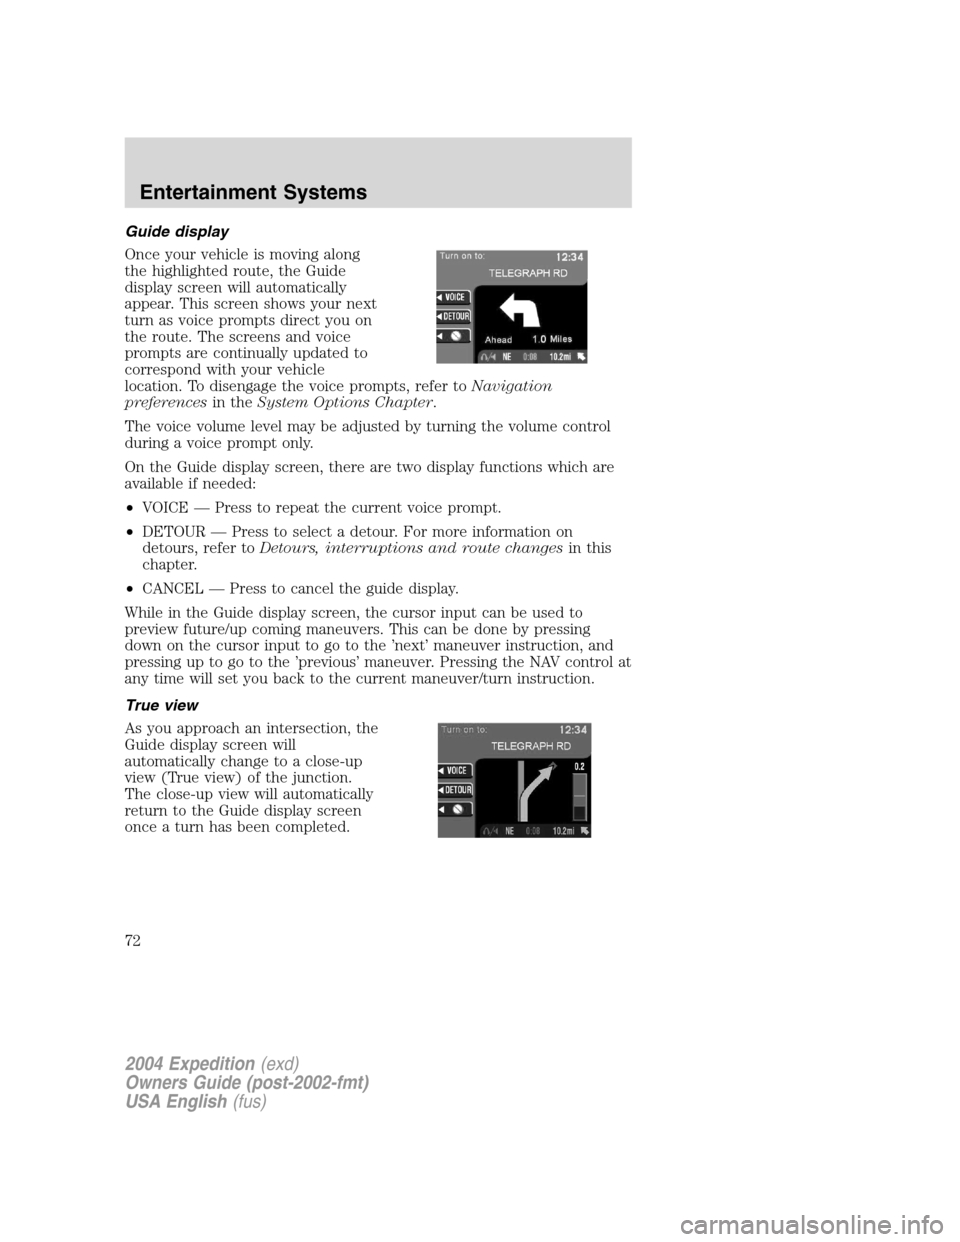
Guide display
Once your vehicle is moving along
the highlighted route, the Guide
display screen will automatically
appear. This screen shows your next
turn as voice prompts direct you on
the route. The screens and voice
prompts are continually updated to
correspond with your vehicle
location. To disengage the voice prompts, refer toNavigation
preferencesin theSystem Options Chapter.
The voice volume level may be adjusted by turning the volume control
during a voice prompt only.
On the Guide display screen, there are two display functions which are
available if needed:
•VOICE—Press to repeat the current voice prompt.
•DETOUR—Press to select a detour. For more information on
detours, refer toDetours, interruptions and route changesin this
chapter.
•CANCEL—Press to cancel the guide display.
While in the Guide display screen, the cursor input can be used to
preview future/up coming maneuvers. This can be done by pressing
down on the cursor input to go to the’next’maneuver instruction, and
pressing up to go to the’previous’maneuver. Pressing the NAV control at
any time will set you back to the current maneuver/turn instruction.
True view
As you approach an intersection, the
Guide display screen will
automatically change to a close-up
view (True view) of the junction.
The close-up view will automatically
return to the Guide display screen
once a turn has been completed.
2004 Expedition(exd)
Owners Guide (post-2002-fmt)
USA English(fus)
Entertainment Systems
72
Page 130 of 344
A driver’s first responsibility is the safe operation of the vehicle.
The most important thing you can do to prevent a crash is to
avoid distractions and pay attention to the road. Wait until it is safe to
operate Mobile Communications Equipment.
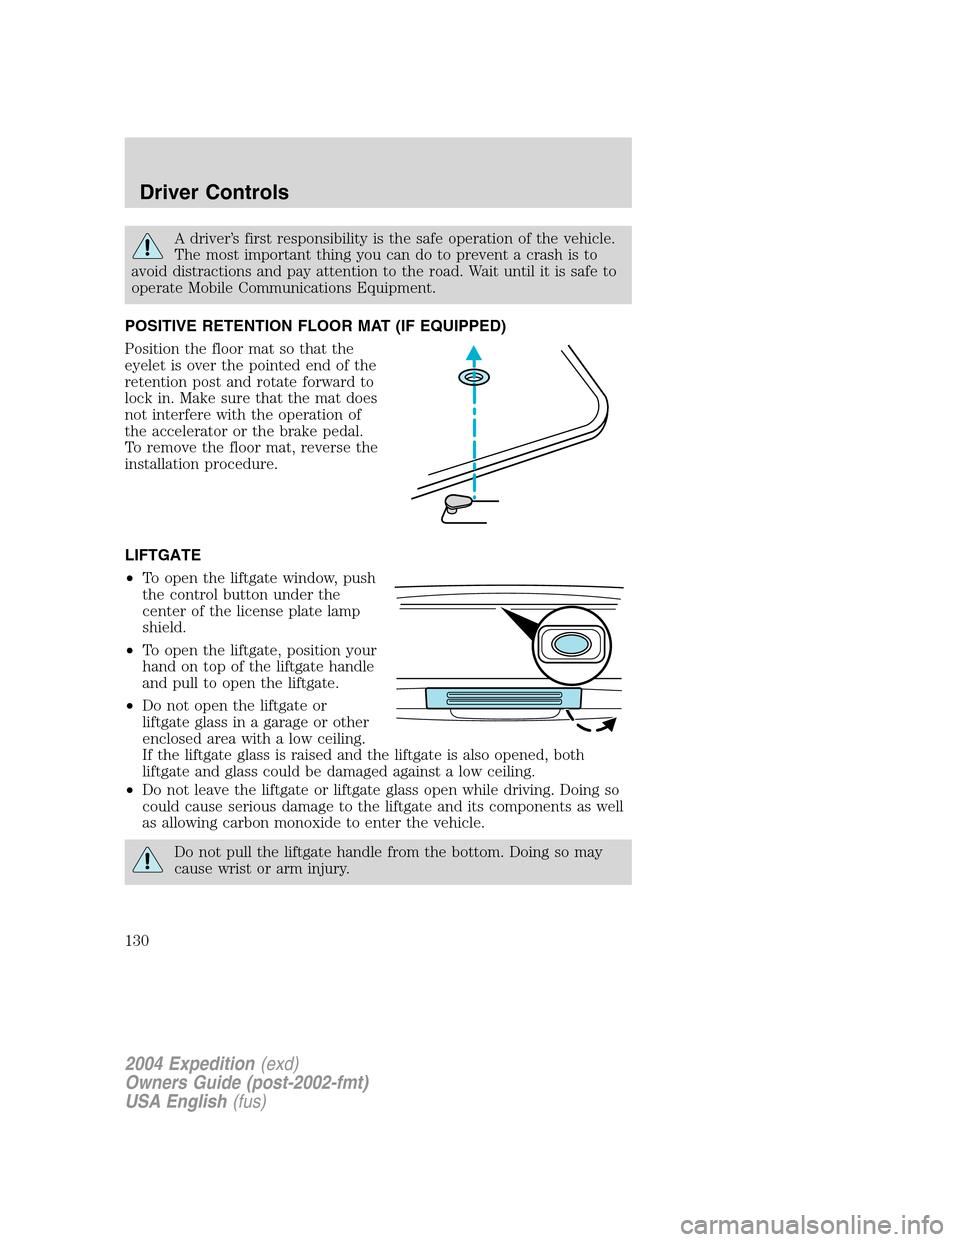
POSITIVE RETENTION FLOOR MAT (IF EQUIPPED)
Position the floor mat so that the
eyelet is over the pointed end of the
retention post and rotate forward to
lock in. Make sure that the mat does
not interfere with the operation of
the accelerator or the brake pedal.
To remove the floor mat, reverse the
installation procedure.
LIFTGATE
•To open the liftgate window, push
the control button under the
center of the license plate lamp
shield.
•To open the liftgate, position your
hand on top of the liftgate handle
and pull to open the liftgate.
•Do not open the liftgate or
liftgate glass in a garage or other
enclosed area with a low ceiling.
If the liftgate glass is raised and the liftgate is also opened, both
liftgate and glass could be damaged against a low ceiling.
•Do not leave the liftgate or liftgate glass open while driving. Doing so
could cause serious damage to the liftgate and its components as well
as allowing carbon monoxide to enter the vehicle.
Do not pull the liftgate handle from the bottom. Doing so may
cause wrist or arm injury.
2004 Expedition(exd)
Owners Guide (post-2002-fmt)
USA English(fus)
Driver Controls
130
Page 133 of 344
REMOTE ENTRY SYSTEM
This device complies with part 15 of the FCC rules and with RS-210 of
Industry Canada. Operation is subject to the following two conditions:
(1) This device may not cause harmful interference, and (2) This device
must accept any interference received, including interference that may
cause undesired operation.
Changes or modifications not expressly approved by the party
responsible for compliance could void the user’s authority to
operate the equipment.
The remote entry system allows you to lock or unlock all vehicle doors
and liftgate and open the liftgate window without a key.
The remote entry lock/unlock feature operates in any ignition position.
The liftgate glass feature operates as long as the ignition is in the ON (3)
position and the vehicle is in (P) PARK. The panic feature operates with
the key in the OFF (1) and ACC (2) position.
If there is any potential remote keyless entry problem with your vehicle,
ensureALLremote entry transmitters are brought to the dealership, to
aid in troubleshooting.
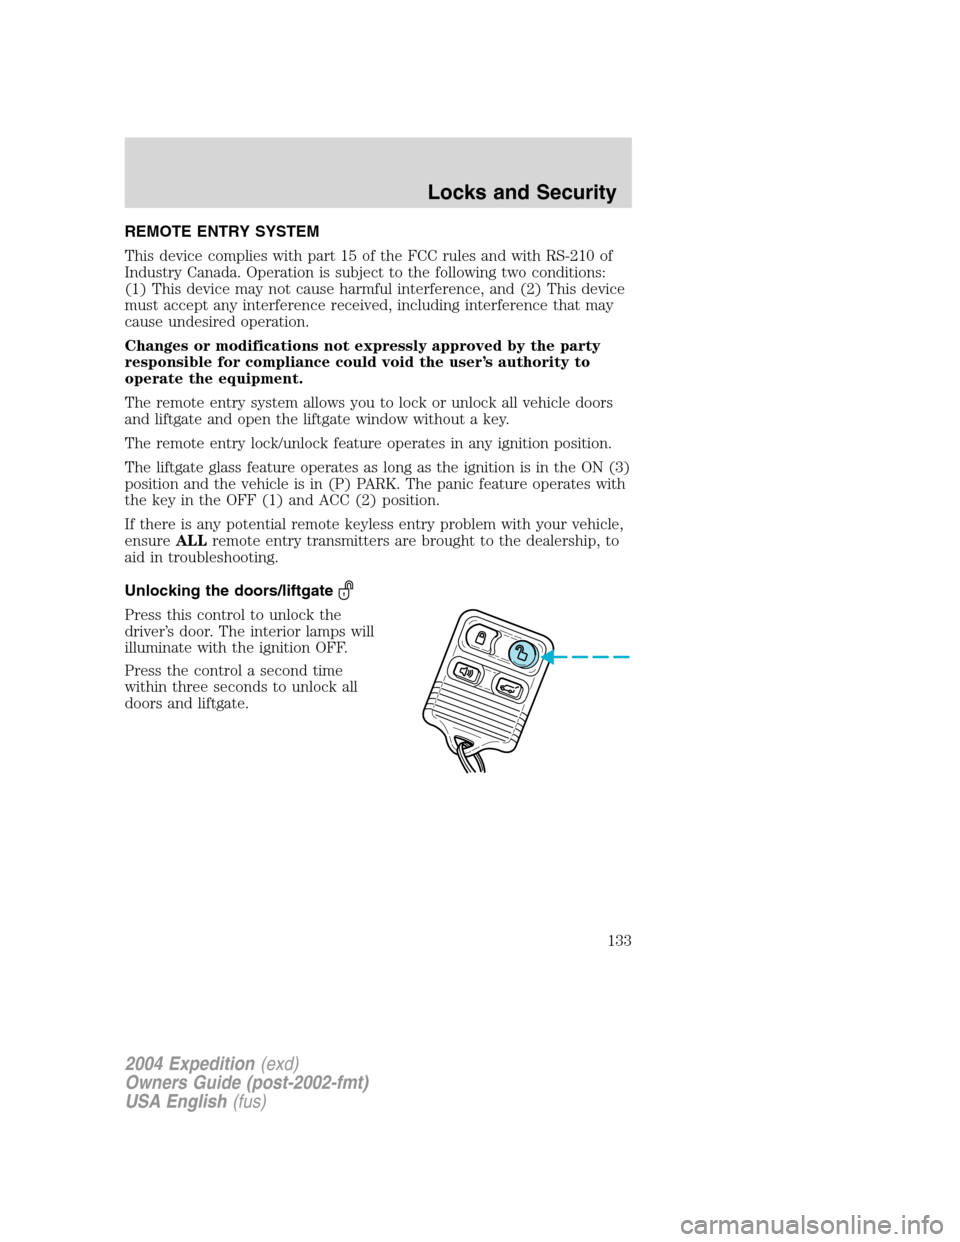
Unlocking the doors/liftgate
Press this control to unlock the
driver’s door. The interior lamps will
illuminate with the ignition OFF.
Press the control a second time
within three seconds to unlock all
doors and liftgate.
2004 Expedition(exd)
Owners Guide (post-2002-fmt)
USA English(fus)
Locks and Security
133
Page 135 of 344
Memory feature (if equipped)
The remote entry system can also
control the memory feature.
Press the control once to unlock the
driver’s door. Pressing the control
will automatically move the seat,
rearview mirrors, and adjustable
pedals to the desired memory
position (the memory position
corresponds to the transmitter being
used).
Activating the memory feature
To activate this feature:
1. Position the seat, rearview mirrors, and adjustable pedals to the
positions you desire.
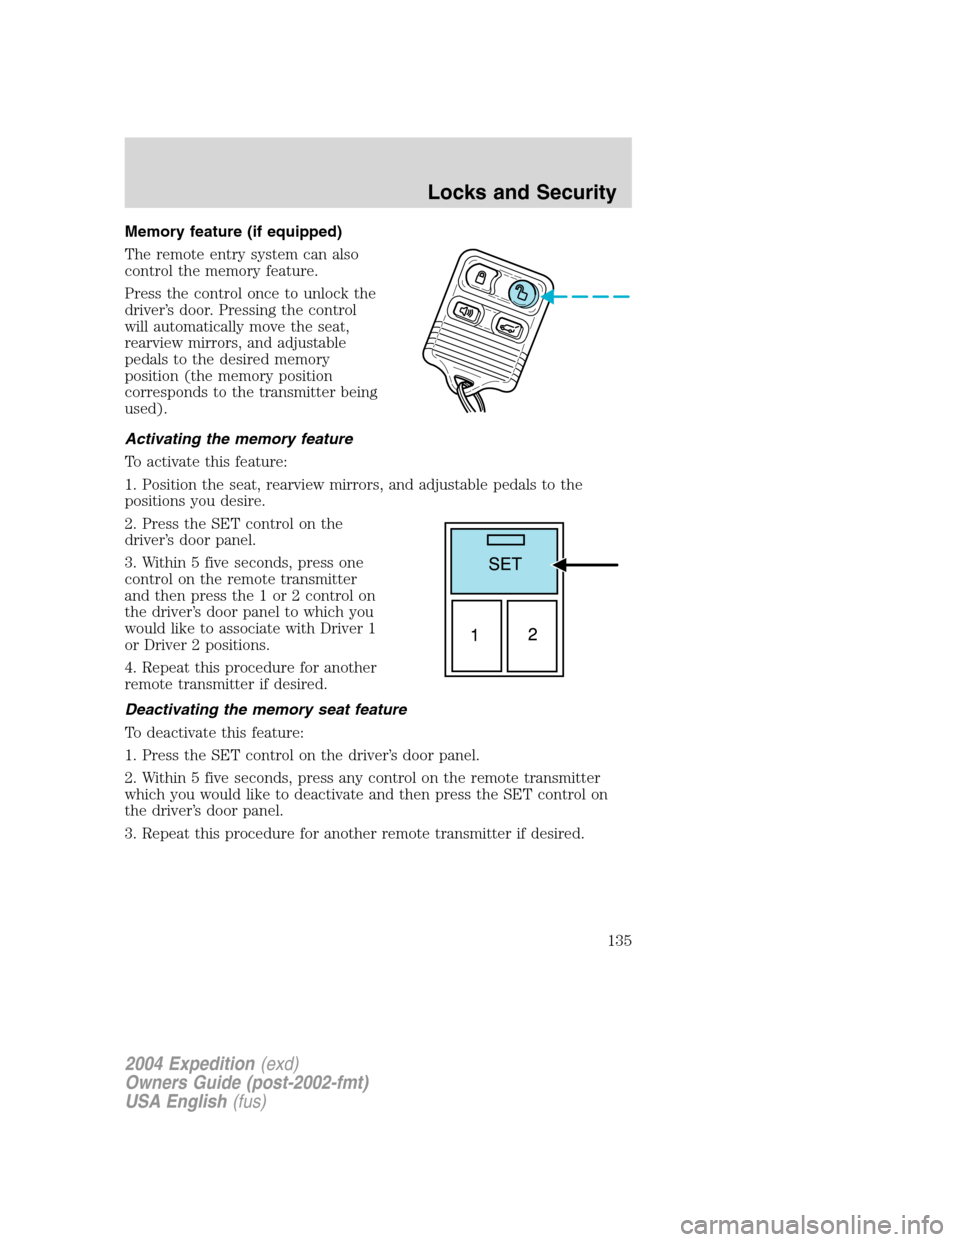
2. Press the SET control on the
driver’s door panel.
3. Within 5 five seconds, press one
control on the remote transmitter
and then press the 1 or 2 control on
the driver’s door panel to which you
would like to associate with Driver 1
or Driver 2 positions.
4. Repeat this procedure for another
remote transmitter if desired.
Deactivating the memory seat feature
To deactivate this feature:
1. Press the SET control on the driver’s door panel.
2. Within 5 five seconds, press any control on the remote transmitter
which you would like to deactivate and then press the SET control on
the driver’s door panel.
3. Repeat this procedure for another remote transmitter if desired.
2004 Expedition(exd)
Owners Guide (post-2002-fmt)
USA English(fus)
Locks and Security
135