ECU FORD EXPEDITION 2007 3.G Owner's Guide
[x] Cancel search | Manufacturer: FORD, Model Year: 2007, Model line: EXPEDITION, Model: FORD EXPEDITION 2007 3.GPages: 328, PDF Size: 2.96 MB
Page 137 of 328
In a rollover crash, an unbelted person is significantly more likely
to die than a person wearing a safety belt.
Each seating position in your vehicle has a specific safety belt
assembly which is made up of one buckle and one tongue that
are designed to be used as a pair. 1) Use the shoulder belt on the
outside shoulder only. Never wear the shoulder belt under the arm. 2)
Never swing the safety belt around your neck over the inside shoulder.
3) Never use a single belt for more than one person.
Always transport children 12 years old and under in the back
seat and always properly use appropriate child restraints.
Safety belts and seats can become hot in a vehicle that has been
closed up in sunny weather; they could burn a small child. Check
seat covers and buckles before you place a child anywhere near them.
Combination lap and shoulder belts
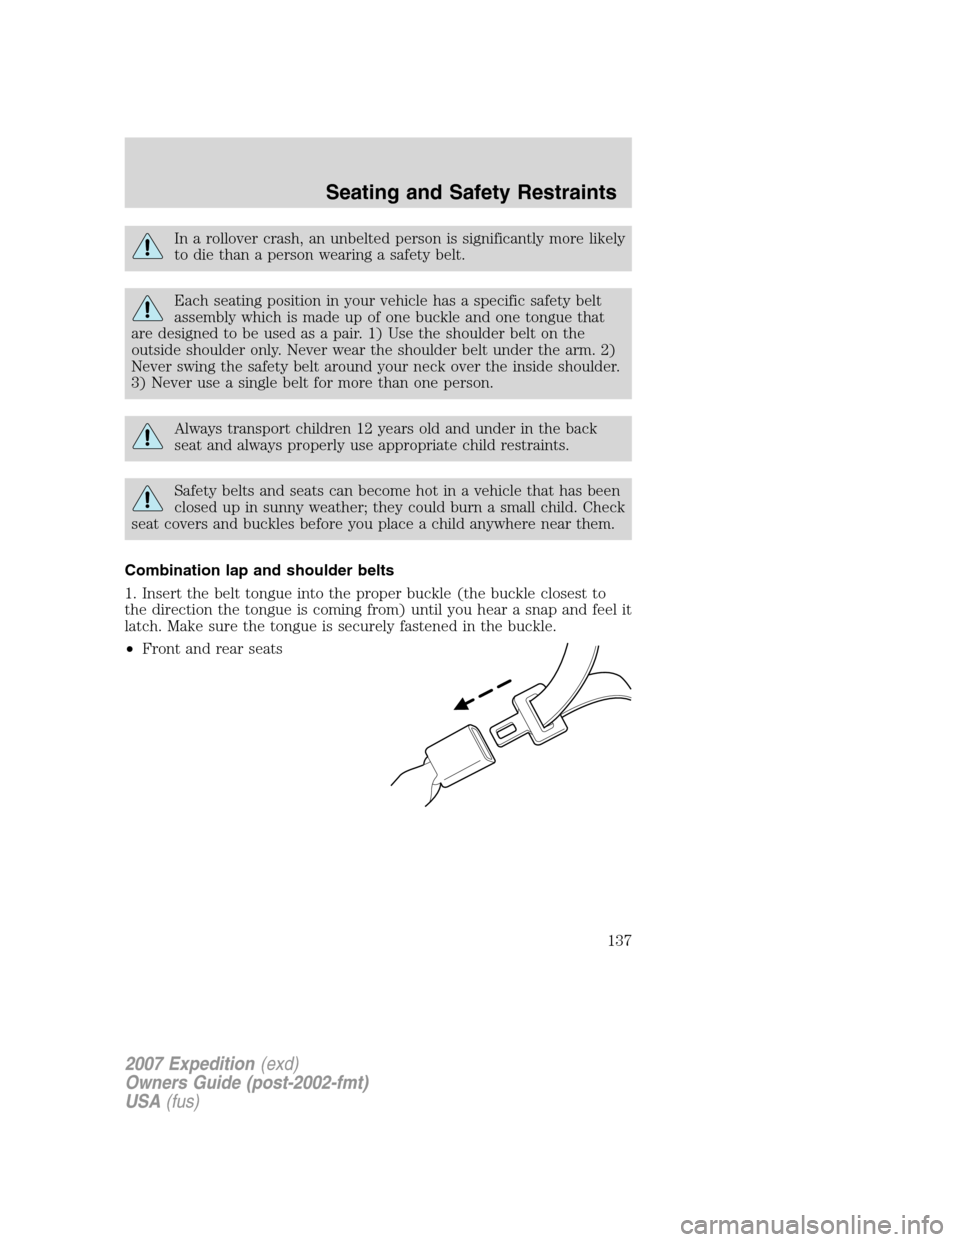
1. Insert the belt tongue into the proper buckle (the buckle closest to
the direction the tongue is coming from) until you hear a snap and feel it
latch. Make sure the tongue is securely fastened in the buckle.
•Front and rear seats
2007 Expedition(exd)
Owners Guide (post-2002-fmt)
USA(fus)
Seating and Safety Restraints
137
Page 138 of 328
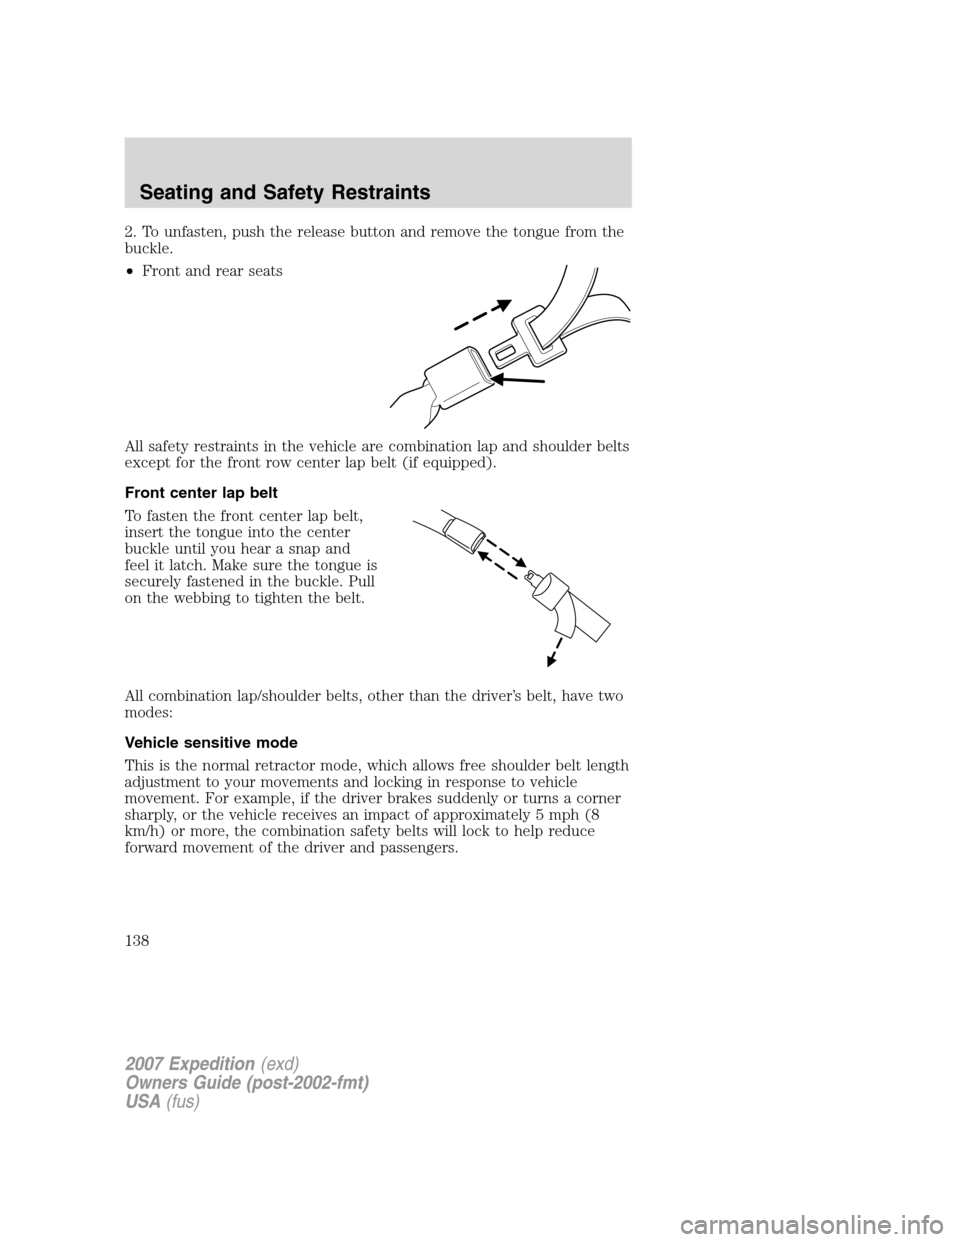
2. To unfasten, push the release button and remove the tongue from the
buckle.
•Front and rear seats
All safety restraints in the vehicle are combination lap and shoulder belts
except for the front row center lap belt (if equipped).
Front center lap belt
To fasten the front center lap belt,
insert the tongue into the center
buckle until you hear a snap and
feel it latch. Make sure the tongue is
securely fastened in the buckle. Pull
on the webbing to tighten the belt.
All combination lap/shoulder belts, other than the driver’s belt, have two
modes:
Vehicle sensitive mode
This is the normal retractor mode, which allows free shoulder belt length
adjustment to your movements and locking in response to vehicle
movement. For example, if the driver brakes suddenly or turns a corner
sharply, or the vehicle receives an impact of approximately 5 mph (8
km/h) or more, the combination safety belts will lock to help reduce
forward movement of the driver and passengers.
2007 Expedition(exd)
Owners Guide (post-2002-fmt)
USA(fus)
Seating and Safety Restraints
138
Page 161 of 328
Never use pillows, books, or towels to boost a child. They can
slide around and increase the likelihood of injury or death in a
collision.
SAFETY SEATS FOR CHILDREN
Child and infant or child safety seats
Use a safety seat that is recommended for the size and weight of the
child. Carefully follow all of the manufacturer’s instructions with the
safety seat you put in your vehicle. If you do not install and use the
safety seat properly, the child may be injured in a sudden stop or
collision.
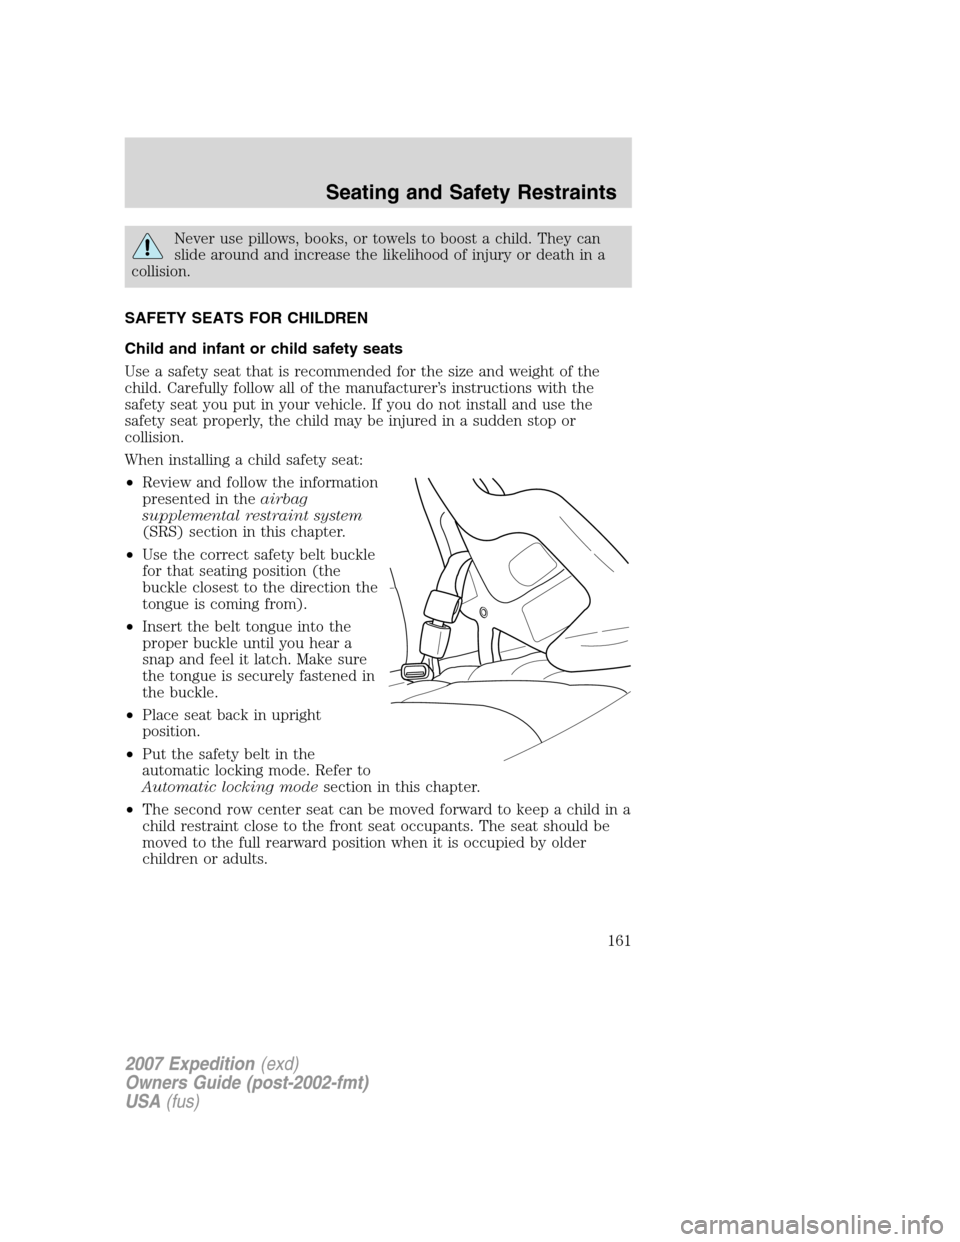
When installing a child safety seat:
•Review and follow the information
presented in theairbag
supplemental restraint system
(SRS) section in this chapter.
•Use the correct safety belt buckle
for that seating position (the
buckle closest to the direction the
tongue is coming from).
•Insert the belt tongue into the
proper buckle until you hear a
snap and feel it latch. Make sure
the tongue is securely fastened in
the buckle.
•Place seat back in upright
position.
•Put the safety belt in the
automatic locking mode. Refer to
Automatic locking modesection in this chapter.
•The second row center seat can be moved forward to keep a child in a
child restraint close to the front seat occupants. The seat should be
moved to the full rearward position when it is occupied by older
children or adults.
2007 Expedition(exd)
Owners Guide (post-2002-fmt)
USA(fus)
Seating and Safety Restraints
161
Page 163 of 328
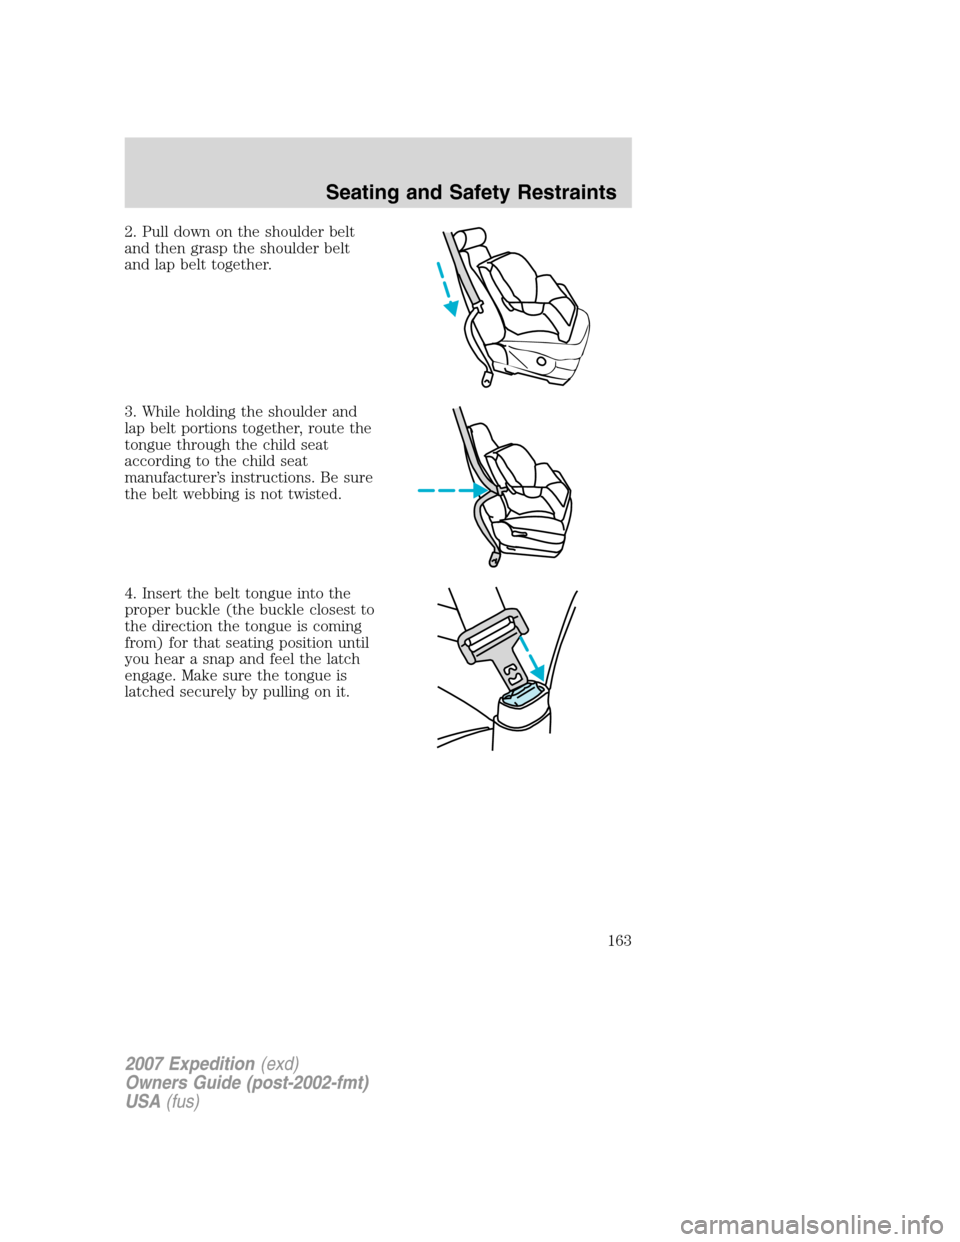
2. Pull down on the shoulder belt
and then grasp the shoulder belt
and lap belt together.
3. While holding the shoulder and
lap belt portions together, route the
tongue through the child seat
according to the child seat
manufacturer’s instructions. Be sure
the belt webbing is not twisted.
4. Insert the belt tongue into the
proper buckle (the buckle closest to
the direction the tongue is coming
from) for that seating position until
you hear a snap and feel the latch
engage. Make sure the tongue is
latched securely by pulling on it.
2007 Expedition(exd)
Owners Guide (post-2002-fmt)
USA(fus)
Seating and Safety Restraints
163
Page 164 of 328
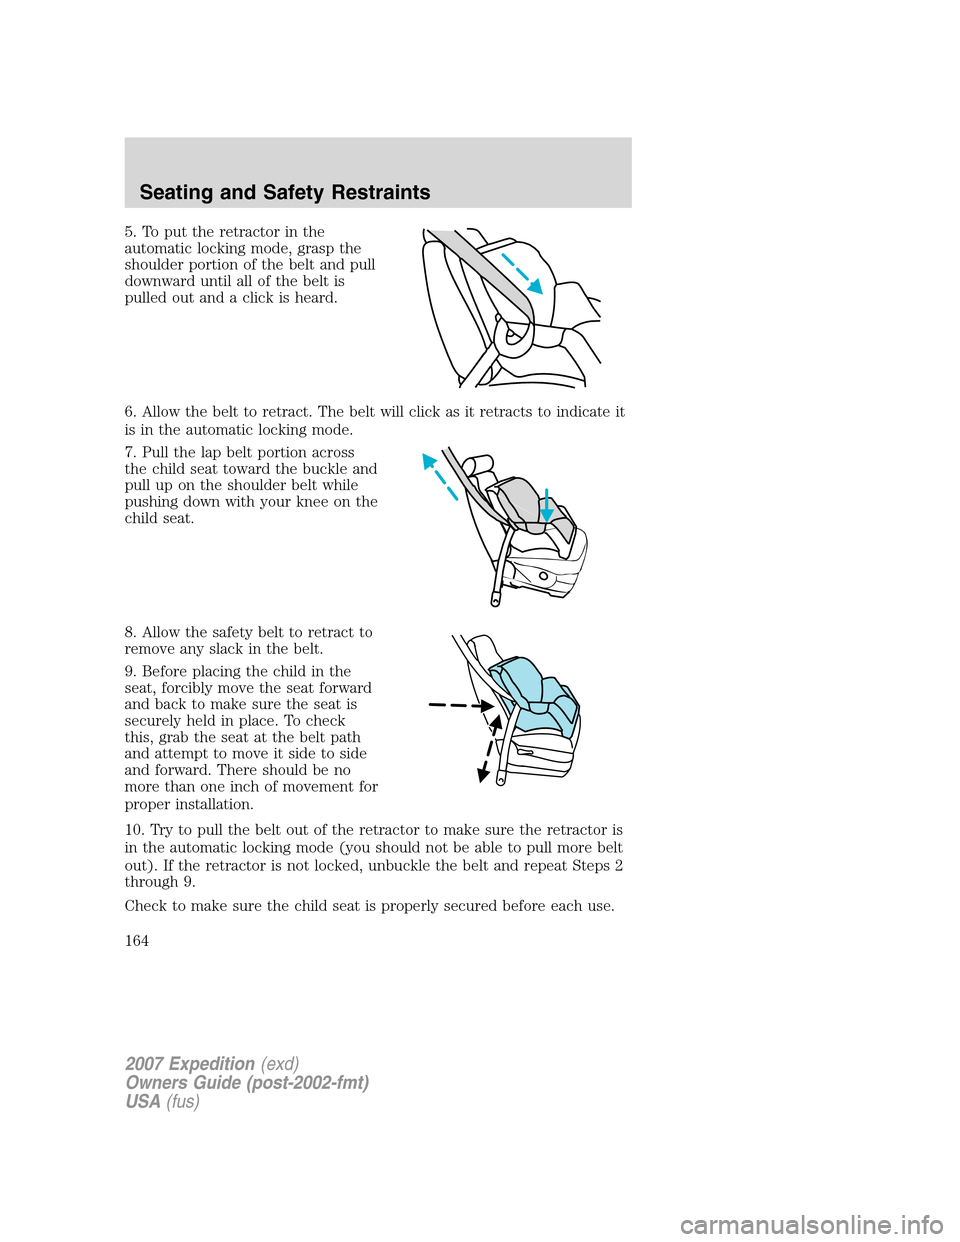
5. To put the retractor in the
automatic locking mode, grasp the
shoulder portion of the belt and pull
downward until all of the belt is
pulled out and a click is heard.
6. Allow the belt to retract. The belt will click as it retracts to indicate it
is in the automatic locking mode.
7. Pull the lap belt portion across
the child seat toward the buckle and
pull up on the shoulder belt while
pushing down with your knee on the
child seat.
8. Allow the safety belt to retract to
remove any slack in the belt.
9. Before placing the child in the
seat, forcibly move the seat forward
and back to make sure the seat is
securely held in place. To check
this, grab the seat at the belt path
and attempt to move it side to side
and forward. There should be no
more than one inch of movement for
proper installation.
10. Try to pull the belt out of the retractor to make sure the retractor is
in the automatic locking mode (you should not be able to pull more belt
out). If the retractor is not locked, unbuckle the belt and repeat Steps 2
through 9.
Check to make sure the child seat is properly secured before each use.
2007 Expedition(exd)
Owners Guide (post-2002-fmt)
USA(fus)
Seating and Safety Restraints
164
Page 165 of 328
Installing child safety seats in the center front seating position
(if equipped)
Always transport children 12 years old and under in the rear
seats and always properly use appropriate child restraints.
It is safer to install child safety seats in seating positions that
have child seat anchors. The front seat has no tether anchor nor
does it have LATCH anchors.
1. Lengthen the lap belt. To lengthen the belt, hold the tongue so that its
bottom is perpendicular to the direction of webbing while sliding the
tongue up the webbing.
2. Place the child safety seat in the center seating position.
3. Route the tongue and webbing through the child seat according to the
child seat manufacturer’s instructions.
4. Insert the belt tongue into the proper buckle for the center seating
position until you hear a snap and feel it latch. Make sure the tongue is
securely fastened to the buckle by pulling on tongue.
5. Push down on the child seat with your knee while pulling on the loose
end of the lap belt webbing to tighten the belt.
6. Before placing the child into the child seat, forcibly move the child
seat from side to side and forward to make sure that the seat is held
securely. If the child seat moves excessively, repeat Steps 5 through 6, or
properly install the child seat in a different position.
Attaching child safety seats with tether straps
Most new forward-facing child safety seats include a tether strap which
goes over the back of the seat and hooks to an anchoring point. Tether
straps are available as an accessory for many older safety seats. Contact
the manufacturer of your child seat for information about ordering a
tether strap.
Some of the rear seats of your vehicle are equipped with built-in tether
strap anchors located behind the seats as described below.
In the third row center seating position, the tether anchor is a loop at
the bottom of the seatback.
2007 Expedition(exd)
Owners Guide (post-2002-fmt)
USA(fus)
Seating and Safety Restraints
165
Page 193 of 328
any tire is under-inflated, carefully drive the vehicle to the nearest
location where air can be added to the tires. Inflate all the tires to the
recommended inflation pressure.
SNOW TIRES AND CHAINS
Snow tires must be the same size and grade as the tires you
currently have on your vehicle.
The tires on your vehicle have all weather treads to provide traction in
rain and snow. However, in some climates, you may need to use snow
tires and chains. If you need to use chains, it is recommended that steel
wheels (of the same size and specifications) be used, as chains may chip
aluminum wheels.
Follow these guidelines when using snow tires and chains:
•Use only cable type chains or chains offered by Ford as an accessory
or equivalent. Other conventional link type chains may contact and
cause damage to the vehicle’s wheel house and/or body.
•Do not install chains on the front wheels. Chains on the front wheels
may interfere with suspension components.
•Chains are not recommended for use on the P275/55R20 tire.
•Install chains securely, verifying that the chains do not touch any
wiring, brake lines or fuel lines.
•Drive cautiously. If you hear the chains rub or bang against your
vehicle, stop and re-tighten the chains. If this does not work, remove
the chains to prevent damage to your vehicle.
•If possible, avoid fully loading your vehicle.
•Remove the tire chains when they are no longer needed. Do not use
tire chains on dry roads.
•The suspension insulation and bumpers will help prevent vehicle
damage. Do not remove these components from your vehicle when
using snow tires and chains.
•Do not exceed 30 mph (48 km/h) with tire chains on your vehicle.
VEHICLE LOADING – WITH AND WITHOUT A TRAILER
This section will guide you in the proper loading of your vehicle and/or
trailer, to keep your loaded vehicle weight within its design rating
capability, with or without a trailer. Properly loading your vehicle will
provide maximum return of vehicle design performance. Before loading
2007 Expedition(exd)
Owners Guide (post-2002-fmt)
USA(fus)
Tires, Wheels and Loading
193
Page 214 of 328
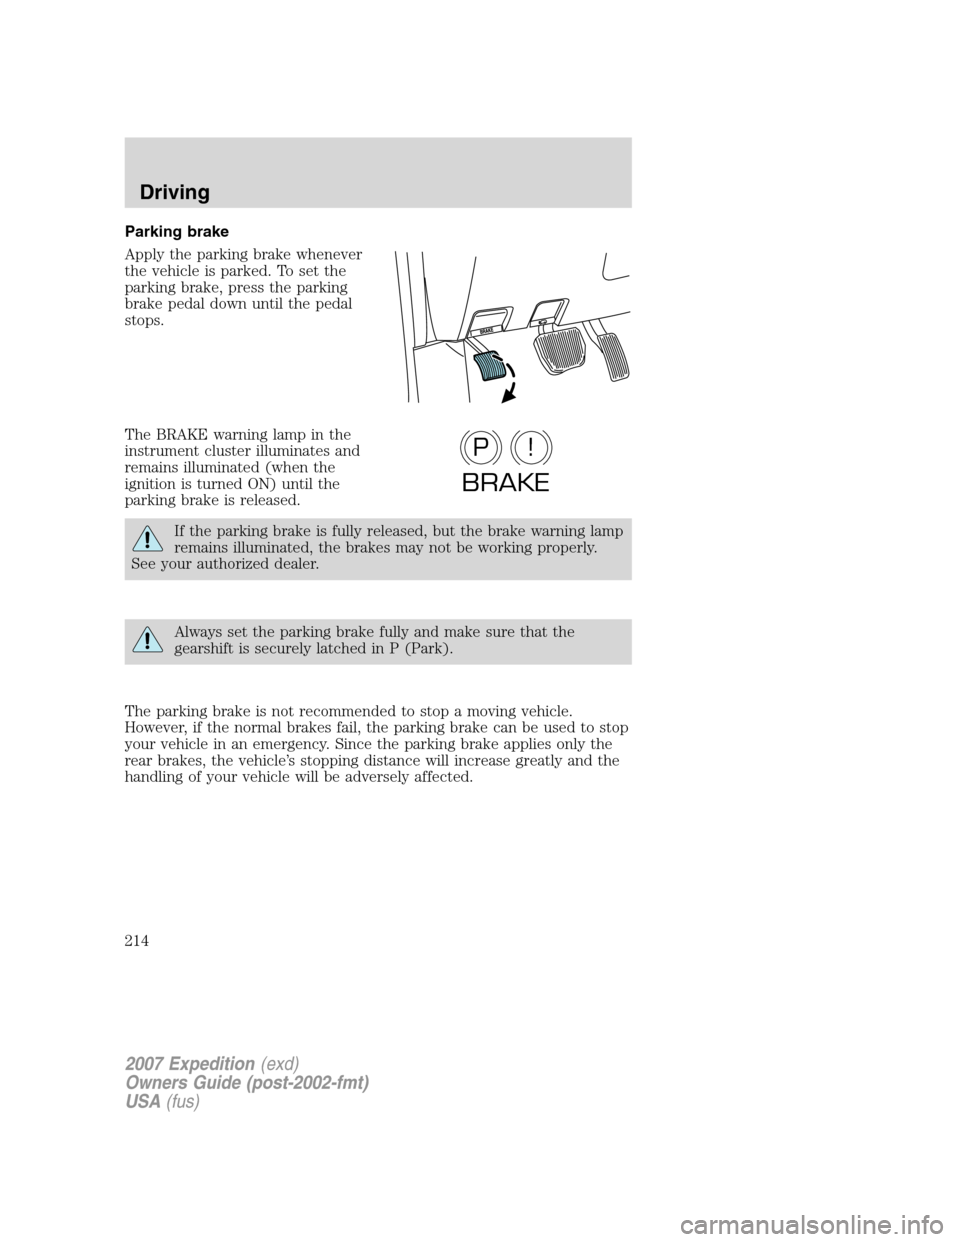
Parking brake
Apply the parking brake whenever
the vehicle is parked. To set the
parking brake, press the parking
brake pedal down until the pedal
stops.
The BRAKE warning lamp in the
instrument cluster illuminates and
remains illuminated (when the
ignition is turned ON) until the
parking brake is released.
If the parking brake is fully released, but the brake warning lamp
remains illuminated, the brakes may not be working properly.
See your authorized dealer.
Always set the parking brake fully and make sure that the
gearshift is securely latched in P (Park).
The parking brake is not recommended to stop a moving vehicle.
However, if the normal brakes fail, the parking brake can be used to stop
your vehicle in an emergency. Since the parking brake applies only the
rear brakes, the vehicle’s stopping distance will increase greatly and the
handling of your vehicle will be adversely affected.
P!
BRAKE
2007 Expedition(exd)
Owners Guide (post-2002-fmt)
USA(fus)
Driving
214
Page 225 of 328
•Move the gearshift lever into the desired gear. If your vehicle is
equipped with a floor-shift transmission, press the gearshift lever
release button (on the front of the lever) while shifting into the
desired gear.
To put your vehicle in P (Park):
•Come to a complete stop
•Move the gearshift lever and securely latch it in P (Park)
Always set the parking brake fully and make sure the gearshift is
latched in P (Park). Turn the ignition to the LOCK position and
remove the key whenever you leave your vehicle.
R (Reverse)
With the gearshift lever in R (Reverse), the vehicle will move backward.
Always come to a complete stop before shifting into and out of R
(Reverse).
N (Neutral)
With the gearshift lever in N (Neutral), the vehicle can be started and is
free to roll. Hold the brake pedal down while in this position.
D (Drive) with Overdrive
The normal driving position for the best fuel economy. Transmission
operates in gears one through six except in 4L where transmission
operates in gears two through six.
D (Drive) without Overdrive
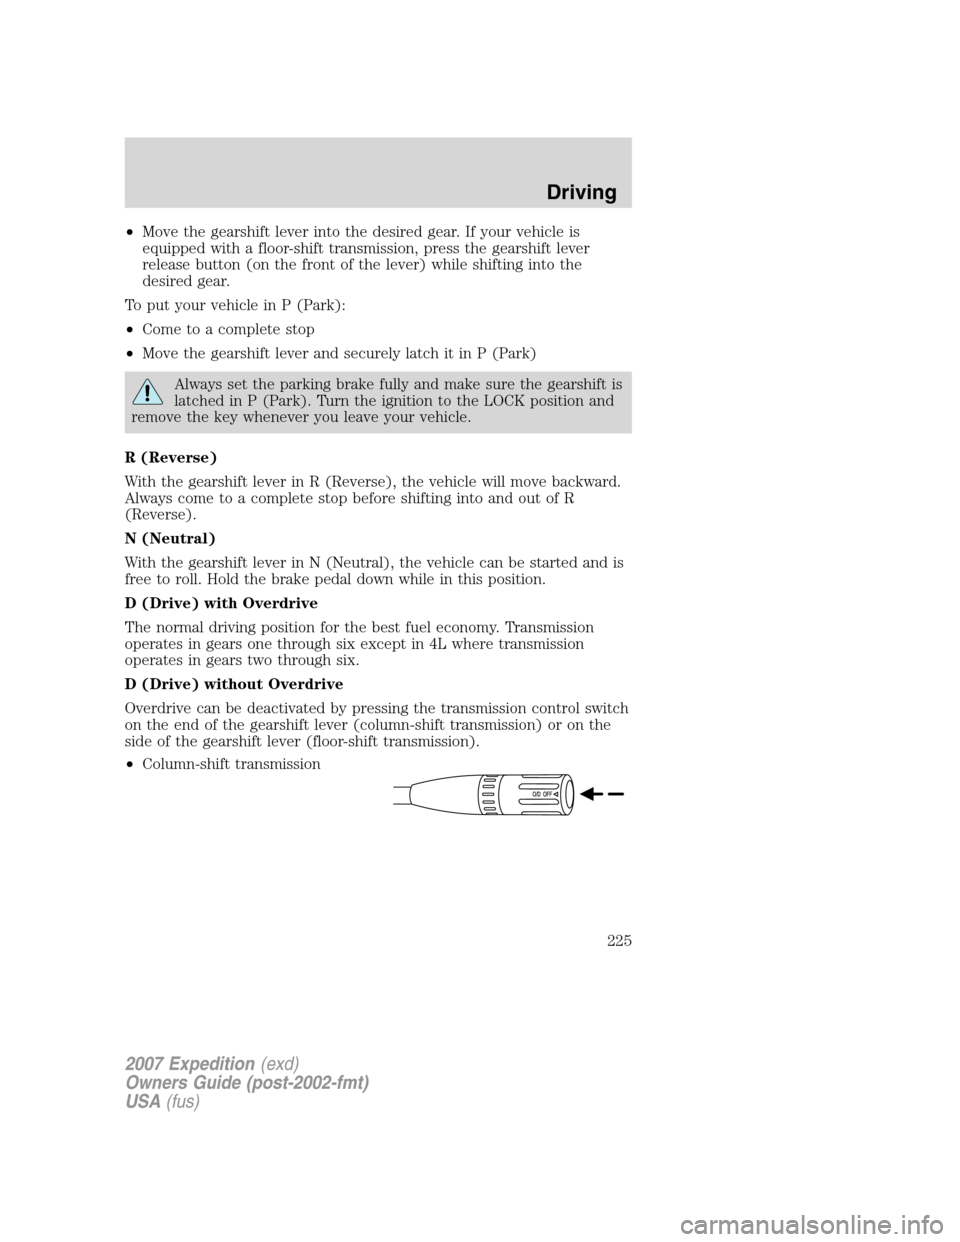
Overdrive can be deactivated by pressing the transmission control switch
on the end of the gearshift lever (column-shift transmission) or on the
side of the gearshift lever (floor-shift transmission).
•Column-shift transmission
2007 Expedition(exd)
Owners Guide (post-2002-fmt)
USA(fus)
Driving
225
Page 257 of 328
To lessen the risk of
personal injury, do not put
any part of your body under the
vehicle while changing a tire. Do
not start the engine when your
vehicle is on the jack. The jack is
only meant for changing the tire.
•Never use the front or rear
differential as a jacking point.
8. Remove the lug nuts with the lug wrench.
9. Replace the flat tire with the spare tire, making sure the valve stem is
facing outward. Reinstall the lug nuts until the wheel is snug against the
hub. Do not fully tighten the lug nuts until the wheel has been lowered.
10. Lower the wheel by turning the jack handle counterclockwise.
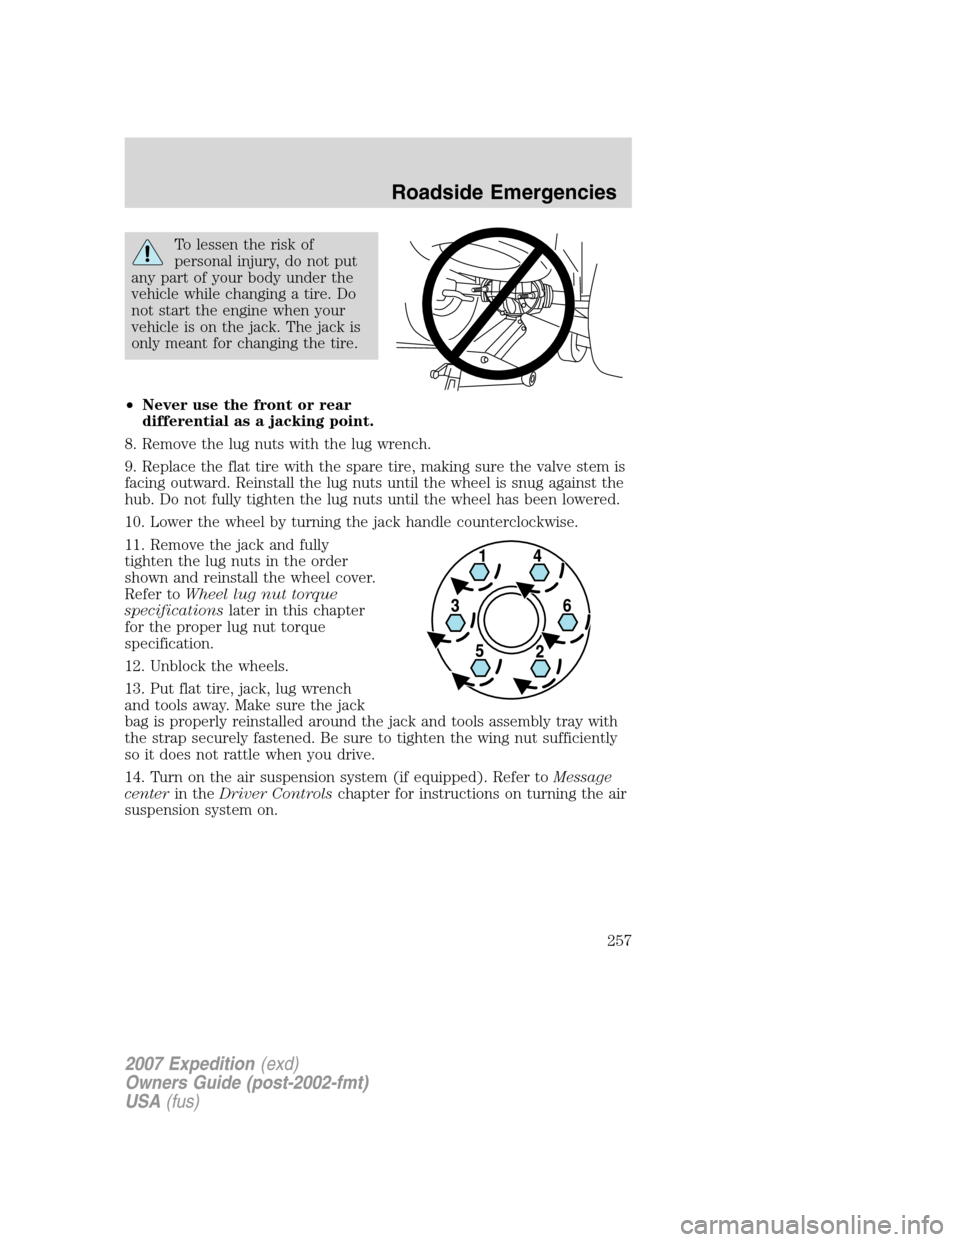
11. Remove the jack and fully
tighten the lug nuts in the order
shown and reinstall the wheel cover.
Refer toWheel lug nut torque
specificationslater in this chapter
for the proper lug nut torque
specification.
12. Unblock the wheels.
13. Put flat tire, jack, lug wrench
and tools away. Make sure the jack
bag is properly reinstalled around the jack and tools assembly tray with
the strap securely fastened. Be sure to tighten the wing nut sufficiently
so it does not rattle when you drive.
14. Turn on the air suspension system (if equipped). Refer toMessage
centerin theDriver Controlschapter for instructions on turning the air
suspension system on.
2007 Expedition(exd)
Owners Guide (post-2002-fmt)
USA(fus)
Roadside Emergencies
257