display FORD EXPEDITION 2016 3.G Workshop Manual
[x] Cancel search | Manufacturer: FORD, Model Year: 2016, Model line: EXPEDITION, Model: FORD EXPEDITION 2016 3.GPages: 421, PDF Size: 6.3 MB
Page 143 of 421
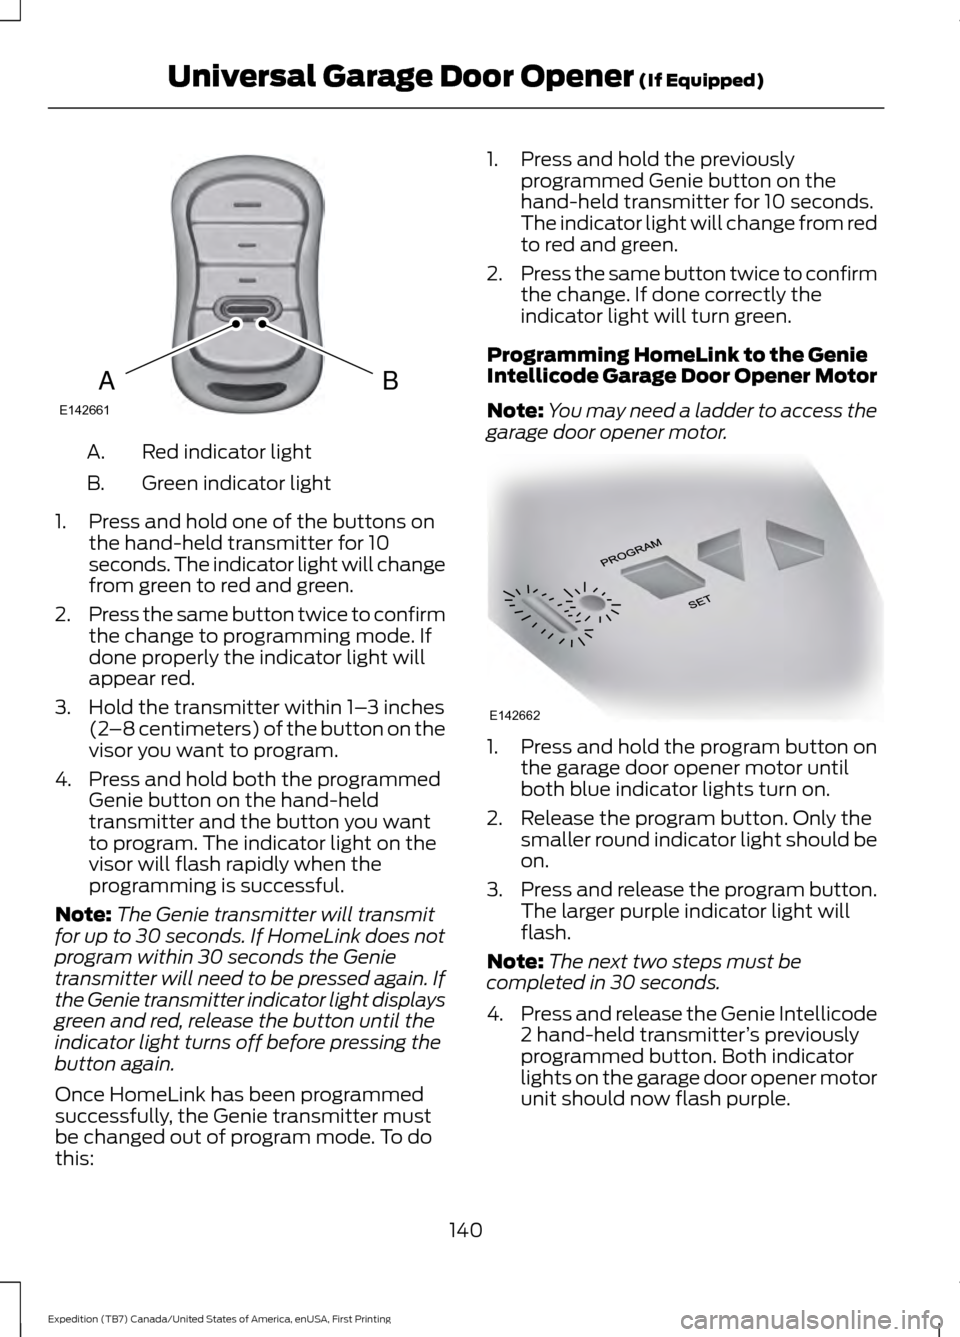
Red indicator light
A.
Green indicator light
B.
1. Press and hold one of the buttons on the hand-held transmitter for 10
seconds. The indicator light will change
from green to red and green.
2. Press the same button twice to confirm
the change to programming mode. If
done properly the indicator light will
appear red.
3. Hold the transmitter within 1– 3 inches
(2 –8 centimeters) of the button on the
visor you want to program.
4. Press and hold both the programmed Genie button on the hand-held
transmitter and the button you want
to program. The indicator light on the
visor will flash rapidly when the
programming is successful.
Note: The Genie transmitter will transmit
for up to 30 seconds. If HomeLink does not
program within 30 seconds the Genie
transmitter will need to be pressed again. If
the Genie transmitter indicator light displays
green and red, release the button until the
indicator light turns off before pressing the
button again.
Once HomeLink has been programmed
successfully, the Genie transmitter must
be changed out of program mode. To do
this: 1. Press and hold the previously
programmed Genie button on the
hand-held transmitter for 10 seconds.
The indicator light will change from red
to red and green.
2. Press the same button twice to confirm
the change. If done correctly the
indicator light will turn green.
Programming HomeLink to the Genie
Intellicode Garage Door Opener Motor
Note: You may need a ladder to access the
garage door opener motor. 1. Press and hold the program button on
the garage door opener motor until
both blue indicator lights turn on.
2. Release the program button. Only the smaller round indicator light should be
on.
3. Press and release the program button.
The larger purple indicator light will
flash.
Note: The next two steps must be
completed in 30 seconds.
4. Press and release the Genie Intellicode
2 hand-held transmitter ’s previously
programmed button. Both indicator
lights on the garage door opener motor
unit should now flash purple.
140
Expedition (TB7) Canada/United States of America, enUSA, First Printing Universal Garage Door Opener (If Equipped)BAE142661 E142662
Page 149 of 421
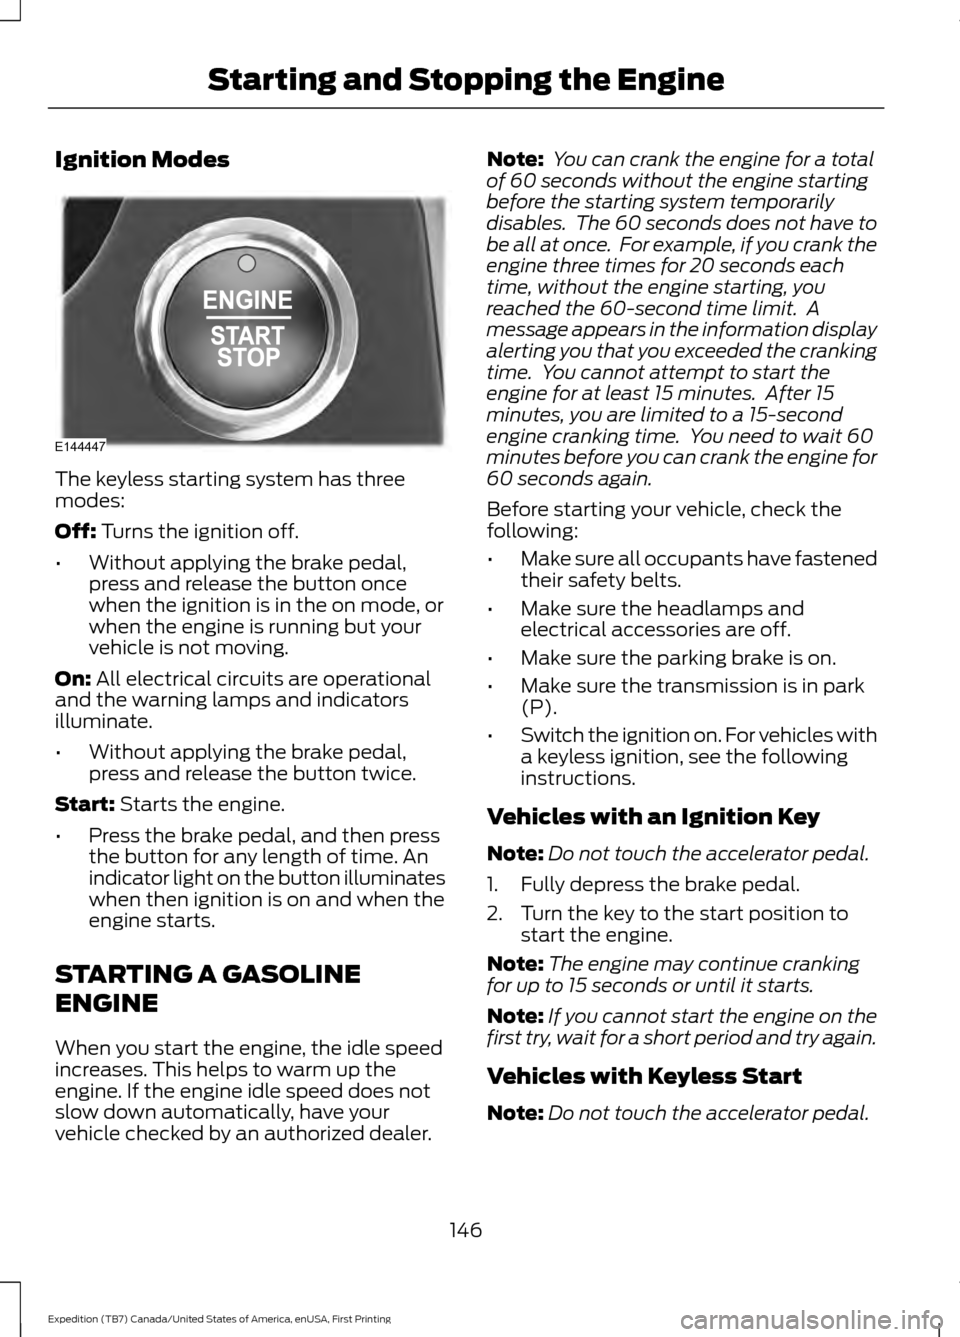
Ignition Modes
The keyless starting system has three
modes:
Off: Turns the ignition off.
• Without applying the brake pedal,
press and release the button once
when the ignition is in the on mode, or
when the engine is running but your
vehicle is not moving.
On:
All electrical circuits are operational
and the warning lamps and indicators
illuminate.
• Without applying the brake pedal,
press and release the button twice.
Start:
Starts the engine.
• Press the brake pedal, and then press
the button for any length of time. An
indicator light on the button illuminates
when then ignition is on and when the
engine starts.
STARTING A GASOLINE
ENGINE
When you start the engine, the idle speed
increases. This helps to warm up the
engine. If the engine idle speed does not
slow down automatically, have your
vehicle checked by an authorized dealer. Note:
You can crank the engine for a total
of 60 seconds without the engine starting
before the starting system temporarily
disables. The 60 seconds does not have to
be all at once. For example, if you crank the
engine three times for 20 seconds each
time, without the engine starting, you
reached the 60-second time limit. A
message appears in the information display
alerting you that you exceeded the cranking
time. You cannot attempt to start the
engine for at least 15 minutes. After 15
minutes, you are limited to a 15-second
engine cranking time. You need to wait 60
minutes before you can crank the engine for
60 seconds again.
Before starting your vehicle, check the
following:
• Make sure all occupants have fastened
their safety belts.
• Make sure the headlamps and
electrical accessories are off.
• Make sure the parking brake is on.
• Make sure the transmission is in park
(P).
• Switch the ignition on. For vehicles with
a keyless ignition, see the following
instructions.
Vehicles with an Ignition Key
Note: Do not touch the accelerator pedal.
1. Fully depress the brake pedal.
2. Turn the key to the start position to start the engine.
Note: The engine may continue cranking
for up to 15 seconds or until it starts.
Note: If you cannot start the engine on the
first try, wait for a short period and try again.
Vehicles with Keyless Start
Note: Do not touch the accelerator pedal.
146
Expedition (TB7) Canada/United States of America, enUSA, First Printing Starting and Stopping the EngineE144447
Page 151 of 421
Automatic Engine Shutdown
For vehicles with a keyless ignition, this
feature automatically shuts down the
engine if it has been idling for an extended
period. The ignition also turns off in order
to save battery power. Before your vehicle
shuts down, a message appears in the
information display showing a timer
counting down from 30 seconds. If you do
not intervene within 30 seconds, your
vehicle shuts down. Another message
appears in the information display to
inform you that your vehicle has shut down
to save fuel. Start your vehicle as you
normally do.
Automatic Engine Shutdown Override
Note:
You cannot permanently switch off
the automatic shutdown feature. When you
switch it off temporarily, it turns on at the
next ignition cycle.
You can stop the shutdown, or reset the
timer, at any point before the 30-second
countdown has expired by doing any of the
following:
• You can reset the timer by interacting
with your vehicle, for example pressing
the brake or accelerator pedal.
• You can temporarily switch off the
shutdown feature any time the ignition
is on using the information display. See
Information Displays (page 92). The
feature only remains off for the current
ignition cycle.
• During the 30-second countdown, the
system prompts you to press OK or
RESET to temporarily switch the
feature off for the current ignition cycle
only.
Stopping the Engine When Your
Vehicle is Stationary
Vehicles with an Ignition Key
1. Shift into park (P). 2. Switch the ignition off.
3. Apply the parking brake.
Vehicles with Keyless Start
1. Shift into park (P).
2. Press the push button ignition switch.
3. Apply the parking brake.
Note:
The ignition, all electrical circuits and
all warning lamps and indicators will be
turned off.
Note: If the engine is idling for 30 minutes,
the ignition and engine automatically shut
down.
Stopping the Engine When Your
Vehicle is Moving WARNING
Switching off the engine when the
vehicle is still moving will result in a
loss of brake and steering assistance.
The steering will not lock, but higher effort
will be required. When the ignition is
switched off, some electrical circuits,
including air bags, warning lamps and
indicators may also be off. If the ignition
was turned off accidentally, you can shift
into neutral (N) and re-start the engine. Vehicles with an Ignition Key
1.
Shift into neutral and use the brakes to
bring your vehicle to a safe stop.
2. When your vehicle has stopped, shift into park (P) and switch the ignition
off.
3. Apply the parking brake.
Vehicles with Keyless Start
1. Shift into neutral and use the brakes to
bring your vehicle to a safe stop.
2. When your vehicle has stopped, shift into park (P).
148
Expedition (TB7) Canada/United States of America, enUSA, First Printing Starting and Stopping the Engine
Page 164 of 421
In order to prevent the engine from running
at too low an RPM, which may cause it to
stall, SelectShift will still automatically
make some downshifts if it has determined
that you have not downshifted in time.
Although SelectShift will make some
downshifts for you, it will still allow you to
downshift at any time as long as the
SelectShift determines that damage will
not be caused to the engine from
over-revving.
SelectShift will not automatically upshift,
even if the engine is approaching the RPM
limit. It must be shifted manually by
pressing the + button.
Note:
Engine damage may occur if you
maintain excessive engine revving without
shifting.
The SelectShift Automatic transmission
feature has two modes: PRS and M mode.
Progressive Range Selection (PRS)
Progressive Range Selection gives you the
ability to lockout gears from the automatic
shifting range. This may provide you with
an improved driving experience (for
example, in slippery conditions or when
experiencing a steep grade). With the gearshift lever in drive (D), press
the – button to active PRS. The available
and selected gears are indicated on the
instrument cluster.
All available gears will display with the
current gear indicated. Press the – button
again to lock out gears beginning with the
highest gear. Example: press the – button
twice to lock out 6th and 5th gears. Only
the available gears will display and the
transmission will automatically shift
between the available gears. Press the +
button to unlock gears to allow the
transmission to shift to higher gears. The
transmission will shift automatically within
the gear range you select.
Manual (M)
Moving the gearshift lever to the manual
(M) position will allow you to manually
select the gear you desire. Only the current
gear will display. Use the buttons on the
gearshift lever to manually select gears.
Press the + button to upshift or the –
button to downshift. Return the
transmission to a different gearshift
position to deactivate manual control.
Upshift to the recommended shift speeds
according to the following chart:
Upshifts when accelerating (recommended for best fuel economy)
Shift from:15 mph (24 km/h)
1 – 2
25 mph (40 km/h)
2 – 3
40 mph (64 km/h)
3 – 4
45 mph (72 km/h)
4 – 5
50 mph (80 km/h)
5 – 6
161
Expedition (TB7) Canada/United States of America, enUSA, First Printing Transmission
Page 167 of 421
USING FOUR-WHEEL DRIVE
WARNING
For important information regarding
safe operation of this type of vehicle,
see General Information in the
Wheels and Tires chapter. Note:
Do not use 4H or 4L mode on dry,
hard surfaced roads. Doing so will produce
excessive noise, increase tire wear and may
damage drive components. 4H and 4L mode
is only intended for consistently slippery or
loose surfaces.
Note: If 4L mode is selected while your
vehicle is moving above 3 mph (5 km/h),
the 4WD system will not perform a shift.
This is normal and should be no reason for
concern. Refer to Shifting to or from 4L for
proper operation.
4WD Indicator Lights
The indicator lights illuminate in the
information display in the reconfigurable
telltale (RTT) location under the following
conditions. See
Warning Lamps and
Indicators (page 88).
Note: When a 4X4 system fault is present,
the system will typically remain in whichever
4WD mode was selected prior to the fault
condition occurring. It will not default to 4X2
in all circumstances. When this warning is
displayed, have your vehicle serviced by an
authorized dealer.
4X2 Momentarily illuminates when
2H is selected.
4X4 AUTO Continuously illuminates when
4A is selected. 4X4 HIGH Continuously illuminates when
4H is selected.
4X4 LOW Continuously illuminates when
4L is selected.
4WD Switch Positions WARNING
Utility and four-wheel drive vehicles
are not designed for cornering at
speeds as high as passenger cars any
more than low-slung sports cars are
designed to perform satisfactorily under
off-road conditions. Avoid sharp turns or
abrupt maneuvers in these vehicles. Note:
If your vehicle is equipped with
AdvanceTrac® with RSC®, the system will
automatically turn off the stability
enhancement feature when you shift the
4WD system into 4L (4X4 LOW). You can
manually turn the system off by pressing
the AdvanceTrac button. See Using
Traction Control (page 175). This will
disable the engine management feature,
allowing the vehicle to maintain full power
and enhanced momentum through the
obstacle. The brake traction enhancement
feature will still be enabled.
Note: The Control Trac® selector switch
should not be changed while the rear wheels
are slipping.
164
Expedition (TB7) Canada/United States of America, enUSA, First Printing Four-Wheel Drive
(If Equipped)E181778 E181781 E181779 E181780
Page 168 of 421
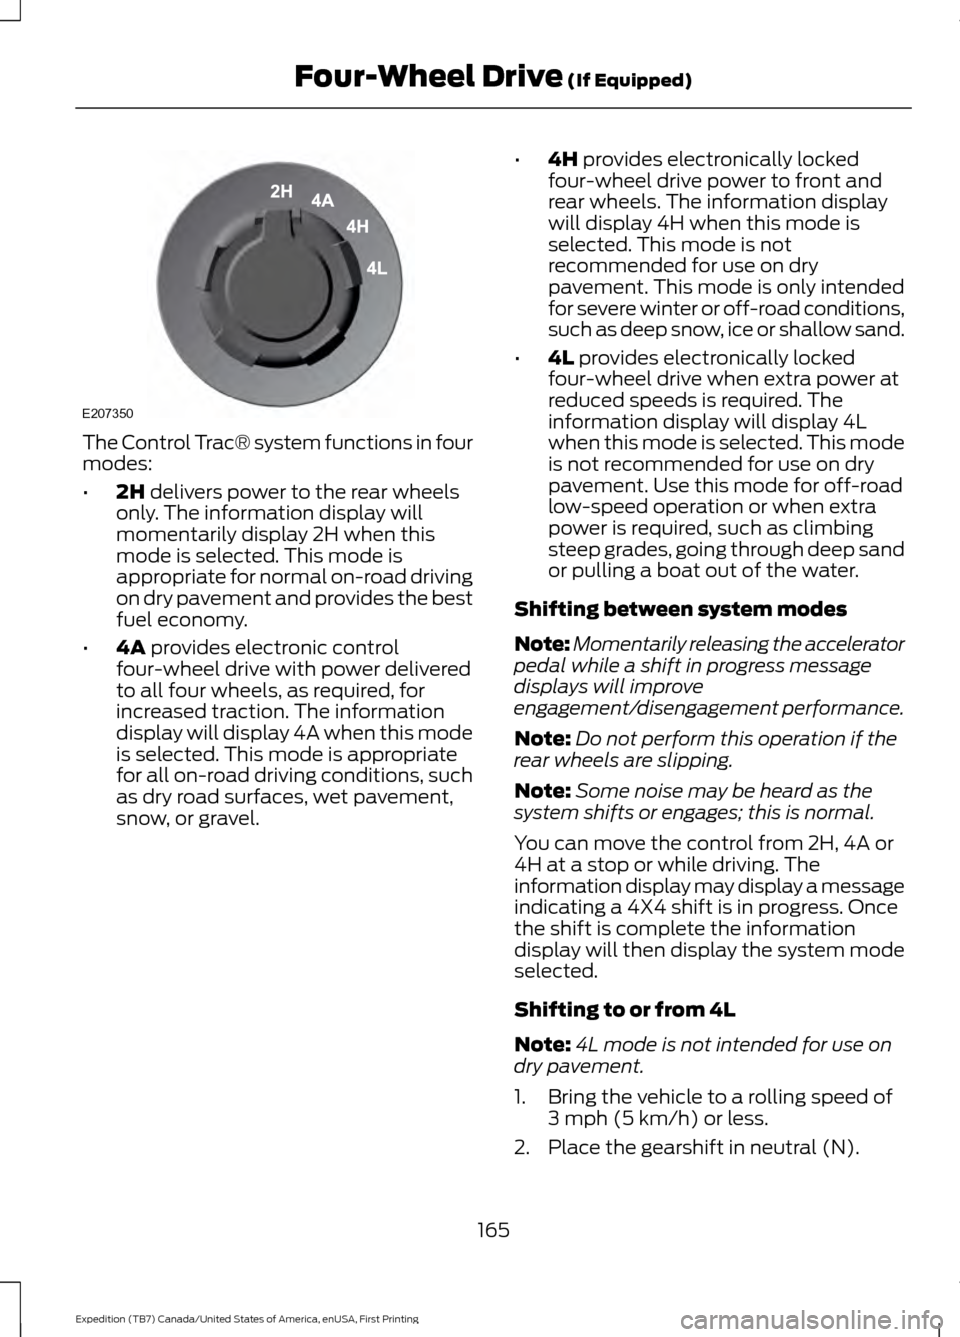
The Control Trac® system functions in four
modes:
•
2H delivers power to the rear wheels
only. The information display will
momentarily display 2H when this
mode is selected. This mode is
appropriate for normal on-road driving
on dry pavement and provides the best
fuel economy.
• 4A
provides electronic control
four-wheel drive with power delivered
to all four wheels, as required, for
increased traction. The information
display will display 4A when this mode
is selected. This mode is appropriate
for all on-road driving conditions, such
as dry road surfaces, wet pavement,
snow, or gravel. •
4H
provides electronically locked
four-wheel drive power to front and
rear wheels. The information display
will display 4H when this mode is
selected. This mode is not
recommended for use on dry
pavement. This mode is only intended
for severe winter or off-road conditions,
such as deep snow, ice or shallow sand.
• 4L
provides electronically locked
four-wheel drive when extra power at
reduced speeds is required. The
information display will display 4L
when this mode is selected. This mode
is not recommended for use on dry
pavement. Use this mode for off-road
low-speed operation or when extra
power is required, such as climbing
steep grades, going through deep sand
or pulling a boat out of the water.
Shifting between system modes
Note: Momentarily releasing the accelerator
pedal while a shift in progress message
displays will improve
engagement/disengagement performance.
Note: Do not perform this operation if the
rear wheels are slipping.
Note: Some noise may be heard as the
system shifts or engages; this is normal.
You can move the control from 2H, 4A or
4H at a stop or while driving. The
information display may display a message
indicating a 4X4 shift is in progress. Once
the shift is complete the information
display will then display the system mode
selected.
Shifting to or from 4L
Note: 4L mode is not intended for use on
dry pavement.
1. Bring the vehicle to a rolling speed of 3 mph (5 km/h)
or less.
2. Place the gearshift in neutral (N).
165
Expedition (TB7) Canada/United States of America, enUSA, First Printing Four-Wheel Drive
(If Equipped)E207350
Page 169 of 421
3. Move the 4WD switch to the desired
mode.
The information display will display a
message indicating a 4X4 shift is in
progress. The information display will then
display the system mode selected.
If any of the above shift conditions are not
met, the shift will not occur and the
information display will display information
guiding the driver through the proper range
of shifting procedures.
If SHIFT DELAYED PULL FORWARD is
displayed in the information display,
transfer case gear tooth blockage is
present. To alleviate this condition, place
the transmission in a forward gear, move
the vehicle forward approximately
5 ft
(2 m), and shift the transmission back to
neutral (N) to allow the transfer case to
complete the range shift.
How Your Vehicle Differs From
Other Vehicles WARNING
Vehicles with a higher center of
gravity such as utility and four-wheel
drive vehicles handle differently than
vehicles with a lower center of gravity.
Utility and four-wheel drive vehicles are
not designed for cornering at speeds as
high as passenger cars any more than
low-slung sports cars are designed to
perform satisfactorily under off-road
conditions. Avoid sharp turns, excessive
speed and abrupt maneuvers in these
vehicles. Failure to drive cautiously could
result in an increased risk of loss of vehicle
control, vehicle rollover, personal injury and
death. Truck and utility vehicles can differ from
some other vehicles. Your vehicle may be
higher to allow it to travel over rough
terrain without getting hung up or
damaging underbody components. The differences that make your vehicle so
versatile also make it handle differently
than an ordinary passenger car.
Maintain steering wheel control at all
times, especially in rough terrain. Since
sudden changes in terrain can result in
abrupt steering wheel motion, make sure
you grip the steering wheel from the
outside. Do not grip the spokes.
Drive cautiously to avoid vehicle damage
from concealed objects such as rocks and
stumps.
You should either know the terrain or
examine maps of the area before driving.
Map out your route before driving in the
area. To maintain steering and braking
control of your vehicle, you must have all
four wheels on the ground and they must
be rolling, not sliding or spinning.
Driving Off-Road With Truck and
Utility Vehicles
Note:
On some models, the initial shift from
two-wheel drive to four-wheel drive while
your vehicle is moving can cause some
momentary clunk and ratcheting sounds.
This is the front drivetrain coming up to
speed and the automatic locking hubs
engaging and is not cause for concern.
Note: Your vehicle may be equipped with
a front air dam that can become damaged
(due to reduced ground clearance) when
taking your vehicle off-road. You may
remove this air dam by removing eight bolts.
Four-wheel drive vehicles are specially
equipped for driving on sand, snow, mud
and rough terrain and have operating
characteristics that are somewhat
different from conventional vehicles, both
on and off the road.
166
Expedition (TB7) Canada/United States of America, enUSA, First Printing Four-Wheel Drive
(If Equipped)
Page 176 of 421
PARKING BRAKE
WARNING
Always set the parking brake fully
and make sure the transmission is
placed in park (P). Failure to set the
parking brake and engage park could result
in vehicle roll-away, property damage or
bodily injury. Turn the ignition to the lock
position and remove the key whenever you
leave your vehicle. Apply the parking brake whenever your
vehicle is parked. Press the pedal
downward to set the parking brake. The
brake warning lamp in the instrument
cluster will illuminate and remains
illuminated until the parking brake is
released.
To release, pull the brake release lever
located at the lower left side of the
instrument panel.
If you are parking your vehicle on a grade
or with a trailer, press and hold the brake
pedal down, then set the parking brake.
There may be a little vehicle movement as
the parking brake sets to hold the vehicle's
weight. This is normal and should be no
reason for concern. If needed, press and
hold the service brake pedal down, then
try reapplying the parking brake. Chock the
wheels if required. If the parking brake
cannot hold the weight of the vehicle, the
parking brake may need to be serviced or
the vehicle may be overloaded.
HILL START ASSIST
WARNINGS
The system does not replace the
parking brake. When you leave your
vehicle, always apply the parking
brake and shift the transmission into park
(P) (automatic transmission) or first gear
(1) (manual transmission). WARNINGS
You must remain in your vehicle once
you have activated the system.
During all times, you are responsible
for controlling your vehicle,
supervising the system and
intervening, if required. If the engine is revved excessively, or
if a malfunction is detected, the
system will be deactivated.
The system makes it easier to pull away
when your vehicle is on a slope without the
need to use the parking brake.
When the system is active, your vehicle will
remain stationary on the slope for two to
three seconds after you release the brake
pedal. This allows you time to move your
foot from the brake to the accelerator
pedal. The brakes release automatically
when the engine has sufficient torque to
prevent your vehicle from rolling down the
grade. This is an advantage when pulling
away on a slope, for example from a car
park ramp, traffic lights or when reversing
uphill into a parking space.
The system will activate automatically on
any slope that will cause significant vehicle
rollback. For vehicles with a manual
transmission, you can switch this feature
off using the information display. See
Information Displays (page 92). The
system will remain on or off depending on
how it was last set.
Note: There is no warning lamp to indicate
the system is either on or off.
Note: If your vehicle is equipped with Auto
Hold, Hill Start Assist will not be available
while Auto Hold is active.
173
Expedition (TB7) Canada/United States of America, enUSA, First Printing Brakes
Page 177 of 421
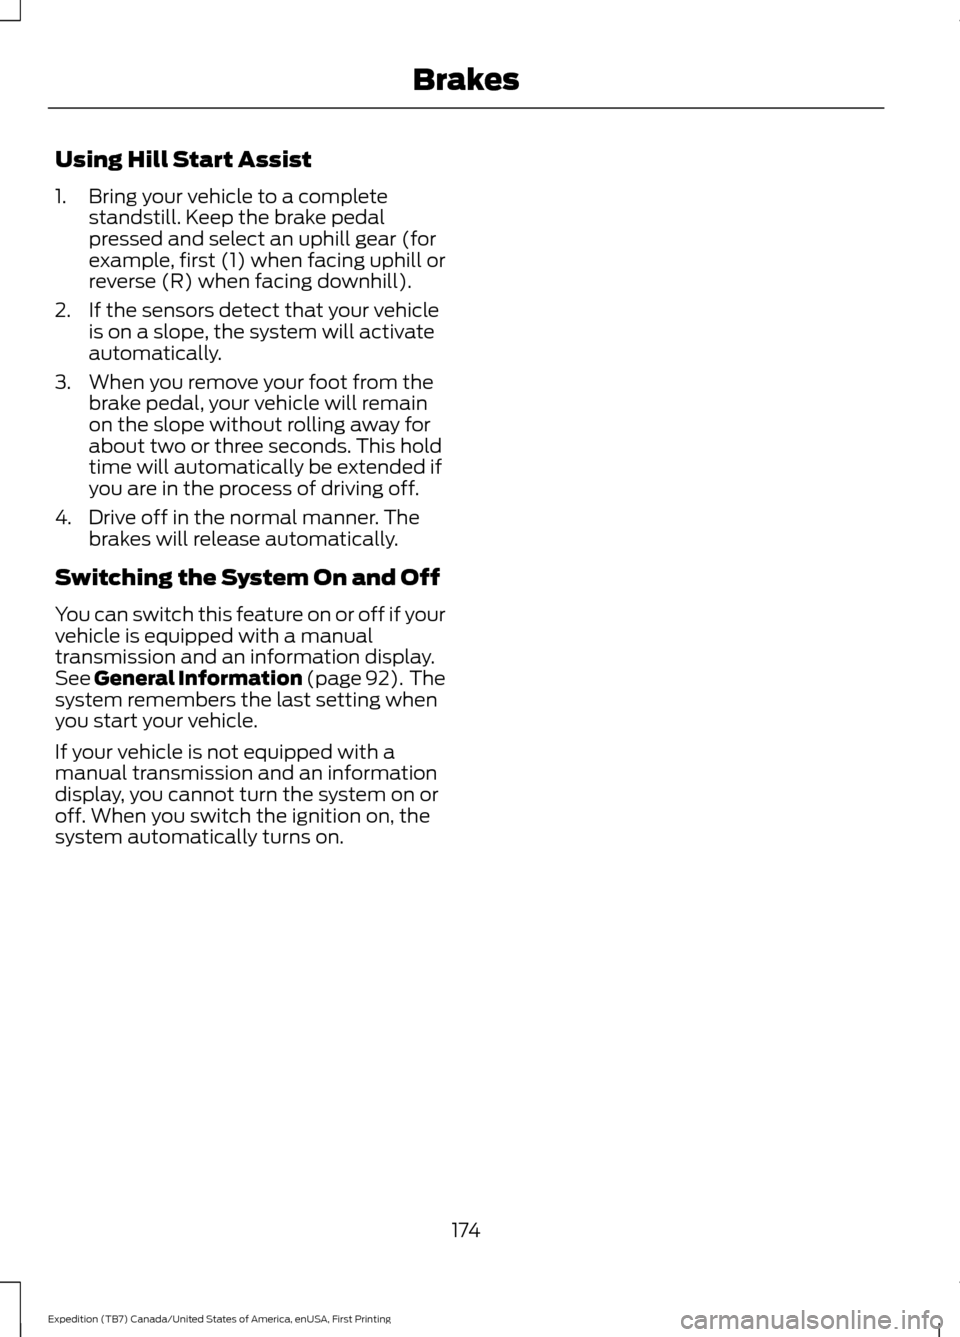
Using Hill Start Assist
1. Bring your vehicle to a complete
standstill. Keep the brake pedal
pressed and select an uphill gear (for
example, first (1) when facing uphill or
reverse (R) when facing downhill).
2. If the sensors detect that your vehicle is on a slope, the system will activate
automatically.
3. When you remove your foot from the brake pedal, your vehicle will remain
on the slope without rolling away for
about two or three seconds. This hold
time will automatically be extended if
you are in the process of driving off.
4. Drive off in the normal manner. The brakes will release automatically.
Switching the System On and Off
You can switch this feature on or off if your
vehicle is equipped with a manual
transmission and an information display.
See General Information (page 92). The
system remembers the last setting when
you start your vehicle.
If your vehicle is not equipped with a
manual transmission and an information
display, you cannot turn the system on or
off. When you switch the ignition on, the
system automatically turns on.
174
Expedition (TB7) Canada/United States of America, enUSA, First Printing Brakes
Page 183 of 421
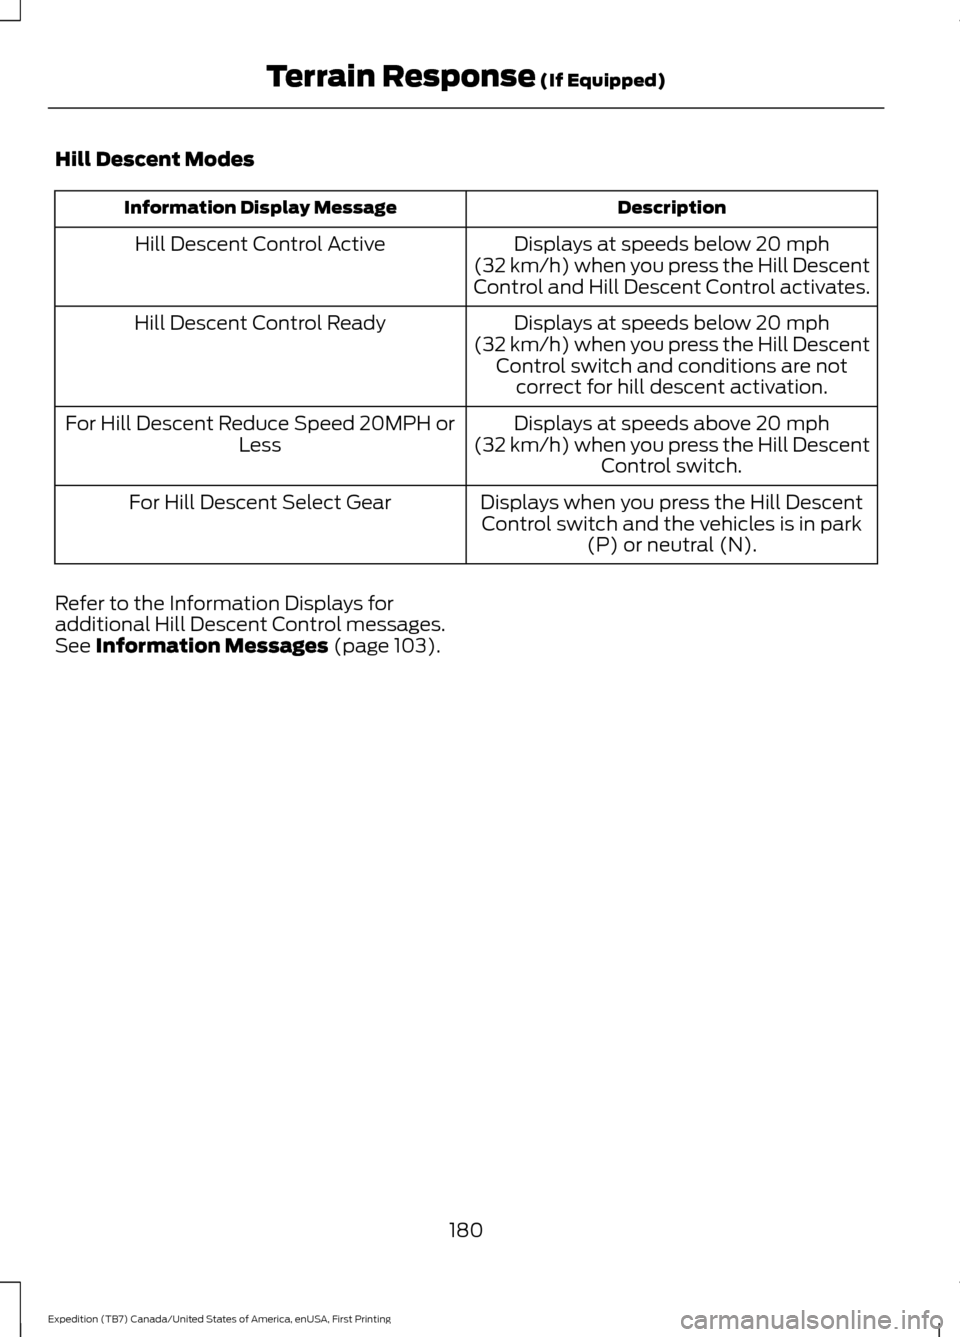
Hill Descent Modes
Description
Information Display Message
Displays at speeds below 20 mph
(32 km/h) when you press the Hill Descent
Control and Hill Descent Control activates.
Hill Descent Control Active
Displays at speeds below
20 mph
(32 km/h) when you press the Hill Descent
Control switch and conditions are not correct for hill descent activation.
Hill Descent Control Ready
Displays at speeds above
20 mph
(32 km/h) when you press the Hill Descent Control switch.
For Hill Descent Reduce Speed 20MPH or
Less
Displays when you press the Hill DescentControl switch and the vehicles is in park (P) or neutral (N).
For Hill Descent Select Gear
Refer to the Information Displays for
additional Hill Descent Control messages.
See
Information Messages (page 103).
180
Expedition (TB7) Canada/United States of America, enUSA, First Printing Terrain Response
(If Equipped)