change wheel FORD EXPEDITION 2016 3.G Quick Reference Guide
[x] Cancel search | Manufacturer: FORD, Model Year: 2016, Model line: EXPEDITION, Model: FORD EXPEDITION 2016 3.GPages: 10, PDF Size: 3.01 MB
Page 8 of 10

comfort
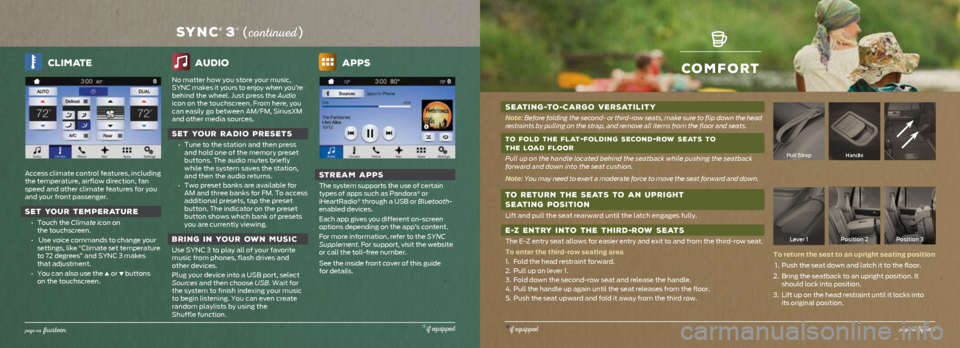
SEATING-TO -CARGO VERSATILITY
Note: Before folding the second- or third-row seats, make sure to flip down th\
e head
restraints by pulling on the strap, and remove all items from the floor \
and seats.
TO FOLD THE FLAT
-FOLDING SECOND-ROW SEATS TO
THE LOAD FLOOR
Pull up on the handle located behind the seatback while pushing the seat\
back
forward and down into the seat cushion.
Note: You may need to exert a moderate force to move the seat forward and dow\
n.
TO RETURN THE SEATS TO AN UPRIGHT
SEATING POSITION
Lift and pull the seat rearward until the latch engages fully.
E -Z ENTRY INTO THE THIRD -ROW SEATS
The E-Z entry seat allows for easier entry and exit to and from the thir\
d-row seat.
To enter the third-row seating area
1. Fold the head restraint forward.
2. Pull up on lever 1.
3. Fold down the second-row seat and release the handle.
4. Pull the handle up again until the seat releases from the floor.
5. Push the seat upward and fold it away from the third row.
Pull StrapHandle
Lever 1 Position 2 Position 3
To return the seat to an upright seating position
1. Push the seat down and latch it to the floor.
2. Bring the seatback to an upright position. It
should lock into position.
3. Lift up on the head restraint until it locks into
its original position.
*if equippedpage no. fifte en
Climate
Access climate control features, including
the temperature, airflow direction, fan
speed and other climate features for you
and your front passenger.
SET YOUR TEMPERATURE
• Touch the Climate icon on
the touchscreen.
• Use voice commands to change your
settings, like “Climate set temperature
to 72 degrees” and SYNC 3 makes
that adjustment.
• You can also use the
▲ or ▼ buttons
on the touchscreen.
audio
No matter how you store your music,
SYNC makes it yours to enjoy when you’re
behind the wheel. Just press the Audio
icon on the touchscreen. From here, you
can easily go between AM/FM, SiriusXM
and other media sources.
SET YOUR RADIO PRESETS
• Tune to the station and then press
and hold one of the memory preset
buttons. The audio mutes briefly
while the system saves the station,
and then the audio returns.
• Two preset banks are available for
AM and three banks for FM. To access
additional presets, tap the preset
button. The indicator on the preset
button shows which bank of presets
you are currently viewing.
BRING IN YOUR OWN MUSIC
Use SYNC 3 to play all of your favorite
music from phones, flash drives and
other devices.
Plug your device into a USB port, select
Sources and then choose USB. Wait for
the system to finish indexing your music
to begin listening. You can even create
random playlists by using the
Shuffle function.
Apps
STREAM APPS
The system supports the use of certain
types of apps such as Pandora® or
iHeartRadio® through a USB or Bluetooth-
enabled devices.
Each app gives you different on-screen
options depending on the app’s content.
For more information, refer to the SYNC
Supplement. For support, visit the website
or call the toll-free number.
See the inside front cover of this guide
for details.
SYNC® 3* ( co ntinued )
page no. fo urteen*if equipped
Page 10 of 10

SELECTSHIFT AUTOMATICTM TRANSMISSION *
Gives you the ability to manually change gears if you like. To use,
move the gearshift lever from drive (D) to manual (M).
• Press the (+) button to upshift.
• Press the (–) button to downshift.
To return back to automatic shifts, move the gearshift lever from
manual (M) to a different gearshift position.
EASY FUEL® SYSTEM
When fueling your vehicle
1. Put your vehicle in park (P) and switch the ignition off.
2. Open the fuel filler door.
3. Slowly insert the fuel filler nozzle fully into the fuel system,
and leave the nozzle fully inserted until you are done pumping.
4. Wait at least 10 seconds before removing the fuel pump
nozzle to allow any residual fuel to drain into the fuel tank.
When refueling the vehicle fuel tank from a fuel container,
use the plastic funnel located in the spare wheel storage tray.
Clean the funnel or properly dispose of it.
Note: Do not use aftermarket funnels as they will not work with
the Easy Fuel system and may cause damage. You can purchase
extra funnels from an authorized dealer if you choose to dispose
of the funnel.
FUEL TYPE AND FUEL TANK CAPACITY
Depending on your vehicle, your fuel tank has a capacity of
either 28 gallons (106L) or 33.5 gallons (126.8L).
Use only UNLEADED gasoline blended with a maximum of
15% ethanol and a minimum of an 87 octane rating. Do not use
E85 (ethanol), diesel, fuel-methanol, leaded fuel or any other
fuel because it could damage or impair the emission
control system.
TIRE PRESSURE MONITORING SYSTEM
Your vehicle is equipped with a Tire Pressure Monitoring
System (TPMS) that displays a low tire pressure warning light
when one or more of your tires are significantly under-inflated.
If this happens, stop and check your tires as soon as possible.
Inflate them to the proper pressure. Refer to the Tire Pressure
Monitoring System section in the Wheels and Tires chapter of
your Owner’s Manual for more information.
LOCATION OF SPARE TIRE AND TOOLS
The temporary spare tire is located under the vehicle, just
forward of the rear bumper. The temporary spare is for
emergency use only and you should replace it as soon as
possible. The jack and tools are under the access panel in the
floor behind the rear seat. Make sure to switch off the power
running boards* prior to jacking, hoisting or towing your vehicle.
Refer to the Wheels and Tires chapter in your Owner’s Manual.
CONVENIENCE
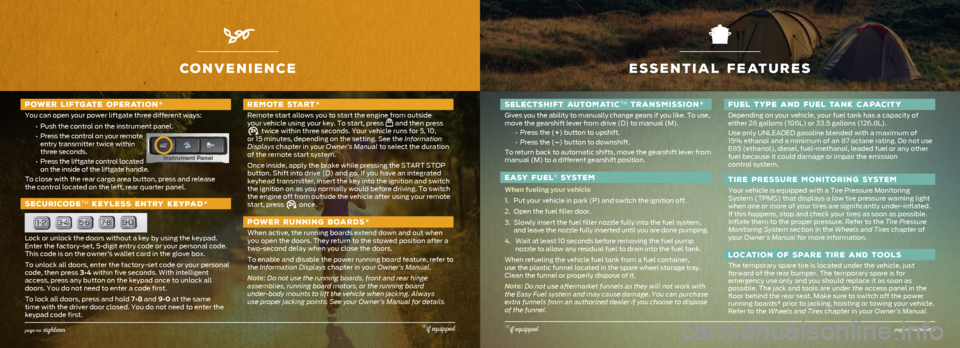
POWER LIFTGATE OPERATION*
You can open your power liftgate three different ways:
• Push the control on the instrument panel.
• Press the control on your remote
entry transmitter twice within
three seconds.
• Press the liftgate control located
on the inside of the liftgate handle.
To close with the rear cargo area button, press and release
the control located on the left, rear quarter panel.
SECURICODETM KEYLESS ENTRY KEYPAD *
Lock or unlock the doors without a key by using the keypad.
Enter the factory-set, 5-digit entry code or your personal code.
This code is on the owner’s wallet card in the glove box.
To unlock all doors, enter the factory-set code or your personal
code, then press 3•4 within five seconds. With intelligent
access, press any button on the keypad once to unlock all
doors. You do not need to enter a code first.
To lock all doors, press and hold 7•8 and 9•0 at the same
time with the driver door closed. You do not need to enter the
keypad code first.
REMOTE START*
Remote start allows you to start the engine from outside
your vehicle using your key. To start, press and then press twice within three seconds. Your vehicle runs for 5, 10,
or 15 minutes, depending on the setting. See the Information
Displays chapter in your Owner’s Manual to select the duration
of the remote start system.
Once inside, apply the brake while pressing the START STOP
button. Shift into drive (D) and go. If you have an integrated
keyhead transmitter, insert the key into the ignition and switch
the ignition on as you normally would before driving. To switch
the engine off from outside the vehicle after using your remote
start, press
once.
POWER RUNNING BOARDS *
When active, the running boards extend down and out when
you open the doors. They return to the stowed position after a
two-second delay when you close the doors.
To enable and disable the power running board feature, refer to
the Information Displays chapter in your Owner’s Manual.
Note: Do not use the running boards, front and rear hinge
assemblies, running board motors, or the running board
under-body mounts to lift the vehicle when jacking. Always
use proper jacking points. See your Owner’s Manual for details.
ESSENTIAL FEATURES
*if equippedpage no. nineteenpage no. eighteen*if equipped
Instrument Panel