Gas FORD EXPEDITION 2021 Owners Manual
[x] Cancel search | Manufacturer: FORD, Model Year: 2021, Model line: EXPEDITION, Model: FORD EXPEDITION 2021Pages: 574, PDF Size: 8.33 MB
Page 7 of 574

Wireless Accessory Charger Precautions
........................................................................\
180
Locating the Wireless Accessory Charger ........................................................................\
180
Charging a Wireless Device .....................
180
Storage Compartments
Center Console .............................................
182
Overhead Console .......................................
182
Starting and Stopping the Engine
General Information ...................................
183
Ignition Switch ..............................................
183
Keyless Starting ...........................................
183
Starting a Gasoline Engine ......................
184
Engine Block Heater ...................................
187
Unique Driving Characteristics
Auto-Start-Stop ..........................................
189
Fuel and Refueling
Safety Precautions ......................................
192
Fuel Quality ....................................................
192
Fuel Filler Funnel Location .......................
193
Running Out of Fuel ...................................
193
Refueling .........................................................
195
Fuel Consumption .......................................
197
Engine Emission Control
Emission Law ................................................
199
Catalytic Converter ....................................
200
Transmission
Automatic Transmission .........................
203
Four-Wheel Drive
Using Four-Wheel Drive ............................
210Rear Axle
Limited Slip Differential
............................
218
Brakes
General Information ...................................
219
Hints on Driving With Anti-Lock Brakes ........................................................................\
.
219
Electric Parking Brake ...............................
220
Hill Start Assist .............................................
221
Traction Control
Principle of Operation ...............................
223
Using Traction Control ..............................
223
Stability Control
Principle of Operation ...............................
224
Using Stability Control ..............................
225
Hill Descent Control
Principle of Operation ................................
227
Using Hill Descent Control .......................
227
Parking Aids
Principle of Operation ...............................
228
Rear Parking Aid ..........................................
229
Front Parking Aid ........................................
230
Side Sensing System .................................
232
Active Park Assist .......................................
233
Rear View Camera .....................................
240
360 Degree Camera ..................................
243
Cruise Control
What Is Cruise Control ..............................
246
Switching Cruise Control On and Off ........................................................................\
246
Setting the Cruise Control Speed ........
246
Canceling the Set Speed .........................
247
Resuming the Set Speed .........................
247
Cruise Control Indicators ..........................
247
Using Adaptive Cruise Control ...............
247
4
Expedition (TB8) Canada/United States of America, enUSA, First-Printing Table of Contents
Page 13 of 574
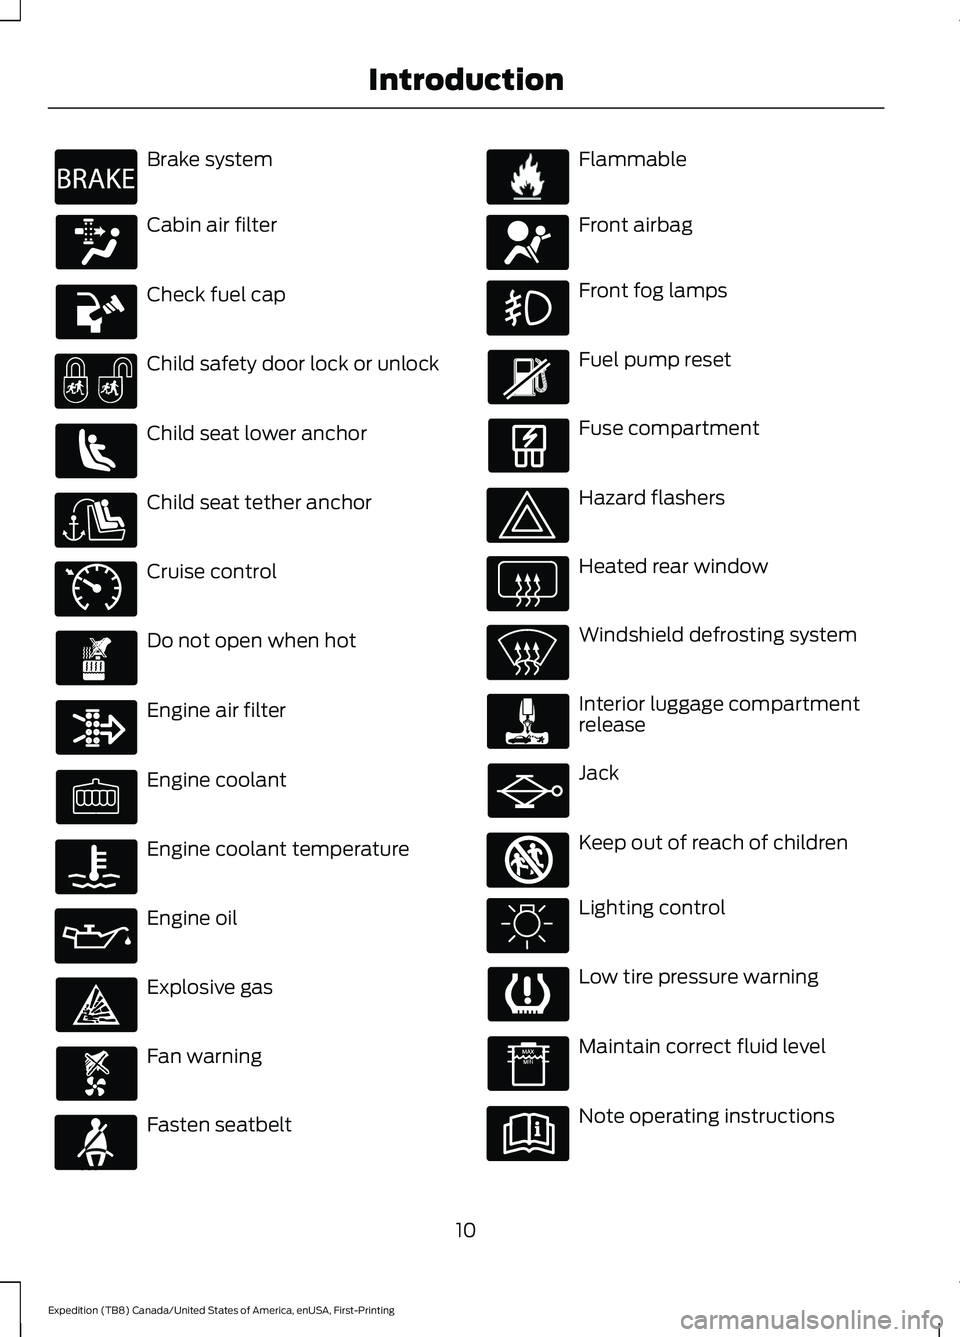
Brake system
Cabin air filter
Check fuel cap
Child safety door lock or unlock
Child seat lower anchor
Child seat tether anchor
Cruise control
Do not open when hot
Engine air filter
Engine coolant
Engine coolant temperature
Engine oil
Explosive gas
Fan warning
Fasten seatbelt Flammable
Front airbag
Front fog lamps
Fuel pump reset
Fuse compartment
Hazard flashers
Heated rear window
Windshield defrosting system
Interior luggage compartment
release
Jack
Keep out of reach of children
Lighting control
Low tire pressure warning
Maintain correct fluid level
Note operating instructions
10
Expedition (TB8) Canada/United States of America, enUSA, First-Printing IntroductionE270480 E71340 E71880 E231160 E67017 E161353
Page 46 of 574
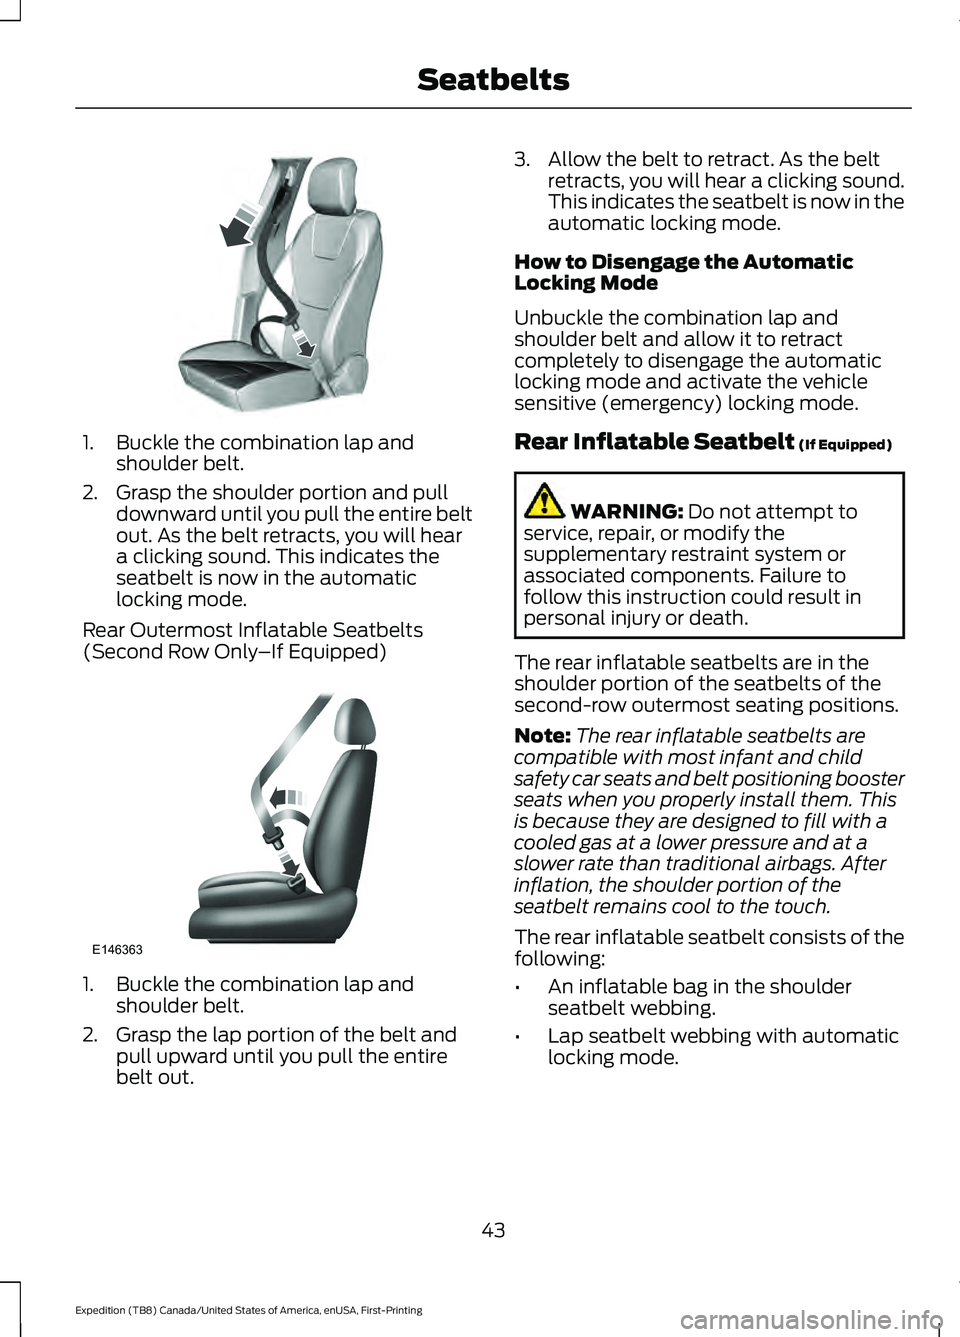
1. Buckle the combination lap and
shoulder belt.
2. Grasp the shoulder portion and pull downward until you pull the entire belt
out. As the belt retracts, you will hear
a clicking sound. This indicates the
seatbelt is now in the automatic
locking mode.
Rear Outermost Inflatable Seatbelts
(Second Row Only –If Equipped)1. Buckle the combination lap and
shoulder belt.
2. Grasp the lap portion of the belt and pull upward until you pull the entire
belt out. 3. Allow the belt to retract. As the belt
retracts, you will hear a clicking sound.
This indicates the seatbelt is now in the
automatic locking mode.
How to Disengage the Automatic
Locking Mode
Unbuckle the combination lap and
shoulder belt and allow it to retract
completely to disengage the automatic
locking mode and activate the vehicle
sensitive (emergency) locking mode.
Rear Inflatable Seatbelt (If Equipped) WARNING:
Do not attempt to
service, repair, or modify the
supplementary restraint system or
associated components. Failure to
follow this instruction could result in
personal injury or death.
The rear inflatable seatbelts are in the
shoulder portion of the seatbelts of the
second-row outermost seating positions.
Note: The rear inflatable seatbelts are
compatible with most infant and child
safety car seats and belt positioning booster
seats when you properly install them. This
is because they are designed to fill with a
cooled gas at a lower pressure and at a
slower rate than traditional airbags. After
inflation, the shoulder portion of the
seatbelt remains cool to the touch.
The rear inflatable seatbelt consists of the
following:
• An inflatable bag in the shoulder
seatbelt webbing.
• Lap seatbelt webbing with automatic
locking mode.
43
Expedition (TB8) Canada/United States of America, enUSA, First-Printing SeatbeltsE142591 E146363
Page 72 of 574
Note:
Not every feature applies to every
vehicle in every market. When they are
available for your vehicle, then they appear
in your information display, providing
choices to switch them on or off, or to select
a more specific setting.
• Various vehicle speed limits so the
MyKey driver cannot exceed certain
speeds. The information display shows
warnings followed by an audible tone
when the MyKey driver reaches the set
speed. You cannot override the set
speed by fully depressing the
accelerator pedal. WARNING: Do not set MyKey
maximum speed limit to a limit that will
prevent the driver from maintaining a
safe speed considering posted speed
limits and prevailing road conditions. The
driver is always responsible to drive in
accordance with local laws and
prevailing conditions. Failure to do so
could result in accident or injury. •
Various vehicle speed reminders so
MyKey drivers know when their vehicle
speed approaches the limits. Warnings
appear in your information display and
a tone sounds when the MyKey drivers
exceed the set vehicle speed.
• The audio system's maximum volume
limits to 45% so MyKey drivers can
concentrate on the road. A message
appears in the information display
when MyKey drivers attempt to exceed
the limited volume. MyKey also
disables the automatic volume control.
Note:
If your vehicle includes an
AM/FM radio or a very basic audio
system, then the radio may not limit.
• Always on setting. This setting forces
certain features to remain on and
active for MyKey drivers. For example,
E911 or emergency assistance and the
do not disturb features stay on even if
a MyKey driver uses the feature's
control to switch it off. When selected,
you will not be able to turn off Advance
Trac or traction control (if your vehicle
has this feature).
CREATING A MYKEY
Use the information display to create a
MyKey:
1. Insert the key you want to program into
the ignition. If your vehicle has a
push-button start, place the remote
control into the backup slot. See
Starting a Gasoline Engine
(page
184).
2. Switch the ignition on.
3. Access the main menu in the information display and then scroll
through the menus to change the
settings of your MyKey. From the
MyKey menu select the option Create
MyKey. See
Information Displays
(page 119).
69
Expedition (TB8) Canada/United States of America, enUSA, First-Printing MyKey
™
Page 120 of 574
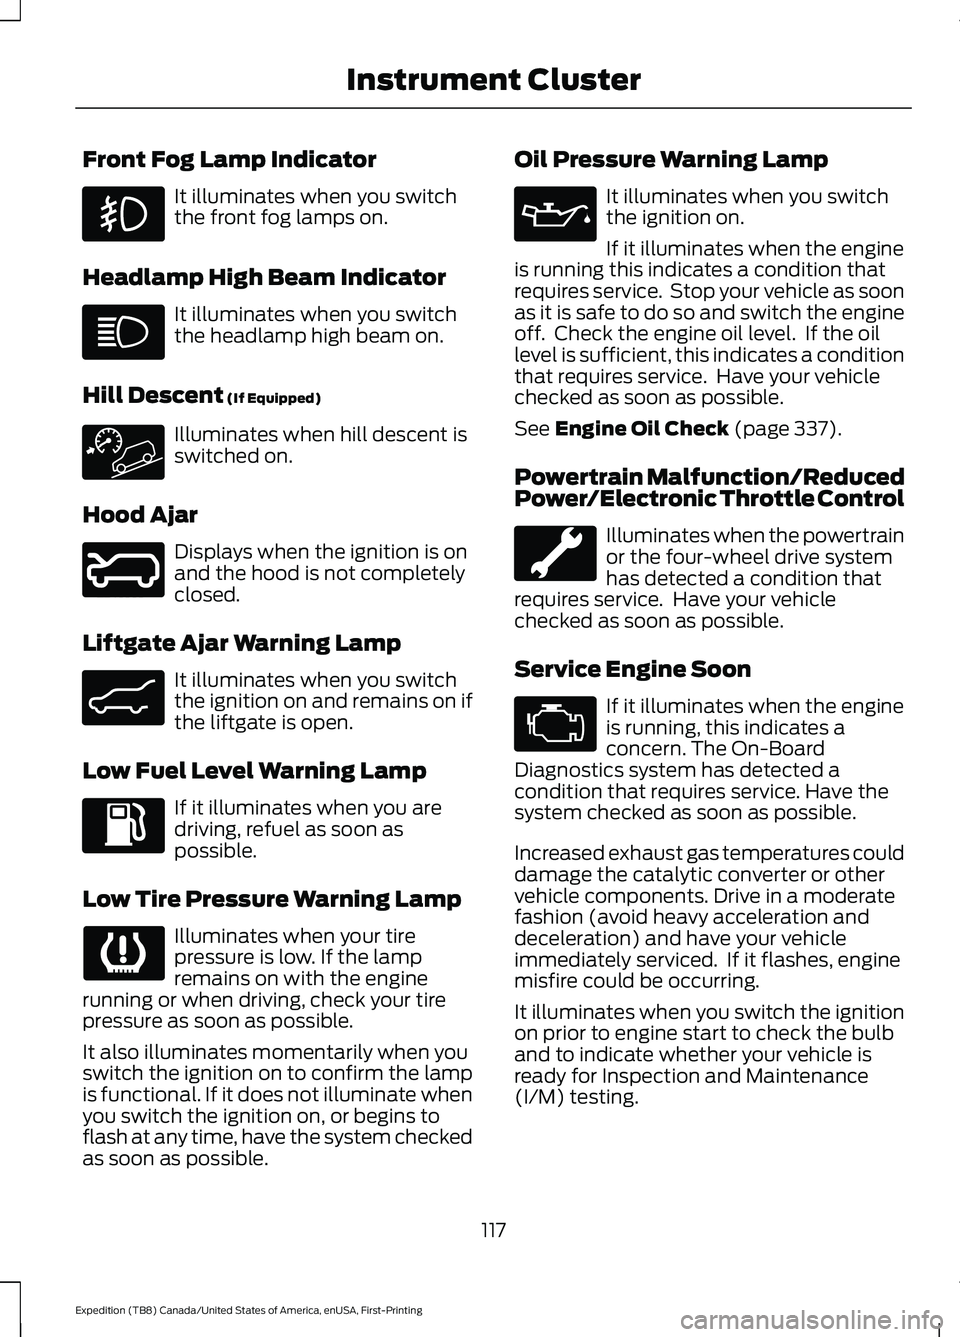
Front Fog Lamp Indicator
It illuminates when you switch
the front fog lamps on.
Headlamp High Beam Indicator It illuminates when you switch
the headlamp high beam on.
Hill Descent (If Equipped) Illuminates when hill descent is
switched on.
Hood Ajar Displays when the ignition is on
and the hood is not completely
closed.
Liftgate Ajar Warning Lamp It illuminates when you switch
the ignition on and remains on if
the liftgate is open.
Low Fuel Level Warning Lamp If it illuminates when you are
driving, refuel as soon as
possible.
Low Tire Pressure Warning Lamp Illuminates when your tire
pressure is low. If the lamp
remains on with the engine
running or when driving, check your tire
pressure as soon as possible.
It also illuminates momentarily when you
switch the ignition on to confirm the lamp
is functional. If it does not illuminate when
you switch the ignition on, or begins to
flash at any time, have the system checked
as soon as possible. Oil Pressure Warning Lamp It illuminates when you switch
the ignition on.
If it illuminates when the engine
is running this indicates a condition that
requires service. Stop your vehicle as soon
as it is safe to do so and switch the engine
off. Check the engine oil level. If the oil
level is sufficient, this indicates a condition
that requires service. Have your vehicle
checked as soon as possible.
See
Engine Oil Check (page 337).
Powertrain Malfunction/Reduced
Power/Electronic Throttle Control Illuminates when the powertrain
or the four-wheel drive system
has detected a condition that
requires service. Have your vehicle
checked as soon as possible.
Service Engine Soon If it illuminates when the engine
is running, this indicates a
concern. The On-Board
Diagnostics system has detected a
condition that requires service. Have the
system checked as soon as possible.
Increased exhaust gas temperatures could
damage the catalytic converter or other
vehicle components. Drive in a moderate
fashion (avoid heavy acceleration and
deceleration) and have your vehicle
immediately serviced. If it flashes, engine
misfire could be occurring.
It illuminates when you switch the ignition
on prior to engine start to check the bulb
and to indicate whether your vehicle is
ready for Inspection and Maintenance
(I/M) testing.
117
Expedition (TB8) Canada/United States of America, enUSA, First-Printing Instrument Cluster E246598 E162453
Page 187 of 574
Note:
A valid passive key must be located
inside your vehicle to switch the ignition on
and start your vehicle.
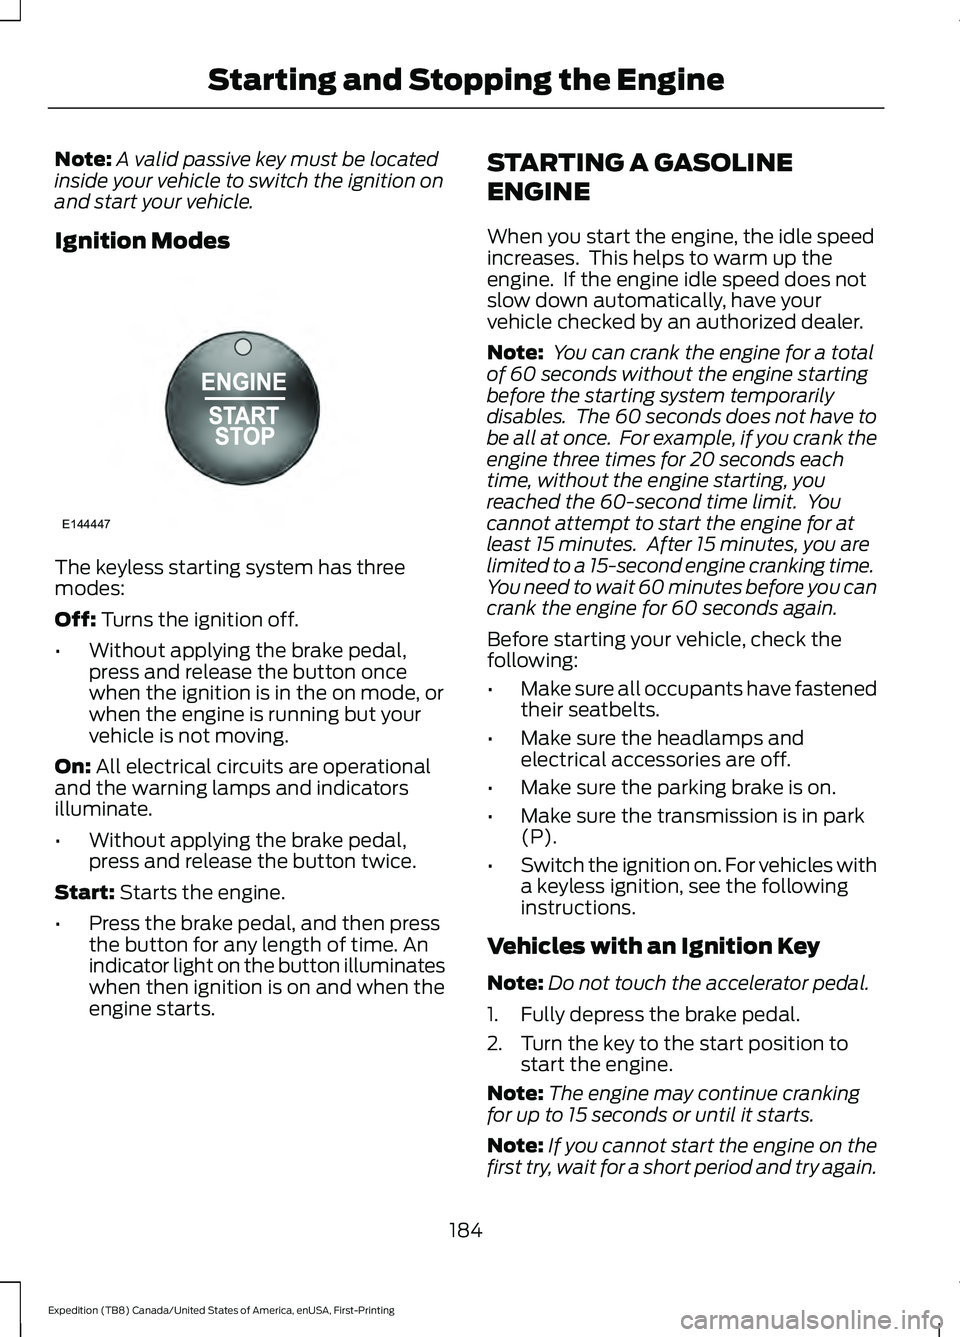
Ignition Modes The keyless starting system has three
modes:
Off: Turns the ignition off.
• Without applying the brake pedal,
press and release the button once
when the ignition is in the on mode, or
when the engine is running but your
vehicle is not moving.
On:
All electrical circuits are operational
and the warning lamps and indicators
illuminate.
• Without applying the brake pedal,
press and release the button twice.
Start:
Starts the engine.
• Press the brake pedal, and then press
the button for any length of time. An
indicator light on the button illuminates
when then ignition is on and when the
engine starts. STARTING A GASOLINE
ENGINE
When you start the engine, the idle speed
increases. This helps to warm up the
engine. If the engine idle speed does not
slow down automatically, have your
vehicle checked by an authorized dealer.
Note:
You can crank the engine for a total
of 60 seconds without the engine starting
before the starting system temporarily
disables. The 60 seconds does not have to
be all at once. For example, if you crank the
engine three times for 20 seconds each
time, without the engine starting, you
reached the 60-second time limit. You
cannot attempt to start the engine for at
least 15 minutes. After 15 minutes, you are
limited to a 15-second engine cranking time.
You need to wait 60 minutes before you can
crank the engine for 60 seconds again.
Before starting your vehicle, check the
following:
• Make sure all occupants have fastened
their seatbelts.
• Make sure the headlamps and
electrical accessories are off.
• Make sure the parking brake is on.
• Make sure the transmission is in park
(P).
• Switch the ignition on. For vehicles with
a keyless ignition, see the following
instructions.
Vehicles with an Ignition Key
Note: Do not touch the accelerator pedal.
1. Fully depress the brake pedal.
2. Turn the key to the start position to start the engine.
Note: The engine may continue cranking
for up to 15 seconds or until it starts.
Note: If you cannot start the engine on the
first try, wait for a short period and try again.
184
Expedition (TB8) Canada/United States of America, enUSA, First-Printing Starting and Stopping the EngineE144447
Page 195 of 574
SAFETY PRECAUTIONS
WARNING: Do not overfill the fuel
tank. The pressure in an overfilled tank
may cause leakage and lead to fuel spray
and fire. WARNING:
The fuel system may
be under pressure. If you hear a hissing
sound near the fuel filler inlet, do not
refuel until the sound stops. Otherwise,
fuel may spray out, which could cause
serious personal injury. WARNING: Fuels can cause serious
injury or death if misused or mishandled. WARNING:
Fuel may contain
benzene, which is a cancer-causing
agent. WARNING: When refueling always
shut the engine off and never allow
sparks or open flames near the fuel tank
filler valve. Never smoke or use a cell
phone while refueling. Fuel vapor is
extremely hazardous under certain
conditions. Avoid inhaling excess fumes.
Follow these guidelines when refueling:
• Extinguish all smoking materials and
any open flames before refueling your
vehicle.
• Always switch the engine off before
refueling.
• Automotive fuels can be harmful or
fatal if swallowed. Fuel is highly toxic
and if swallowed can cause death or
permanent injury. If fuel is swallowed
immediately call a physician, even if no
symptoms are immediately apparent.
The toxic effects of fuel may not be
apparent for hours. •
Avoid inhaling fuel vapors. Inhaling fuel
vapor can lead to eye and respiratory
tract irritation. In severe cases,
excessive or prolonged breathing of
fuel vapor can cause serious illness and
permanent injury.
• Avoid getting fuel in your eyes. If you
splash fuel in your eyes, immediately
remove contact lenses (if worn), flush
with water for 15 minutes and seek
medical attention. Failure to seek
proper medical attention could lead to
permanent injury.
• Fuels can be harmful if absorbed
through the skin. If you splash fuel on
your skin, clothing or both, promptly
remove contaminated clothing and
thoroughly wash your skin with soap
and water. Repeated or prolonged skin
contact causes skin irritation.
• Be particularly careful if you are taking
Antabuse or other forms of Disulfiram
for the treatment of alcoholism.
Breathing fuel vapors could cause an
adverse reaction, serious personal
injury or sickness. Immediately call a
physician if you experience any adverse
reactions.
FUEL QUALITY
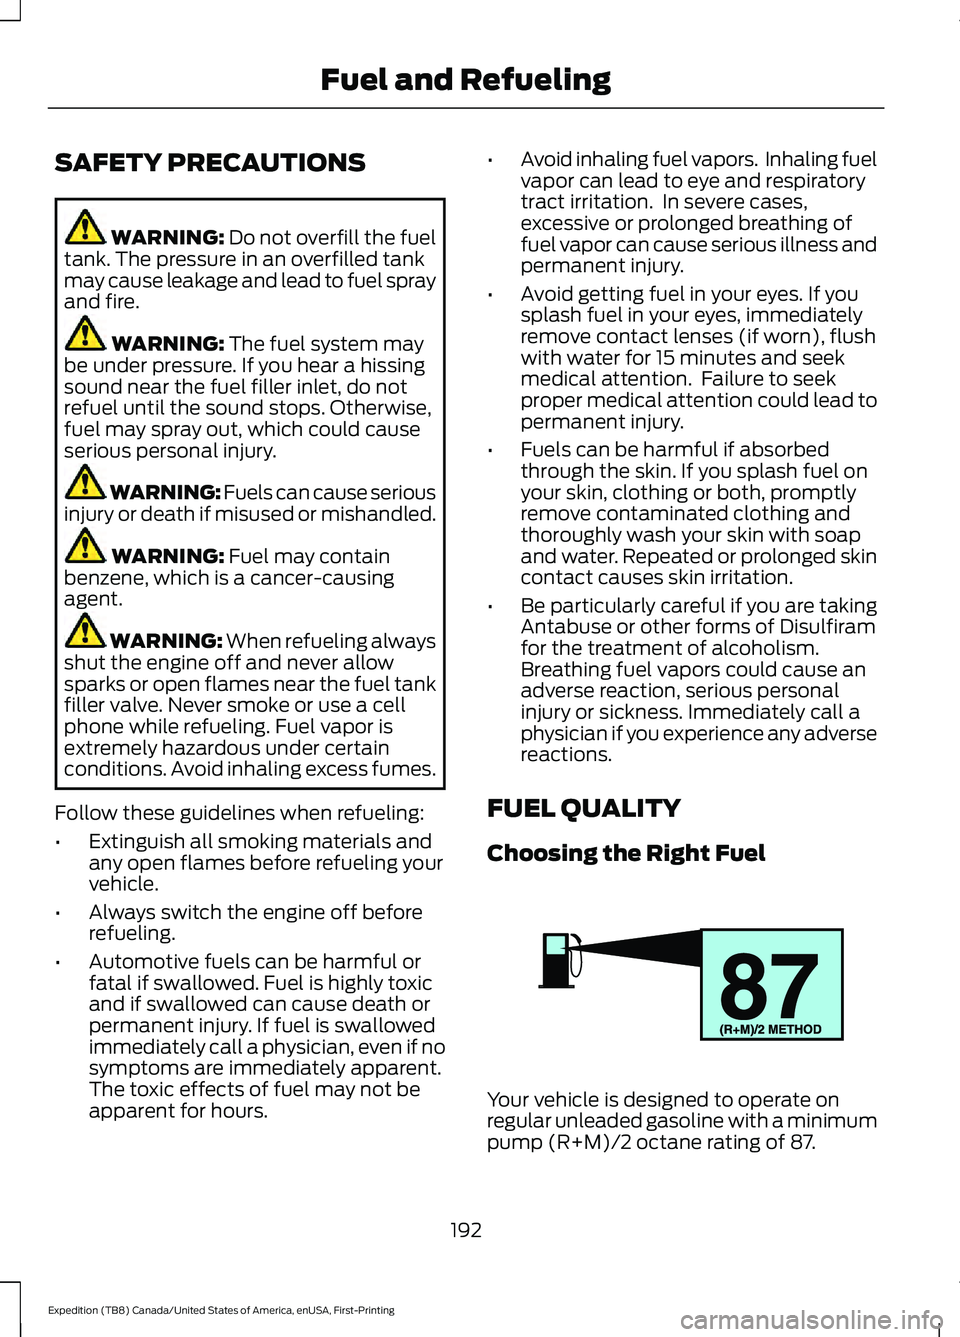
Choosing the Right Fuel Your vehicle is designed to operate on
regular unleaded gasoline with a minimum
pump (R+M)/2 octane rating of 87.
192
Expedition (TB8) Canada/United States of America, enUSA, First-Printing Fuel and RefuelingE161513
Page 196 of 574
Some fuel stations, particularly those in
high altitude areas, offer fuels posted as
regular unleaded gasoline with an octane
rating below 87. The use of these fuels
could result in engine damage that will not
be covered by the vehicle warranty.
For best overall vehicle and engine
performance, premium fuel with an octane
rating of 91 or higher is recommended. The
performance gained by using premium fuel
is most noticeable in hot weather as well
as other conditions, for example when
towing a trailer. See Towing (page 285).
Do not be concerned if the engine
sometimes knocks lightly. However, if the
engine knocks heavily while using fuel with
the recommended octane rating, contact
an authorized dealer to prevent any engine
damage.
We recommend Top Tier detergent
gasolines, where available to help minimize
engine deposits and maintain optimal
vehicle and engine performance. For
additional information, refer to
www.toptiergas.com.
Note: Use of any fuel for which the vehicle
was not designed can impair the emission
control system, cause loss of vehicle
performance, and cause damage to the
engine which may not be covered by the
vehicle Warranty.
Do not use:
• Diesel fuel.
• Fuels containing kerosene or paraffin.
• Fuel containing more than 15% ethanol
or E85 fuel.
• Fuels containing methanol.
• Fuels containing metallic-based
additives, including manganese-based
compounds. •
Fuels containing the octane booster
additive, methylcyclopentadienyl
manganese tricarbonyl (MMT).
• Leaded fuel, using leaded fuel is
prohibited by law.
The use of fuels with metallic compounds
such as methylcyclopentadienyl
manganese tricarbonyl (commonly known
as MMT), which is a manganese-based
fuel additive, will impair engine
performance and affect the emission
control system.
FUEL FILLER FUNNEL
LOCATION
The fuel filler funnel is under the luggage
compartment floor covering.
RUNNING OUT OF FUEL
Running out of fuel can cause damage not
covered by the vehicle Warranty.
If your vehicle runs out of fuel:
• Add a minimum of
1.3 gal (5 L) of fuel
to restart the engine.
• You may need to switch the ignition
from off to on several times after
refueling to allow the fuel system to
pump the fuel from the tank to the
engine. When restarting, cranking time
takes a few seconds longer than
normal.
Note: If your vehicle is on a steep slope,
more fuel may be required.
Filling a Portable Fuel Container WARNING:
Flow of fuel through a
fuel pump nozzle can produce static
electricity. This can cause a fire if you are
filling an ungrounded fuel container.
193
Expedition (TB8) Canada/United States of America, enUSA, First-Printing Fuel and Refueling
Page 315 of 574
ROADSIDE ASSISTANCE
Vehicles Sold in the United States:
Getting Roadside Assistance
To fully assist you should you have a
vehicle concern, Ford Motor Company
offers a complimentary roadside
assistance program. This program is
separate from the New Vehicle Limited
Warranty.
The service is available:
•
24 hours a day, seven days a week.
• For the coverage period supplied with
your vehicle.
Roadside Assistance covers:
• A flat tire change with a good spare
(except vehicles supplied with a tire
inflation kit).
• Battery jump start.
• Lock-out assistance (key replacement
cost is the customer's responsibility).
• Fuel delivery — independent service
contractors, if not prohibited by state,
local or municipal law, shall deliver up
to 2 gal (8 L) of gasoline or 5 gal (20 L)
of diesel fuel to a disabled vehicle.
Roadside Assistance limits fuel delivery
service to two no-charge occurrences
within a 12-month period.
• Winch out — available within 100 ft
(30 m) of a paved or county
maintained road, no recoveries. •
Towing — independent service
contractors, if not prohibited by state,
local or municipal law, shall tow Ford
eligible vehicles to an authorized dealer
within
35 mi (56 km) of the
disablement location or to the nearest
authorized dealer. If a member
requests a tow to an authorized dealer
that is more than
35 mi (56 km) from
the disablement location, the member
shall be responsible for any mileage
costs in excess of
35 mi (56 km).
• Roadside Assistance includes up to
$200 for a towed trailer if the disabled
eligible vehicle requires service at the
nearest authorized dealer. If the towing
vehicle is operational but the trailer is
not, then the trailer does not qualify for
any roadside services.
Vehicles Sold in the United States:
Using Roadside Assistance
Complete the roadside assistance
identification card and place it in your
wallet for quick reference. This card is in
the Owner's Manual kit.
United States vehicle customers who
require Roadside Assistance, call
1-800-241-3673.
If you need to arrange roadside assistance
for yourself, Ford Motor Company
reimburses a reasonable amount for
towing to the nearest dealership within
35 mi (56 km)
. To obtain reimbursement
information, United States vehicle
customers call 1-800-241-3673.
Customers need to submit their original
receipts.
312
Expedition (TB8) Canada/United States of America, enUSA, First-Printing Roadside Emergencies
Page 317 of 574
4. You can attempt to start the vehicle
by pressing the brake pedal and
START/STOP, or press START/STOP
without pressing the brake pedal.
5. If the vehicle does not start, repeat steps 1 through 4.
JUMP STARTING THE VEHICLE WARNING:
Batteries normally
produce explosive gases which can
cause personal injury. Therefore, do not
allow flames, sparks or lighted
substances to come near the battery.
When working near the battery, always
shield your face and protect your eyes.
Always provide correct ventilation. WARNING:
Keep batteries out of
reach of children. Batteries contain
sulfuric acid. Avoid contact with skin,
eyes or clothing. Shield your eyes when
working near the battery to protect
against possible splashing of acid
solution. In case of acid contact with skin
or eyes, flush immediately with water for
a minimum of 15 minutes and get prompt
medical attention. If acid is swallowed,
call a physician immediately. WARNING:
Use only adequately
sized cables with insulated clamps.
Note: To avoid reverse polarity connections,
make sure that you correctly identify the
positive (+) and negative (-) terminals on
both the disabled and booster vehicles
before connecting the cables. Stay clear of
moving parts.
Preparing Your Vehicle
Do not attempt to push-start your
automatic transmission vehicle. Note:
Attempting to push-start a vehicle
with an automatic transmission may cause
transmission damage.
Note: Use only a 12-volt supply to start your
vehicle.
Note: Do not disconnect the battery of the
disabled vehicle as this could damage the
vehicle electrical system.
Park the booster vehicle close to the hood
of the disabled vehicle, making sure the
two vehicles do not touch.
Connecting the Jumper Cables WARNING:
Do not connect the
negative jumper cable to any other part
of your vehicle. Use the ground point.
Note: Do not attach the end of the positive
cable to the studs or L-shaped eyelet
located above the positive (+) terminal of
your vehicle ’s battery. High current may flow
through and cause damage to the fuses.
Note: In the illustration, the bottom vehicle
represents the booster vehicle.
314
Expedition (TB8) Canada/United States of America, enUSA, First-Printing Roadside Emergencies