FORD EXPEDITION EL 2016 Owners Manual
Manufacturer: FORD, Model Year: 2016, Model line: EXPEDITION EL, Model: FORD EXPEDITION EL 2016Pages: 421, PDF Size: 7.39 MB
Page 131 of 421
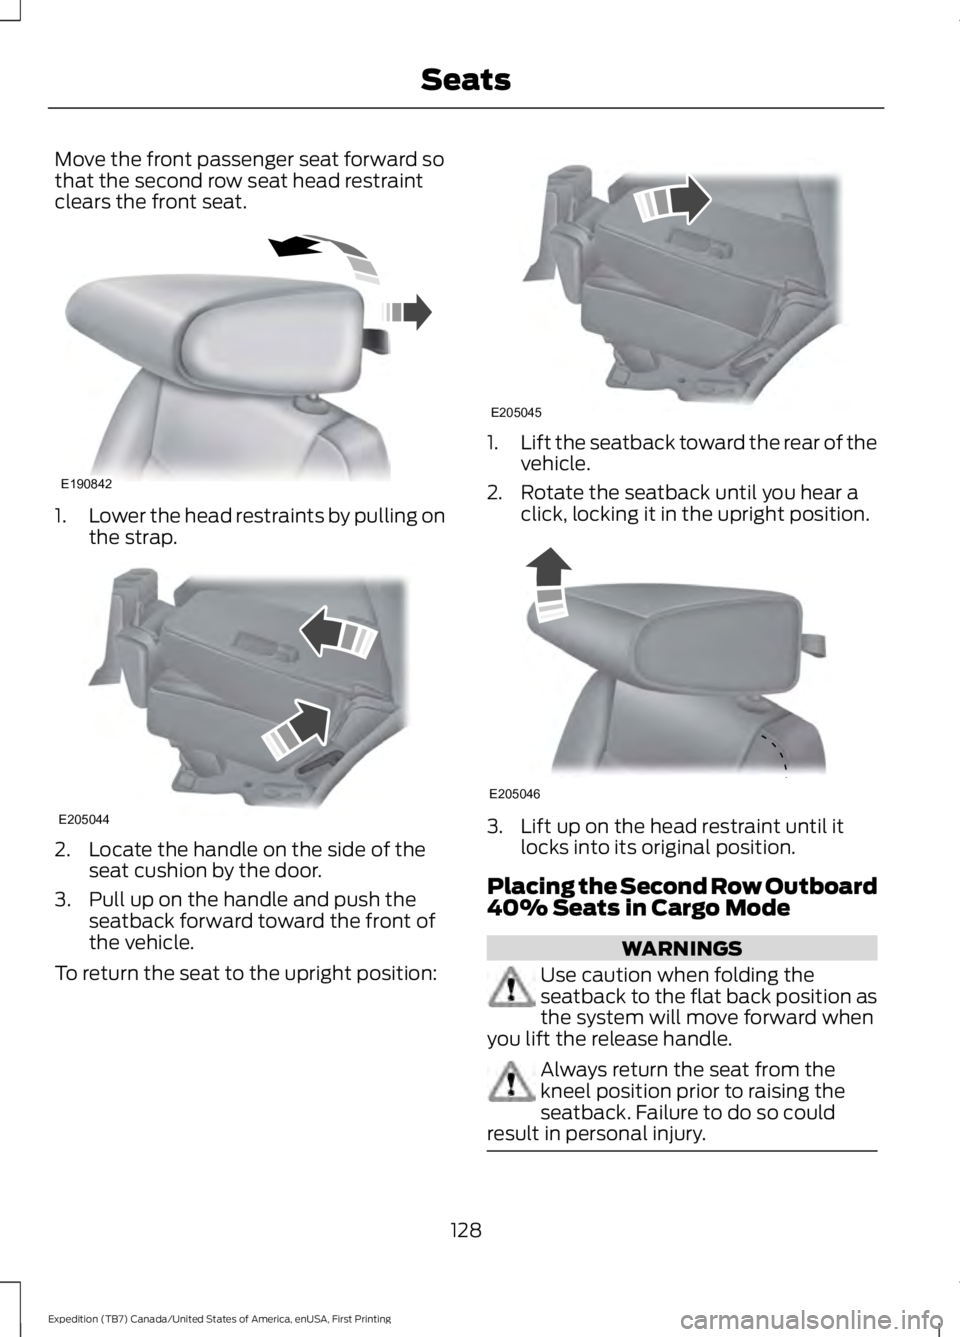
Move the front passenger seat forward sothat the second row seat head restraintclears the front seat.
1.Lower the head restraints by pulling onthe strap.
2. Locate the handle on the side of theseat cushion by the door.
3. Pull up on the handle and push theseatback forward toward the front ofthe vehicle.
To return the seat to the upright position:
1.Lift the seatback toward the rear of thevehicle.
2. Rotate the seatback until you hear aclick, locking it in the upright position.
3. Lift up on the head restraint until itlocks into its original position.
Placing the Second Row Outboard40% Seats in Cargo Mode
WARNINGS
Use caution when folding theseatback to the flat back position asthe system will move forward whenyou lift the release handle.
Always return the seat from thekneel position prior to raising theseatback. Failure to do so couldresult in personal injury.
128
Expedition (TB7) Canada/United States of America, enUSA, First Printing
SeatsE190842 E205044 E205045 E205046
Page 132 of 421
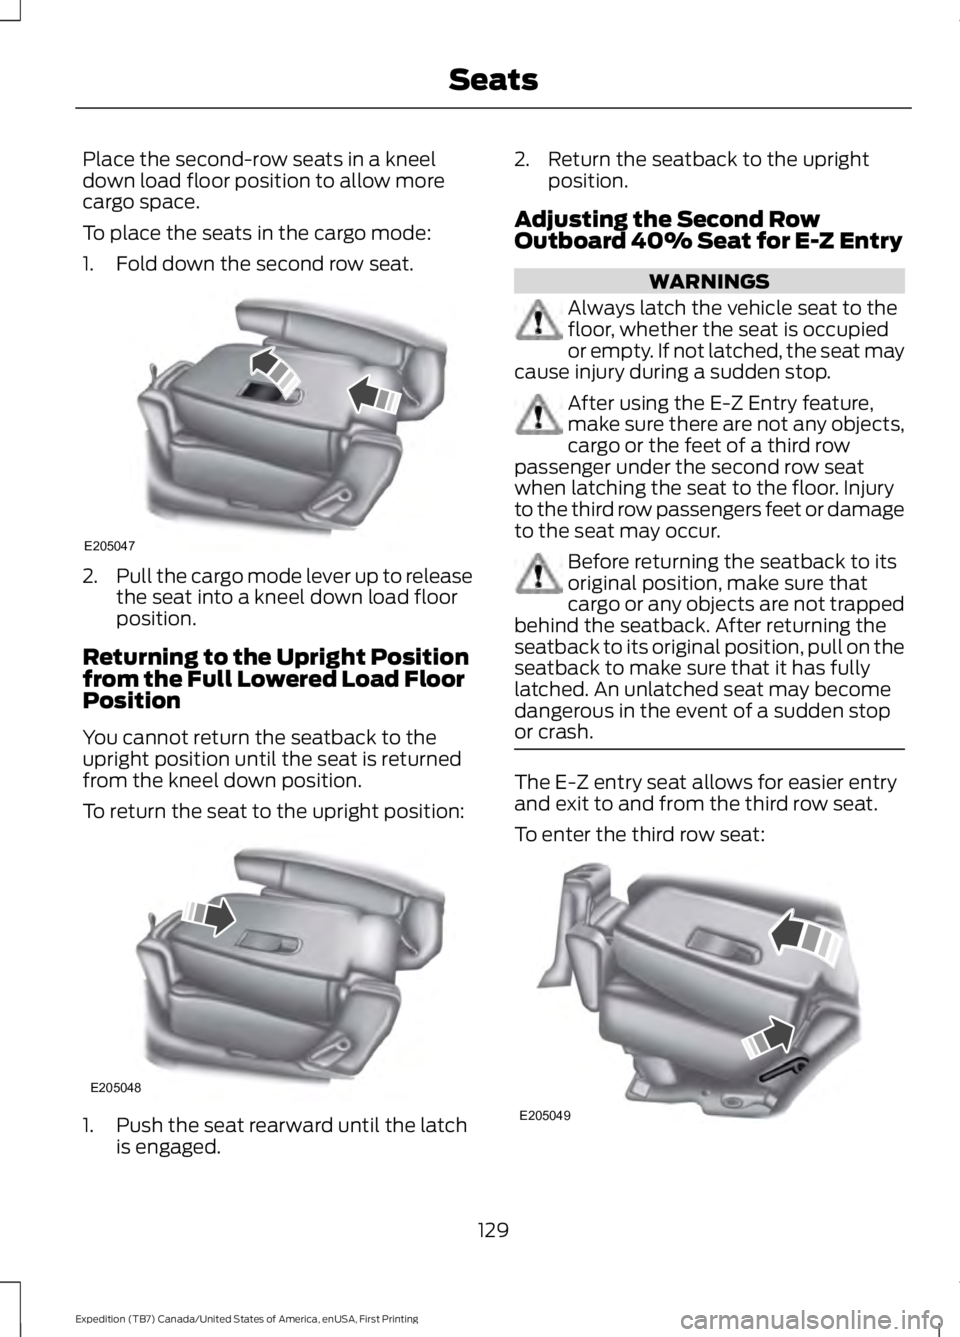
Place the second-row seats in a kneeldown load floor position to allow morecargo space.
To place the seats in the cargo mode:
1. Fold down the second row seat.
2.Pull the cargo mode lever up to releasethe seat into a kneel down load floorposition.
Returning to the Upright Positionfrom the Full Lowered Load FloorPosition
You cannot return the seatback to theupright position until the seat is returnedfrom the kneel down position.
To return the seat to the upright position:
1. Push the seat rearward until the latchis engaged.
2. Return the seatback to the uprightposition.
Adjusting the Second RowOutboard 40% Seat for E-Z Entry
WARNINGS
Always latch the vehicle seat to thefloor, whether the seat is occupiedor empty. If not latched, the seat maycause injury during a sudden stop.
After using the E-Z Entry feature,make sure there are not any objects,cargo or the feet of a third rowpassenger under the second row seatwhen latching the seat to the floor. Injuryto the third row passengers feet or damageto the seat may occur.
Before returning the seatback to itsoriginal position, make sure thatcargo or any objects are not trappedbehind the seatback. After returning theseatback to its original position, pull on theseatback to make sure that it has fullylatched. An unlatched seat may becomedangerous in the event of a sudden stopor crash.
The E-Z entry seat allows for easier entryand exit to and from the third row seat.
To enter the third row seat:
129
Expedition (TB7) Canada/United States of America, enUSA, First Printing
SeatsE205047 E205048 E205049
Page 133 of 421
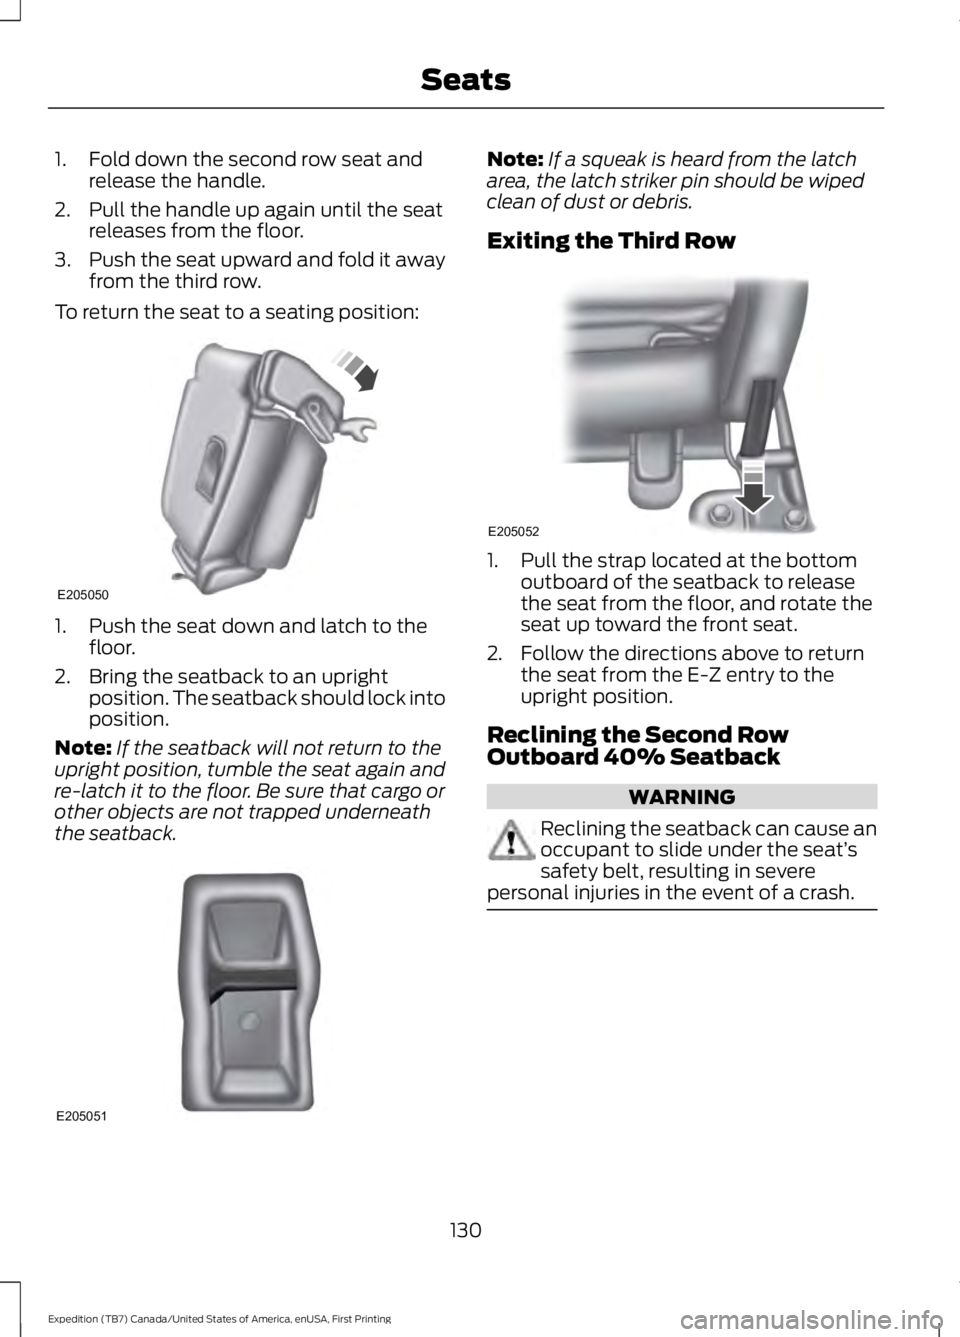
1. Fold down the second row seat andrelease the handle.
2. Pull the handle up again until the seatreleases from the floor.
3.Push the seat upward and fold it awayfrom the third row.
To return the seat to a seating position:
1. Push the seat down and latch to thefloor.
2. Bring the seatback to an uprightposition. The seatback should lock intoposition.
Note:If the seatback will not return to theupright position, tumble the seat again andre-latch it to the floor. Be sure that cargo orother objects are not trapped underneaththe seatback.
Note:If a squeak is heard from the latcharea, the latch striker pin should be wipedclean of dust or debris.
Exiting the Third Row
1. Pull the strap located at the bottomoutboard of the seatback to releasethe seat from the floor, and rotate theseat up toward the front seat.
2. Follow the directions above to returnthe seat from the E-Z entry to theupright position.
Reclining the Second RowOutboard 40% Seatback
WARNING
Reclining the seatback can cause anoccupant to slide under the seat’ssafety belt, resulting in severepersonal injuries in the event of a crash.
130
Expedition (TB7) Canada/United States of America, enUSA, First Printing
SeatsE205050 E205051 E205052
Page 134 of 421
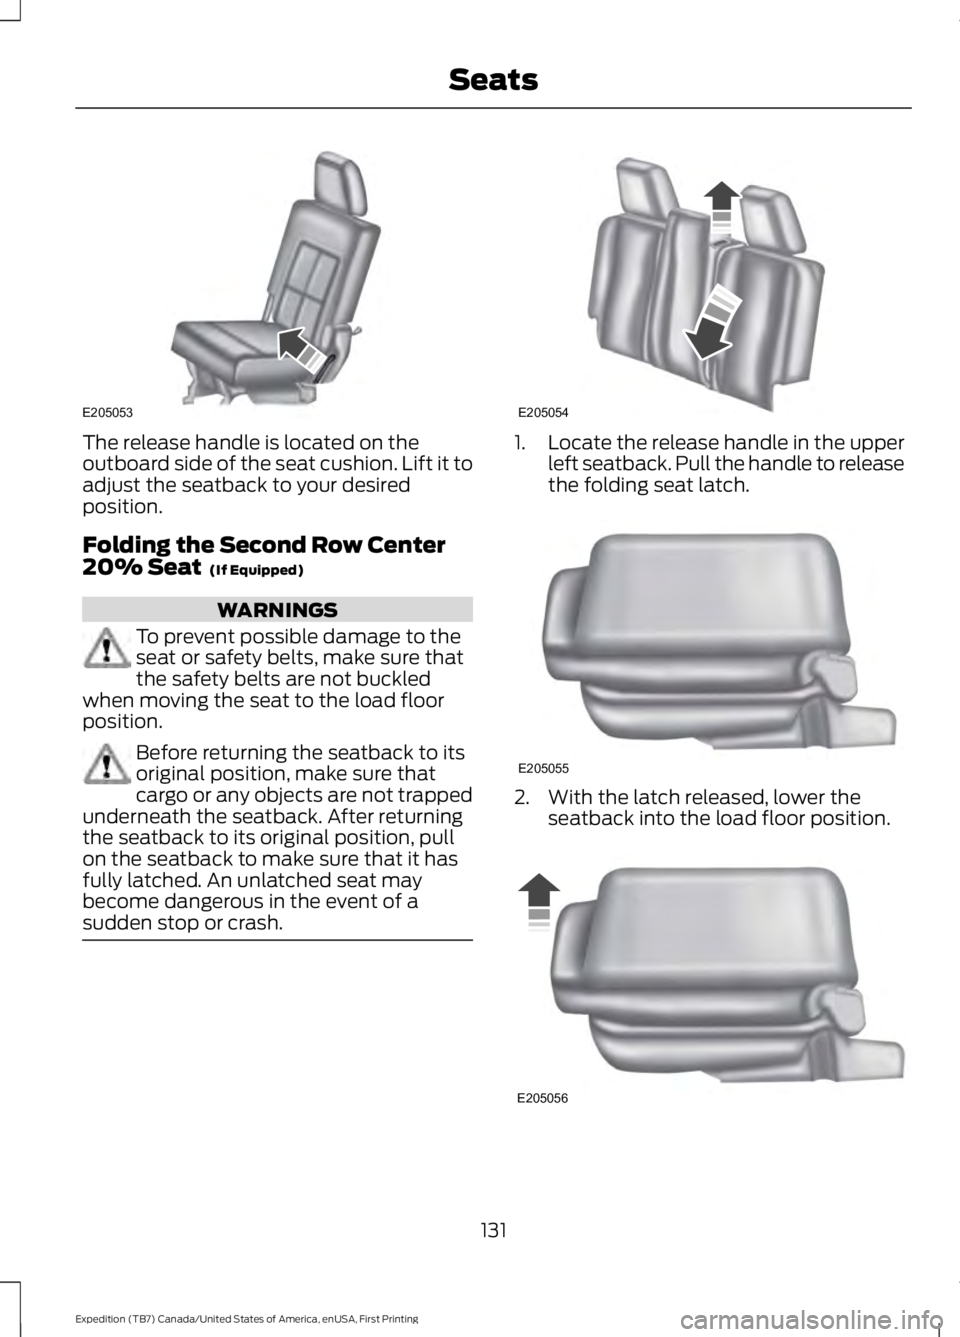
The release handle is located on theoutboard side of the seat cushion. Lift it toadjust the seatback to your desiredposition.
Folding the Second Row Center20% Seat (If Equipped)
WARNINGS
To prevent possible damage to theseat or safety belts, make sure thatthe safety belts are not buckledwhen moving the seat to the load floorposition.
Before returning the seatback to itsoriginal position, make sure thatcargo or any objects are not trappedunderneath the seatback. After returningthe seatback to its original position, pullon the seatback to make sure that it hasfully latched. An unlatched seat maybecome dangerous in the event of asudden stop or crash.
1.Locate the release handle in the upperleft seatback. Pull the handle to releasethe folding seat latch.
2. With the latch released, lower theseatback into the load floor position.
131
Expedition (TB7) Canada/United States of America, enUSA, First Printing
SeatsE205053 E205054 E205055 E205056
Page 135 of 421
3. To return the seat to the uprightposition, lift the seatback until the latchis fully engaged.
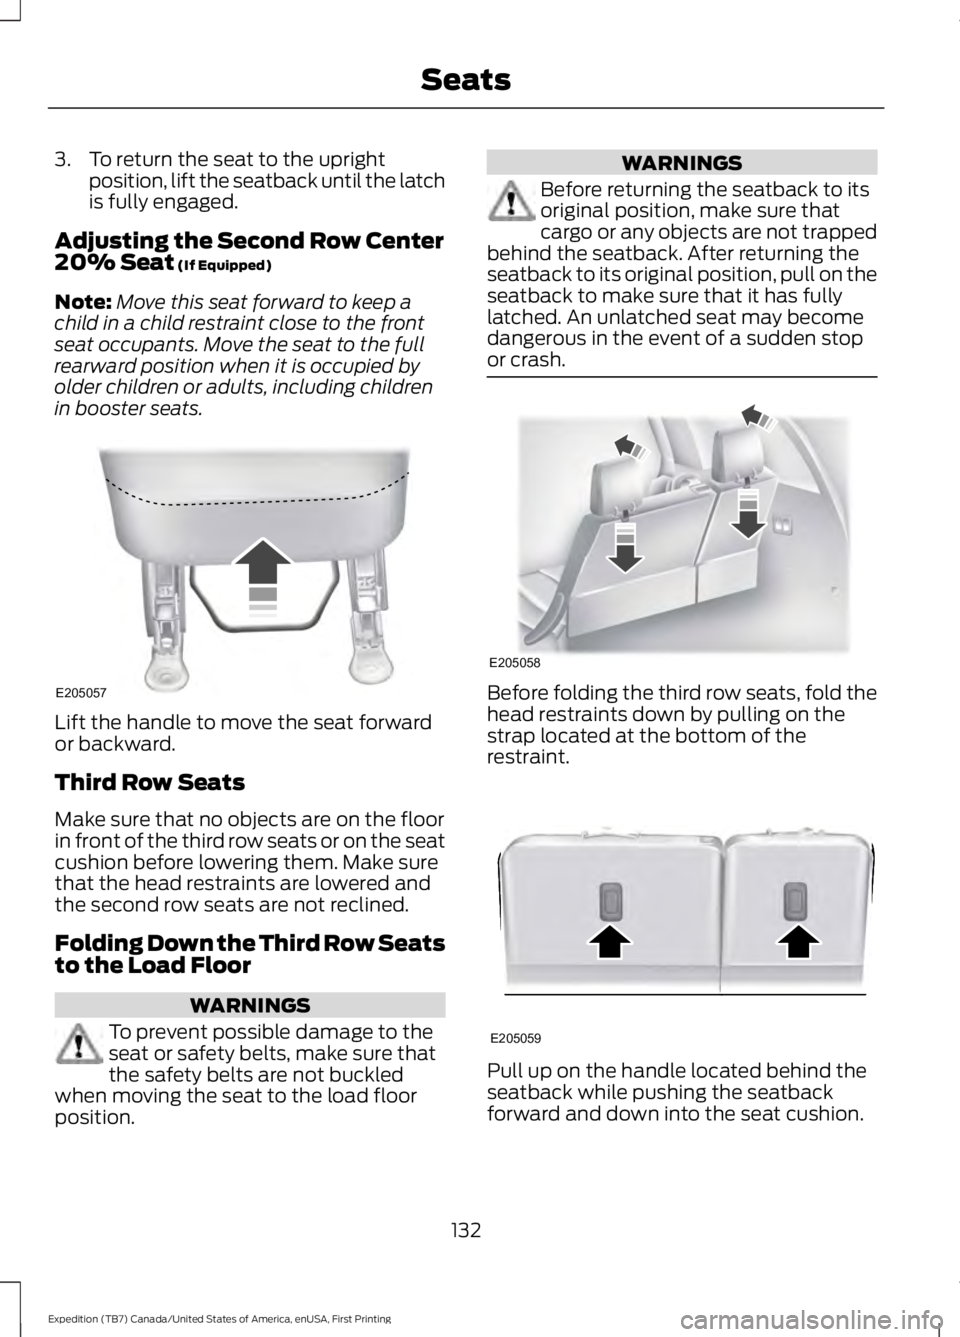
Adjusting the Second Row Center20% Seat (If Equipped)
Note:Move this seat forward to keep achild in a child restraint close to the frontseat occupants. Move the seat to the fullrearward position when it is occupied byolder children or adults, including childrenin booster seats.
Lift the handle to move the seat forwardor backward.
Third Row Seats
Make sure that no objects are on the floorin front of the third row seats or on the seatcushion before lowering them. Make surethat the head restraints are lowered andthe second row seats are not reclined.
Folding Down the Third Row Seatsto the Load Floor
WARNINGS
To prevent possible damage to theseat or safety belts, make sure thatthe safety belts are not buckledwhen moving the seat to the load floorposition.
WARNINGS
Before returning the seatback to itsoriginal position, make sure thatcargo or any objects are not trappedbehind the seatback. After returning theseatback to its original position, pull on theseatback to make sure that it has fullylatched. An unlatched seat may becomedangerous in the event of a sudden stopor crash.
Before folding the third row seats, fold thehead restraints down by pulling on thestrap located at the bottom of therestraint.
Pull up on the handle located behind theseatback while pushing the seatbackforward and down into the seat cushion.
132
Expedition (TB7) Canada/United States of America, enUSA, First Printing
SeatsE205057 E205058 E205059
Page 136 of 421
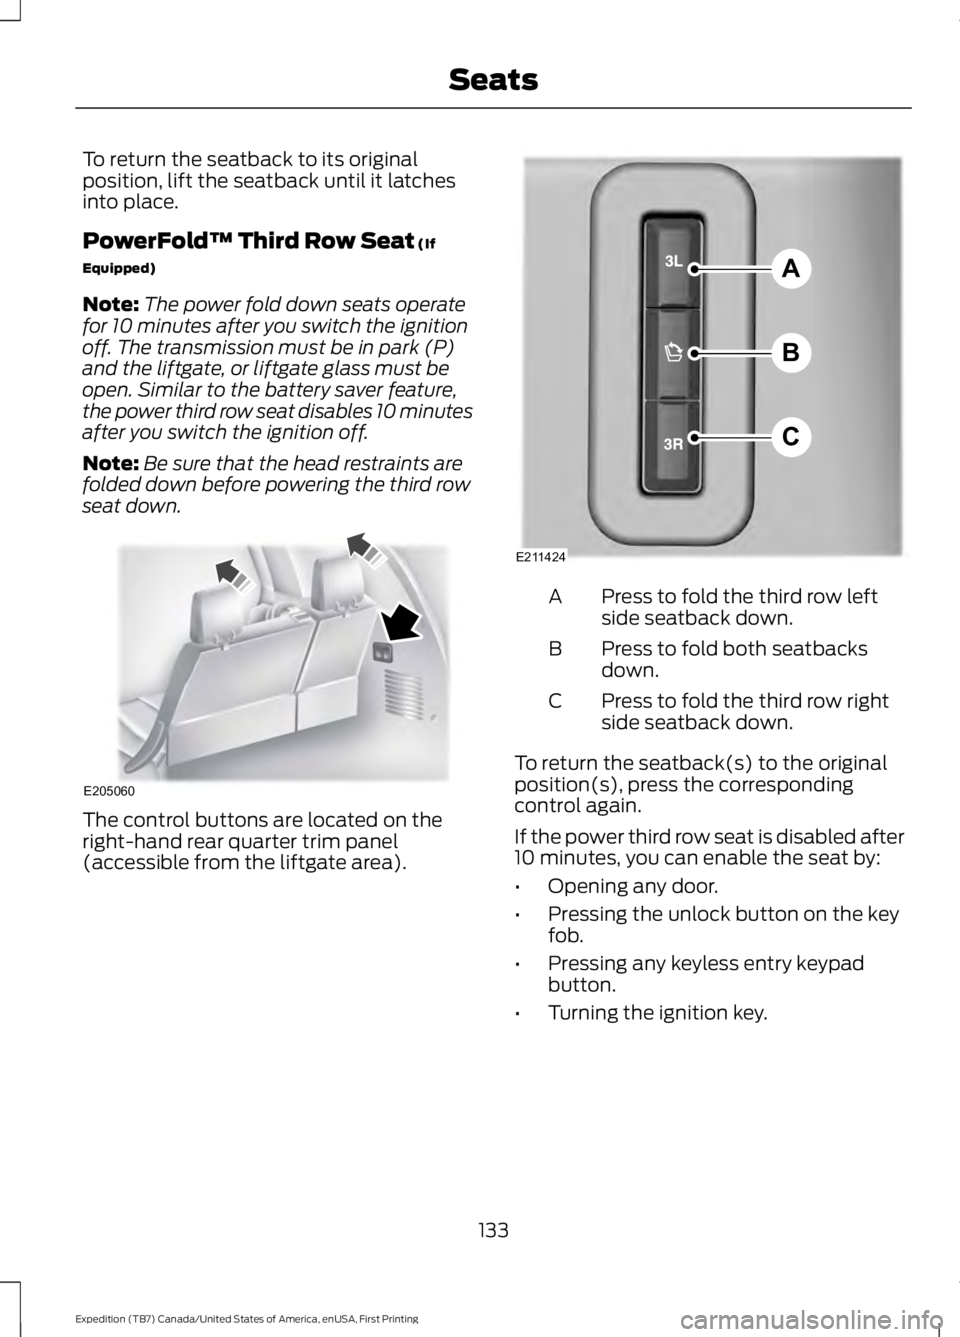
To return the seatback to its originalposition, lift the seatback until it latchesinto place.
PowerFold™ Third Row Seat (If
Equipped)
Note:The power fold down seats operatefor 10 minutes after you switch the ignitionoff. The transmission must be in park (P)and the liftgate, or liftgate glass must beopen. Similar to the battery saver feature,the power third row seat disables 10 minutesafter you switch the ignition off.
Note:Be sure that the head restraints arefolded down before powering the third rowseat down.
The control buttons are located on theright-hand rear quarter trim panel(accessible from the liftgate area).
Press to fold the third row leftside seatback down.A
Press to fold both seatbacksdown.B
Press to fold the third row rightside seatback down.C
To return the seatback(s) to the originalposition(s), press the correspondingcontrol again.
If the power third row seat is disabled after10 minutes, you can enable the seat by:
•Opening any door.
•Pressing the unlock button on the keyfob.
•Pressing any keyless entry keypadbutton.
•Turning the ignition key.
133
Expedition (TB7) Canada/United States of America, enUSA, First Printing
SeatsE205060 A
B
C
E211424
Page 137 of 421
HEATED SEATS (If Equipped)
Front Seats
WARNING
People who are unable to feel painto their skin because of advancedage, chronic illness, diabetes, spinalcord injury, medication, alcohol use,exhaustion or other physical conditions,must exercise care when using the heatedseat. The heated seat may cause burnseven at low temperatures, especially ifused for long periods of time. Do not placeanything on the seat that insulates againstheat, such as a blanket or cushion. Thismay cause the heated seat to overheat.Do not puncture the seat with pins, needlesor other pointed objects. This may damagethe heating element which may cause theheated seat to overheat. An overheatedseat may cause serious personal injury.
Do not do the following:
•Place heavy objects on the seat.
•Operate the heated seat if water or anyother liquid spills on the seat. Allow theseat to dry thoroughly.
•Operate the heated seats unless theengine is running. Doing so can causethe battery to lose charge.
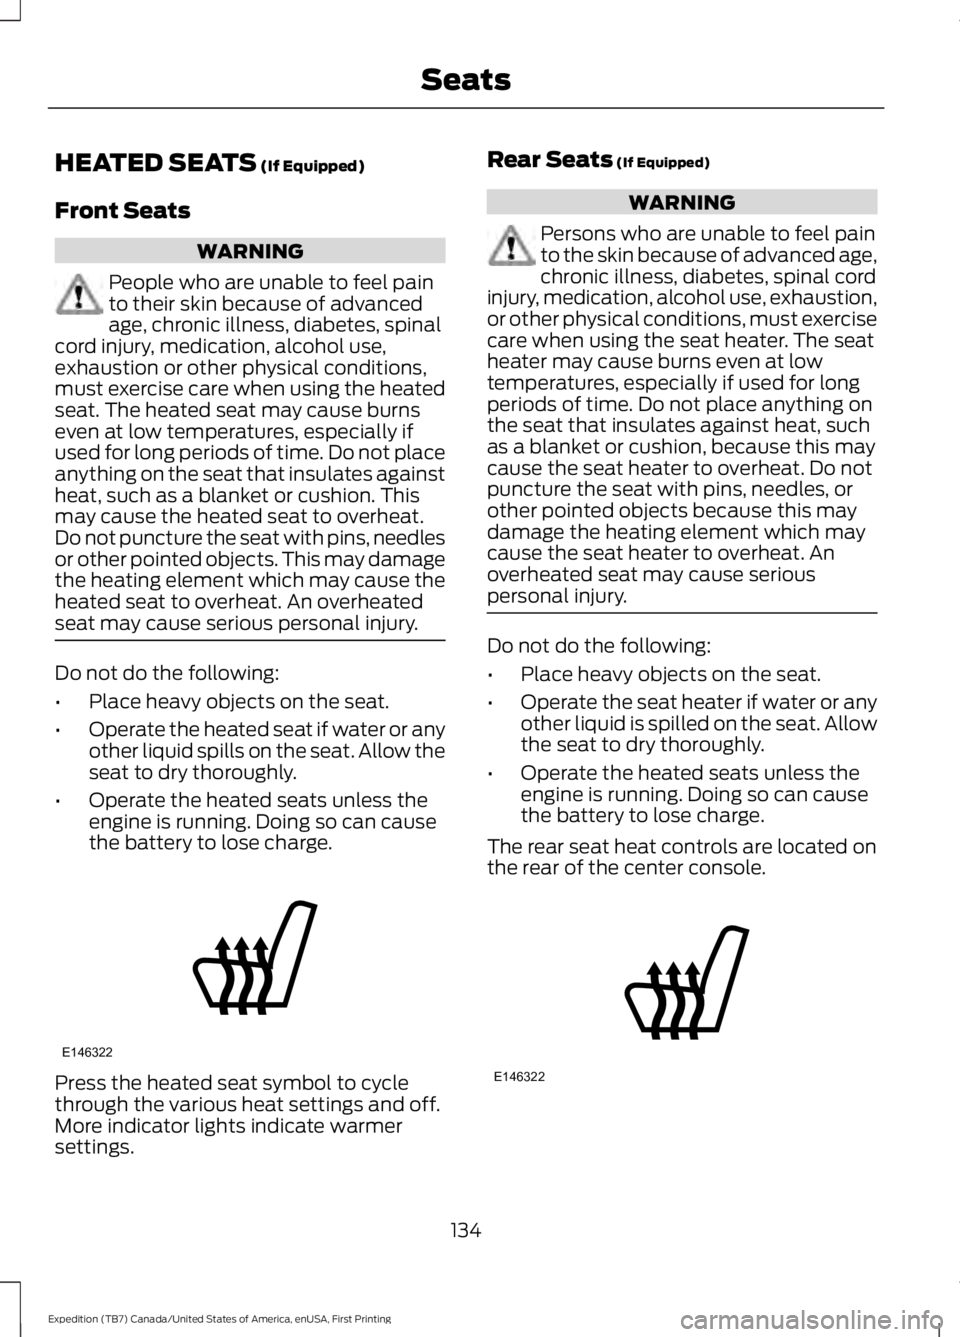
Press the heated seat symbol to cyclethrough the various heat settings and off.More indicator lights indicate warmersettings.
Rear Seats (If Equipped)
WARNING
Persons who are unable to feel painto the skin because of advanced age,chronic illness, diabetes, spinal cordinjury, medication, alcohol use, exhaustion,or other physical conditions, must exercisecare when using the seat heater. The seatheater may cause burns even at lowtemperatures, especially if used for longperiods of time. Do not place anything onthe seat that insulates against heat, suchas a blanket or cushion, because this maycause the seat heater to overheat. Do notpuncture the seat with pins, needles, orother pointed objects because this maydamage the heating element which maycause the seat heater to overheat. Anoverheated seat may cause seriouspersonal injury.
Do not do the following:
•Place heavy objects on the seat.
•Operate the seat heater if water or anyother liquid is spilled on the seat. Allowthe seat to dry thoroughly.
•Operate the heated seats unless theengine is running. Doing so can causethe battery to lose charge.
The rear seat heat controls are located onthe rear of the center console.
134
Expedition (TB7) Canada/United States of America, enUSA, First Printing
SeatsE146322 E146322
Page 138 of 421
Press the heated seat symbol to cyclethrough the various heat settings and off.More indicator lights indicate warmersettings.
The heated seat module resets at everyignition run cycle. While the ignition is on,press the high or low heated seat switchto enable heating mode. When activated,they will turn off automatically when youturn the engine off.
CLIMATE CONTROLLED SEATS
(If Equipped)
Heated Seats
WARNING
Persons who are unable to feel painto the skin because of advanced age,chronic illness, diabetes, spinal cordinjury, medication, alcohol use, exhaustion,or other physical conditions, must exercisecare when using the seat heater. The seatheater may cause burns even at lowtemperatures, especially if used for longperiods of time. Do not place anything onthe seat that insulates against heat, suchas a blanket or cushion, because this maycause the seat heater to overheat. Do notpuncture the seat with pins, needles, orother pointed objects because this maydamage the heating element which maycause the seat heater to overheat. Anoverheated seat may cause seriouspersonal injury.
Note:Do not do the following:
•Place heavy objects on the seat.
•Operate the seat heater if water or anyother liquid spill on the seat. Allow theseat to dry thoroughly.
The heated seats will only function whenthe engine is running.
Press the heated seat symbol to cyclethrough the various heat settings and off.More indicator lights indicate warmersettings.
Cooled Seats
The cooled seats will only function whenthe engine is running.
Press the cooled seat symbol to cyclethrough the various cooling settings andoff. More indicator lights indicate coolersettings.
If the engine falls below 350 RPM whilethe cooled seats are on, the feature willturn itself off. You will need to reactivateit.
Climate Controlled Seat Air FilterReplacement
The climate controlled seat systemincludes air filters. You must replace themperiodically. See ScheduledMaintenance (page 372).
135
Expedition (TB7) Canada/United States of America, enUSA, First Printing
SeatsE146322 E146309
Page 139 of 421
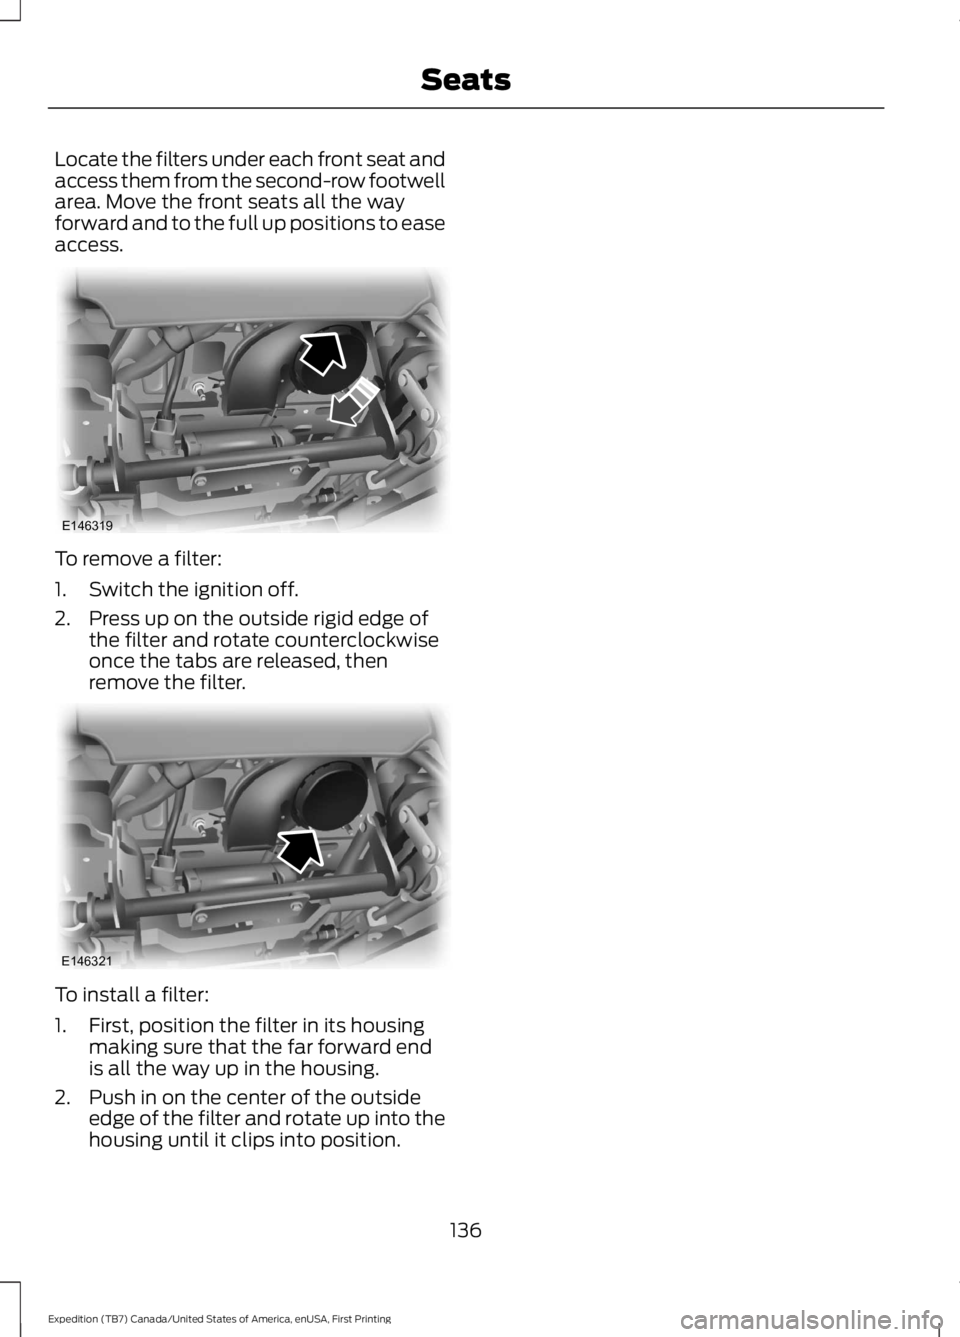
Locate the filters under each front seat andaccess them from the second-row footwellarea. Move the front seats all the wayforward and to the full up positions to easeaccess.
To remove a filter:
1. Switch the ignition off.
2. Press up on the outside rigid edge ofthe filter and rotate counterclockwiseonce the tabs are released, thenremove the filter.
To install a filter:
1. First, position the filter in its housingmaking sure that the far forward endis all the way up in the housing.
2. Push in on the center of the outsideedge of the filter and rotate up into thehousing until it clips into position.
136
Expedition (TB7) Canada/United States of America, enUSA, First Printing
SeatsE146319 E146321
Page 140 of 421
HomeLink Wireless ControlSystem
WARNINGS
Make sure that the garage door andsecurity device are free fromobstruction when you areprogramming. Do not program the systemwith the vehicle in the garage.
Do not use the system with anygarage door opener that does nothave the safety stop and reversefeature as required by U.S. Federal SafetyStandards (this includes any garage dooropener manufactured before April 1, 1982).A garage door opener which cannot detectan object, signaling the door to stop andreverse, does not meet current federalsafety standards. Using a garage dooropener without these features increasesthe risk of serious injury or death.
Note:Make sure you keep the originalremote control transmitter for use in othervehicles as well as for future systemprogramming.
Note:We recommend that upon the saleor lease termination of your vehicle, youerase the programmed function buttons forsecurity reasons. See Erasing the FunctionButton Codes.
Note:You can program a maximum ofthree devices. To change or replace any ofthe three devices after it has been initiallyprogrammed, you must first erase thecurrent settings. See Erasing the FunctionButton Codes.
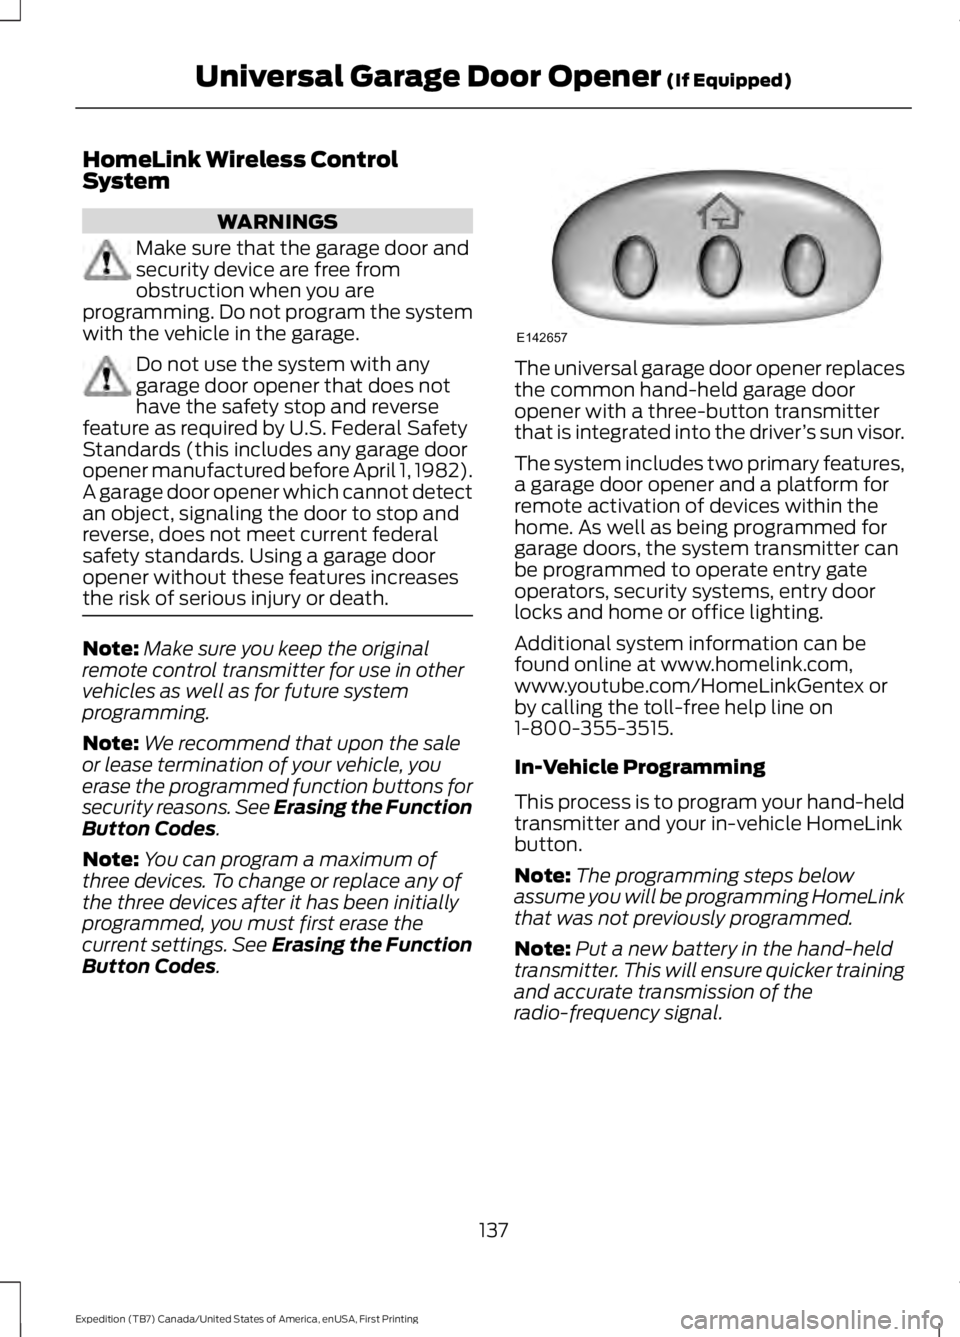
The universal garage door opener replacesthe common hand-held garage dooropener with a three-button transmitterthat is integrated into the driver’s sun visor.
The system includes two primary features,a garage door opener and a platform forremote activation of devices within thehome. As well as being programmed forgarage doors, the system transmitter canbe programmed to operate entry gateoperators, security systems, entry doorlocks and home or office lighting.
Additional system information can befound online at www.homelink.com,www.youtube.com/HomeLinkGentex orby calling the toll-free help line on1-800-355-3515.
In-Vehicle Programming
This process is to program your hand-heldtransmitter and your in-vehicle HomeLinkbutton.
Note:The programming steps belowassume you will be programming HomeLinkthat was not previously programmed.
Note:Put a new battery in the hand-heldtransmitter. This will ensure quicker trainingand accurate transmission of theradio-frequency signal.
137
Expedition (TB7) Canada/United States of America, enUSA, First Printing
Universal Garage Door Opener (If Equipped)E142657