manual transmission FORD EXPEDITION EL 2016 Owners Manual
[x] Cancel search | Manufacturer: FORD, Model Year: 2016, Model line: EXPEDITION EL, Model: FORD EXPEDITION EL 2016Pages: 421, PDF Size: 7.39 MB
Page 57 of 421
At the Liftgate
The liftgate unlocks and opensautomatically when you press the liftgaterelease button.
Smart Unlocks for IntegratedKeyhead Transmitter (If Equipped)
This helps to prevent you from lockingyourself out of your vehicle if the key is stillin the ignition.
When you open one of the front doors andlock your vehicle with the power door lockcontrol, all the doors will lock then unlockand the horn will sound twice if the key isstill in the ignition.
Your can still lock your vehicle with the keyin the ignition by:
•Using the manual lock on the door.
•Locking the driver door with a key.
•Using the keyless entry keypad.
•Pressing the lock button on anotherremote control.
Smart Unlocks for IntelligentAccess Keys (If Equipped)
This helps to prevent you from locking yourkey inside the passenger compartment orrear cargo area.
When you electronically lock your vehiclewith any door open, the transmission is inpark (P) and the ignition is off, the systemsearches for an intelligent access keyinside your vehicle after you close the lastdoor. If the system finds a key, all of thedoors will immediately unlock and the hornwill sound twice, indicating that a key isinside.
You can override the smart unlock featureand intentionally lock the intelligent accesskey inside your vehicle.
To do this, lock your vehicle after you haveclosed all the doors by:
•Using the keyless entry keypad.
•Pressing the lock button on anotherintelligent access key.
When you open one of the front doors andlock your vehicle using the power door lockcontrol, all doors will lock then unlock if:
•The ignition is on.
•The ignition is off and the transmissionis not in park (P).
Auto Relock
If you press the unlock button on theremote control and do not open a doorwithin 45 seconds, your vehicle will lockand the alarm will arm. You can switch thisfeature on or off in the information display.See Information Displays (page 92).
Autolock
Autolock locks all the doors when all of thefollowing occur:
•All doors are closed.
•The ignition is on.
•You shift into any gear putting yourvehicle in motion.
•Your vehicle's speed is greater than12 mph (20 km/h).
Autolock repeats when:
•You open then close any door while theignition is on and your vehicle's speedis less than 9 mph (15 km/h).
•Your vehicle's speed is greater than12 mph (20 km/h).
Enabling or Disabling
To enable or disable the autolock feature,contact an authorized dealer.
54
Expedition (TB7) Canada/United States of America, enUSA, First Printing
Locks
Page 79 of 421
INSTRUMENT LIGHTING
DIMMER
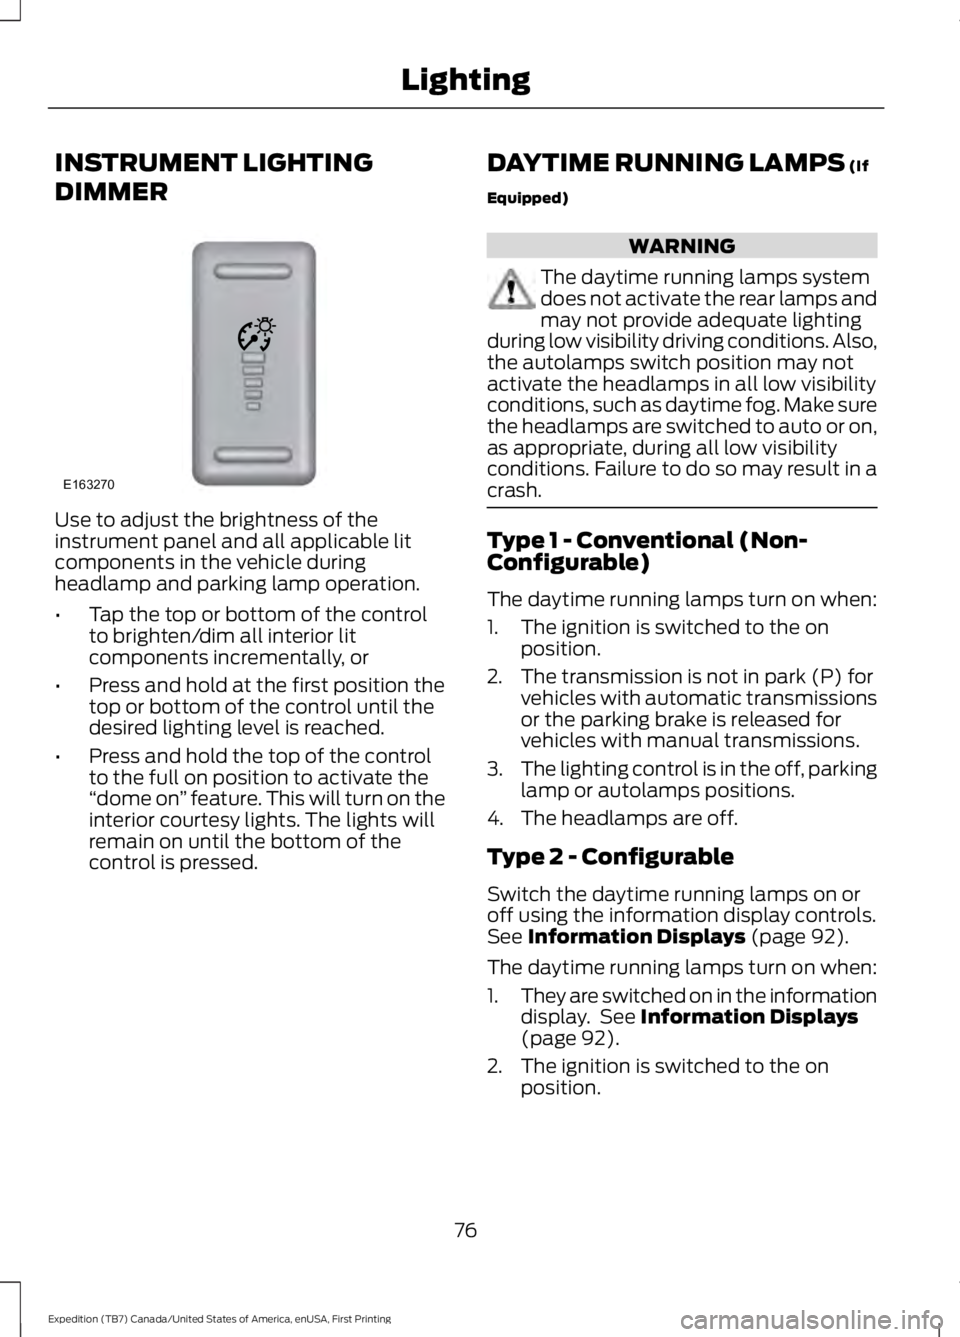
Use to adjust the brightness of theinstrument panel and all applicable litcomponents in the vehicle duringheadlamp and parking lamp operation.
•Tap the top or bottom of the controlto brighten/dim all interior litcomponents incrementally, or
•Press and hold at the first position thetop or bottom of the control until thedesired lighting level is reached.
•Press and hold the top of the controlto the full on position to activate the“dome on” feature. This will turn on theinterior courtesy lights. The lights willremain on until the bottom of thecontrol is pressed.
DAYTIME RUNNING LAMPS (If
Equipped)
WARNING
The daytime running lamps systemdoes not activate the rear lamps andmay not provide adequate lightingduring low visibility driving conditions. Also,the autolamps switch position may notactivate the headlamps in all low visibilityconditions, such as daytime fog. Make surethe headlamps are switched to auto or on,as appropriate, during all low visibilityconditions. Failure to do so may result in acrash.
Type 1 - Conventional (Non-Configurable)
The daytime running lamps turn on when:
1. The ignition is switched to the onposition.
2. The transmission is not in park (P) forvehicles with automatic transmissionsor the parking brake is released forvehicles with manual transmissions.
3.The lighting control is in the off, parkinglamp or autolamps positions.
4. The headlamps are off.
Type 2 - Configurable
Switch the daytime running lamps on oroff using the information display controls.See Information Displays (page 92).
The daytime running lamps turn on when:
1.They are switched on in the informationdisplay. See Information Displays(page 92).
2. The ignition is switched to the onposition.
76
Expedition (TB7) Canada/United States of America, enUSA, First Printing
LightingE163270
Page 80 of 421
3. The transmission is not in park (P) forvehicles with automatic transmissionsor the parking brake is released forvehicles with manual transmissions.
4.The lighting control is in the autolampsposition.
5. The headlamps are off.
The other lighting control switch positionsdo not activate the daytime running lamps,and you can use them to temporarilyoverride autolamp control.
When switched off in the informationdisplay, the daytime running lamps are offin all lighting control switch positions.
FRONT FOG LAMPS
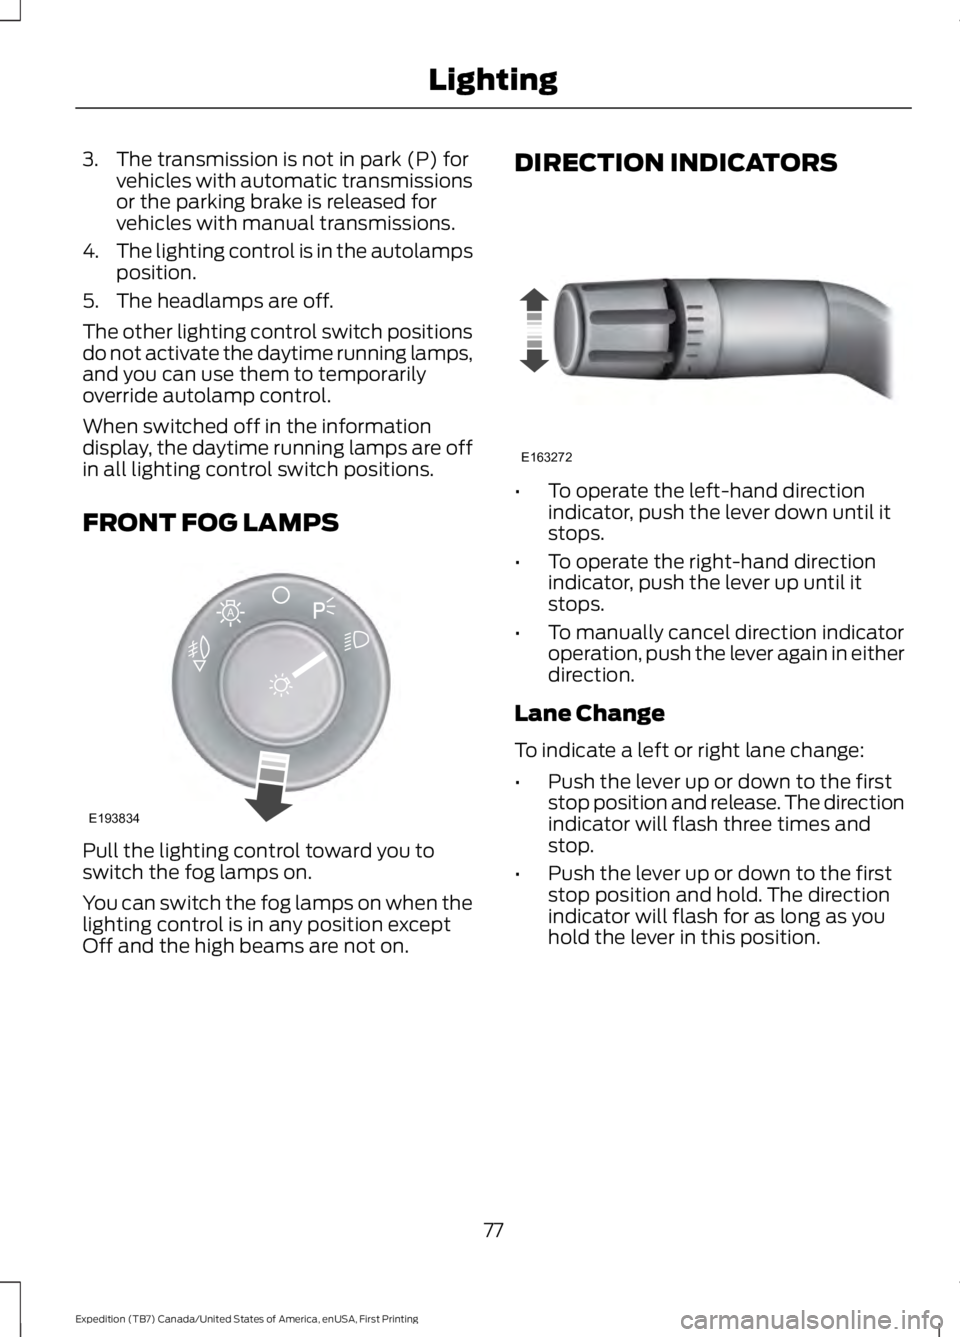
Pull the lighting control toward you toswitch the fog lamps on.
You can switch the fog lamps on when thelighting control is in any position exceptOff and the high beams are not on.
DIRECTION INDICATORS
•To operate the left-hand directionindicator, push the lever down until itstops.
•To operate the right-hand directionindicator, push the lever up until itstops.
•To manually cancel direction indicatoroperation, push the lever again in eitherdirection.
Lane Change
To indicate a left or right lane change:
•Push the lever up or down to the firststop position and release. The directionindicator will flash three times andstop.
•Push the lever up or down to the firststop position and hold. The directionindicator will flash for as long as youhold the lever in this position.
77
Expedition (TB7) Canada/United States of America, enUSA, First Printing
LightingE193834
A E163272
Page 114 of 421
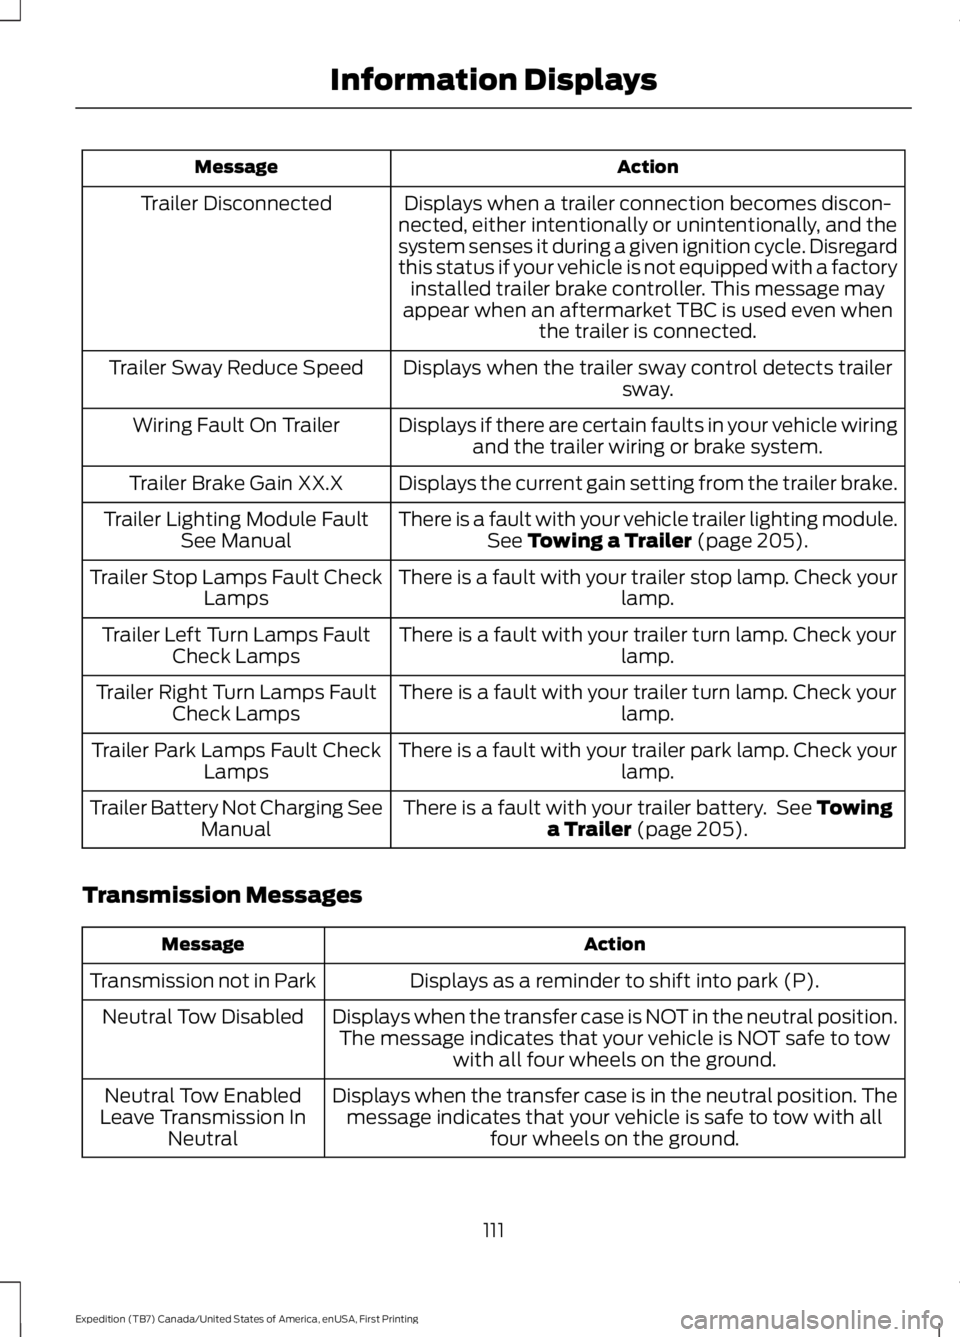
ActionMessage
Displays when a trailer connection becomes discon-nected, either intentionally or unintentionally, and thesystem senses it during a given ignition cycle. Disregardthis status if your vehicle is not equipped with a factoryinstalled trailer brake controller. This message mayappear when an aftermarket TBC is used even whenthe trailer is connected.
Trailer Disconnected
Displays when the trailer sway control detects trailersway.Trailer Sway Reduce Speed
Displays if there are certain faults in your vehicle wiringand the trailer wiring or brake system.Wiring Fault On Trailer
Displays the current gain setting from the trailer brake.Trailer Brake Gain XX.X
There is a fault with your vehicle trailer lighting module.See Towing a Trailer (page 205).Trailer Lighting Module FaultSee Manual
There is a fault with your trailer stop lamp. Check yourlamp.Trailer Stop Lamps Fault CheckLamps
There is a fault with your trailer turn lamp. Check yourlamp.Trailer Left Turn Lamps FaultCheck Lamps
There is a fault with your trailer turn lamp. Check yourlamp.Trailer Right Turn Lamps FaultCheck Lamps
There is a fault with your trailer park lamp. Check yourlamp.Trailer Park Lamps Fault CheckLamps
There is a fault with your trailer battery. See Towinga Trailer (page 205).Trailer Battery Not Charging SeeManual
Transmission Messages
ActionMessage
Displays as a reminder to shift into park (P).Transmission not in Park
Displays when the transfer case is NOT in the neutral position.The message indicates that your vehicle is NOT safe to towwith all four wheels on the ground.
Neutral Tow Disabled
Displays when the transfer case is in the neutral position. Themessage indicates that your vehicle is safe to tow with allfour wheels on the ground.
Neutral Tow EnabledLeave Transmission InNeutral
111
Expedition (TB7) Canada/United States of America, enUSA, First Printing
Information Displays
Page 162 of 421
AUTOMATIC TRANSMISSION
WARNINGS
Always set the parking brake fullyand latch the gearshift in park (P).Turn the ignition to the off positionand remove the key whenever you leaveyour vehicle.
Do not use the tow/haul featurewhen driving in icy or slipperyconditions as the increased enginebraking can cause the rear wheels to slideand your vehicle to swing around with thepossible loss of vehicle control.
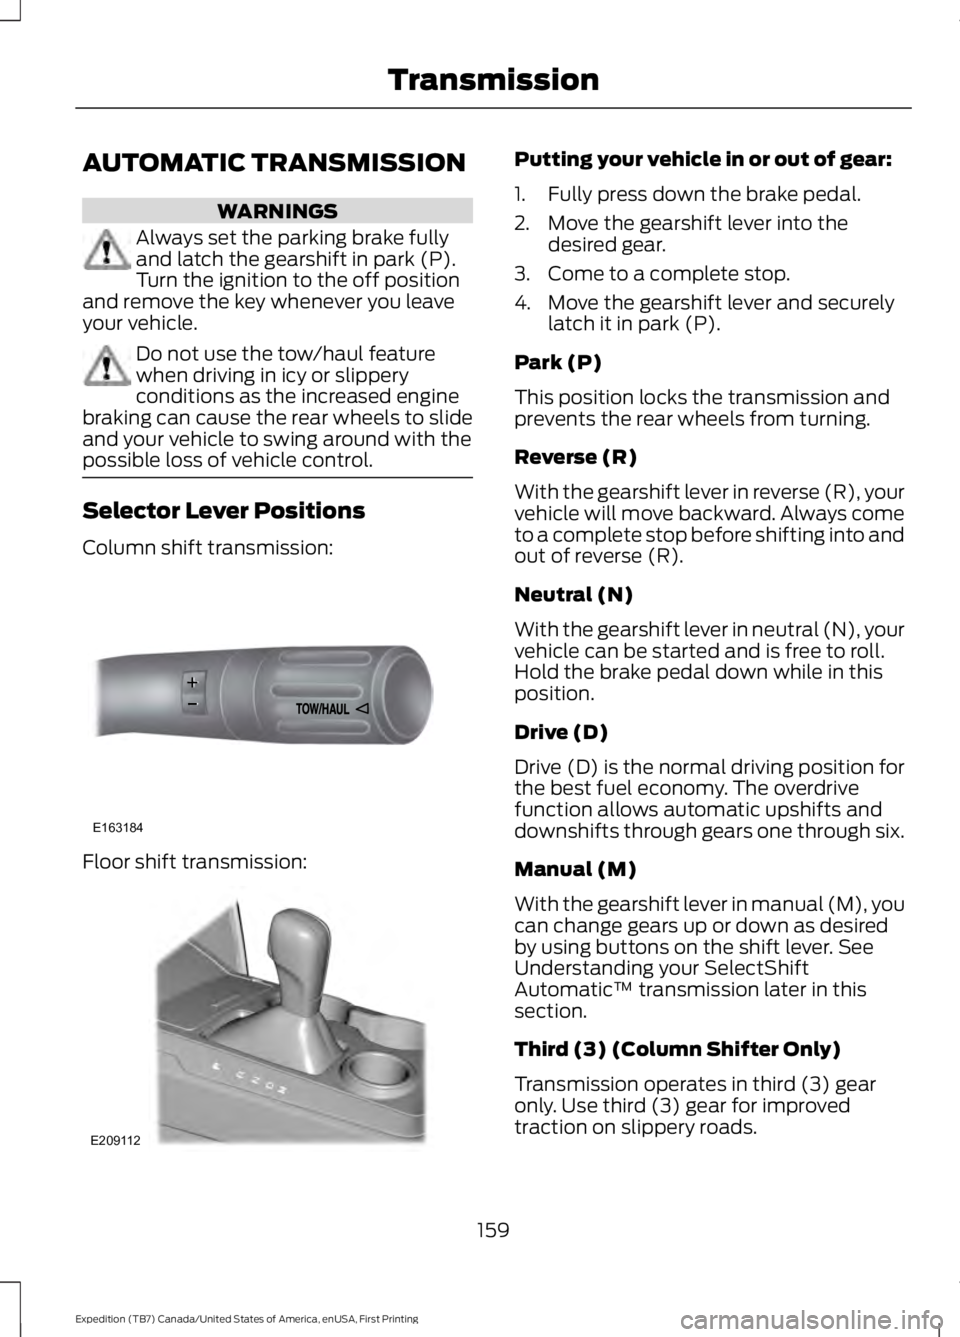
Selector Lever Positions
Column shift transmission:
Floor shift transmission:
Putting your vehicle in or out of gear:
1. Fully press down the brake pedal.
2. Move the gearshift lever into thedesired gear.
3. Come to a complete stop.
4. Move the gearshift lever and securelylatch it in park (P).
Park (P)
This position locks the transmission andprevents the rear wheels from turning.
Reverse (R)
With the gearshift lever in reverse (R), yourvehicle will move backward. Always cometo a complete stop before shifting into andout of reverse (R).
Neutral (N)
With the gearshift lever in neutral (N), yourvehicle can be started and is free to roll.Hold the brake pedal down while in thisposition.
Drive (D)
Drive (D) is the normal driving position forthe best fuel economy. The overdrivefunction allows automatic upshifts anddownshifts through gears one through six.
Manual (M)
With the gearshift lever in manual (M), youcan change gears up or down as desiredby using buttons on the shift lever. SeeUnderstanding your SelectShiftAutomatic™ transmission later in thissection.
Third (3) (Column Shifter Only)
Transmission operates in third (3) gearonly. Use third (3) gear for improvedtraction on slippery roads.
159
Expedition (TB7) Canada/United States of America, enUSA, First Printing
TransmissionE163184 E209112
Page 164 of 421
In order to prevent the engine from runningat too low an RPM, which may cause it tostall, SelectShift will still automaticallymake some downshifts if it has determinedthat you have not downshifted in time.Although SelectShift will make somedownshifts for you, it will still allow you todownshift at any time as long as theSelectShift determines that damage willnot be caused to the engine fromover-revving.
SelectShift will not automatically upshift,even if the engine is approaching the RPMlimit. It must be shifted manually bypressing the + button.
Note:Engine damage may occur if youmaintain excessive engine revving withoutshifting.
The SelectShift Automatic transmissionfeature has two modes: PRS and M mode.
Progressive Range Selection (PRS)
Progressive Range Selection gives you theability to lockout gears from the automaticshifting range. This may provide you withan improved driving experience (forexample, in slippery conditions or whenexperiencing a steep grade).
With the gearshift lever in drive (D), pressthe – button to active PRS. The availableand selected gears are indicated on theinstrument cluster.
All available gears will display with thecurrent gear indicated. Press the – buttonagain to lock out gears beginning with thehighest gear. Example: press the – buttontwice to lock out 6th and 5th gears. Onlythe available gears will display and thetransmission will automatically shiftbetween the available gears. Press the +button to unlock gears to allow thetransmission to shift to higher gears. Thetransmission will shift automatically withinthe gear range you select.
Manual (M)
Moving the gearshift lever to the manual(M) position will allow you to manuallyselect the gear you desire. Only the currentgear will display. Use the buttons on thegearshift lever to manually select gears.Press the + button to upshift or the –button to downshift. Return thetransmission to a different gearshiftposition to deactivate manual control.
Upshift to the recommended shift speedsaccording to the following chart:
Upshifts when accelerating (recommended for best fuel economy)
Shift from:
15 mph (24 km/h)1 – 2
25 mph (40 km/h)2 – 3
40 mph (64 km/h)3 – 4
45 mph (72 km/h)4 – 5
50 mph (80 km/h)5 – 6
161
Expedition (TB7) Canada/United States of America, enUSA, First Printing
Transmission
Page 176 of 421
PARKING BRAKE
WARNING
Always set the parking brake fullyand make sure the transmission isplaced in park (P). Failure to set theparking brake and engage park could resultin vehicle roll-away, property damage orbodily injury. Turn the ignition to the lockposition and remove the key whenever youleave your vehicle.
Apply the parking brake whenever yourvehicle is parked. Press the pedaldownward to set the parking brake. Thebrake warning lamp in the instrumentcluster will illuminate and remainsilluminated until the parking brake isreleased.
To release, pull the brake release leverlocated at the lower left side of theinstrument panel.
If you are parking your vehicle on a gradeor with a trailer, press and hold the brakepedal down, then set the parking brake.There may be a little vehicle movement asthe parking brake sets to hold the vehicle'sweight. This is normal and should be noreason for concern. If needed, press andhold the service brake pedal down, thentry reapplying the parking brake. Chock thewheels if required. If the parking brakecannot hold the weight of the vehicle, theparking brake may need to be serviced orthe vehicle may be overloaded.
HILL START ASSIST
WARNINGS
The system does not replace theparking brake. When you leave yourvehicle, always apply the parkingbrake and shift the transmission into park(P) (automatic transmission) or first gear(1) (manual transmission).
WARNINGS
You must remain in your vehicle onceyou have activated the system.
During all times, you are responsiblefor controlling your vehicle,supervising the system andintervening, if required.
If the engine is revved excessively, orif a malfunction is detected, thesystem will be deactivated.
The system makes it easier to pull awaywhen your vehicle is on a slope without theneed to use the parking brake.
When the system is active, your vehicle willremain stationary on the slope for two tothree seconds after you release the brakepedal. This allows you time to move yourfoot from the brake to the acceleratorpedal. The brakes release automaticallywhen the engine has sufficient torque toprevent your vehicle from rolling down thegrade. This is an advantage when pullingaway on a slope, for example from a carpark ramp, traffic lights or when reversinguphill into a parking space.
The system will activate automatically onany slope that will cause significant vehiclerollback. For vehicles with a manualtransmission, you can switch this featureoff using the information display. SeeInformation Displays (page 92). Thesystem will remain on or off depending onhow it was last set.
Note:There is no warning lamp to indicatethe system is either on or off.
Note:If your vehicle is equipped with AutoHold, Hill Start Assist will not be availablewhile Auto Hold is active.
173
Expedition (TB7) Canada/United States of America, enUSA, First Printing
Brakes
Page 177 of 421
Using Hill Start Assist
1. Bring your vehicle to a completestandstill. Keep the brake pedalpressed and select an uphill gear (forexample, first (1) when facing uphill orreverse (R) when facing downhill).
2. If the sensors detect that your vehicleis on a slope, the system will activateautomatically.
3. When you remove your foot from thebrake pedal, your vehicle will remainon the slope without rolling away forabout two or three seconds. This holdtime will automatically be extended ifyou are in the process of driving off.
4. Drive off in the normal manner. Thebrakes will release automatically.
Switching the System On and Off
You can switch this feature on or off if yourvehicle is equipped with a manualtransmission and an information display.See General Information (page 92). Thesystem remembers the last setting whenyou start your vehicle.
If your vehicle is not equipped with amanual transmission and an informationdisplay, you cannot turn the system on oroff. When you switch the ignition on, thesystem automatically turns on.
174
Expedition (TB7) Canada/United States of America, enUSA, First Printing
Brakes
Page 187 of 421
Note:When towing, the camera only seeswhat you are towing behind your vehicle.This might not provide adequate coverageas it usually provides in normal operationand you might not see some objects. Insome vehicles, the guidelines may disappearonce you engage the trailer tow connector.
The camera may not operate correctlyunder the following conditions:
•Nighttime or dark areas if one or bothreverse lamps are not operating.
•Mud, water or debris obstructs thecamera's view. Clean the lens with asoft, lint-free cloth and non-abrasivecleaner.
•The camera is misaligned due todamage to the rear of your vehicle.
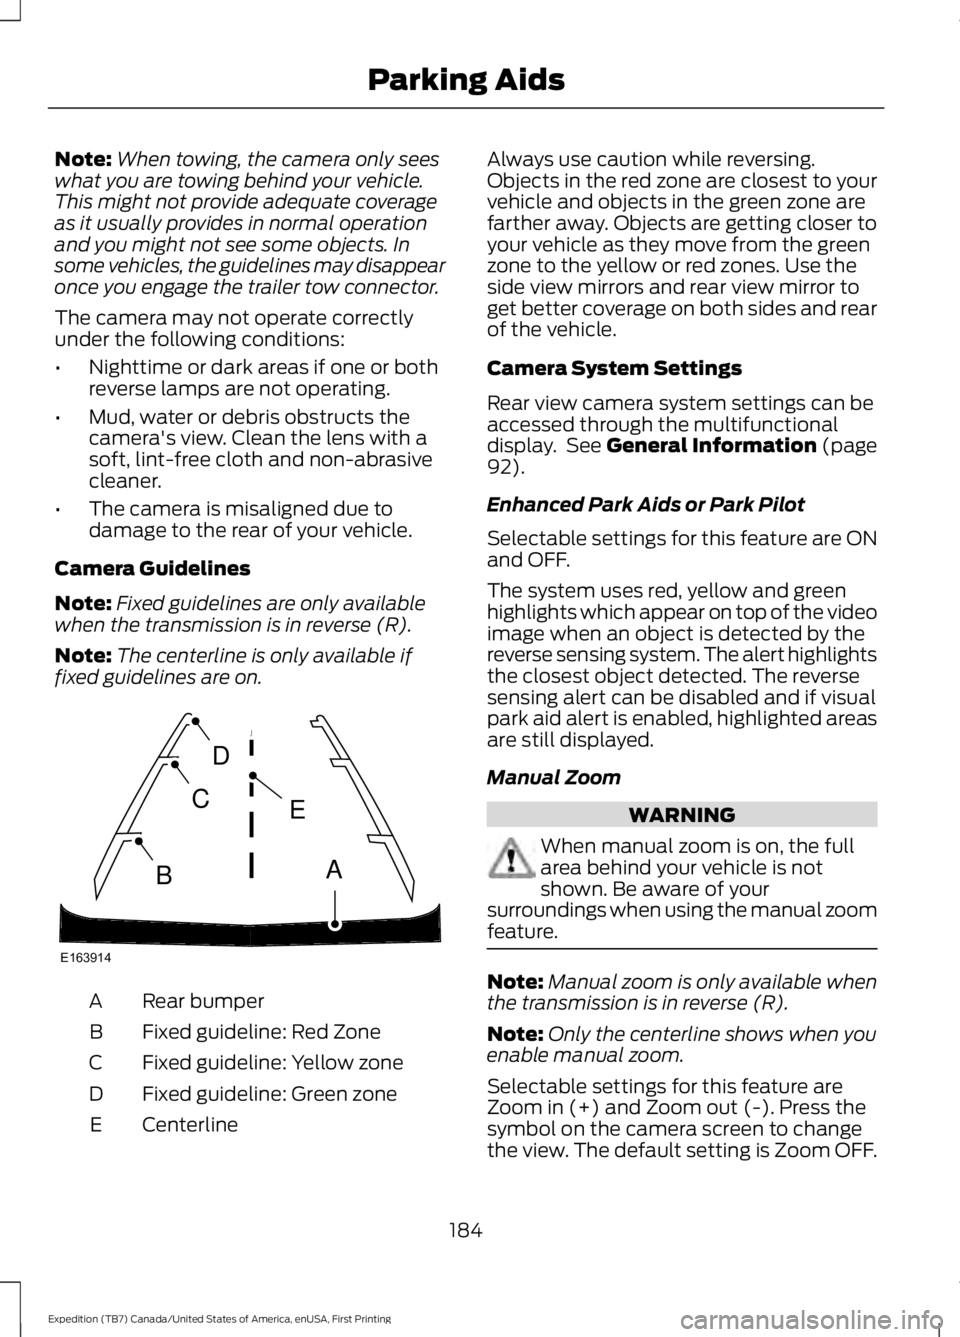
Camera Guidelines
Note:Fixed guidelines are only availablewhen the transmission is in reverse (R).
Note:The centerline is only available iffixed guidelines are on.
Rear bumperA
Fixed guideline: Red ZoneB
Fixed guideline: Yellow zoneC
Fixed guideline: Green zoneD
CenterlineE
Always use caution while reversing.Objects in the red zone are closest to yourvehicle and objects in the green zone arefarther away. Objects are getting closer toyour vehicle as they move from the greenzone to the yellow or red zones. Use theside view mirrors and rear view mirror toget better coverage on both sides and rearof the vehicle.
Camera System Settings
Rear view camera system settings can beaccessed through the multifunctionaldisplay. See General Information (page92).
Enhanced Park Aids or Park Pilot
Selectable settings for this feature are ONand OFF.
The system uses red, yellow and greenhighlights which appear on top of the videoimage when an object is detected by thereverse sensing system. The alert highlightsthe closest object detected. The reversesensing alert can be disabled and if visualpark aid alert is enabled, highlighted areasare still displayed.
Manual Zoom
WARNING
When manual zoom is on, the fullarea behind your vehicle is notshown. Be aware of yoursurroundings when using the manual zoomfeature.
Note:Manual zoom is only available whenthe transmission is in reverse (R).
Note:Only the centerline shows when youenable manual zoom.
Selectable settings for this feature areZoom in (+) and Zoom out (-). Press thesymbol on the camera screen to changethe view. The default setting is Zoom OFF.
184
Expedition (TB7) Canada/United States of America, enUSA, First Printing
Parking AidsE163914
A
E
D
C
B
Page 191 of 421
BLIND SPOT INFORMATION
SYSTEM
WARNING
To help avoid injuries, NEVER use theBlind Spot Information System as areplacement for using the interiorand exterior mirrors or looking over yourshoulder before changing lanes. The BlindSpot Information System is not areplacement for careful driving.
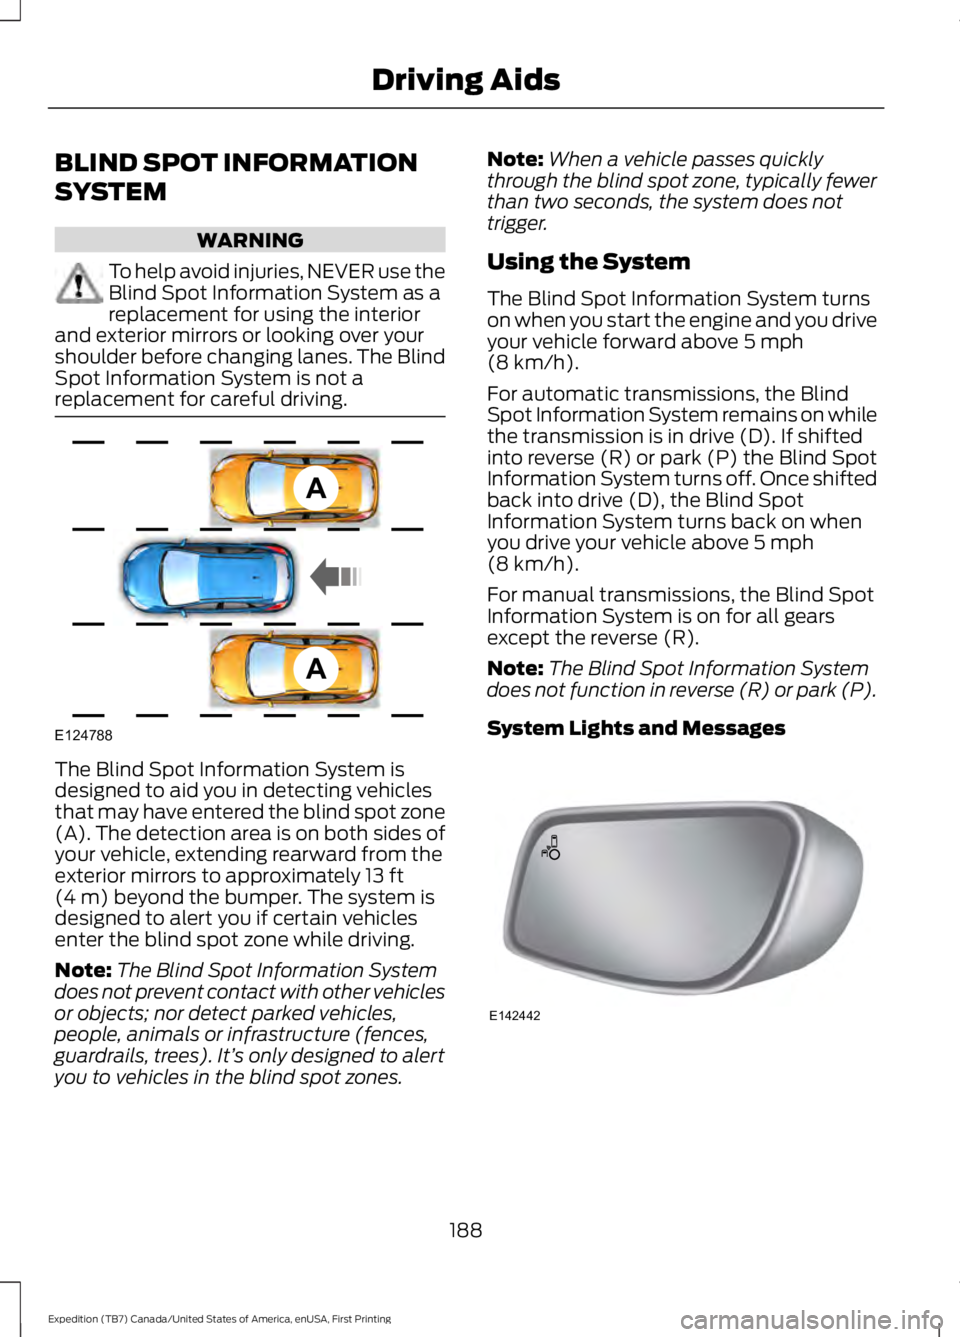
The Blind Spot Information System isdesigned to aid you in detecting vehiclesthat may have entered the blind spot zone(A). The detection area is on both sides ofyour vehicle, extending rearward from theexterior mirrors to approximately 13 ft(4 m) beyond the bumper. The system isdesigned to alert you if certain vehiclesenter the blind spot zone while driving.
Note:The Blind Spot Information Systemdoes not prevent contact with other vehiclesor objects; nor detect parked vehicles,people, animals or infrastructure (fences,guardrails, trees). It’s only designed to alertyou to vehicles in the blind spot zones.
Note:When a vehicle passes quicklythrough the blind spot zone, typically fewerthan two seconds, the system does nottrigger.
Using the System
The Blind Spot Information System turnson when you start the engine and you driveyour vehicle forward above 5 mph(8 km/h).
For automatic transmissions, the BlindSpot Information System remains on whilethe transmission is in drive (D). If shiftedinto reverse (R) or park (P) the Blind SpotInformation System turns off. Once shiftedback into drive (D), the Blind SpotInformation System turns back on whenyou drive your vehicle above 5 mph(8 km/h).
For manual transmissions, the Blind SpotInformation System is on for all gearsexcept the reverse (R).
Note:The Blind Spot Information Systemdoes not function in reverse (R) or park (P).
System Lights and Messages
188
Expedition (TB7) Canada/United States of America, enUSA, First Printing
Driving AidsA
A
E124788 E142442