ECO mode FORD EXPEDITION EL 2017 Owners Manual
[x] Cancel search | Manufacturer: FORD, Model Year: 2017, Model line: EXPEDITION EL, Model: FORD EXPEDITION EL 2017Pages: 500, PDF Size: 6.13 MB
Page 10 of 500
ABOUT THIS MANUAL
Thank you for choosing Ford. Werecommend that you take some time toget to know your vehicle by reading thismanual. The more that you know aboutyour vehicle, the greater the safety andpleasure you will get from driving it.
WARNING
Driving while distracted can result inloss of vehicle control, crash andinjury. We strongly recommend thatyou use extreme caution when using anydevice that may take your focus off theroad. Your primary responsibility is the safeoperation of your vehicle. We recommendagainst the use of any hand-held devicewhile driving and encourage the use ofvoice-operated systems when possible.Make sure you are aware of all applicablelocal laws that may affect the use ofelectronic devices while driving.
Note: This manual describes productfeatures and options available throughoutthe range of available models, sometimeseven before they are generally available. Itmay describe options not fitted to thevehicle you have purchased.
Note: Some of the illustrations in thismanual may show features as used indifferent models, so may appear differentto you on your vehicle.
Note: Always use and operate your vehiclein line with all applicable laws andregulations.
Note: Pass on this manual when sellingyour vehicle. It is an integral part of yourvehicle.
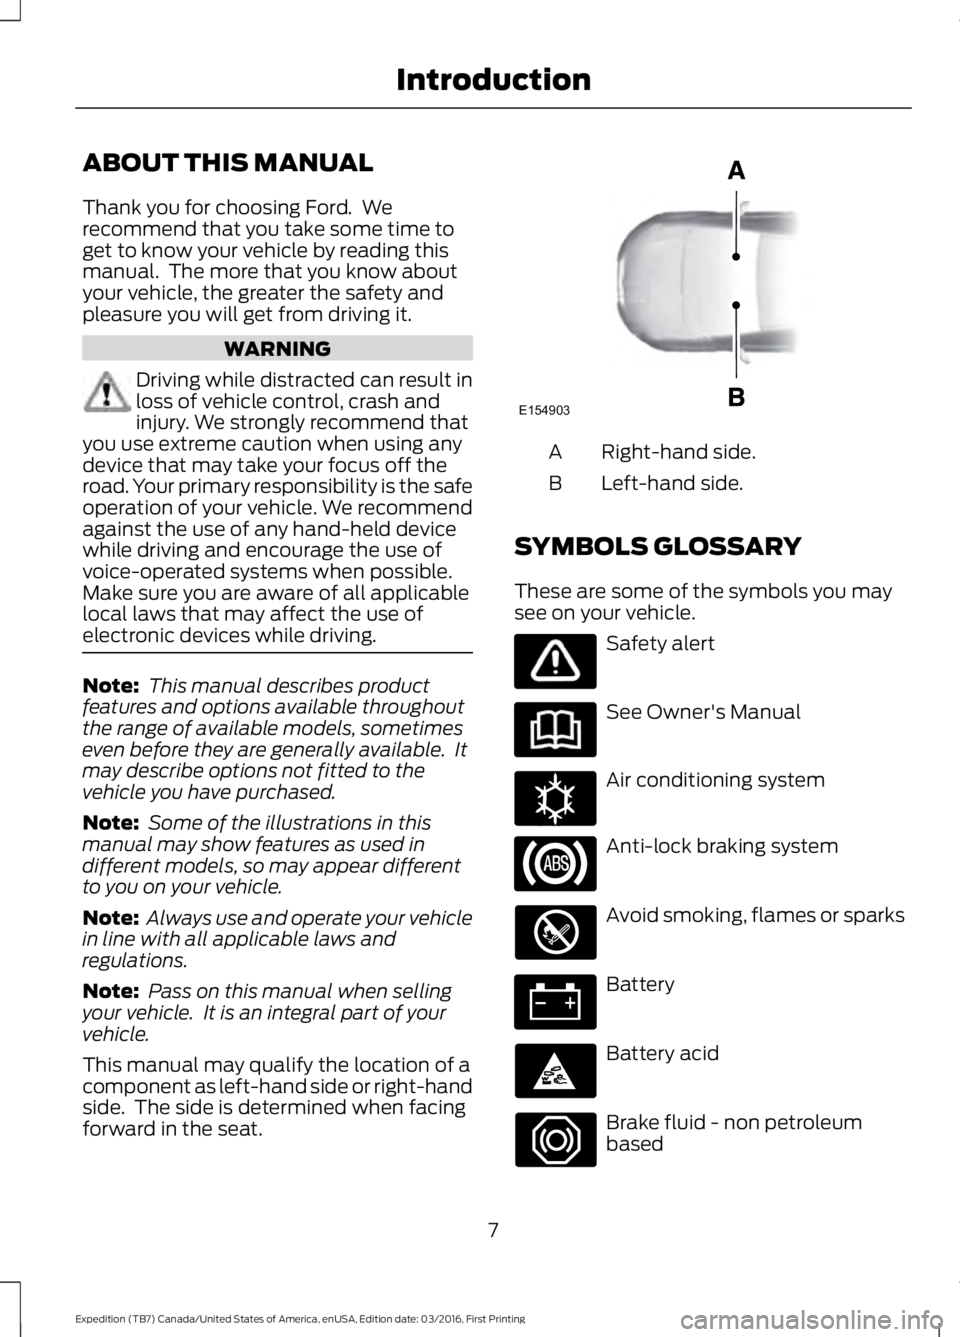
This manual may qualify the location of acomponent as left-hand side or right-handside. The side is determined when facingforward in the seat.
Right-hand side.A
Left-hand side.B
SYMBOLS GLOSSARY
These are some of the symbols you maysee on your vehicle.
Safety alert
See Owner's Manual
Air conditioning system
Anti-lock braking system
Avoid smoking, flames or sparks
Battery
Battery acid
Brake fluid - non petroleumbased
7
Expedition (TB7) Canada/United States of America, enUSA, Edition date: 03/2016, First Printing
IntroductionE154903 E162384
Page 32 of 500
PRINCIPLE OF OPERATION
WARNINGS
Always drive and ride with yourseatback upright and the lap beltsnug and low across the hips.
To reduce the risk of injury, makesure children sit where they can beproperly restrained.
Never let a passenger hold a child onhis or her lap while the vehicle ismoving. The passenger cannotprotect the child from injury in a crash,which may result in serious injury or death.
All occupants of the vehicle,including the driver, should alwaysproperly wear their safety belts, evenwhen an airbag supplemental restraintsystem is provided. Failure to properly wearyour safety belt could seriously increasethe risk of injury or death.
It is extremely dangerous to ride in acargo area, inside or outside of avehicle. In a crash, people riding inthese areas are more likely to be seriouslyinjured or killed. Do not allow people to ridein any area of your vehicle that is notequipped with seats and safety belts. Besure everyone in your vehicle is in a seatand using a safety belt properly.
In a rollover crash, an unbeltedperson is significantly more likely todie than a person wearing a safetybelt.
Each seating position in your vehiclehas a specific safety belt assemblywhich is made up of one buckle andone tongue that are designed to be usedas a pair. 1) Use the shoulder belt on theoutside shoulder only. Never wear theshoulder belt under the arm. 2) Neverswing the safety belt around your neck overthe inside shoulder. 3) Never use a singlebelt for more than one person.
WARNINGS
When possible, all children 12 yearsold and under should be properlyrestrained in a rear seating position.Failure to follow this could seriouslyincrease the risk of injury or death.
Safety belts and seats can becomehot in a vehicle that has been closedup in sunny weather; they could burna small child. Check seat covers andbuckles before you place a child anywherenear them.
Front and rear seat occupants,including pregnant women, shouldwear safety belts for optimumprotection in an accident.
All seating positions in this vehicle havelap and shoulder safety belts. Alloccupants of the vehicle should alwaysproperly wear their safety belts, even whenan airbag supplemental restraint systemis provided.
The safety belt system consists of:
•Lap and shoulder safety belts.
•Shoulder safety belt with automaticlocking mode, (except driver safetybelt).
•Height adjuster at the front outboardseating positions.
•Safety belt pretensioner at the frontoutboard seating positions.
•Safety belt warning light and chime.
•Crash sensors and monitoring systemwith readiness indicator.
29
Expedition (TB7) Canada/United States of America, enUSA, Edition date: 03/2016, First Printing
Seatbelts
Page 34 of 500
Pregnant women should always wear theirseatbelt. The lap belt portion of acombination lap and shoulder belt shouldbe positioned low across the hips belowthe belly and worn as tight as comfort willallow. The shoulder belt should bepositioned to cross the middle of theshoulder and the center of the chest.
Seatbelt Locking Modes
WARNINGS
After any vehicle crash, the seatbeltsystem at all passenger seatingpositions must be checked by anauthorized dealer to verify that theautomatic locking retractor feature forchild seats is still functioning properly. Inaddition, all seatbelts should be checkedfor proper function.
The belt and retractor assemblymust be replaced if the seatbeltassembly automatic locking retractorfeature or any other seatbelt function isnot operating properly when checked byan authorized dealer. Failure to replace thebelt and retractor assembly could increasethe risk of injury in crashes.
All safety restraints in the vehicle arecombination lap and shoulder belts. Thedriver seatbelt has the first type of lockingmode. The front outboard passenger andrear seat seatbelts have both types oflocking modes described as follows:
Vehicle Sensitive Mode
This is the normal retractor mode, whichallows free shoulder belt lengthadjustment to your movements andlocking in response to vehicle movement.For example, if the driver brakes suddenlyor turns a corner sharply, or the vehiclereceives an impact of about 5 mph(8 km/h) or more, the combinationseatbelts will lock to help reduce forwardmovement of the driver and passengers.
In addition, the retractor is designed to lockif the webbing is pulled out too quickly. Ifthis occurs, let the belt retract slightly andpull webbing out again in a slow andcontrolled manner.
Automatic Locking Mode
In this mode, the shoulder belt isautomatically pre-locked. The belt will stillretract to remove any slack in the shoulderbelt. The automatic locking mode is notavailable on the driver seatbelt.
When to Use the Automatic LockingMode
This mode should be used any time a childsafety seat, except a booster, is installedin passenger front or rear seating positions.Children 12 years old and under should beproperly restrained in a rear seatingposition whenever possible. See ChildSafety (page 16).
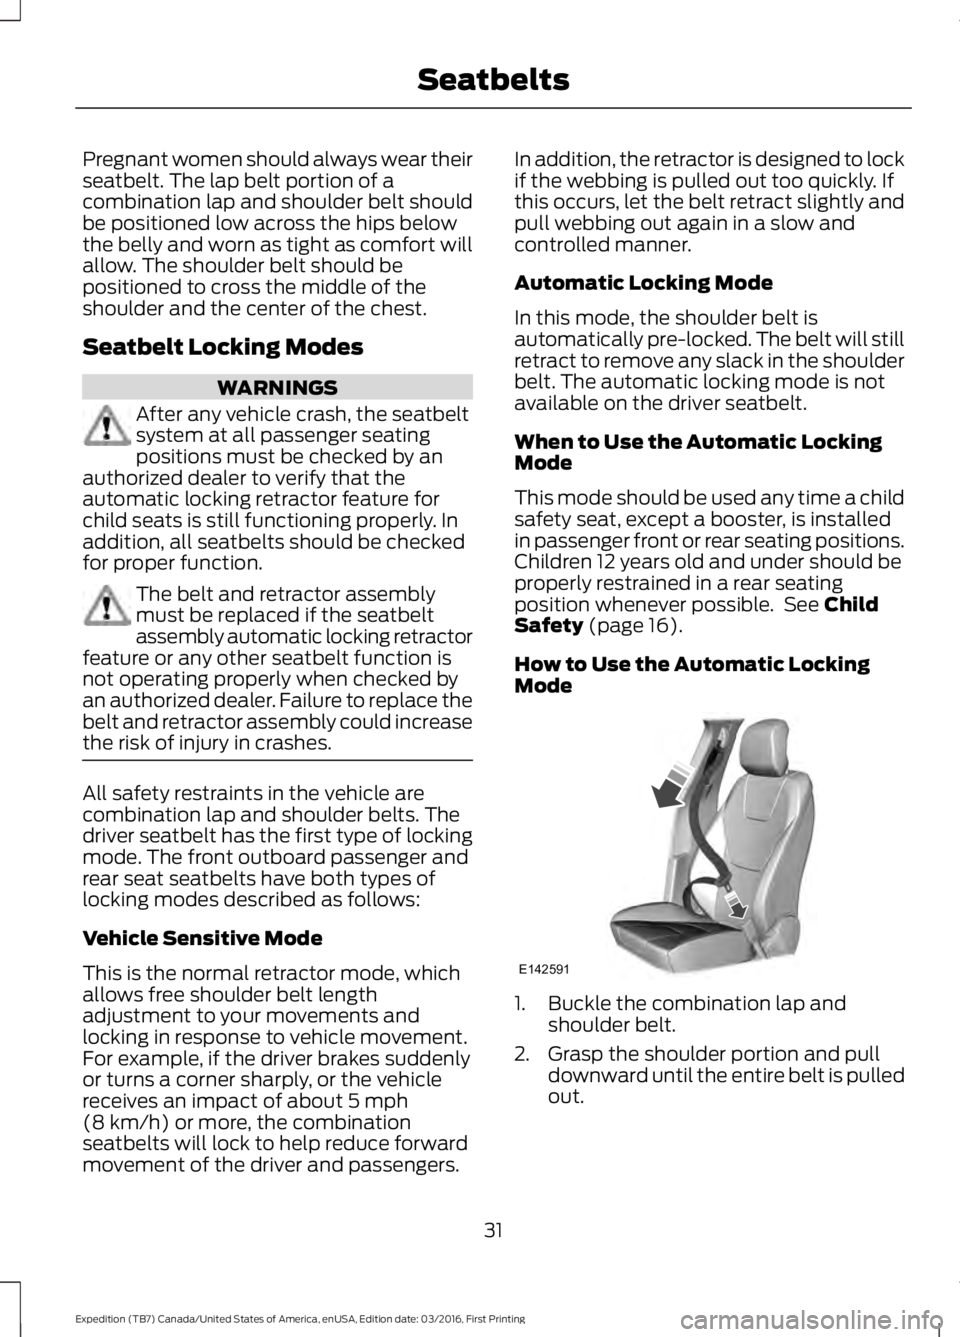
How to Use the Automatic LockingMode
1. Buckle the combination lap andshoulder belt.
2. Grasp the shoulder portion and pulldownward until the entire belt is pulledout.
31
Expedition (TB7) Canada/United States of America, enUSA, Edition date: 03/2016, First Printing
SeatbeltsE142591
Page 35 of 500
Allow the belt to retract. As the beltretracts, you will hear a clicking sound. Thisindicates the seatbelt is now in theautomatic locking mode.
How to Disengage the AutomaticLocking Mode
Unbuckle the combination lap andshoulder belt and allow it to retractcompletely to disengage the automaticlocking mode and activate the vehiclesensitive (emergency) locking mode.
SEATBELT HEIGHT
ADJUSTMENT
WARNING
Position the safety belt heightadjuster so that the belt rests acrossthe middle of your shoulder. Failureto adjust the safety belt properly couldreduce the effectiveness of the safety beltand increase the risk of injury in a crash.
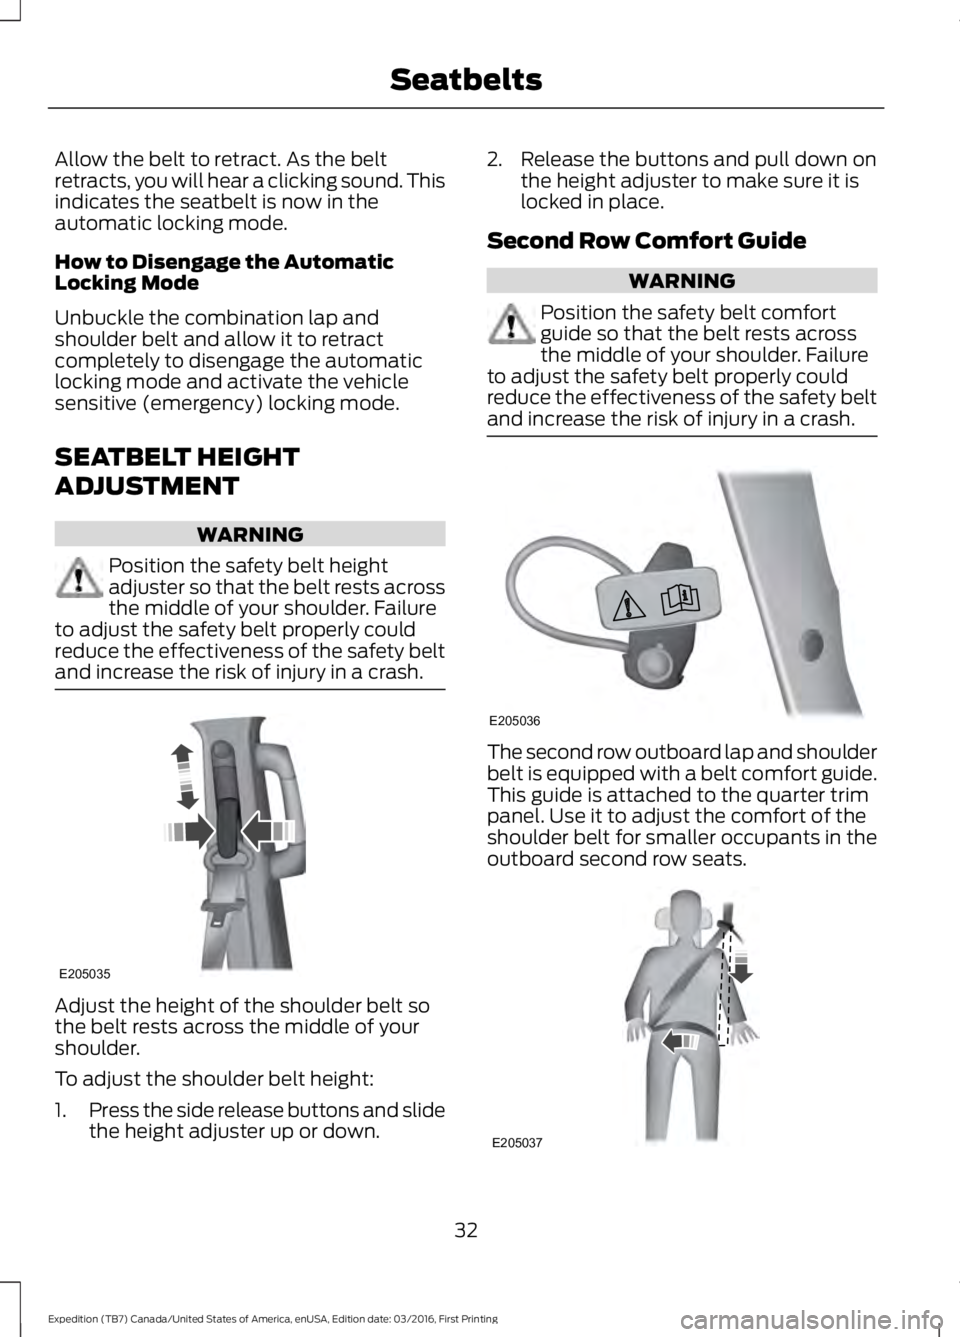
Adjust the height of the shoulder belt sothe belt rests across the middle of yourshoulder.
To adjust the shoulder belt height:
1.Press the side release buttons and slidethe height adjuster up or down.
2. Release the buttons and pull down onthe height adjuster to make sure it islocked in place.
Second Row Comfort Guide
WARNING
Position the safety belt comfortguide so that the belt rests acrossthe middle of your shoulder. Failureto adjust the safety belt properly couldreduce the effectiveness of the safety beltand increase the risk of injury in a crash.
The second row outboard lap and shoulderbelt is equipped with a belt comfort guide.This guide is attached to the quarter trimpanel. Use it to adjust the comfort of theshoulder belt for smaller occupants in theoutboard second row seats.
32
Expedition (TB7) Canada/United States of America, enUSA, Edition date: 03/2016, First Printing
SeatbeltsE205035 E205036 E205037
Page 37 of 500
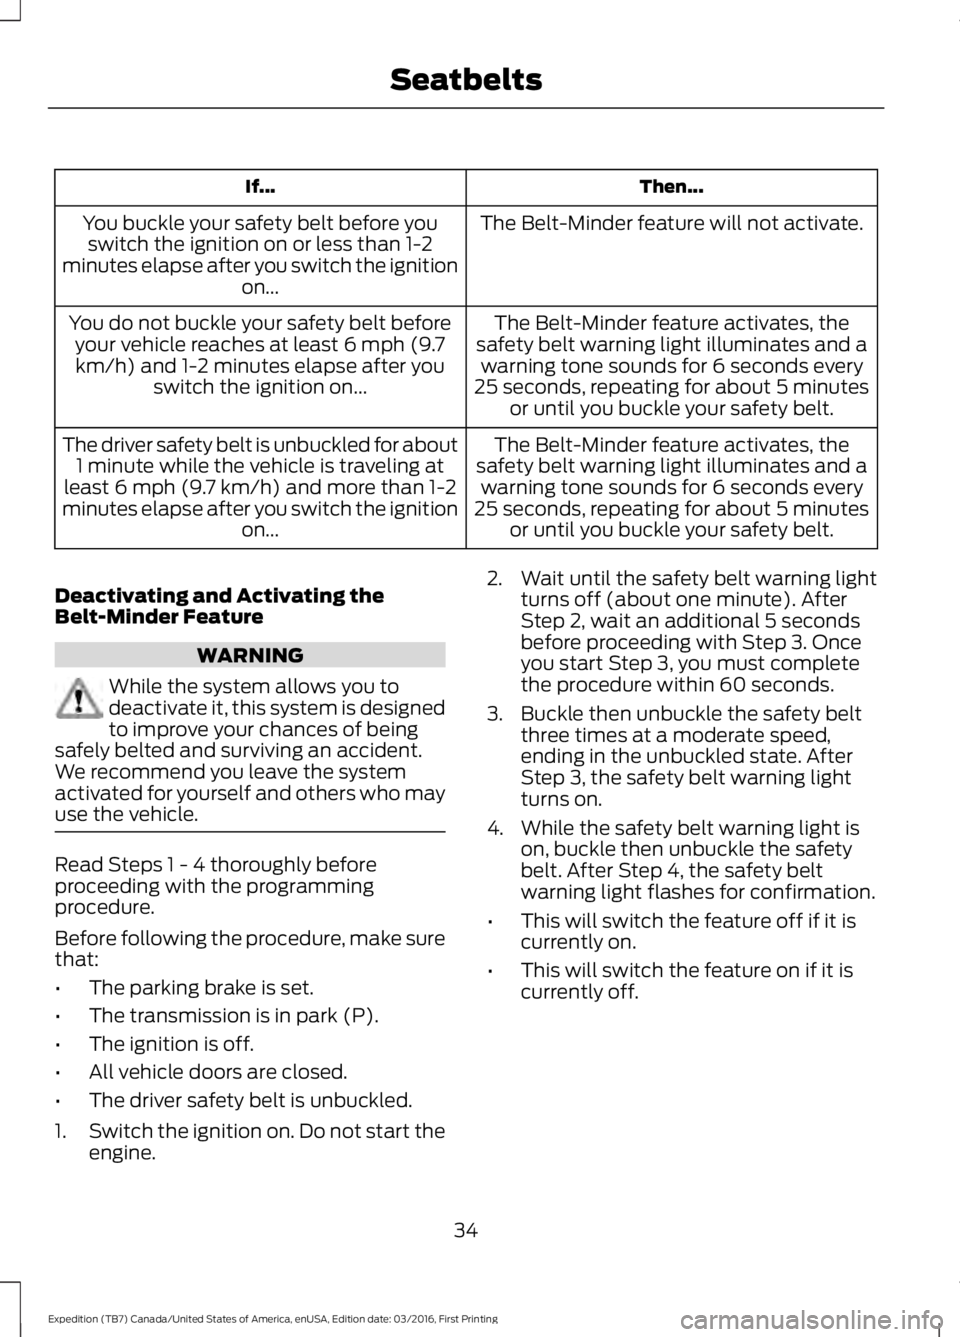
Then...If...
The Belt-Minder feature will not activate.You buckle your safety belt before youswitch the ignition on or less than 1-2minutes elapse after you switch the ignitionon...
The Belt-Minder feature activates, thesafety belt warning light illuminates and awarning tone sounds for 6 seconds every25 seconds, repeating for about 5 minutesor until you buckle your safety belt.
You do not buckle your safety belt beforeyour vehicle reaches at least 6 mph (9.7km/h) and 1-2 minutes elapse after youswitch the ignition on...
The Belt-Minder feature activates, thesafety belt warning light illuminates and awarning tone sounds for 6 seconds every25 seconds, repeating for about 5 minutesor until you buckle your safety belt.
The driver safety belt is unbuckled for about1 minute while the vehicle is traveling atleast 6 mph (9.7 km/h) and more than 1-2minutes elapse after you switch the ignitionon...
Deactivating and Activating theBelt-Minder Feature
WARNING
While the system allows you todeactivate it, this system is designedto improve your chances of beingsafely belted and surviving an accident.We recommend you leave the systemactivated for yourself and others who mayuse the vehicle.
Read Steps 1 - 4 thoroughly beforeproceeding with the programmingprocedure.
Before following the procedure, make surethat:
•The parking brake is set.
•The transmission is in park (P).
•The ignition is off.
•All vehicle doors are closed.
•The driver safety belt is unbuckled.
1.Switch the ignition on. Do not start theengine.
2. Wait until the safety belt warning lightturns off (about one minute). AfterStep 2, wait an additional 5 secondsbefore proceeding with Step 3. Onceyou start Step 3, you must completethe procedure within 60 seconds.
3. Buckle then unbuckle the safety beltthree times at a moderate speed,ending in the unbuckled state. AfterStep 3, the safety belt warning lightturns on.
4. While the safety belt warning light ison, buckle then unbuckle the safetybelt. After Step 4, the safety beltwarning light flashes for confirmation.
•This will switch the feature off if it iscurrently on.
•This will switch the feature on if it iscurrently off.
34
Expedition (TB7) Canada/United States of America, enUSA, Edition date: 03/2016, First Printing
Seatbelts
Page 38 of 500
CHILD RESTRAINT AND
SEATBELT MAINTENANCE
Inspect the vehicle safety belts and childsafety seat systems periodically to makesure they work properly and are notdamaged. Inspect the vehicle and childseat safety belts to make sure there are nonicks, tears or cuts. Replace if necessary.All vehicle safety belt assemblies, includingretractors, buckles, front safety belt buckleassemblies, buckle support assemblies(slide bar-if equipped), shoulder beltheight adjusters (if equipped), shoulderbelt guide on seat back (if equipped), childsafety seat LATCH and tether anchors, andattaching hardware, should be inspectedafter a crash. Read the child restraintmanufacturer's instructions for additionalinspection and maintenance informationspecific to the child restraint.
Ford Motor Company recommends thatall safety belt assemblies in use in vehiclesinvolved in a crash be replaced. However,if the crash was minor and an authorizeddealer finds that the belts do not showdamage and continue to operate properly,they do not need to be replaced. Safetybelt assemblies not in use during a crashshould also be inspected and replaced ifeither damage or improper operation isnoted.
Properly care for safety belts. See VehicleCare (page 264).
SEATBELT EXTENSION
WARNINGS
Persons who fit into the vehicle'sseatbelt should not use an extension.Unnecessary use could result inserious personal injury in the event of acrash.
WARNINGS
Only use extensions provided free ofcharge by Ford Motor Companydealers. The dealer will provide anextension designed specifically for thisvehicle, model year and seating position.The use of an extension intended foranother vehicle, model year or seatingposition may not offer you the fullprotection of your vehicle’s seatbeltrestraint system.
Never use seatbelt extensions toinstall child restraints.
Do not use a seatbelt extension withan inflatable seatbelt.
Do not use extensions to change thefit of the belt across the torso, overthe lap or to make the seatbeltbuckle easier to reach.
If, because of body size or driving position,it is not possible to properly fasten theseatbelt over your lap and shoulder, anextension that is compatible with theseatbelts is available free of charge fromFord Motor Company dealers. Only Fordseatbelt extensions made by the originalequipment seatbelts manufacturer shouldbe used with Ford seatbelts. Ask yourauthorized dealer if your extension iscompatible with your Ford vehicle restraintsystem.
35
Expedition (TB7) Canada/United States of America, enUSA, Edition date: 03/2016, First Printing
Seatbelts
Page 50 of 500
PRINCIPLE OF OPERATION
MyKey allows you to program keys withrestricted driving modes to promote gooddriving habits. All but one of the keysprogrammed to the vehicle can beactivated with these restricted modes.
Any keys that have not been programmedare referred to as administrator keys oradmin keys. They can be used to:
•Create a MyKey.
•Program configurable MyKey settings.
•Clear all MyKey features.
When you have programmed a MyKey, youcan access the following information usingthe information display:
•How many admin keys and MyKeys areprogrammed to your vehicle.
•The total distance your vehicle hastraveled using a MyKey.
Note:All MyKeys are programmed to thesame settings. You cannot program themindividually.
Note:For vehicles equipped with apush-button start switch: When both aMyKey and an admin key are present whenyou start your vehicle, the system recognizesthe admin key only.
Non-configurable Settings
The following settings cannot be changedby an admin key user:
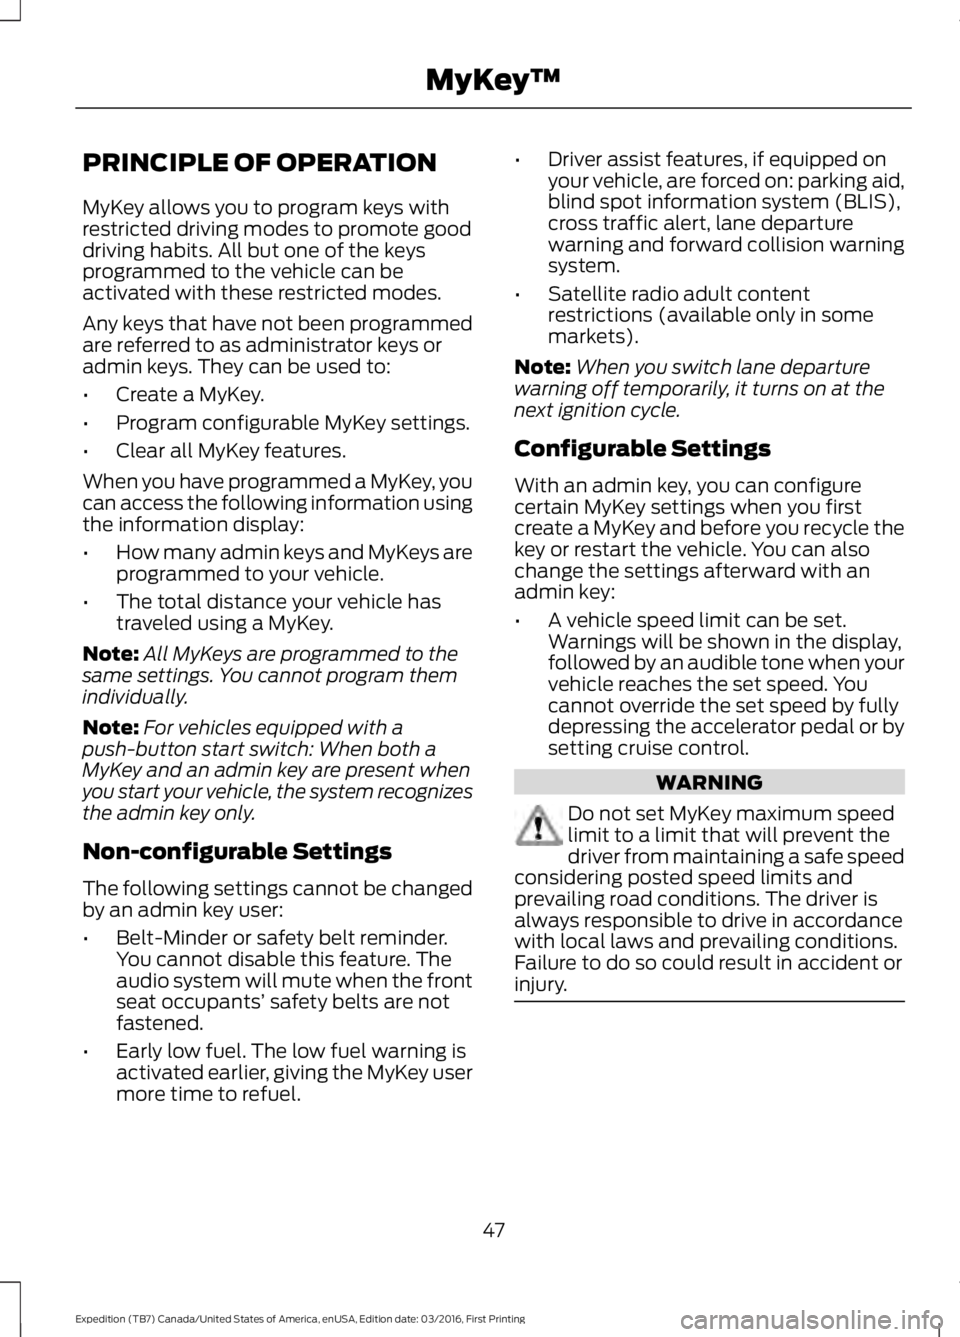
•Belt-Minder or safety belt reminder.You cannot disable this feature. Theaudio system will mute when the frontseat occupants’ safety belts are notfastened.
•Early low fuel. The low fuel warning isactivated earlier, giving the MyKey usermore time to refuel.
•Driver assist features, if equipped onyour vehicle, are forced on: parking aid,blind spot information system (BLIS),cross traffic alert, lane departurewarning and forward collision warningsystem.
•Satellite radio adult contentrestrictions (available only in somemarkets).
Note:When you switch lane departurewarning off temporarily, it turns on at thenext ignition cycle.
Configurable Settings
With an admin key, you can configurecertain MyKey settings when you firstcreate a MyKey and before you recycle thekey or restart the vehicle. You can alsochange the settings afterward with anadmin key:
•A vehicle speed limit can be set.Warnings will be shown in the display,followed by an audible tone when yourvehicle reaches the set speed. Youcannot override the set speed by fullydepressing the accelerator pedal or bysetting cruise control.
WARNING
Do not set MyKey maximum speedlimit to a limit that will prevent thedriver from maintaining a safe speedconsidering posted speed limits andprevailing road conditions. The driver isalways responsible to drive in accordancewith local laws and prevailing conditions.Failure to do so could result in accident orinjury.
47
Expedition (TB7) Canada/United States of America, enUSA, Edition date: 03/2016, First Printing
MyKey™
Page 55 of 500
LOCKING AND UNLOCKING
You can use the power door lock controlor the remote control to lock and unlockyour vehicle.
Power Door Locks
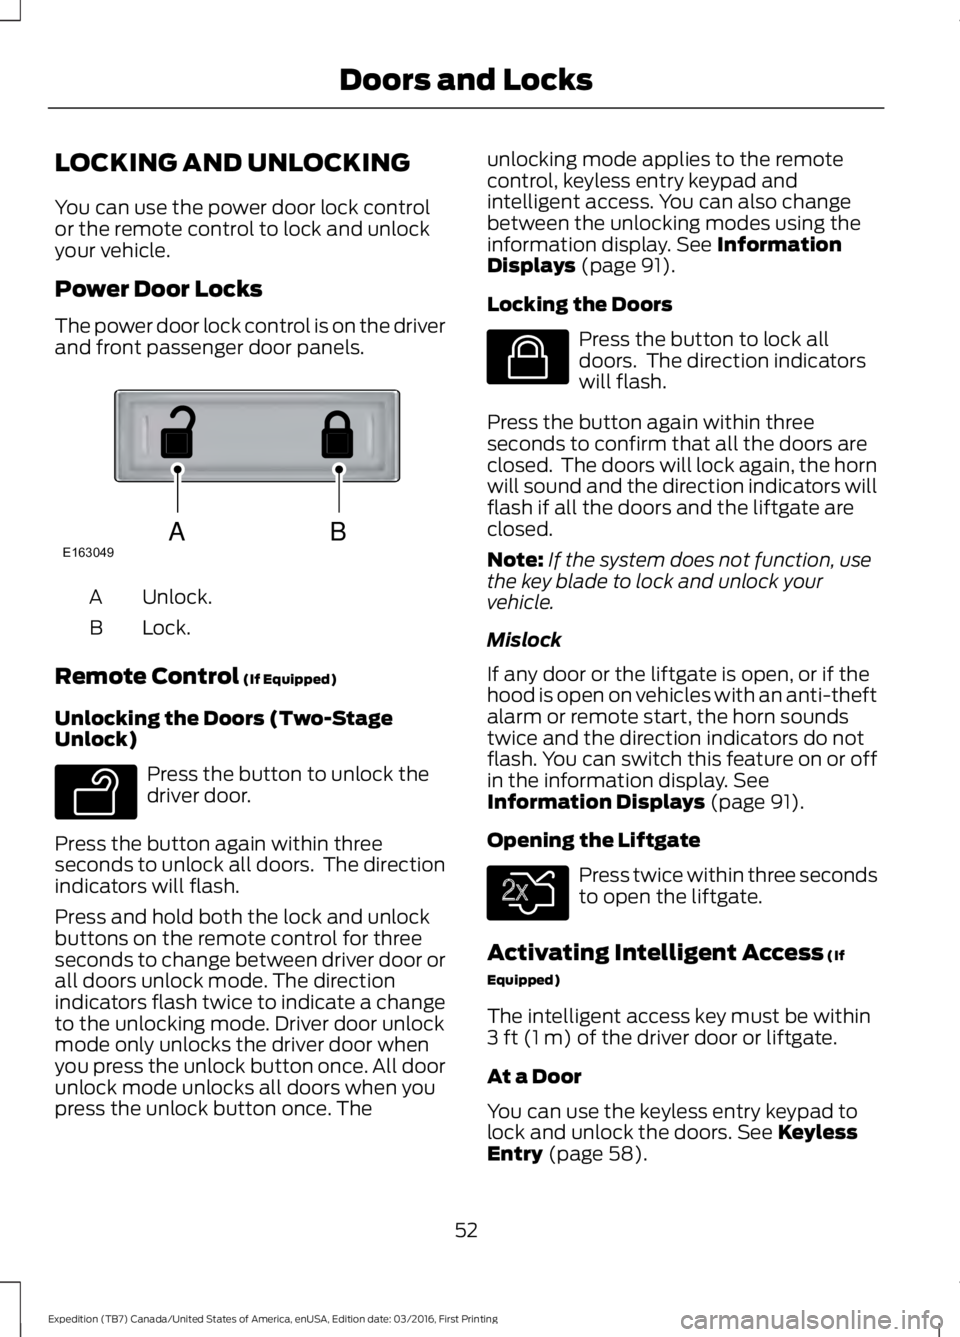
The power door lock control is on the driverand front passenger door panels.
Unlock.A
Lock.B
Remote Control (If Equipped)
Unlocking the Doors (Two-StageUnlock)
Press the button to unlock thedriver door.
Press the button again within threeseconds to unlock all doors. The directionindicators will flash.
Press and hold both the lock and unlockbuttons on the remote control for threeseconds to change between driver door orall doors unlock mode. The directionindicators flash twice to indicate a changeto the unlocking mode. Driver door unlockmode only unlocks the driver door whenyou press the unlock button once. All doorunlock mode unlocks all doors when youpress the unlock button once. The
unlocking mode applies to the remotecontrol, keyless entry keypad andintelligent access. You can also changebetween the unlocking modes using theinformation display. See InformationDisplays (page 91).
Locking the Doors
Press the button to lock alldoors. The direction indicatorswill flash.
Press the button again within threeseconds to confirm that all the doors areclosed. The doors will lock again, the hornwill sound and the direction indicators willflash if all the doors and the liftgate areclosed.
Note:If the system does not function, usethe key blade to lock and unlock yourvehicle.
Mislock
If any door or the liftgate is open, or if thehood is open on vehicles with an anti-theftalarm or remote start, the horn soundstwice and the direction indicators do notflash. You can switch this feature on or offin the information display. SeeInformation Displays (page 91).
Opening the Liftgate
Press twice within three secondsto open the liftgate.
Activating Intelligent Access (If
Equipped)
The intelligent access key must be within3 ft (1 m) of the driver door or liftgate.
At a Door
You can use the keyless entry keypad tolock and unlock the doors. See KeylessEntry (page 58).
52
Expedition (TB7) Canada/United States of America, enUSA, Edition date: 03/2016, First Printing
Doors and LocksABE163049 E138629 E138623 E138630
Page 62 of 500
You can use the keypad to lock or unlockthe doors without using a key.
For vehicles without intelligent access, youcan operate the keypad with thefactory-set 5-digit entry code. The code islocated on the owner’s wallet card in theglove box and is available from anauthorized dealer. You can also create upto five of your own 5-digit personal entrycodes.
For vehicles with intelligent access, you donot need to enter a 5-digit entry code.Press any button on keyless entry keypadonce to unlock all doors.
Note:You must have an intelligent accesskey within 3 ft (1 m) of your vehicle.
Programming a Personal Entry Code
To create your own personal entry code:
1. Enter the factory-set code.
2. Press 1·2 on the keypad within fiveseconds.
3. Enter your personal 5-digit code. Youmust enter each number within fiveseconds of each other.
4. Press 1·2 on the keypad to savepersonal code 1.
The doors will lock then unlock to confirmthat programming was successful.
To program additional personal entrycodes, repeat Steps 1-3, then for Step 4:
•press 3·4 to save personal code 2
•press 5·6 to save personal code 3
•press 7·8 to save personal code 4
•press 9·0 to save personal code 5.
You may also program a personal entrycode through the information display.
Tips:
•Do not set a code that uses five of thesame number.
•Do not use five numbers in sequentialorder.
•The factory-set code will work even ifyou have set your own personal code.
Recalling Memory Positions (IfEquipped)
The programmed entry codes will recalldriver memory positions as follows:
•Entry code 1 will recall driver 1 memorypositions.
•Entry code 2 will recall driver 2 memorypositions.
Note:Personal entry codes 3, 4 and 5 willnot recall memory positions.
Erasing a Personal Code
1. Enter the factory-set 5-digit code.
2. Press and release 1·2 on the keypadwithin five seconds.
3. Press and hold 1·2 for two seconds.You must do this within five secondsof completing Step 2.
All personal codes will erase and only thefactory-set 5-digit code will work.
Anti-Scan Feature
The keypad will go into an anti-scan modeif you enter the wrong code seven times(35 consecutive button presses). Thismode disables the keypad for one minuteand the keypad lamp will flash.
The anti-scan feature will turn off after:
•one minute of keypad inactivity
•pressing the unlock button on theremote control
•switching the ignition on.
59
Expedition (TB7) Canada/United States of America, enUSA, Edition date: 03/2016, First Printing
Doors and Locks
Page 63 of 500
Displaying the Factory Set Code
Note:You need to have two programmedkeys for this procedure.
To display the factory-set code in theinformation display:
1.Insert a key into the ignition and switchthe ignition on for a few seconds.
2.Switch the ignition off and remove thekey.
3. Insert the second key into the ignitionand switch the ignition on.
The factory-set code will display for a fewseconds.
Note:The code may not display until afterany other warning messages first display.
Unlocking and Locking the Doors
Vehicles Without Intelligent Access
To Unlock the Driver Door
Enter the factory-set 5-digit code or yourpersonal code. You must press eachnumber within five seconds of each other.The interior lamps will illuminate.
Note:All doors will unlock if you disablethe two-stage unlocking mode. SeeLocking and Unlocking (page 52).
To Unlock All Doors
Enter the factory-set code or your personalcode, then press 3·4 within five seconds.
To Lock All Doors
Press and hold 7·8 and 9·0 at the sametime (with the driver door closed). You donot need to enter the keypad code first.
Vehicles With Intelligent Access
Press any button on keyless entry keypadonce to unlock all doors.
Note:You must have an intelligent accesskey within 3 ft (1 m) of your vehicle.
60
Expedition (TB7) Canada/United States of America, enUSA, Edition date: 03/2016, First Printing
Doors and Locks