clock FORD EXPLORER 1997 2.G Owners Manual
[x] Cancel search | Manufacturer: FORD, Model Year: 1997, Model line: EXPLORER, Model: FORD EXPLORER 1997 2.GPages: 236, PDF Size: 2.43 MB
Page 157 of 236
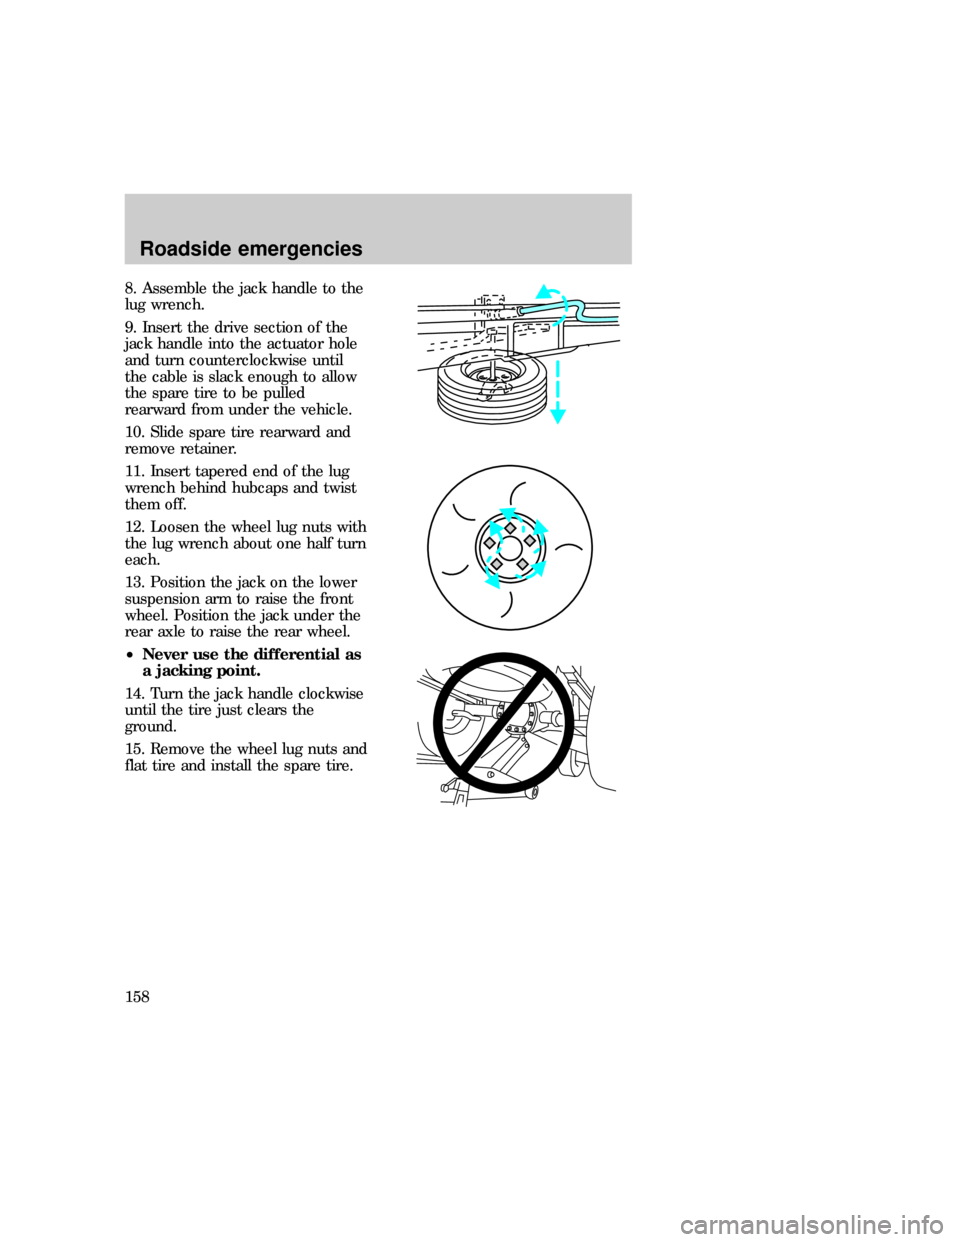
8. Assemble the jack handle to the
lug wrench.
9. Insert the drive section of the
jack handle into the actuator hole
and turn counterclockwise until
the cable is slack enough to allow
the spare tire to be pulled
rearward from under the vehicle.
10. Slide spare tire rearward and
remove retainer.
11. Insert tapered end of the lug
wrench behind hubcaps and twist
them off.
12. Loosen the wheel lug nuts with
the lug wrench about one half turn
each.
13. Position the jack on the lower
suspension arm to raise the front
wheel. Position the jack under the
rear axle to raise the rear wheel.
²Never use the differential as
a jacking point.
14. Turn the jack handle clockwise
until the tire just clears the
ground.
15. Remove the wheel lug nuts and
flat tire and install the spare tire.
Roadside emergencies
158
Page 190 of 236
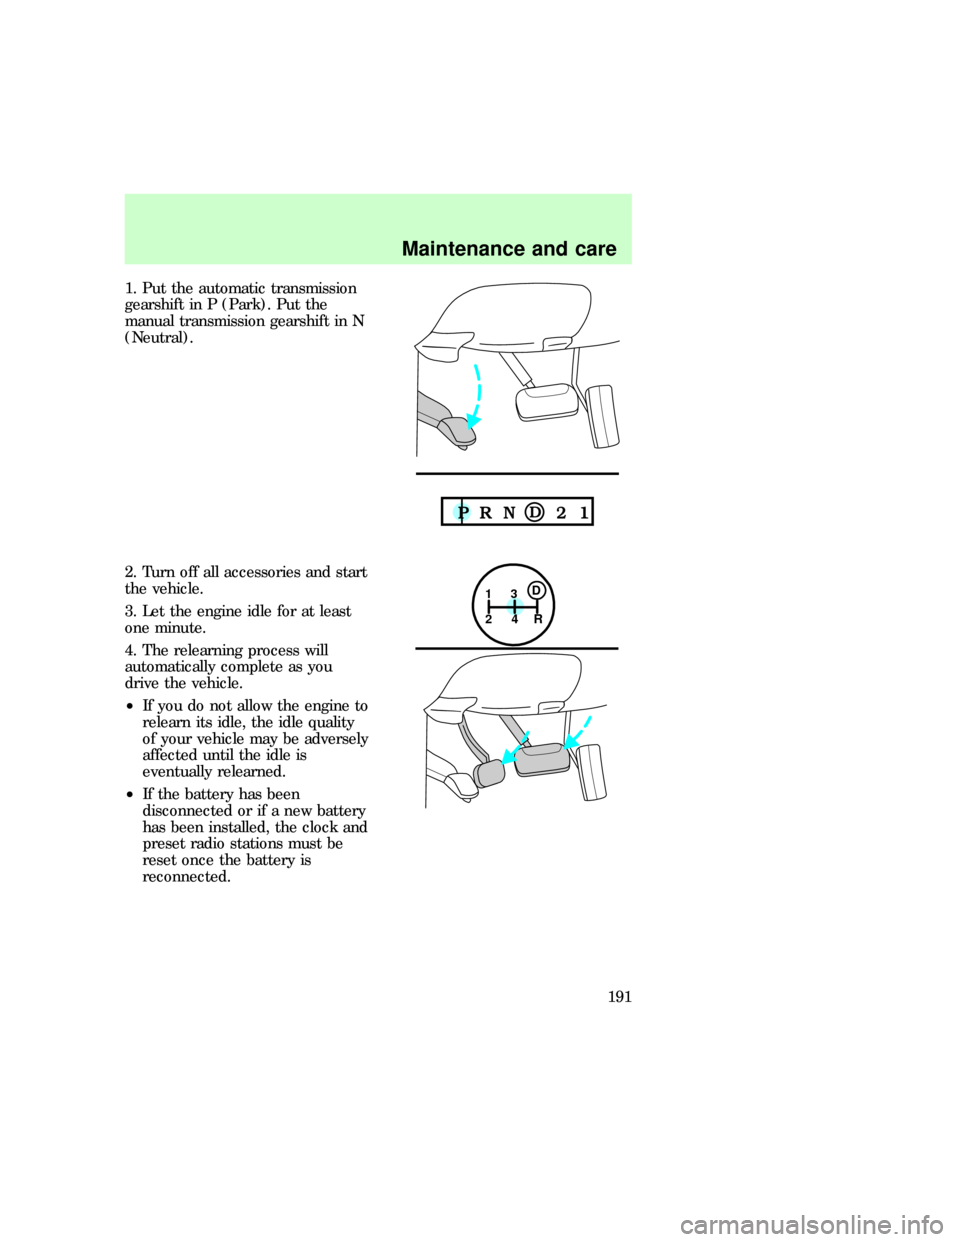
1. Put the automatic transmission
gearshift in P (Park). Put the
manual transmission gearshift in N
(Neutral).
2. Turn off all accessories and start
the vehicle.
3. Let the engine idle for at least
one minute.
4. The relearning process will
automatically complete as you
drive the vehicle.
²If you do not allow the engine to
relearn its idle, the idle quality
of your vehicle may be adversely
affected until the idle is
eventually relearned.
²If the battery has been
disconnected or if a new battery
has been installed, the clock and
preset radio stations must be
reset once the battery is
reconnected.
1
24R3D
Maintenance and care
191
Page 210 of 236
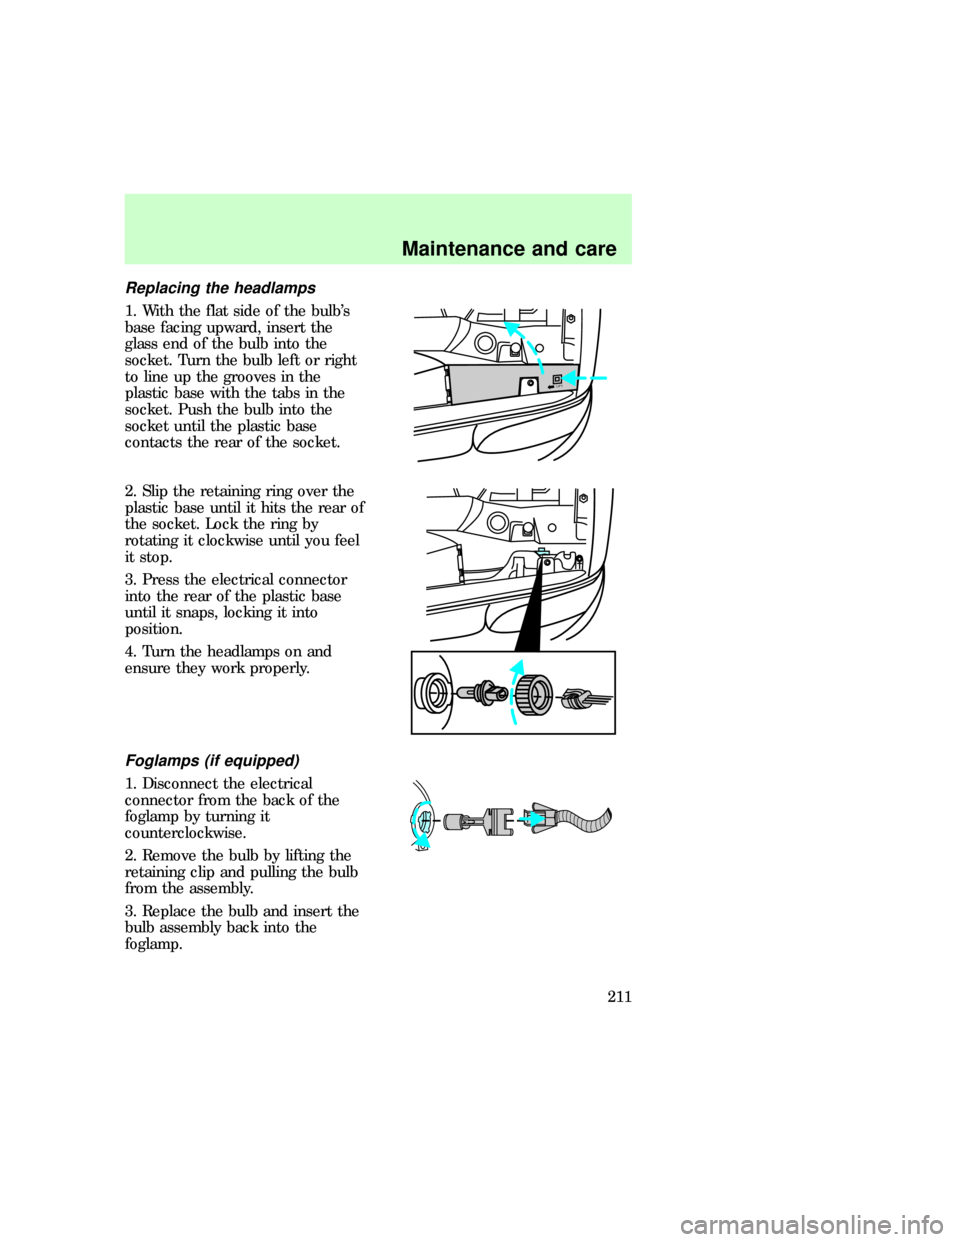
Replacing the headlamps
1. With the flat side of the bulb's
base facing upward, insert the
glass end of the bulb into the
socket. Turn the bulb left or right
to line up the grooves in the
plastic base with the tabs in the
socket. Push the bulb into the
socket until the plastic base
contacts the rear of the socket.
2. Slip the retaining ring over the
plastic base until it hits the rear of
the socket. Lock the ring by
rotating it clockwise until you feel
it stop.
3. Press the electrical connector
into the rear of the plastic base
until it snaps, locking it into
position.
4. Turn the headlamps on and
ensure they work properly.
Foglamps (if equipped)
1. Disconnect the electrical
connector from the back of the
foglamp by turning it
counterclockwise.
2. Remove the bulb by lifting the
retaining clip and pulling the bulb
from the assembly.
3. Replace the bulb and insert the
bulb assembly back into the
foglamp.
LIFT
uno_foglamps
Maintenance and care
211
Page 211 of 236
4. Lock the bulb assembly into
place by turning it clockwise until
it stops.
Highmount brakelamp
The highmount brakelamp is
located just above the rear liftgate
window. For bulb replacement, see
a dealer or qualified service
technician.
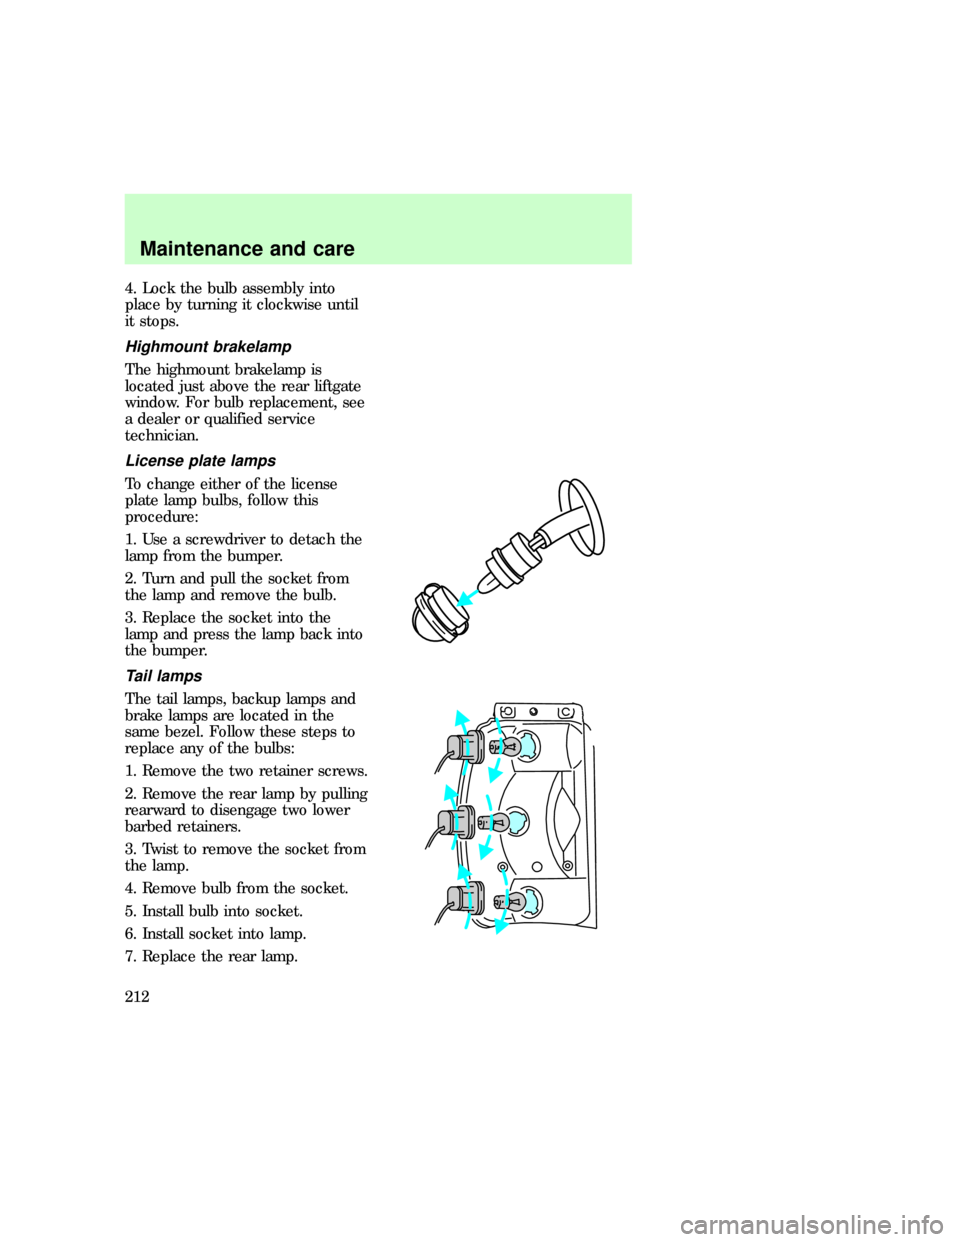
License plate lamps
To change either of the license
plate lamp bulbs, follow this
procedure:
1. Use a screwdriver to detach the
lamp from the bumper.
2. Turn and pull the socket from
the lamp and remove the bulb.
3. Replace the socket into the
lamp and press the lamp back into
the bumper.
Tail lamps
The tail lamps, backup lamps and
brake lamps are located in the
same bezel. Follow these steps to
replace any of the bulbs:
1. Remove the two retainer screws.
2. Remove the rear lamp by pulling
rearward to disengage two lower
barbed retainers.
3. Twist to remove the socket from
the lamp.
4. Remove bulb from the socket.
5. Install bulb into socket.
6. Install socket into lamp.
7. Replace the rear lamp.
uno_highmount
uno_license_plate
uno_tail_lamps
uno_interior_bulbs
Maintenance and care
212
Page 212 of 236
Replacing the interior bulbs
Check the operation of the
following interior bulbs frequently:
²interior overhead lamp
²map lamp
²courtesy and cargo lamps
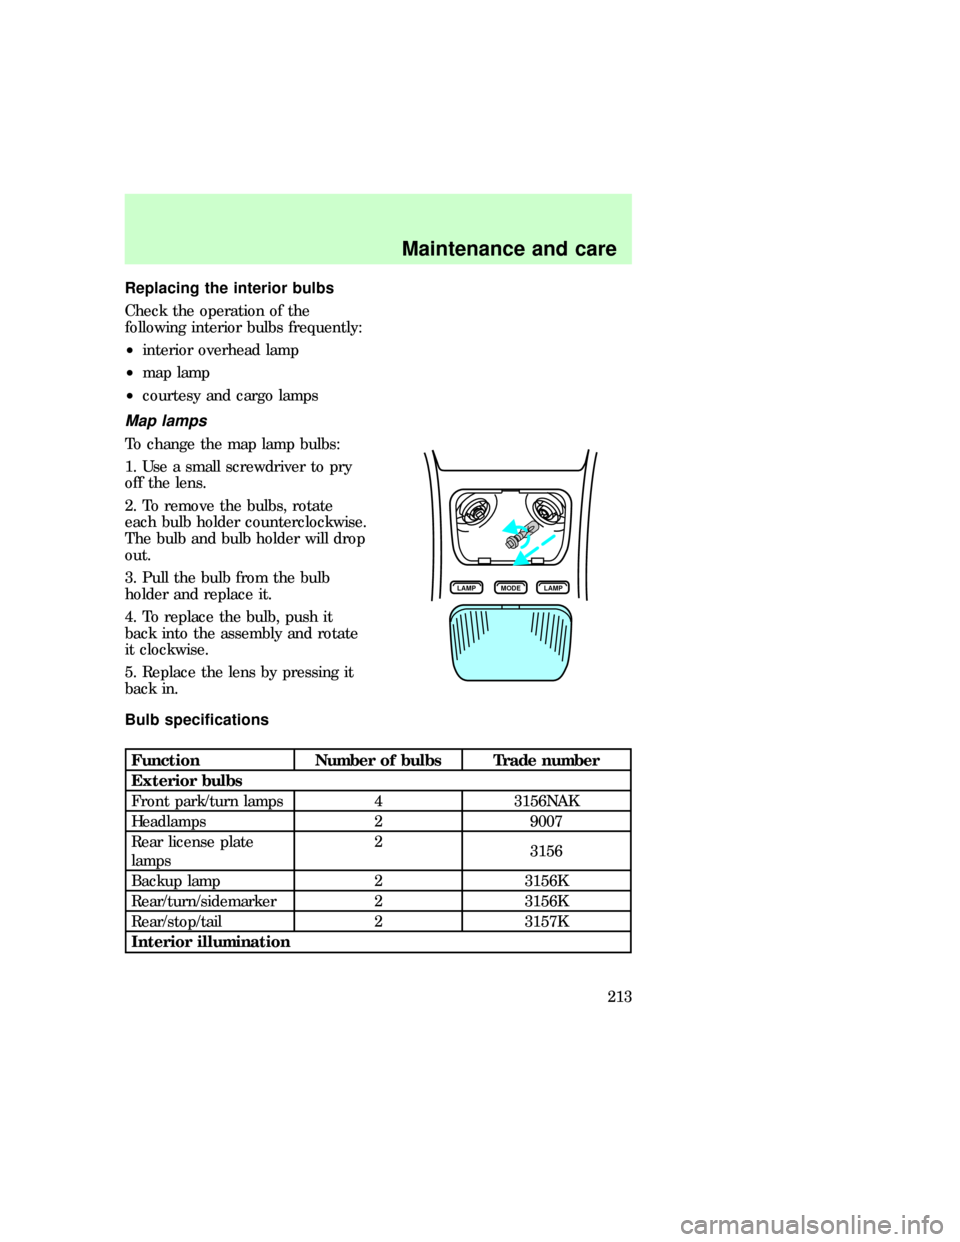
Map lamps
To change the map lamp bulbs:
1. Use a small screwdriver to pry
off the lens.
2. To remove the bulbs, rotate
each bulb holder counterclockwise.
The bulb and bulb holder will drop
out.
3. Pull the bulb from the bulb
holder and replace it.
4. To replace the bulb, push it
back into the assembly and rotate
it clockwise.
5. Replace the lens by pressing it
back in.
Bulb specifications
Function Number of bulbs Trade number
Exterior bulbs
Front park/turn lamps 4 3156NAK
Headlamps 2 9007
Rear license plate
lamps2
3156
Backup lamp 2 3156K
Rear/turn/sidemarker 2 3156K
Rear/stop/tail 2 3157K
Interior illumination
LAMP LAMPMODE
uno_maplamps
uno_bulb_spec_chart
Maintenance and care
213