key FORD EXPLORER 1998 2.G Owners Manual
[x] Cancel search | Manufacturer: FORD, Model Year: 1998, Model line: EXPLORER, Model: FORD EXPLORER 1998 2.GPages: 210, PDF Size: 1.65 MB
Page 7 of 210
What you should do if the check engine light illuminates
Light turns on solid:
This means that the OBD II system has detected a malfunction.
Temporary malfunctions may cause yourCheck Enginelight to
illuminate. Examples are:
1. The vehicle has run out of fuel. (The engine may misfire or run
poorly.)
2. Poor fuel quality or water in the fuel.
3. The fuel cap may not have been properly installed and securely
tightened.
These temporary malfunctions can be corrected by filling the fuel tank
with good quality fuel and/or properly installing and securely tightening
the gas cap. After three driving cycles without these or any other
temporary malfunctions present, theCheck Enginelight should turn off.
(A driving cycle consists of a cold engine startup followed by mixed
city/highway driving.) No additional vehicle service is required.
If theCheck Enginelight remains on, have your vehicle serviced at the
first available opportunity.
Light is blinking:
Engine misfire is occurring which could damage your catalytic converter.
You should drive in a moderate fashion (avoid heavy acceleration and
deceleration) and have your vehicle serviced at the first available
opportunity.
Under engine misfire conditions, excessive exhaust temperatures
could damage the catalytic converter, the fuel system, interior
floor coverings or other vehicle components, possibly causing a fire.
Fuel reset
Illuminates when the ignition key is
turned to the ON position and the
fuel pump shut-off switch has been
triggered. For more information,
refer toFuel pump shut-off switch
in theRoadside emergencies
chapter.
FUEL
RESET
Instrumentation
7
Page 10 of 210

Check gage
Illuminates when the key is in the
ON position and the engine coolant
temperature is high, the engine oil
pressure is low or the fuel level is
near empty. Refer toEngine
coolant temperature gauge,
Engine oil pressure gaugeorFuel gaugein this chapter for more
information.
Four wheel drive low (if equipped)
Illuminates when four-wheel drive
low is engaged.
Four wheel drive high (if equipped)
Illuminates when four-wheel drive
high is engaged.
Door ajar
Illuminates when the ignition switch
is in the ON or START position and
any door is open.
CHECK
GAGE
4WD
LOW
4WD
HIGH
DOOR
AJAR
Instrumentation
10
Page 11 of 210

O/D off (if equipped)
Illuminates when the transmission
control switch has been pushed.
When the light is on, the
transmission does not shift into
overdrive. If the light does not come
on when the transmission control
switch is depressed or if the light
flashes when you are driving, have
your vehicle serviced.
Speed control (if equipped)
This light comes on when either the
SET/ACCEL or RESUME controls
are pressed. It turns off when the
speed control OFF control is
pressed, the brake is applied or the
ignition is turned to the OFF
position.
Safety belt warning chime
Chimes to remind you to fasten your safety belts.
For information on the safety belt warning chime, refer to theSeating
and safety restraintschapter.
Supplemental restraint system (SRS) warning chime
For information on the SRS warning chime, refer to theSeating and
safety restraintschapter.
Key-in-ignition warning chime
Sounds when the key is left in the ignition in the OFF/LOCK or ACC
position and the driver's door is opened.
Headlamps on warning chime
Sounds when the headlamps or parking lamps are on, the ignition is off
(and the key is not in the ignition) and the driver's door is opened.
O/D
OFF
SPEED
CONT
Instrumentation
11
Page 15 of 210
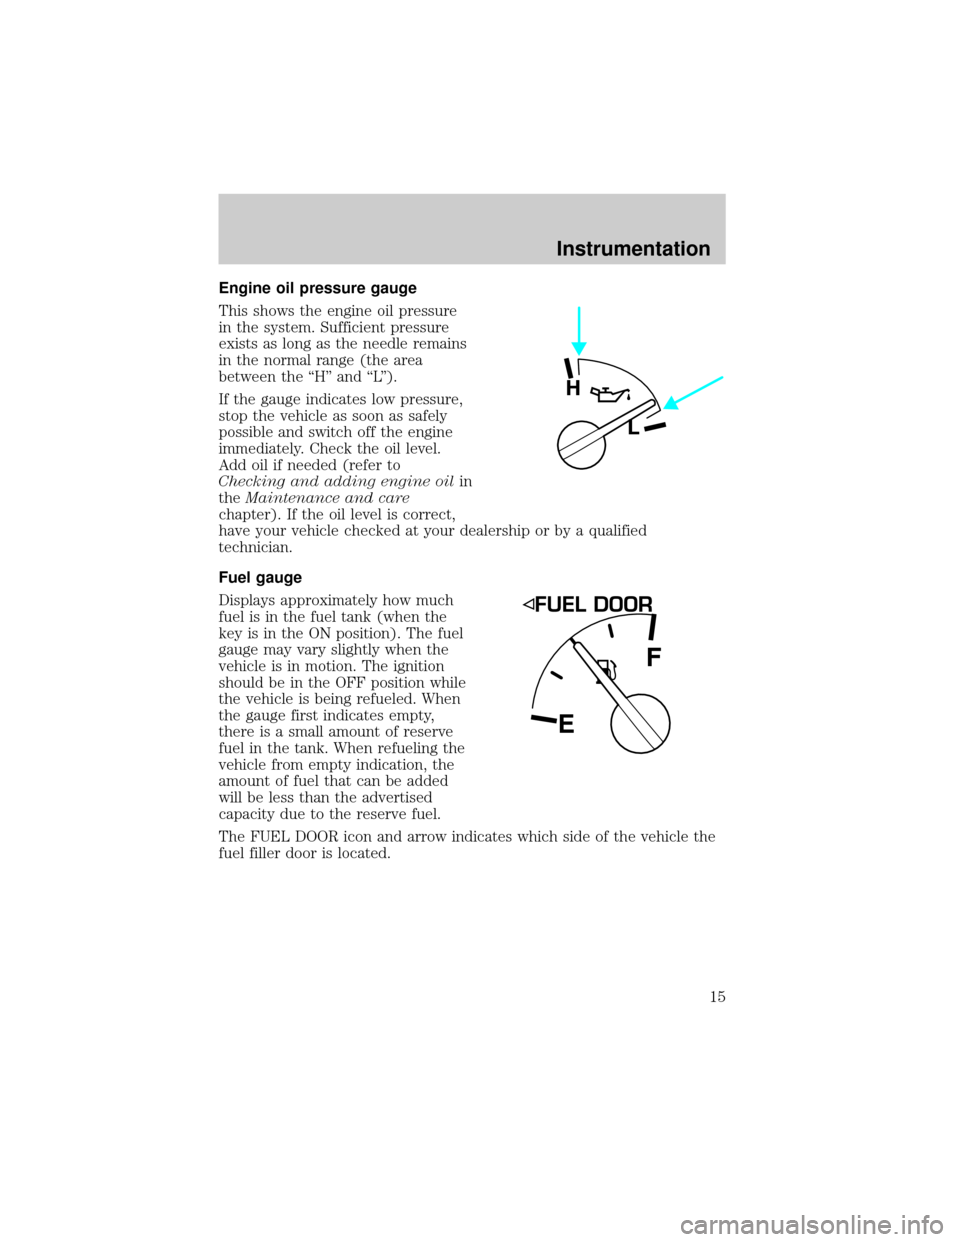
Engine oil pressure gauge
This shows the engine oil pressure
in the system. Sufficient pressure
exists as long as the needle remains
in the normal range (the area
between the ``H'' and ``L'').
If the gauge indicates low pressure,
stop the vehicle as soon as safely
possible and switch off the engine
immediately. Check the oil level.
Add oil if needed (refer to
Checking and adding engine oilin
theMaintenance and care
chapter). If the oil level is correct,
have your vehicle checked at your dealership or by a qualified
technician.
Fuel gauge
Displays approximately how much
fuel is in the fuel tank (when the
key is in the ON position). The fuel
gauge may vary slightly when the
vehicle is in motion. The ignition
should be in the OFF position while
the vehicle is being refueled. When
the gauge first indicates empty,
there is a small amount of reserve
fuel in the tank. When refueling the
vehicle from empty indication, the
amount of fuel that can be added
will be less than the advertised
capacity due to the reserve fuel.
The FUEL DOOR icon and arrow indicates which side of the vehicle the
fuel filler door is located.
H
L
EF
Instrumentation
15
Page 35 of 210
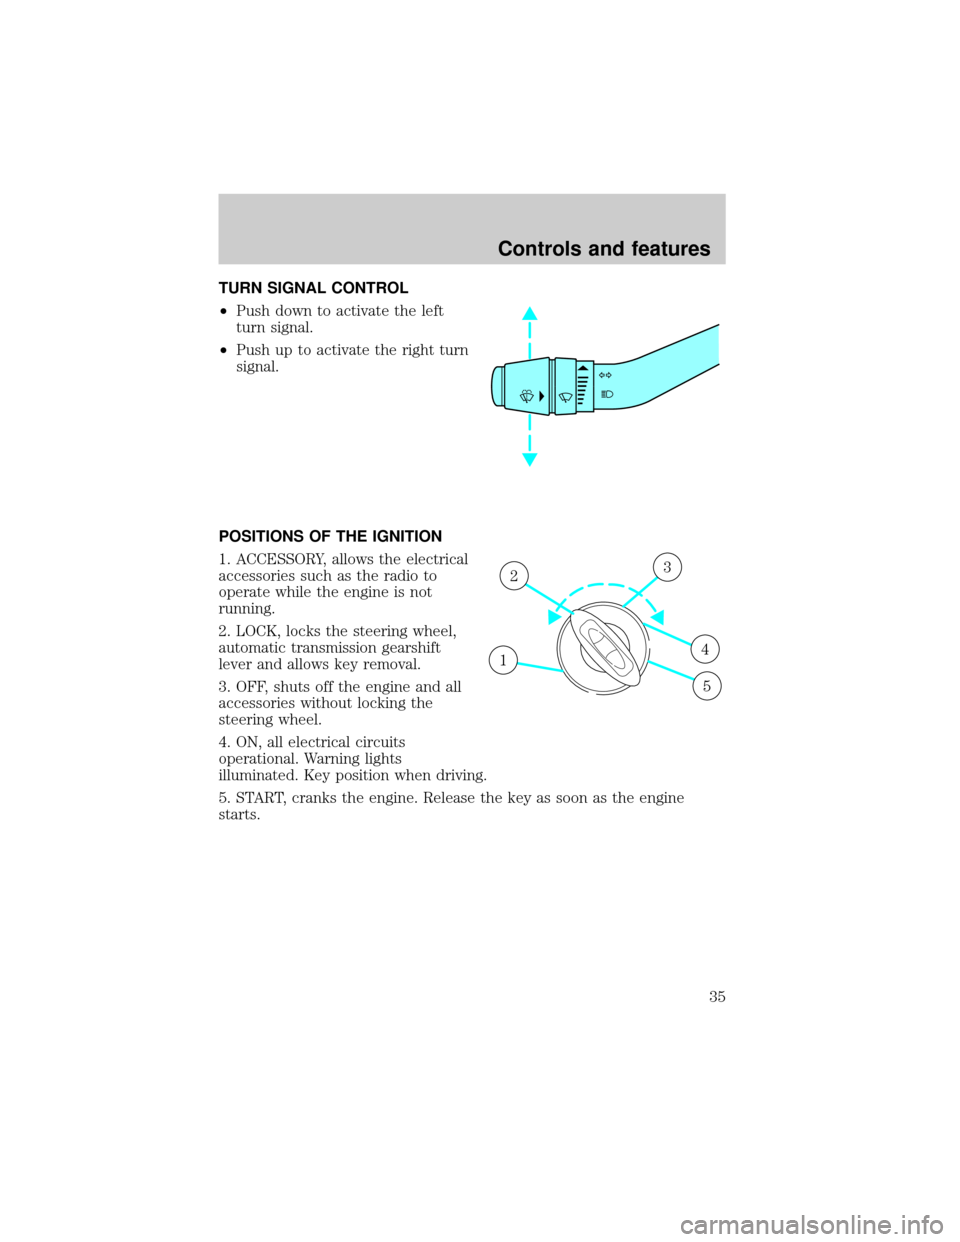
TURN SIGNAL CONTROL
²Push down to activate the left
turn signal.
²Push up to activate the right turn
signal.
POSITIONS OF THE IGNITION
1. ACCESSORY, allows the electrical
accessories such as the radio to
operate while the engine is not
running.
2. LOCK, locks the steering wheel,
automatic transmission gearshift
lever and allows key removal.
3. OFF, shuts off the engine and all
accessories without locking the
steering wheel.
4. ON, all electrical circuits
operational. Warning lights
illuminated. Key position when driving.
5. START, cranks the engine. Release the key as soon as the engine
starts.
1
23
4
5
Controls and features
35
Page 48 of 210
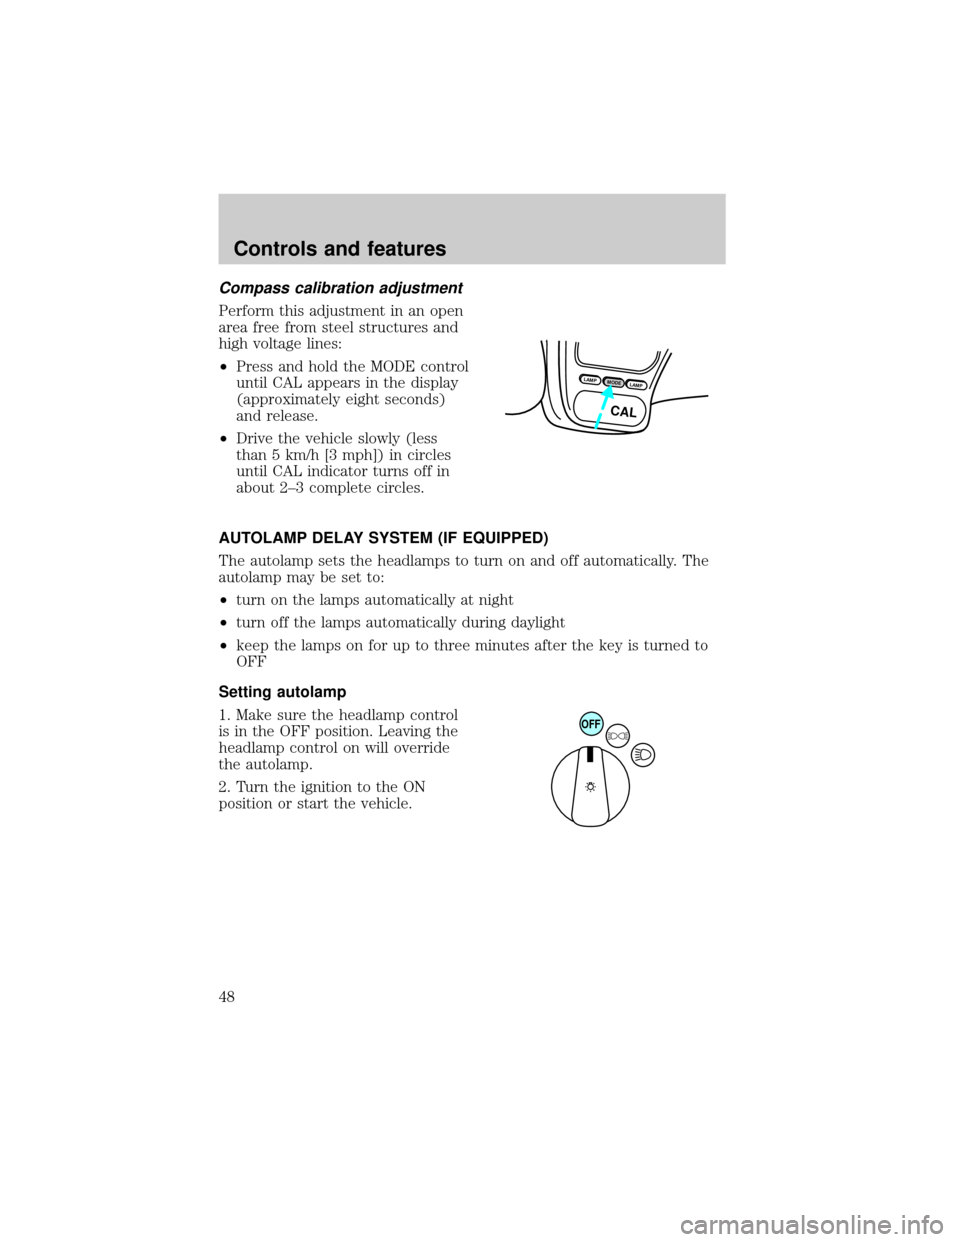
Compass calibration adjustment
Perform this adjustment in an open
area free from steel structures and
high voltage lines:
²Press and hold the MODE control
until CAL appears in the display
(approximately eight seconds)
and release.
²Drive the vehicle slowly (less
than 5 km/h [3 mph]) in circles
until CAL indicator turns off in
about 2±3 complete circles.
AUTOLAMP DELAY SYSTEM (IF EQUIPPED)
The autolamp sets the headlamps to turn on and off automatically. The
autolamp may be set to:
²turn on the lamps automatically at night
²turn off the lamps automatically during daylight
²keep the lamps on for up to three minutes after the key is turned to
OFF
Setting autolamp
1. Make sure the headlamp control
is in the OFF position. Leaving the
headlamp control on will override
the autolamp.
2. Turn the ignition to the ON
position or start the vehicle.
LAMPMODELAMP
CAL
OFF
Controls and features
48
Page 52 of 210
Two step unlocking (if equipped)
When unlocking the driver door with the key, turn it once toward the
rear of the vehicle to unlock that door only. Turn the key to the rear a
second time to unlock all doors.
If the vehicle is equipped with the optional perimeter alarm system, this
feature will work from all doors.
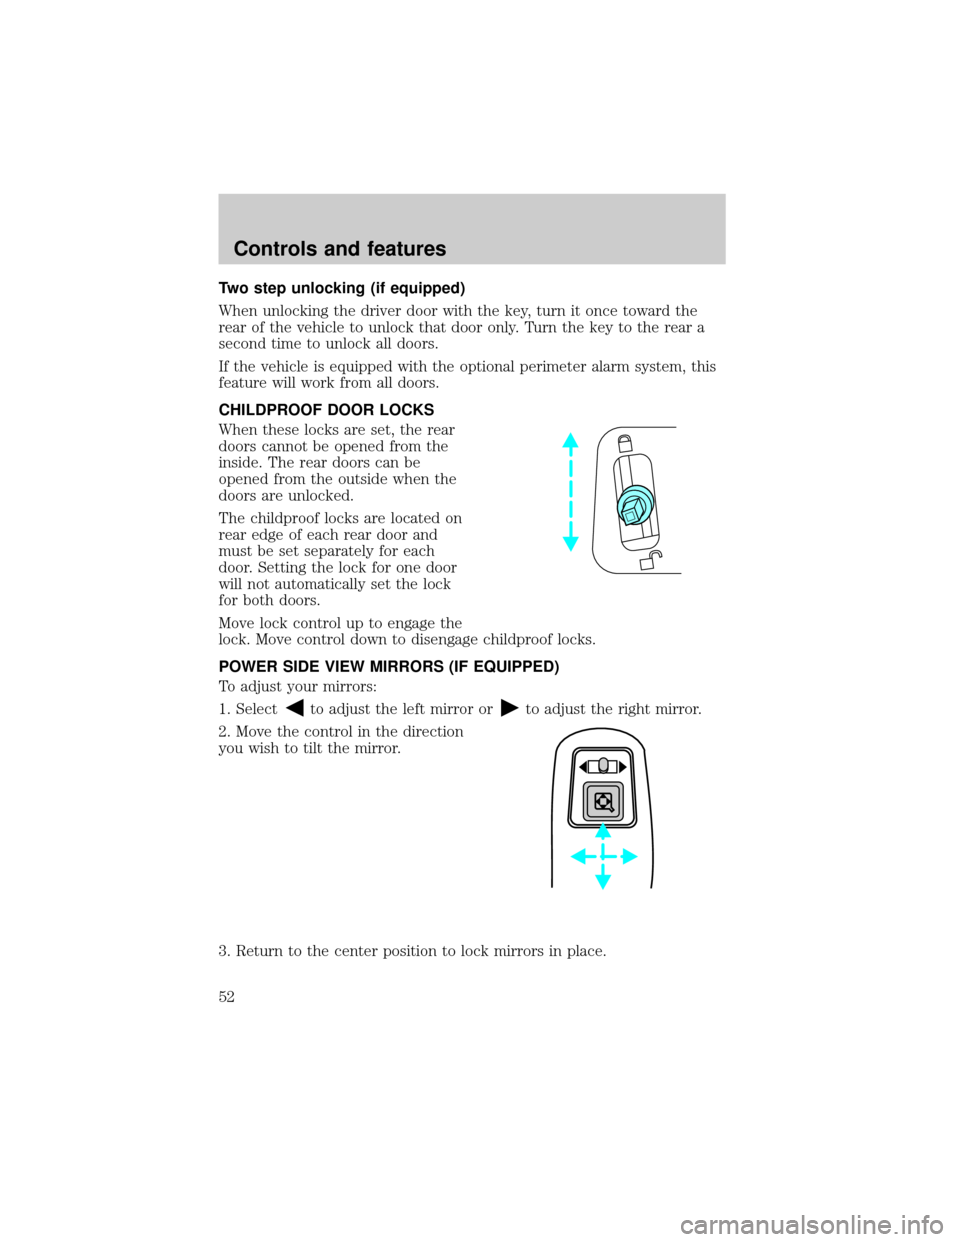
CHILDPROOF DOOR LOCKS
When these locks are set, the rear
doors cannot be opened from the
inside. The rear doors can be
opened from the outside when the
doors are unlocked.
The childproof locks are located on
rear edge of each rear door and
must be set separately for each
door. Setting the lock for one door
will not automatically set the lock
for both doors.
Move lock control up to engage the
lock. Move control down to disengage childproof locks.
POWER SIDE VIEW MIRRORS (IF EQUIPPED)
To adjust your mirrors:
1. Select
to adjust the left mirror orto adjust the right mirror.
2. Move the control in the direction
you wish to tilt the mirror.
3. Return to the center position to lock mirrors in place.
Controls and features
52
Page 56 of 210
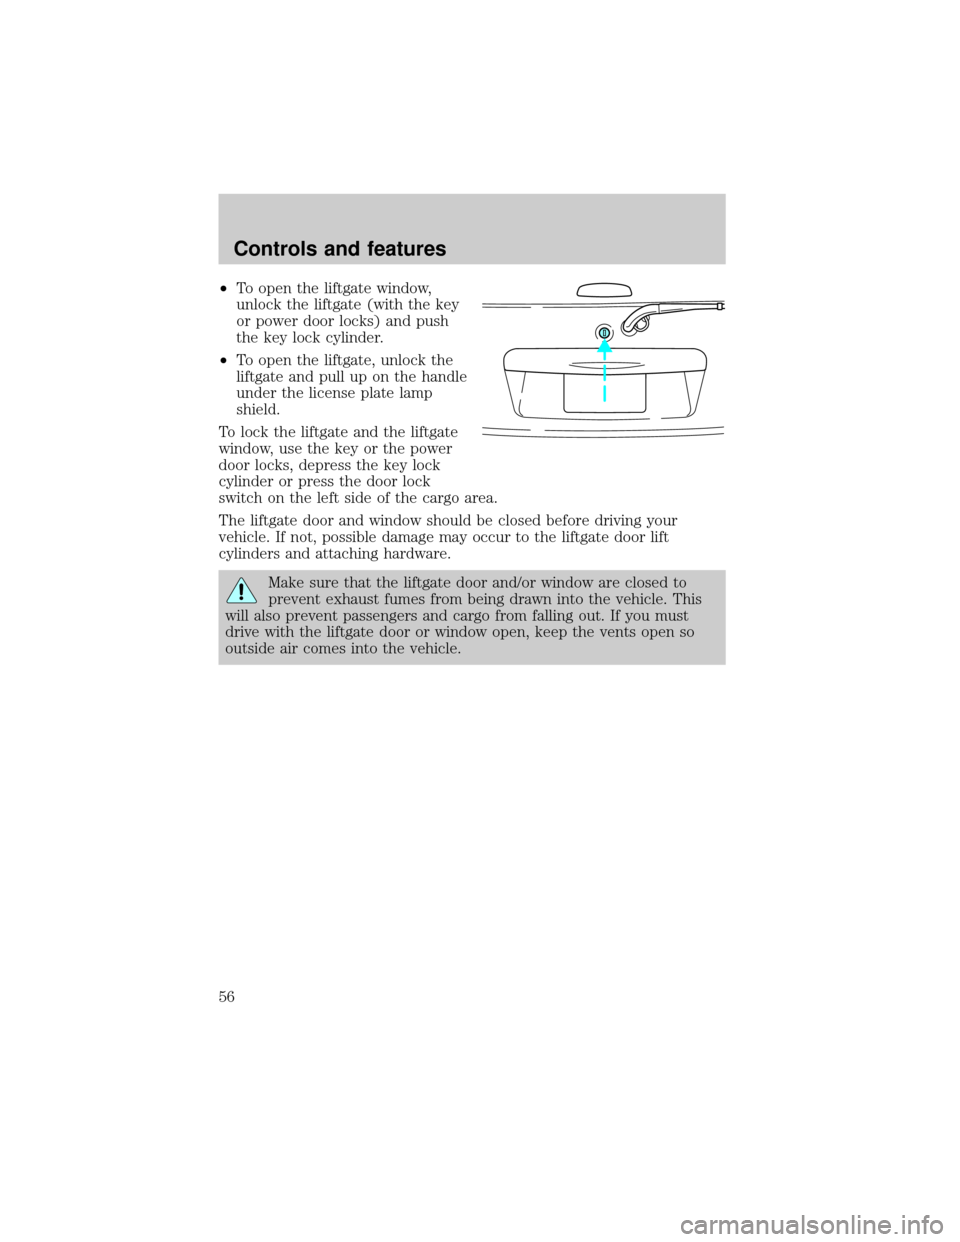
²To open the liftgate window,
unlock the liftgate (with the key
or power door locks) and push
the key lock cylinder.
²To open the liftgate, unlock the
liftgate and pull up on the handle
under the license plate lamp
shield.
To lock the liftgate and the liftgate
window, use the key or the power
door locks, depress the key lock
cylinder or press the door lock
switch on the left side of the cargo area.
The liftgate door and window should be closed before driving your
vehicle. If not, possible damage may occur to the liftgate door lift
cylinders and attaching hardware.
Make sure that the liftgate door and/or window are closed to
prevent exhaust fumes from being drawn into the vehicle. This
will also prevent passengers and cargo from falling out. If you must
drive with the liftgate door or window open, keep the vents open so
outside air comes into the vehicle.
Controls and features
56
Page 58 of 210
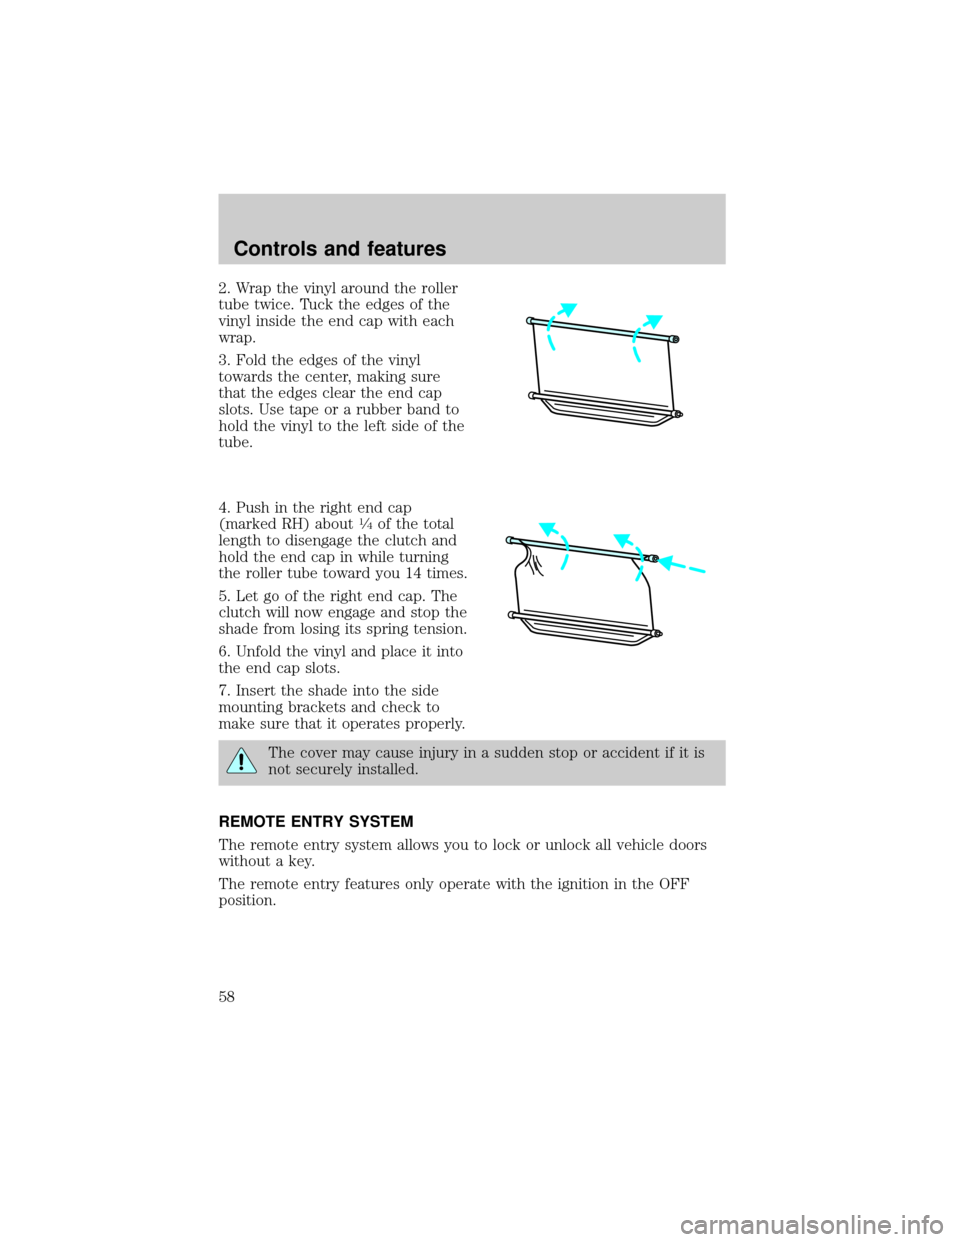
2. Wrap the vinyl around the roller
tube twice. Tuck the edges of the
vinyl inside the end cap with each
wrap.
3. Fold the edges of the vinyl
towards the center, making sure
that the edges clear the end cap
slots. Use tape or a rubber band to
hold the vinyl to the left side of the
tube.
4. Push in the right end cap
(marked RH) about
1¤4of the total
length to disengage the clutch and
hold the end cap in while turning
the roller tube toward you 14 times.
5. Let go of the right end cap. The
clutch will now engage and stop the
shade from losing its spring tension.
6. Unfold the vinyl and place it into
the end cap slots.
7. Insert the shade into the side
mounting brackets and check to
make sure that it operates properly.
The cover may cause injury in a sudden stop or accident if it is
not securely installed.
REMOTE ENTRY SYSTEM
The remote entry system allows you to lock or unlock all vehicle doors
without a key.
The remote entry features only operate with the ignition in the OFF
position.
Controls and features
58
Page 61 of 210

Press the control once to unlock the
driver's door and move the memory
seat feature to the corresponding
memory position, just as if you had
pressed the memory control in the
vehicle.
When your dealer programs new
transmitters:
²the first transmitter programmed
will recall memory position one.
²the second transmitter
programmed will recall memory
position two.
²the third transmitter programmed recall memory position three.
²the fourth transmitter programmed will not recall a memory position.
Memory positions can be changed at any time. The memory feature can
be deactivated or reactivated by performing the following:
1. Make sure the alarm system (if equipped) is not armed or triggered,
the ignition is off and all doors and the liftgate window are closed.
2. Turn the ignition key from OFF to ON.
3. Press the power door unlock control three times.
4. Turn the ignition key from ON to OFF.
5. Press the power door unlock control three times.
6. Turn the ignition switch back to ON. The horn will chirp.
7. Press the power door unlock switch twice.
8. Press the unlock control two times, then press the lock control. The
horn will chirp twice if the remote memory seat feature was deactivated
or will sound three times (two short chirps followed by one long chirp) if
the feature was activated.
9. Turn the ignition to OFF. The horn will chirp once to confirm that you
activated or deactivated the remote memory seat feature.
The memory feature will continue to work from the door switch even
when deactivated at the remote entry module.
Controls and features
61