manual transmission FORD EXPLORER 1998 2.G Owners Manual
[x] Cancel search | Manufacturer: FORD, Model Year: 1998, Model line: EXPLORER, Model: FORD EXPLORER 1998 2.GPages: 210, PDF Size: 1.65 MB
Page 100 of 210
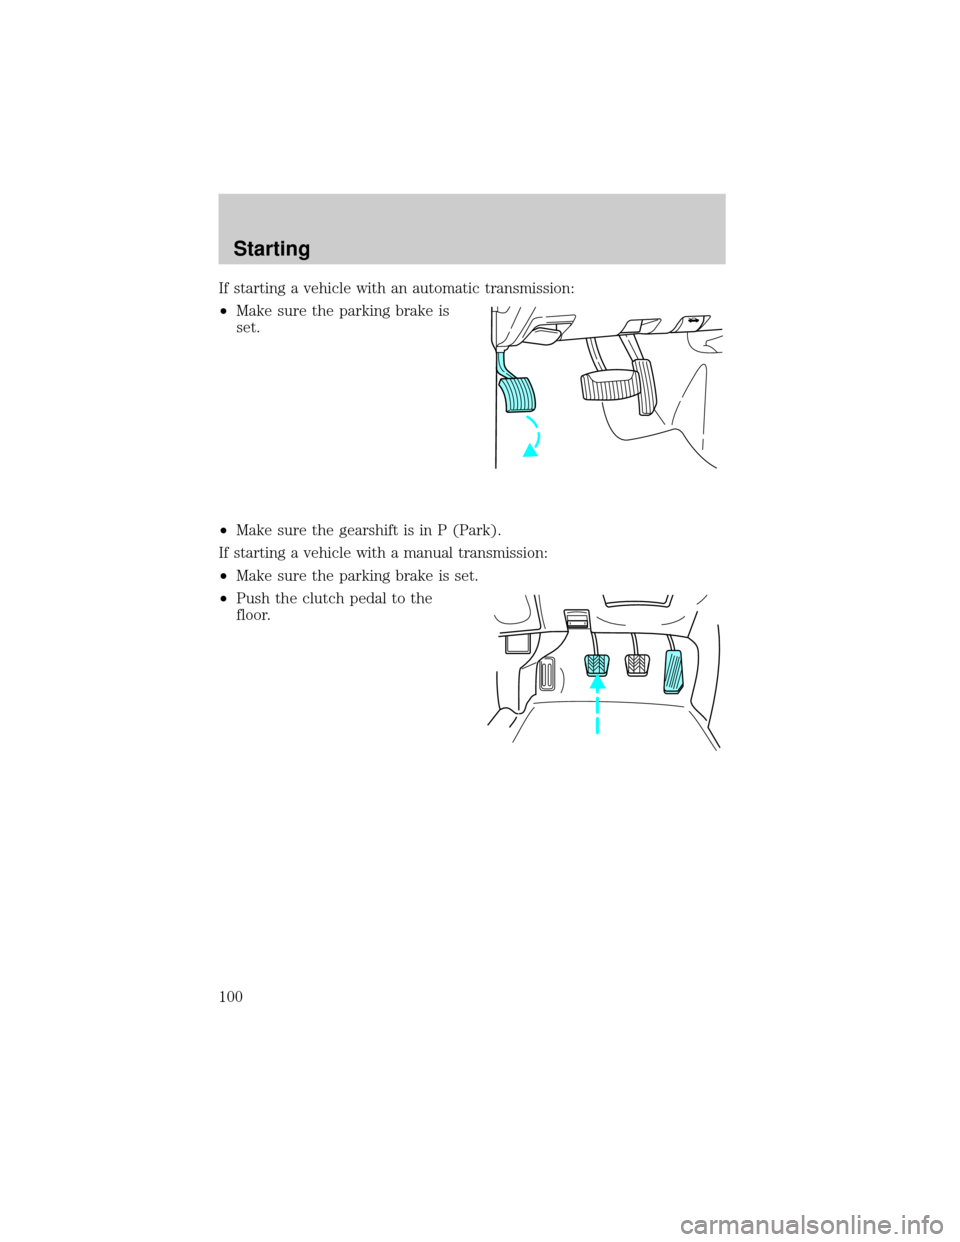
If starting a vehicle with an automatic transmission:
²Make sure the parking brake is
set.
²Make sure the gearshift is in P (Park).
If starting a vehicle with a manual transmission:
²Make sure the parking brake is set.
²Push the clutch pedal to the
floor.
Starting
100
Page 106 of 210

Always set the parking brake fully and make sure that the
gearshift is securely latched in P (Park) (automatic
transmission) or in 1 (First) (manual transmission).
The parking brake is not designed to stop a moving vehicle. However, if
the normal brakes fail, the parking brake can be used to stop your
vehicle in an emergency. Since the parking brake applies only the rear
brakes, the vehicle's stopping distance will be adversely affected.
Pull the release lever to release the
brake. Driving with the parking
brake on will cause the brakes to
wear out quickly and reduce fuel
economy.
AIR SUSPENSION SYSTEM (IF EQUIPPED)
The air suspension system is designed to improve ride, handling and
general vehicle performance during:
²certain road conditions
²steering maneuvers
²braking
²accelerations
This system maintains the vehicle height at a constant level by
automatically adding air or releasing air from the springs to offset
changes in vehicle loads.
Driving
106
Page 113 of 210
and will shift to 1 (First) after the vehicle decelerates to the proper
vehicle speed.
Driving a manual transmission (if equipped)
Using the clutch
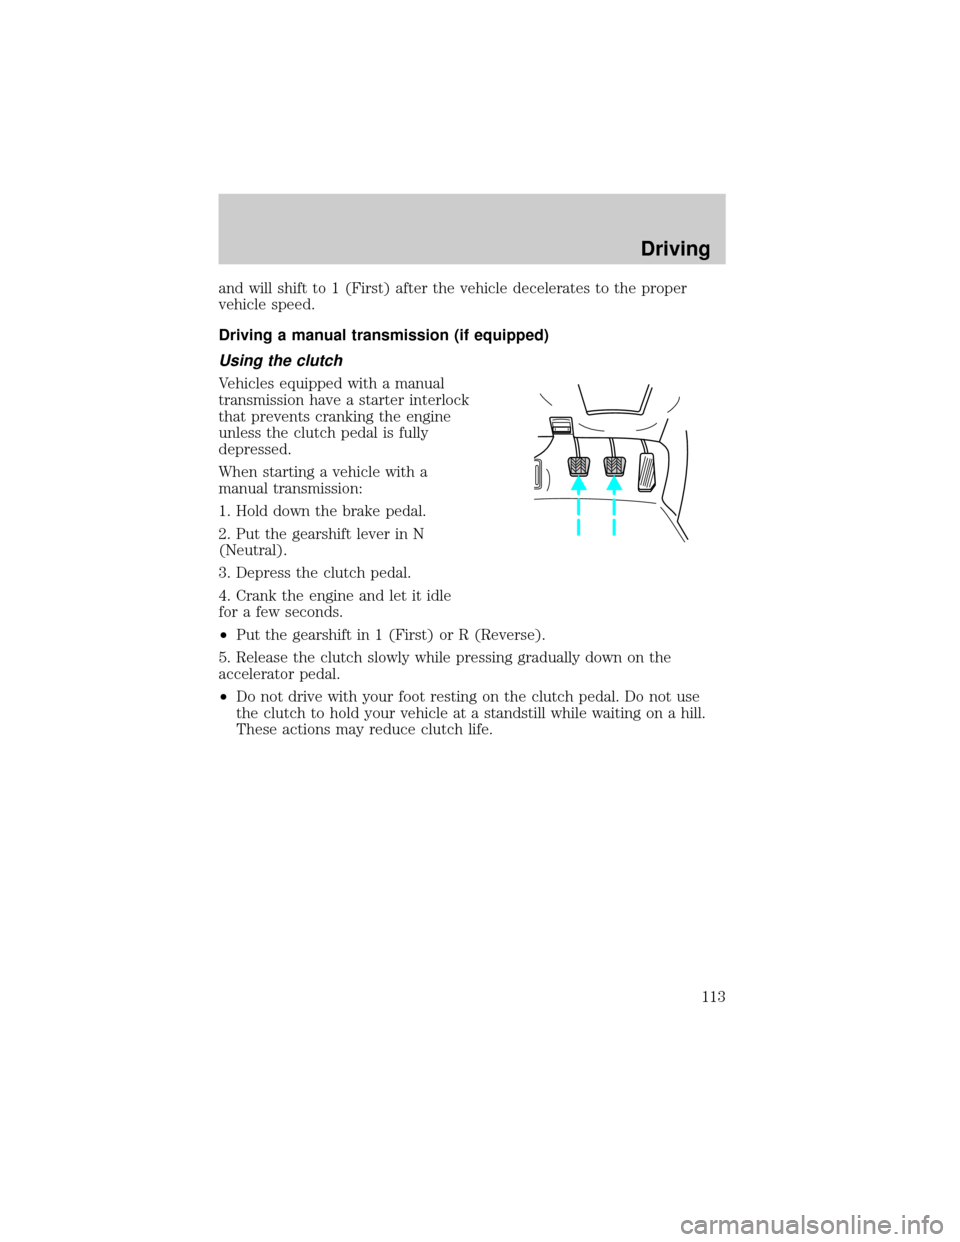
Vehicles equipped with a manual
transmission have a starter interlock
that prevents cranking the engine
unless the clutch pedal is fully
depressed.
When starting a vehicle with a
manual transmission:
1. Hold down the brake pedal.
2. Put the gearshift lever in N
(Neutral).
3. Depress the clutch pedal.
4. Crank the engine and let it idle
for a few seconds.
²Put the gearshift in 1 (First) or R (Reverse).
5. Release the clutch slowly while pressing gradually down on the
accelerator pedal.
²Do not drive with your foot resting on the clutch pedal. Do not use
the clutch to hold your vehicle at a standstill while waiting on a hill.
These actions may reduce clutch life.
Driving
113
Page 118 of 210
Using the Control-Trac system
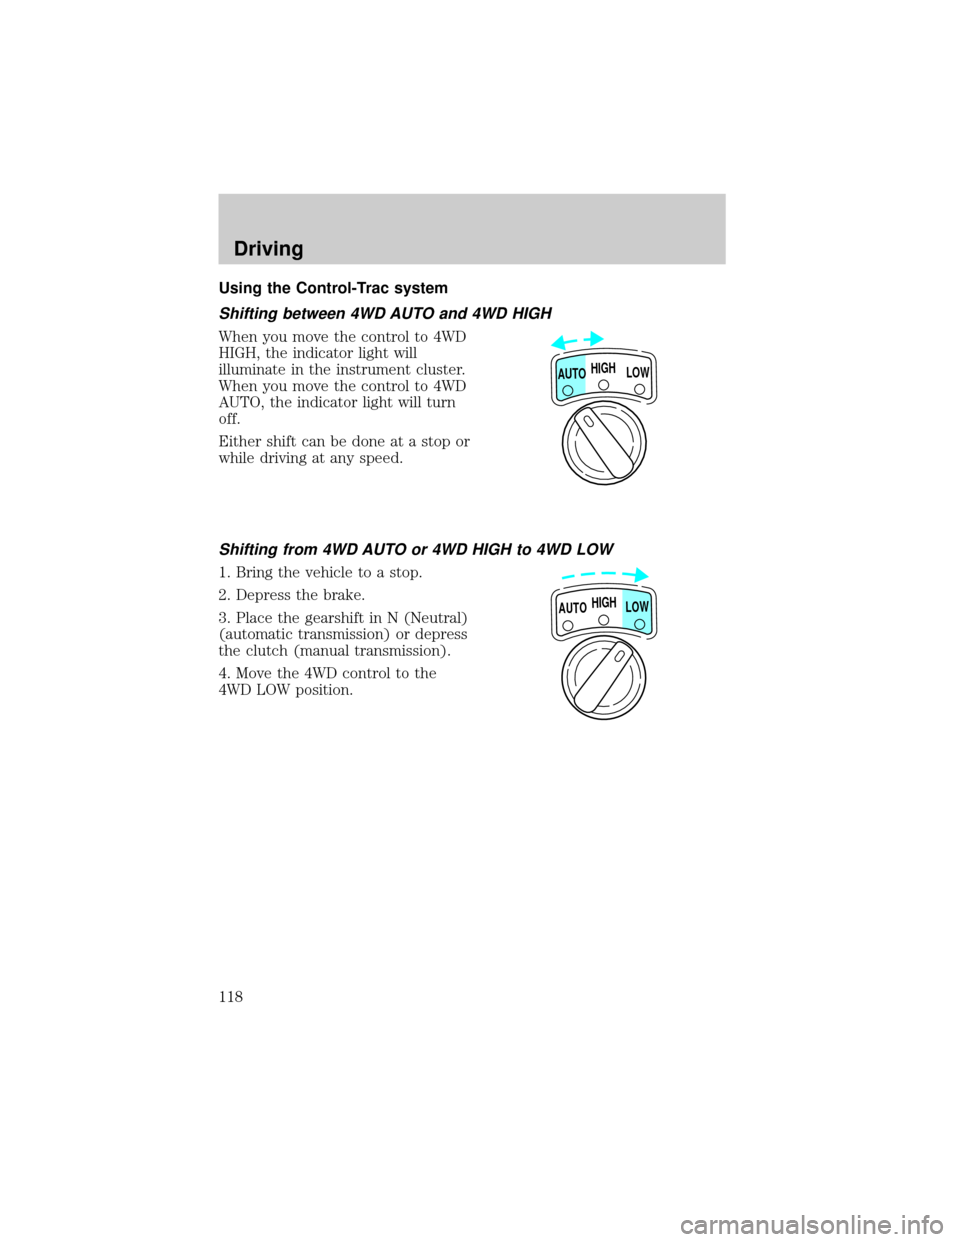
Shifting between 4WD AUTO and 4WD HIGH
When you move the control to 4WD
HIGH, the indicator light will
illuminate in the instrument cluster.
When you move the control to 4WD
AUTO, the indicator light will turn
off.
Either shift can be done at a stop or
while driving at any speed.
Shifting from 4WD AUTO or 4WD HIGH to 4WD LOW
1. Bring the vehicle to a stop.
2. Depress the brake.
3. Place the gearshift in N (Neutral)
(automatic transmission) or depress
the clutch (manual transmission).
4. Move the 4WD control to the
4WD LOW position.
HIGH
LOW AUTO
HIGH
LOW AUTO
Driving
118
Page 119 of 210
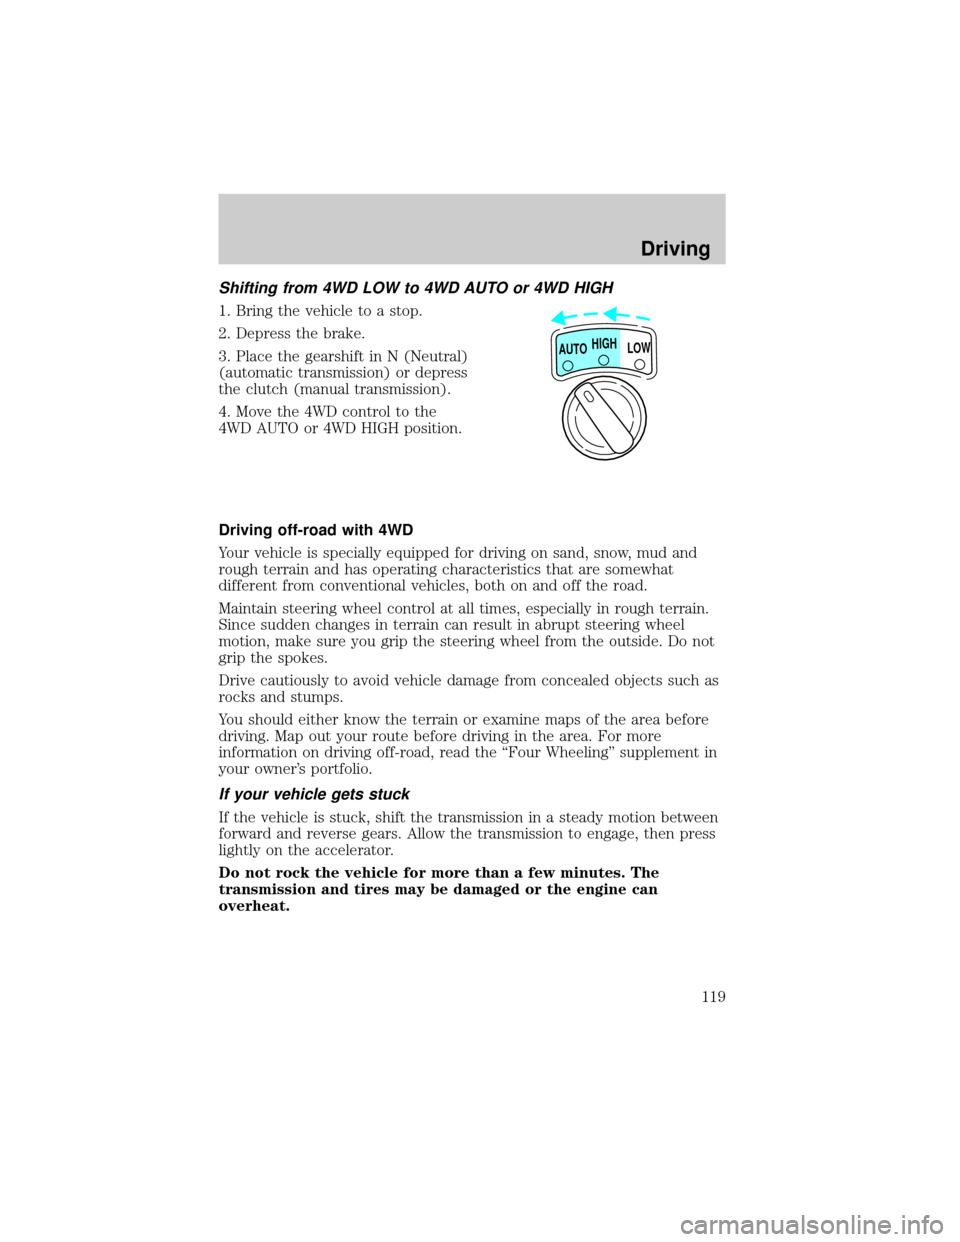
Shifting from 4WD LOW to 4WD AUTO or 4WD HIGH
1. Bring the vehicle to a stop.
2. Depress the brake.
3. Place the gearshift in N (Neutral)
(automatic transmission) or depress
the clutch (manual transmission).
4. Move the 4WD control to the
4WD AUTO or 4WD HIGH position.
Driving off-road with 4WD
Your vehicle is specially equipped for driving on sand, snow, mud and
rough terrain and has operating characteristics that are somewhat
different from conventional vehicles, both on and off the road.
Maintain steering wheel control at all times, especially in rough terrain.
Since sudden changes in terrain can result in abrupt steering wheel
motion, make sure you grip the steering wheel from the outside. Do not
grip the spokes.
Drive cautiously to avoid vehicle damage from concealed objects such as
rocks and stumps.
You should either know the terrain or examine maps of the area before
driving. Map out your route before driving in the area. For more
information on driving off-road, read the ``Four Wheeling'' supplement in
your owner's portfolio.
If your vehicle gets stuck
If the vehicle is stuck, shift the transmission in a steady motion between
forward and reverse gears. Allow the transmission to engage, then press
lightly on the accelerator.
Do not rock the vehicle for more than a few minutes. The
transmission and tires may be damaged or the engine can
overheat.
HIGH
LOW AUTO
Driving
119
Page 127 of 210

²Thoroughly prepare your vehicle for towing. Refer toPreparing to
towin this chapter.
²Use extra caution when driving while trailer towing. Refer toDriving
while you towin this chapter.
²Service your vehicle more frequently if you tow a trailer. Refer to the
severe duty schedule in the ``Service Guide''.
²Do not tow a trailer until your vehicle has been driven at least 800 km
(500 miles).
²Refer to the instructions included with towing accessories for the
proper installation and adjustment specifications.
Do not exceed the maximum loads listed on the Safety Compliance
Certification label. For load specification terms found on the label, refer
toVehicle loadingin this chapter. Remember to figure in the tongue
load of your loaded vehicle when figuring the total weight.
Trailer towing table (4x2 manual transmission)
GCWR (Gross Combined Weight Rating)/Trailer weights
EngineRear
axle
ratioMaximum
GCWR-kg
(lbs.)Trailer weight
range-kg (lbs.)
(0-Maximum)Maximum
frontal area of
trailer-m
2(ft2)
2-door
4.0L EFI 3.27 2 721 (6 000) 0-907 (0-2 000) 4.64 (50)
4.0L EFI 3.73 3 175 (7 000) 0-1 424 (0-3 140) 4.64 (50)
4-door
4.0L EFI 3.27 2 721 (6 000) 0-880 (0-1 940) 4.64 (50)
4.0L EFI 3.73 3 175 (7 000) 0-1 325 (0-2 920) 4.64 (50)
Notes:-For high altitude operation, reduce GCW by 2% per 300
meters (1 800 ft) elevation. For definitions of terms used in this table
and instructions on how to calculate your vehicle load, refer toVehicle
loadingin this chapter. Maximum trailer weights shown. The combined
weight of the completed towing vehicle and the loaded trailer must not
exceed the GCWR.
Towing a trailer over 907 kg (2 000 lbs.) requires a weight distributing
hitch.
Driving
127
Page 128 of 210

Trailer towing table (4x4 manual transmission)
GCWR (Gross Combined Weight Rating)/Trailer weights
EngineRear
axle
ratioMaximum
GCWR-kg
(lbs.)Trailer weight
range-kg (lbs.)
(0-Maximum)Maximum
frontal area of
trailer-m
2(ft2)
2-door
4.0L EFI 3.27 2 721 (6 000) 0-871 (0-1 920) 4.64 (50)
4.0L EFI 3.55 2 948 (6 500) 0-1 089 (0-2 420) 4.64 (50)
4.0L EFI 3.73 3 175 (7 000) 0-1 325 (0-2 920) 4.64 (50)
4-door
4.0L EFI 3.55 2 948 (6 500) 0-998 (0-2 200) 4.64 (50)
4.0L EFI 3.73 3 175 (7 000) 0-1 225 (0-2 700) 4.64 (50)
Notes:- For high altitude operation, reduce GCW by 2% per 300
meters (1 800 ft) elevation. For definitions of terms used in this table
and instructions on how to calculate your vehicle load, refer toVehicle
loadingin this chapter. Maximum trailer weights shown. The combined
weight of the completed towing vehicle and the loaded trailer must not
exceed the GCWR.
Towing a trailer over 907 kg (2 000 lbs.) requires a weight distributing
hitch.
Driving
128
Page 131 of 210
Do not exceed the GVWR or the GAWR specified on the Safety
Compliance Certification Label.
Towing trailers beyond the maximum recommended gross trailer
weight exceeds the limit of the vehicle and could result in
engine damage, transmission damage, structural damage, loss of
control, and personal injury.
Preparing to tow
Use the proper equipment for towing a trailer, and make sure it is
properly attached to your vehicle. See your dealer or a reliable trailer
dealer if you require assistance.
Hitches
Do not use hitches that clamp onto the vehicle bumper. Use a load
carrying hitch. You must distribute the load in your trailer so that
10 ± 15% of the total weight of the trailer is on the tongue.
Use a frame-mounted weight distributing hitch for trailers over
907 kg (2 000 lb).
Safety chains
Always connect the trailer's safety chains to the vehicle. To connect the
trailer's safety chains, cross the chains under the trailer tongue and allow
slack for turning corners.
If you use a rental trailer, follow the instructions that the rental agency
gives to you.
Trailer brakes
Electric brakes and manual, automatic or surge-type brakes are safe if
installed properly and adjusted to the manufacturer's specifications. The
trailer brakes must meet local and Federal regulations.
Do not connect a trailer's hydraulic brake system directly to your
vehicle's brake system. Your vehicle may not have enough
braking power and your chances of having a collision greatly increase.
Driving
131
Page 133 of 210

²Allow more distance for stopping with a trailer attached.
²The trailer tongue weight should be 10±15% of the loaded trailer
weight.
²After you have traveled 80 km (50 miles), thoroughly check your
hitch, electrical connections and trailer wheel lug nuts.
²When stopped in traffic for long periods of time in hot weather, place
the gearshift in P (Park) (automatic transmissions) or 1 (First)
(manual transmissions) and increase idle speed. This aids engine
cooling and air conditioner efficiency.
²Vehicles with trailers should not be parked on a grade. If you must
park on a grade, place wheel chocks under the trailer's wheels.
Launching or retrieving a boat
When backing down a ramp during boat launching or retrieval,
²Do not allow the static water level to rise above the bottom edge of
the rear bumper and
²Do not allow waves to break higher than 15 cm (six inches) above the
bottom edge of the rear bumper.
Exceeding these limits may allow water to enter critical vehicle
components, adversely affecting driveability, emissions and reliability.
If the rear axle is submerged in water, the rear axle lubricant should be
checked and changed, if necessary. The rear axle is filled with a
synthetic lubricant and does not normally require a lubricant change for
the life of the vehicle. Rear axle lubricant quantities should not need to
be checked unless a leak is suspected.
Recreational towing (all wheels on the ground)
(Neutral tow kit accessory)
On vehicles equipped with a 4.0L engine, an accessory is available that
allows you to tow your vehicle, behind another vehicle, with all the
wheels on the ground. Contact your dealer for more details. Do not tow
your vehicle with all wheels on the ground unless you install the neutral
tow kit as vehicle damage may occur.
LUGGAGE RACK
Maximum load is 45 kg (100 lbs), evenly distributed. If it is not possible
to distribute the load, position it as far rearward as possible. Adjustable
tie down loops must be used to secure the load.
Driving
133
Page 145 of 210

Stowing the spare
1. Lay the tire on the ground with the valve stem facing up.
2. Slide the wheel under the vehicle
and install the retainer through the
wheel center.
3. Turn the jack handle clockwise
until the tire is raised to its original
position underneath the vehicle. The
jack handle ratchets when the tire is
raised to the stowed position. It will
not allow you to overtighten.
Tire change procedure
On vehicles equipped with Air Suspension, turn OFF the Air
Suspension switch prior to jacking, hoisting or towing your
vehicle.
Refer to the instruction sheet for detailed tire change instructions.
1. Park on a level surface, activate
hazard flashers and set the parking
brake.
2. Place gearshift lever in P (Park)
or in the reverse gear (manual
transmission).
When one of the rear wheels is off
the ground, the transmission alone
will not prevent the vehicle from
moving or slipping off the jack, even
if the transmission is in P (Park)
(automatic transmission) or reverse
(manual transmission).
Roadside emergencies
145