automatic transmission FORD EXPLORER 1999 2.G Owners Manual
[x] Cancel search | Manufacturer: FORD, Model Year: 1999, Model line: EXPLORER, Model: FORD EXPLORER 1999 2.GPages: 264, PDF Size: 1.83 MB
Page 79 of 264
²Station overload.Weak signals are sometimes captured by stronger
signals when you pass a broadcast tower. A stronger signal may
temporarily overtake a weaker signal and play while the weak station
frequency is displayed.
The audio system automatically switches to single channel reception if it
will improve the reception of a station normally received in stereo.
Audio system warranties and service
Refer to the ªWarranty Guideº for audio system warranty information.
If service is necessary, see your dealer or a qualified technician.
TURN SIGNAL CONTROL
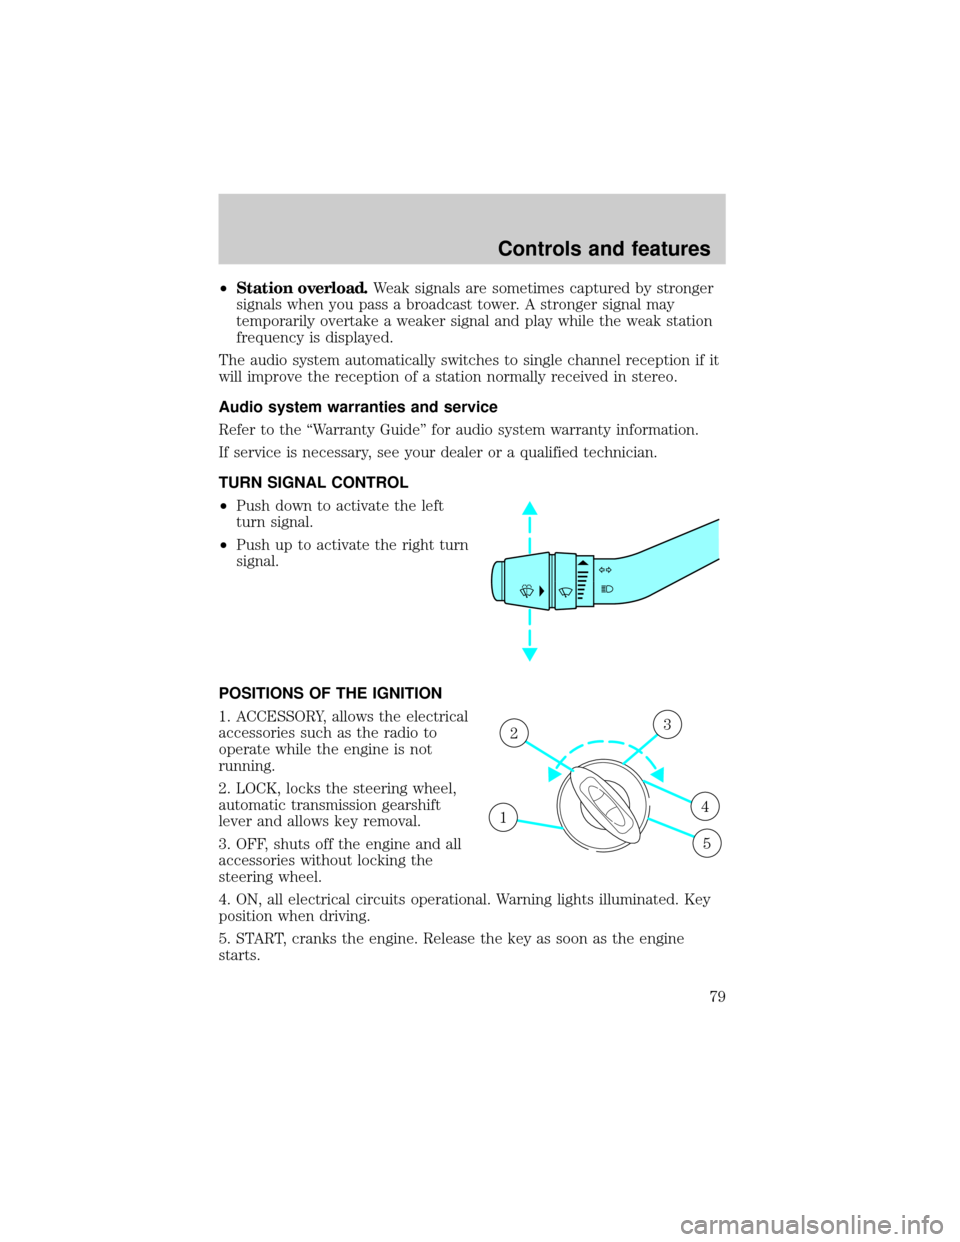
²Push down to activate the left
turn signal.
²Push up to activate the right turn
signal.
POSITIONS OF THE IGNITION
1. ACCESSORY, allows the electrical
accessories such as the radio to
operate while the engine is not
running.
2. LOCK, locks the steering wheel,
automatic transmission gearshift
lever and allows key removal.
3. OFF, shuts off the engine and all
accessories without locking the
steering wheel.
4. ON, all electrical circuits operational. Warning lights illuminated. Key
position when driving.
5. START, cranks the engine. Release the key as soon as the engine
starts.
1
23
4
5
Controls and features
79
Page 118 of 264
Memory seats (if equipped)
This system allows automatic
positioning of the driver seat to
three programmable positions.
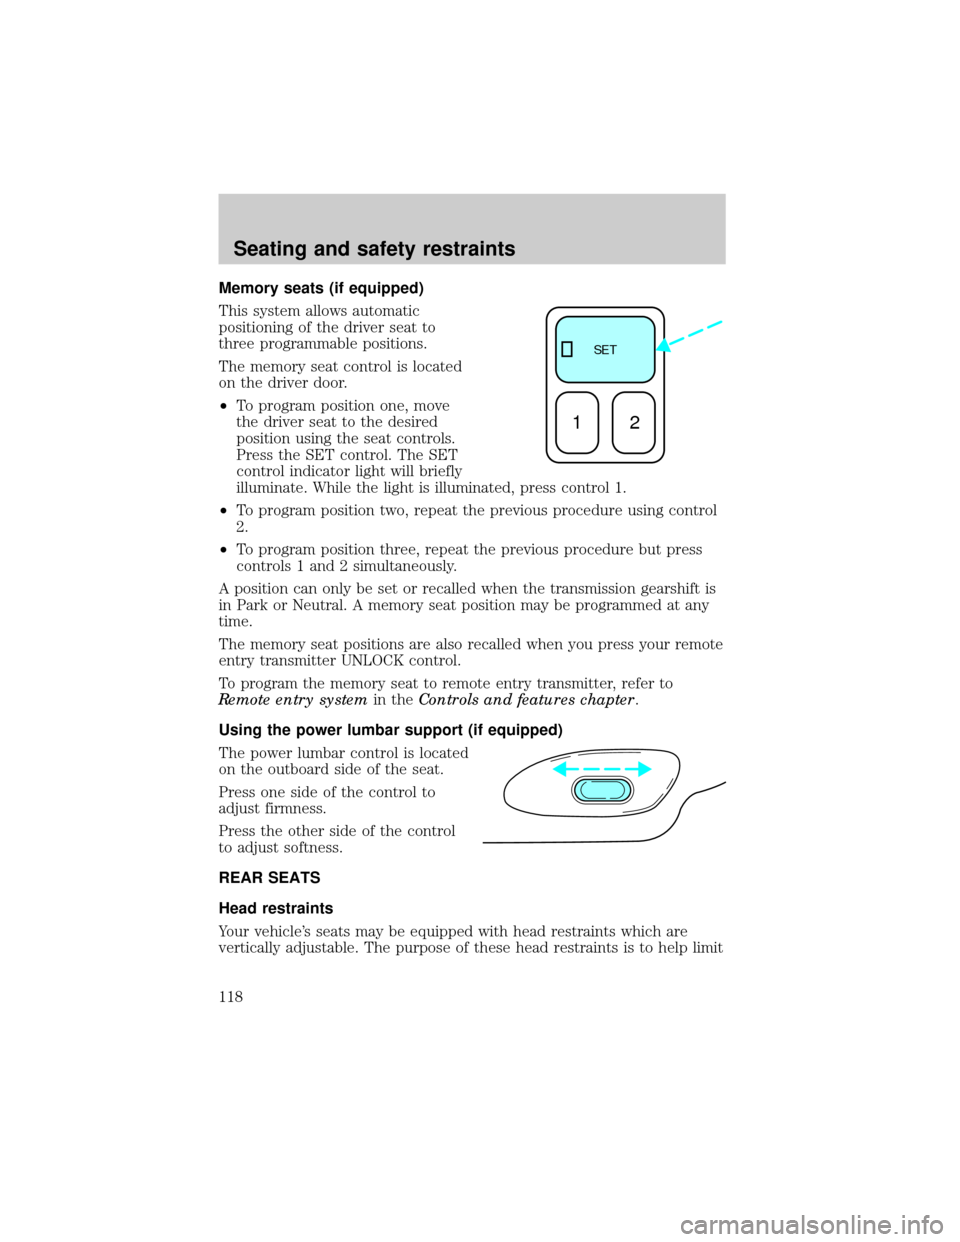
The memory seat control is located
on the driver door.
²To program position one, move
the driver seat to the desired
position using the seat controls.
Press the SET control. The SET
control indicator light will briefly
illuminate. While the light is illuminated, press control 1.
²To program position two, repeat the previous procedure using control
2.
²To program position three, repeat the previous procedure but press
controls 1 and 2 simultaneously.
A position can only be set or recalled when the transmission gearshift is
in Park or Neutral. A memory seat position may be programmed at any
time.
The memory seat positions are also recalled when you press your remote
entry transmitter UNLOCK control.
To program the memory seat to remote entry transmitter, refer to
Remote entry systemin theControls and features chapter.
Using the power lumbar support (if equipped)
The power lumbar control is located
on the outboard side of the seat.
Press one side of the control to
adjust firmness.
Press the other side of the control
to adjust softness.
REAR SEATS
Head restraints
Your vehicle's seats may be equipped with head restraints which are
vertically adjustable. The purpose of these head restraints is to help limit
SE T
12
Seating and safety restraints
118
Page 141 of 264
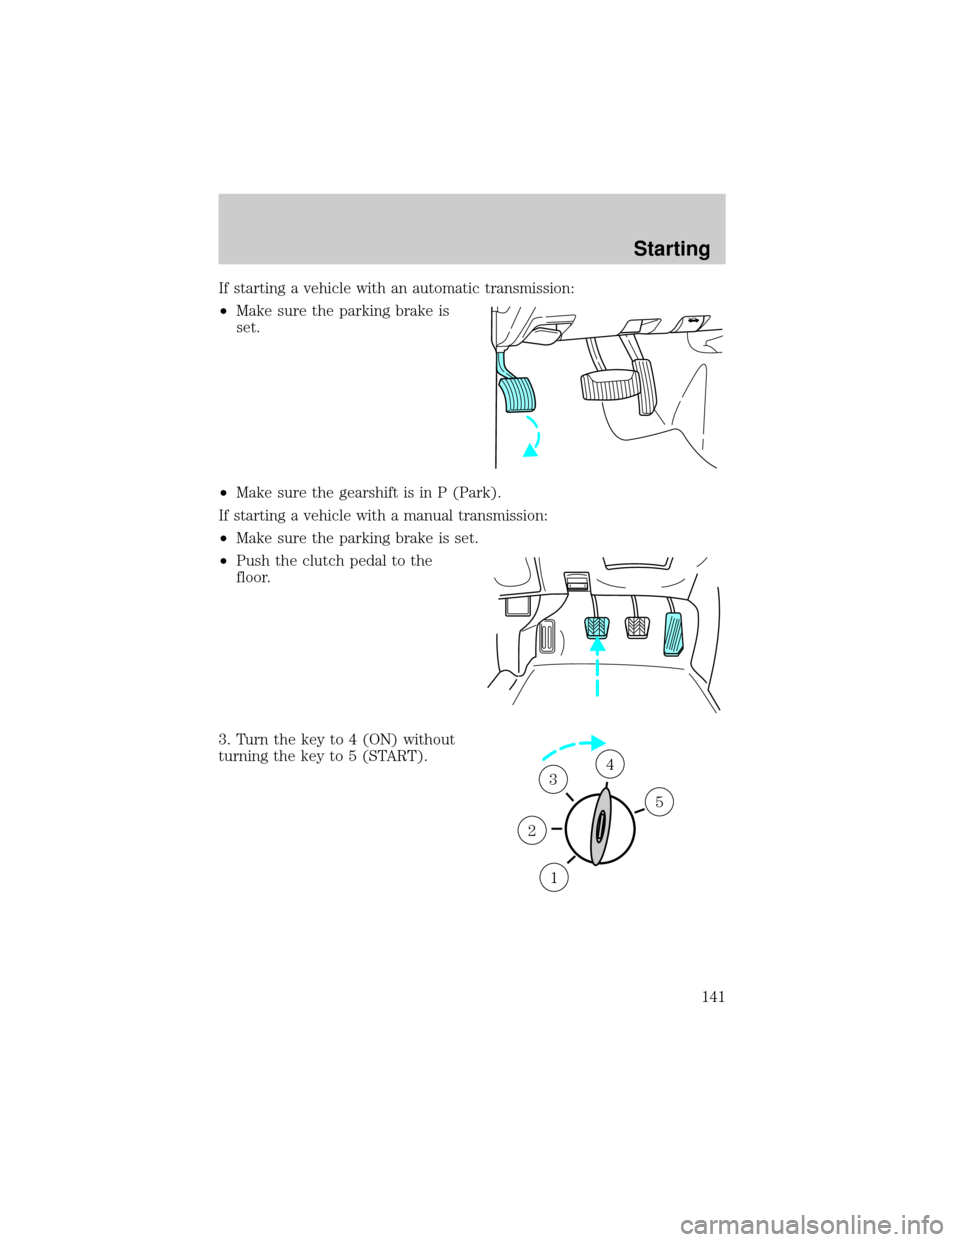
If starting a vehicle with an automatic transmission:
²Make sure the parking brake is
set.
²Make sure the gearshift is in P (Park).
If starting a vehicle with a manual transmission:
²Make sure the parking brake is set.
²Push the clutch pedal to the
floor.
3. Turn the key to 4 (ON) without
turning the key to 5 (START).
1
2
34
5
Starting
141
Page 147 of 264
The BRAKE warning lamp in the
instrument cluster illuminates and
remains illuminated (when the
ignition is turned ON) until the
parking brake is released.
Always set the parking brake fully and make sure that the
gearshift is securely latched in P (Park) (automatic
transmission) or in 1 (First) (manual transmission).
The parking brake is not recommended to stop a moving vehicle.
However, if the normal brakes fail, the parking brake can be used to stop
your vehicle in an emergency. Since the parking brake applies only the
rear brakes, the vehicle's stopping distance will increase greatly and the
handling of your vehicle will be adversely affected.
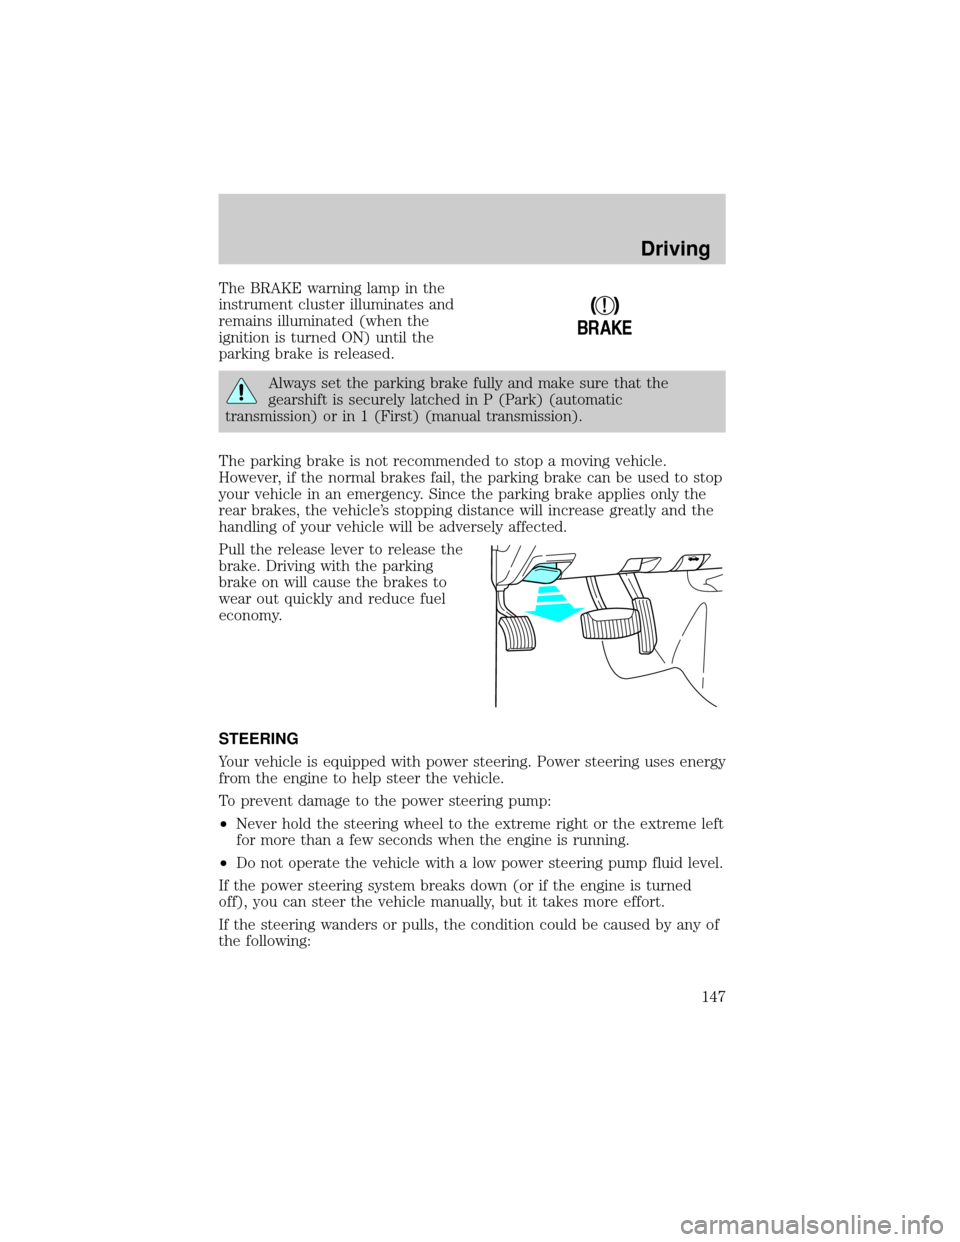
Pull the release lever to release the
brake. Driving with the parking
brake on will cause the brakes to
wear out quickly and reduce fuel
economy.
STEERING
Your vehicle is equipped with power steering. Power steering uses energy
from the engine to help steer the vehicle.
To prevent damage to the power steering pump:
²Never hold the steering wheel to the extreme right or the extreme left
for more than a few seconds when the engine is running.
²Do not operate the vehicle with a low power steering pump fluid level.
If the power steering system breaks down (or if the engine is turned
off), you can steer the vehicle manually, but it takes more effort.
If the steering wanders or pulls, the condition could be caused by any of
the following:
!
BRAKE
Driving
147
Page 149 of 264
TRANSMISSION OPERATION
Automatic transmission operation
Brake-shift interlock
This vehicle is equipped with a brake-shift interlock feature that prevents
the gearshift from being moved from P (Park) unless the brake pedal is
depressed.
If you cannot move the gearshift out of P (Park) with the brake pedal
depressed:
1. Apply the parking brake, turn ignition key to LOCK, then remove the
key.
2. Insert the key and turn it to OFF. Apply the brake pedal and shift to N
(Neutral).
3. Start the vehicle.
If it is necessary to use the above procedure to move the gearshift, it is
possible that a fuse has blown or the vehicle's brakelamps are not
operating properly. Refer toFuses and relaysin theRoadside
emergencieschapter.
Do not drive your vehicle until you verify that the brakelamps
are working.
If your vehicle gets stuck in mud or snow it may be rocked out by
shifting between forward and reverse gears, stopping between shifts, in a
steady pattern. Press lightly on the accelerator in each gear.
Do not rock the vehicle for more than a few minutes. The
transmission and tires may be damaged or the engine may
overheat.
Always set the parking brake fully and make sure the gearshift is
latched in P (Park). Turn off the ignition whenever you leave
your vehicle.
If the parking brake is fully released, but the brake warning lamp
remains illuminated, the brakes may not be working properly.
See your dealer or a qualified service technician.
Driving
149
Page 150 of 264
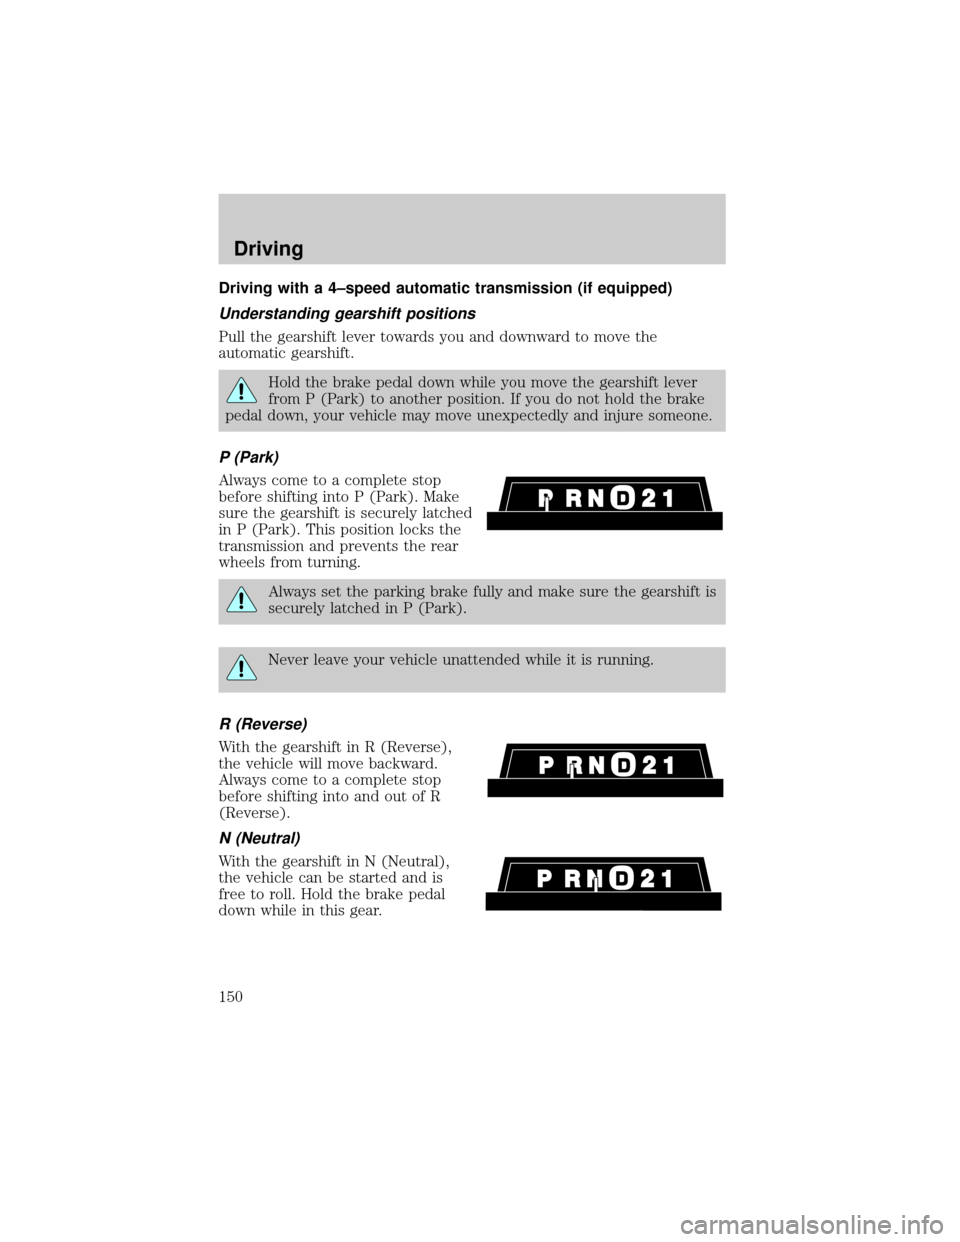
Driving with a 4±speed automatic transmission (if equipped)
Understanding gearshift positions
Pull the gearshift lever towards you and downward to move the
automatic gearshift.
Hold the brake pedal down while you move the gearshift lever
from P (Park) to another position. If you do not hold the brake
pedal down, your vehicle may move unexpectedly and injure someone.
P (Park)
Always come to a complete stop
before shifting into P (Park). Make
sure the gearshift is securely latched
in P (Park). This position locks the
transmission and prevents the rear
wheels from turning.
Always set the parking brake fully and make sure the gearshift is
securely latched in P (Park).
Never leave your vehicle unattended while it is running.
R (Reverse)
With the gearshift in R (Reverse),
the vehicle will move backward.
Always come to a complete stop
before shifting into and out of R
(Reverse).
N (Neutral)
With the gearshift in N (Neutral),
the vehicle can be started and is
free to roll. Hold the brake pedal
down while in this gear.
Driving
150
Page 151 of 264
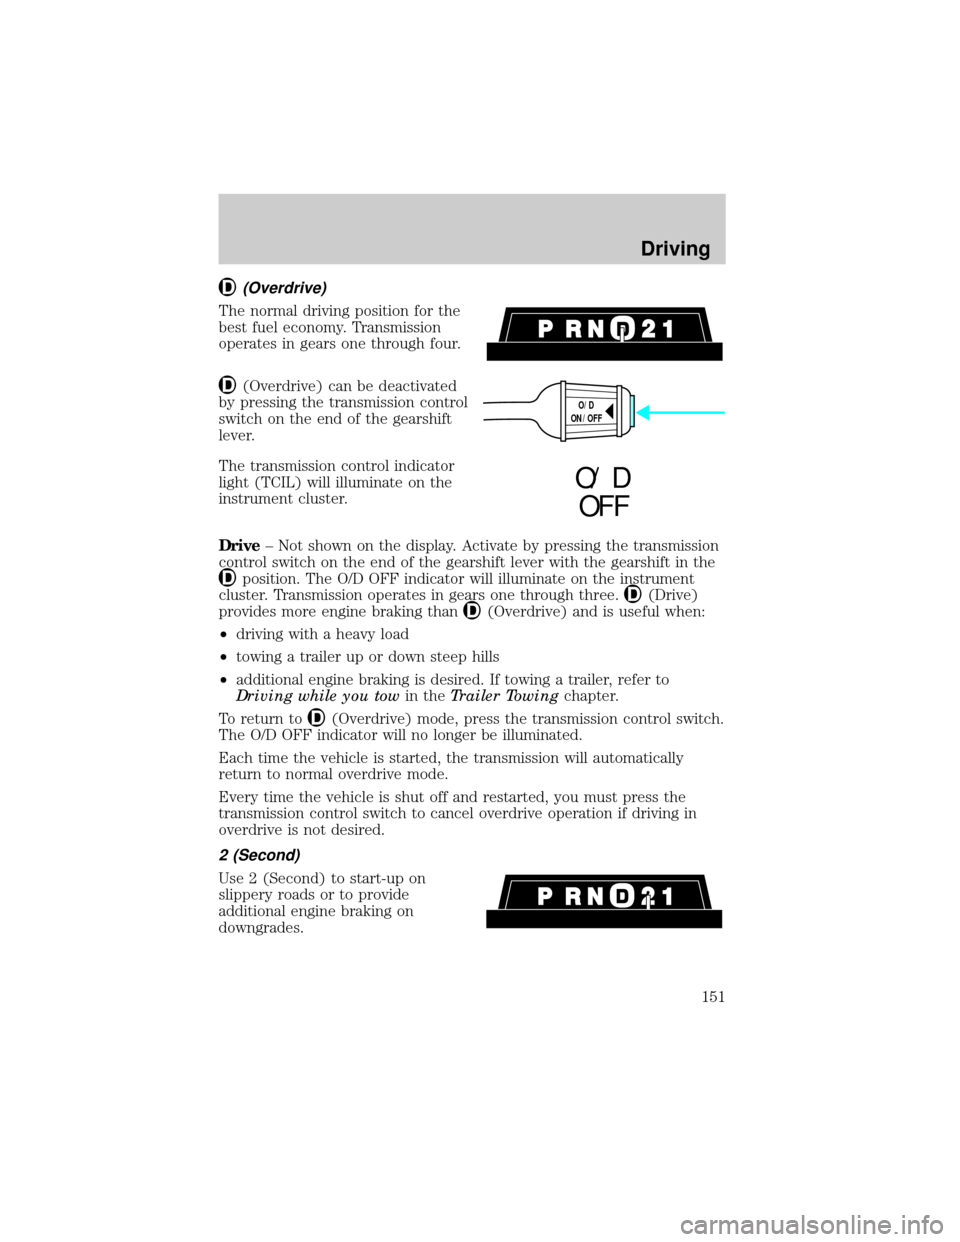
(Overdrive)
The normal driving position for the
best fuel economy. Transmission
operates in gears one through four.
(Overdrive) can be deactivated
by pressing the transmission control
switch on the end of the gearshift
lever.
The transmission control indicator
light (TCIL) will illuminate on the
instrument cluster.
Drive± Not shown on the display. Activate by pressing the transmission
control switch on the end of the gearshift lever with the gearshift in the
position. The O/D OFF indicator will illuminate on the instrument
cluster. Transmission operates in gears one through three.
(Drive)
provides more engine braking than
(Overdrive) and is useful when:
²driving with a heavy load
²towing a trailer up or down steep hills
²additional engine braking is desired. If towing a trailer, refer to
Driving while you towin theTrailer Towingchapter.
To return to
(Overdrive) mode, press the transmission control switch.
The O/D OFF indicator will no longer be illuminated.
Each time the vehicle is started, the transmission will automatically
return to normal overdrive mode.
Every time the vehicle is shut off and restarted, you must press the
transmission control switch to cancel overdrive operation if driving in
overdrive is not desired.
2 (Second)
Use 2 (Second) to start-up on
slippery roads or to provide
additional engine braking on
downgrades.
O/D
ON/OFF
O/ D
OFF
Driving
151
Page 152 of 264
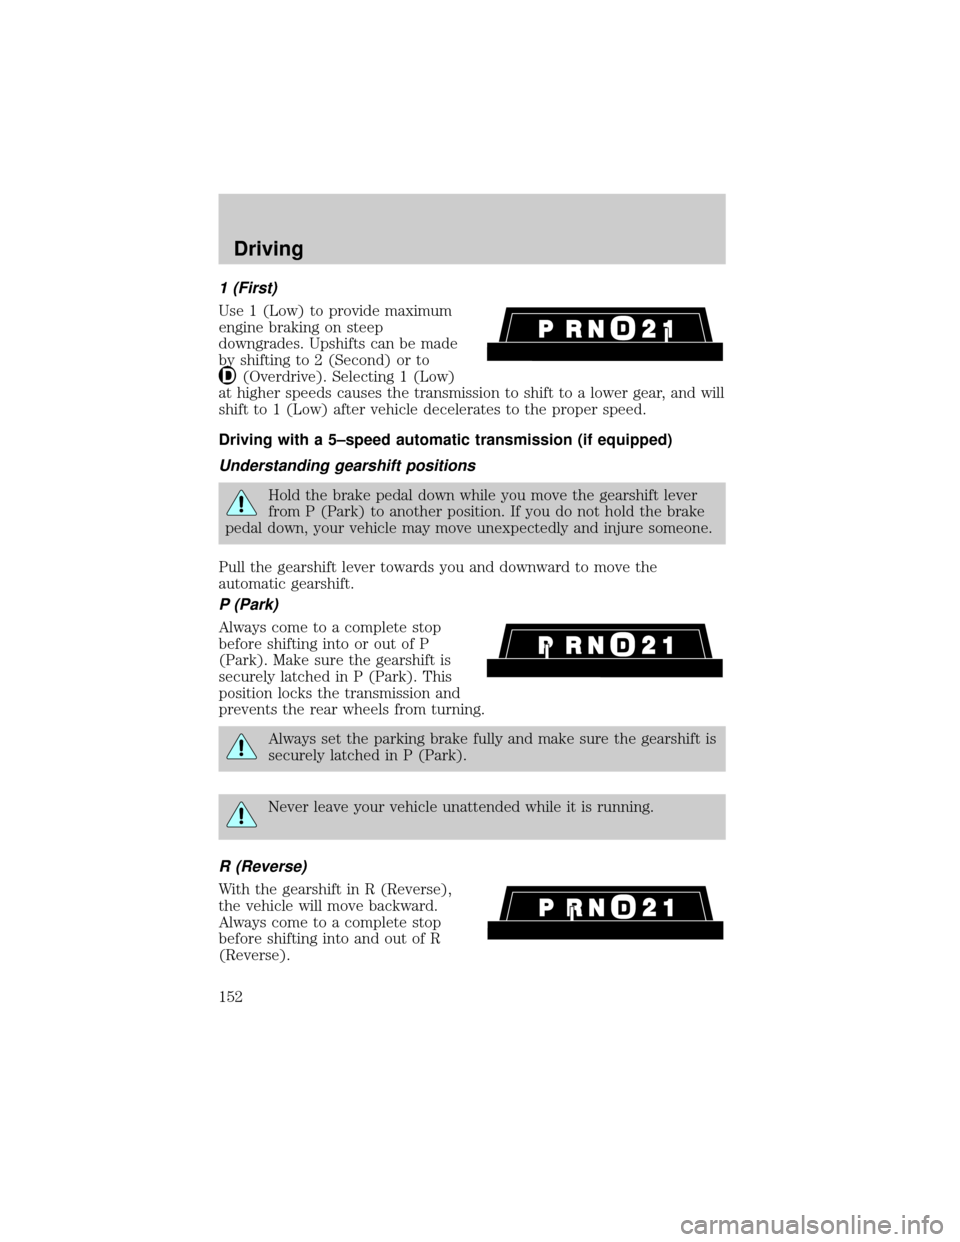
1 (First)
Use 1 (Low) to provide maximum
engine braking on steep
downgrades. Upshifts can be made
by shifting to 2 (Second) or to
(Overdrive). Selecting 1 (Low)
at higher speeds causes the transmission to shift to a lower gear, and will
shift to 1 (Low) after vehicle decelerates to the proper speed.
Driving with a 5±speed automatic transmission (if equipped)
Understanding gearshift positions
Hold the brake pedal down while you move the gearshift lever
from P (Park) to another position. If you do not hold the brake
pedal down, your vehicle may move unexpectedly and injure someone.
Pull the gearshift lever towards you and downward to move the
automatic gearshift.
P (Park)
Always come to a complete stop
before shifting into or out of P
(Park). Make sure the gearshift is
securely latched in P (Park). This
position locks the transmission and
prevents the rear wheels from turning.
Always set the parking brake fully and make sure the gearshift is
securely latched in P (Park).
Never leave your vehicle unattended while it is running.
R (Reverse)
With the gearshift in R (Reverse),
the vehicle will move backward.
Always come to a complete stop
before shifting into and out of R
(Reverse).
Driving
152
Page 153 of 264
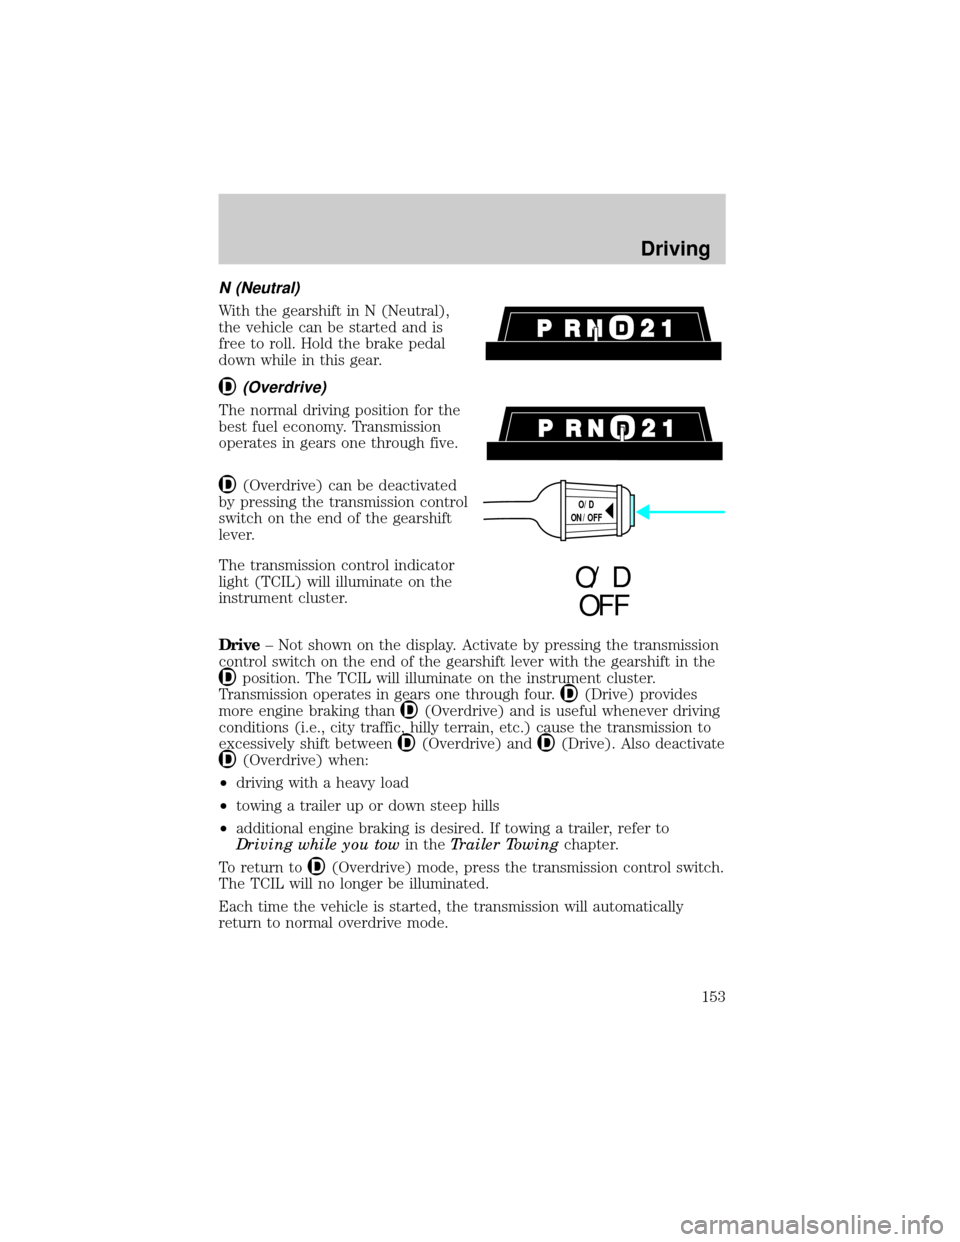
N (Neutral)
With the gearshift in N (Neutral),
the vehicle can be started and is
free to roll. Hold the brake pedal
down while in this gear.
(Overdrive)
The normal driving position for the
best fuel economy. Transmission
operates in gears one through five.
(Overdrive) can be deactivated
by pressing the transmission control
switch on the end of the gearshift
lever.
The transmission control indicator
light (TCIL) will illuminate on the
instrument cluster.
Drive± Not shown on the display. Activate by pressing the transmission
control switch on the end of the gearshift lever with the gearshift in the
position. The TCIL will illuminate on the instrument cluster.
Transmission operates in gears one through four.
(Drive) provides
more engine braking than
(Overdrive) and is useful whenever driving
conditions (i.e., city traffic, hilly terrain, etc.) cause the transmission to
excessively shift between
(Overdrive) and(Drive). Also deactivate
(Overdrive) when:
²driving with a heavy load
²towing a trailer up or down steep hills
²additional engine braking is desired. If towing a trailer, refer to
Driving while you towin theTrailer Towingchapter.
To return to
(Overdrive) mode, press the transmission control switch.
The TCIL will no longer be illuminated.
Each time the vehicle is started, the transmission will automatically
return to normal overdrive mode.
O/D
ON/OFF
O/ D
OFF
Driving
153
Page 159 of 264
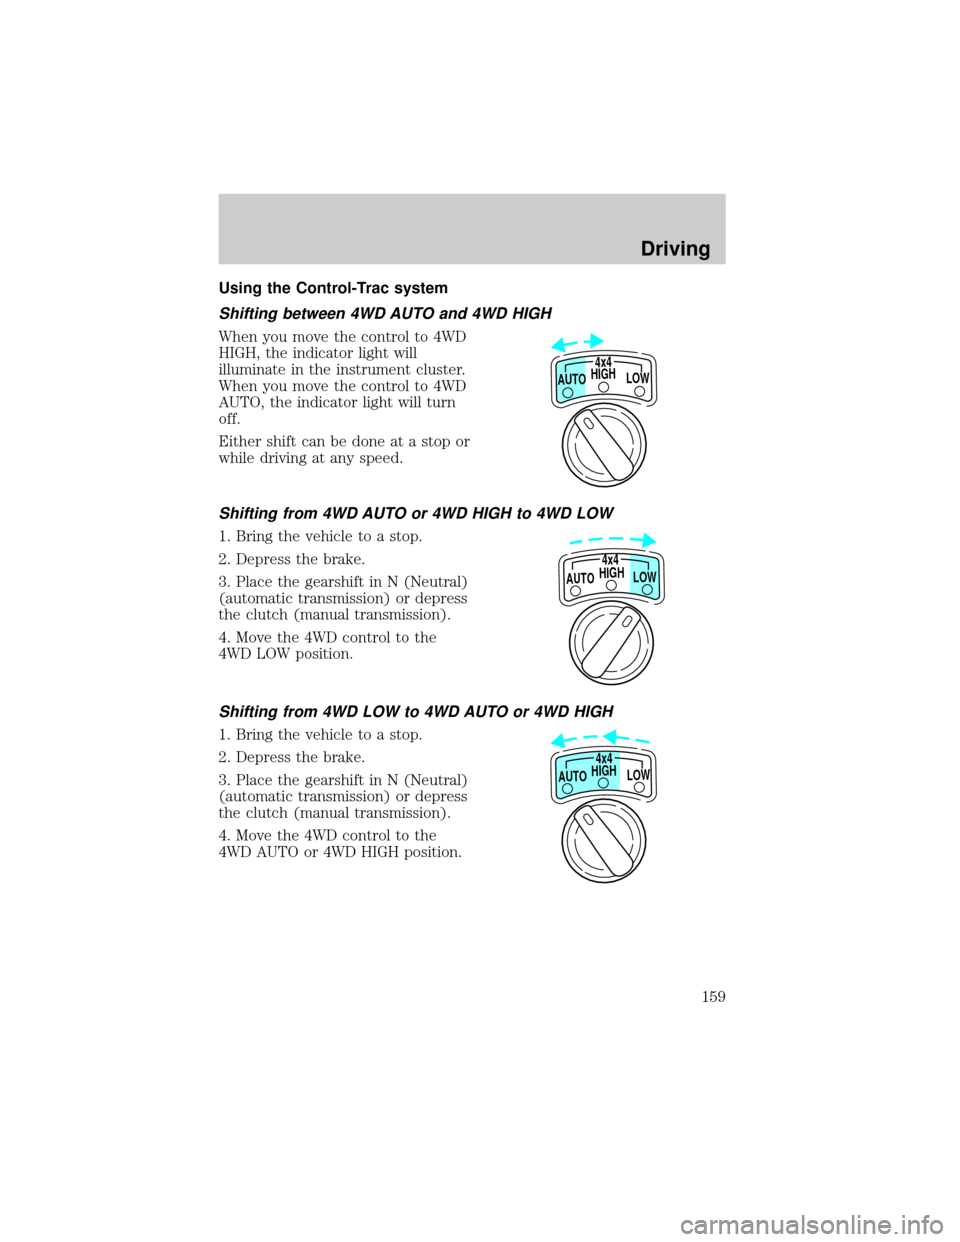
Using the Control-Trac system
Shifting between 4WD AUTO and 4WD HIGH
When you move the control to 4WD
HIGH, the indicator light will
illuminate in the instrument cluster.
When you move the control to 4WD
AUTO, the indicator light will turn
off.
Either shift can be done at a stop or
while driving at any speed.
Shifting from 4WD AUTO or 4WD HIGH to 4WD LOW
1. Bring the vehicle to a stop.
2. Depress the brake.
3. Place the gearshift in N (Neutral)
(automatic transmission) or depress
the clutch (manual transmission).
4. Move the 4WD control to the
4WD LOW position.
Shifting from 4WD LOW to 4WD AUTO or 4WD HIGH
1. Bring the vehicle to a stop.
2. Depress the brake.
3. Place the gearshift in N (Neutral)
(automatic transmission) or depress
the clutch (manual transmission).
4. Move the 4WD control to the
4WD AUTO or 4WD HIGH position.
HIGH
LOW AUTO4x4
HIGH
LOW AUTO4x4
HIGH
LOW AUTO4x4
Driving
159