lock FORD EXPLORER 2002 3.G Owners Manual
[x] Cancel search | Manufacturer: FORD, Model Year: 2002, Model line: EXPLORER, Model: FORD EXPLORER 2002 3.GPages: 312, PDF Size: 3.28 MB
Page 4 of 312
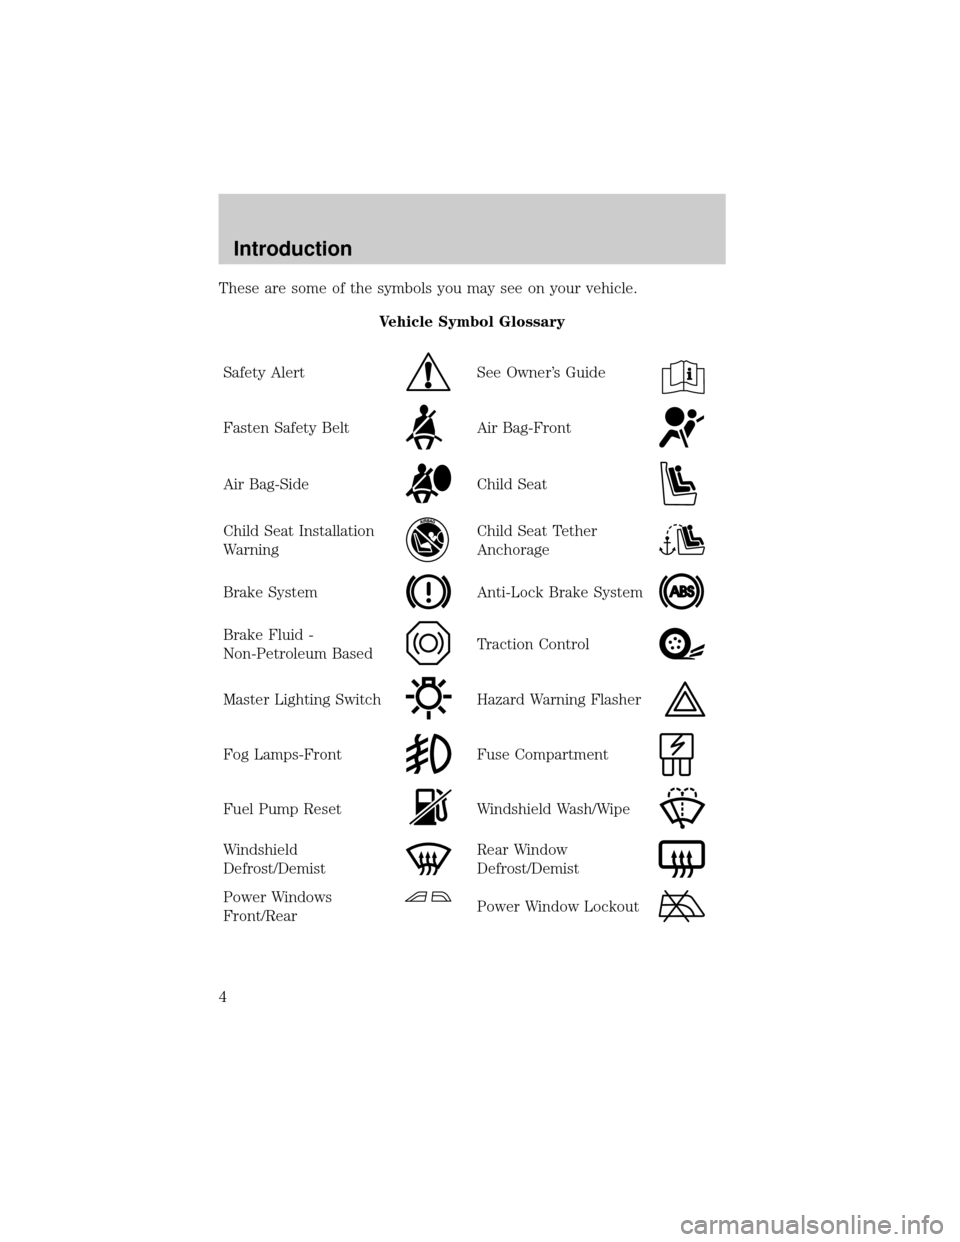
These are some of the symbols you may see on your vehicle.
Vehicle Symbol Glossary
Safety Alert
See Owner's Guide
Fasten Safety BeltAir Bag-Front
Air Bag-SideChild Seat
Child Seat Installation
WarningChild Seat Tether
Anchorage
Brake SystemAnti-Lock Brake System
Brake Fluid -
Non-Petroleum BasedTraction Control
Master Lighting SwitchHazard Warning Flasher
Fog Lamps-FrontFuse Compartment
Fuel Pump ResetWindshield Wash/Wipe
Windshield
Defrost/DemistRear Window
Defrost/Demist
Power Windows
Front/RearPower Window Lockout
Introduction
4
Page 5 of 312
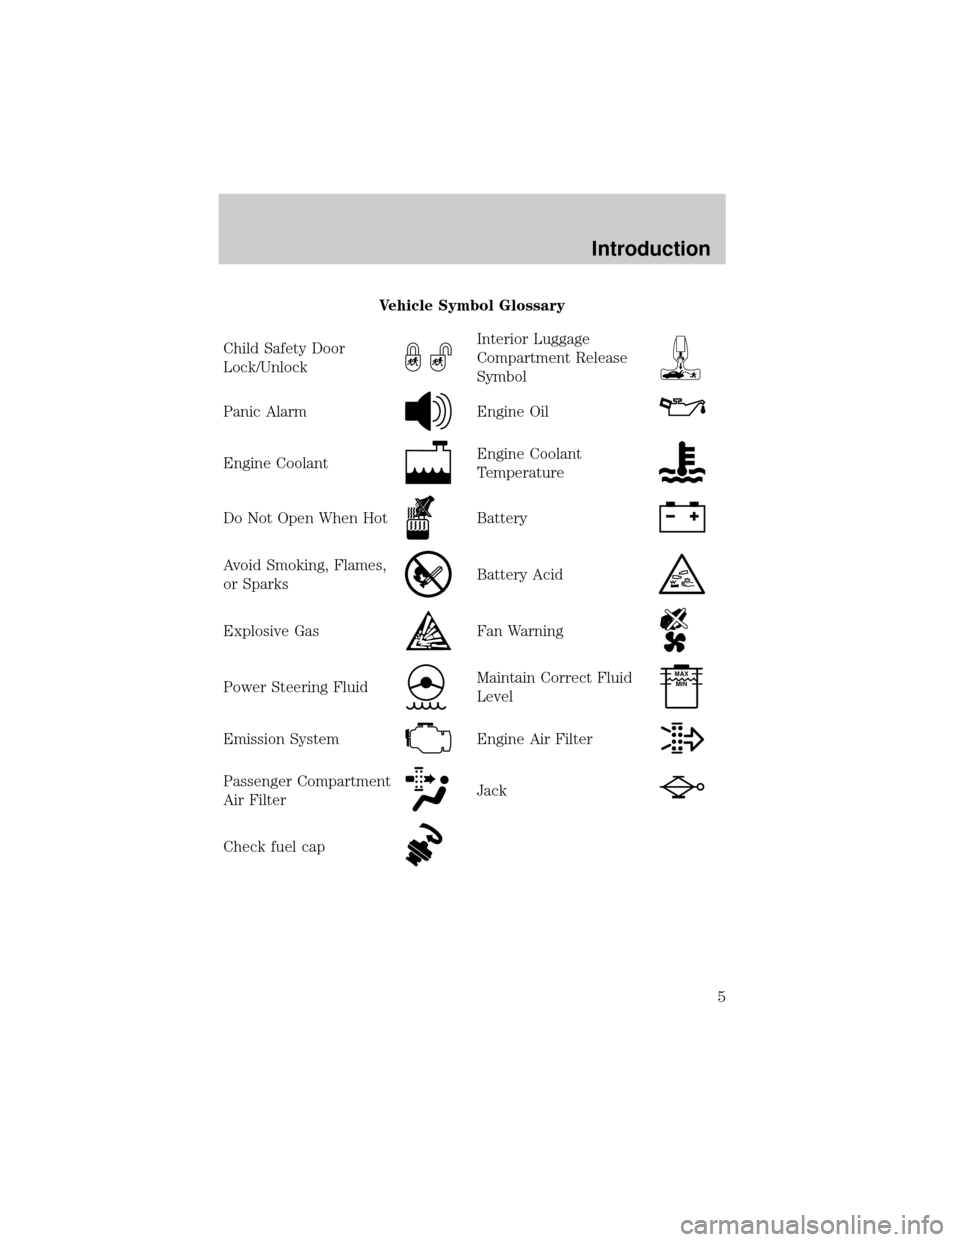
Vehicle Symbol Glossary
Child Safety Door
Lock/Unlock
Interior Luggage
Compartment Release
Symbol
Panic AlarmEngine Oil
Engine CoolantEngine Coolant
Temperature
Do Not Open When HotBattery
Avoid Smoking, Flames,
or SparksBattery Acid
Explosive GasFan Warning
Power Steering FluidMaintain Correct Fluid
LevelMAX
MIN
Emission SystemEngine Air Filter
Passenger Compartment
Air FilterJack
Check fuel cap
Introduction
5
Page 11 of 312
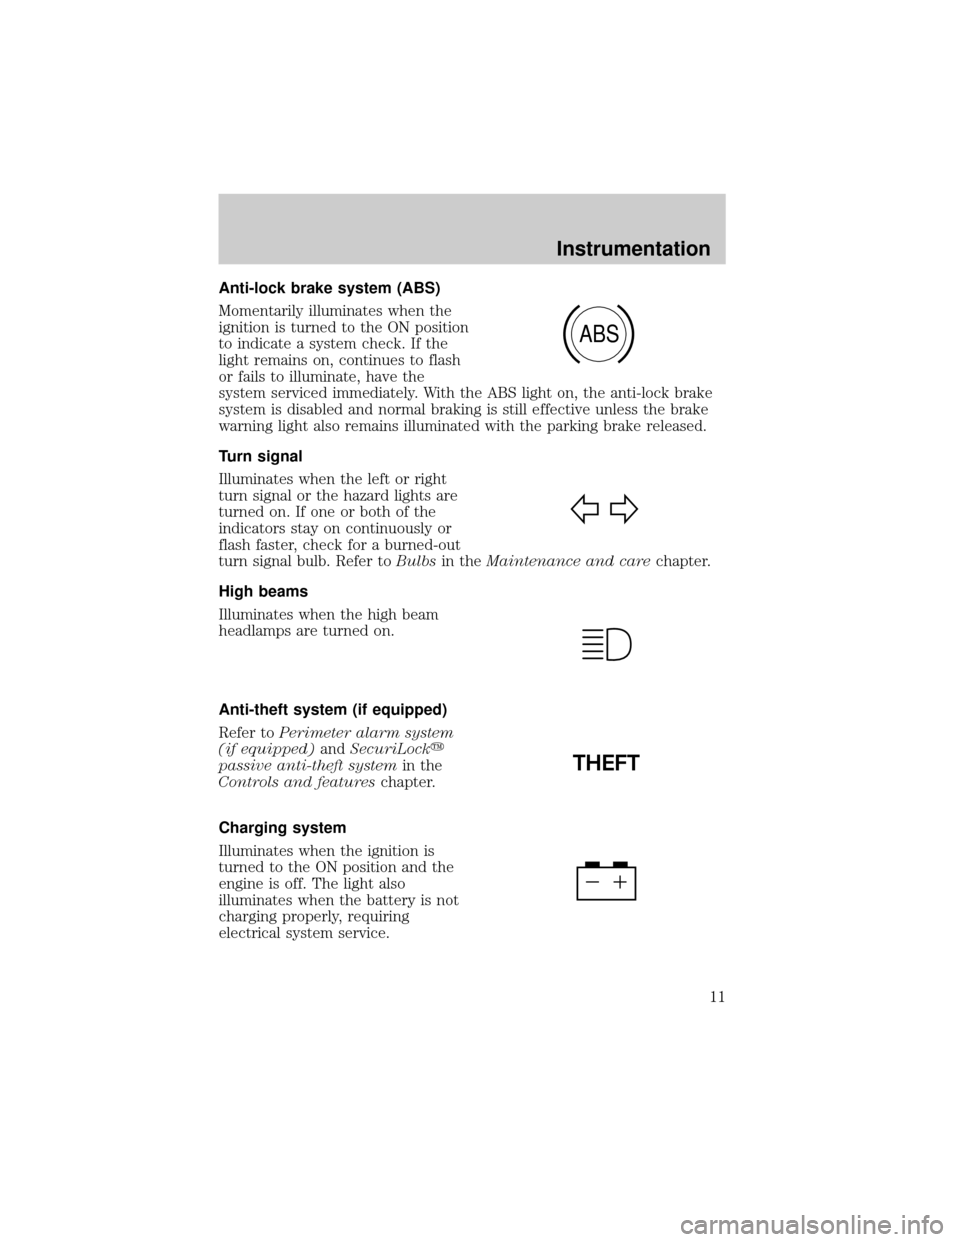
Anti-lock brake system (ABS)
Momentarily illuminates when the
ignition is turned to the ON position
to indicate a system check. If the
light remains on, continues to flash
or fails to illuminate, have the
system serviced immediately. With the ABS light on, the anti-lock brake
system is disabled and normal braking is still effective unless the brake
warning light also remains illuminated with the parking brake released.
Turn signal
Illuminates when the left or right
turn signal or the hazard lights are
turned on. If one or both of the
indicators stay on continuously or
flash faster, check for a burned-out
turn signal bulb. Refer toBulbsin theMaintenance and carechapter.
High beams
Illuminates when the high beam
headlamps are turned on.
Anti-theft system (if equipped)
Refer toPerimeter alarm system
(if equipped)andSecuriLocky
passive anti-theft systemin the
Controls and featureschapter.
Charging system
Illuminates when the ignition is
turned to the ON position and the
engine is off. The light also
illuminates when the battery is not
charging properly, requiring
electrical system service.
ABS
THEFT
Instrumentation
11
Page 13 of 312
Safety belt warning chime
Sounds to remind you to fasten your safety belts.
For information on the safety belt warning chime, refer to theSeating
and safety restraintschapter.
Belt minder chime
Sounds intermittently to remind you to fasten your safety belts.
For information on the safety belt minder chime, refer to theSeating
and safety restraintschapter.
Supplemental restraint system (SRS) warning chime
For information on the SRS warning chime, refer to theSeating and
safety restraintschapter.
Key-in-ignition warning chime
Sounds when the key is left in the ignition in the OFF/LOCK or ACC
position and the driver's door is opened.
Headlamps on warning chime
Sounds when the headlamps or parking lamps are on, the ignition is off
(and the key is not in the ignition) and the driver's door is opened.
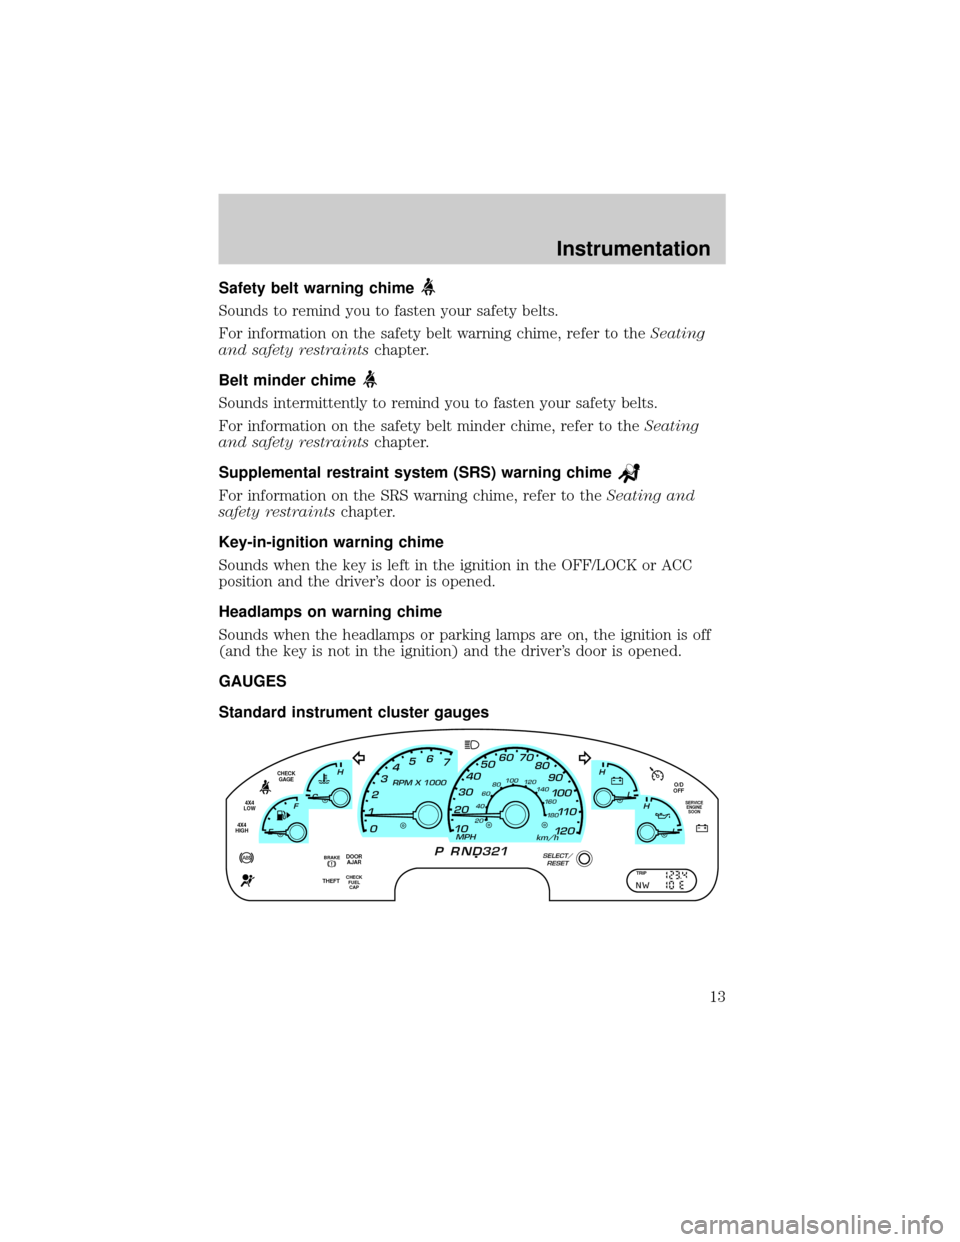
GAUGES
Standard instrument cluster gauges
O/D
OFF
DOOR
AJARCHECK
GAGE
4X4
LOW
4X4
HIGH
CHECK
FUEL
CAPTHEFT
BRAKE
SERVICE
ENGINE
SOON
TRIP
Instrumentation
13
Page 28 of 312
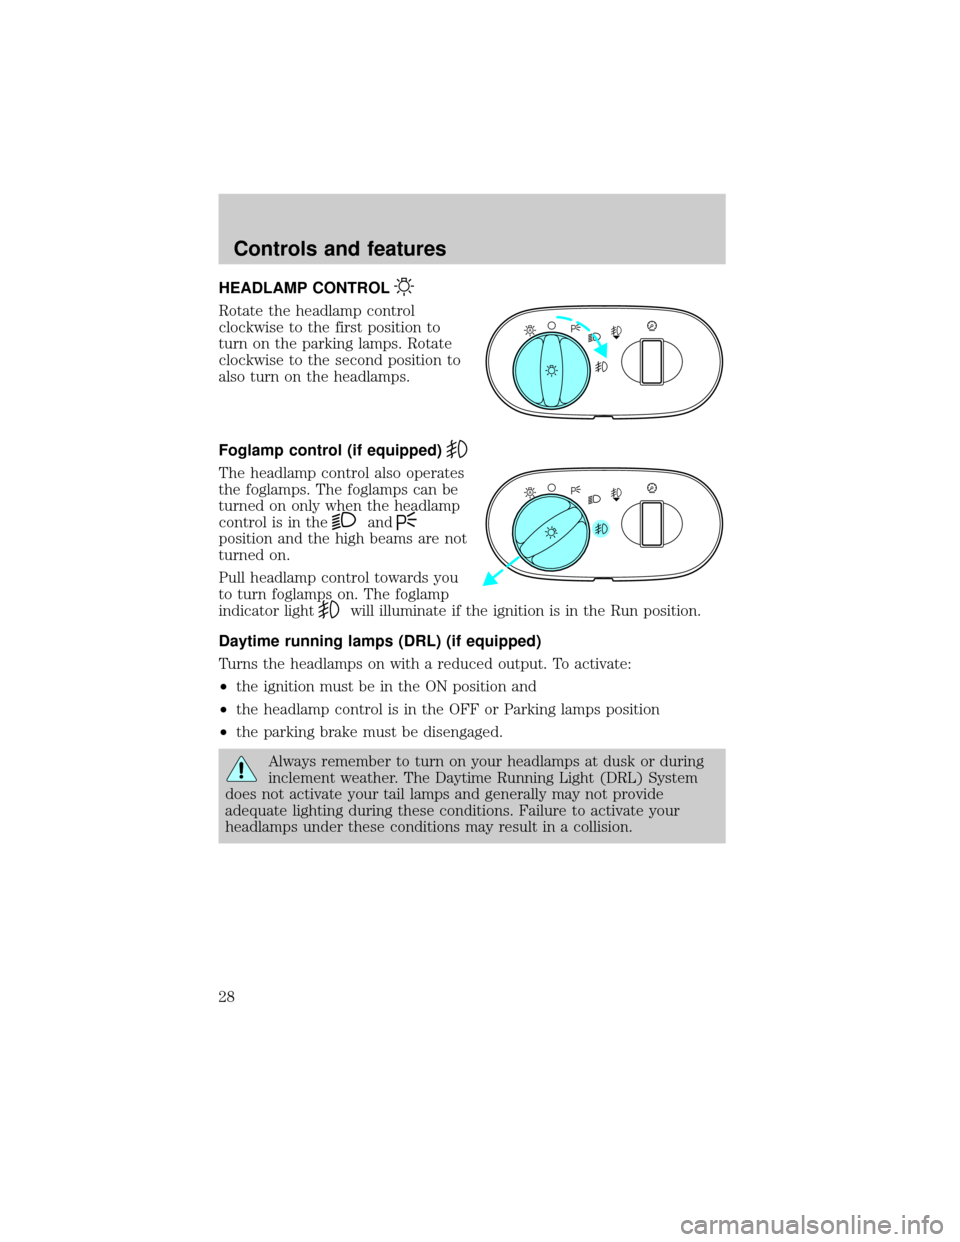
HEADLAMP CONTROL
Rotate the headlamp control
clockwise to the first position to
turn on the parking lamps. Rotate
clockwise to the second position to
also turn on the headlamps.
Foglamp control (if equipped)
The headlamp control also operates
the foglamps. The foglamps can be
turned on only when the headlamp
control is in the
and
position and the high beams are not
turned on.
Pull headlamp control towards you
to turn foglamps on. The foglamp
indicator light
will illuminate if the ignition is in the Run position.
Daytime running lamps (DRL) (if equipped)
Turns the headlamps on with a reduced output. To activate:
²the ignition must be in the ON position and
²the headlamp control is in the OFF or Parking lamps position
²the parking brake must be disengaged.
Always remember to turn on your headlamps at dusk or during
inclement weather. The Daytime Running Light (DRL) System
does not activate your tail lamps and generally may not provide
adequate lighting during these conditions. Failure to activate your
headlamps under these conditions may result in a collision.
A
A
Controls and features
28
Page 30 of 312
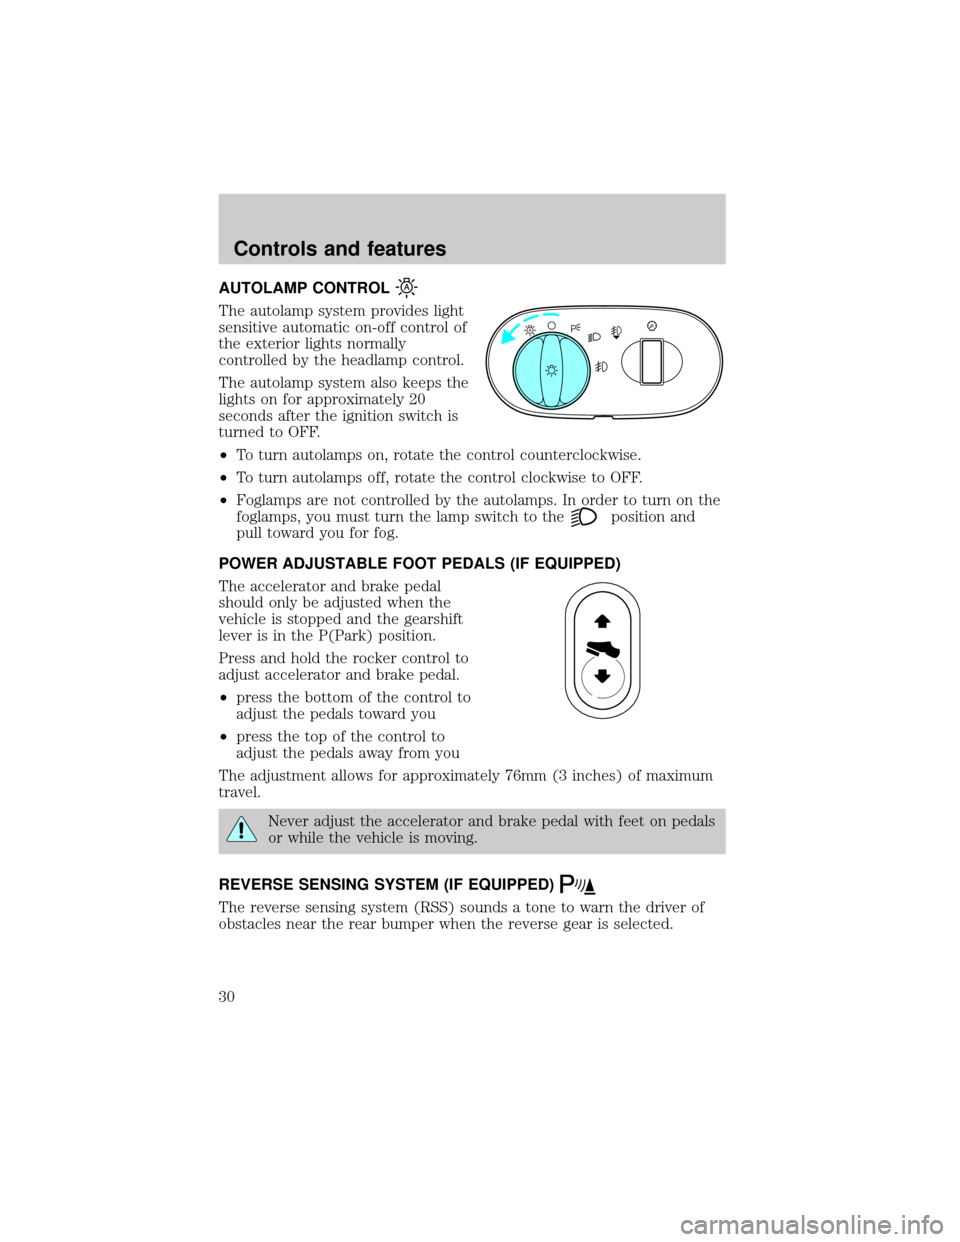
AUTOLAMP CONTROL
The autolamp system provides light
sensitive automatic on-off control of
the exterior lights normally
controlled by the headlamp control.
The autolamp system also keeps the
lights on for approximately 20
seconds after the ignition switch is
turned to OFF.
²To turn autolamps on, rotate the control counterclockwise.
²To turn autolamps off, rotate the control clockwise to OFF.
²Foglamps are not controlled by the autolamps. In order to turn on the
foglamps, you must turn the lamp switch to the
position and
pull toward you for fog.
POWER ADJUSTABLE FOOT PEDALS (IF EQUIPPED)
The accelerator and brake pedal
should only be adjusted when the
vehicle is stopped and the gearshift
lever is in the P(Park) position.
Press and hold the rocker control to
adjust accelerator and brake pedal.
²press the bottom of the control to
adjust the pedals toward you
²press the top of the control to
adjust the pedals away from you
The adjustment allows for approximately 76mm (3 inches) of maximum
travel.
Never adjust the accelerator and brake pedal with feet on pedals
or while the vehicle is moving.
REVERSE SENSING SYSTEM (IF EQUIPPED)
The reverse sensing system (RSS) sounds a tone to warn the driver of
obstacles near the rear bumper when the reverse gear is selected.
A
Controls and features
30
Page 36 of 312
Operating tips
²In humid weather conditions, place the climate control system in
before driving. This will reduce fogging on your windshield. Once the
windshield has been cleared, operate the climate control system as
desired.
²To reduce humidity buildup inside the vehicle in cold weather
conditions, don't drive with the climate control system in the OFF or
MAX A/C position.
²To reduce humidity buildup inside the vehicle in warm weather
conditions, don't drive with the climate control system in the OFF
position.
²Under normal weather conditions, your vehicle's climate control
system should be left in any position other than MAX A/C or OFF
when the vehicle is parked. This allows the vehicle to ªbreatheº
through the outside air inlet duct.
²Under snowy or dirty weather conditions, your vehicle's climate
control system should be left in the OFF position when the vehicle is
parked. This allows the climate control system to be free from
contamination of outside pollutants.
²If your vehicle has been parked with the windows closed during warm
weather conditions, the air conditioner will perform more efficiently in
cooling the vehicle if driven for two or three minutes with the
windows open. This will force most of the hot, stale air out of the
vehicle. Once the vehicle has been ªaired outº, operate the climate
control system as desired.
²Do not place objects under the front seat that will interfere with the
airflow to the rear seats.
²Remove any snow, ice or leaves from the air intake area at the base of
the windshield.
²Do not place objects over the defroster outlets. These objects can
block airflow and reduce your ability to see through your windshield.
Avoid placing small objects on top of the instrument panel. These
objects may fall down into the defroster outlets and block airflow, in
addition to damaging the climate control system.
Controls and features
36
Page 46 of 312
²Do not place objects over the defroster outlets. These objects can
block airflow and reduce your ability to see through your windshield.
Avoid placing small objects on top of the instrument panel. These
objects may fall down into the defroster outlets and block airflow, in
addition to damaging the climate control system.
To aide in side window defogging/demisting in cold weather conditions:
1. Select
2. Set the temperature control to full heat
3. Set the fan speed to High
4. Direct the outer panel vents towards the side windows
In order to increase the airflow to the outer panel vents, close the
central panel vents.
Do not place objects on top of the instrument panel, as these
objects may become projectiles in a collision or sudden stop.
Auxiliary climate controls (if equipped)
Depending on the equipment package of your vehicle, your vehicle may
be equipped with auxiliary climate controls. The auxiliary climate control
feature provides increased capacity to quickly heat or cool the vehicle.
Your auxiliary climate controls are located in the overhead console of the
first and second row seating. The auxiliary climate controls are
independent of the main climate control system. If the main climate
control system is in the OFF position, the auxiliary climate controls will
still work. However, the A/C function will not operate unless the A/C
control has been selected on the main climate control system.
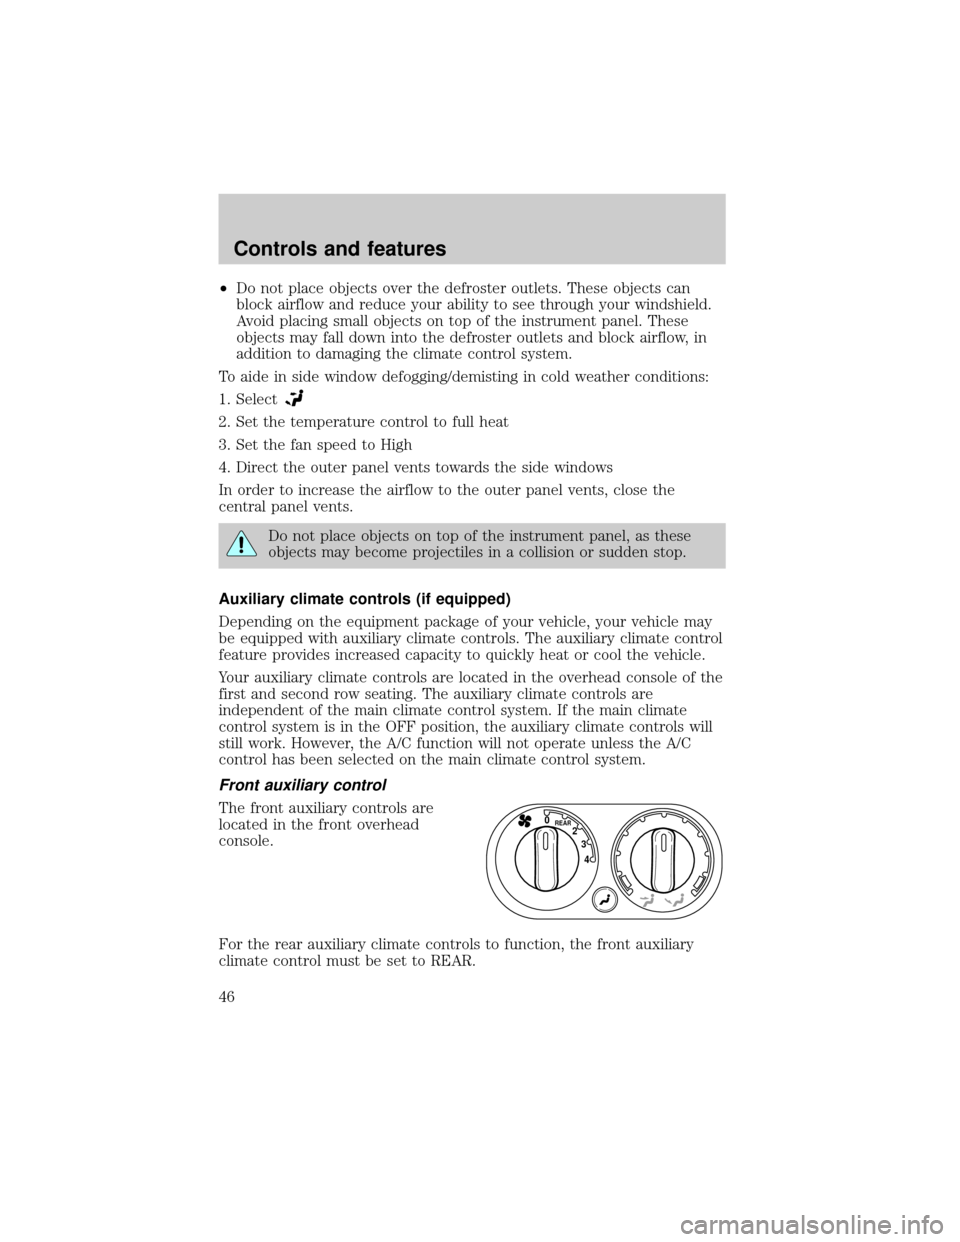
Front auxiliary control
The front auxiliary controls are
located in the front overhead
console.
For the rear auxiliary climate controls to function, the front auxiliary
climate control must be set to REAR.
4 3 2
REAR0
Controls and features
46
Page 56 of 312
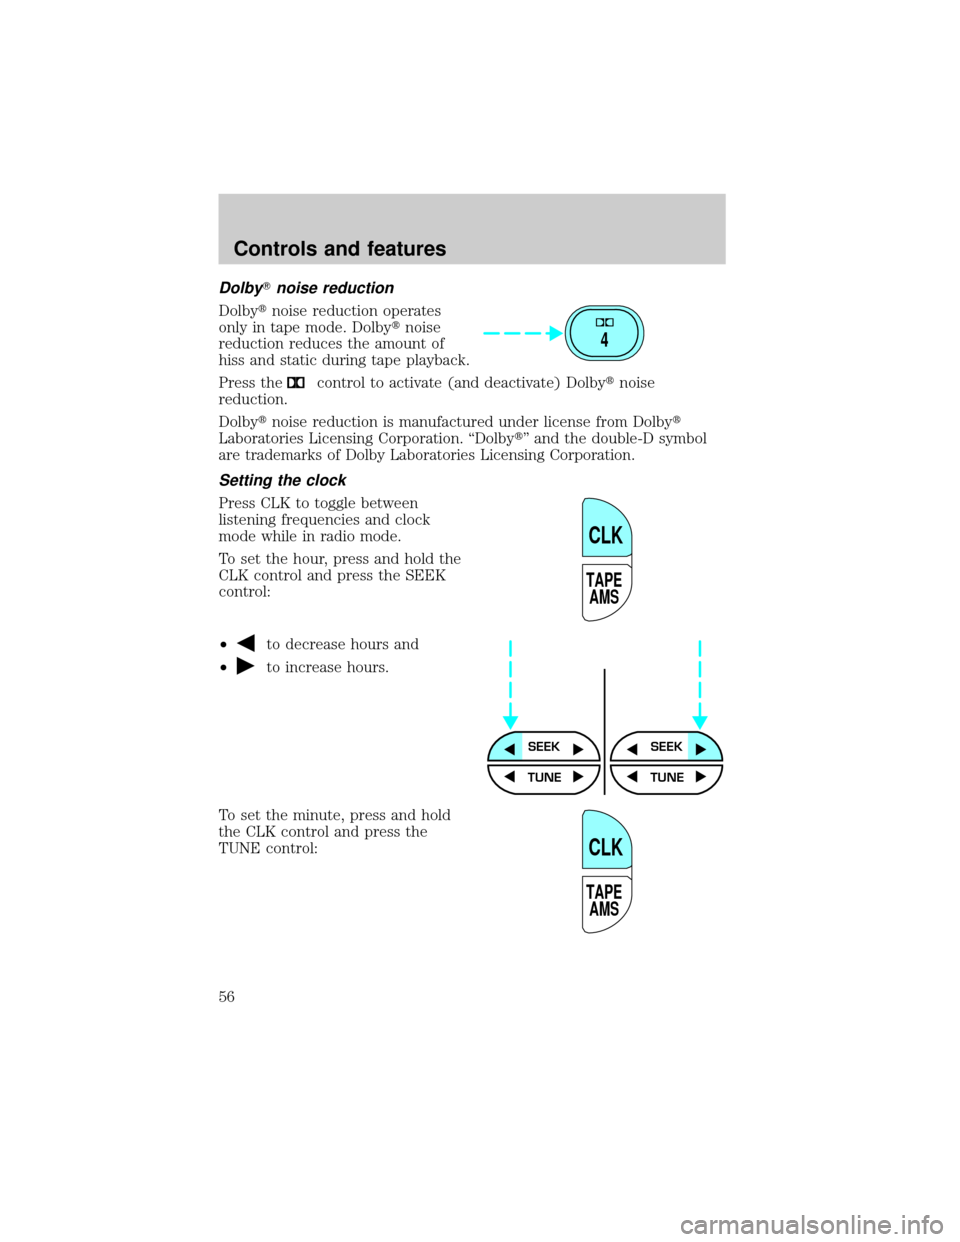
DolbyTnoise reduction
Dolbytnoise reduction operates
only in tape mode. Dolbytnoise
reduction reduces the amount of
hiss and static during tape playback.
Press the
control to activate (and deactivate) Dolbytnoise
reduction.
Dolbytnoise reduction is manufactured under license from Dolbyt
Laboratories Licensing Corporation. ªDolbytº and the double-D symbol
are trademarks of Dolby Laboratories Licensing Corporation.
Setting the clock
Press CLK to toggle between
listening frequencies and clock
mode while in radio mode.
To set the hour, press and hold the
CLK control and press the SEEK
control:
²
to decrease hours and
²
to increase hours.
To set the minute, press and hold
the CLK control and press the
TUNE control:
4
TAPE
AMS
CLK
SEEKSEEK
TUNE TUNE
TAPE
AMS
CLK
Controls and features
56
Page 57 of 312
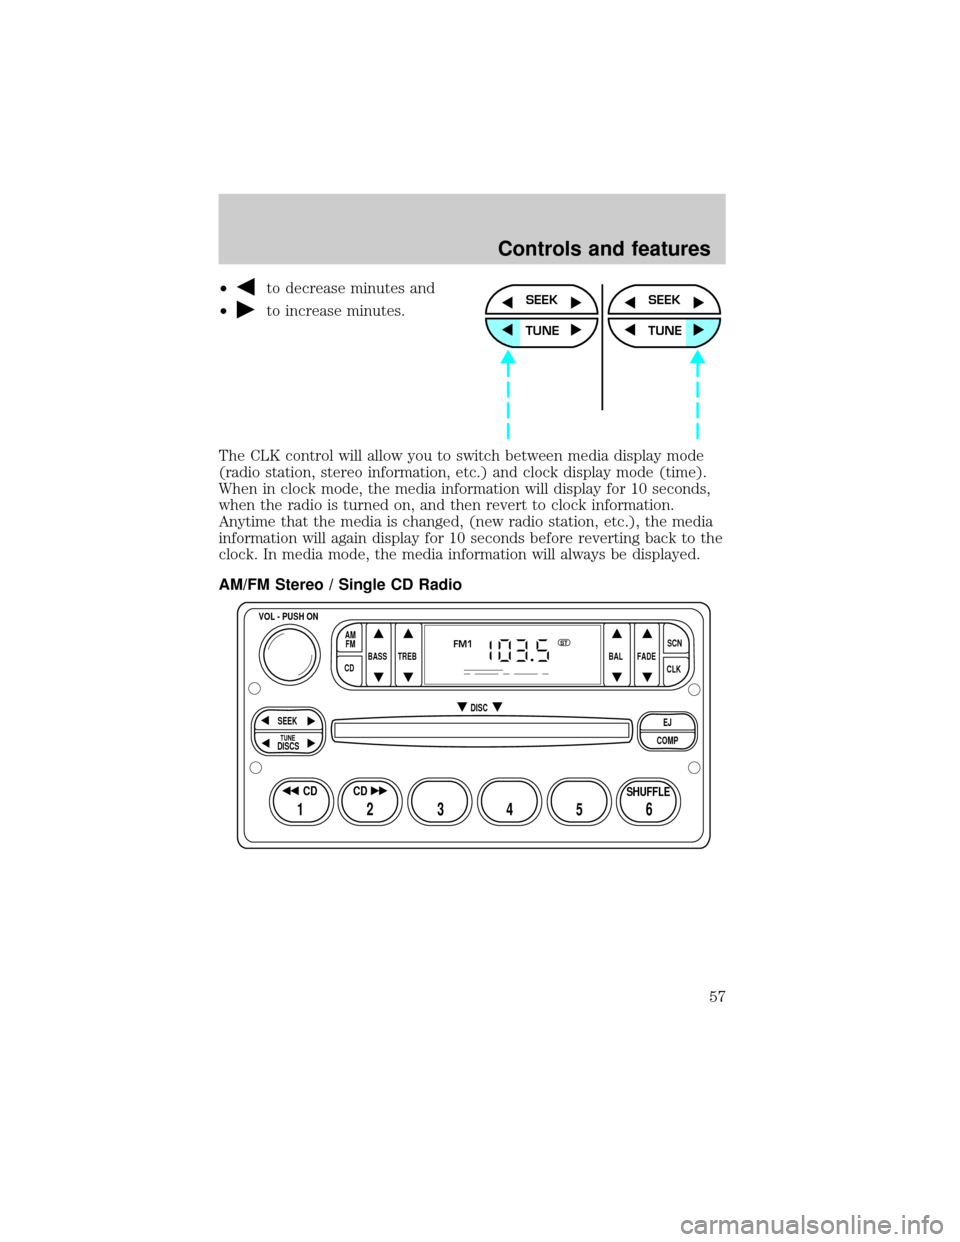
²to decrease minutes and
²
to increase minutes.
The CLK control will allow you to switch between media display mode
(radio station, stereo information, etc.) and clock display mode (time).
When in clock mode, the media information will display for 10 seconds,
when the radio is turned on, and then revert to clock information.
Anytime that the media is changed, (new radio station, etc.), the media
information will again display for 10 seconds before reverting back to the
clock. In media mode, the media information will always be displayed.
AM/FM Stereo / Single CD RadioSEEK
TUNE
SEEK
TUNE
BASS
CDTREB BAL FADESCN
CLK AM
FM
VOL - PUSH ON
SEEK
EJ
COMP DISC
DISCS
TUNE
12 3456
FM1ST
SHUFFLE CD CD
Controls and features
57