sensor FORD EXPLORER 2002 3.G Owners Manual
[x] Cancel search | Manufacturer: FORD, Model Year: 2002, Model line: EXPLORER, Model: FORD EXPLORER 2002 3.GPages: 312, PDF Size: 3.28 MB
Page 18 of 312
Most geographic areas (zones) have a magnetic north compass point that
varies slightly from the northerly direction on maps. This variation is four
degrees between adjacent zones and will become noticeable as the
vehicle crosses multiple zones. A correct zone setting will eliminate this
error. Refer toCompass zone adjustment.
Compass zone adjustment
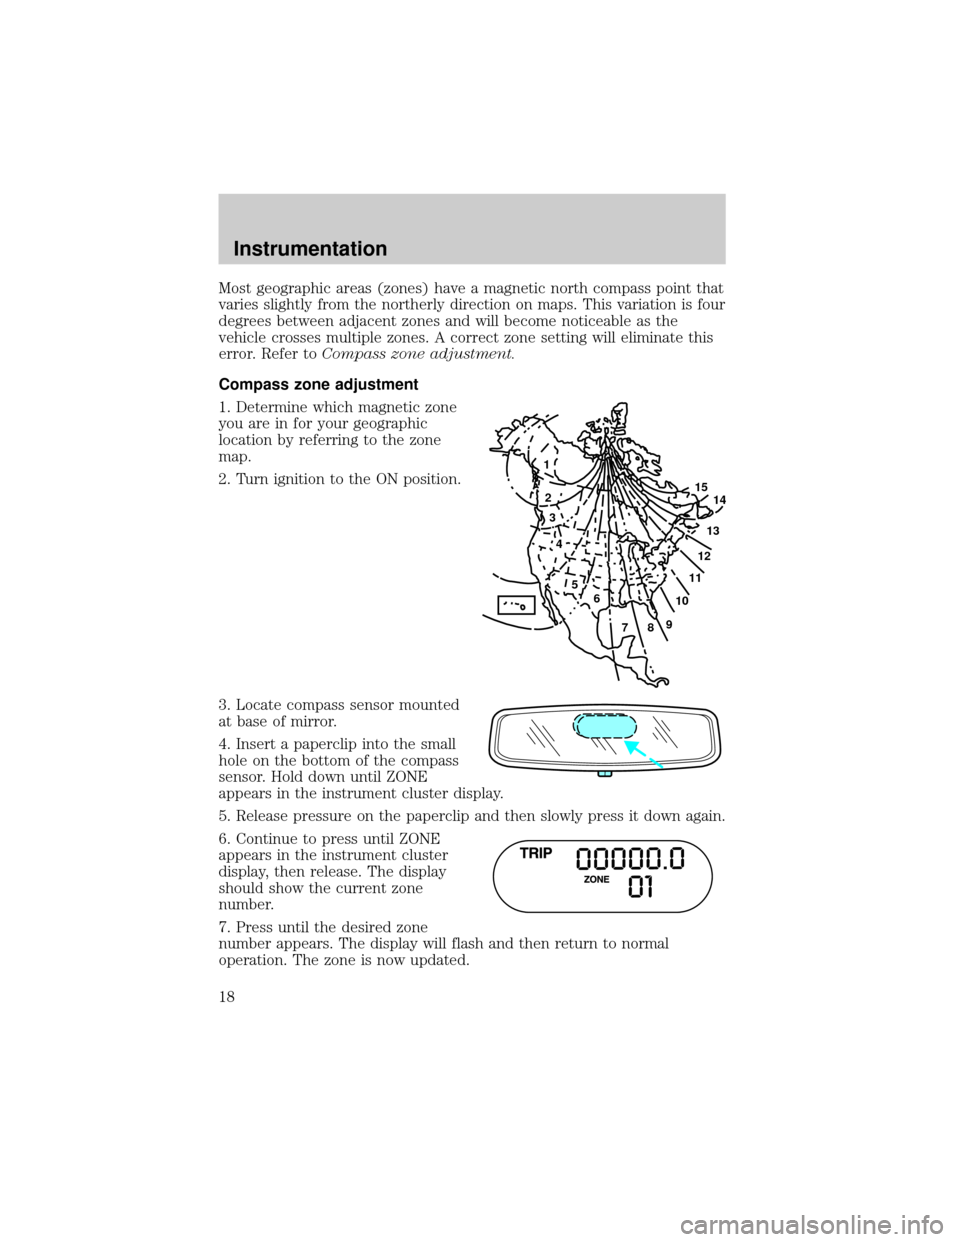
1. Determine which magnetic zone
you are in for your geographic
location by referring to the zone
map.
2. Turn ignition to the ON position.
3. Locate compass sensor mounted
at base of mirror.
4. Insert a paperclip into the small
hole on the bottom of the compass
sensor. Hold down until ZONE
appears in the instrument cluster display.
5. Release pressure on the paperclip and then slowly press it down again.
6. Continue to press until ZONE
appears in the instrument cluster
display, then release. The display
should show the current zone
number.
7. Press until the desired zone
number appears. The display will flash and then return to normal
operation. The zone is now updated.
1
2
3
4
5
6
7891011121314 15
Instrumentation
18
Page 19 of 312
Compass calibration adjustment
Perform this adjustment in an open area free from steel structures and
high voltage lines:
For optimum calibration, turn off all electrical accessories (heater/air
conditioning, wipers, etc.) and make sure all vehicle doors are shut.
1. Start the vehicle.
2. Locate compass sensor mounted at base of mirror.
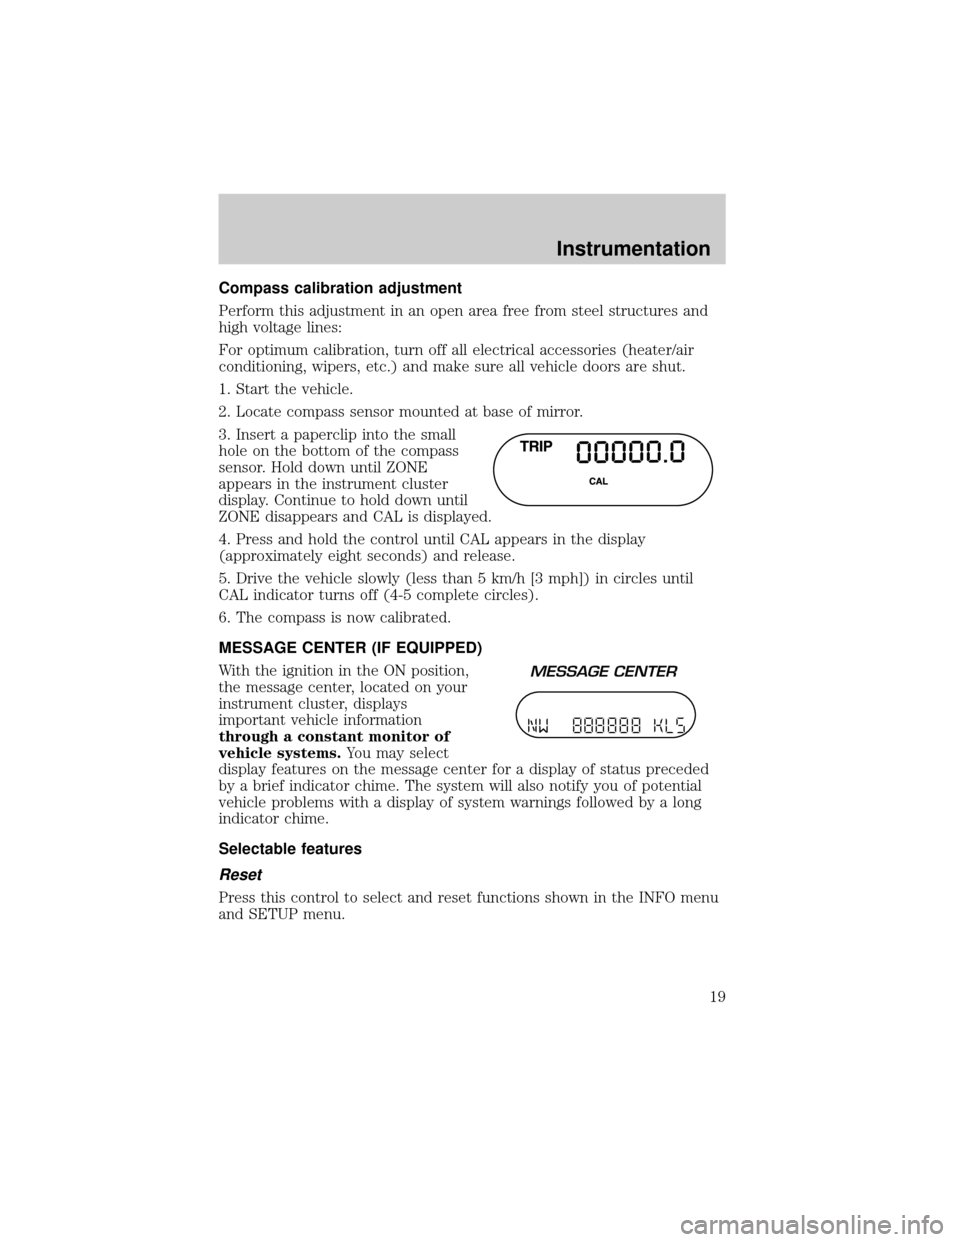
3. Insert a paperclip into the small
hole on the bottom of the compass
sensor. Hold down until ZONE
appears in the instrument cluster
display. Continue to hold down until
ZONE disappears and CAL is displayed.
4. Press and hold the control until CAL appears in the display
(approximately eight seconds) and release.
5. Drive the vehicle slowly (less than 5 km/h [3 mph]) in circles until
CAL indicator turns off (4-5 complete circles).
6. The compass is now calibrated.
MESSAGE CENTER (IF EQUIPPED)
With the ignition in the ON position,
the message center, located on your
instrument cluster, displays
important vehicle information
through a constant monitor of
vehicle systems.You may select
display features on the message center for a display of status preceded
by a brief indicator chime. The system will also notify you of potential
vehicle problems with a display of system warnings followed by a long
indicator chime.
Selectable features
Reset
Press this control to select and reset functions shown in the INFO menu
and SETUP menu.
Instrumentation
19
Page 27 of 312
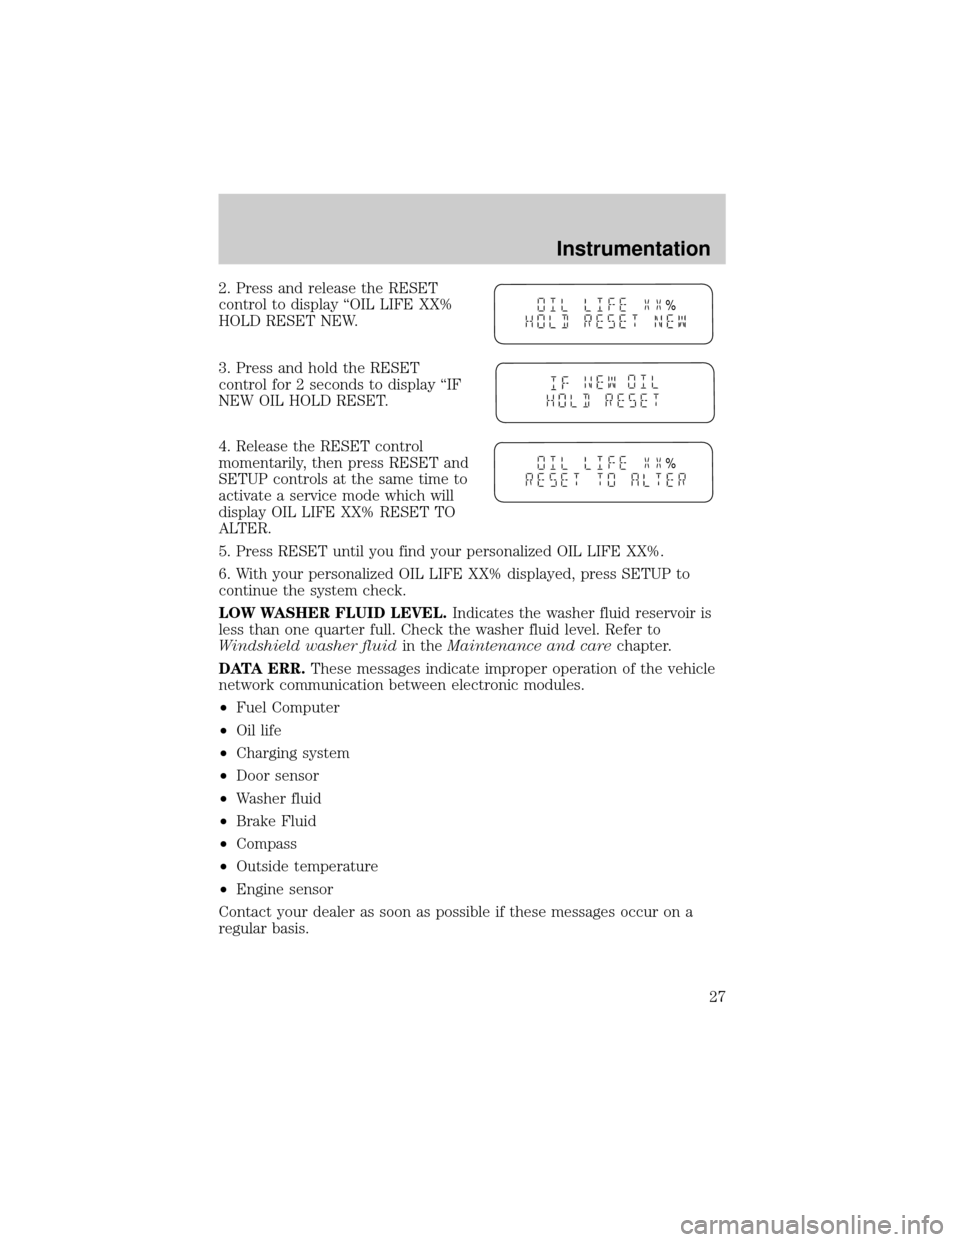
2. Press and release the RESET
control to display ªOIL LIFE XX%
HOLD RESET NEW.
3. Press and hold the RESET
control for 2 seconds to display ªIF
NEW OIL HOLD RESET.
4. Release the RESET control
momentarily, then press RESET and
SETUP controls at the same time to
activate a service mode which will
display OIL LIFE XX% RESET TO
ALTER.
5. Press RESET until you find your personalized OIL LIFE XX%.
6. With your personalized OIL LIFE XX% displayed, press SETUP to
continue the system check.
LOW WASHER FLUID LEVEL.Indicates the washer fluid reservoir is
less than one quarter full. Check the washer fluid level. Refer to
Windshield washer fluidin theMaintenance and carechapter.
DATA ERR.These messages indicate improper operation of the vehicle
network communication between electronic modules.
²Fuel Computer
²Oil life
²Charging system
²Door sensor
²Washer fluid
²Brake Fluid
²Compass
²Outside temperature
²Engine sensor
Contact your dealer as soon as possible if these messages occur on a
regular basis.
%
%
Instrumentation
27
Page 32 of 312
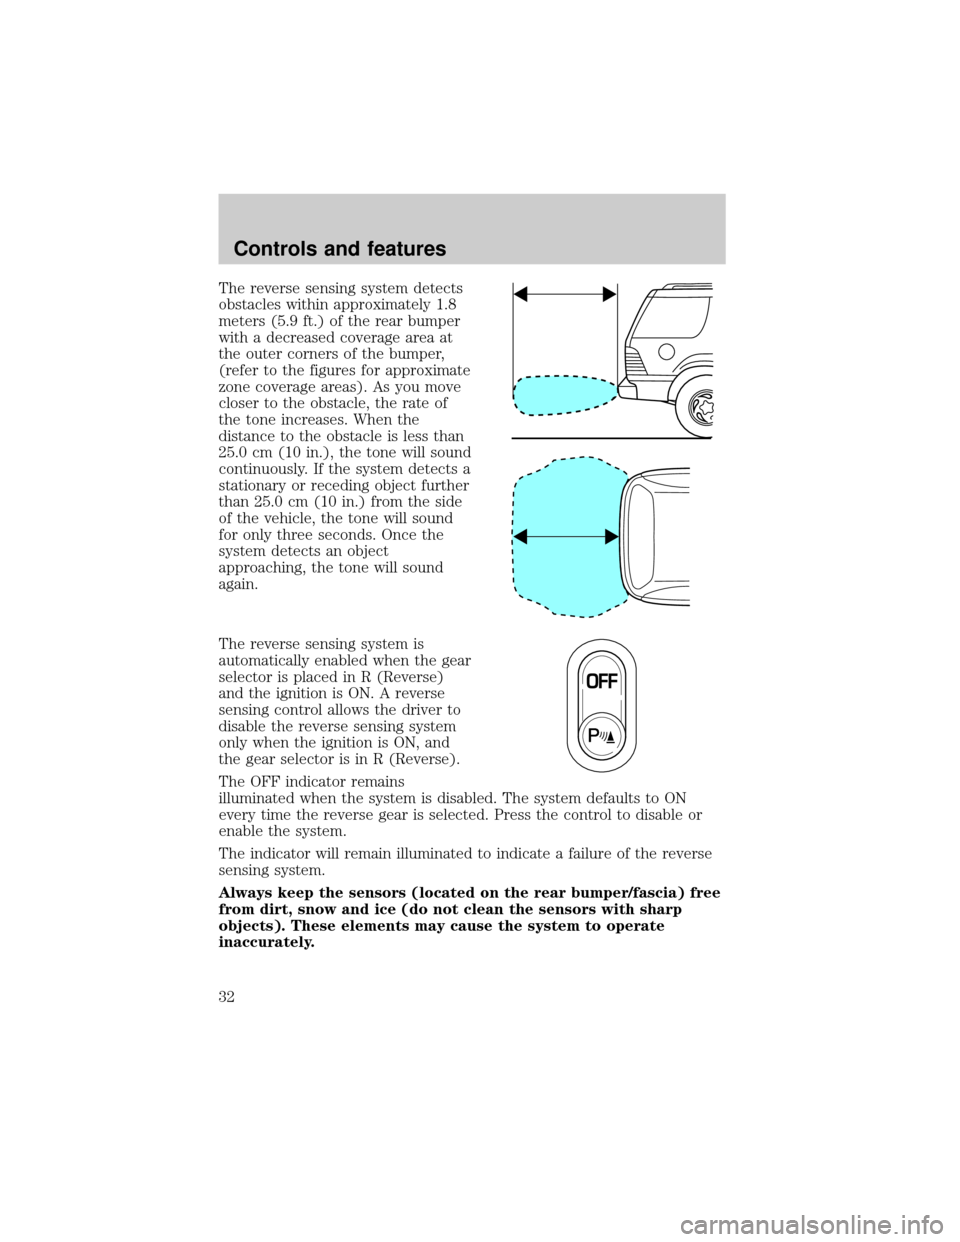
The reverse sensing system detects
obstacles within approximately 1.8
meters (5.9 ft.) of the rear bumper
with a decreased coverage area at
the outer corners of the bumper,
(refer to the figures for approximate
zone coverage areas). As you move
closer to the obstacle, the rate of
the tone increases. When the
distance to the obstacle is less than
25.0 cm (10 in.), the tone will sound
continuously. If the system detects a
stationary or receding object further
than 25.0 cm (10 in.) from the side
of the vehicle, the tone will sound
for only three seconds. Once the
system detects an object
approaching, the tone will sound
again.
The reverse sensing system is
automatically enabled when the gear
selector is placed in R (Reverse)
and the ignition is ON. A reverse
sensing control allows the driver to
disable the reverse sensing system
only when the ignition is ON, and
the gear selector is in R (Reverse).
The OFF indicator remains
illuminated when the system is disabled. The system defaults to ON
every time the reverse gear is selected. Press the control to disable or
enable the system.
The indicator will remain illuminated to indicate a failure of the reverse
sensing system.
Always keep the sensors (located on the rear bumper/fascia) free
from dirt, snow and ice (do not clean the sensors with sharp
objects). These elements may cause the system to operate
inaccurately.
Controls and features
32
Page 155 of 312
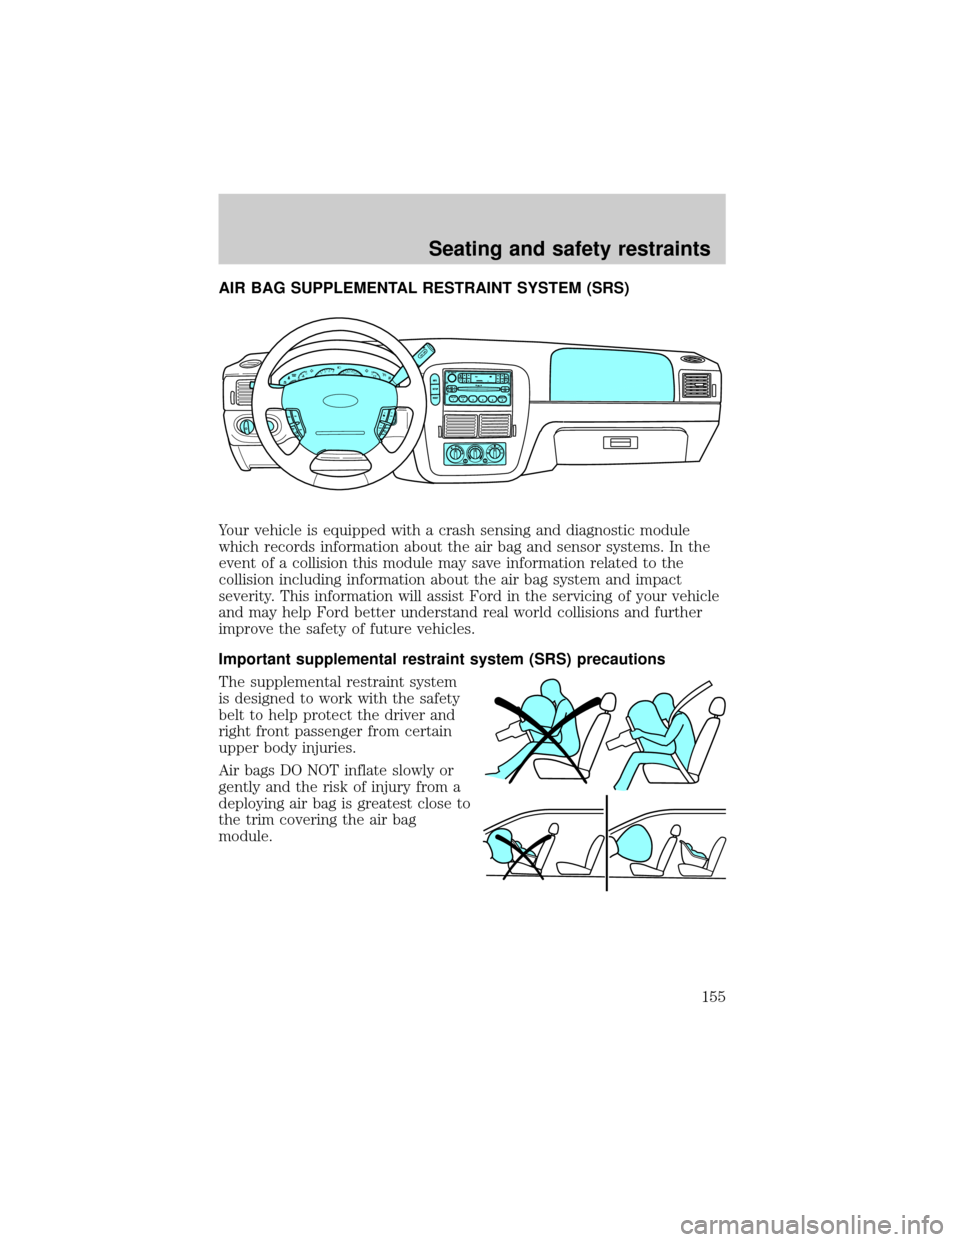
AIR BAG SUPPLEMENTAL RESTRAINT SYSTEM (SRS)
Your vehicle is equipped with a crash sensing and diagnostic module
which records information about the air bag and sensor systems. In the
event of a collision this module may save information related to the
collision including information about the air bag system and impact
severity. This information will assist Ford in the servicing of your vehicle
and may help Ford better understand real world collisions and further
improve the safety of future vehicles.
Important supplemental restraint system (SRS) precautions
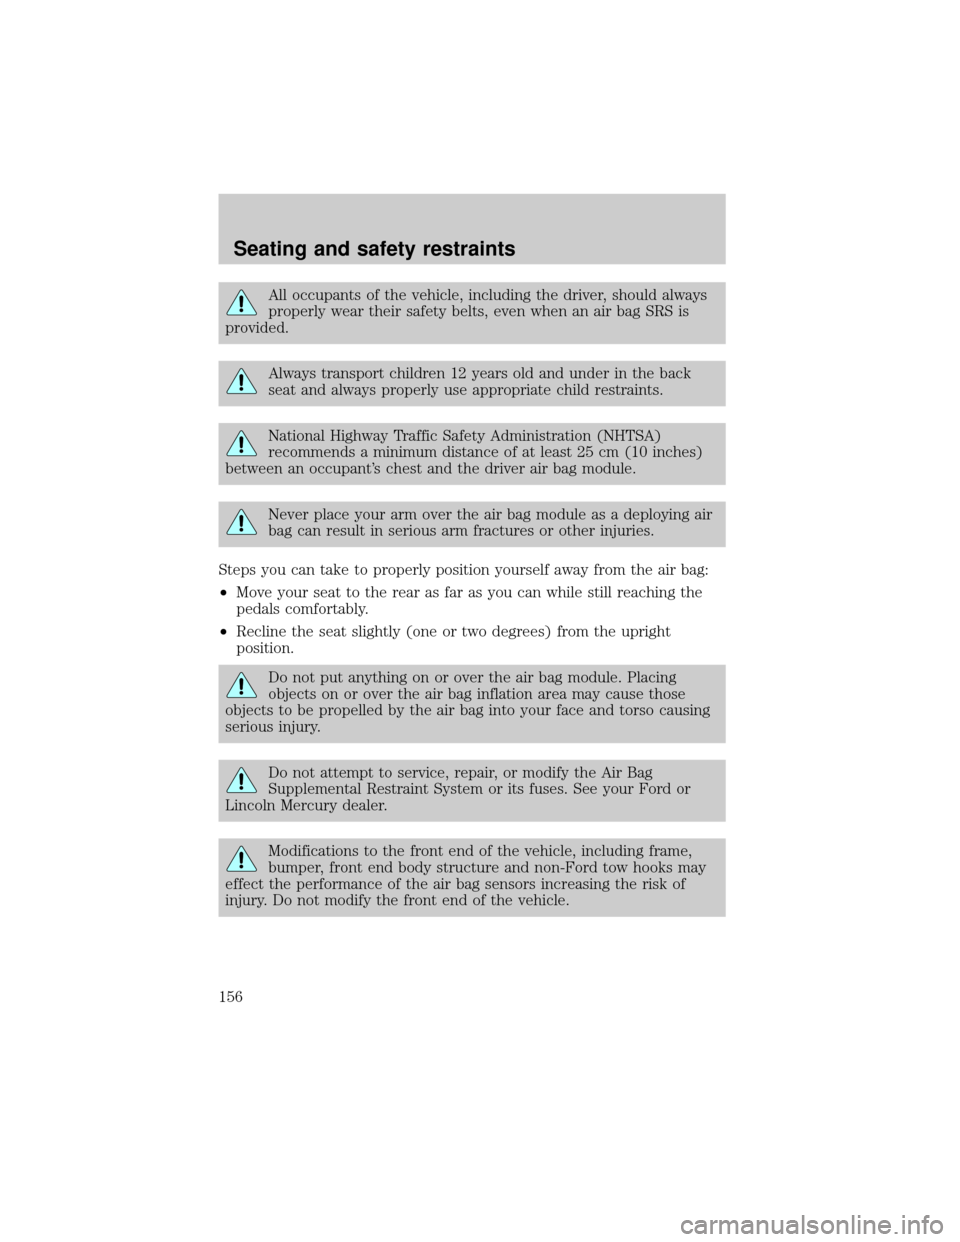
The supplemental restraint system
is designed to work with the safety
belt to help protect the driver and
right front passenger from certain
upper body injuries.
Air bags DO NOT inflate slowly or
gently and the risk of injury from a
deploying air bag is greatest close to
the trim covering the air bag
module.
Seating and safety restraints
155
Page 156 of 312
All occupants of the vehicle, including the driver, should always
properly wear their safety belts, even when an air bag SRS is
provided.
Always transport children 12 years old and under in the back
seat and always properly use appropriate child restraints.
National Highway Traffic Safety Administration (NHTSA)
recommends a minimum distance of at least 25 cm (10 inches)
between an occupant's chest and the driver air bag module.
Never place your arm over the air bag module as a deploying air
bag can result in serious arm fractures or other injuries.
Steps you can take to properly position yourself away from the air bag:
²Move your seat to the rear as far as you can while still reaching the
pedals comfortably.
²Recline the seat slightly (one or two degrees) from the upright
position.
Do not put anything on or over the air bag module. Placing
objects on or over the air bag inflation area may cause those
objects to be propelled by the air bag into your face and torso causing
serious injury.
Do not attempt to service, repair, or modify the Air Bag
Supplemental Restraint System or its fuses. See your Ford or
Lincoln Mercury dealer.
Modifications to the front end of the vehicle, including frame,
bumper, front end body structure and non-Ford tow hooks may
effect the performance of the air bag sensors increasing the risk of
injury. Do not modify the front end of the vehicle.
Seating and safety restraints
156
Page 157 of 312
Additional equipment may effect the performance of the air bag
sensors increasing the risk of injury. Please refer to the Body
Builders Layout Book for instructions about the appropriate installation
of additional equipment.
Children and air bags
For additional important safety
information, read all information on
safety restraints in this guide.
Children must always be properly
restrained. Accident statistics
suggest that children are safer when
properly restrained in the rear
seating positions than in the front
seating position. Failure to follow
these instructions may increase the
risk of injury in a collision.
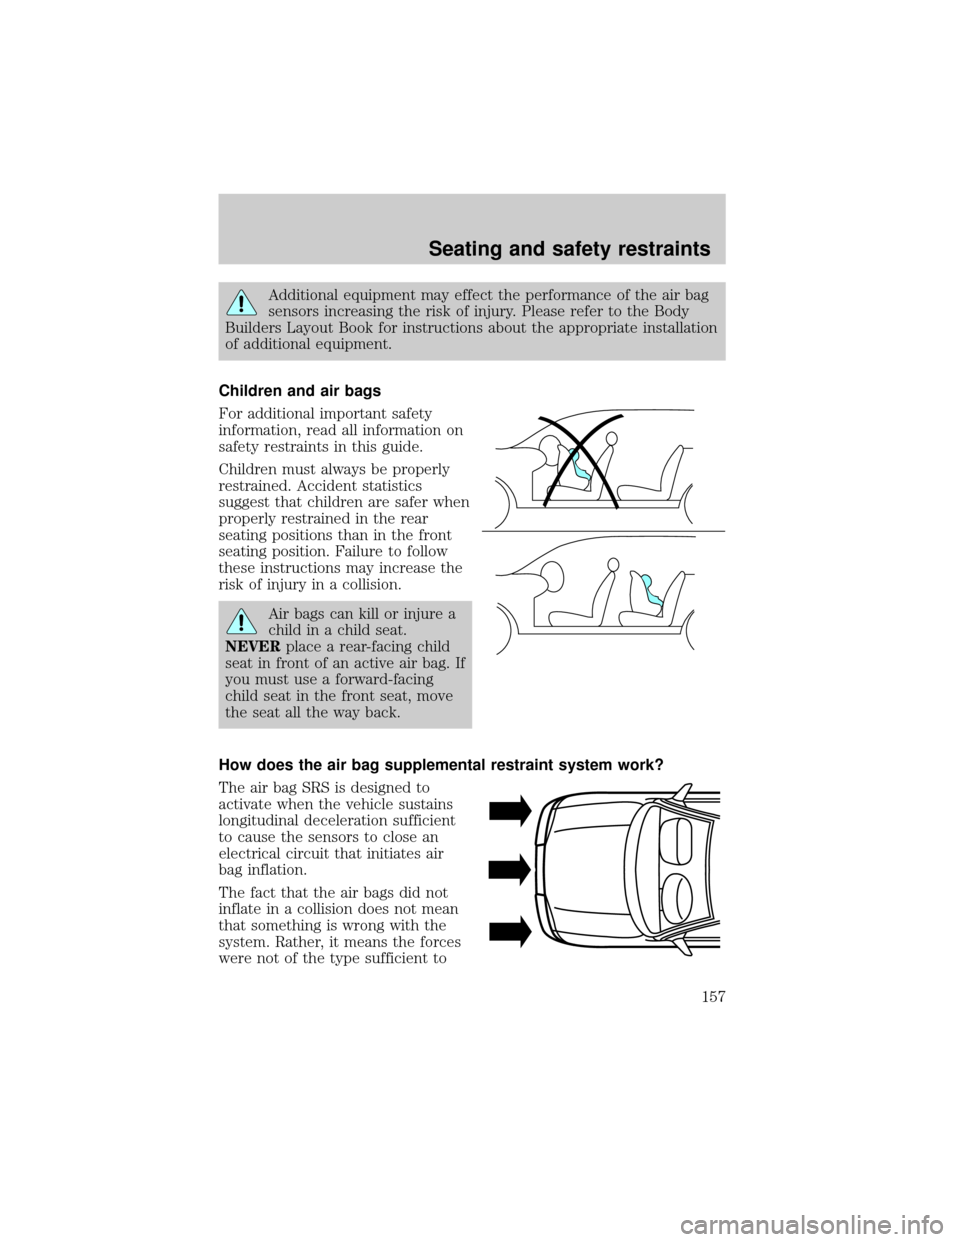
Air bags can kill or injure a
child in a child seat.
NEVERplace a rear-facing child
seat in front of an active air bag. If
you must use a forward-facing
child seat in the front seat, move
the seat all the way back.
How does the air bag supplemental restraint system work?
The air bag SRS is designed to
activate when the vehicle sustains
longitudinal deceleration sufficient
to cause the sensors to close an
electrical circuit that initiates air
bag inflation.
The fact that the air bags did not
inflate in a collision does not mean
that something is wrong with the
system. Rather, it means the forces
were not of the type sufficient to
Seating and safety restraints
157
Page 159 of 312
The SRS consists of:
²driver and passenger air bag modules (which include the inflators and
air bags).
²side air curtains (if equipped). Refer toSide air bag systemlater in
this chapter.
²one or more impact and safing sensors.
²a readiness light and tone.
²diagnostic module.
²and the electrical wiring which connects the components.
The diagnostic module monitors its own internal circuits and the
supplemental air bag electrical system warning (including the impact
sensors), the system wiring, the air bag system readiness light, the air
bag back up power and the air bag ignitors.
Determining if the system is operational
The SRS uses a readiness light in the instrument cluster or a tone to
indicate the condition of the system. Refer to theAir bag readiness
section in theInstrumentationchapter. Routine maintenance of the air
bag is not required.
A difficulty with the system is indicated by one or more of the following:
²The readiness light will either
flash or stay lit.
²The readiness light will not
illuminate immediately after
ignition is turned on.
²A series of five beeps will be heard. The tone pattern will repeat
periodically until the problem and/or light are repaired.
If any of these things happen, even intermittently, have the SRS serviced at
your dealership or by a qualified technician immediately. Unless serviced,
the system may not function properly in the event of a collision.
Side air curtain system (if equipped)
Do not attempt to service, repair, or modify the air bag
Supplemental Restraint System, its fuses or the seat cover on a
seat containing an air bag. See your Ford or Lincoln Mercury dealer.
Seating and safety restraints
159
Page 160 of 312
All occupants of the vehicle including the driver should always
wear their safety belts even when an air bag SRS is provided.
To reduce risk of injury, do not obstruct or place objects in the
deployment path of the inflatable curtain.
How does the side air curtain system work?
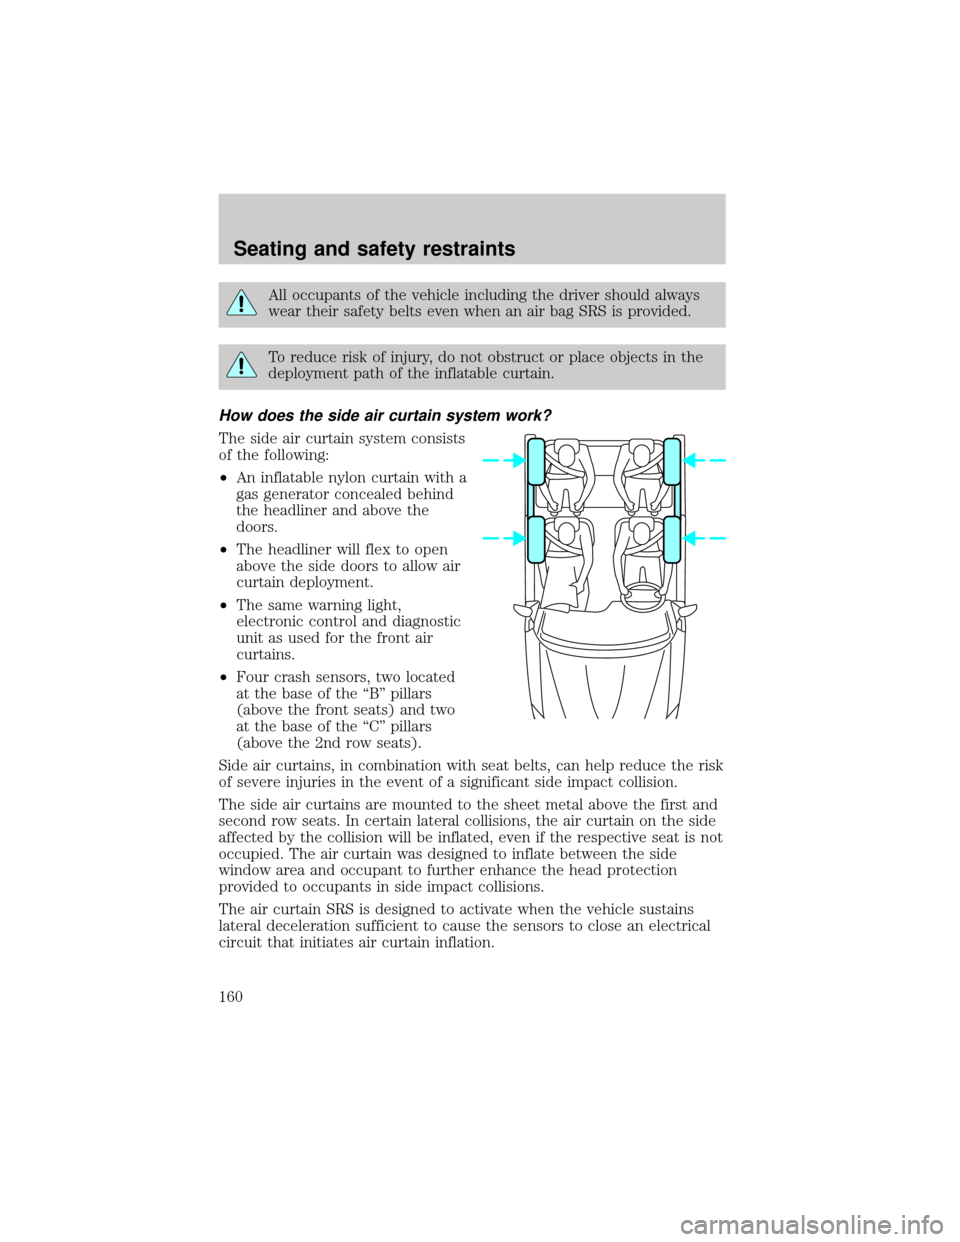
The side air curtain system consists
of the following:
²An inflatable nylon curtain with a
gas generator concealed behind
the headliner and above the
doors.
²The headliner will flex to open
above the side doors to allow air
curtain deployment.
²The same warning light,
electronic control and diagnostic
unit as used for the front air
curtains.
²Four crash sensors, two located
at the base of the ªBº pillars
(above the front seats) and two
at the base of the ªCº pillars
(above the 2nd row seats).
Side air curtains, in combination with seat belts, can help reduce the risk
of severe injuries in the event of a significant side impact collision.
The side air curtains are mounted to the sheet metal above the first and
second row seats. In certain lateral collisions, the air curtain on the side
affected by the collision will be inflated, even if the respective seat is not
occupied. The air curtain was designed to inflate between the side
window area and occupant to further enhance the head protection
provided to occupants in side impact collisions.
The air curtain SRS is designed to activate when the vehicle sustains
lateral deceleration sufficient to cause the sensors to close an electrical
circuit that initiates air curtain inflation.
Seating and safety restraints
160
Page 210 of 312
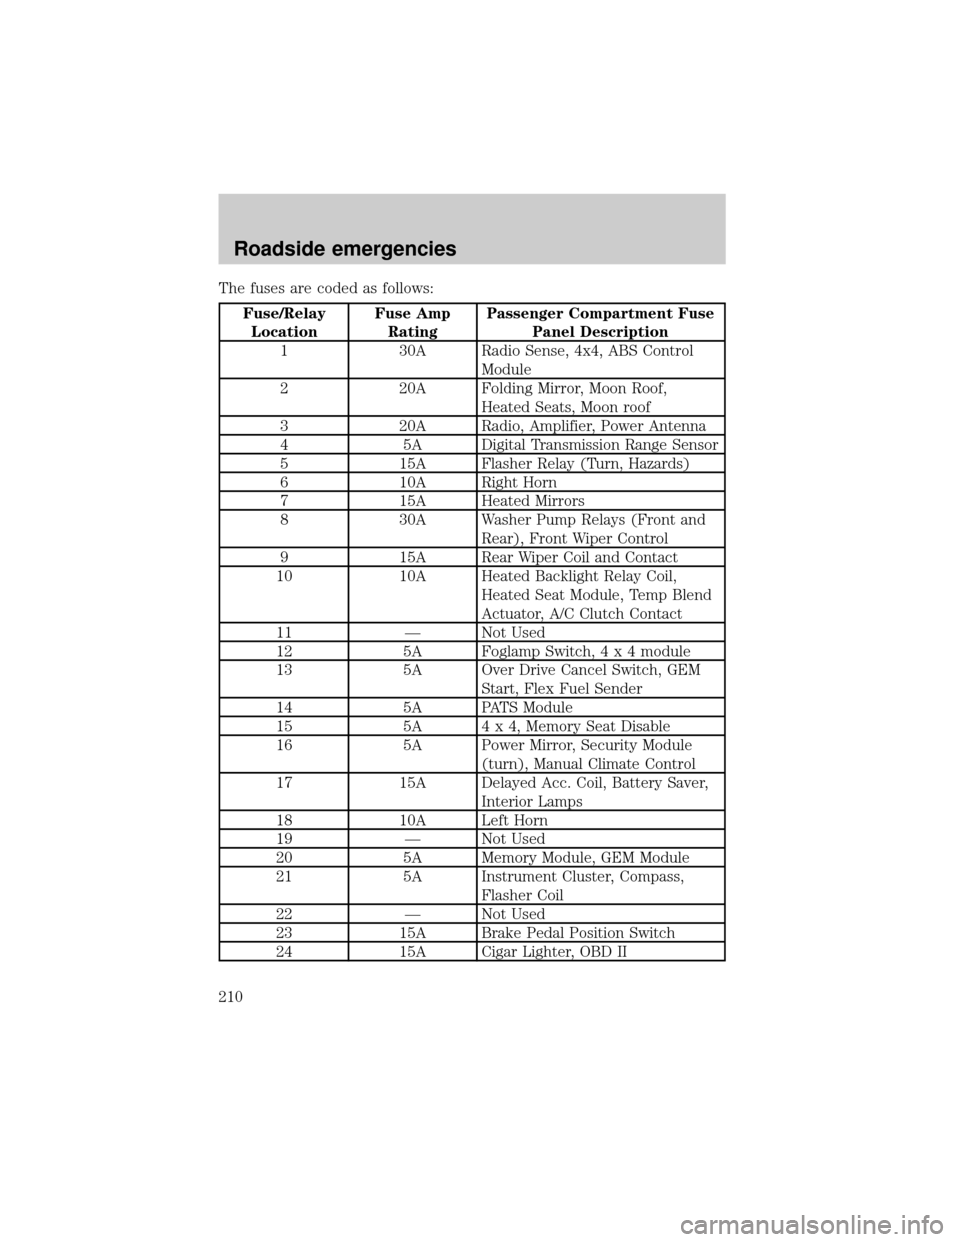
The fuses are coded as follows:
Fuse/Relay
LocationFuse Amp
RatingPassenger Compartment Fuse
Panel Description
1 30A Radio Sense, 4x4, ABS Control
Module
2 20A Folding Mirror, Moon Roof,
Heated Seats, Moon roof
3 20A Radio, Amplifier, Power Antenna
4 5A Digital Transmission Range Sensor
5 15A Flasher Relay (Turn, Hazards)
6 10A Right Horn
7 15A Heated Mirrors
8 30A Washer Pump Relays (Front and
Rear), Front Wiper Control
9 15A Rear Wiper Coil and Contact
10 10A Heated Backlight Relay Coil,
Heated Seat Module, Temp Blend
Actuator, A/C Clutch Contact
11 Ð Not Used
12 5A Foglamp Switch,4x4module
13 5A Over Drive Cancel Switch, GEM
Start, Flex Fuel Sender
14 5A PATS Module
15 5A 4 x 4, Memory Seat Disable
16 5A Power Mirror, Security Module
(turn), Manual Climate Control
17 15A Delayed Acc. Coil, Battery Saver,
Interior Lamps
18 10A Left Horn
19 Ð Not Used
20 5A Memory Module, GEM Module
21 5A Instrument Cluster, Compass,
Flasher Coil
22 Ð Not Used
23 15A Brake Pedal Position Switch
24 15A Cigar Lighter, OBD II
Roadside emergencies
210