maintenance FORD EXPLORER 2009 4.G Owner's Manual
[x] Cancel search | Manufacturer: FORD, Model Year: 2009, Model line: EXPLORER, Model: FORD EXPLORER 2009 4.GPages: 407, PDF Size: 3.47 MB
Page 255 of 407
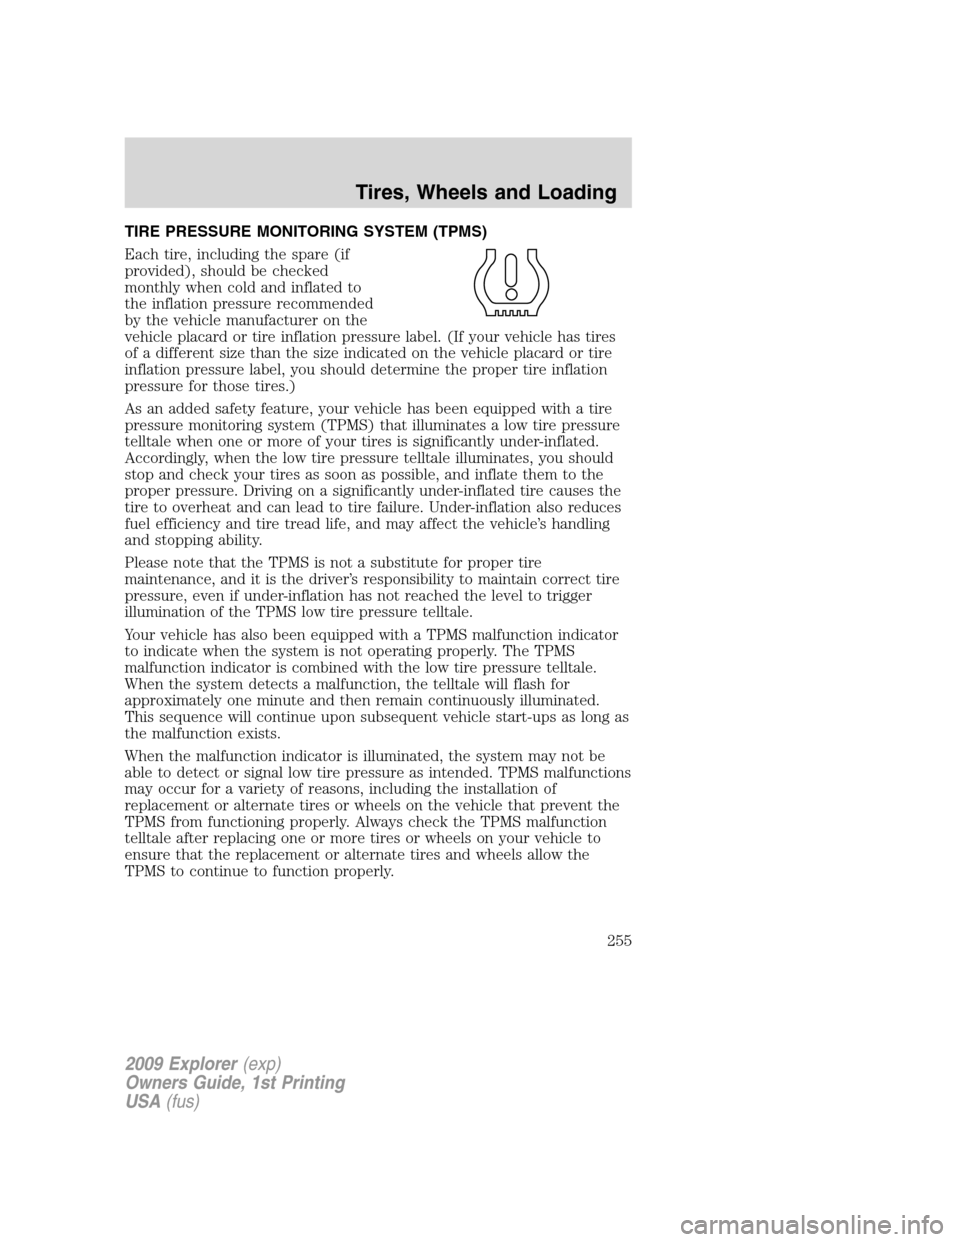
TIRE PRESSURE MONITORING SYSTEM (TPMS)
Each tire, including the spare (if
provided), should be checked
monthly when cold and inflated to
the inflation pressure recommended
by the vehicle manufacturer on the
vehicle placard or tire inflation pressure label. (If your vehicle has tires
of a different size than the size indicated on the vehicle placard or tire
inflation pressure label, you should determine the proper tire inflation
pressure for those tires.)
As an added safety feature, your vehicle has been equipped with a tire
pressure monitoring system (TPMS) that illuminates a low tire pressure
telltale when one or more of your tires is significantly under-inflated.
Accordingly, when the low tire pressure telltale illuminates, you should
stop and check your tires as soon as possible, and inflate them to the
proper pressure. Driving on a significantly under-inflated tire causes the
tire to overheat and can lead to tire failure. Under-inflation also reduces
fuel efficiency and tire tread life, and may affect the vehicle’s handling
and stopping ability.
Please note that the TPMS is not a substitute for proper tire
maintenance, and it is the driver’s responsibility to maintain correct tire
pressure, even if under-inflation has not reached the level to trigger
illumination of the TPMS low tire pressure telltale.
Your vehicle has also been equipped with a TPMS malfunction indicator
to indicate when the system is not operating properly. The TPMS
malfunction indicator is combined with the low tire pressure telltale.
When the system detects a malfunction, the telltale will flash for
approximately one minute and then remain continuously illuminated.
This sequence will continue upon subsequent vehicle start-ups as long as
the malfunction exists.
When the malfunction indicator is illuminated, the system may not be
able to detect or signal low tire pressure as intended. TPMS malfunctions
may occur for a variety of reasons, including the installation of
replacement or alternate tires or wheels on the vehicle that prevent the
TPMS from functioning properly. Always check the TPMS malfunction
telltale after replacing one or more tires or wheels on your vehicle to
ensure that the replacement or alternate tires and wheels allow the
TPMS to continue to function properly.
2009 Explorer(exp)
Owners Guide, 1st Printing
USA(fus)
Tires, Wheels and Loading
255
Page 267 of 407
2. Weigh your vehicle without cargo. To obtain correct weights, take your
vehicle to a shipping company or an inspection station for trucks.
3. Subtract your loaded weight from the maximum GCWR in the chart.
This is the maximum trailer weight your vehicle can tow. It must be
below the maximum trailer weight shown in the chart.
TRAILER TOWING
Trailer towing with your vehicle may require the use of a trailer tow
option package.
Trailer towing puts additional loads on your vehicle’s engine,
transmission, axle, brakes, tires, and suspension. For your safety and to
maximize vehicle performance, be sure to use the proper equipment
while towing.
Follow these guidelines to ensure safe towing procedure:
•Do not tow a trailer until your vehicle has been driven at least
1,000 miles (1600 km).
•Stay within your vehicle’s load limits.
•Thoroughly prepare your vehicle for towing. Refer toPreparing to
towin this chapter.
•Use extra caution when driving while trailer towing. Refer toDriving
while you towin this chapter.
•Service your vehicle more frequently if you tow a trailer. Refer to the
severe duty schedule in thescheduled maintenance information.
•Refer to the instructions included with towing accessories for the
proper installation and adjustment specifications.
Do not exceed the maximum loads listed on the Safety Compliance
Certification label. For load specification terms found on the label, refer
toVehicle loadingin this chapter when figuring the total weight of your
vehicle.
Your vehicle is equipped with a standard Class II integrated hitch and
requires only a draw bar and ball with a 19 mm (3/4 inch) shank
diameter. An optional Class III/Class IV hitch is also available.
Note:Do not exceed the GVWR or the GAWR specified on the
certification label.
WARNING:Towing trailers beyond the maximum recommended
gross trailer weight exceeds the limit of the vehicle and could
result in engine damage, transmission damage, structural damage, loss
of vehicle control, vehicle rollover and personal injury.
2009 Explorer(exp)
Owners Guide, 1st Printing
USA(fus)
Tires, Wheels and Loading
267
Page 271 of 407
Driving while you tow
When towing a trailer:
•To ensure proper “break-in” of powertrain components, do not trailer
tow during the first 1,000 miles (1,600 km) of a new vehicle.
•To ensure proper “break-in” of powertrain components during the first
500 miles (800 km) of trailer towing, drive no faster than 70 mph
(113 km/h) with no full throttle starts.
•Turn off the speed control. The speed control may shut off
automatically when you are towing on long, steep grades.
•Consult your local motor vehicle speed regulations for towing a trailer.
•To eliminate excessive shifting, use a lower gear. This will also assist
in transmission cooling. For additional information, refer toAutomatic
transmission operationin theDrivingchapter.
•Under extreme conditions with large frontal trailers, high outside
temperatures and highway speeds, the coolant gauge may indicate
higher than normal coolant temperatures. If this occurs, reduce speed
until the coolant temperature returns to the normal range. Refer to
Engine coolant temperature gaugein theInstrument Cluster
chapter.
•Anticipate stops and brake gradually.
•Do not exceed the GCWR rating or transmission damage may occur.
Servicing after towing
If you tow a trailer for long distances, your vehicle will require more
frequent service intervals. Refer to yourscheduled maintenance
informationfor more information.
Trailer towing tips
•Practice turning, stopping and backing up before starting on a trip to
get the feel of the vehicle trailer combination. When turning, make
wider turns so the trailer wheels will clear curbs and other obstacles.
•Allow more distance for stopping with a trailer attached.
•If you are driving down a long or steep hill, shift to a lower gear. Do
not apply the brakes continuously, as they may overheat and become
less effective.
•The trailer tongue weight should be 10–15% of the loaded trailer
weight.
2009 Explorer(exp)
Owners Guide, 1st Printing
USA(fus)
Tires, Wheels and Loading
271
Page 272 of 407
•If you will be towing a trailer frequently in hot weather, hilly
conditions, at GCWR, or any combination of these factors, consider
refilling your rear axle with synthetic gear lube if not already so
equipped. Refer to theMaintenance and Specificationschapter for
the lubricant specification. Remember that regardless of the rear axle
lube used, do not tow a trailer for the first 1,000 miles (1,600 km) of a
new vehicle, and that the first 500 miles (800 km) of towing be done
at no faster than 70 mph (113 km/h) with no full throttle starts.
•After you have traveled 50 miles (80 km), thoroughly check your
hitch, electrical connections and trailer wheel lug nuts.
•To aid in engine/transmission cooling and A/C efficiency during hot
weather while stopped in traffic, place the gearshift lever in P (Park).
•Vehicles with trailers should not be parked on a grade. If you must
park on a grade, place wheel chocks under the trailer’s wheels.
Launching or retrieving a boat
Disconnect the wiring to the trailer before backing the trailer
into the water. Reconnect the wiring to the trailer after the
trailer is removed from the water.
When backing down a ramp during boat launching or retrieval:
•do not allow the static water level to rise above the bottom edge of
the rear bumper.
•do not allow waves to break higher than 6 inches (15 cm) above the
bottom edge of the rear bumper.
Exceeding these limits may allow water to enter vehicle components:
•causing internal damage to the components.
•affecting driveability, emissions and reliability.
Replace the rear axle lubricant any time the axle has been submerged in
water. Rear axle lubricant quantities are not to be checked or changed
unless a leak is suspected or repair required.
2009 Explorer(exp)
Owners Guide, 1st Printing
USA(fus)
Tires, Wheels and Loading
272
Page 300 of 407
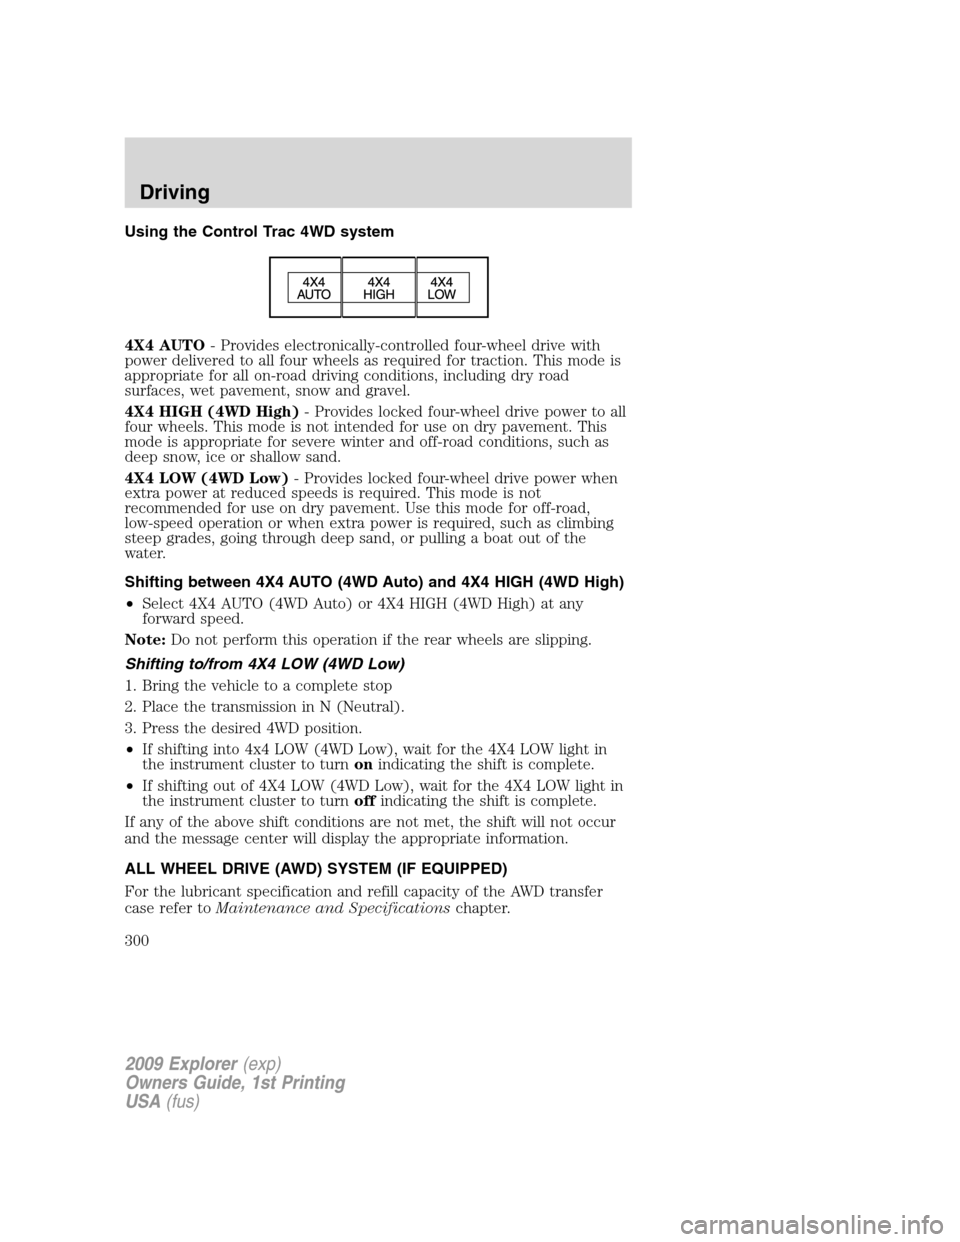
Using the Control Trac 4WD system
4X4 AUTO- Provides electronically-controlled four-wheel drive with
power delivered to all four wheels as required for traction. This mode is
appropriate for all on-road driving conditions, including dry road
surfaces, wet pavement, snow and gravel.
4X4 HIGH (4WD High)- Provides locked four-wheel drive power to all
four wheels. This mode is not intended for use on dry pavement. This
mode is appropriate for severe winter and off-road conditions, such as
deep snow, ice or shallow sand.
4X4 LOW (4WD Low)- Provides locked four-wheel drive power when
extra power at reduced speeds is required. This mode is not
recommended for use on dry pavement. Use this mode for off-road,
low-speed operation or when extra power is required, such as climbing
steep grades, going through deep sand, or pulling a boat out of the
water.
Shifting between 4X4 AUTO (4WD Auto) and 4X4 HIGH (4WD High)
•Select 4X4 AUTO (4WD Auto) or 4X4 HIGH (4WD High) at any
forward speed.
Note:Do not perform this operation if the rear wheels are slipping.
Shifting to/from 4X4 LOW (4WD Low)
1. Bring the vehicle to a complete stop
2. Place the transmission in N (Neutral).
3. Press the desired 4WD position.
•If shifting into 4x4 LOW (4WD Low), wait for the 4X4 LOW light in
the instrument cluster to turnonindicating the shift is complete.
•If shifting out of 4X4 LOW (4WD Low), wait for the 4X4 LOW light in
the instrument cluster to turnoffindicating the shift is complete.
If any of the above shift conditions are not met, the shift will not occur
and the message center will display the appropriate information.
ALL WHEEL DRIVE (AWD) SYSTEM (IF EQUIPPED)
For the lubricant specification and refill capacity of the AWD transfer
case refer toMaintenance and Specificationschapter.
2009 Explorer(exp)
Owners Guide, 1st Printing
USA(fus)
Driving
300
Page 304 of 407
Emergency maneuvers
•In an unavoidable emergency situation where a sudden sharp turn
must be made, remember to avoid “over-driving” your vehicle, i.e.,
turn the steering wheel only as rapidly and as far as required to avoid
the emergency. Excessive steering will result in less vehicle control,
not more. Additionally, smooth variations of the accelerator and/or
brake pedal pressure should be utilized if changes in vehicle speed are
called for. Avoid abrupt steering, acceleration or braking which could
result in an increased risk of loss of vehicle control, vehicle rollover
and/or personal injury. Use all available road surface to return the
vehicle to a safe direction of travel.
•In the event of an emergency stop, avoid skidding the tires and do not
attempt any sharp steering wheel movements.
WARNING:Vehicles with a higher center of gravity such as
utility and four-wheel drive vehicles handle differently than
vehicles with a lower center of gravity. Utility and four-wheel drive
vehicles arenotdesigned for cornering at speeds as high as passenger
cars any more than low-slung sports cars are designed to perform
satisfactorily under off-road conditions. Avoid sharp turns, excessive
speed and abrupt maneuvers in these vehicles. Failure to drive
cautiously could result in an increased risk of loss of vehicle control,
vehicle rollover, personal injury and death.
•If the vehicle goes from one type of surface to another (i.e., from
concrete to gravel) there will be a change in the way the vehicle
responds to a maneuver (steering, acceleration or braking). Again,
avoid these abrupt inputs.
4WD Systems
4WD uses all four wheels to power the vehicle. This increases traction,
enabling you to drive over terrain and road conditions that a
conventional two-wheel drive vehicle cannot.
Power is supplied to all four wheels through a transfer case. On 4WD
vehicles, the transfer case allows you to select 4WD when necessary.
Information on transfer case operation and shifting procedures can be
found in this chapter. Information on transfer case maintenance can be
found in theMaintenance and Specificationschapter. You should
become thoroughly familiar with this information before you operate
your vehicle.
2009 Explorer(exp)
Owners Guide, 1st Printing
USA(fus)
Driving
304
Page 308 of 407
Avoid sudden applications of power and quick changes of direction on
snow and ice. Apply the accelerator slowly and steadily when starting
from a full stop.
Avoid sudden braking as well. Although an AWD or a 4WD vehicle may
accelerate better than a two-wheel drive vehicle in snow and ice, it won’t
stop any faster, because as in other vehicles, braking occurs at all four
wheels. Do not become overconfident as to road conditions.
Make sure you allow sufficient distance between you and other vehicles
for stopping. Drive slower than usual and consider using one of the lower
gears. In emergency stopping situations, avoid locking of the wheels. Use
a “squeeze” technique, push on the brake pedal with a steadily increasing
force which allows the wheels to brake yet continue to roll so that you
may steer in the direction you want to travel. If you lock the wheels,
release the brake pedal and repeat the squeeze technique. If your vehicle
is equipped with a Four Wheel Anti-Lock Brake System (ABS), apply the
brake steadily. Do not “pump” the brakes. Refer to theBrakessection of
this chapter for additional information on the operation of the anti-lock
brake system.
Never drive with chains on the front tires of AWD or 4WD vehicles
without also putting them on the rear tires. This could cause the rear to
slide and swing around during braking.
Maintenance and Modifications
The suspension and steering systems on your vehicle have been designed
and tested to provide predictable performance whether loaded or empty
and durable load carrying capability. For this reason, Ford Motor
Company strongly recommends that you do not make modifications such
as adding or removing parts (such as lift kits or stabilizer bars) or by
using replacement parts not equivalent to the original factory equipment.
Any modifications to a vehicle that raise the center of gravity can make
it more likely the vehicle will roll over as a result of a loss of control.
Ford Motor Company recommends that caution be used with any vehicle
equipped with a high load or device (such as ladder racks or pickup box
cover).
Failure to maintain your vehicle properly may void the warranty, increase
your repair cost, reduce vehicle performance and operational capabilities
and adversely affect driver and passenger safety. Frequent inspection of
vehicle chassis components is recommended if the vehicle is subjected to
heavy off-road usage.
2009 Explorer(exp)
Owners Guide, 1st Printing
USA(fus)
Driving
308
Page 317 of 407
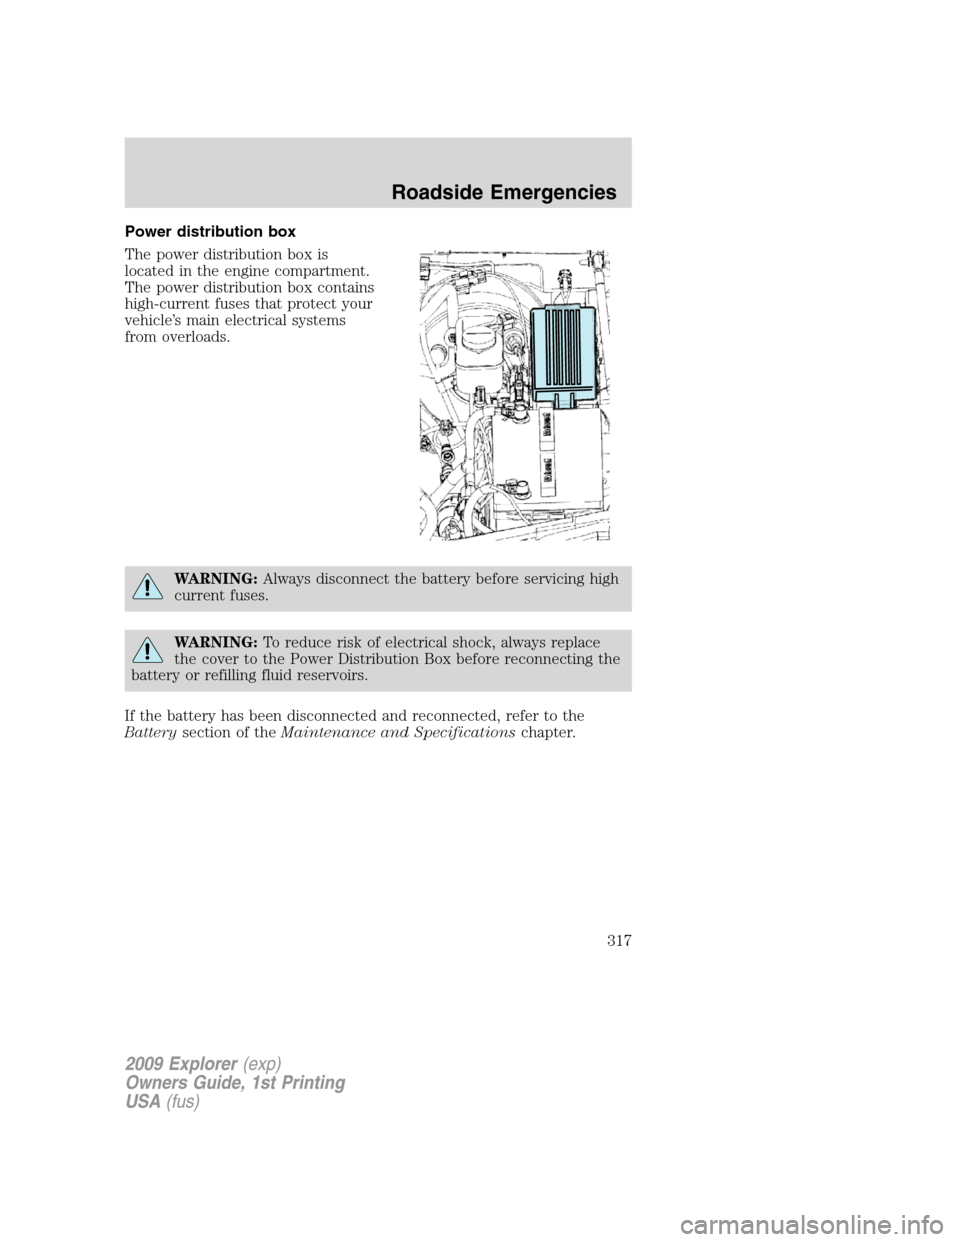
Power distribution box
The power distribution box is
located in the engine compartment.
The power distribution box contains
high-current fuses that protect your
vehicle’s main electrical systems
from overloads.
WARNING:Always disconnect the battery before servicing high
current fuses.
WARNING:To reduce risk of electrical shock, always replace
the cover to the Power Distribution Box before reconnecting the
battery or refilling fluid reservoirs.
If the battery has been disconnected and reconnected, refer to the
Batterysection of theMaintenance and Specificationschapter.
2009 Explorer(exp)
Owners Guide, 1st Printing
USA(fus)
Roadside Emergencies
317
Page 329 of 407
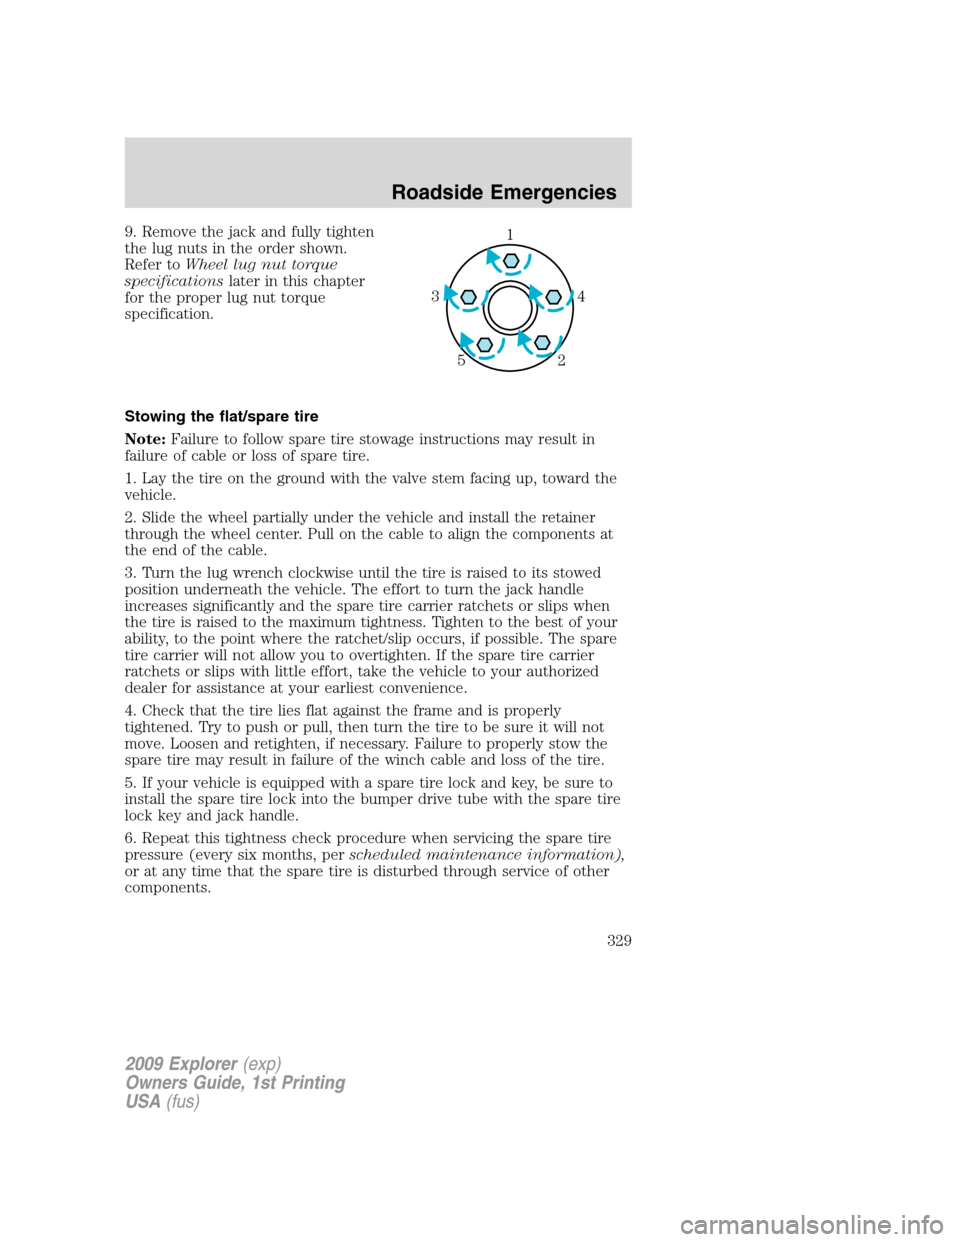
9. Remove the jack and fully tighten
the lug nuts in the order shown.
Refer toWheel lug nut torque
specificationslater in this chapter
for the proper lug nut torque
specification.
Stowing the flat/spare tire
Note:Failure to follow spare tire stowage instructions may result in
failure of cable or loss of spare tire.
1. Lay the tire on the ground with the valve stem facing up, toward the
vehicle.
2. Slide the wheel partially under the vehicle and install the retainer
through the wheel center. Pull on the cable to align the components at
the end of the cable.
3. Turn the lug wrench clockwise until the tire is raised to its stowed
position underneath the vehicle. The effort to turn the jack handle
increases significantly and the spare tire carrier ratchets or slips when
the tire is raised to the maximum tightness. Tighten to the best of your
ability, to the point where the ratchet/slip occurs, if possible. The spare
tire carrier will not allow you to overtighten. If the spare tire carrier
ratchets or slips with little effort, take the vehicle to your authorized
dealer for assistance at your earliest convenience.
4. Check that the tire lies flat against the frame and is properly
tightened. Try to push or pull, then turn the tire to be sure it will not
move. Loosen and retighten, if necessary. Failure to properly stow the
spare tire may result in failure of the winch cable and loss of the tire.
5. If your vehicle is equipped with a spare tire lock and key, be sure to
install the spare tire lock into the bumper drive tube with the spare tire
lock key and jack handle.
6. Repeat this tightness check procedure when servicing the spare tire
pressure (every six months, perscheduled maintenance information),
or at any time that the spare tire is disturbed through service of other
components.1
4 3
2 5
2009 Explorer(exp)
Owners Guide, 1st Printing
USA(fus)
Roadside Emergencies
329
Page 331 of 407
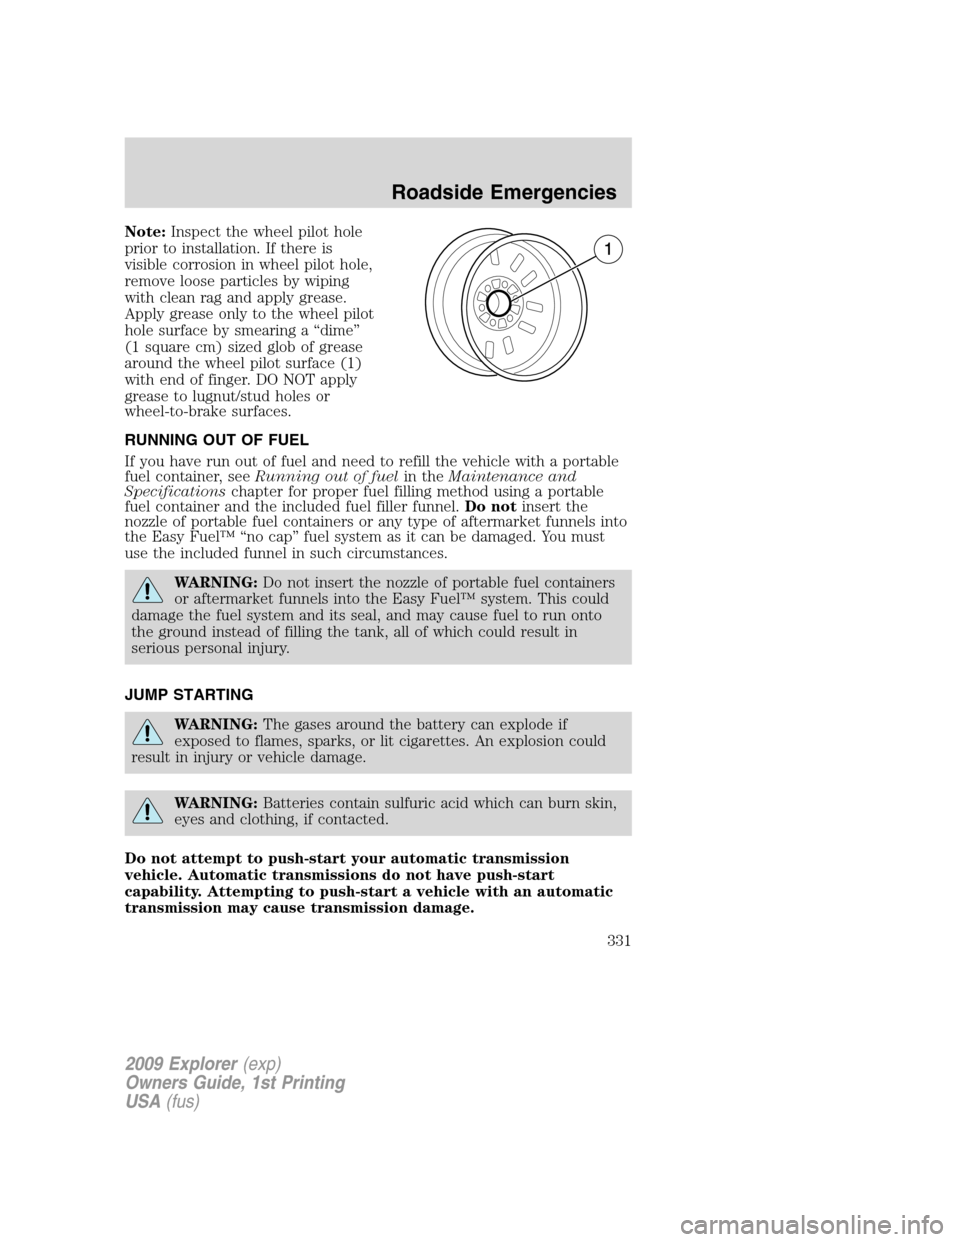
Note:Inspect the wheel pilot hole
prior to installation. If there is
visible corrosion in wheel pilot hole,
remove loose particles by wiping
with clean rag and apply grease.
Apply grease only to the wheel pilot
hole surface by smearing a “dime”
(1 square cm) sized glob of grease
around the wheel pilot surface (1)
with end of finger. DO NOT apply
grease to lugnut/stud holes or
wheel-to-brake surfaces.
RUNNING OUT OF FUEL
If you have run out of fuel and need to refill the vehicle with a portable
fuel container, seeRunning out of fuelin theMaintenance and
Specificationschapter for proper fuel filling method using a portable
fuel container and the included fuel filler funnel.Do notinsert the
nozzle of portable fuel containers or any type of aftermarket funnels into
the Easy Fuel™ “no cap” fuel system as it can be damaged. You must
use the included funnel in such circumstances.
WARNING:Do not insert the nozzle of portable fuel containers
or aftermarket funnels into the Easy Fuel™ system. This could
damage the fuel system and its seal, and may cause fuel to run onto
the ground instead of filling the tank, all of which could result in
serious personal injury.
JUMP STARTING
WARNING:The gases around the battery can explode if
exposed to flames, sparks, or lit cigarettes. An explosion could
result in injury or vehicle damage.
WARNING:Batteries contain sulfuric acid which can burn skin,
eyes and clothing, if contacted.
Do not attempt to push-start your automatic transmission
vehicle. Automatic transmissions do not have push-start
capability. Attempting to push-start a vehicle with an automatic
transmission may cause transmission damage.
2009 Explorer(exp)
Owners Guide, 1st Printing
USA(fus)
Roadside Emergencies
331